FORD MUSTANG 2009 5.G Repair Manual
Manufacturer: FORD, Model Year: 2009, Model line: MUSTANG, Model: FORD MUSTANG 2009 5.GPages: 292, PDF Size: 2.66 MB
Page 61 of 292
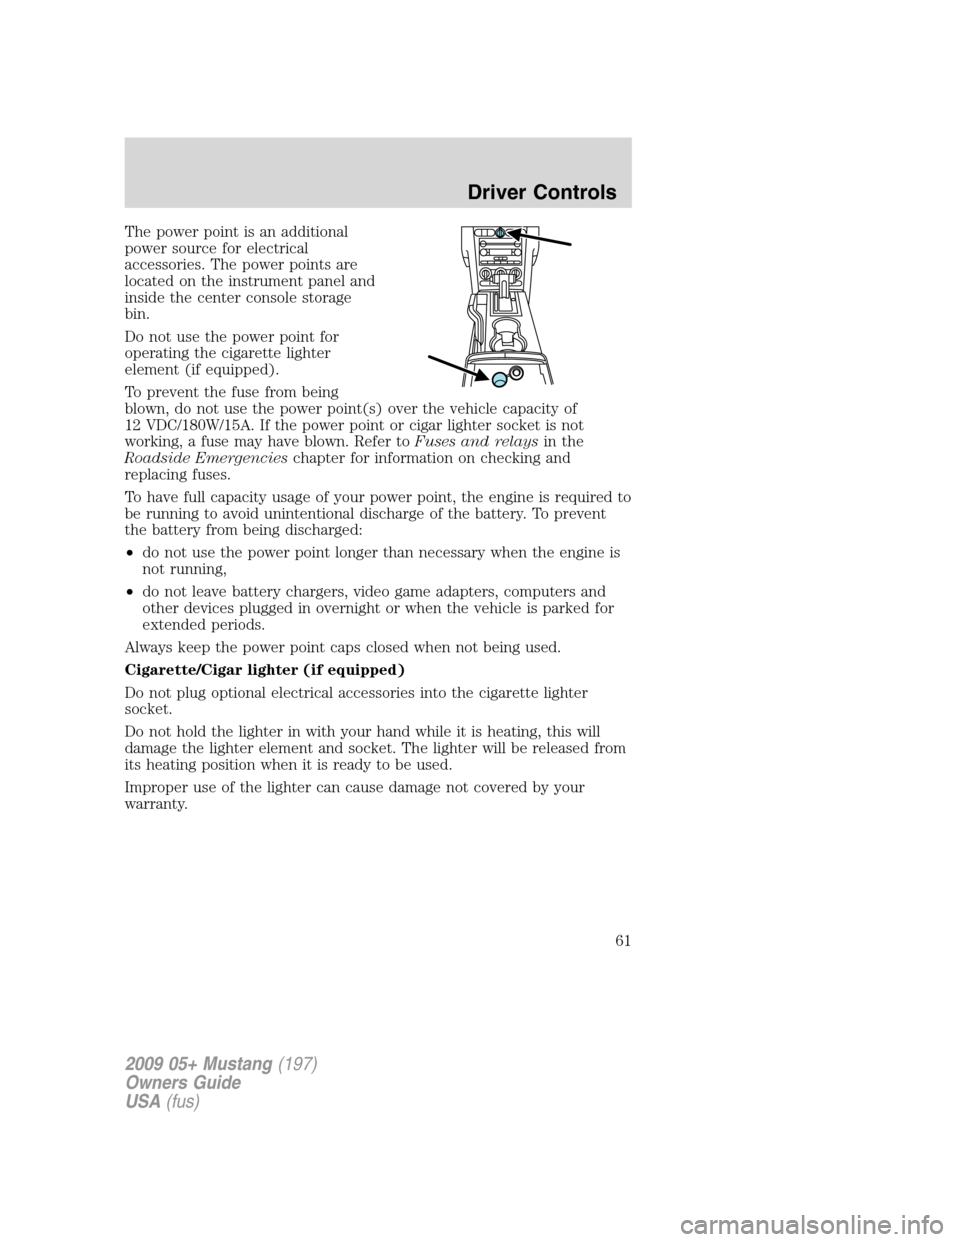
The power point is an additional
power source for electrical
accessories. The power points are
located on the instrument panel and
inside the center console storage
bin.
Do not use the power point for
operating the cigarette lighter
element (if equipped).
To prevent the fuse from being
blown, do not use the power point(s) over the vehicle capacity of
12 VDC/180W/15A. If the power point or cigar lighter socket is not
working, a fuse may have blown. Refer toFuses and relaysin the
Roadside Emergencieschapter for information on checking and
replacing fuses.
To have full capacity usage of your power point, the engine is required to
be running to avoid unintentional discharge of the battery. To prevent
the battery from being discharged:
•do not use the power point longer than necessary when the engine is
not running,
•do not leave battery chargers, video game adapters, computers and
other devices plugged in overnight or when the vehicle is parked for
extended periods.
Always keep the power point caps closed when not being used.
Cigarette/Cigar lighter (if equipped)
Do not plug optional electrical accessories into the cigarette lighter
socket.
Do not hold the lighter in with your hand while it is heating, this will
damage the lighter element and socket. The lighter will be released from
its heating position when it is ready to be used.
Improper use of the lighter can cause damage not covered by your
warranty.
2009 05+ Mustang(197)
Owners Guide
USA(fus)
Driver Controls
61
Page 62 of 292
POWER WINDOWS
WARNING:Do not leave children unattended in the vehicle and
do not let children play with the power windows. They may
seriously injure themselves.
WARNING:When closing the power windows, you should verify
they are free of obstructions and ensure that children and/or
pets are not in the proximity of the window openings.
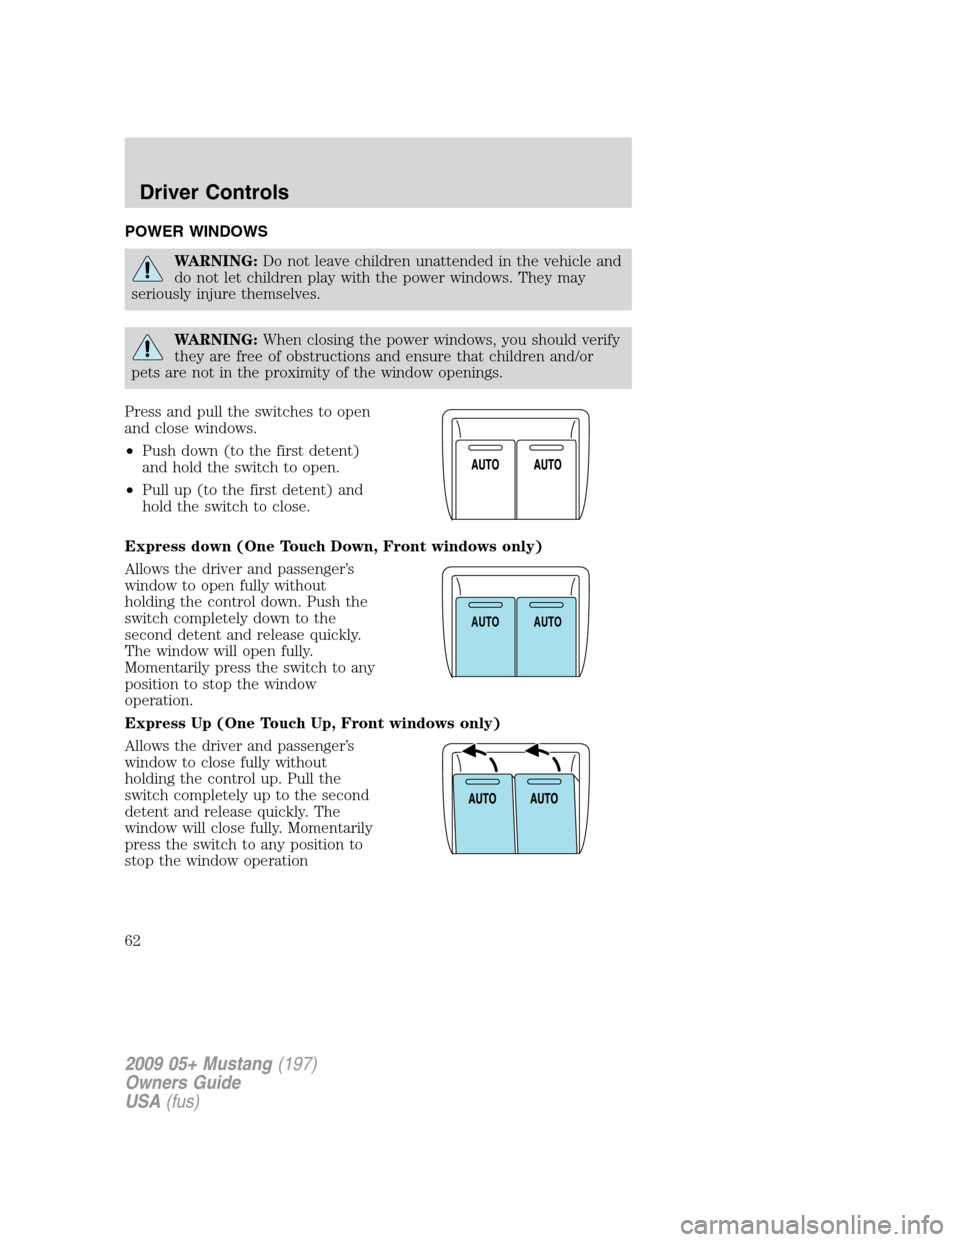
Press and pull the switches to open
and close windows.
•Push down (to the first detent)
and hold the switch to open.
•Pull up (to the first detent) and
hold the switch to close.
Express down (One Touch Down, Front windows only)
Allows the driver and passenger’s
window to open fully without
holding the control down. Push the
switch completely down to the
second detent and release quickly.
The window will open fully.
Momentarily press the switch to any
position to stop the window
operation.
Express Up (One Touch Up, Front windows only)
Allows the driver and passenger’s
window to close fully without
holding the control up. Pull the
switch completely up to the second
detent and release quickly. The
window will close fully. Momentarily
press the switch to any position to
stop the window operation
AUTOAUTO
2009 05+ Mustang(197)
Owners Guide
USA(fus)
Driver Controls
62
Page 63 of 292
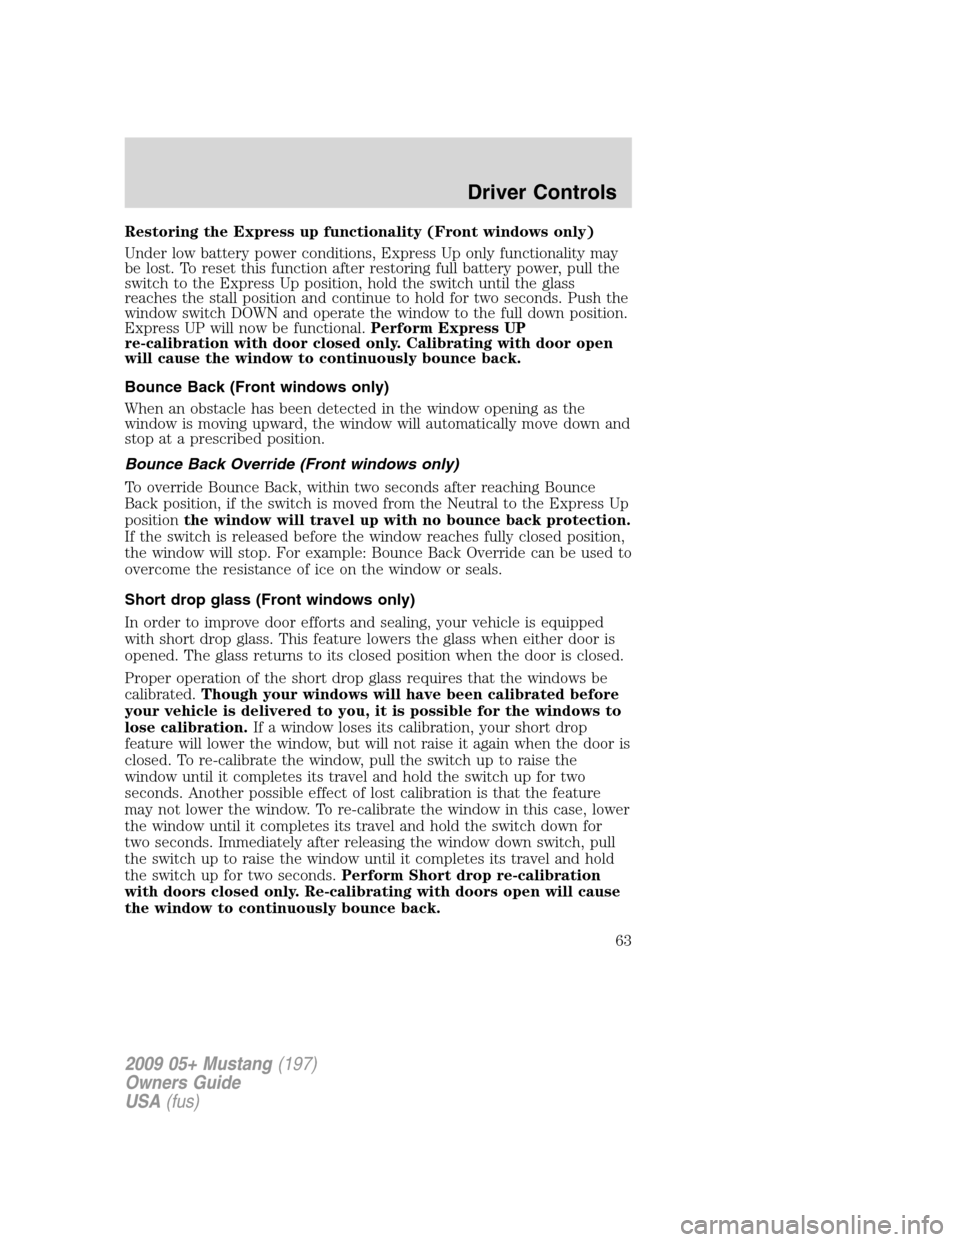
Restoring the Express up functionality (Front windows only)
Under low battery power conditions, Express Up only functionality may
be lost. To reset this function after restoring full battery power, pull the
switch to the Express Up position, hold the switch until the glass
reaches the stall position and continue to hold for two seconds. Push the
window switch DOWN and operate the window to the full down position.
Express UP will now be functional.Perform Express UP
re-calibration with door closed only. Calibrating with door open
will cause the window to continuously bounce back.
Bounce Back (Front windows only)
When an obstacle has been detected in the window opening as the
window is moving upward, the window will automatically move down and
stop at a prescribed position.
Bounce Back Override (Front windows only)
To override Bounce Back, within two seconds after reaching Bounce
Back position, if the switch is moved from the Neutral to the Express Up
positionthe window will travel up with no bounce back protection.
If the switch is released before the window reaches fully closed position,
the window will stop. For example: Bounce Back Override can be used to
overcome the resistance of ice on the window or seals.
Short drop glass (Front windows only)
In order to improve door efforts and sealing, your vehicle is equipped
with short drop glass. This feature lowers the glass when either door is
opened. The glass returns to its closed position when the door is closed.
Proper operation of the short drop glass requires that the windows be
calibrated.Though your windows will have been calibrated before
your vehicle is delivered to you, it is possible for the windows to
lose calibration.If a window loses its calibration, your short drop
feature will lower the window, but will not raise it again when the door is
closed. To re-calibrate the window, pull the switch up to raise the
window until it completes its travel and hold the switch up for two
seconds. Another possible effect of lost calibration is that the feature
may not lower the window. To re-calibrate the window in this case, lower
the window until it completes its travel and hold the switch down for
two seconds. Immediately after releasing the window down switch, pull
the switch up to raise the window until it completes its travel and hold
the switch up for two seconds.Perform Short drop re-calibration
with doors closed only. Re-calibrating with doors open will cause
the window to continuously bounce back.
2009 05+ Mustang(197)
Owners Guide
USA(fus)
Driver Controls
63
Page 64 of 292
Rear Power Windows (Convertible Only)
The rear quarter windows are operated by a single window switch
located at the Driver door window controls. Press and pull the window
switch to open and close the windows.
•Push down and hold the switch to open.
•Pull up and hold the switch to close.
Accessory delay
With accessory delay, the window switches, convertible top (if equipped)
and radio may be used for up to 10 minutes after the ignition switch is
turned to the off position or until either front door or trunk is opened.
INTERIOR MIRROR
The interior rear view mirror has two pivot points on the support arm
which lets you adjust the mirror UP or DOWN and from SIDE to SIDE.
WARNING:Do not adjust the mirror while the vehicle is in
motion.
Automatic dimming interior rear view mirror (if equipped)
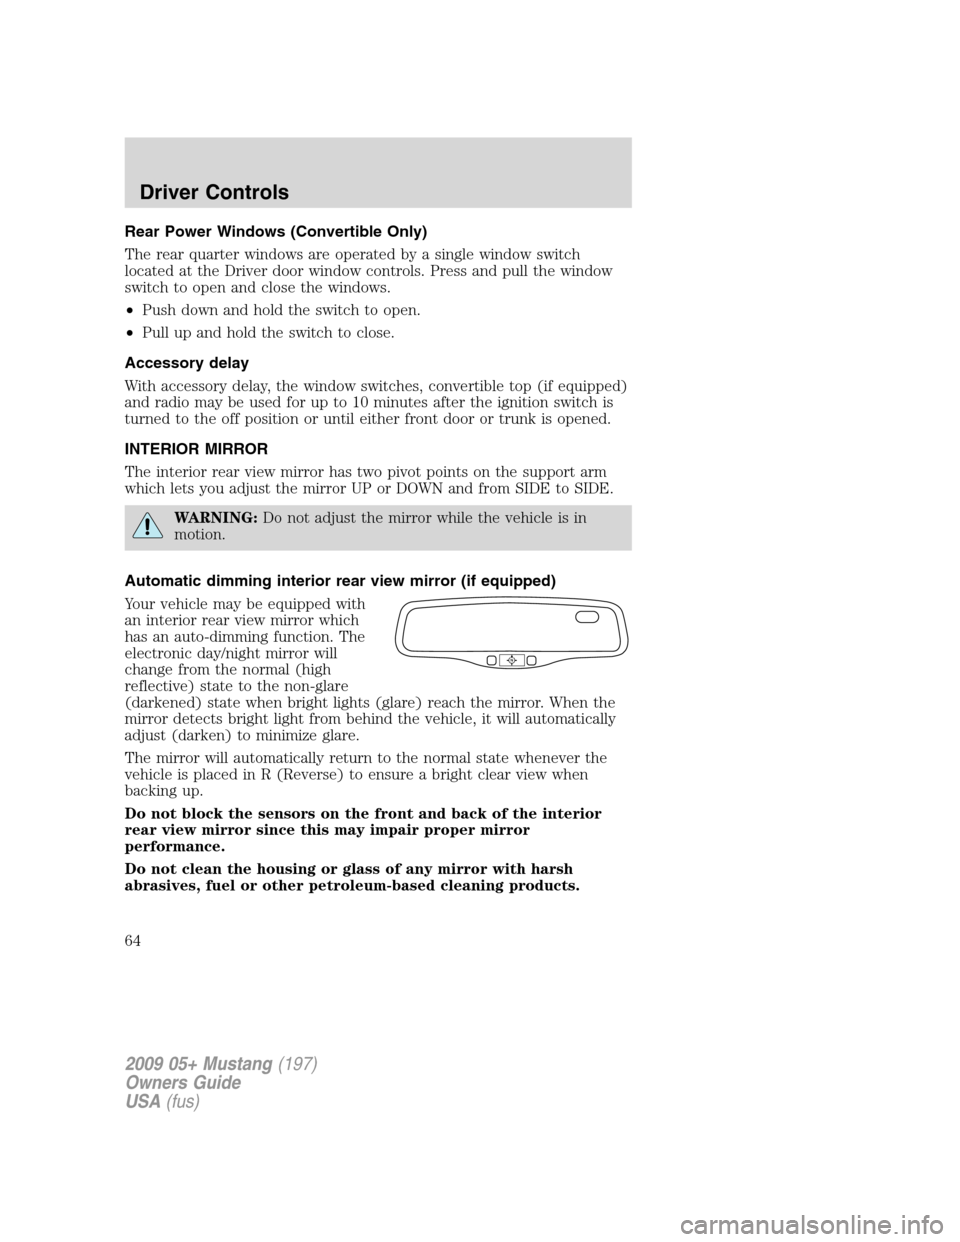
Your vehicle may be equipped with
an interior rear view mirror which
has an auto-dimming function. The
electronic day/night mirror will
change from the normal (high
reflective) state to the non-glare
(darkened) state when bright lights (glare) reach the mirror. When the
mirror detects bright light from behind the vehicle, it will automatically
adjust (darken) to minimize glare.
The mirror will automatically return to the normal state whenever the
vehicle is placed in R (Reverse) to ensure a bright clear view when
backing up.
Do not block the sensors on the front and back of the interior
rear view mirror since this may impair proper mirror
performance.
Do not clean the housing or glass of any mirror with harsh
abrasives, fuel or other petroleum-based cleaning products.
2009 05+ Mustang(197)
Owners Guide
USA(fus)
Driver Controls
64
Page 65 of 292
Electronic compass (if equipped)
The compass reading will remain accurate during most driving
conditions. The compass is continuously re-calibrating due to changing
magnetic fields and subtle, slow changes in vehicle magnetics which can
occur over the life of the vehicle. If heading appears inaccurate
re-calibrate mirror, refer toCompass calibration adjustment.
The compass reading will remain fixed when significant levels of
magnetic interference are experienced (such as steel bridges). The
compass will return to normal operation upon leaving the magnetized
area.
If highly magnetized items (such as magnetic mount antennas) are
placed very near the compass the display will change to “C”. If a “C” is
displayed, remove the source of magnetic interference and re-calibrate
compass, refer toCompass calibration adjustment.
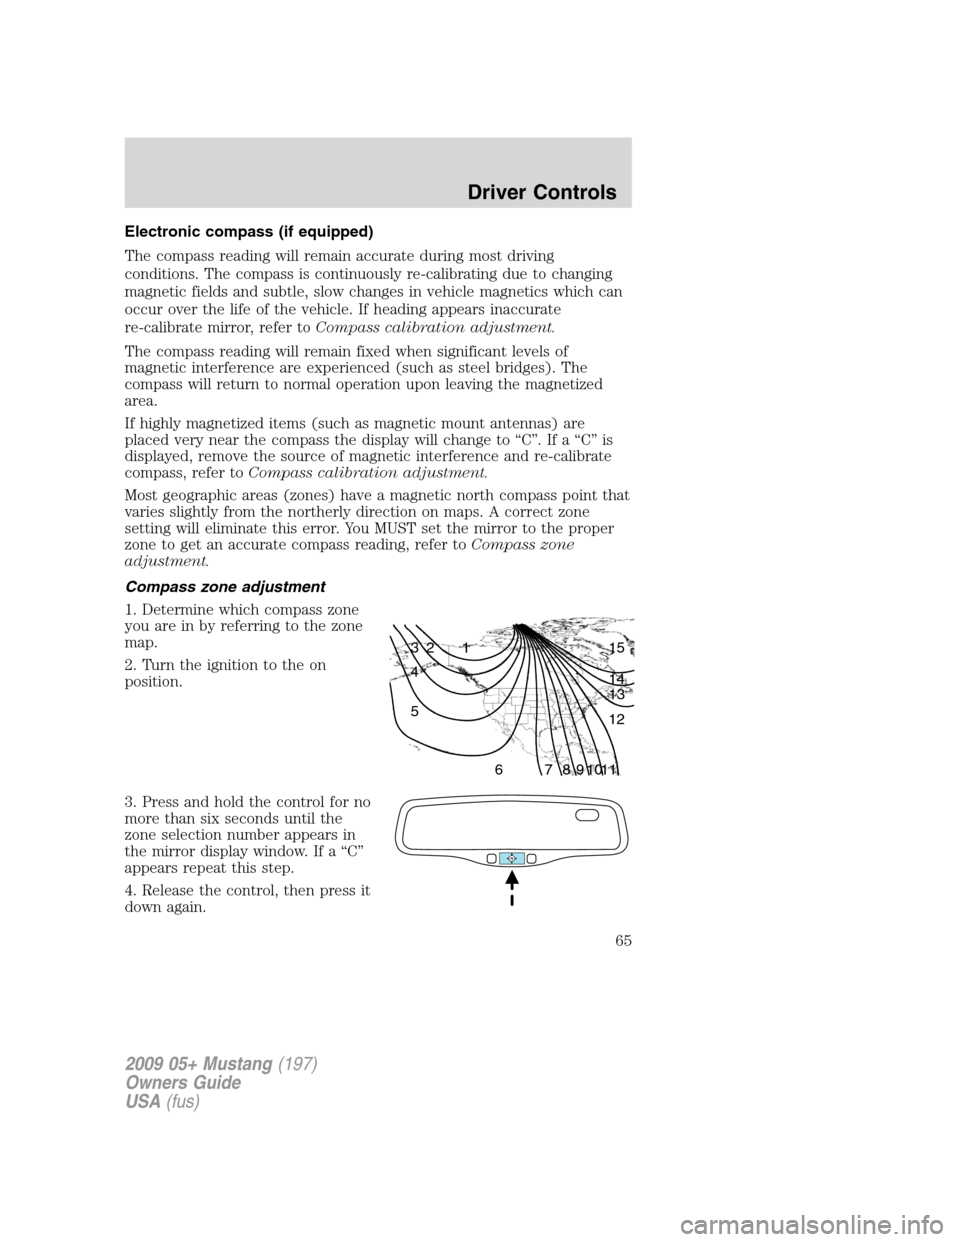
Most geographic areas (zones) have a magnetic north compass point that
varies slightly from the northerly direction on maps. A correct zone
setting will eliminate this error. You MUST set the mirror to the proper
zone to get an accurate compass reading, refer toCompass zone
adjustment.
Compass zone adjustment
1. Determine which compass zone
you are in by referring to the zone
map.
2. Turn the ignition to the on
position.
3. Press and hold the control for no
more than six seconds until the
zone selection number appears in
the mirror display window. If a “C”
appears repeat this step.
4. Release the control, then press it
down again.
1 2 3
4
5
6 7 8 9 101112 13 14 15
2009 05+ Mustang(197)
Owners Guide
USA(fus)
Driver Controls
65
Page 66 of 292
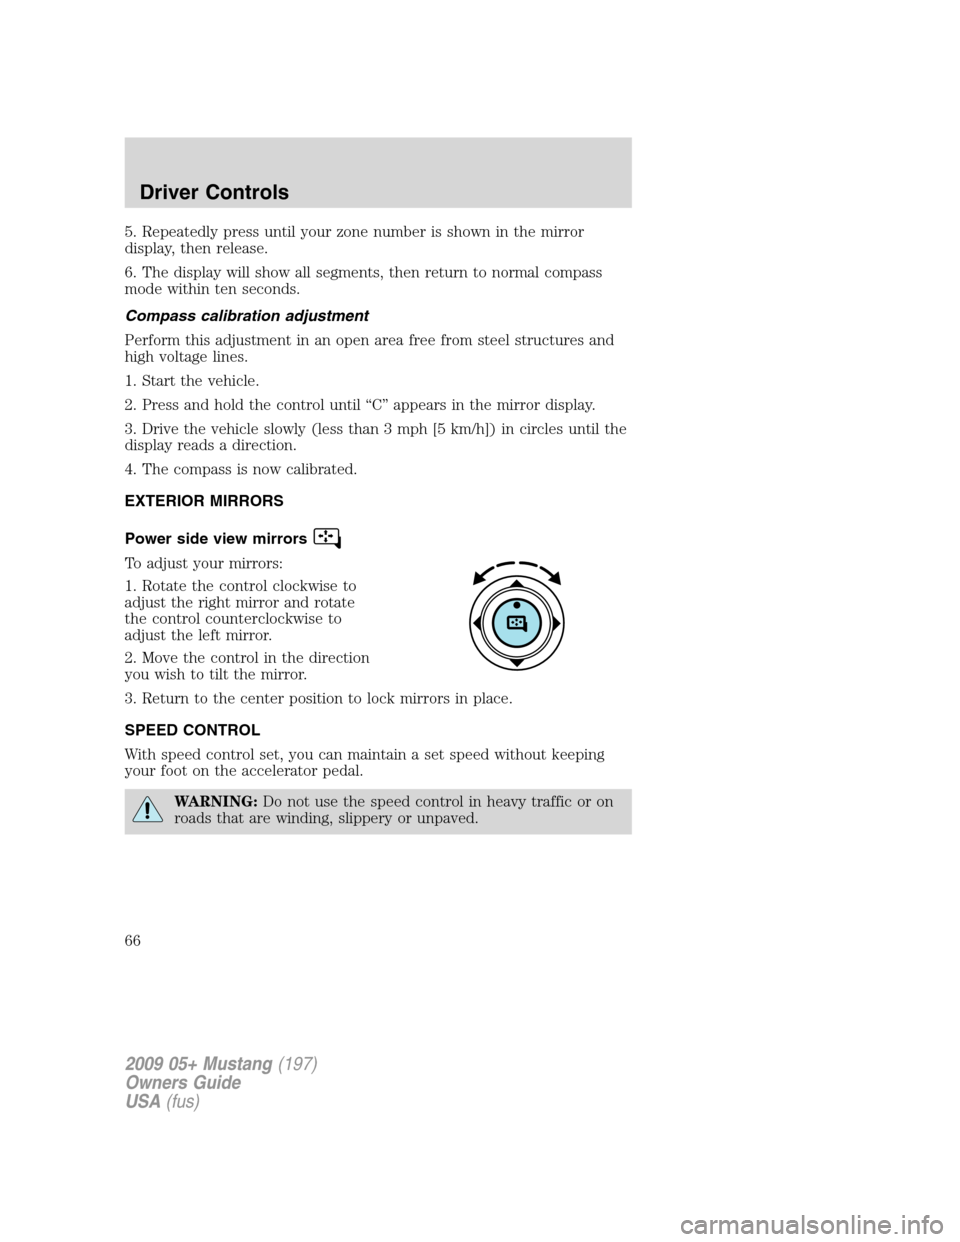
5. Repeatedly press until your zone number is shown in the mirror
display, then release.
6. The display will show all segments, then return to normal compass
mode within ten seconds.
Compass calibration adjustment
Perform this adjustment in an open area free from steel structures and
high voltage lines.
1. Start the vehicle.
2. Press and hold the control until “C” appears in the mirror display.
3. Drive the vehicle slowly (less than 3 mph [5 km/h]) in circles until the
display reads a direction.
4. The compass is now calibrated.
EXTERIOR MIRRORS
Power side view mirrors
To adjust your mirrors:
1. Rotate the control clockwise to
adjust the right mirror and rotate
the control counterclockwise to
adjust the left mirror.
2. Move the control in the direction
you wish to tilt the mirror.
3. Return to the center position to lock mirrors in place.
SPEED CONTROL
With speed control set, you can maintain a set speed without keeping
your foot on the accelerator pedal.
WARNING:Do not use the speed control in heavy traffic or on
roads that are winding, slippery or unpaved.
2009 05+ Mustang(197)
Owners Guide
USA(fus)
Driver Controls
66
Page 67 of 292
Setting speed control
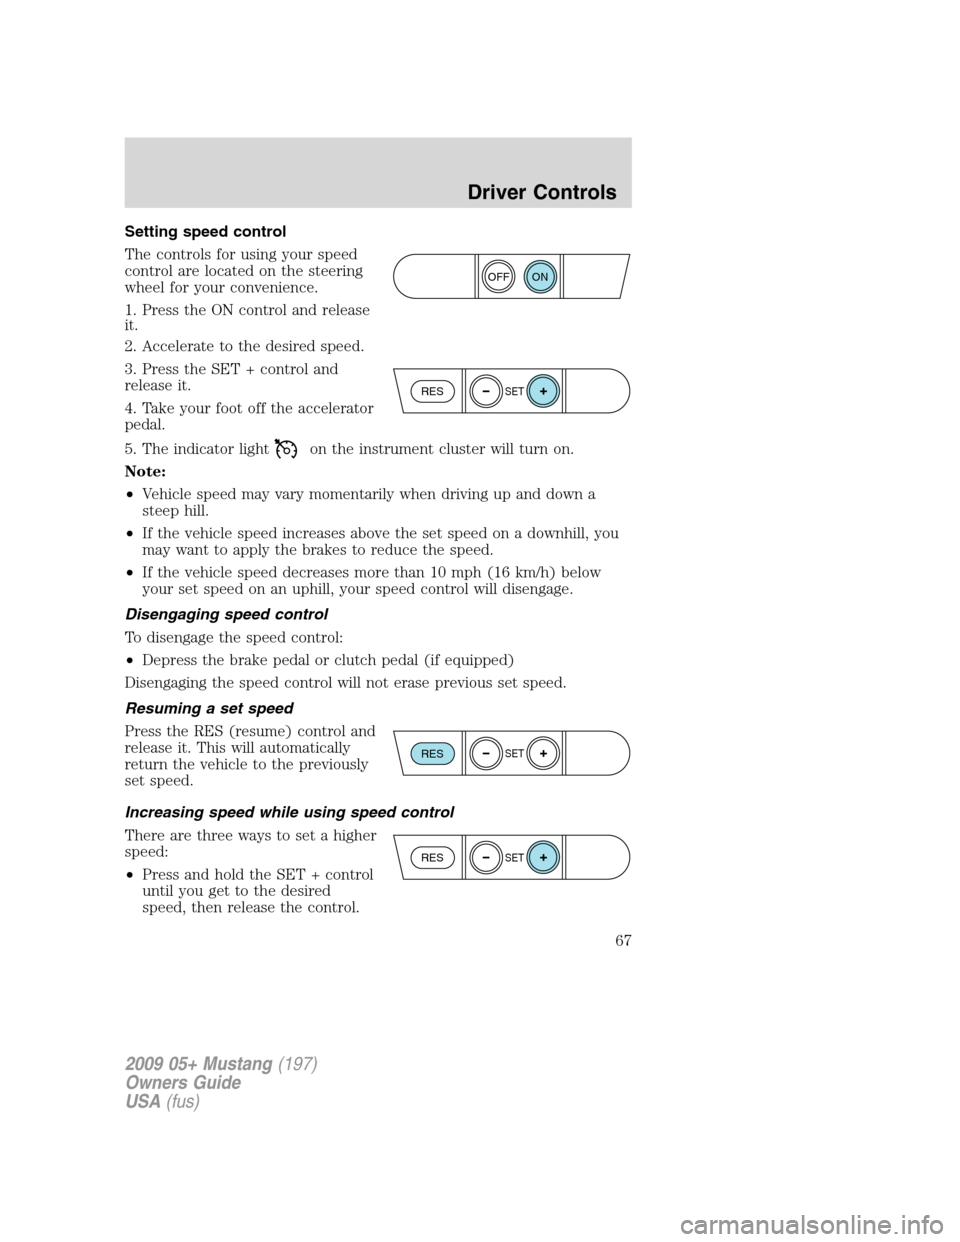
The controls for using your speed
control are located on the steering
wheel for your convenience.
1. Press the ON control and release
it.
2. Accelerate to the desired speed.
3. Press the SET + control and
release it.
4. Take your foot off the accelerator
pedal.
5. The indicator light
on the instrument cluster will turn on.
Note:
•Vehicle speed may vary momentarily when driving up and down a
steep hill.
•If the vehicle speed increases above the set speed on a downhill, you
may want to apply the brakes to reduce the speed.
•If the vehicle speed decreases more than 10 mph (16 km/h) below
your set speed on an uphill, your speed control will disengage.
Disengaging speed control
To disengage the speed control:
•Depress the brake pedal or clutch pedal (if equipped)
Disengaging the speed control will not erase previous set speed.
Resuming a set speed
Press the RES (resume) control and
release it. This will automatically
return the vehicle to the previously
set speed.
Increasing speed while using speed control
There are three ways to set a higher
speed:
•Press and hold the SET + control
until you get to the desired
speed, then release the control.
ON
OFF
RESSET
RESSET
RESSET
2009 05+ Mustang(197)
Owners Guide
USA(fus)
Driver Controls
67
Page 68 of 292
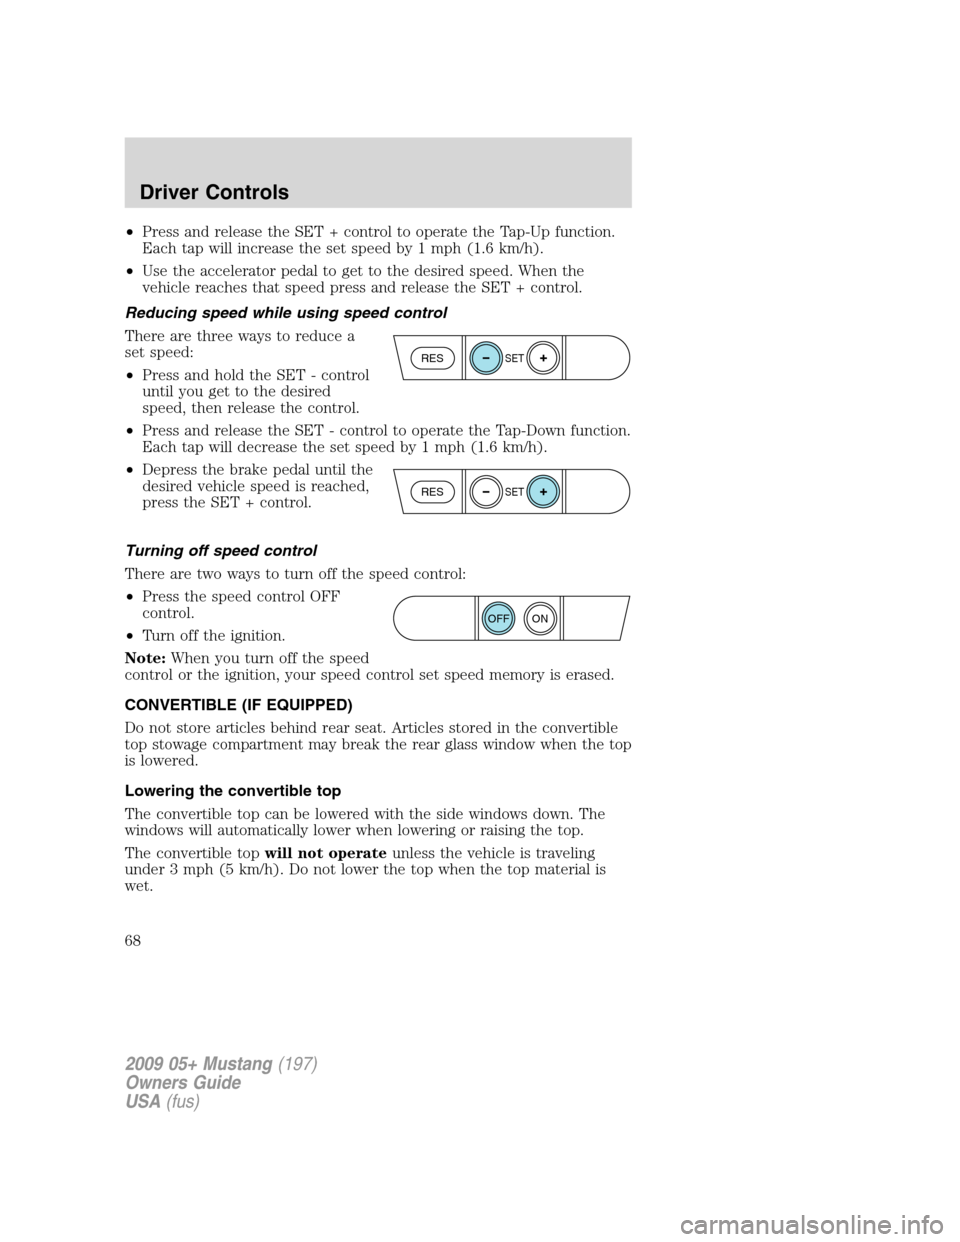
•Press and release the SET + control to operate the Tap-Up function.
Each tap will increase the set speed by 1 mph (1.6 km/h).
•Use the accelerator pedal to get to the desired speed. When the
vehicle reaches that speed press and release the SET + control.
Reducing speed while using speed control
There are three ways to reduce a
set speed:
•Press and hold the SET - control
until you get to the desired
speed, then release the control.
•Press and release the SET - control to operate the Tap-Down function.
Each tap will decrease the set speed by 1 mph (1.6 km/h).
•Depress the brake pedal until the
desired vehicle speed is reached,
press the SET + control.
Turning off speed control
There are two ways to turn off the speed control:
•Press the speed control OFF
control.
•Turn off the ignition.
Note:When you turn off the speed
control or the ignition, your speed control set speed memory is erased.
CONVERTIBLE (IF EQUIPPED)
Do not store articles behind rear seat. Articles stored in the convertible
top stowage compartment may break the rear glass window when the top
is lowered.
Lowering the convertible top
The convertible top can be lowered with the side windows down. The
windows will automatically lower when lowering or raising the top.
The convertible topwill not operateunless the vehicle is traveling
under 3 mph (5 km/h). Do not lower the top when the top material is
wet.
RESSET
RESSET
ON
OFF
2009 05+ Mustang(197)
Owners Guide
USA(fus)
Driver Controls
68
Page 69 of 292
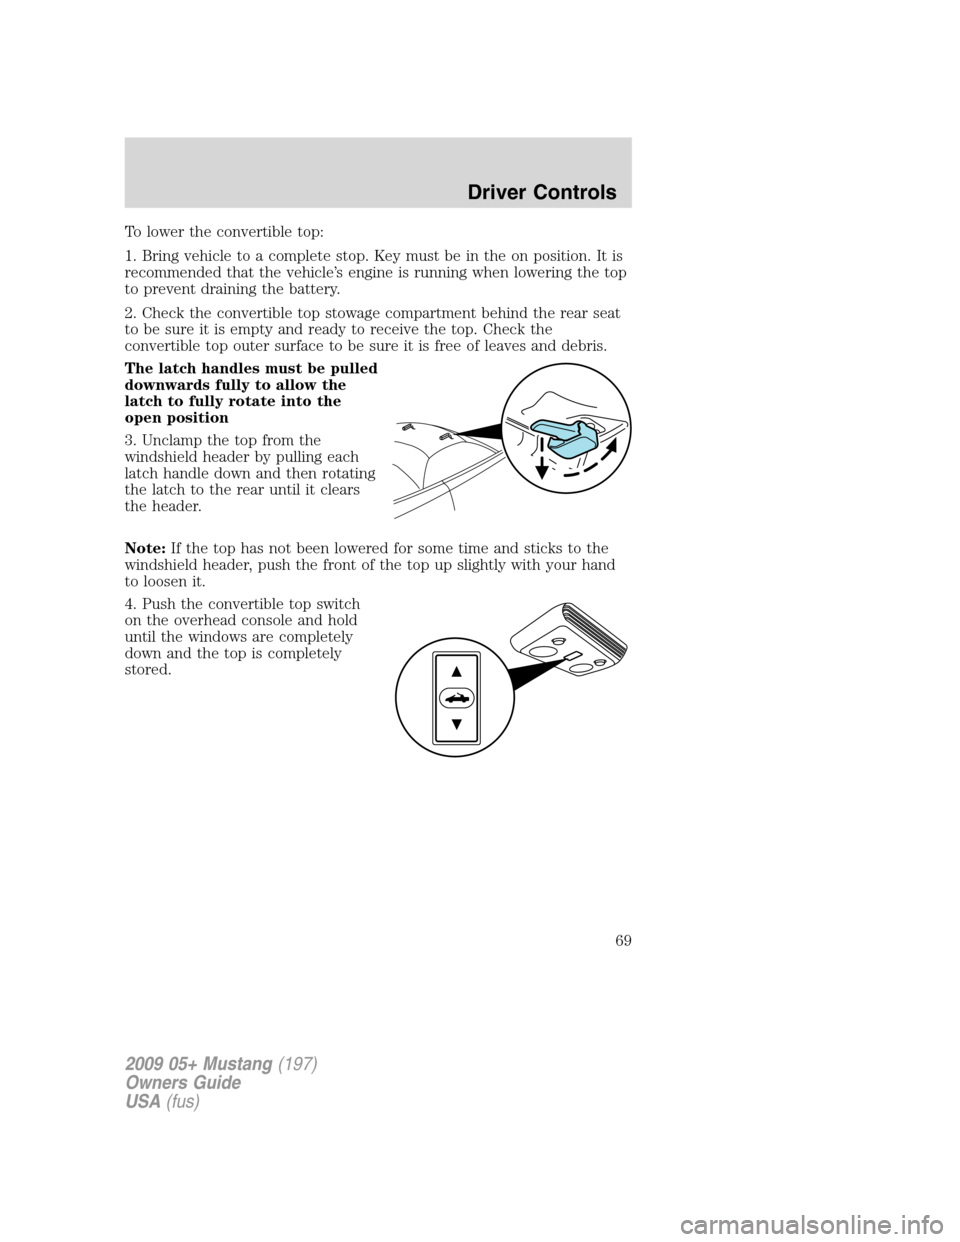
To lower the convertible top:
1. Bring vehicle to a complete stop. Key must be in the on position. It is
recommended that the vehicle’s engine is running when lowering the top
to prevent draining the battery.
2. Check the convertible top stowage compartment behind the rear seat
to be sure it is empty and ready to receive the top. Check the
convertible top outer surface to be sure it is free of leaves and debris.
The latch handles must be pulled
downwards fully to allow the
latch to fully rotate into the
open position
3. Unclamp the top from the
windshield header by pulling each
latch handle down and then rotating
the latch to the rear until it clears
the header.
Note:If the top has not been lowered for some time and sticks to the
windshield header, push the front of the top up slightly with your hand
to loosen it.
4. Push the convertible top switch
on the overhead console and hold
until the windows are completely
down and the top is completely
stored.
2009 05+ Mustang(197)
Owners Guide
USA(fus)
Driver Controls
69
Page 70 of 292
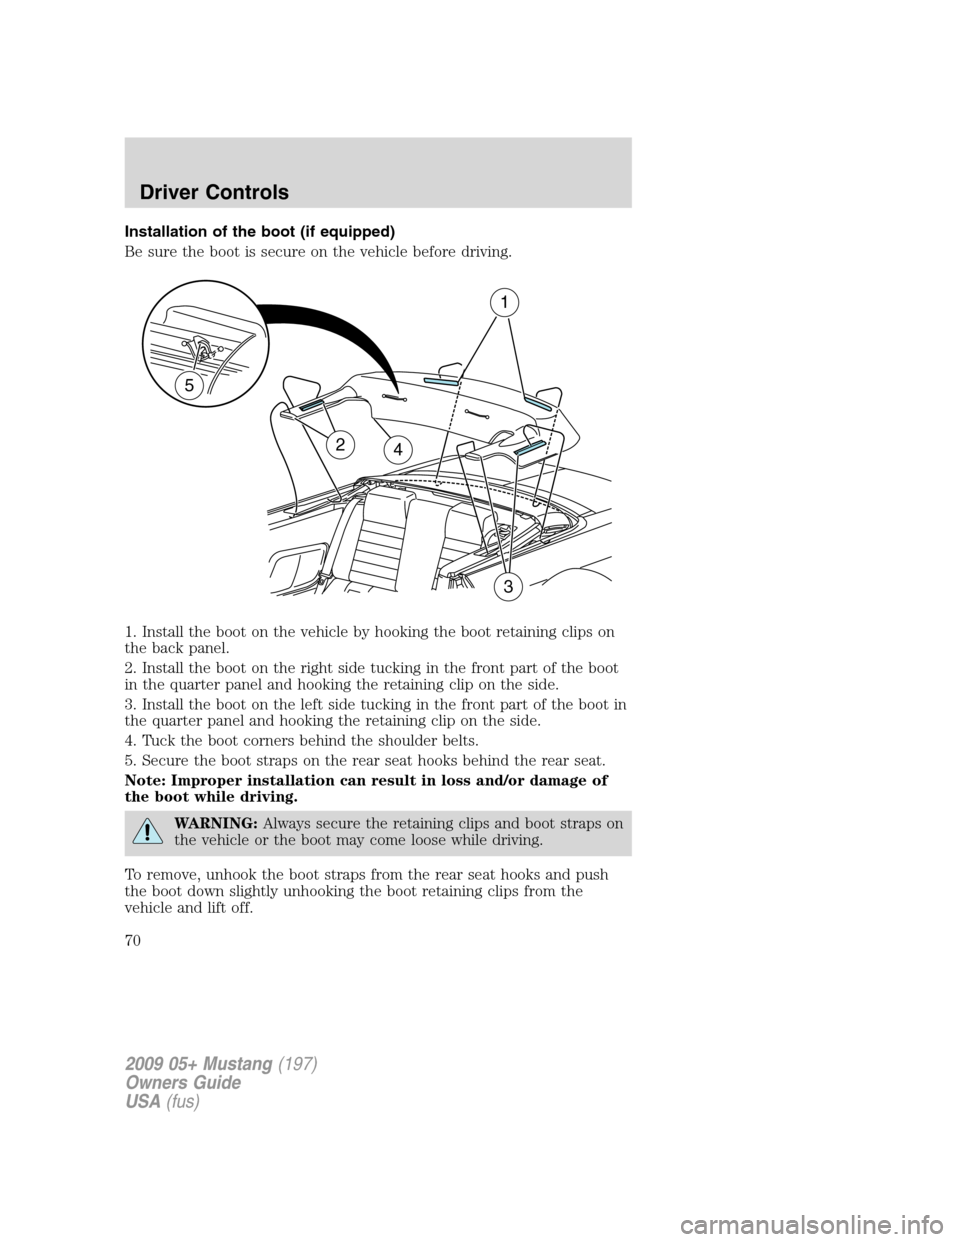
Installation of the boot (if equipped)
Be sure the boot is secure on the vehicle before driving.
1. Install the boot on the vehicle by hooking the boot retaining clips on
the back panel.
2. Install the boot on the right side tucking in the front part of the boot
in the quarter panel and hooking the retaining clip on the side.
3. Install the boot on the left side tucking in the front part of the boot in
the quarter panel and hooking the retaining clip on the side.
4. Tuck the boot corners behind the shoulder belts.
5. Secure the boot straps on the rear seat hooks behind the rear seat.
Note: Improper installation can result in loss and/or damage of
the boot while driving.
WARNING:Always secure the retaining clips and boot straps on
the vehicle or the boot may come loose while driving.
To remove, unhook the boot straps from the rear seat hooks and push
the boot down slightly unhooking the boot retaining clips from the
vehicle and lift off.
24
1
3
5
2009 05+ Mustang(197)
Owners Guide
USA(fus)
Driver Controls
70