FORD MUSTANG 2014 5.G Owners Manual
Manufacturer: FORD, Model Year: 2014, Model line: MUSTANG, Model: FORD MUSTANG 2014 5.GPages: 461, PDF Size: 5.47 MB
Page 141 of 461
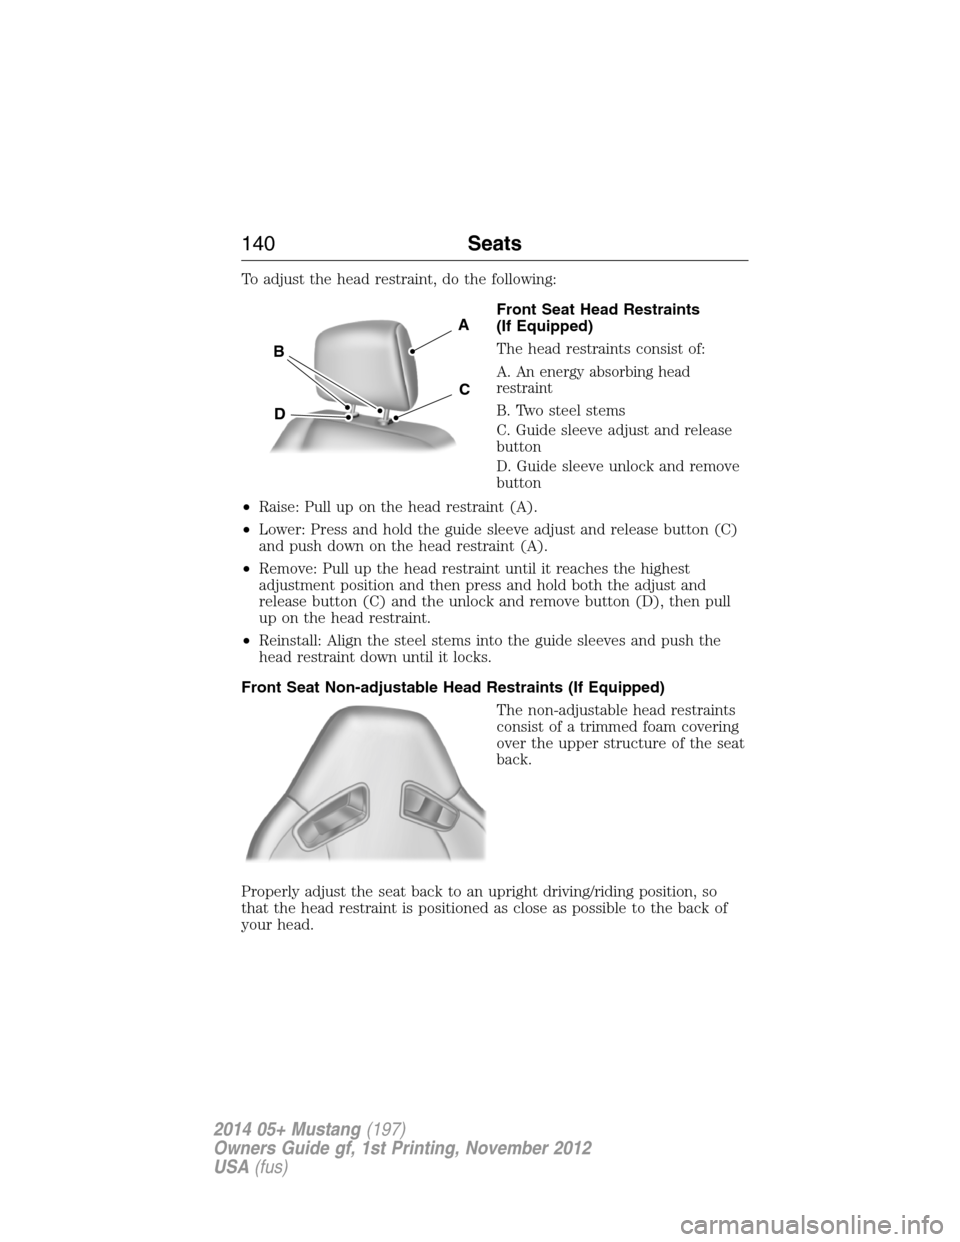
To adjust the head restraint, do the following:
Front Seat Head Restraints
(If Equipped)
The head restraints consist of:
A.
An energy absorbing head
restraint
B. Two steel stems
C. Guide sleeve adjust and release
button
D. Guide sleeve unlock and remove
button
•Raise: Pull up on the head restraint (A).
•Lower: Press and hold the guide sleeve adjust and release button (C)
and push down on the head restraint (A).
•Remove: Pull up the head restraint until it reaches the highest
adjustment position and then press and hold both the adjust and
release button (C) and the unlock and remove button (D), then pull
up on the head restraint.
•Reinstall: Align the steel stems into the guide sleeves and push the
head restraint down until it locks.
Front Seat Non-adjustable Head Restraints (If Equipped)
The non-adjustable head restraints
consist of a trimmed foam covering
over the upper structure of the seat
back.
Properly adjust the seat back to an upright driving/riding position, so
that the head restraint is positioned as close as possible to the back of
your head.
A
B
D
C
140Seats
2014 05+ Mustang(197)
Owners Guide gf, 1st Printing, November 2012
USA(fus)
Page 142 of 461
Rear Seat Non-adjustable Outboard Head Restraints
The second row outboard non-adjustable head restraints can be rotated
forward to improve rear vision when there are no rear occupants.
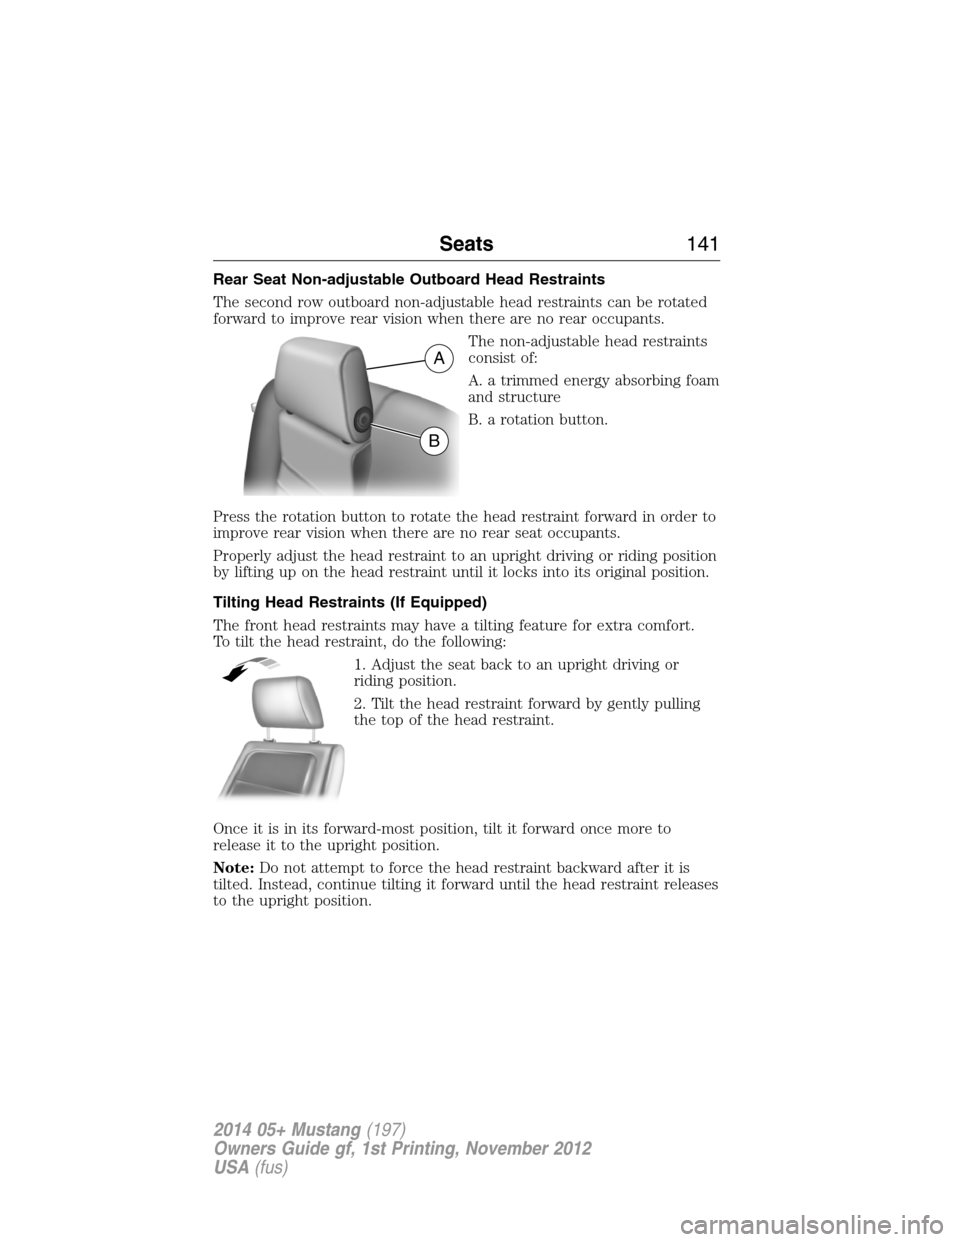
The non-adjustable head restraints
consist of:
A. a trimmed energy absorbing foam
and structure
B. a rotation button.
Press the rotation button to rotate the head restraint forward in order to
improve rear vision when there are no rear seat occupants.
Properly adjust the head restraint to an upright driving or riding position
by lifting up on the head restraint until it locks into its original position.
Tilting Head Restraints (If Equipped)
The front head restraints may have a tilting feature for extra comfort.
To tilt the head restraint, do the following:
1. Adjust the seat back to an upright driving or
riding position.
2. Tilt the head restraint forward by gently pulling
the top of the head restraint.
Once it is in its forward-most position, tilt it forward once more to
release it to the upright position.
Note:Do not attempt to force the head restraint backward after it is
tilted. Instead, continue tilting it forward until the head restraint releases
to the upright position.
A
B
Seats141
2014 05+ Mustang(197)
Owners Guide gf, 1st Printing, November 2012
USA(fus)
Page 143 of 461
MANUAL SEATS
WARNING:Do not adjust the driver’s seat or seat back while the
vehicle is moving.
WARNING:Rock the seat backwards and forwards after
releasing the lever to make sure that it is fully engaged.
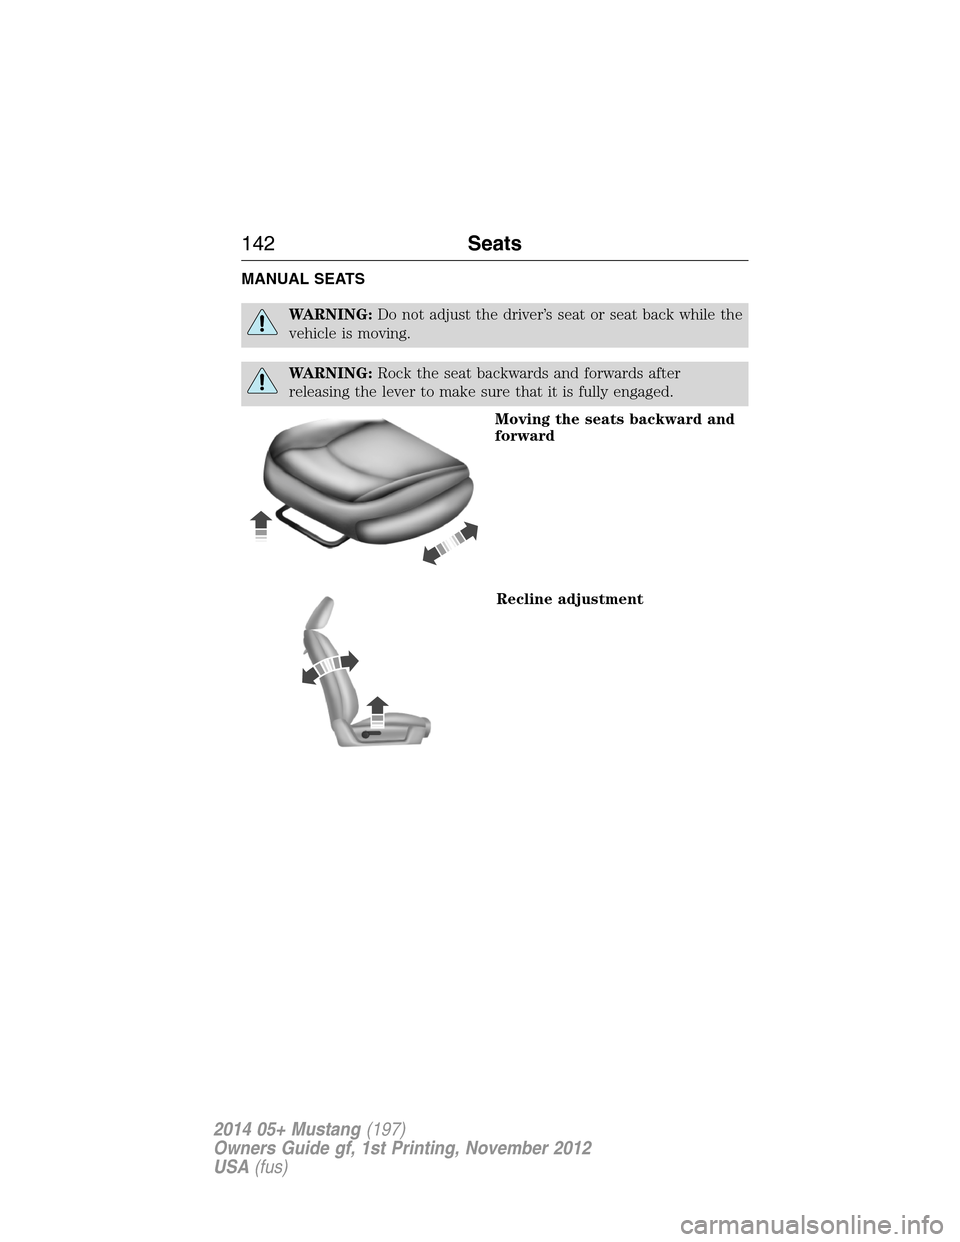
Moving the seats backward and
forward
Recline adjustment
142Seats
2014 05+ Mustang(197)
Owners Guide gf, 1st Printing, November 2012
USA(fus)
Page 144 of 461
WARNING:Always drive and ride with your seat back upright
and the lap belt snug and low across the hips.
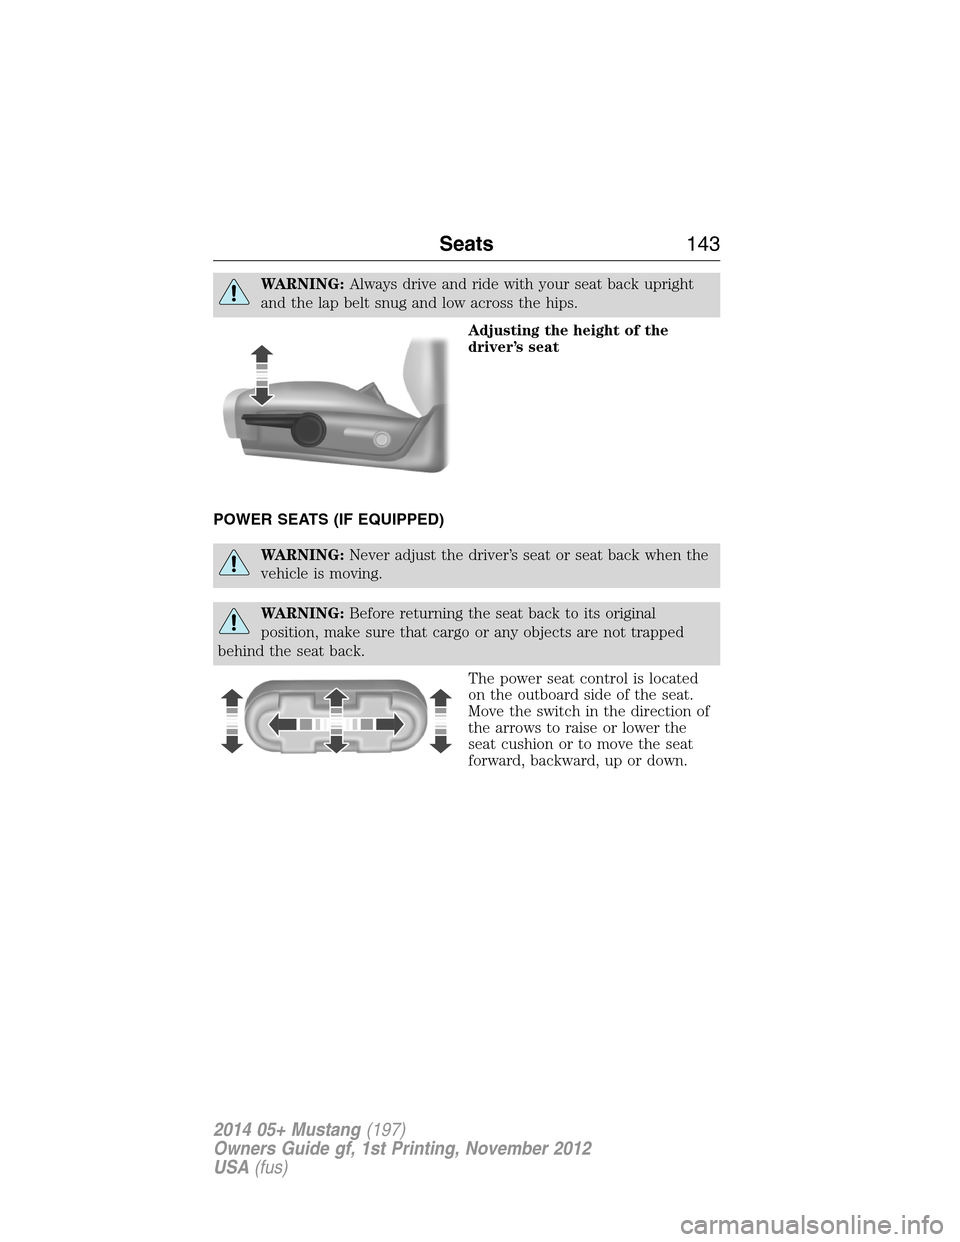
Adjusting the height of the
driver’s seat
POWER SEATS (IF EQUIPPED)
WARNING:Never adjust the driver’s seat or seat back when the
vehicle is moving.
WARNING:Before returning the seat back to its original
position, make sure that cargo or any objects are not trapped
behind the seat back.
The power seat control is located
on the outboard side of the seat.
Move the switch in the direction of
the arrows to raise or lower the
seat cushion or to move the seat
forward, backward, up or down.
Seats143
2014 05+ Mustang(197)
Owners Guide gf, 1st Printing, November 2012
USA(fus)
Page 145 of 461
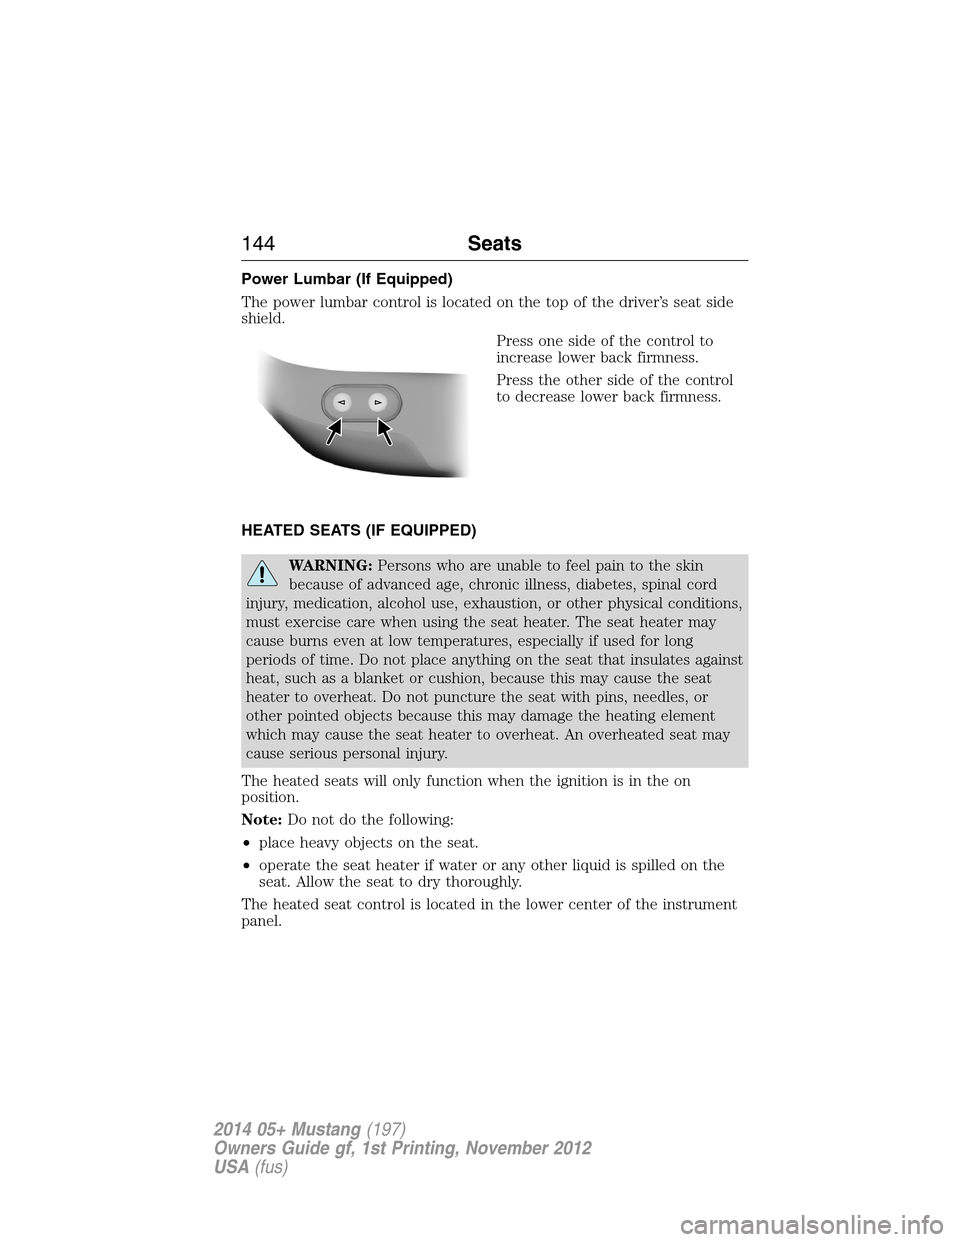
Power Lumbar (If Equipped)
The power lumbar control is located on the top of the driver’s seat side
shield.
Press one side of the control to
increase lower back firmness.
Press the other side of the control
to decrease lower back firmness.
HEATED SEATS (IF EQUIPPED)
WARNING:Persons who are unable to feel pain to the skin
because of advanced age, chronic illness, diabetes, spinal cord
injury, medication, alcohol use, exhaustion, or other physical conditions,
must exercise care when using the seat heater. The seat heater may
cause burns even at low temperatures, especially if used for long
periods of time. Do not place anything on the seat that insulates against
heat, such as a blanket or cushion, because this may cause the seat
heater to overheat. Do not puncture the seat with pins, needles, or
other pointed objects because this may damage the heating element
which may cause the seat heater to overheat. An overheated seat may
cause serious personal injury.
The heated seats will only function when the ignition is in the on
position.
Note:Do not do the following:
•place heavy objects on the seat.
•operate the seat heater if water or any other liquid is spilled on the
seat. Allow the seat to dry thoroughly.
The heated seat control is located in the lower center of the instrument
panel.
144Seats
2014 05+ Mustang(197)
Owners Guide gf, 1st Printing, November 2012
USA(fus)
Page 146 of 461
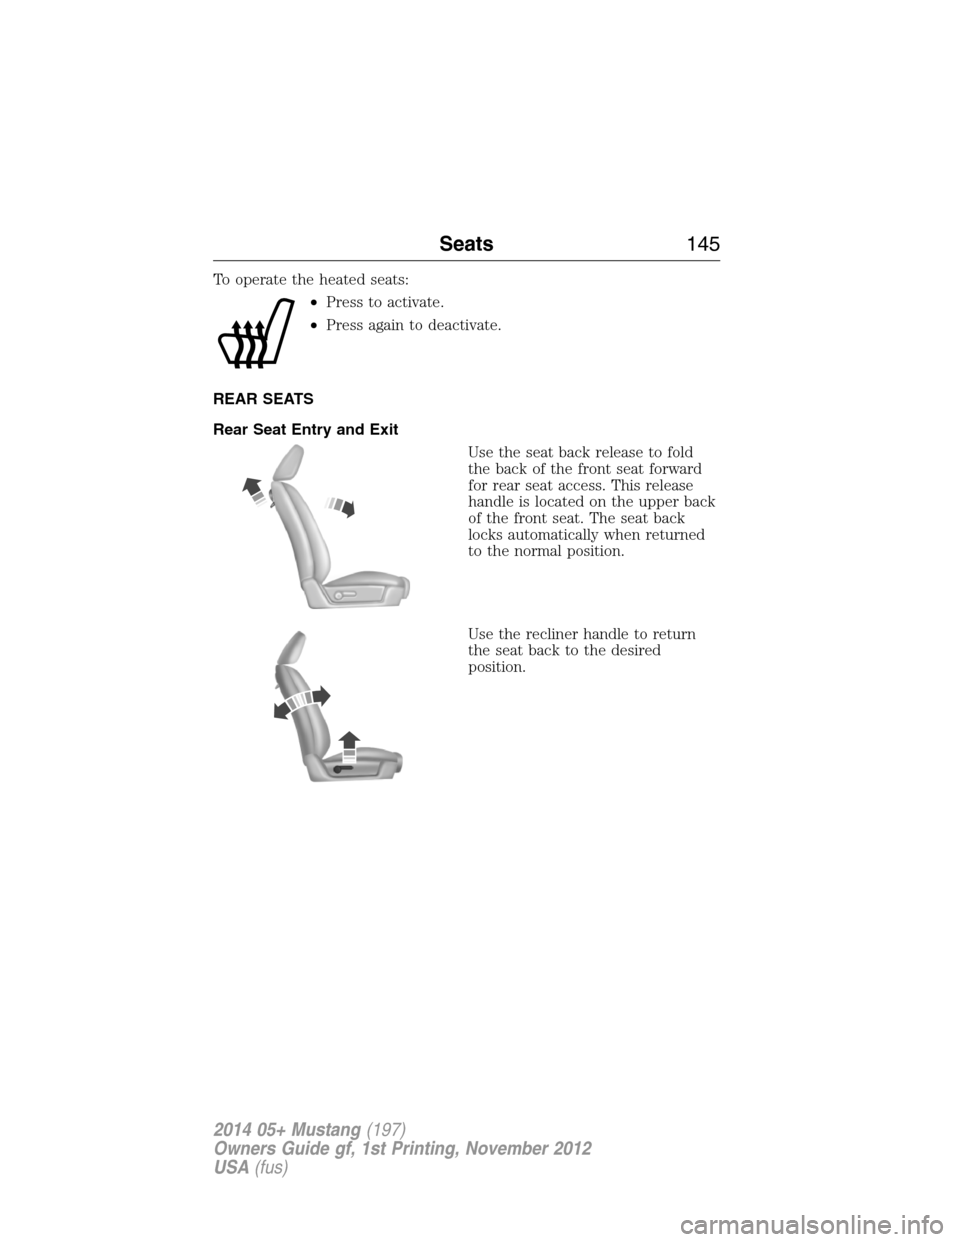
To operate the heated seats:
•Press to activate.
•Press again to deactivate.
REAR SEATS
Rear Seat Entry and Exit
Use the seat back release to fold
the back of the front seat forward
for rear seat access. This release
handle is located on the upper back
of the front seat. The seat back
locks automatically when returned
to the normal position.
Use the recliner handle to return
the seat back to the desired
position.
Seats145
2014 05+ Mustang(197)
Owners Guide gf, 1st Printing, November 2012
USA(fus)
Page 147 of 461
2nd Row Seat/Split-Folding Rear Seat (If Equipped)
WARNING:Before returning the seat back to its original
position, make sure that cargo or any objects are not trapped
behind the seat back. After returning the seat back to its original
position, pull on the seat back to make sure that it has fully latched.
An unlatched seat may become dangerous in the event of a sudden
stop or crash.
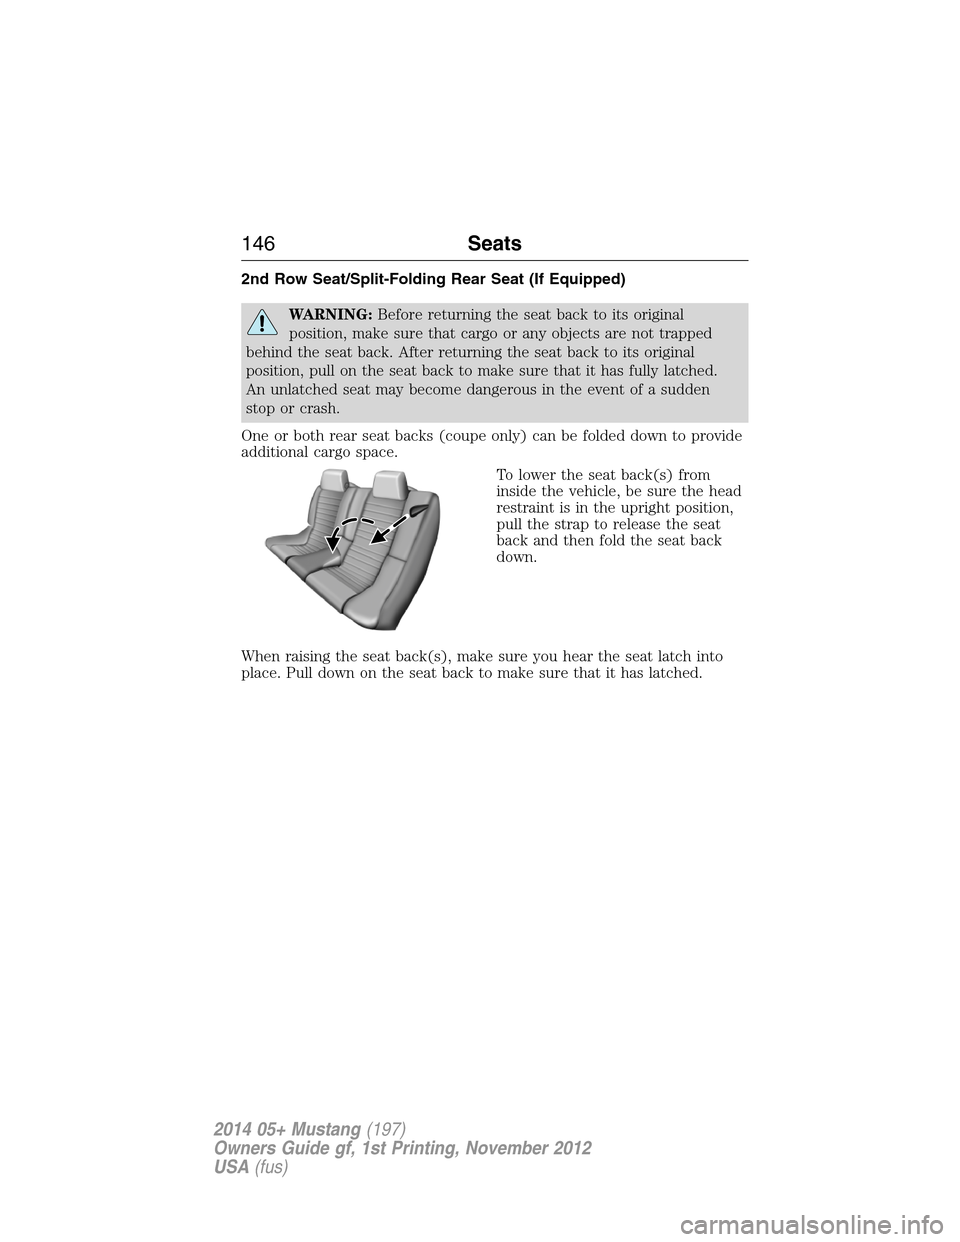
One or both rear seat backs (coupe only) can be folded down to provide
additional cargo space.
To lower the seat back(s) from
inside the vehicle, be sure the head
restraint is in the upright position,
pull the strap to release the seat
back and then fold the seat back
down.
When raising the seat back(s), make sure you hear the seat latch into
place. Pull down on the seat back to make sure that it has latched.
146Seats
2014 05+ Mustang(197)
Owners Guide gf, 1st Printing, November 2012
USA(fus)
Page 148 of 461
HOMELINK® WIRELESS CONTROL SYSTEM (IF EQUIPPED)
WARNING:Make sure that the garage door and security device
are free from obstruction when you are programming. Do not
program the system with the vehicle in the garage.
WARNING:Do not use the system with any garage door opener
that does not have the safety stop and reverse feature as
required by U.S. Federal Safety Standards (this includes any garage
door opener manufactured before April 1, 1982).
Note:Make sure you keep the original remote control transmitter for
use in other vehicles as well as for future system programming.
Note:We recommend that upon the sale or lease termination of your
vehicle, you erase the programmed function buttons for security reasons.
SeeErasing the function button codeslater in this section.
Note:You can program a maximum of three devices. To change or
replace any of the three devices after it has been initially programmed,
you must first erase the current settings. SeeErasing the function
button codeslater in this section.
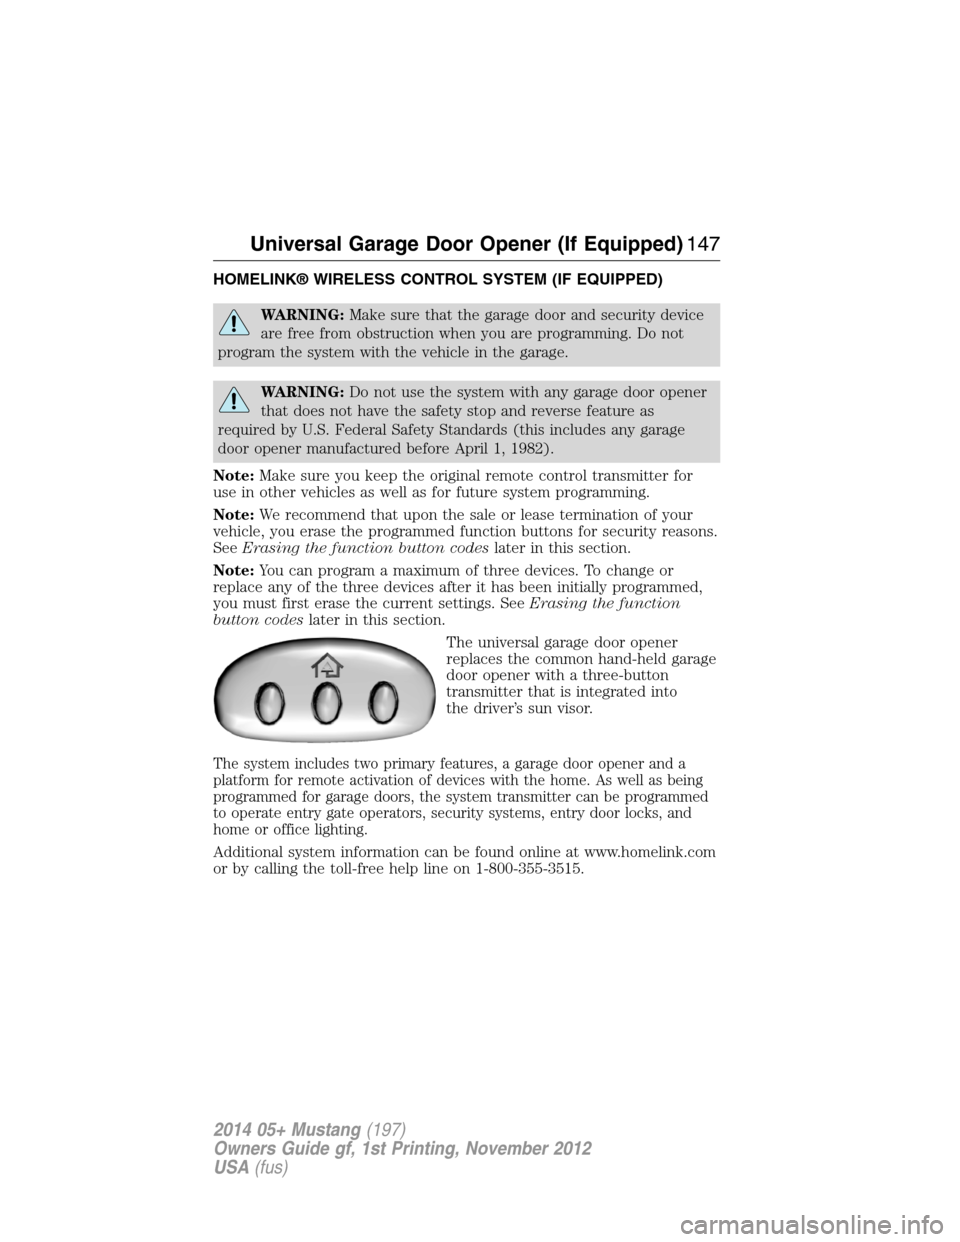
The universal garage door opener
replaces the common hand-held garage
door opener with a three-button
transmitter that is integrated into
the driver’s sun visor.
The system includes two primary features, a garage door opener and a
platform for remote activation of devices with the home. As well as being
programmed for garage doors, the system transmitter can be programmed
to operate entry gate operators, security systems, entry door locks, and
home or office lighting.
Additional system information can be found online at www.homelink.com
or by calling the toll-free help line on 1-800-355-3515.
Universal Garage Door Opener (If Equipped)147
2014 05+ Mustang(197)
Owners Guide gf, 1st Printing, November 2012
USA(fus)
Page 149 of 461
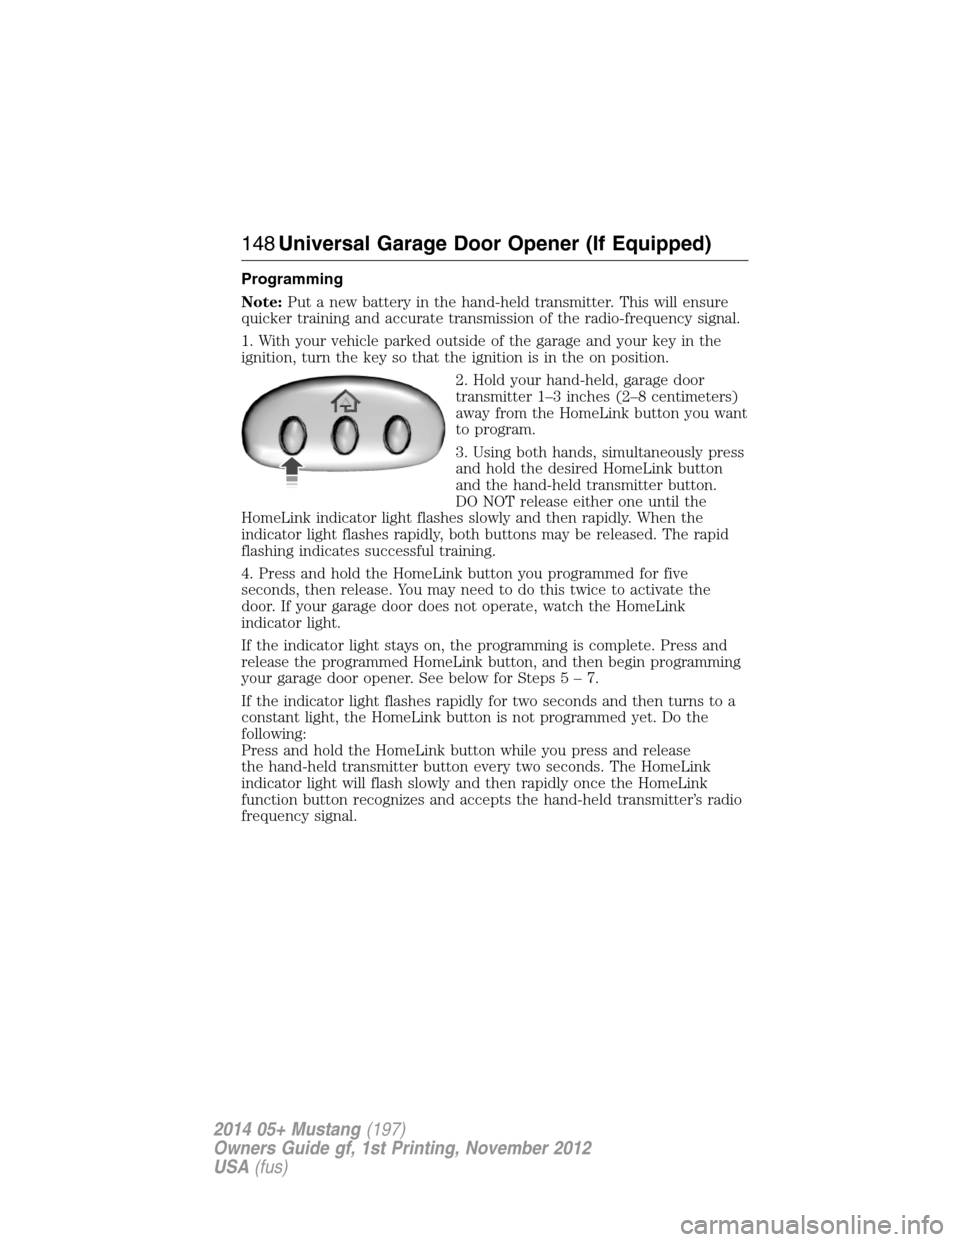
Programming
Note:Put a new battery in the hand-held transmitter. This will ensure
quicker training and accurate transmission of the radio-frequency signal.
1. With your vehicle parked outside of the garage and your key in the
ignition, turn the key so that the ignition is in the on position.
2. Hold your hand-held, garage door
transmitter 1–3 inches (2–8 centimeters)
away from the HomeLink button you want
to program.
3. Using both hands, simultaneously press
and hold the desired HomeLink button
and the hand-held transmitter button.
DO NOT release either one until the
HomeLink indicator light flashes slowly and then rapidly. When the
indicator light flashes rapidly, both buttons may be released. The rapid
flashing indicates successful training.
4. Press and hold the HomeLink button you programmed for five
seconds, then release. You may need to do this twice to activate the
door. If your garage door does not operate, watch the HomeLink
indicator light.
If the indicator light stays on, the programming is complete. Press and
release the programmed HomeLink button, and then begin programming
your garage door opener. See below for Steps5–7.
If the indicator light flashes rapidly for two seconds and then turns to a
constant light, the HomeLink button is not programmed yet. Do the
following:
Press and hold the HomeLink button while you press and release
the hand-held transmitter button every two seconds. The HomeLink
indicator light will flash slowly and then rapidly once the HomeLink
function button recognizes and accepts the hand-held transmitter’s radio
frequency signal.
148Universal Garage Door Opener (If Equipped)
2014 05+ Mustang(197)
Owners Guide gf, 1st Printing, November 2012
USA(fus)
Page 150 of 461
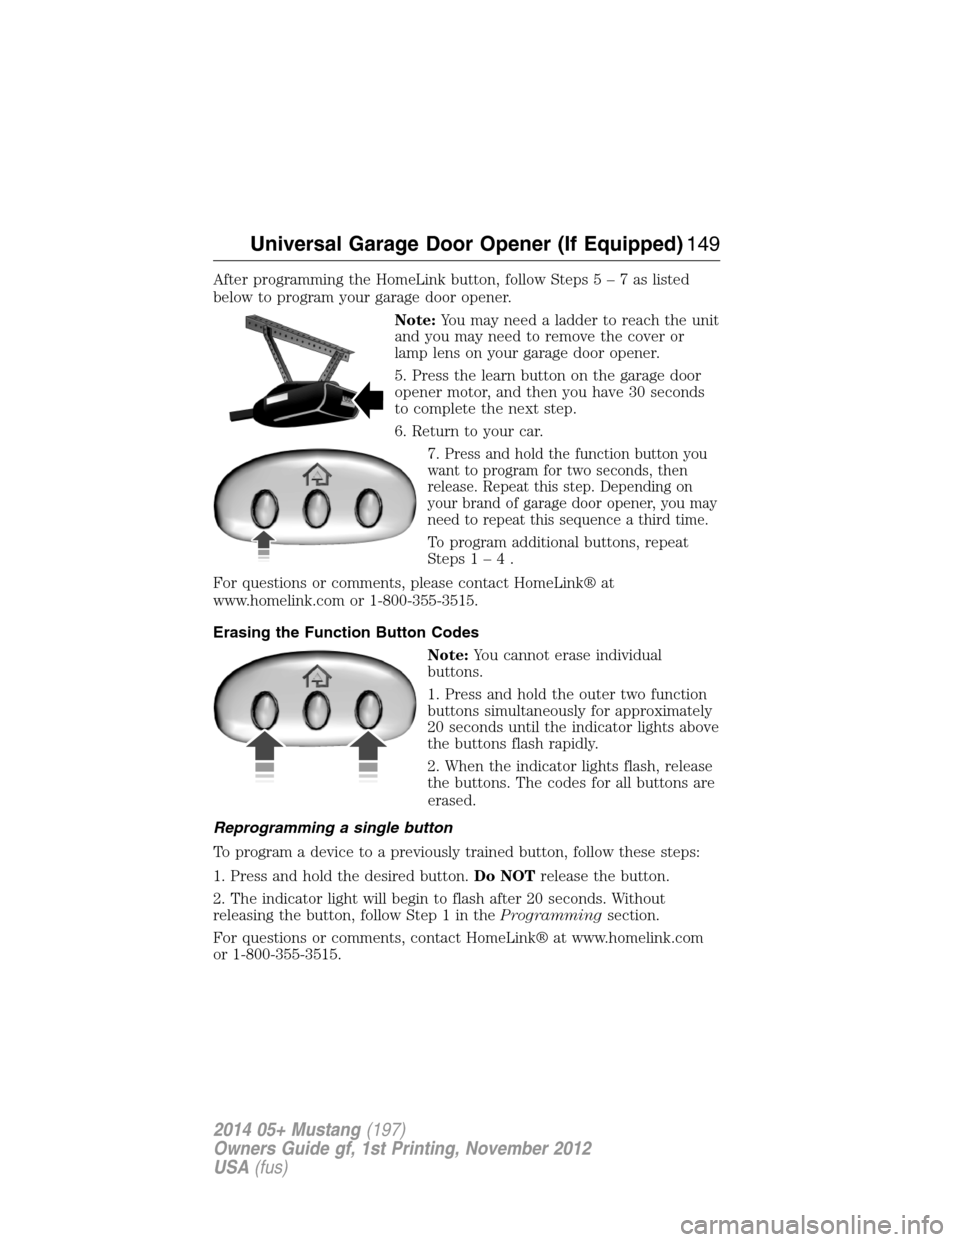
After programming the HomeLink button, follow Steps5–7aslisted
below to program your garage door opener.
Note:You may need a ladder to reach the unit
and you may need to remove the cover or
lamp lens on your garage door opener.
5. Press the learn button on the garage door
opener motor, and then you have 30 seconds
to complete the next step.
6. Return to your car.
7.
Press and hold the function button you
want to program for two seconds, then
release. Repeat this step. Depending on
your brand of garage door opener, you may
need to repeat this sequence a third time.
To program additional buttons, repeat
Steps1–4.
For questions or comments, please contact HomeLink® at
www.homelink.com or 1-800-355-3515.
Erasing the Function Button Codes
Note:You cannot erase individual
buttons.
1. Press and hold the outer two function
buttons simultaneously for approximately
20 seconds until the indicator lights above
the buttons flash rapidly.
2. When the indicator lights flash, release
the buttons. The codes for all buttons are
erased.
Reprogramming a single button
To program a device to a previously trained button, follow these steps:
1. Press and hold the desired button.Do NOTrelease the button.
2. The indicator light will begin to flash after 20 seconds. Without
releasing the button, follow Step 1 in theProgrammingsection.
For questions or comments, contact HomeLink® at www.homelink.com
or 1-800-355-3515.
Universal Garage Door Opener (If Equipped)149
2014 05+ Mustang(197)
Owners Guide gf, 1st Printing, November 2012
USA(fus)