FORD POLICE INTERCEPTOR UTILITY 2016 1.G Owners Manual
Manufacturer: FORD, Model Year: 2016, Model line: POLICE INTERCEPTOR UTILITY, Model: FORD POLICE INTERCEPTOR UTILITY 2016 1.GPages: 350, PDF Size: 3.58 MB
Page 91 of 350
Recommended Settings for
Cooling
•
Adjust the fan speed to the second
speed setting.
• Adjust the temperature control to the
midway point of the cold settings.
• Adjust the air distribution control to the
instrument panel air vents position.
Vehicle Stationary for Extended
Periods During Extreme High
Ambient Temperatures
• Apply the parking brake.
• Move the transmission selector lever
to position P or neutral.
• Adjust the temperature control to the
MAX A/C
position.
• Adjust the fan speed to the lowest
speed setting.
Side Window Defogging in Cold
Weather
• Adjust the air distribution control to the
instrument panel and windshield air
vents positions.
• Press the
A/C button.
• Adjust the temperature control to the
desired setting.
• Adjust the fan speed to the highest
setting.
• Direct the instrument panel side air
vents toward the side windows.
• Close the instrument panel vents. Maximum Cooling Performance in
Instrument Panel or Instrument
Panel and Footwell Positions
•
Adjust the temperature control to the
lowest setting.
• Press the
A/C and recirculated air
buttons.
• Adjust the fan speed to the highest
setting initially and then adjust it to suit
the desired comfort level.
HEATED WINDOWS AND
MIRRORS
(If Equipped)
Heated Rear Window
Note: Make sure the engine is running
before operating the heated windows. Press the button to clear the
heated rear window of thin ice
and fog. The heated rear window
will automatically turn off after a short
period of time. Start the engine before you
switch the heated rear window on.
Note: Do not use razor blades or other
sharp objects to clean or remove decals
from the inside of the heated rear window.
The vehicle warranty does not cover
damage caused to the heated rear window
grid lines.
Heated Exterior Mirror
When you switch the heated rear window
on, the heated exterior mirrors will
automatically turn on.
Note: Do not remove ice from the mirrors
with a scraper or adjust the mirror glass
when it is frozen in place.
Note: Do not clean the mirror housing or
glass with harsh abrasives, fuel or other
petroleum-based cleaning products.
88
Explorer (TUB), enUSA, Edition date: 03/2015, First Printing Climate ControlE184884
Page 92 of 350
CABIN AIR FILTER
Your vehicle is equipped with a cabin air
filter, which gives you and your passengers
the following benefits:
•
It improves your driving comfort by
reducing particle concentration.
• It improves the interior compartment
cleanliness.
• It protects the climate control
components from particle deposits.
You can locate the cabin air filter behind
the glove box.
Note: Make sure you have a cabin air filter
installed at all times. This prevents foreign
objects from entering the system. Running
the system without a filter in place could
result in degradation or damage to the
system.
Replace the filter at regular intervals. See
Scheduled Maintenance (page 296).
For additional cabin air filter information,
or to replace the filter, see an authorized
dealer.
89
Explorer (TUB), enUSA, Edition date: 03/2015, First Printing Climate Control
Page 93 of 350
SITTING IN THE CORRECT
POSITION
WARNINGS
Sitting improperly, out of position or
with the seatback reclined too far
can take weight off the seat cushion
and affect the decision of the passenger
sensing system, resulting in serious injury
or death in the event of a crash. Always sit
upright against your seat back, with your
feet on the floor. Do not recline the seatback as this
can cause the occupant to slide
under the safety belt, resulting in
serious injury in the event of a crash. Do not place objects higher than the
seatback to reduce the risk of serious
injury in the event of a crash or during
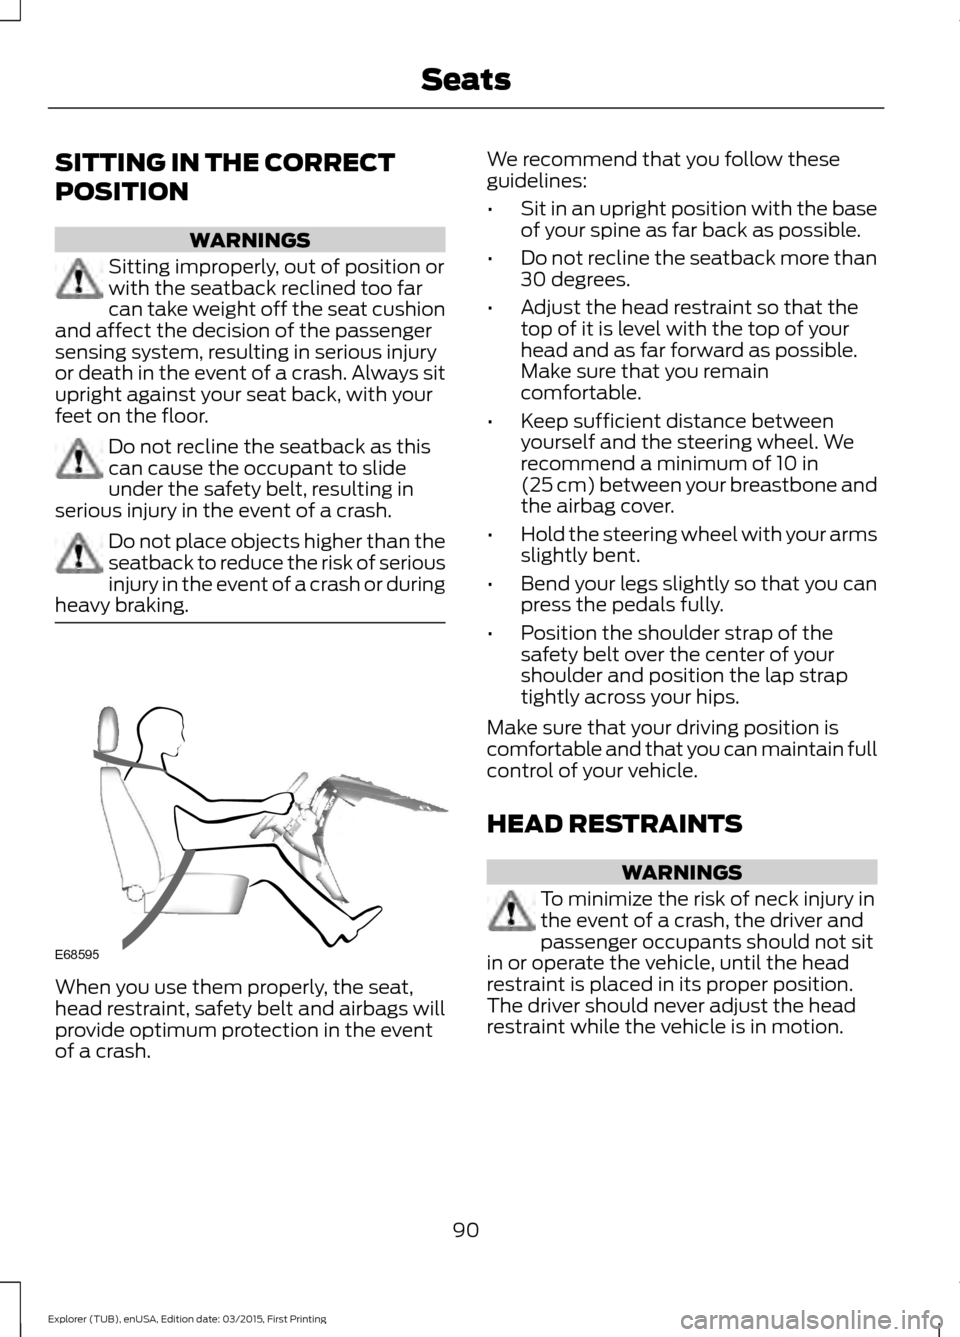
heavy braking. When you use them properly, the seat,
head restraint, safety belt and airbags will
provide optimum protection in the event
of a crash. We recommend that you follow these
guidelines:
•
Sit in an upright position with the base
of your spine as far back as possible.
• Do not recline the seatback more than
30 degrees.
• Adjust the head restraint so that the
top of it is level with the top of your
head and as far forward as possible.
Make sure that you remain
comfortable.
• Keep sufficient distance between
yourself and the steering wheel. We
recommend a minimum of 10 in
(25 cm) between your breastbone and
the airbag cover.
• Hold the steering wheel with your arms
slightly bent.
• Bend your legs slightly so that you can
press the pedals fully.
• Position the shoulder strap of the
safety belt over the center of your
shoulder and position the lap strap
tightly across your hips.
Make sure that your driving position is
comfortable and that you can maintain full
control of your vehicle.
HEAD RESTRAINTS WARNINGS
To minimize the risk of neck injury in
the event of a crash, the driver and
passenger occupants should not sit
in or operate the vehicle, until the head
restraint is placed in its proper position.
The driver should never adjust the head
restraint while the vehicle is in motion.
90
Explorer (TUB), enUSA, Edition date: 03/2015, First Printing SeatsE68595
Page 94 of 350
WARNINGS
The adjustable head restraint is a
safety device. Whenever possible it
should be installed and properly
adjusted when the seat is occupied. An
improperly adjusted head restraint may
provide reduced protection to an occupant
during certain rear impacts. Install the head restraint properly to
help minimize the risk of neck injury
in the event of a crash.
Note:
Adjust the seatback to an upright
driving position before adjusting the head
restraint. Adjust the head restraint so that
the top of it is level with the top of your head
and as far forward as possible. Make sure
that you remain comfortable. If you are
extremely tall, adjust the head restraint to
its highest position.
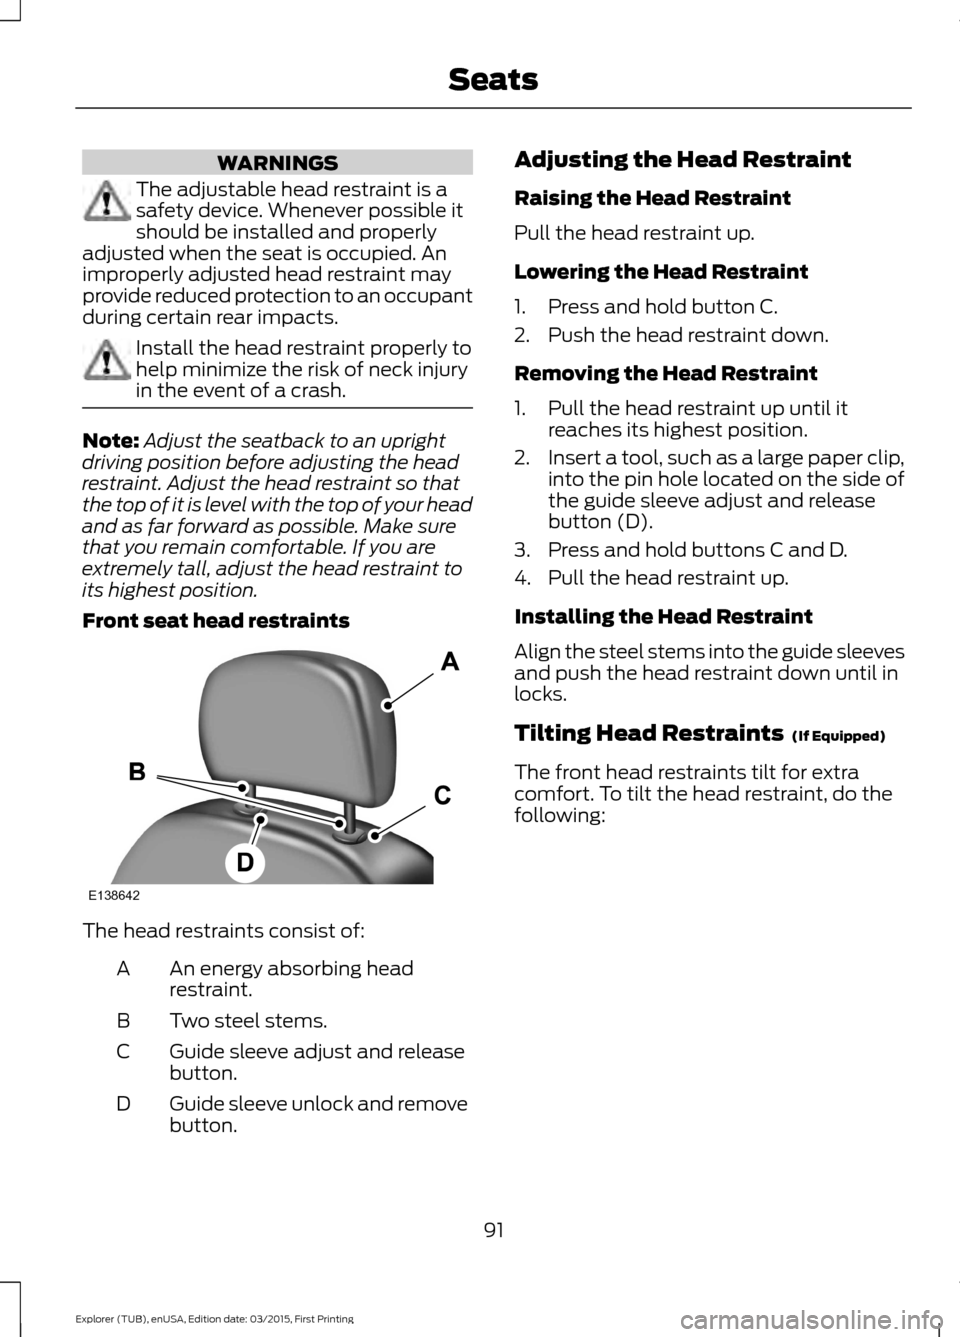
Front seat head restraints The head restraints consist of:
An energy absorbing head
restraint.
A
Two steel stems.
B
Guide sleeve adjust and release
button.
C
Guide sleeve unlock and remove
button.
D Adjusting the Head Restraint
Raising the Head Restraint
Pull the head restraint up.
Lowering the Head Restraint
1. Press and hold button C.
2. Push the head restraint down.
Removing the Head Restraint
1. Pull the head restraint up until it
reaches its highest position.
2. Insert a tool, such as a large paper clip,
into the pin hole located on the side of
the guide sleeve adjust and release
button (D).
3. Press and hold buttons C and D.
4. Pull the head restraint up.
Installing the Head Restraint
Align the steel stems into the guide sleeves
and push the head restraint down until in
locks.
Tilting Head Restraints (If Equipped)
The front head restraints tilt for extra
comfort. To tilt the head restraint, do the
following:
91
Explorer (TUB), enUSA, Edition date: 03/2015, First Printing SeatsE138642
Page 95 of 350
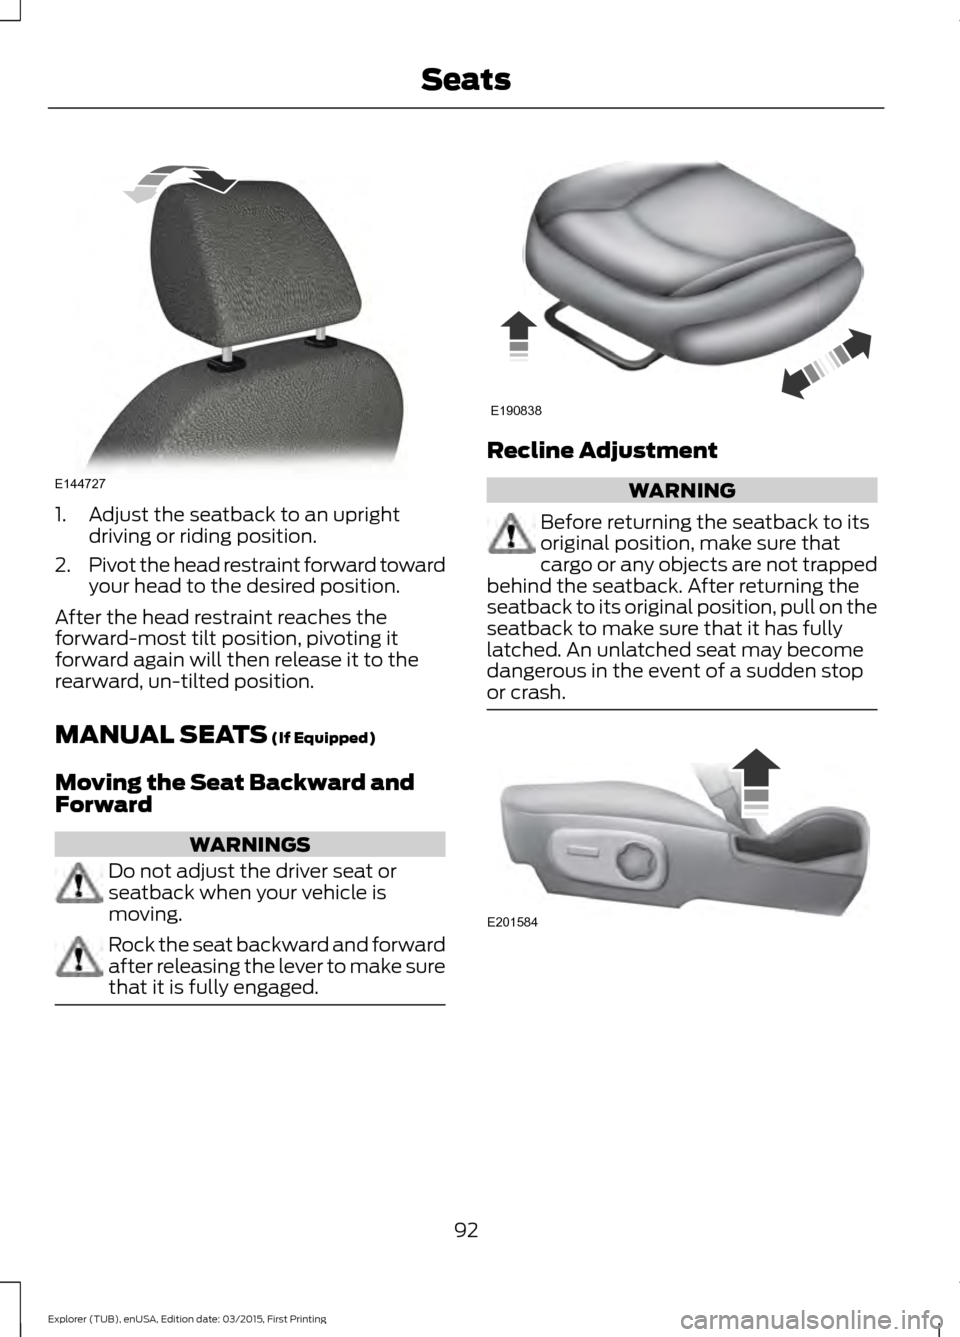
1. Adjust the seatback to an upright
driving or riding position.
2. Pivot the head restraint forward toward
your head to the desired position.
After the head restraint reaches the
forward-most tilt position, pivoting it
forward again will then release it to the
rearward, un-tilted position.
MANUAL SEATS (If Equipped)
Moving the Seat Backward and
Forward WARNINGS
Do not adjust the driver seat or
seatback when your vehicle is
moving.
Rock the seat backward and forward
after releasing the lever to make sure
that it is fully engaged. Recline Adjustment
WARNING
Before returning the seatback to its
original position, make sure that
cargo or any objects are not trapped
behind the seatback. After returning the
seatback to its original position, pull on the
seatback to make sure that it has fully
latched. An unlatched seat may become
dangerous in the event of a sudden stop
or crash. 92
Explorer (TUB), enUSA, Edition date: 03/2015, First Printing SeatsE144727 E190838 E201584
Page 96 of 350

Lumbar Adjustment (If Equipped)
POWER SEATS
(If Equipped)
WARNINGS
Do not adjust the driver seat or
seatback when your vehicle is
moving. Adjusting your seatback
while your vehicle is in motion may cause
loss of control of your vehicle. Do not place cargo or any objects
behind the seatback before returning
it to the original position.
The control is located on the outboard side
of the seat. Move the switch in the direction
of the arrow to raise or lower the seat
cushion or to move the seat forward,
backward, up or down. REAR SEATS WARNINGS
Always drive and ride with your
seatback upright and the lap belt
snug and low across the hips.
Reclining the seatback can cause an
occupant to slide under the seat’
s
safety belt, resulting in severe
personal injuries in the event of a crash. Lift the handle to adjust the seatback
rearward or forward. The seatback can
also fold forward until it is flat.
Fold-flat Seatback
(If Equipped)
WARNING
Before returning the seatback to its
original position, make sure that
cargo or any objects are not trapped
behind the seatback. After returning the
seatback to its original position, pull on the
seatback to make sure that it has fully
latched. An unlatched seat may become
dangerous in the event of a sudden stop
or crash. 93
Explorer (TUB), enUSA, Edition date: 03/2015, First Printing SeatsE201585 E201586 E201587
Page 97 of 350
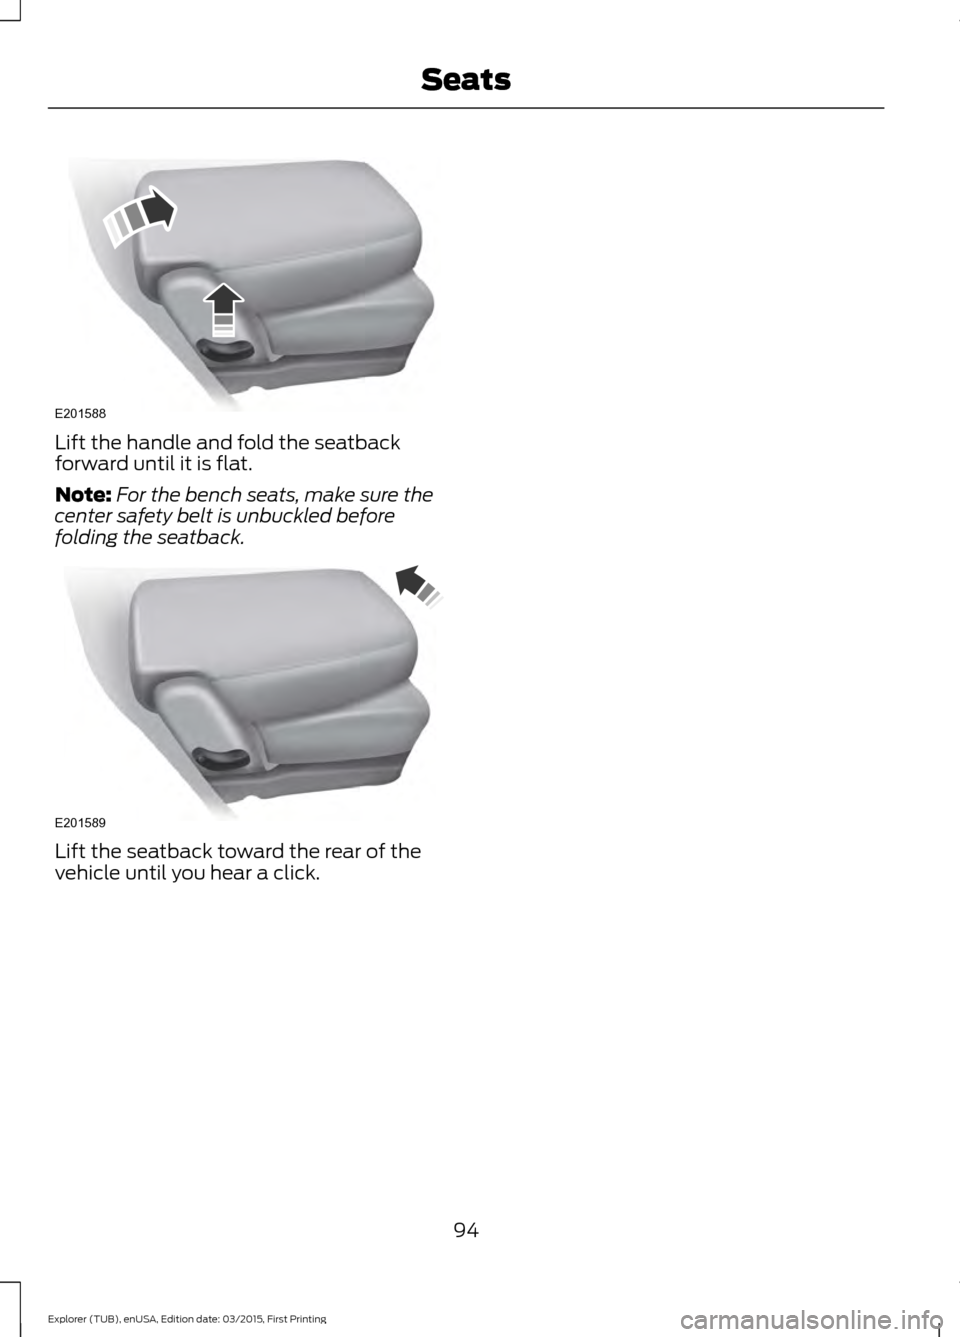
Lift the handle and fold the seatback
forward until it is flat.
Note:
For the bench seats, make sure the
center safety belt is unbuckled before
folding the seatback. Lift the seatback toward the rear of the
vehicle until you hear a click.
94
Explorer (TUB), enUSA, Edition date: 03/2015, First Printing SeatsE201588 E201589
Page 98 of 350
12 Volt DC Power Point
WARNING
Do not plug optional electrical
accessories into the cigar lighter
socket. Incorrect use of the cigar
lighter can cause damage not covered by
the vehicle warranty, and can result in fire
or serious injury. Note:
If used when the vehicle is not
running, the battery will run out of charge.
There may be insufficient power to restart
your vehicle.
Note: Do not insert objects other than an
accessory plug into the power point. This
will damage the power point and blow the
fuse.
Note: Do not hang any accessory from the
accessory plug.
Note: Do not use the power point over the
vehicle capacity of 12 volt DC 180 watts or
a fuse may blow.
Note: Do not use a power point for
operating a cigar lighter.
Note: Incorrect use of the power points can
cause damage not covered by the vehicle
warranty, and can result in fire or serious
injury.
Note: Always keep the power point caps
closed when not in use.
Run the vehicle for full capacity use of the
power point. To prevent the battery from
running out of charge:
• Do not use the power point longer than
necessary when the vehicle is not
running.
• Do not leave devices plugged in
overnight or when you park your vehicle
for extended periods. Locations
Power points may be in the following
locations:
•
On the center console.
• Inside the center console.
• On the rear of the center console.
• In the rear cargo area.
95
Explorer (TUB), enUSA, Edition date: 03/2015, First Printing Auxiliary Power Points
Page 99 of 350
CENTER CONSOLE (If Equipped)
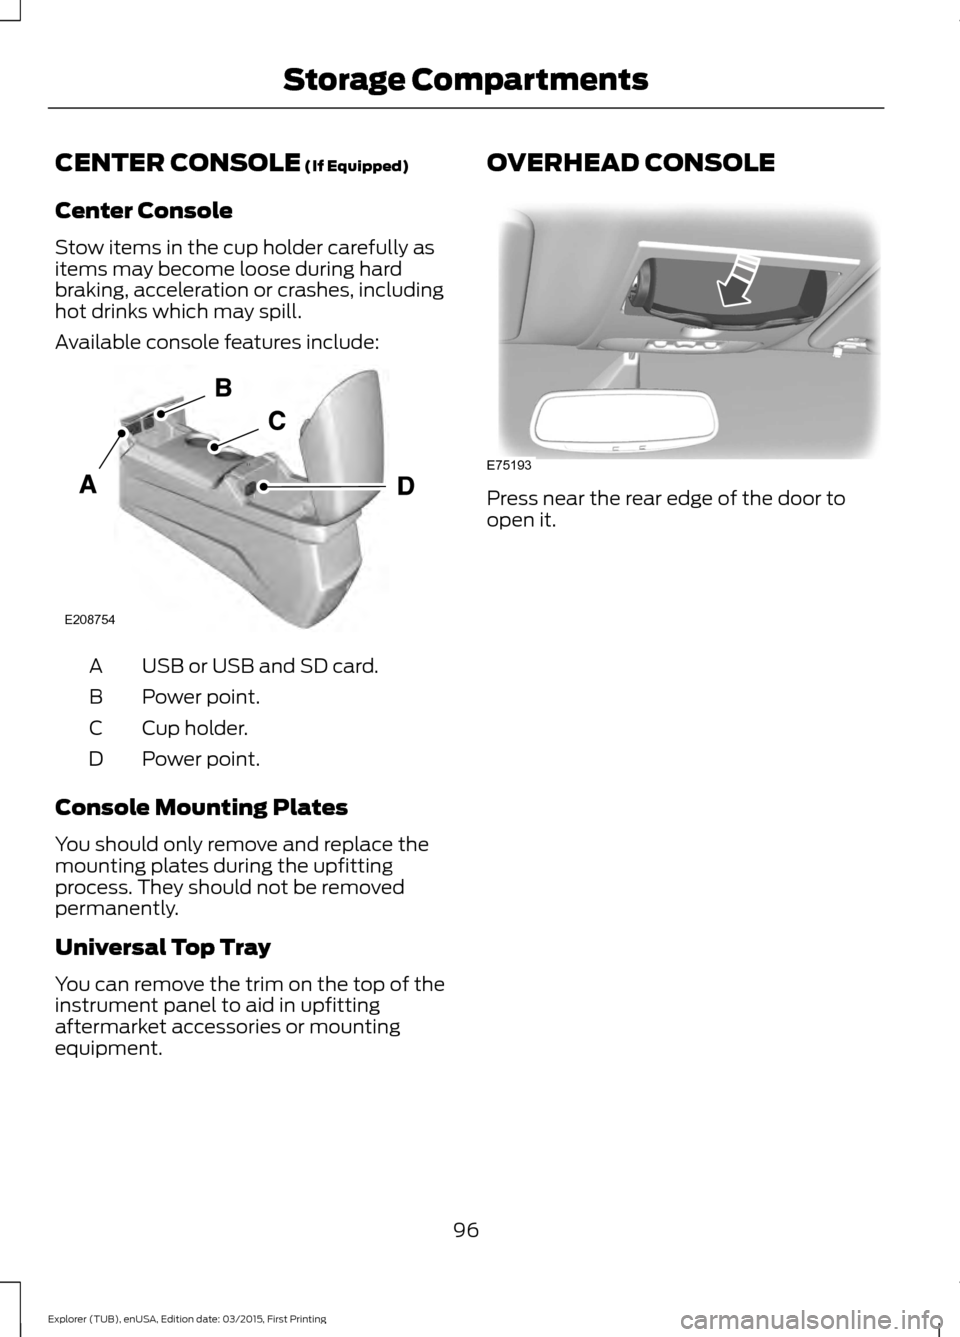
Center Console
Stow items in the cup holder carefully as
items may become loose during hard
braking, acceleration or crashes, including
hot drinks which may spill.
Available console features include: USB or USB and SD card.
A
Power point.
B
Cup holder.
C
Power point.
D
Console Mounting Plates
You should only remove and replace the
mounting plates during the upfitting
process. They should not be removed
permanently.
Universal Top Tray
You can remove the trim on the top of the
instrument panel to aid in upfitting
aftermarket accessories or mounting
equipment. OVERHEAD CONSOLE
Press near the rear edge of the door to
open it.
96
Explorer (TUB), enUSA, Edition date: 03/2015, First Printing Storage CompartmentsE208754 E75193
Page 100 of 350
GENERAL INFORMATION
WARNINGS
Extended idling at high engine
speeds can produce very high
temperatures in the engine and
exhaust system, creating the risk of fire or
other damage. Do not park, idle or drive your vehicle
on dry grass or other dry ground
cover. The emission system heats up
the engine compartment and exhaust
system, creating the risk of fire. Do not start the engine in a closed
garage or in other enclosed areas.
Exhaust fumes can be toxic. Always
open the garage door before you start the
engine. If you smell exhaust fumes inside
your vehicle, have your vehicle
checked by an authorized dealer
immediately. Do not drive your vehicle if
you smell exhaust fumes. If you disconnect the battery, your vehicle
may exhibit some unusual driving
characteristics for approximately 5 miles
(8 kilometers) after you reconnect it. This
is because the engine management system
must realign itself with the engine. You can
disregard any unusual driving
characteristics during this period.
The powertrain control system meets all
Canadian interference-causing equipment
standard requirements regulating the
impulse electrical field or radio noise.
When you start the engine, avoid pressing
the accelerator pedal before and during
operation. Only use the accelerator pedal
when you have difficulty starting the
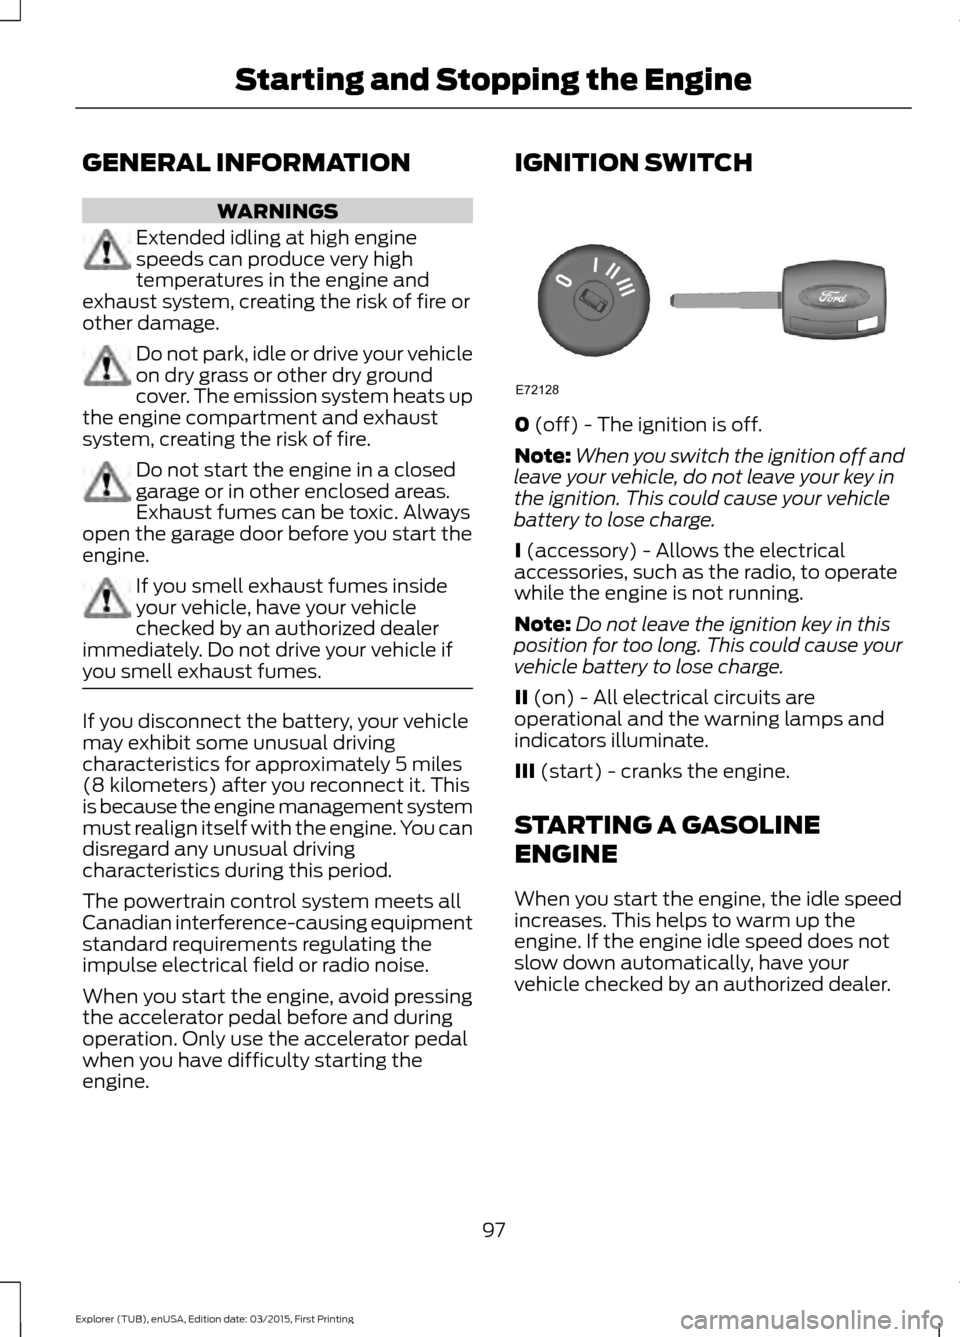
engine. IGNITION SWITCH
0 (off) - The ignition is off.
Note: When you switch the ignition off and
leave your vehicle, do not leave your key in
the ignition. This could cause your vehicle
battery to lose charge.
I
(accessory) - Allows the electrical
accessories, such as the radio, to operate
while the engine is not running.
Note: Do not leave the ignition key in this
position for too long. This could cause your
vehicle battery to lose charge.
II
(on) - All electrical circuits are
operational and the warning lamps and
indicators illuminate.
III
(start) - cranks the engine.
STARTING A GASOLINE
ENGINE
When you start the engine, the idle speed
increases. This helps to warm up the
engine. If the engine idle speed does not
slow down automatically, have your
vehicle checked by an authorized dealer.
97
Explorer (TUB), enUSA, Edition date: 03/2015, First Printing Starting and Stopping the EngineE72128