clock FORD POLICE INTERCEPTOR UTILITY 2017 1.G User Guide
[x] Cancel search | Manufacturer: FORD, Model Year: 2017, Model line: POLICE INTERCEPTOR UTILITY, Model: FORD POLICE INTERCEPTOR UTILITY 2017 1.GPages: 360, PDF Size: 4.06 MB
Page 238 of 360

WARNINGS
Never get underneath a vehicle that
is supported only by a jack. If the
vehicle slips off the jack, you or
someone else could be seriously injured. Do not attempt to change a tire on
the side of the vehicle close to
moving traffic. Pull far enough off the
road to avoid the danger of being hit when
operating the jack or changing the wheel. Always use the jack provided as
original equipment with your vehicle.
If using a jack other than the one
provided as original equipment with your
vehicle, make sure the jack capacity is
adequate for the vehicle weight, including
any vehicle cargo or modifications. To reduce the risk of possible serious
injury or death, do not remove the full
size spare tire from the factory
secured location. This location is necessary
to achieve police-rated 75 mph rear impact
crash-test performance. Removal
increases the risk of fuel leak in high-speed
rear impacts. Note:
Passengers should not remain in your
vehicle when the vehicle is being jacked.
Note: Jack at the specified locations to
avoid damage to the vehicle.
1. Park on a level surface, set the parking
brake and activate the hazard flashers.
2. Place the transmission in park (P) and
turn the engine off. 3. Lift the floor cargo cover, then remove
the wing nut that secures the spare tire
by turning it counterclockwise.
4. Remove the spare tire from the spare tire well.
5. Remove the wing nut bolt that secures
the jack kit by turning it
counterclockwise.
6. Remove the jack kit, which includes the
jack, lug wrench, L-shaped bolt and
tow recovery hook.
7. Turn the lead screw (where the lug wrench attaches) of the jack by hand
to release the lug wrench from the jack.
Press the button on the wrench to
extend the handle. Fold down the
wrench socket.
8. Loosen each wheel lug nut one-half turn counterclockwise, but do not
remove them until the wheel is raised
off the ground.
235
Police Interceptor (TUB) Canada/United States of America, Police, enUSA, First Printing Wheels and TiresE206671
Page 239 of 360

Vehicle Jacking
1. Block the diagonally opposite wheel.
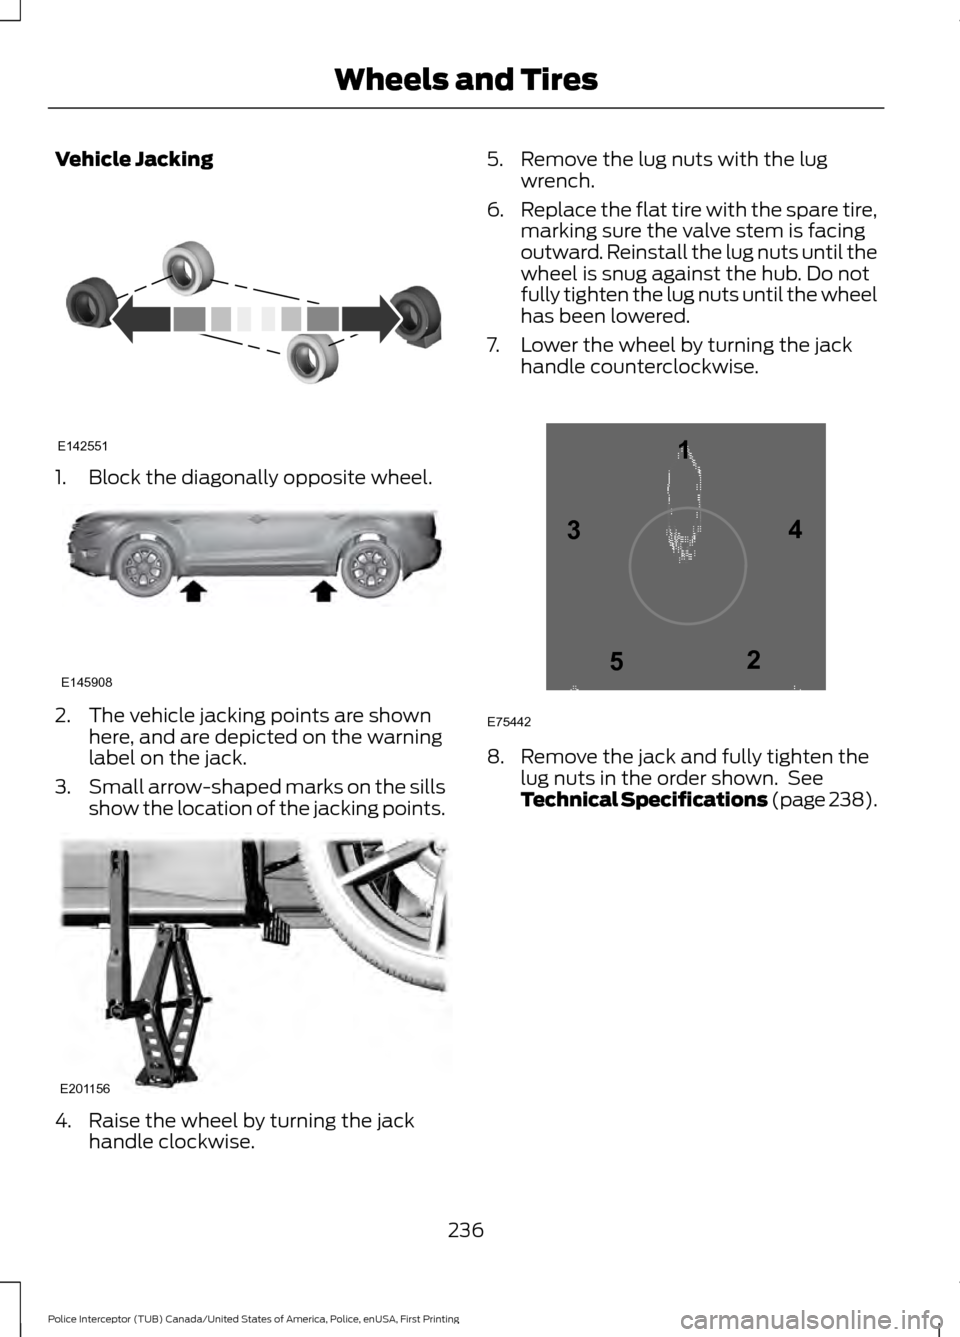
2. The vehicle jacking points are shown
here, and are depicted on the warning
label on the jack.
3. Small arrow-shaped marks on the sills
show the location of the jacking points. 4. Raise the wheel by turning the jack
handle clockwise. 5. Remove the lug nuts with the lug
wrench.
6. Replace the flat tire with the spare tire,
marking sure the valve stem is facing
outward. Reinstall the lug nuts until the
wheel is snug against the hub. Do not
fully tighten the lug nuts until the wheel
has been lowered.
7. Lower the wheel by turning the jack handle counterclockwise. 8. Remove the jack and fully tighten the
lug nuts in the order shown. See
Technical Specifications (page 238).
236
Police Interceptor (TUB) Canada/United States of America, Police, enUSA, First Printing Wheels and TiresE142551 E145908 E201156 12
3
4
5
E75442
Page 240 of 360

Stowing the Spare Tire and Jack
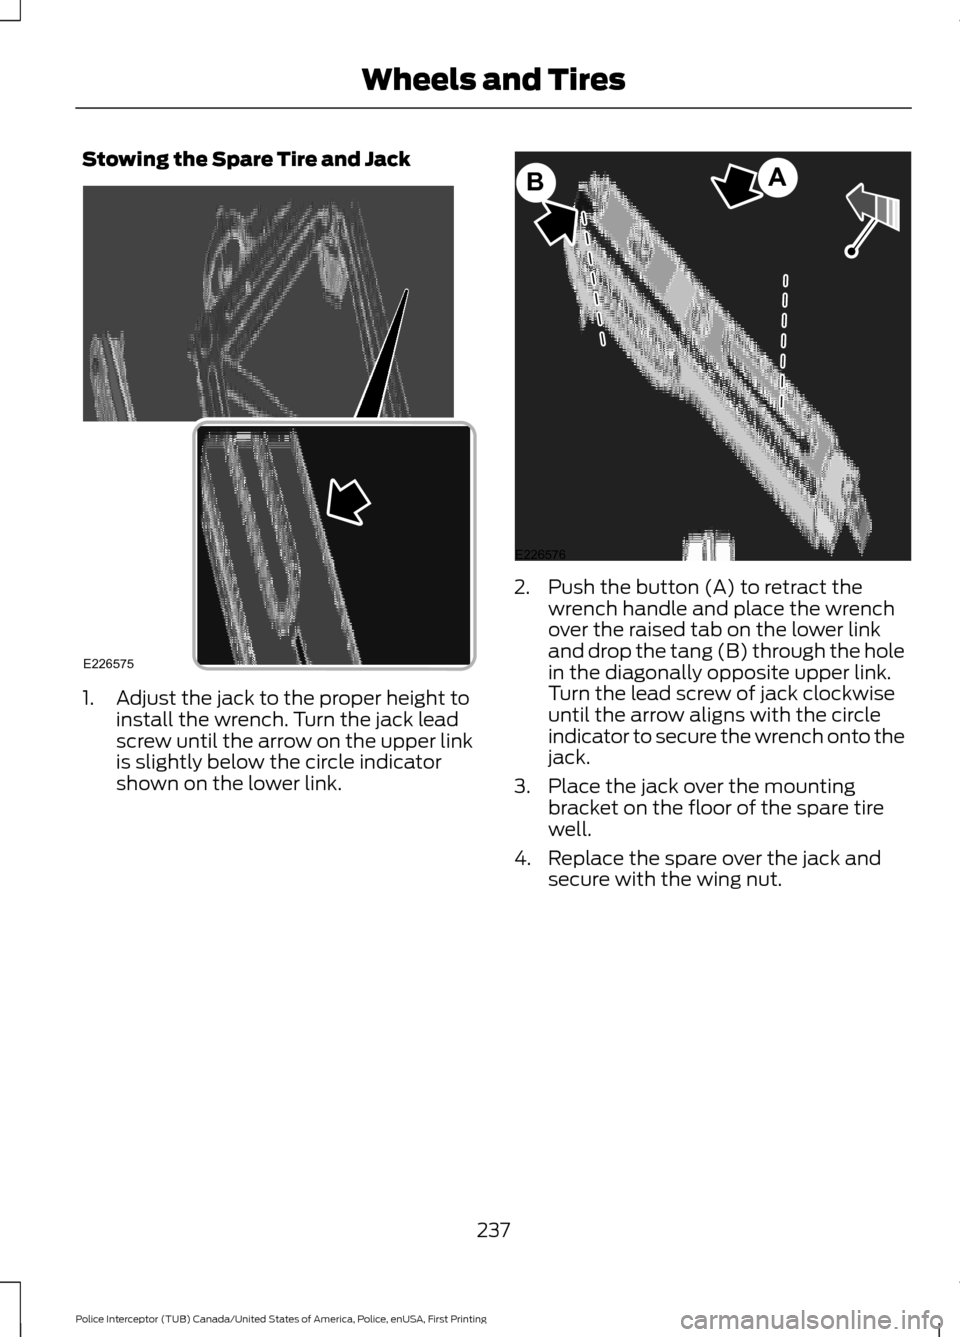
1. Adjust the jack to the proper height to
install the wrench. Turn the jack lead
screw until the arrow on the upper link
is slightly below the circle indicator
shown on the lower link. 2. Push the button (A) to retract the
wrench handle and place the wrench
over the raised tab on the lower link
and drop the tang (B) through the hole
in the diagonally opposite upper link.
Turn the lead screw of jack clockwise
until the arrow aligns with the circle
indicator to secure the wrench onto the
jack.
3. Place the jack over the mounting bracket on the floor of the spare tire
well.
4. Replace the spare over the jack and secure with the wing nut.
237
Police Interceptor (TUB) Canada/United States of America, Police, enUSA, First Printing Wheels and TiresE226575 E226576
AB
Page 258 of 360

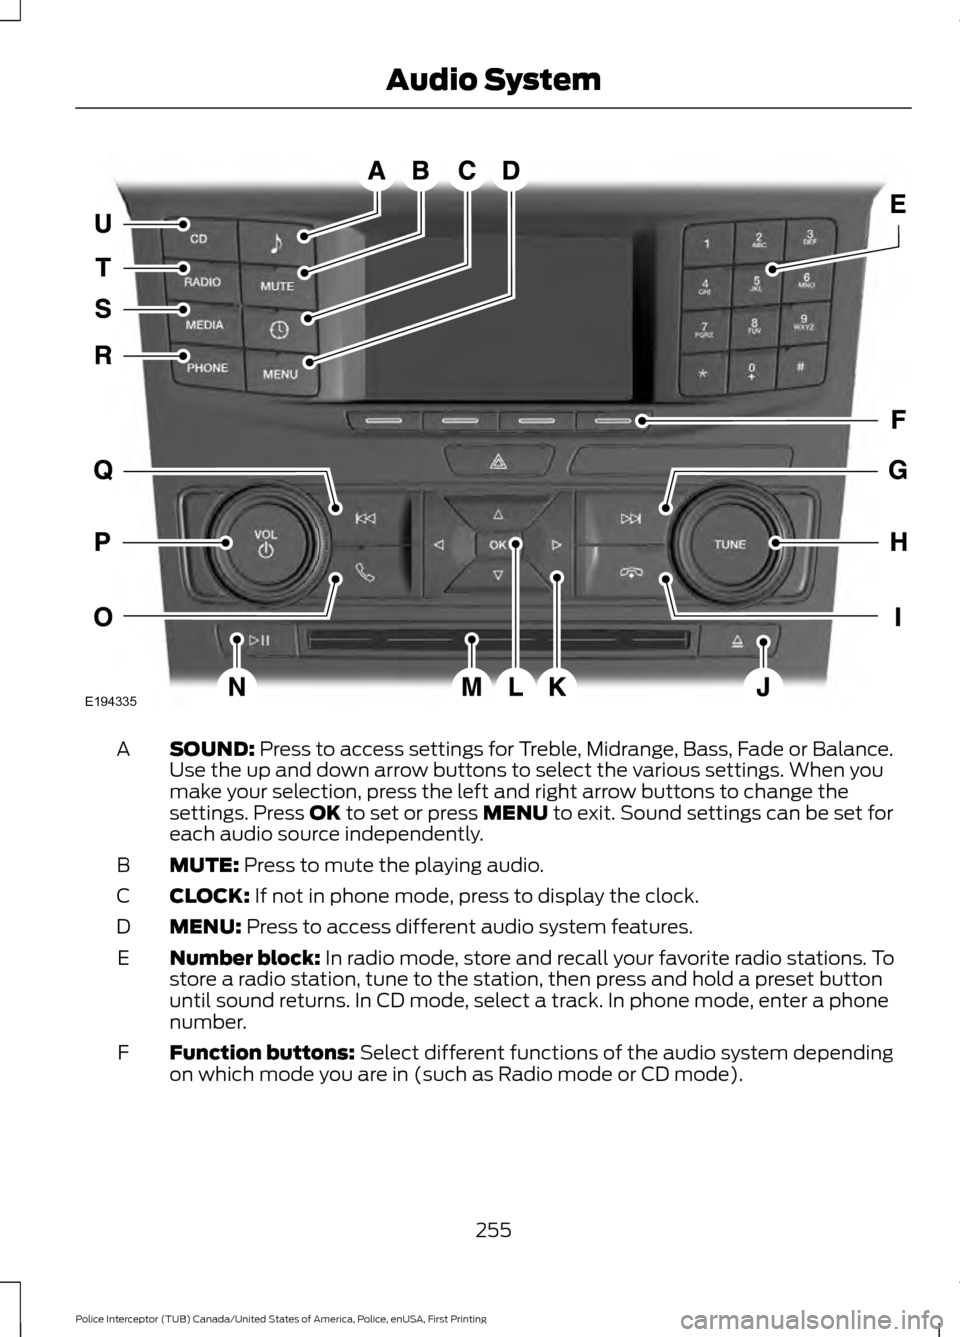
SOUND: Press to access settings for Treble, Midrange, Bass, Fade or Balance.
Use the up and down arrow buttons to select the various settings. When you
make your selection, press the left and right arrow buttons to change the
settings. Press
OK to set or press MENU to exit. Sound settings can be set for
each audio source independently.
A
MUTE:
Press to mute the playing audio.
B
CLOCK:
If not in phone mode, press to display the clock.
C
MENU:
Press to access different audio system features.
D
Number block:
In radio mode, store and recall your favorite radio stations. To
store a radio station, tune to the station, then press and hold a preset button
until sound returns. In CD mode, select a track. In phone mode, enter a phone
number.
E
Function buttons:
Select different functions of the audio system depending
on which mode you are in (such as Radio mode or CD mode).
F
255
Police Interceptor (TUB) Canada/United States of America, Police, enUSA, First Printing Audio SystemE194335