key FORD RANGER 2008 2.G Owner's Manual
[x] Cancel search | Manufacturer: FORD, Model Year: 2008, Model line: RANGER, Model: FORD RANGER 2008 2.GPages: 272, PDF Size: 2.73 MB
Page 172 of 272
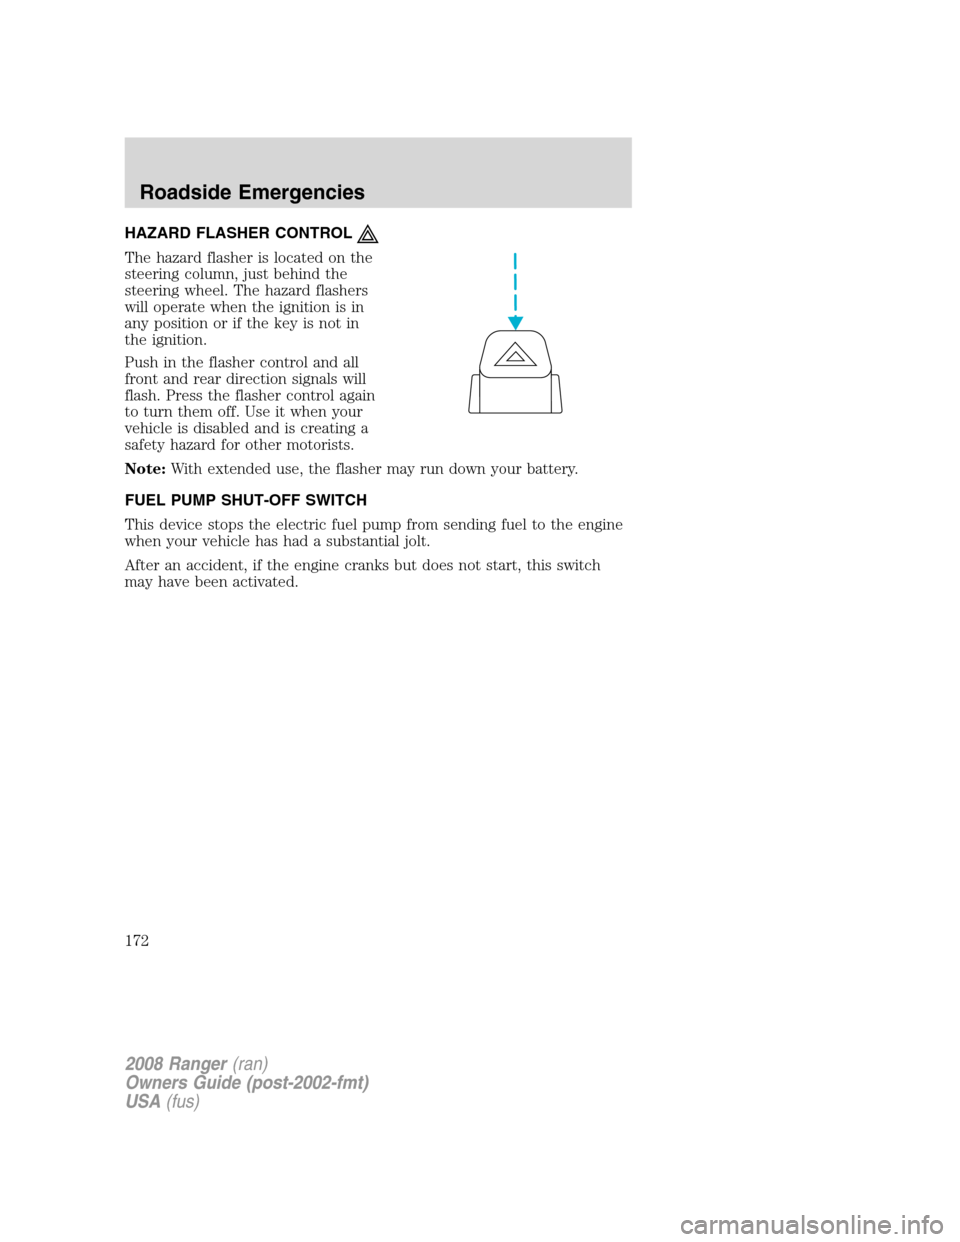
HAZARD FLASHER CONTROL
The hazard flasher is located on the
steering column, just behind the
steering wheel. The hazard flashers
will operate when the ignition is in
any position or if the key is not in
the ignition.
Push in the flasher control and all
front and rear direction signals will
flash. Press the flasher control again
to turn them off. Use it when your
vehicle is disabled and is creating a
safety hazard for other motorists.
Note:With extended use, the flasher may run down your battery.
FUEL PUMP SHUT-OFF SWITCH
This device stops the electric fuel pump from sending fuel to the engine
when your vehicle has had a substantial jolt.
After an accident, if the engine cranks but does not start, this switch
may have been activated.
2008 Ranger(ran)
Owners Guide (post-2002-fmt)
USA(fus)
Roadside Emergencies
172
Page 173 of 272
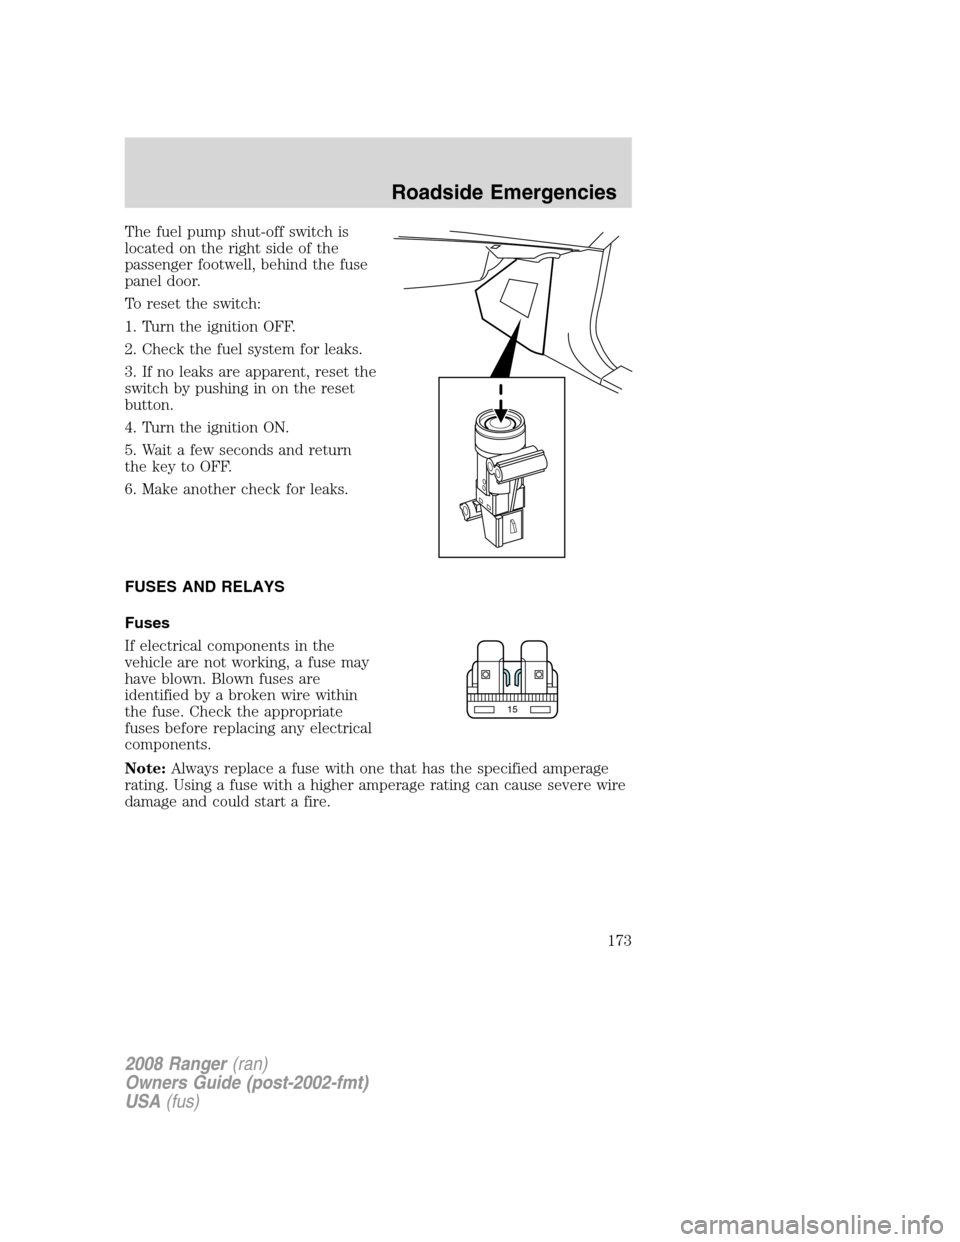
The fuel pump shut-off switch is
located on the right side of the
passenger footwell, behind the fuse
panel door.
To reset the switch:
1. Turn the ignition OFF.
2. Check the fuel system for leaks.
3. If no leaks are apparent, reset the
switch by pushing in on the reset
button.
4. Turn the ignition ON.
5. Wait a few seconds and return
the key to OFF.
6. Make another check for leaks.
FUSES AND RELAYS
Fuses
If electrical components in the
vehicle are not working, a fuse may
have blown. Blown fuses are
identified by a broken wire within
the fuse. Check the appropriate
fuses before replacing any electrical
components.
Note:Always replace a fuse with one that has the specified amperage
rating. Using a fuse with a higher amperage rating can cause severe wire
damage and could start a fire.
15
2008 Ranger(ran)
Owners Guide (post-2002-fmt)
USA(fus)
Roadside Emergencies
173
Page 187 of 272
Tool Location
Spare tire Under the vehicle, just forward of
the rear bumper
Jack, jack handle, wheel nut
wrenchRegular Cab: behind the passenger
seat, underneath the jack and tools
cover on the floor
SuperCab: stowed in the passenger
side rear cab under the plastic tray
inside the storage bin or behind
the jump seat in a separate tool
bag
Four-door models: stowed behind
the front seats, between jump
seats and underneath jack and
tools cover. The lug wrench is held
in place with a wingnut.
Key, spare tire lock (if equipped) In the glove box
Removing the spare tire
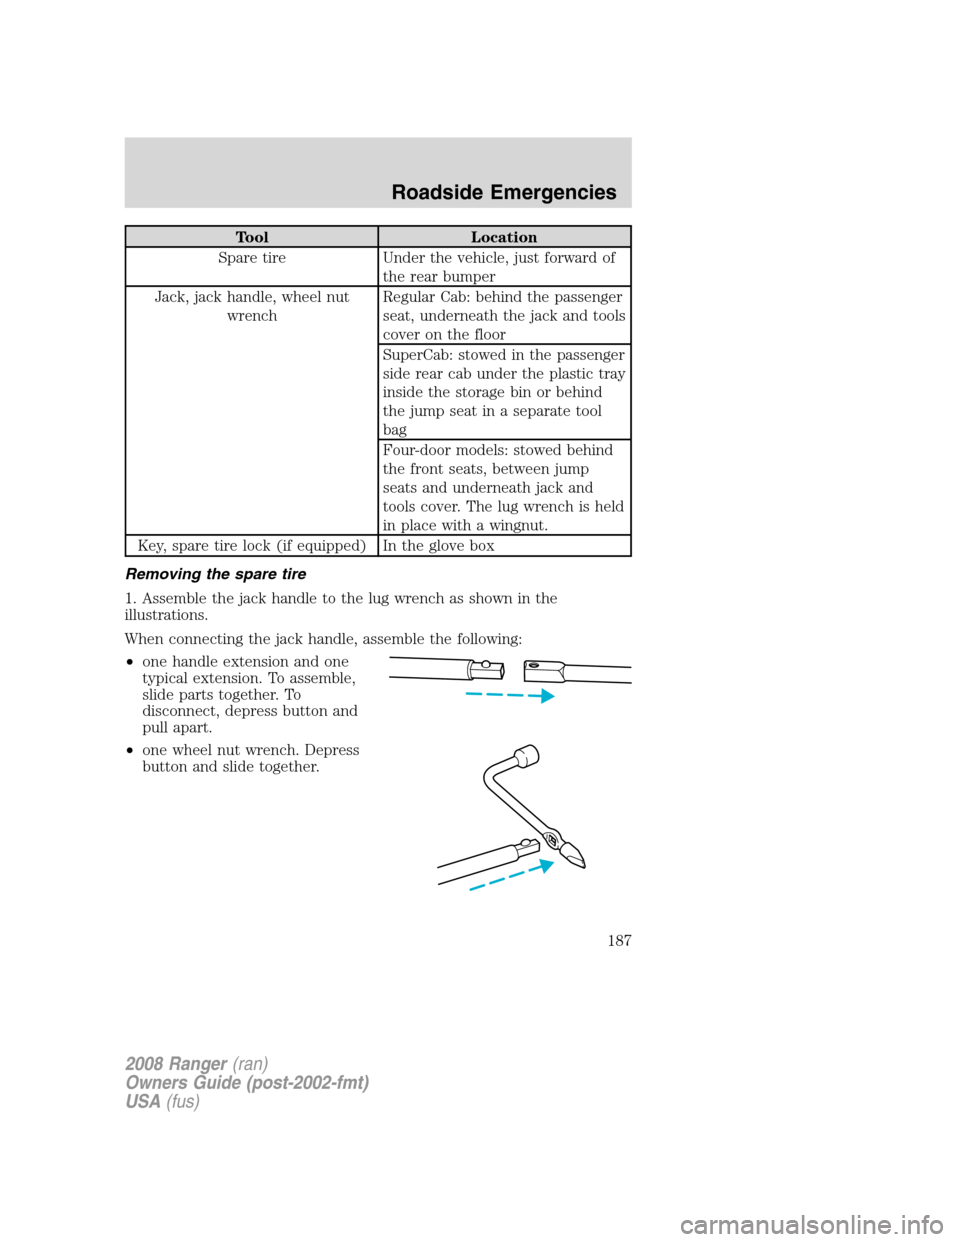
1. Assemble the jack handle to the lug wrench as shown in the
illustrations.
When connecting the jack handle, assemble the following:
•one handle extension and one
typical extension. To assemble,
slide parts together. To
disconnect, depress button and
pull apart.
•one wheel nut wrench. Depress
button and slide together.
2008 Ranger(ran)
Owners Guide (post-2002-fmt)
USA(fus)
Roadside Emergencies
187
Page 191 of 272
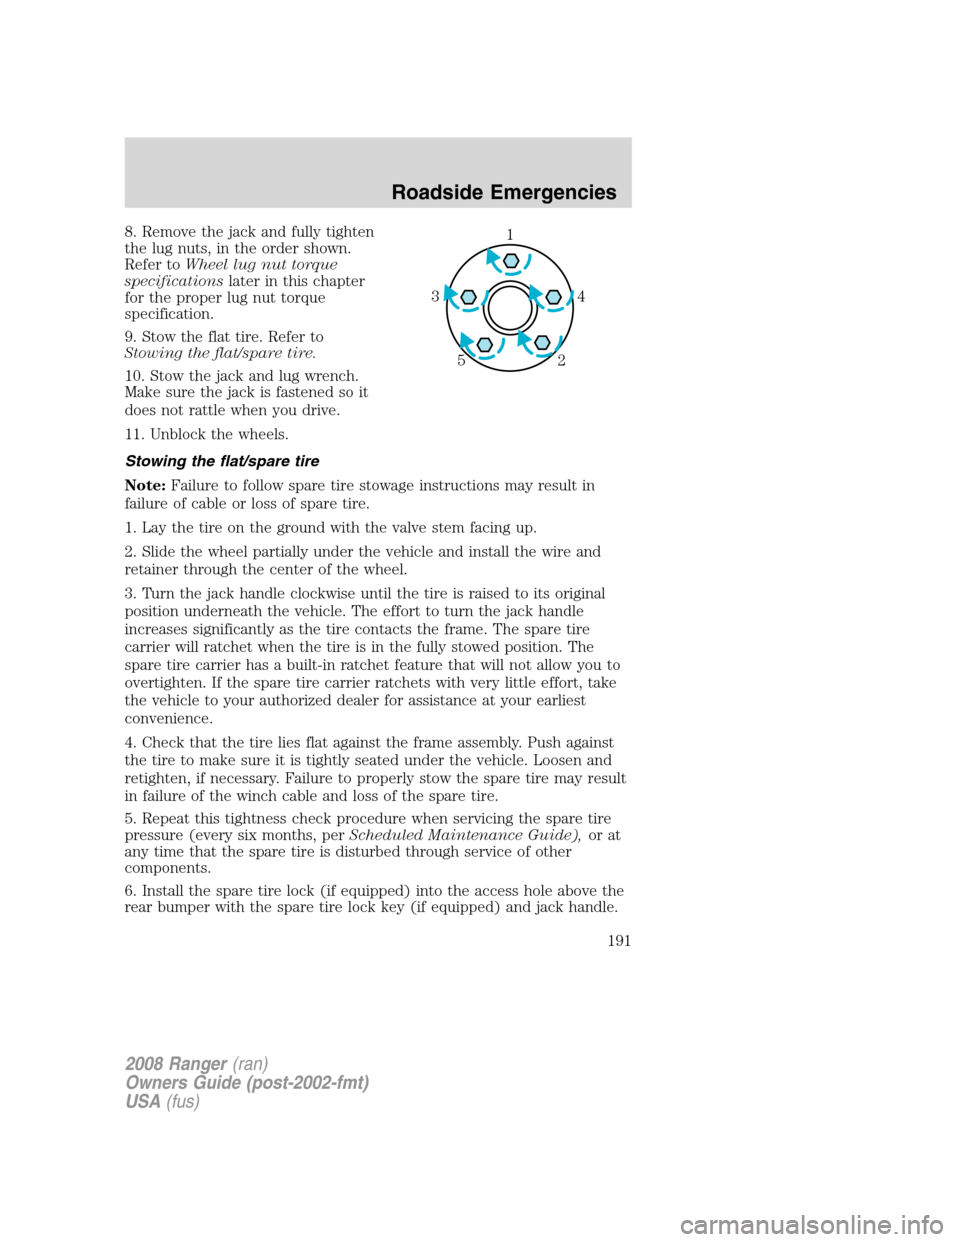
8. Remove the jack and fully tighten
the lug nuts, in the order shown.
Refer toWheel lug nut torque
specificationslater in this chapter
for the proper lug nut torque
specification.
9. Stow the flat tire. Refer to
Stowing the flat/spare tire.
10. Stow the jack and lug wrench.
Make sure the jack is fastened so it
does not rattle when you drive.
11. Unblock the wheels.
Stowing the flat/spare tire
Note:Failure to follow spare tire stowage instructions may result in
failure of cable or loss of spare tire.
1. Lay the tire on the ground with the valve stem facing up.
2. Slide the wheel partially under the vehicle and install the wire and
retainer through the center of the wheel.
3. Turn the jack handle clockwise until the tire is raised to its original
position underneath the vehicle. The effort to turn the jack handle
increases significantly as the tire contacts the frame. The spare tire
carrier will ratchet when the tire is in the fully stowed position. The
spare tire carrier has a built-in ratchet feature that will not allow you to
overtighten. If the spare tire carrier ratchets with very little effort, take
the vehicle to your authorized dealer for assistance at your earliest
convenience.
4. Check that the tire lies flat against the frame assembly. Push against
the tire to make sure it is tightly seated under the vehicle. Loosen and
retighten, if necessary. Failure to properly stow the spare tire may result
in failure of the winch cable and loss of the spare tire.
5. Repeat this tightness check procedure when servicing the spare tire
pressure (every six months, perScheduled Maintenance Guide),or at
any time that the spare tire is disturbed through service of other
components.
6. Install the spare tire lock (if equipped) into the access hole above the
rear bumper with the spare tire lock key (if equipped) and jack handle.1
4 3
2 5
2008 Ranger(ran)
Owners Guide (post-2002-fmt)
USA(fus)
Roadside Emergencies
191
Page 215 of 272
SERVICE RECOMMENDATIONS
To help you service your vehicle, we providescheduled maintenance
informationwhich makes tracking routine service easy.
If your vehicle requires professional service, your authorized dealer can
provide the necessary parts and service. Check yourWarranty Guideto
find out which parts and services are covered.
Use only recommended fuels, lubricants, fluids and service parts
conforming to specifications. Motorcraft parts are designed and built to
provide the best performance in your vehicle.
PRECAUTIONS WHEN SERVICING YOUR VEHICLE
•Do not work on a hot engine.
•Make sure that nothing gets caught in moving parts.
•Do not work on a vehicle with the engine running in an enclosed
space, unless you are sure you have enough ventilation.
•Keep all open flames and other burning (cigarettes) material away
from the battery and all fuel related parts.
Working with the engine off
•Automatic transmission/transaxle:
1. Set the parking brake and shift to P (Park).
2. Turn off the engine and remove the key.
3. Block the wheels.
•Manual transmission/transaxle:
1. Set the parking brake, depress the clutch and place the gearshift in 1
(First).
2. Turn off the engine and remove the key.
3. Block the wheels.
Working with the engine on
•Automatic transmission:
1. Set the parking brake and shift to P (Park).
2. Block the wheels.
•Manual transmission:
1. Set the parking brake, depress the clutch and place the gearshift in N
(Neutral).
2008 Ranger(ran)
Owners Guide (post-2002-fmt)
USA(fus)
Maintenance and Specifications
215
Page 245 of 272
These temporary malfunctions can be corrected by filling the fuel tank
with good quality fuel, properly tightening the fuel cap or letting the
electrical system dry out. After three driving cycles without these or any
other temporary malfunctions present, the
indicator should stay off
the next time the engine is started. A driving cycle consists of a cold
engine startup followed by mixed city/highway driving. No additional
vehicle service is required.
If the
indicator remains on, have your vehicle serviced at the first
available opportunity. Although some malfunctions detected by the
OBD-II may not have symptoms that are apparent, continued driving
with the
indicator on can result in increased emissions, lower fuel
economy, reduced engine and transmission smoothness, and lead to more
costly repairs.
Readiness for Inspection/Maintenance (I/M) testing
Some state/provincial and local governments may have
Inspection/Maintenance (I/M) programs to inspect the emission control
equipment on your vehicle. Failure to pass this inspection could prevent
you from getting a vehicle registration. Your vehicle may not pass the I/M
test if the
indicator is on or not working properly (bulb is burned
out), or if the OBD-II system has determined that some of the emission
control systems have not been properly checked. In this case, the vehicle
is considered not ready for I/M testing.
If the
indicator is on or the bulb does not work, the vehicle may
need to be serviced. Refer to the On board diagnostics (OBD-II)
description in this chapter.
If the vehicle’s engine or transmission has just been serviced, or the
battery has recently run down or been replaced, the OBD-II system may
indicate that the vehicle is not ready for I/M testing. To determine if the
vehicle is ready for I/M testing, turn the ignition key to the ON position
for 15 seconds without cranking the engine. If the
indicator blinks
eight times, it means that the vehicle is not ready for I/M testing; if
the
indicator stays on solid, it means that the vehicle is ready for
I/M testing.
The OBD-II system is designed to check the emission control system
during normal driving. A complete check may take several days. If the
vehicle is not ready for I/M testing, the following driving cycle consisting
of mixed city and highway driving may be performed:
15 minutes of steady driving on an expressway/highway followed by 20
minutes of stop-and-go driving with at least four 30-second idle periods.
2008 Ranger(ran)
Owners Guide (post-2002-fmt)
USA(fus)
Maintenance and Specifications
245
Page 267 of 272
electronic shift ........................162
indicator light .........................162
preparing to drive your
vehicle .....................................155
Fuel ............................................235
calculating fuel economy .......240
cap ...........................................237
capacity ...................................254
choosing the right fuel ...........238
comparisons with EPA fuel
economy estimates .................243
detergent in fuel .....................238
filling your vehicle with
fuel ...........................235, 237, 240
filter, specifications ........234, 253
fuel pump shut-off switch .....172
improving fuel economy ........240
octane rating ...................239, 259
quality ......................................239
running out of fuel .................239
safety information relating to
automotive fuels .....................235
Fuel pump shut-off switch .......172
Fuses ..................................173–174
G
Gas cap (see Fuel cap) ............237
Gas mileage
(see Fuel economy) .................240
Gauges .........................................16
H
Hazard flashers .........................172
Headlamps ...................................43
aiming ........................................45
bulb specifications ....................47
daytime running lights .............44
flash to pass ..............................44high beam .................................43
replacing bulbs .........................49
turning on and off ....................43
Heating
heating and air conditioning
system .................................40–41
Hood ..........................................216
I
Ignition ...............................146, 259
Infant seats (see Safety seats) ..98
Inspection/maintenance (I/M)
testing ........................................245
Instrument panel
cleaning ...................................211
cluster ........................................12
lighting up panel and
interior .......................................44
J
Jack ............................................183
positioning .......................183, 189
storage .....................183, 186–187
Jump-starting your vehicle ......192
K
Keys .......................................61, 66
positions of the ignition .........146
L
Lamps
bulb replacement
specifications chart ..................47
daytime running light ...............44
fog lamps ...................................43
headlamps .................................43
2008 Ranger(ran)
Owners Guide (post-2002-fmt)
USA(fus)
Index
267