FORD SUPER DUTY 2010 2.G Diesel Supplement Manual
Manufacturer: FORD, Model Year: 2010, Model line: SUPER DUTY, Model: FORD SUPER DUTY 2010 2.GPages: 104, PDF Size: 0.63 MB
Page 41 of 104
1. Stop the vehicle andshut offthe engine.
WARNING:The vehicle must be stopped with the engine off
when draining the HFCM/FCM. Fuel may ignite if the separator
is drained while the engine is running or vehicle is moving.
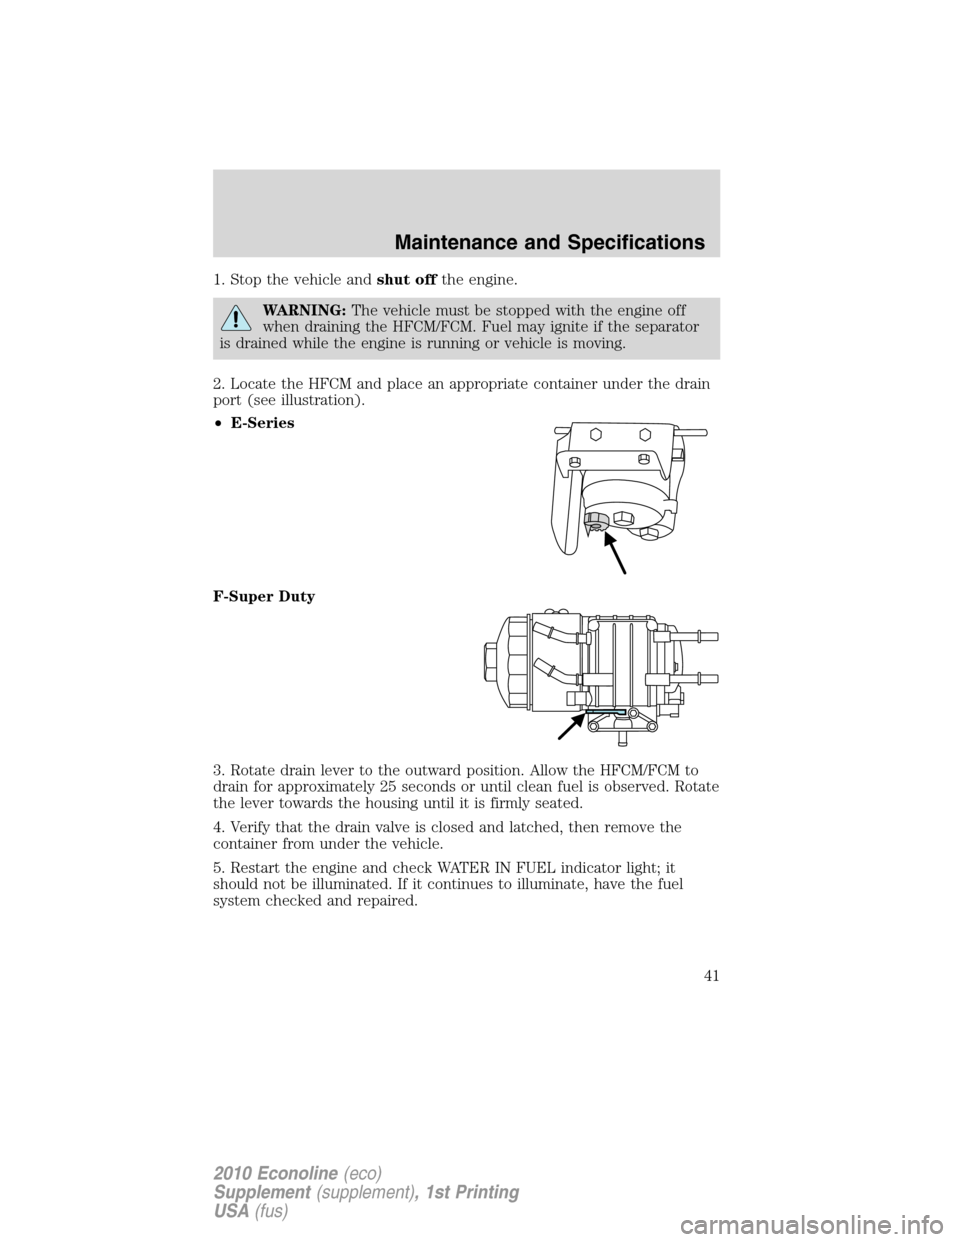
2. Locate the HFCM and place an appropriate container under the drain
port (see illustration).
•E-Series
F-Super Duty
3. Rotate drain lever to the outward position. Allow the HFCM/FCM to
drain for approximately 25 seconds or until clean fuel is observed. Rotate
the lever towards the housing until it is firmly seated.
4. Verify that the drain valve is closed and latched, then remove the
container from under the vehicle.
5. Restart the engine and check WATER IN FUEL indicator light; it
should not be illuminated. If it continues to illuminate, have the fuel
system checked and repaired.
Maintenance and Specifications
41
2010 Econoline(eco)
Supplement(supplement), 1st Printing
USA(fus)
Page 42 of 104
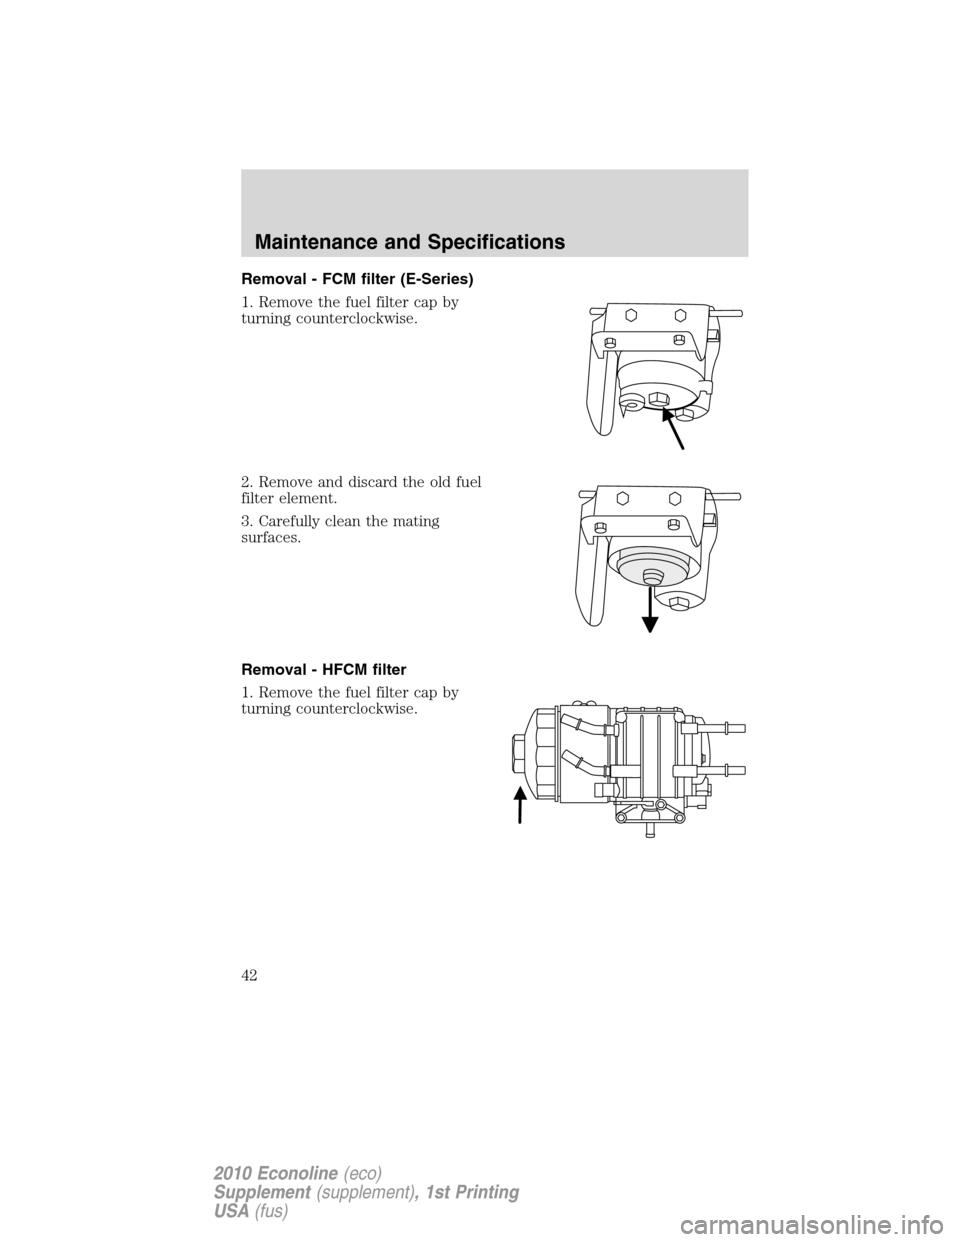
Removal - FCM filter (E-Series)
1. Remove the fuel filter cap by
turning counterclockwise.
2. Remove and discard the old fuel
filter element.
3. Carefully clean the mating
surfaces.
Removal - HFCM filter
1. Remove the fuel filter cap by
turning counterclockwise.
Maintenance and Specifications
42
2010 Econoline(eco)
Supplement(supplement), 1st Printing
USA(fus)
Page 43 of 104
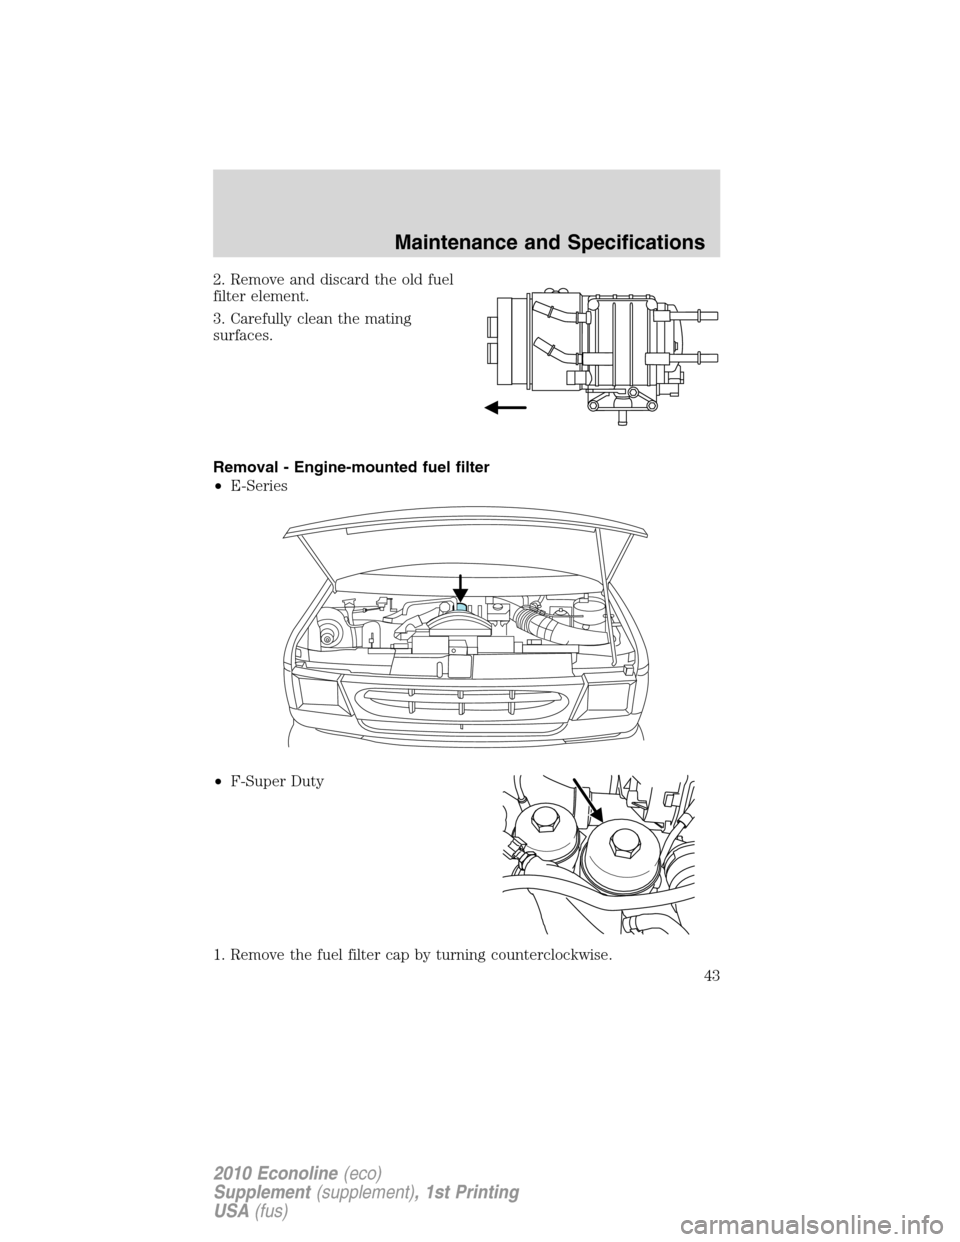
2. Remove and discard the old fuel
filter element.
3. Carefully clean the mating
surfaces.
Removal - Engine-mounted fuel filter
•E-Series
•F-Super Duty
1. Remove the fuel filter cap by turning counterclockwise.
Maintenance and Specifications
43
2010 Econoline(eco)
Supplement(supplement), 1st Printing
USA(fus)
Page 44 of 104
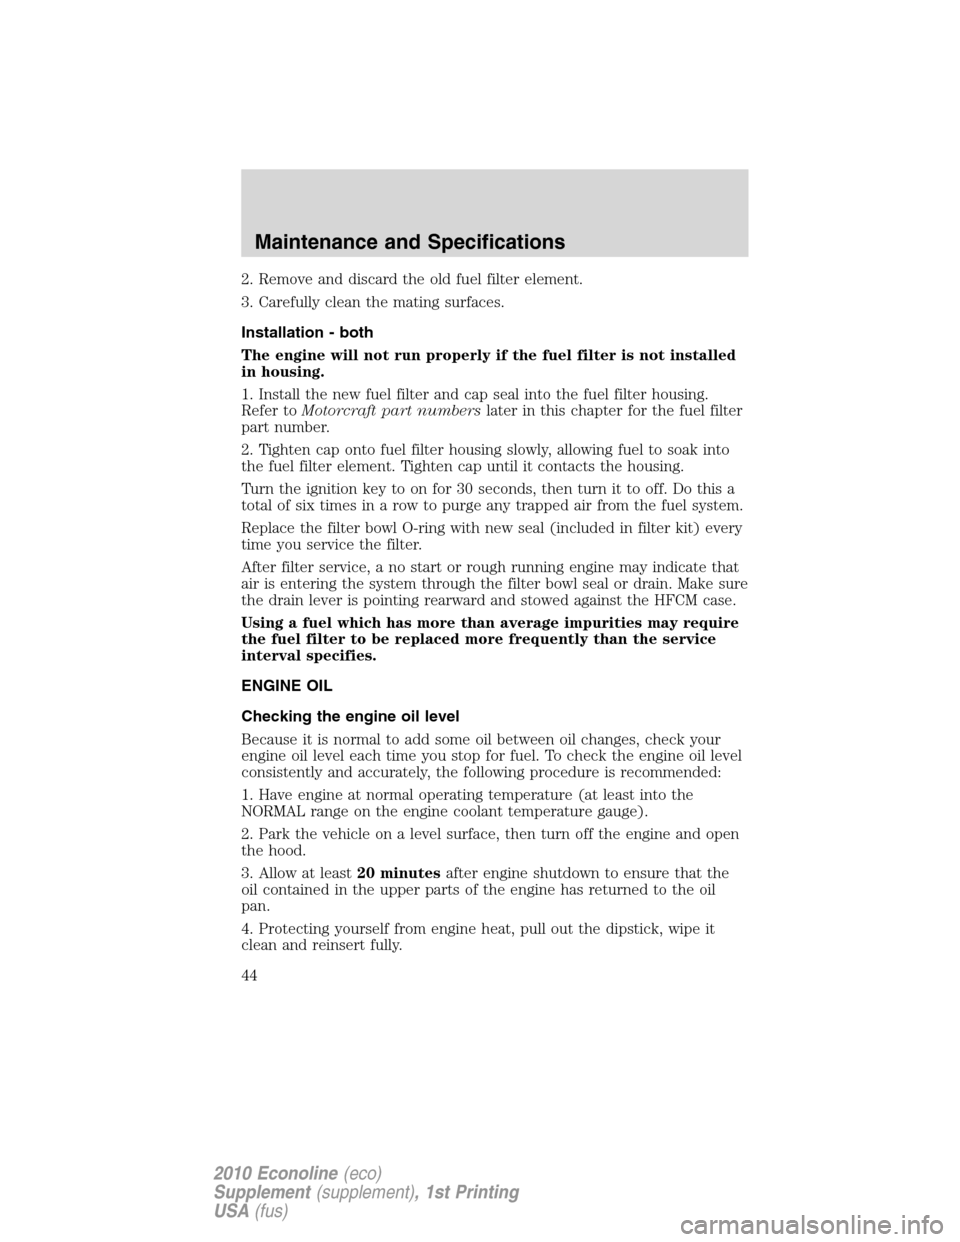
2. Remove and discard the old fuel filter element.
3. Carefully clean the mating surfaces.
Installation - both
The engine will not run properly if the fuel filter is not installed
in housing.
1. Install the new fuel filter and cap seal into the fuel filter housing.
Refer toMotorcraft part numberslater in this chapter for the fuel filter
part number.
2. Tighten cap onto fuel filter housing slowly, allowing fuel to soak into
the fuel filter element. Tighten cap until it contacts the housing.
Turn the ignition key to on for 30 seconds, then turn it to off. Do this a
total of six times in a row to purge any trapped air from the fuel system.
Replace the filter bowl O-ring with new seal (included in filter kit) every
time you service the filter.
After filter service, a no start or rough running engine may indicate that
air is entering the system through the filter bowl seal or drain. Make sure
the drain lever is pointing rearward and stowed against the HFCM case.
Using a fuel which has more than average impurities may require
the fuel filter to be replaced more frequently than the service
interval specifies.
ENGINE OIL
Checking the engine oil level
Because it is normal to add some oil between oil changes, check your
engine oil level each time you stop for fuel. To check the engine oil level
consistently and accurately, the following procedure is recommended:
1. Have engine at normal operating temperature (at least into the
NORMAL range on the engine coolant temperature gauge).
2. Park the vehicle on a level surface, then turn off the engine and open
the hood.
3. Allow at least20 minutesafter engine shutdown to ensure that the
oil contained in the upper parts of the engine has returned to the oil
pan.
4. Protecting yourself from engine heat, pull out the dipstick, wipe it
clean and reinsert fully.
Maintenance and Specifications
44
2010 Econoline(eco)
Supplement(supplement), 1st Printing
USA(fus)
Page 45 of 104
5. Read oil level on both sides of dipstick and use highest level (reading)
for the actual engine oil level.
6. Maintain the oil level between MIN and MAX or the ADD and
OPERATING RANGE on the dipstick by adding oil as required. The
distance from MIN to MAX or ADD to OPERATING RANGE on the
dipstick represents 2.0 quarts (1.9L). Do not overfill. If the oil level
exceeds MAX or OPERATING RANGE, oil consumption may result.
Engine oil specifications
To help achieve acceptable engine performance and durability, it is
important that only engine oils of good quality are used in your diesel
engine and it is changed at the recommended interval. For normal or
severe service, use Motorcraft oil or an equivalent oil conforming to Ford
specification WSS-M2C171–E or API service categories CJ-4 or CJ-4/SM.
It is important to use these oils because they are compatible with the
emission control equipment of your vehicle to meet the more stringent
emission standards.
The use of correct oil viscosities for diesel engines is important for
satisfactory operation. Determine which oil viscosity best suits the
temperature range you expect to encounter for the next service interval
from the following SAE viscosity grade chart.
Maintenance and Specifications
45
2010 Econoline(eco)
Supplement(supplement), 1st Printing
USA(fus)
Page 46 of 104
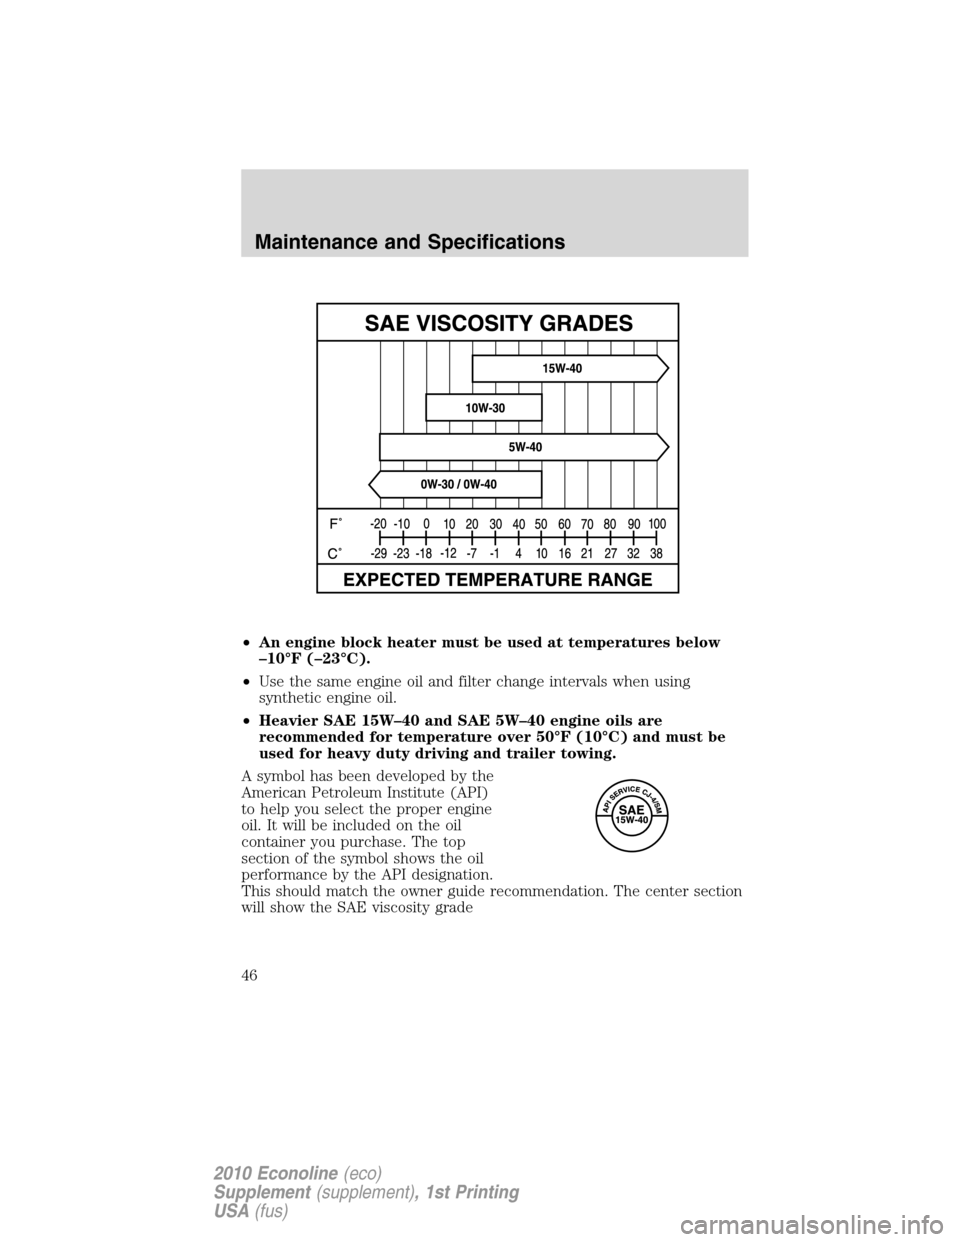
•An engine block heater must be used at temperatures below
–10°F (–23°C).
•Use the same engine oil and filter change intervals when using
synthetic engine oil.
•Heavier SAE 15W–40 and SAE 5W–40 engine oils are
recommended for temperature over 50°F (10°C) and must be
used for heavy duty driving and trailer towing.
A symbol has been developed by the
American Petroleum Institute (API)
to help you select the proper engine
oil. It will be included on the oil
container you purchase. The top
section of the symbol shows the oil
performance by the API designation.
This should match the owner guide recommendation. The center section
will show the SAE viscosity grade
Maintenance and Specifications
46
2010 Econoline(eco)
Supplement(supplement), 1st Printing
USA(fus)
Page 47 of 104
Changing engine oil and filter
Change your oil and filter according to thescheduled maintenance
informationin this supplement. Change more frequently if your vehicle
operation includes extended periods of idling or low-speed operation,
driving for a long time in cold temperatures or driving short distances.
See the following sectionEngine lubrication for severe service
operationfor all severe duty restrictions.
Refer toMotorcraft part numberslater in this chapter for the engine oil
filter part number. This filter protects your engine by filtering harmful,
abrasive or sludge particles and particles significantly smaller than most
available “will-fit” filters.
To replace the filter,
1. Unscrew the oil filter cap and wait a few seconds for the oil to drain
through the built-in drain valve.Note:The filter should be changed
before reinstalling the oil pan drain plug.
2. Reinstall and tighten the oil filter cap.
WARNING:Do not handle a hot oil filter with bare hands.
WARNING:Continuous contact with USED motor oil has caused
cancer in laboratory mice. Protect your skin by washing with
soap and water.
Engine lubrication for severe service operation
The following severe service operating conditions require unique engine
maintenance procedures:
•frequent or extended idling (over 10 minutes per hour of normal
driving).
•if vehicle is operated in sustained ambient temperatures below -10°F
(-23°C) or above 100°F (38°C)
•frequent low speed operation, consistent heavy traffic less than
25 mph (40 km/h)
•operating in severe dust conditions.
•towing a trailer over 1,000 miles (1,600 km)
•sustained, high speed driving at Gross Vehicle Weight Rating
(maximum loaded weight for vehicle operation)
Maintenance and Specifications
47
2010 Econoline(eco)
Supplement(supplement), 1st Printing
USA(fus)
Page 48 of 104
•use of biodiesel, up to and including 5% Biodiesel (B5)
•use of high sulfur diesel fuel
If you are operating your vehicle under any of these conditions, change
engine oil and filter every 5,000 miles (8,000 km).
AIR FILTER RESTRICTION GAUGE AND AIR FILTER
REPLACEMENT
Air filter restriction gauge:
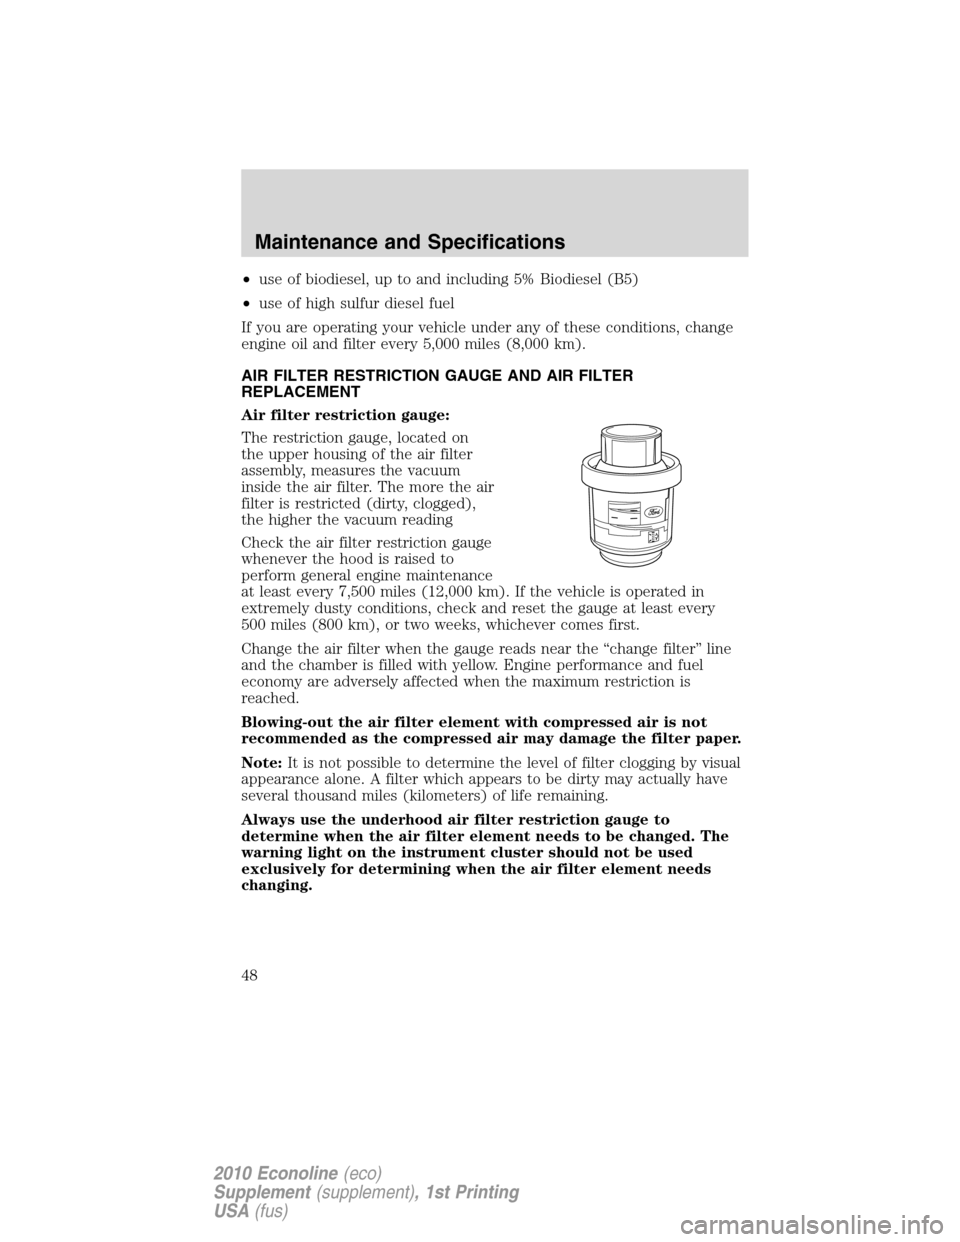
The restriction gauge, located on
the upper housing of the air filter
assembly, measures the vacuum
inside the air filter. The more the air
filter is restricted (dirty, clogged),
the higher the vacuum reading
Check the air filter restriction gauge
whenever the hood is raised to
perform general engine maintenance
at least every 7,500 miles (12,000 km). If the vehicle is operated in
extremely dusty conditions, check and reset the gauge at least every
500 miles (800 km), or two weeks, whichever comes first.
Change the air filter when the gauge reads near the “change filter” line
and the chamber is filled with yellow. Engine performance and fuel
economy are adversely affected when the maximum restriction is
reached.
Blowing-out the air filter element with compressed air is not
recommended as the compressed air may damage the filter paper.
Note:It is not possible to determine the level of filter clogging by visual
appearance alone. A filter which appears to be dirty may actually have
several thousand miles (kilometers) of life remaining.
Always use the underhood air filter restriction gauge to
determine when the air filter element needs to be changed. The
warning light on the instrument cluster should not be used
exclusively for determining when the air filter element needs
changing.
Maintenance and Specifications
48
2010 Econoline(eco)
Supplement(supplement), 1st Printing
USA(fus)
Page 49 of 104
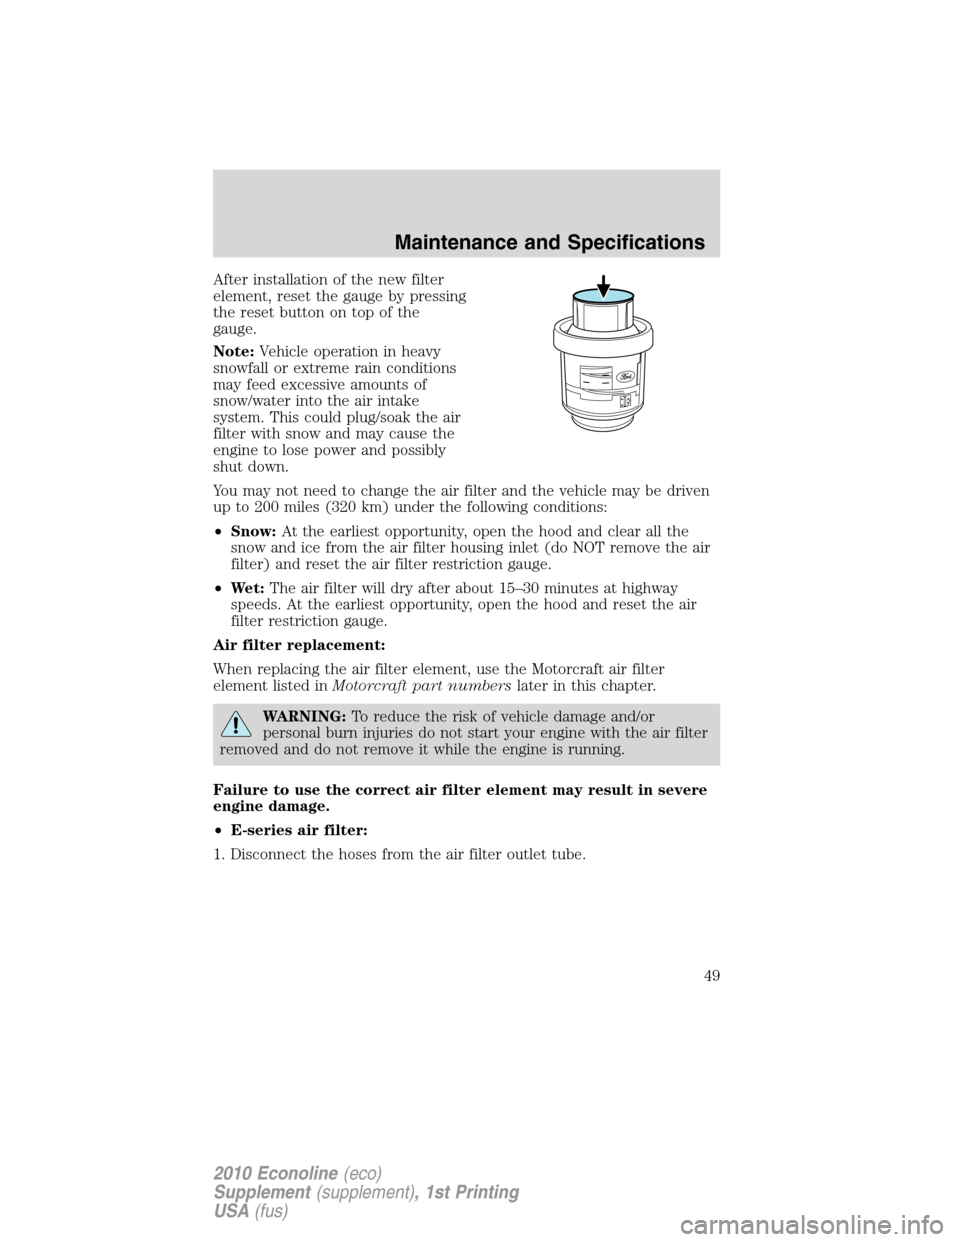
After installation of the new filter
element, reset the gauge by pressing
the reset button on top of the
gauge.
Note:Vehicle operation in heavy
snowfall or extreme rain conditions
may feed excessive amounts of
snow/water into the air intake
system. This could plug/soak the air
filter with snow and may cause the
engine to lose power and possibly
shut down.
You may not need to change the air filter and the vehicle may be driven
up to 200 miles (320 km) under the following conditions:
•Snow:At the earliest opportunity, open the hood and clear all the
snow and ice from the air filter housing inlet (do NOT remove the air
filter) and reset the air filter restriction gauge.
•Wet:The air filter will dry after about 15–30 minutes at highway
speeds. At the earliest opportunity, open the hood and reset the air
filter restriction gauge.
Air filter replacement:
When replacing the air filter element, use the Motorcraft air filter
element listed inMotorcraft part numberslater in this chapter.
WARNING:To reduce the risk of vehicle damage and/or
personal burn injuries do not start your engine with the air filter
removed and do not remove it while the engine is running.
Failure to use the correct air filter element may result in severe
engine damage.
•E-series air filter:
1. Disconnect the hoses from the air filter outlet tube.
Maintenance and Specifications
49
2010 Econoline(eco)
Supplement(supplement), 1st Printing
USA(fus)
Page 50 of 104
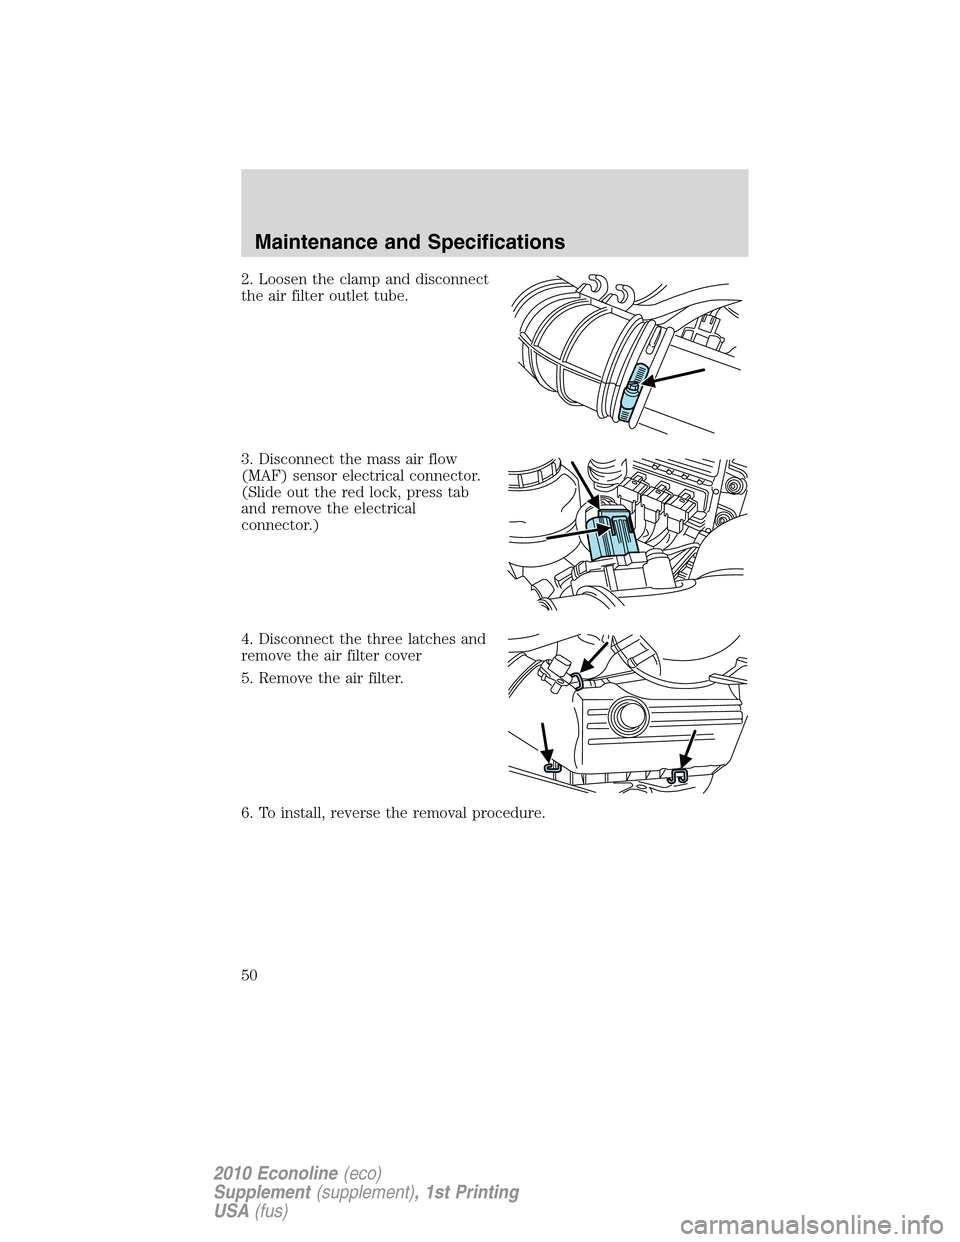
2. Loosen the clamp and disconnect
the air filter outlet tube.
3. Disconnect the mass air flow
(MAF) sensor electrical connector.
(Slide out the red lock, press tab
and remove the electrical
connector.)
4. Disconnect the three latches and
remove the air filter cover
5. Remove the air filter.
6. To install, reverse the removal procedure.
Maintenance and Specifications
50
2010 Econoline(eco)
Supplement(supplement), 1st Printing
USA(fus)