seats FORD TAURUS 1997 Owners Manual
[x] Cancel search | Manufacturer: FORD, Model Year: 1997, Model line: TAURUS, Model: FORD TAURUS 1997Pages: 167, PDF Size: 1.48 MB
Page 16 of 167
Operating tips
²In humid weather, selectbefore driving. This
will prevent your windshield from fogging. After a
few minutes, select any desired position.
²To prevent humidity buildup inside the vehicle,
don't drive with the climate control system in the
OFF position.
²Don't put objects under the front seat that will
interfere with the airflow to the back seats.
²Remove any snow, ice or leaves from the air
intake area (at the bottom of the windshield
under the hood) on the passenger side of your
vehicle.
²If the air conditioner works well in MAX A/C but
not in A/C, this may indicate that the passenger
compartment air filter (if equipped) needs to be
replaced.
Electronic Automatic Temperature Control
(EATC) system (if equipped)
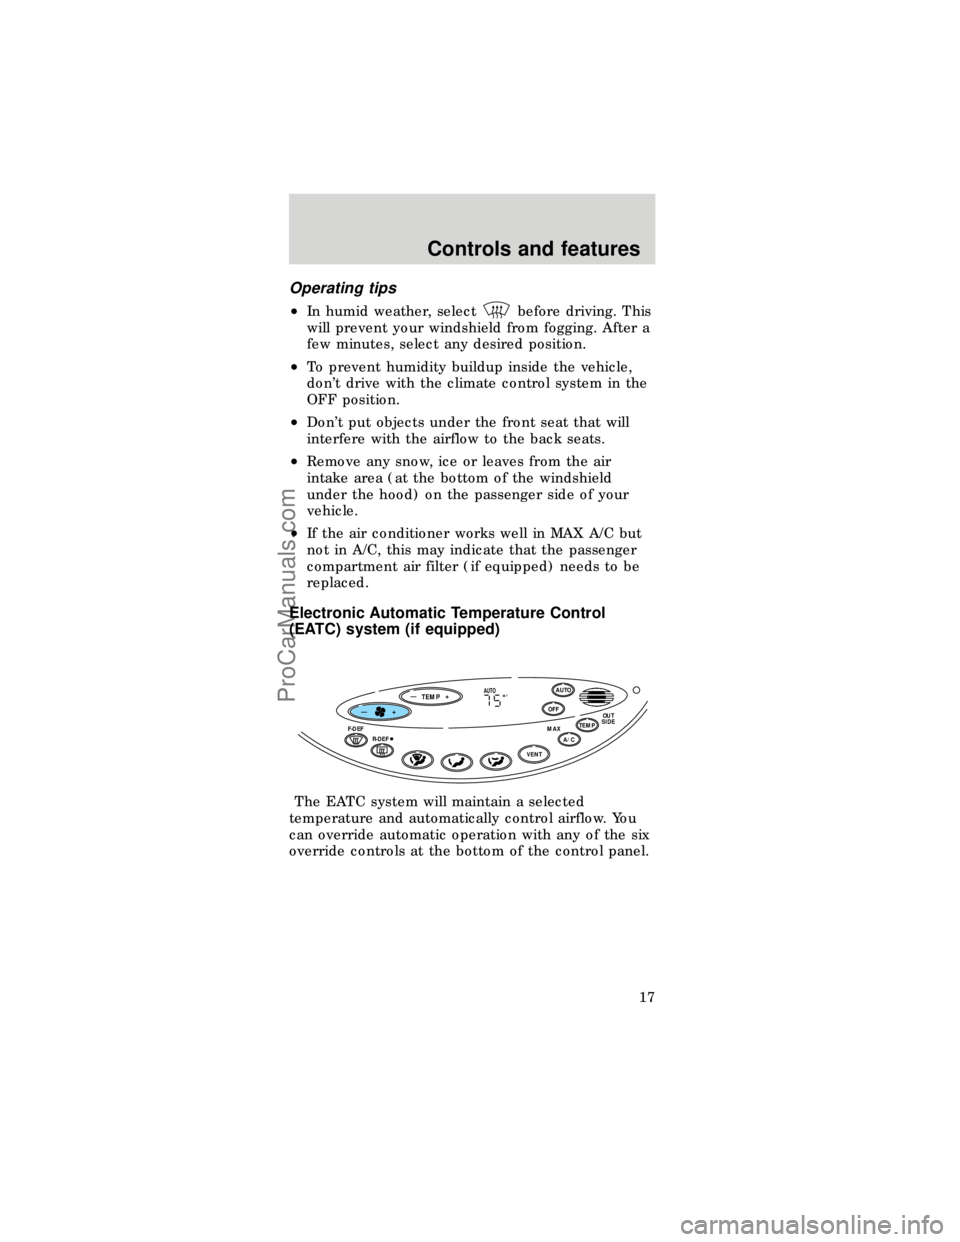
The EATC system will maintain a selected
temperature and automatically control airflow. You
can override automatic operation with any of the six
override controls at the bottom of the control panel.
TEMP
—+OFFAUTO
TEMPOUT
SIDEA/C MAXF-DEF
R-DEF
AUTO
VENT
F—+
Controls and features
17
ProCarManuals.com
Page 20 of 167

The outside temperature reading is most accurate
when the vehicle is moving. Higher readings may be
obtained when the vehicle is not moving. The
readings that you get may not agree with
temperatures given on the radio due to differences
in vehicle and station locations.
Operating tips
²In humid weather, selectF-DEF before
driving. This will prevent your windshield from
fogging. After a few minutes, select any desired
position.
²To prevent humidity buildup inside the vehicle,
don't drive with the climate control system in the
OFF position.
²Don't put objects under the front seat that will
interfere with the air circulation to the back seats.
²Remove any snow, ice or leaves from the air
intake area (at the bottom of the windshield
under the hood) on the passenger side of your
vehicle.
²If the air conditioner works well in MAX A/C but
not in A/C, this may indicate that the passenger
compartment air filter (if equipped) needs to be
replaced.
Rear window defroster and heated outside rear
view mirrors
The defroster clears
away fog, frost and
thin ice from the rear
window and outside
rear view mirrors.
Clear away snow from rear window and mirrors. The
defroster operates for 10 minutes then shuts off. If
more defrosting is required, press the control again.
R-DEF
Controls and features
21
ProCarManuals.com
Page 27 of 167
TILT STEERING
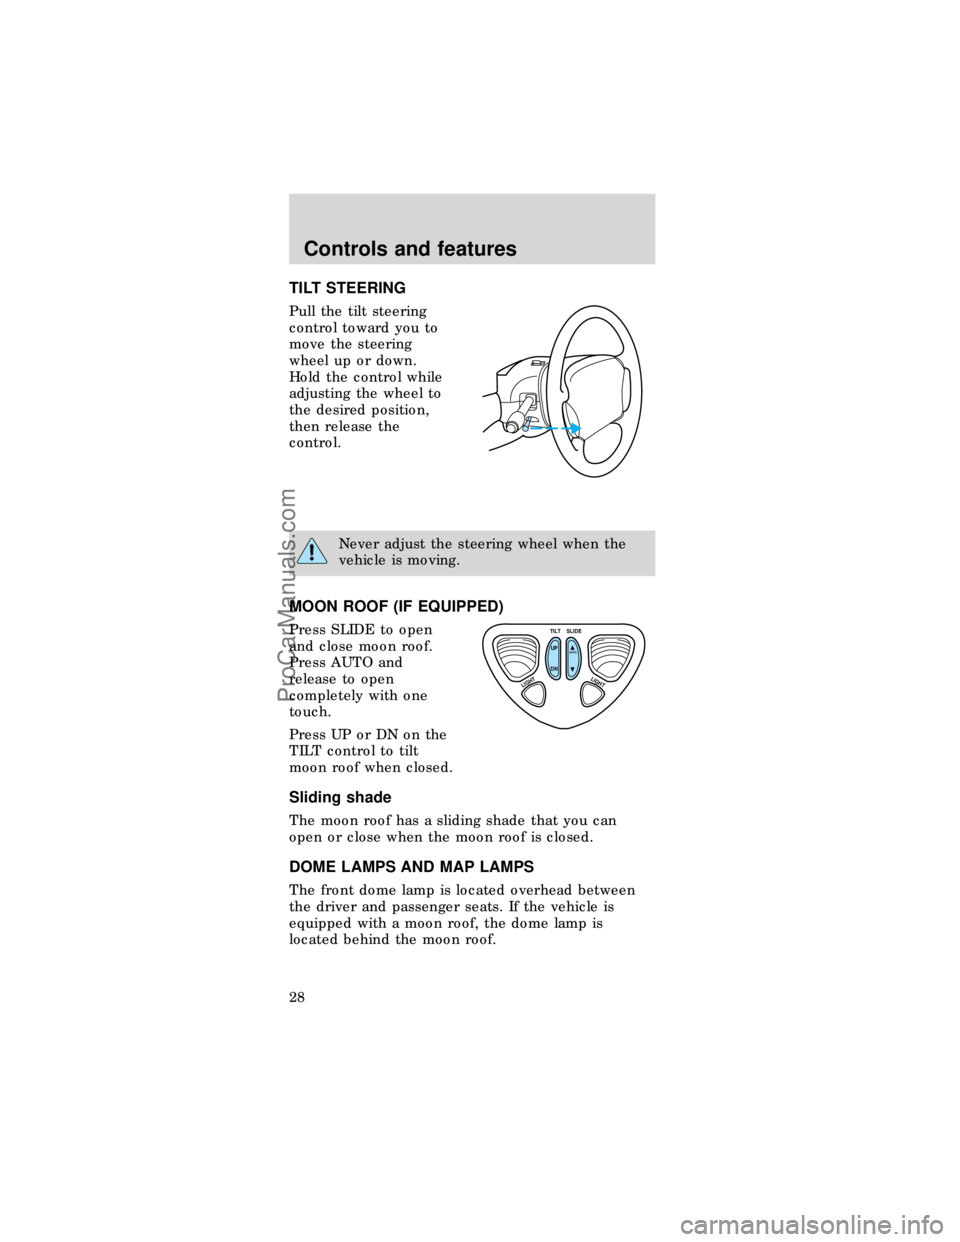
Pull the tilt steering
control toward you to
move the steering
wheel up or down.
Hold the control while
adjusting the wheel to
the desired position,
then release the
control.
Never adjust the steering wheel when the
vehicle is moving.
MOON ROOF (IF EQUIPPED)
Press SLIDE to open
and close moon roof.
Press AUTO and
release to open
completely with one
touch.
Press UP or DN on the
TILT control to tilt
moon roof when closed.
Sliding shade
The moon roof has a sliding shade that you can
open or close when the moon roof is closed.
DOME LAMPS AND MAP LAMPS
The front dome lamp is located overhead between
the driver and passenger seats. If the vehicle is
equipped with a moon roof, the dome lamp is
located behind the moon roof.
TILT
UP
LIGHTLIGHT
AUTO
DNSLIDE
Controls and features
28
ProCarManuals.com
Page 50 of 167
SEATING
Head restraints
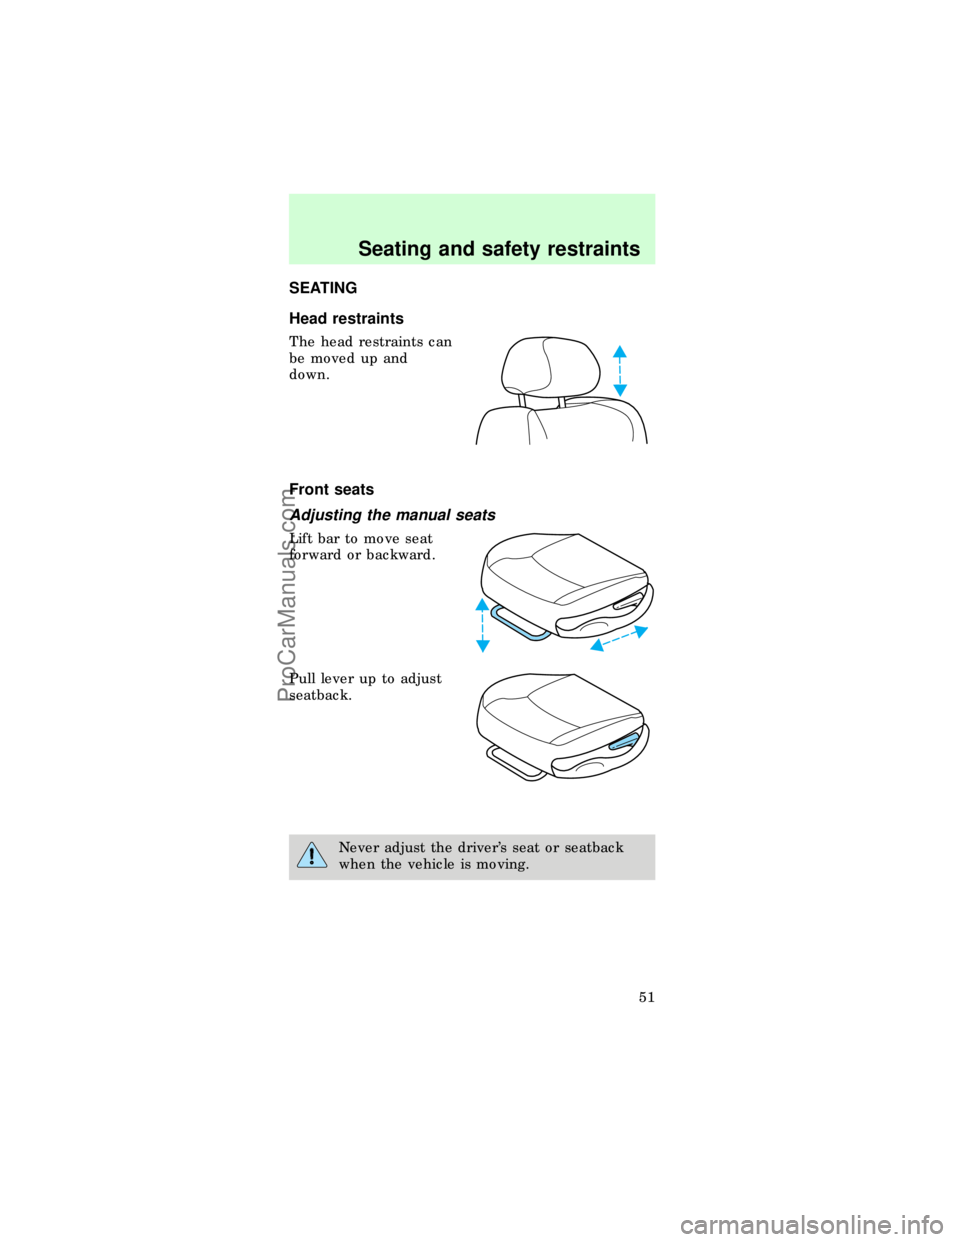
The head restraints can
be moved up and
down.
Front seats
Adjusting the manual seats
Lift bar to move seat
forward or backward.
Pull lever up to adjust
seatback.
Never adjust the driver's seat or seatback
when the vehicle is moving.
Seating and safety restraints
51
ProCarManuals.com
Page 51 of 167
Adjusting the power seats (if equipped)
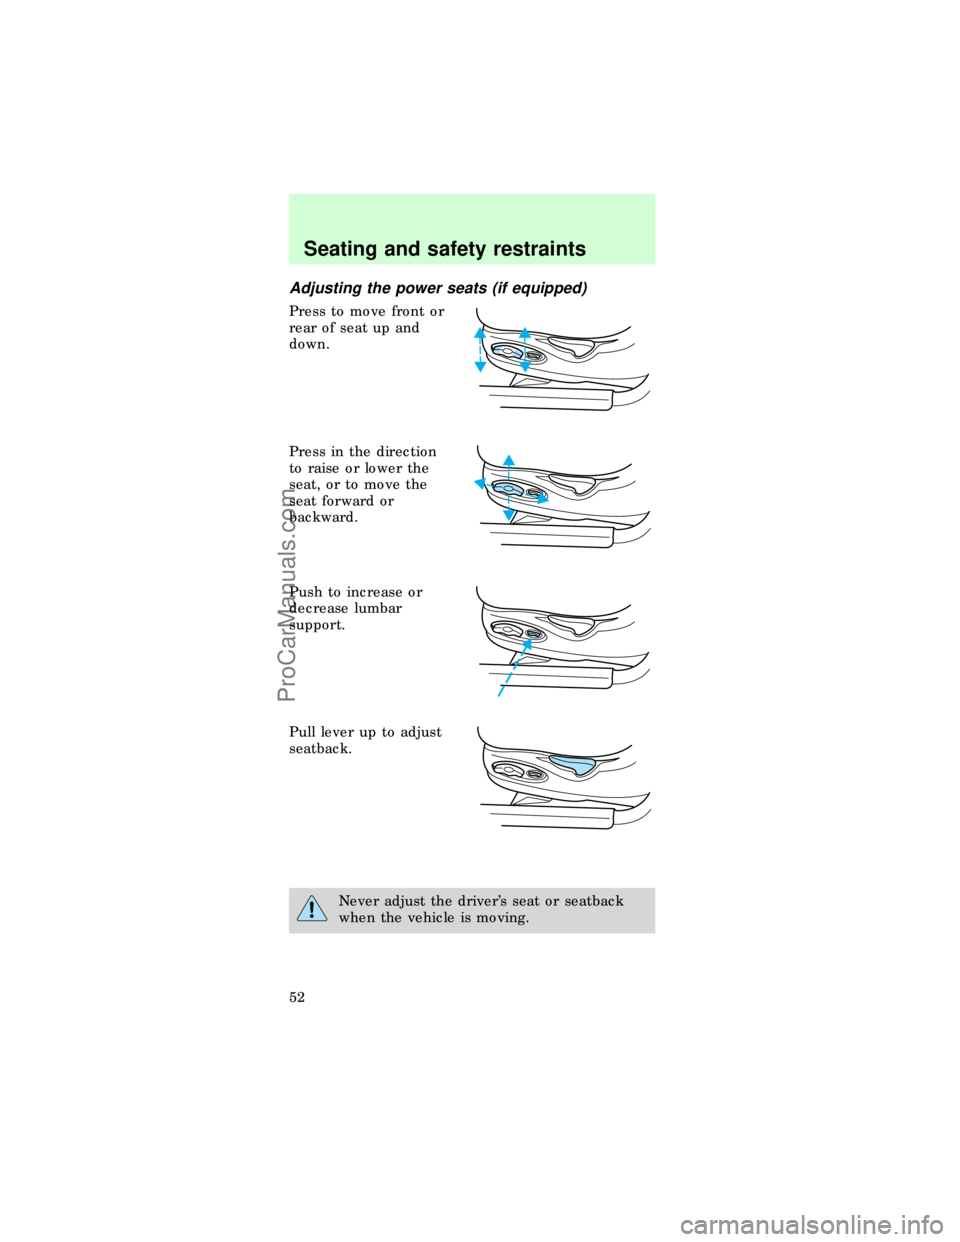
Press to move front or
rear of seat up and
down.
Press in the direction
to raise or lower the
seat, or to move the
seat forward or
backward.
Push to increase or
decrease lumbar
support.
Pull lever up to adjust
seatback.
Never adjust the driver's seat or seatback
when the vehicle is moving.
Seating and safety restraints
52
ProCarManuals.com
Page 54 of 167
SAFETY RESTRAINTS
Safety restraints precautions
Always drive and ride with your seatback
upright and the lap belt snug and low across
the hips.
To prevent the risk of injury, make sure
children sit where they can be properly
restrained.
It is extremely dangerous to ride in a cargo
area, inside or outside of a vehicle. In a
collision, people riding in these areas are more
likely to be seriously injured or killed. Do not allow
people to ride in any area of your vehicle that is
not equipped with seats and safety belts. Be sure
everyone in your vehicle is in a seat and using a
safety belt properly.
Combination lap and shoulder belts
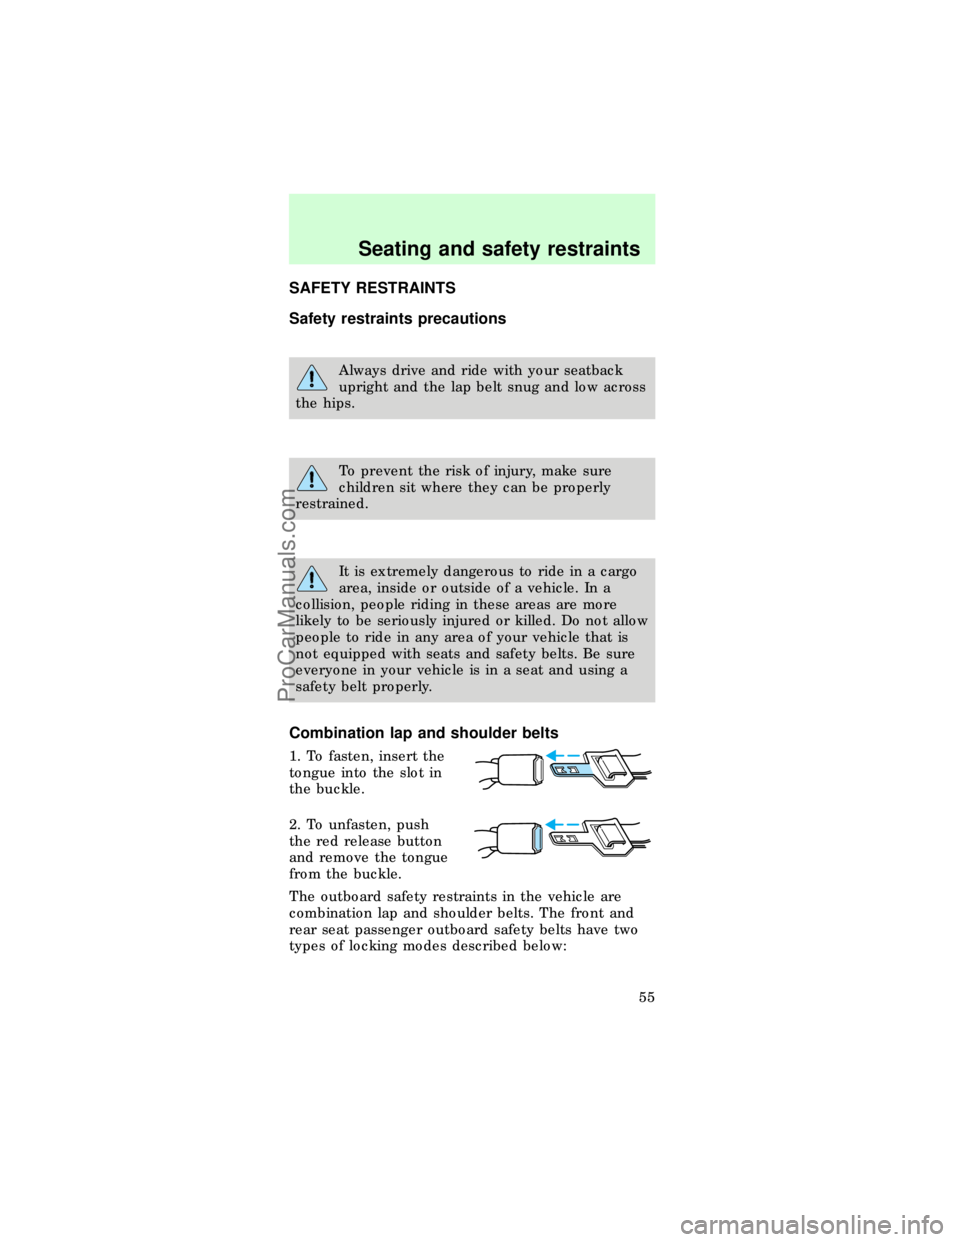
1. To fasten, insert the
tongue into the slot in
the buckle.
2. To unfasten, push
the red release button
and remove the tongue
from the buckle.
The outboard safety restraints in the vehicle are
combination lap and shoulder belts. The front and
rear seat passenger outboard safety belts have two
types of locking modes described below:
Seating and safety restraints
55
ProCarManuals.com
Page 55 of 167
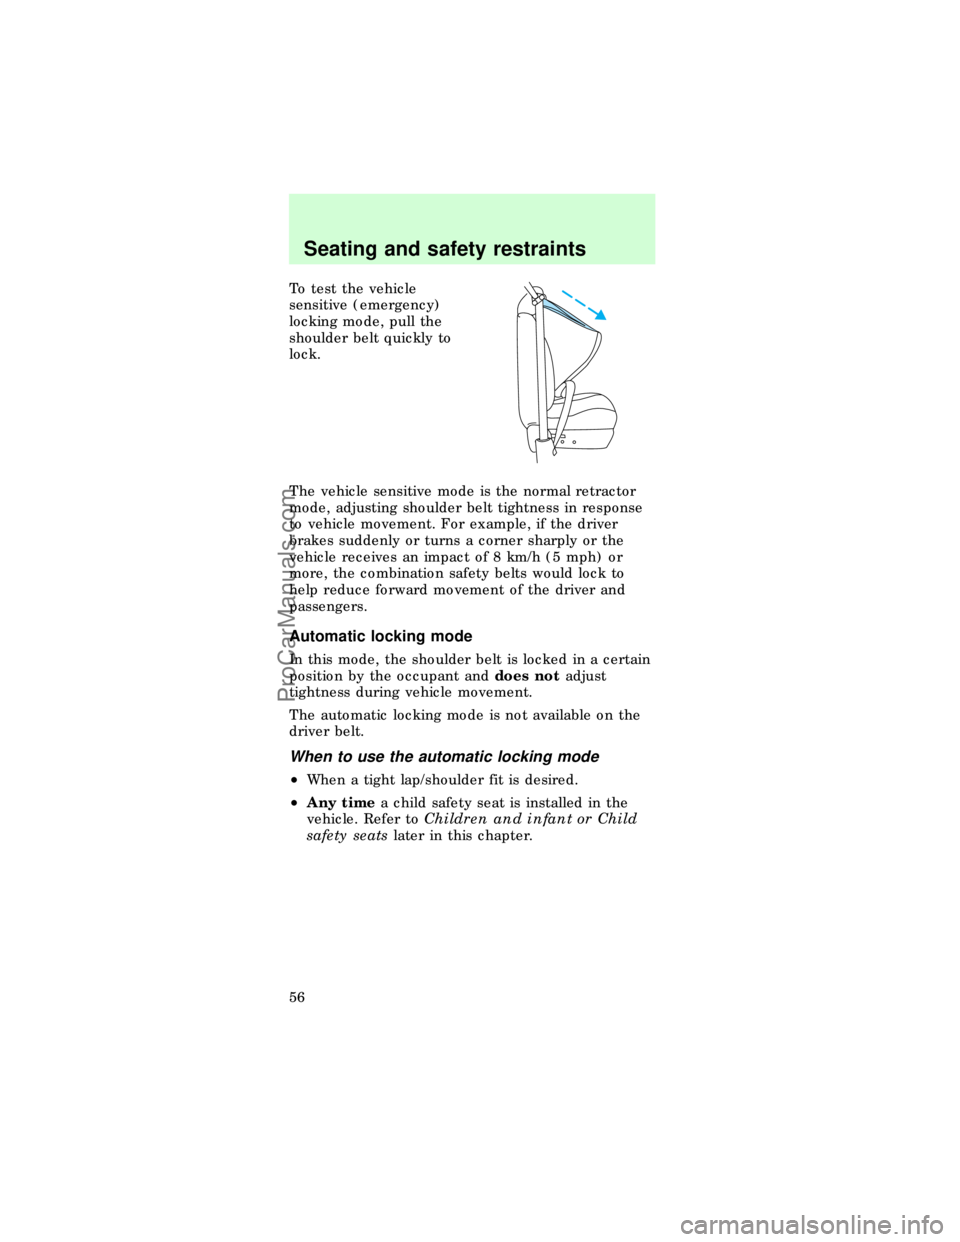
To test the vehicle
sensitive (emergency)
locking mode, pull the
shoulder belt quickly to
lock.
The vehicle sensitive mode is the normal retractor
mode, adjusting shoulder belt tightness in response
to vehicle movement. For example, if the driver
brakes suddenly or turns a corner sharply or the
vehicle receives an impact of 8 km/h (5 mph) or
more, the combination safety belts would lock to
help reduce forward movement of the driver and
passengers.
Automatic locking mode
In this mode, the shoulder belt is locked in a certain
position by the occupant anddoes notadjust
tightness during vehicle movement.
The automatic locking mode is not available on the
driver belt.
When to use the automatic locking mode
²When a tight lap/shoulder fit is desired.
²Any timea child safety seat is installed in the
vehicle. Refer toChildren and infant or Child
safety seatslater in this chapter.
Seating and safety restraints
56
ProCarManuals.com
Page 58 of 167
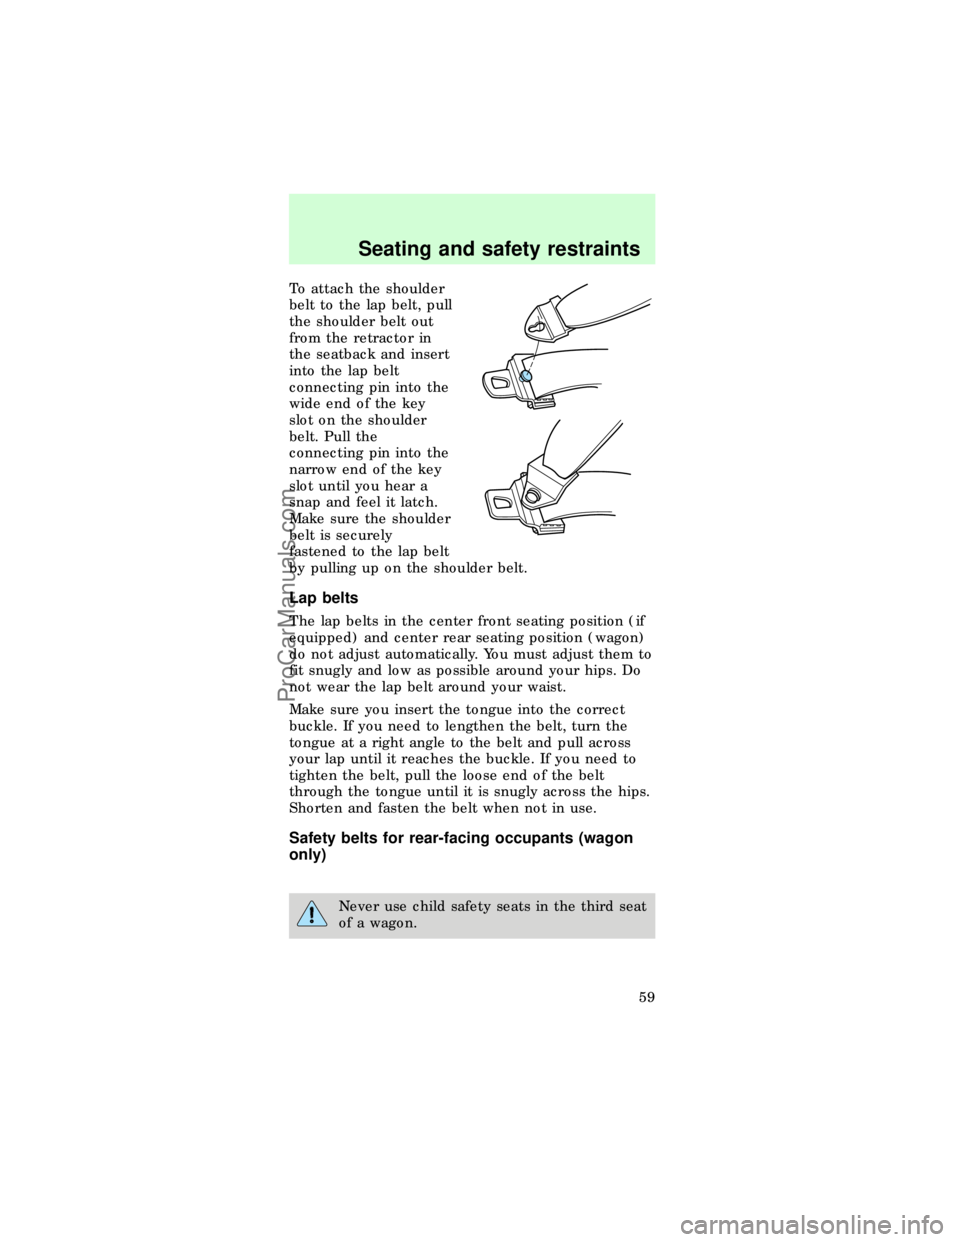
To attach the shoulder
belt to the lap belt, pull
the shoulder belt out
from the retractor in
the seatback and insert
into the lap belt
connecting pin into the
wide end of the key
slot on the shoulder
belt. Pull the
connecting pin into the
narrow end of the key
slot until you hear a
snap and feel it latch.
Make sure the shoulder
belt is securely
fastened to the lap belt
by pulling up on the shoulder belt.
Lap belts
The lap belts in the center front seating position (if
equipped) and center rear seating position (wagon)
do not adjust automatically. You must adjust them to
fit snugly and low as possible around your hips. Do
not wear the lap belt around your waist.
Make sure you insert the tongue into the correct
buckle. If you need to lengthen the belt, turn the
tongue at a right angle to the belt and pull across
your lap until it reaches the buckle. If you need to
tighten the belt, pull the loose end of the belt
through the tongue until it is snugly across the hips.
Shorten and fasten the belt when not in use.
Safety belts for rear-facing occupants (wagon
only)
Never use child safety seats in the third seat
of a wagon.
Seating and safety restraints
59
ProCarManuals.com
Page 60 of 167
Each seating position in your vehicle has a
specific safety belt assembly which is made
up of one buckle and one tongue that are designed
to be used as a pair. 1) Use the shoulder belt on
the outside shoulder only. Never wear the shoulder
belt under the arm. 2) Never swing it around your
neck over the inside shoulder. 3) Never use a
single belt for more than one person.
Due to folding rear seats, sometimes the buckles and
tongues toward the center of the vehicle may be
hidden by the rear edge of the seat cushion. Pull
them out so they will be accessible.
While you are fastened in the seat belt, the shoulder
belt adjusts to your movement. However, if you
brake hard, turn hard or your vehicle receives an
impact of 8 km/h (5 mph) or more, the safety belt
will become locked and help reduce your forward
movement.
To unfasten the belt, push the red release button on
the end of the buckle. This allows the tongue to
unlatch from the buckle. While the belt retracts,
guide the tongue to its original position to prevent it
from striking you or the vehicle.
Safety belt extension assembly
If the safety belt assembly is too short, even when
fully extended, eight inches can be added to the
safety belt assembly by adding a safety belt
extension assembly (part number 611C22). Safety
belt extension assemblies can be obtained from your
dealer at no cost. This assembly is not for use in the
wagon's rear-facing seat.
Use only extensions manufactured by the same
supplier as the safety belt. Manufacturer
identification is located at the end of the webbing on
the label. Also, use the safety belt extension only if
the safety belt is too short for you when fully
Seating and safety restraints
61
ProCarManuals.com
Page 63 of 167
Do not attempt to service, repair, or modify
the Air Bag Supplemental Restraint System
or its fuses. See your Ford or Lincoln-Mercury
dealer.
CHILDREN AND AIR BAGS
For additional important safety information, read all
information on safety restraints in this guide.
Children should always wear their safety belts.
Failure to follow these instructions may increase the
risk of injury in a collision.
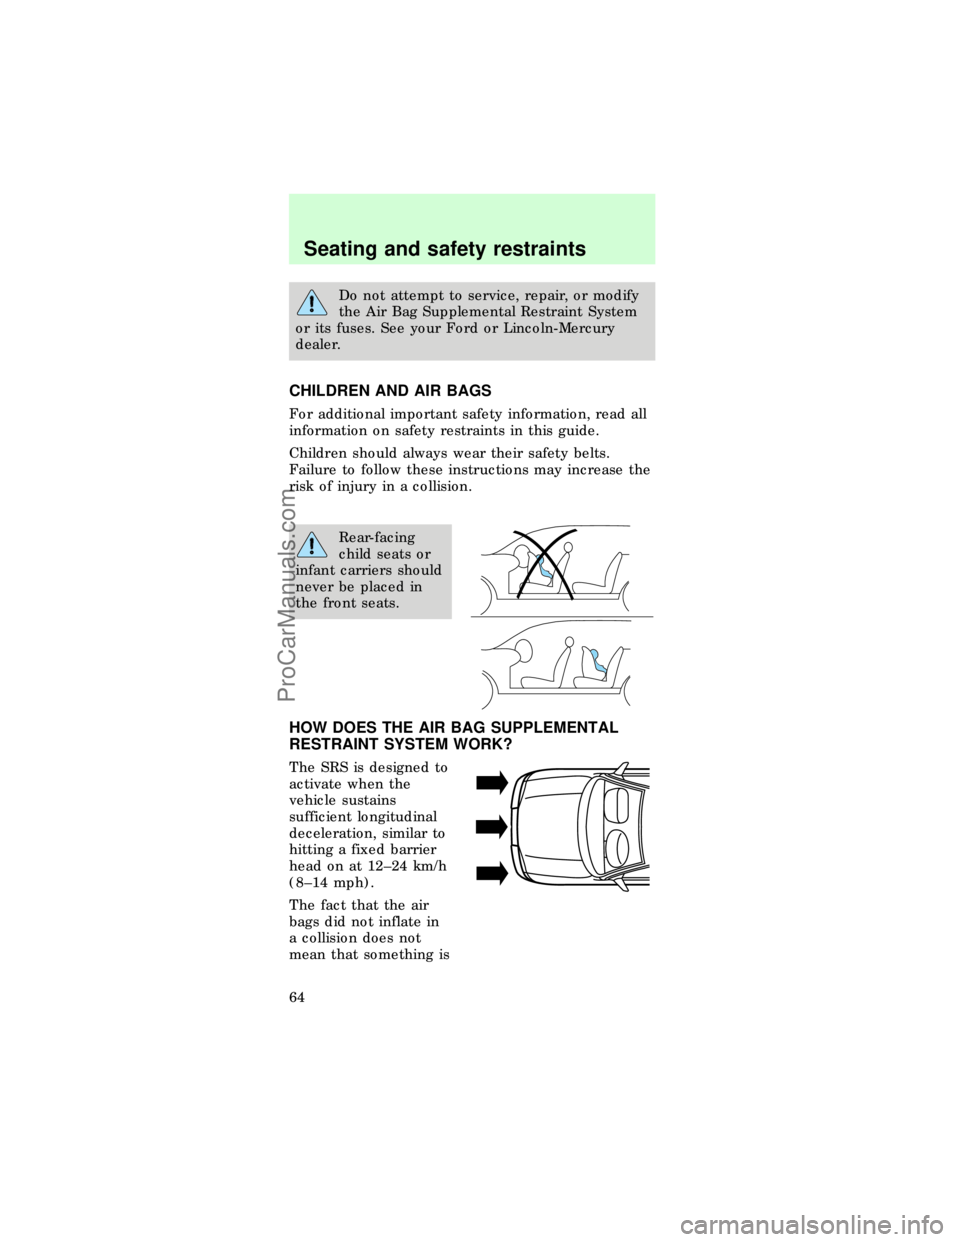
Rear-facing
child seats or
infant carriers should
never be placed in
the front seats.
HOW DOES THE AIR BAG SUPPLEMENTAL
RESTRAINT SYSTEM WORK?
The SRS is designed to
activate when the
vehicle sustains
sufficient longitudinal
deceleration, similar to
hitting a fixed barrier
head on at 12±24 km/h
(8±14 mph).
The fact that the air
bags did not inflate in
a collision does not
mean that something is
Seating and safety restraints
64
ProCarManuals.com