check engine FORD TRANSIT 2016 5.G Owner's Guide
[x] Cancel search | Manufacturer: FORD, Model Year: 2016, Model line: TRANSIT, Model: FORD TRANSIT 2016 5.GPages: 411, PDF Size: 5.65 MB
Page 215 of 411
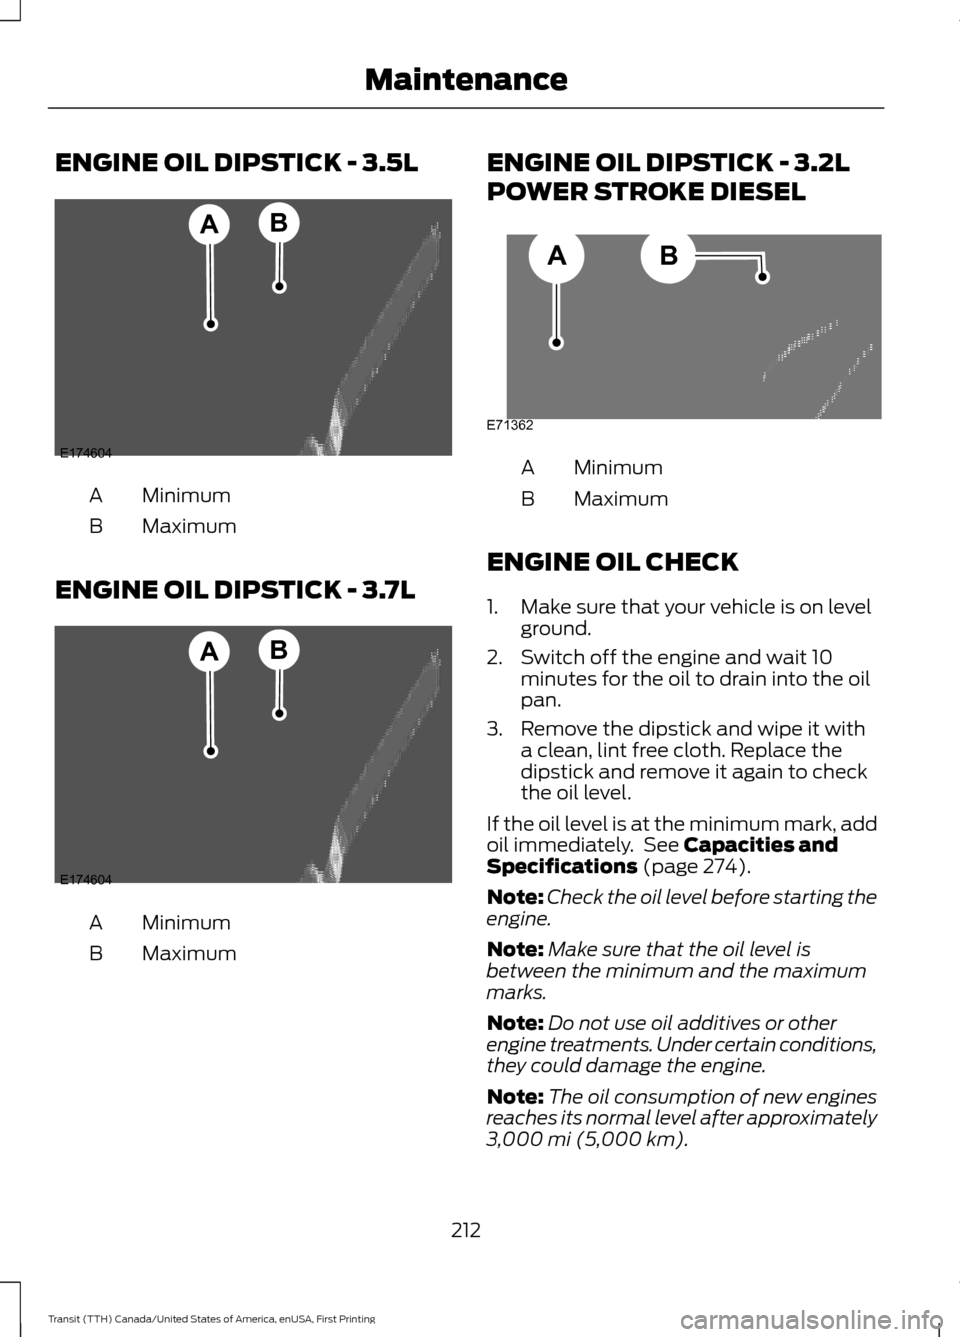
ENGINE OIL DIPSTICK - 3.5L
Minimum
A
Maximum
B
ENGINE OIL DIPSTICK - 3.7L Minimum
A
Maximum
B ENGINE OIL DIPSTICK - 3.2L
POWER STROKE DIESEL Minimum
A
Maximum
B
ENGINE OIL CHECK
1. Make sure that your vehicle is on level ground.
2. Switch off the engine and wait 10 minutes for the oil to drain into the oil
pan.
3. Remove the dipstick and wipe it with a clean, lint free cloth. Replace the
dipstick and remove it again to check
the oil level.
If the oil level is at the minimum mark, add
oil immediately. See Capacities and
Specifications (page 274).
Note: Check the oil level before starting the
engine.
Note: Make sure that the oil level is
between the minimum and the maximum
marks.
Note: Do not use oil additives or other
engine treatments. Under certain conditions,
they could damage the engine.
Note: The oil consumption of new engines
reaches its normal level after approximately
3,000 mi (5,000 km)
.
212
Transit (TTH) Canada/United States of America, enUSA, First Printing MaintenanceE174604
AB E174604
AB E71362
AB
Page 217 of 411
•
Sustained high-speed driving at Gross
Vehicle Weight Rating (maximum
loaded weight for vehicle operation).
• Sustained use of diesel fuel other than
ultra-low sulfur diesel (ULSD).
OIL CHANGE INDICATOR
RESET
Resetting the Oil Life Monitoring
System
Only reset the oil life monitoring system
after changing the engine oil and oil filter.
1. Switch the ignition on. Do not start the
engine. For vehicles with push-button
start, press and hold the start button
for two seconds without pressing the
brake pedal. Do not start the engine.
2. Press the accelerator and brake pedals
at the same time.
3. Keep the accelerator and brake pedals
fully pressed.
4. After three seconds, a message confirming that the reset is in progress
will be displayed.
5. After 25 seconds, a message confirming that the reset is complete
will be displayed.
6. Release the accelerator and brake pedals.
7. The message confirming that the reset
is complete will no longer be displayed.
8. Switch the ignition off. For vehicles with
push-button start, press the start
button to switch the ignition off. ENGINE COOLANT CHECK
Checking the Engine Coolant
When the engine is cold, check the
concentration and level of the engine
coolant at the intervals listed in the
scheduled maintenance information. See
Scheduled Maintenance (page 363).
Note: Make sure that the level is between
the MIN and MAX marks on the coolant
reservoir.
Note: Coolant expands when it is hot. The
level may extend beyond the MAX mark.
Note: If the level is at the MIN mark, below
the MIN mark, or empty, add coolant
immediately. See
Adding Engine Coolant
in this chapter.
The coolant concentration should be
maintained within 48% to 50%, which
equates to a freeze point between -30°F
(-34°C) and -34°F (-37°C).
Note: For best results, coolant
concentration should be tested with a
refractometer, for example Robinair®
Coolant and Battery Refractometer 75240.
We do not recommend the use of
hydrometers or coolant test strips for
measuring coolant concentrations.
Note: Automotive fluids are not
interchangeable. Do not use engine coolant,
antifreeze or windshield washer fluid outside
of its specified function and vehicle location.
Adding Engine Coolant WARNINGS
Do not add engine coolant when the
engine is hot. Steam and scalding
liquids released from a hot cooling
system can burn you badly. Also, spilling
coolant on hot engine parts can burn you.
214
Transit (TTH) Canada/United States of America, enUSA, First Printing Maintenance
Page 218 of 411
WARNINGS
Do not put engine coolant in the
windshield washer fluid reservoir. If
sprayed on the windshield, engine
coolant could make it difficult to see
through the windshield. Do not add coolant further than the
MAX mark.
To reduce the risk of personal injury,
make sure the engine is cool before
unscrewing the coolant pressure
relief cap. The cooling system is under
pressure; steam and hot liquid can come
out forcefully when the cap is loosened
slightly. Note:
Do not use stop leak pellets, cooling
system sealants or additives as they can
cause damage to the engine cooling or
heating systems. The vehicle warranty does
not cover this damage.
Note: During normal vehicle operation, the
engine coolant may change color from
orange to pink or light red. As long as the
engine coolant is clear and uncontaminated,
this color change does not indicate the
coolant has degraded nor does it require the
coolant to be drained, the system to be
flushed, or the coolant to be replaced. •
Do not mix different colors or types of
coolant in your vehicle. Make sure the
correct coolant is used. Mixing of
engine coolants may harm the engine ’s
cooling system. The use of incorrect
coolant may harm engine and cooling
system components and may void the
warranty. Use prediluted engine
coolant meeting the Ford specification.
See Capacities and Specifications
(page 274).
• In case of emergency, you can add a
large amount of water without engine
coolant in order to reach a vehicle
service location. In this instance, you
must have the cooling system drained,
chemically cleaned with Motorcraft
Premium Cooling System Flush, and
refilled with engine coolant as soon as
possible. Water alone (without engine
coolant) can cause engine damage, for
example corrosion, overheating or
freezing.
• Do not use alcohol, methanol, brine or
any engine coolants mixed with alcohol
or methanol antifreeze. Alcohol and
other liquids can cause engine damage,
for example overheating or freezing.
• Do not add extra inhibitors or additives
to the coolant. These can be harmful
and compromise the corrosion
protection of the engine coolant.
Unscrew the cap slowly. Any pressure will
escape as you unscrew the cap.
Whenever you add coolant, check the
coolant level in the coolant reservoir the
next few times you drive the vehicle. If
necessary, add enough prediluted engine
coolant to bring the coolant level to the
correct level.
Recycled Engine Coolant
We do not recommend the use of recycled
engine coolant since a Ford-approved
recycling process is not yet available.
215
Transit (TTH) Canada/United States of America, enUSA, First Printing Maintenance
Page 220 of 411
The engine is capable of completely
shutting down automatically to prevent
engine damage, if this situation occurs:
1. Stop your vehicle as soon as it is safe
to do so and switch the ignition off.
2. Have your vehicle towed to an authorized dealer.
3. If this is not possible, wait a short period for the engine to cool.
4. Check the coolant level and replenish if low.
5. Re-start the engine and take your vehicle to an authorized dealer.
Note: Driving the vehicle without repairing
the engine problem increases the chance of
engine damage. Take your vehicle to an
authorized dealer as soon as possible.
Engine Fluid Temperature
Management (If Equipped) WARNING
To reduce the risk of a crash and
injury, be prepared that the vehicle
speed may reduce and the vehicle
may not be able to accelerate with full
power until the fluid temperature reduces. When towing a trailer the vehicle
’s engine
may temporarily reach a higher
temperature during severe operating
conditions, for example ascending a long
or steep grade in hot ambient
temperatures.
You may notice a reduction in vehicle
speed caused by reduced engine power.
The design of your vehicle allows it to enter
this mode if certain high-temperature and
high-load conditions take place in order to
manage the engine fluid temperatures. The amount of speed reduction will depend on
the vehicle loading, towing, grade, ambient
temperature and other factors. If this
occurs, there is no need to pull off the road.
You can continue to drive your vehicle
while this message is active.
The air conditioning may also cycle on and
off during severe operating conditions to
protect overheating of the engine. When
the engine coolant temperature decreases
normal operating temperature, the air
conditioning will turn on. If you notice any
of the following:
•
The engine coolant temperature gauge
moves fully into the red area.
• The coolant temperature warning light
illuminates.
• The service engine soon indicator
illuminates.
1. Stop your vehicle as soon as it is safe to do so and place the vehicle in park
(P).
2. Leave the engine running until the coolant temperature gauge needle
moves away from the red area. After
several minutes, if this does not
happen, follow the remaining steps.
3. Switch the engine off and wait for it to
cool before checking the coolant level.
4. If the coolant level is normal, you may restart the engine and continue on.
5. If the coolant is low, add coolant, restart the engine and take your vehicle
to an authorized dealer.
AUTOMATIC TRANSMISSION
FLUID CHECK
The automatic transmission does not have
a transmission fluid dipstick.
217
Transit (TTH) Canada/United States of America, enUSA, First Printing Maintenance
Page 221 of 411
Have an authorized dealer check and
change the transmission fluid at the
correct service interval. See Scheduled
Maintenance (page 363). Your
transmission does not consume fluid.
However, if the transmission slips, shifts
slowly or if you notice a sign of leaking
fluid, contact an authorized dealer.
Do not use supplemental transmission
fluid additives, treatments or cleaning
agents. The use of these materials may
affect transmission operation and result
in damage to internal transmission
components.
BRAKE FLUID CHECK
Fluid levels between the MIN and MAX
lines are within the normal operating range;
there is no need to add fluid. If the fluid
levels are outside of the normal operating
range, the performance of the system
could be compromised; seek service from
your authorized dealer immediately.
POWER STEERING FLUID
CHECK WARNING
Do not allow the fluid to touch your
skin or eyes. This could cause serious
personal injury. Rinse the affected
areas immediately with plenty of water
and consult a physician. If the power steering fluid level is not
between the
MAX and MIN marks, add
power steering fluid that meets the correct
specification. See
Capacities and
Specifications (page 281).
Adding Power Steering Fluid
1. Remove the filler cap. 2. Add power steering fluid to the
MAX
mark. Do not overfill.
3. Replace the filler cap. Turn it until you feel a strong resistance.
WASHER FLUID CHECK
Note: The reservoir supplies the front and
rear washer systems.
When adding fluid, use a mixture of washer
fluid and water to help prevent freezing in
cold weather and improve the cleaning
capability. We recommend that you use
only high quality washer fluid.
For information on fluid dilution, refer to
the product instructions.
DRAINING THE FUEL FILTER
WATER TRAP WARNING
Do not dispose of fuel in the
household refuse or the public
sewage system. Use an authorized
waste disposal facility. Your vehicle is fitted with a diesel fuel
conditioner module located behind the fuel
tank.
A warning lamp will illuminate
and a message will be displayed
when approximately
3.38 fl oz
(100 ml) of water accumulates in the
module. If you allow the water level to
exceed this level, the water may pass
through to the engine and may cause fuel
injection equipment damage.
Note: To drain the fuel filter water trap,
access the underside of your vehicle.
218
Transit (TTH) Canada/United States of America, enUSA, First Printing Maintenance
Page 223 of 411
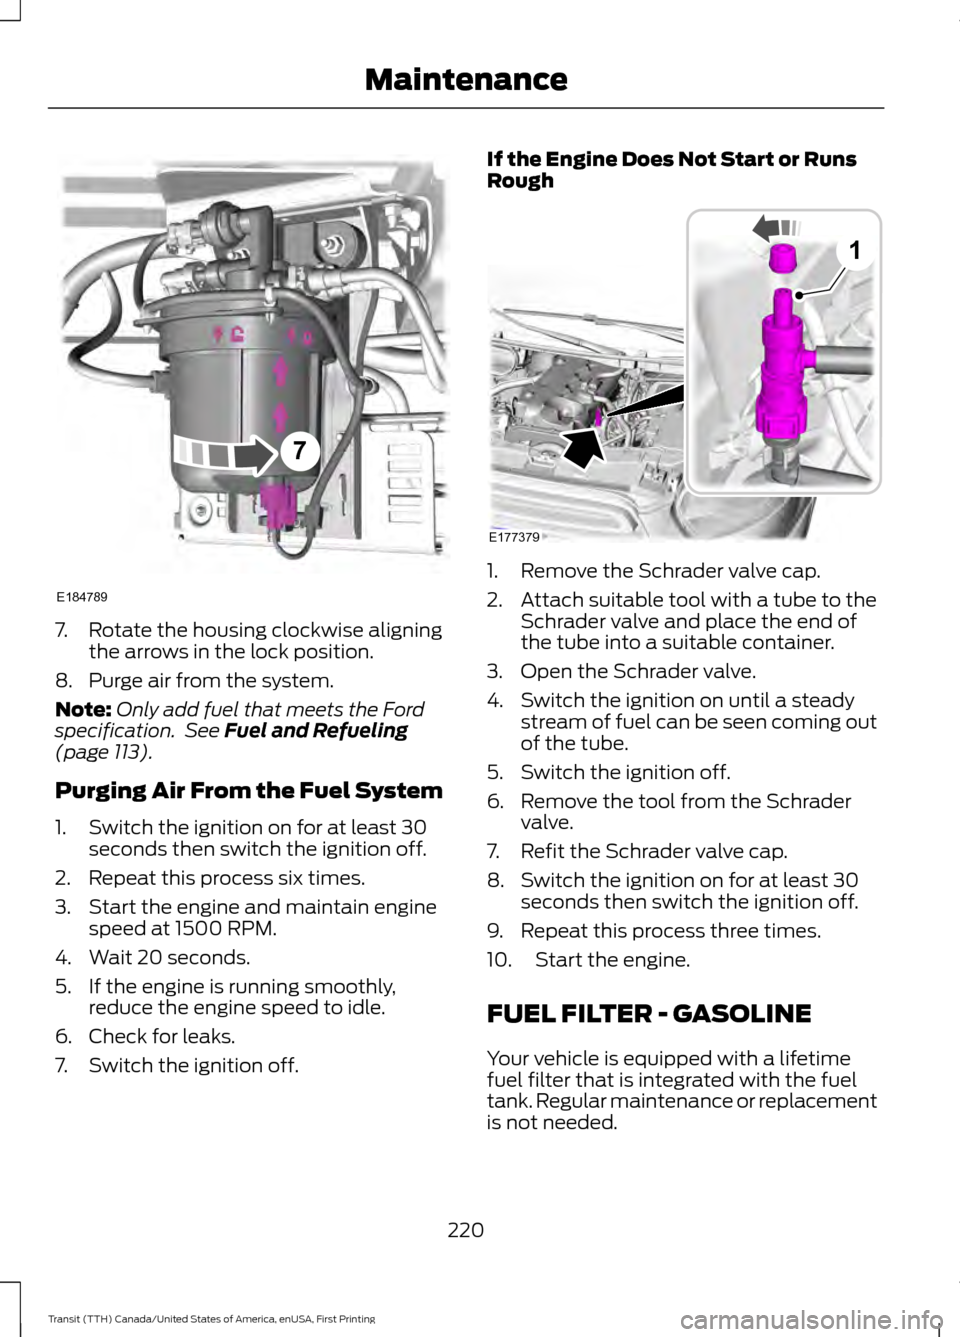
7. Rotate the housing clockwise aligning
the arrows in the lock position.
8. Purge air from the system.
Note: Only add fuel that meets the Ford
specification. See Fuel and Refueling
(page 113).
Purging Air From the Fuel System
1. Switch the ignition on for at least 30 seconds then switch the ignition off.
2. Repeat this process six times.
3. Start the engine and maintain engine speed at 1500 RPM.
4. Wait 20 seconds.
5. If the engine is running smoothly, reduce the engine speed to idle.
6. Check for leaks.
7. Switch the ignition off. If the Engine Does Not Start or Runs
Rough
1. Remove the Schrader valve cap.
2. Attach suitable tool with a tube to the
Schrader valve and place the end of
the tube into a suitable container.
3. Open the Schrader valve.
4. Switch the ignition on until a steady stream of fuel can be seen coming out
of the tube.
5. Switch the ignition off.
6. Remove the tool from the Schrader valve.
7. Refit the Schrader valve cap.
8. Switch the ignition on for at least 30 seconds then switch the ignition off.
9. Repeat this process three times.
10. Start the engine.
FUEL FILTER - GASOLINE
Your vehicle is equipped with a lifetime
fuel filter that is integrated with the fuel
tank. Regular maintenance or replacement
is not needed.
220
Transit (TTH) Canada/United States of America, enUSA, First Printing MaintenanceE184789
7 E177379
1
Page 237 of 411
CLEANING PRODUCTS
For best results, use the following products
or products of equivalent quality:
•
Motorcraft Bug and Tar Remover
(ZC-42)
• Motorcraft Custom Bright Metal
Cleaner (ZC-15)
• Motorcraft Detail Wash (ZC-3-A)
• Motorcraft Dusting Cloth (ZC-24)
• Motorcraft Engine Shampoo and
Degreaser (U.S. only) (ZC-20)
• Motorcraft Engine Shampoo (Canada
only) (CXC-66-A)
• Motorcraft Multi-Purpose Cleaner
(Canada only) (CXC-101)
• Motorcraft Premium Glass Cleaner
(Canada only) (CXC-100)
• Motorcraft Premium Quality
Windshield Washer Fluid (Canada
only) [CXC-37-(A, B, D or F)]
• Motorcraft Premium Windshield Wash
Concentrate with Bitterant (U.S. only)
(ZC-32-B2)
• Motorcraft Professional Strength
Carpet & Upholstery Cleaner (ZC-54)
• Motorcraft Premium Leather and Vinyl
Cleaner (ZC-56)
• Motorcraft Spot and Stain Remover
(U.S. only) (ZC-14)
• Motorcraft Ultra-Clear Spray Glass
Cleaner (ZC-23)
• Motorcraft Wheel and Tire Cleaner
(ZC-37-A)
CLEANING THE EXTERIOR
Note: If you use a car wash with a waxing
cycle, make sure that you remove the wax
from the windshield and the wiper blades.
Note: Prior to using a car wash facility
check the suitability of it for your vehicle. Note:
Some car washes use water at high
pressure. Due to this, water droplets may
enter inside your vehicle and could also
damage certain parts of your vehicle.
Note: Remove the aerial before using an
automatic car wash.
Note: Switch the heater blower off to
prevent contamination of the fresh air filter.
We recommend that you wash your vehicle
with a sponge and lukewarm water
containing a car shampoo.
Cleaning the Headlamps
Note: Do not scrape the headlamp lenses
or use abrasives, alcoholic solvents or
chemical solvents to clean them.
Note: Do not wipe the headlamps when
they are dry.
Cleaning the Rear Window
Note: Do not scrape the inside of the rear
window or use abrasives or chemical
solvents to clean it.
Use a clean, lint free cloth or a damp
chamois leather to clean the inside of the
rear window.
Cleaning the Chrome Trim
Note: Do not use abrasives or chemical
solvents. Use soapy water.
Note: Do not apply cleaning product to hot
surfaces and do not leave cleaning product
on chrome surfaces for a period of time
exceeding that which is recommended.
Note: Industrial-strength (heavy-duty)
cleaners, or cleaning chemicals, may cause
damage over a period of time.
Body Paintwork Preservation WARNINGS
Do not polish your vehicle in strong
sunshine.
234
Transit (TTH) Canada/United States of America, enUSA, First Printing Vehicle Care
Page 242 of 411
Engine
•
Change the engine oil and filter prior to
storage because used engine oil
contains contaminates which may
cause engine damage.
• Start the engine every 15 days for a
minimum of 15 minutes. Run at fast idle
with the climate controls set to defrost
until the engine reaches normal
operating temperature.
• With your foot on the brake, shift
through all the gears while the engine
is running.
• We recommend that you change the
engine oil before you use your vehicle
again.
Fuel system
• Fill the fuel tank with high-quality fuel
until the first automatic shutoff of the
fuel pump nozzle.
Cooling system
• Protect against freezing temperatures.
• When removing your vehicle from
storage, check coolant fluid level.
Confirm that there are no cooling
system leaks and that fluid is at the
recommended level.
Battery
• Check and recharge as necessary. Keep
connections clean.
• If storing your vehicle for more than 30
days without recharging the battery,
we recommend that you disconnect
the battery cables to maintain battery
charge for quick starting.
Note: It is necessary to reset memory
features if battery cables are disconnected. Brakes
•
Make sure the brakes and parking brake
release fully.
Tires
• Maintain recommended air pressure.
Miscellaneous
• Make sure all linkages, cables, levers
and pins under your vehicle are covered
with grease to prevent rust.
• Move vehicles at least 25 ft (7.5 m)
every 15 days to lubricate working parts
and prevent corrosion.
Removing Vehicle From Storage
When your vehicle is ready to come out of
storage, do the following:
• Wash your vehicle to remove any dirt
or grease film build-up on window
surfaces.
• Check windshield wipers for any
deterioration.
• Check under the hood for any foreign
material that may have collected
during storage such as mice or squirrel
nests.
• Check the exhaust for any foreign
material that may have collected
during storage.
• Check tire pressures and set tire
inflation per the Tire Label.
• Check brake pedal operation. Drive
your vehicle
15 ft (4.5 m) back and
forth to remove rust build-up.
• Check fluid levels (including coolant,
oil and gas) to make sure there are no
leaks, and fluids are at recommended
levels.
• If you remove the battery, clean the
battery cable ends and check for
damage.
239
Transit (TTH) Canada/United States of America, enUSA, First Printing Vehicle Care
Page 267 of 411
Carrying Out the System Reset
Procedure
Read the entire procedure before carrying
out a system reset.
1. Drive your vehicle above 20 mph (32
km/h) for at least two minutes and
then park in a safe location where you
can easily get to all four tires and have
access to a tire inflation pump.
2. Switch the ignition off.
3. Switch the ignition on with the engine off.
4. Turn the hazard flashers on then off three times, this must be completed
within 10 seconds. If the reset mode
has been entered successfully, the horn
will chirp once and the system indicator
will flash. If this does not occur, repeat
the procedure from step 2. If after
repeated attempts to enter the reset
mode, the horn does not chirp and the
system indicator does not flash, have
your vehicle checked by an authorized
dealer as soon as possible.
5. Train the system sensors in the tires using the following reset sequence
starting with the left front tire and
following a clockwise order: Left front,
right front, right rear, left rear.
6. Remove the valve cap from the valve stem on the left front tire. Decrease the
air pressure until the horn chirps.
Note: The single horn chirp confirms that
the sensor identification code has been
learned by your vehicle for this position. If a
double horn chirp is heard, the reset
procedure was unsuccessful and must be
repeated.
7. Remove the valve cap from the valve stem on the right front tire. Decrease
the air pressure until the horn chirps.
8. Remove the valve cap from the valve stem on the right rear tire. Decrease the
air pressure until the horn chirps. 9. Remove the valve cap from the valve
stem on the left rear tire. Decrease the
air pressure until the horn chirps.
Training is complete when the horn
chirps after the last system sensor (left
rear) has been trained and the system
indicator stops flashing.
10. Switch the ignition off. If two short horn chirps are heard, the reset
procedure was unsuccessful and
must be repeated.
Note: If after repeating the procedure two
short horn chirps are heard again, have your
vehicle checked by an authorized dealer as
soon as possible.
11. Set all four tires to the correct pressure See Maintenance (page
207). or the tire inflation pressure label
(located on the edge of driver door or
the B-Pillar).
CHANGING A ROAD WHEEL WARNINGS
The use of tire sealant may damage
your tire pressure monitoring system
and should only be used in roadside
emergencies. If you must use a sealant, the
Ford Tire Mobility Kit sealant should be
used. The tire pressure monitoring system
sensor and valve stem on the wheel must
be replaced by an authorized dealer after
use of the sealant. If the tire pressure monitor sensor
becomes damaged, it will no longer
function. See
Tire Pressure
Monitoring System (page 260). Note:
The tire pressure monitoring system
indicator light will illuminate when the spare
tire is in use. To restore the full function of
the monitoring system, all road wheels
equipped with tire pressure monitoring
sensors must be mounted on this vehicle.
264
Transit (TTH) Canada/United States of America, enUSA, First Printing Wheels and Tires
Page 282 of 411
VEHICLE IDENTIFICATION
NUMBER
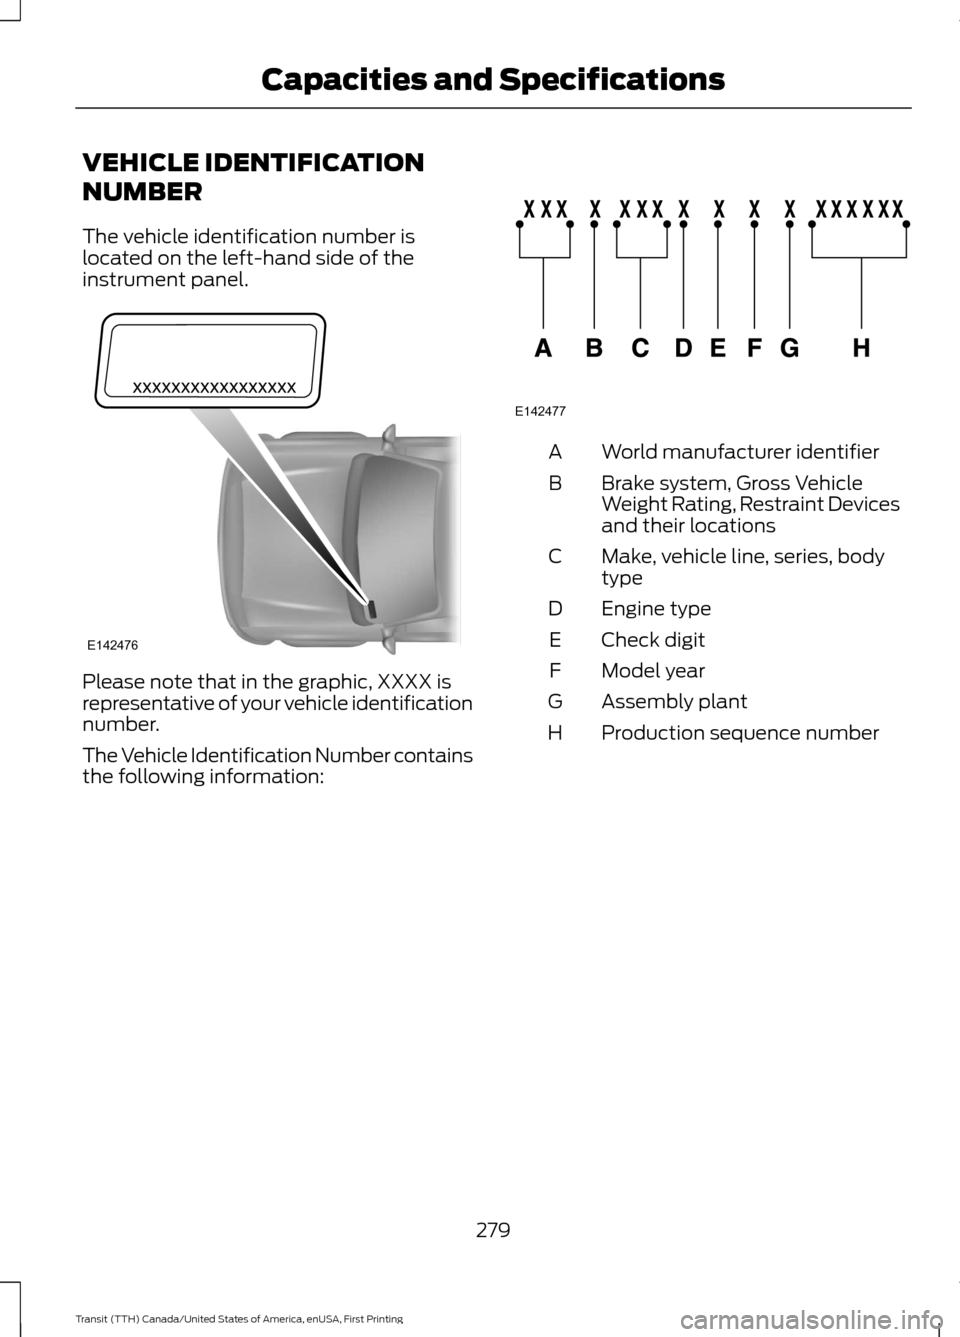
The vehicle identification number is
located on the left-hand side of the
instrument panel.
Please note that in the graphic, XXXX is
representative of your vehicle identification
number.
The Vehicle Identification Number contains
the following information: World manufacturer identifier
A
Brake system, Gross Vehicle
Weight Rating, Restraint Devices
and their locations
B
Make, vehicle line, series, body
type
C
Engine type
D
Check digit
E
Model year
F
Assembly plant
G
Production sequence number
H
279
Transit (TTH) Canada/United States of America, enUSA, First Printing Capacities and SpecificationsE142476 E142477