reset FORD TRANSIT 2016 5.G Owners Manual
[x] Cancel search | Manufacturer: FORD, Model Year: 2016, Model line: TRANSIT, Model: FORD TRANSIT 2016 5.GPages: 411, PDF Size: 5.65 MB
Page 7 of 411
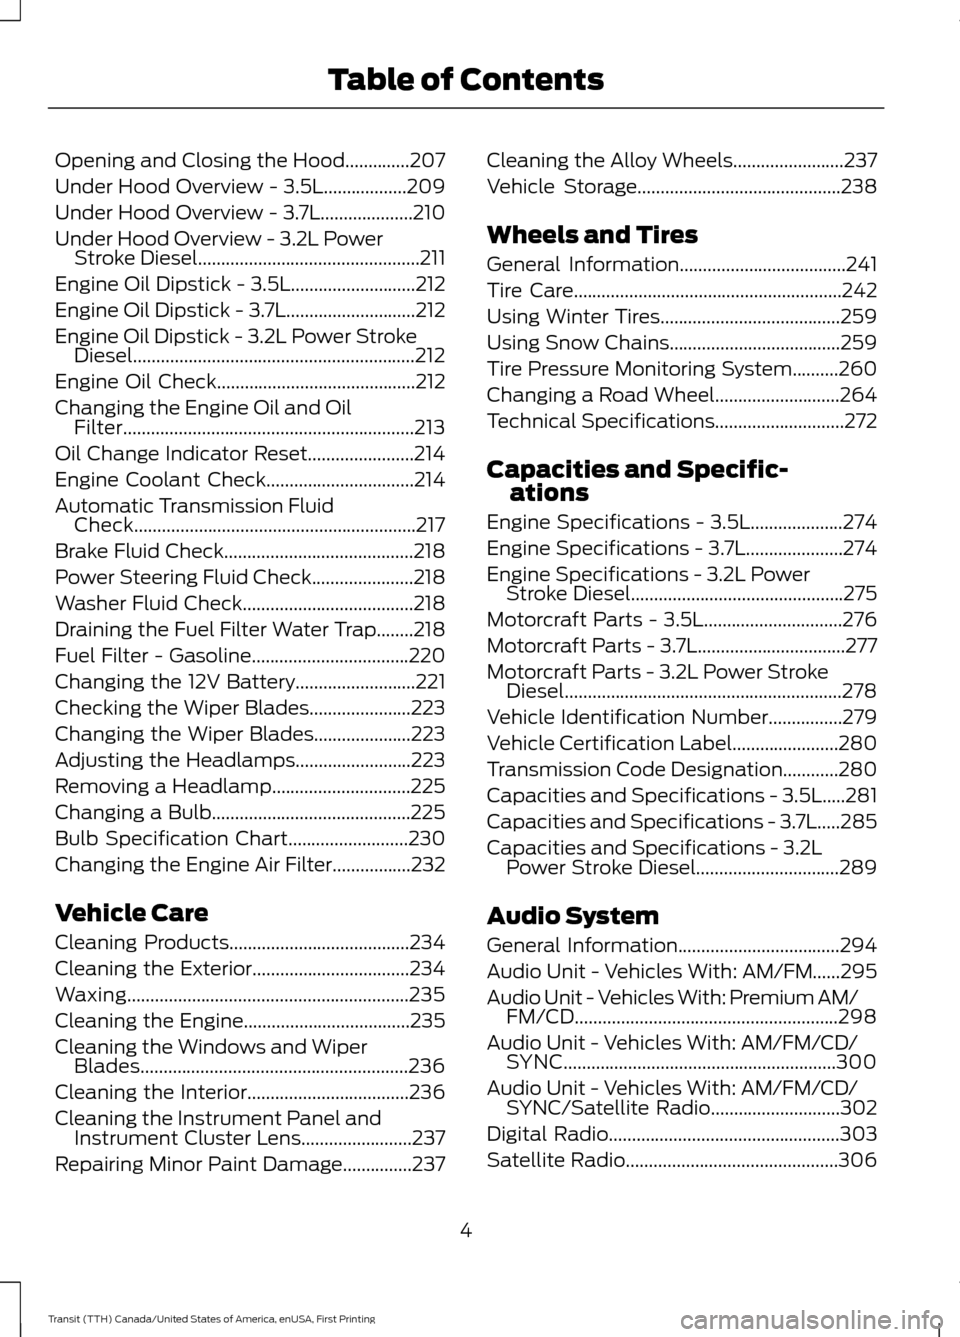
Opening and Closing the Hood..............207
Under Hood Overview - 3.5L..................209
Under Hood Overview - 3.7L....................210
Under Hood Overview - 3.2L Power
Stroke Diesel................................................211
Engine Oil Dipstick - 3.5L...........................212
Engine Oil Dipstick - 3.7L............................212
Engine Oil Dipstick - 3.2L Power Stroke Diesel.............................................................212
Engine Oil Check...........................................212
Changing the Engine Oil and Oil Filter...............................................................213
Oil Change Indicator Reset.......................214
Engine Coolant Check
................................214
Automatic Transmission Fluid Check.............................................................217
Brake Fluid Check.........................................218
Power Steering Fluid Check......................218
Washer Fluid Check
.....................................218
Draining the Fuel Filter Water Trap........218
Fuel Filter - Gasoline
..................................220
Changing the 12V Battery
..........................221
Checking the Wiper Blades......................223
Changing the Wiper Blades.....................223
Adjusting the Headlamps
.........................223
Removing a Headlamp
..............................225
Changing a Bulb...........................................225
Bulb Specification Chart
..........................230
Changing the Engine Air Filter.................232
Vehicle Care
Cleaning Products
.......................................234
Cleaning the Exterior..................................234
Waxing.............................................................235
Cleaning the Engine....................................235
Cleaning the Windows and Wiper Blades..........................................................236
Cleaning the Interior...................................236
Cleaning the Instrument Panel and Instrument Cluster Lens........................237
Repairing Minor Paint Damage...............237 Cleaning the Alloy Wheels
........................237
Vehicle Storage
............................................238
Wheels and Tires
General Information
....................................241
Tire Care
..........................................................242
Using Winter Tires.......................................259
Using Snow Chains.....................................259
Tire Pressure Monitoring System..........260
Changing a Road Wheel...........................264
Technical Specifications............................272
Capacities and Specific- ations
Engine Specifications - 3.5L....................274
Engine Specifications - 3.7L
.....................274
Engine Specifications - 3.2L Power Stroke Diesel..............................................275
Motorcraft Parts - 3.5L..............................276
Motorcraft Parts - 3.7L
................................277
Motorcraft Parts - 3.2L Power Stroke Diesel............................................................278
Vehicle Identification Number................279
Vehicle Certification Label.......................280
Transmission Code Designation............280
Capacities and Specifications - 3.5L.....281
Capacities and Specifications - 3.7L.....285
Capacities and Specifications - 3.2L Power Stroke Diesel...............................289
Audio System
General Information
...................................294
Audio Unit - Vehicles With: AM/FM......295
Audio Unit - Vehicles With: Premium AM/ FM/CD.........................................................298
Audio Unit - Vehicles With: AM/FM/CD/ SYNC...........................................................300
Audio Unit - Vehicles With: AM/FM/CD/ SYNC/Satellite Radio............................302
Digital Radio
..................................................303
Satellite Radio
..............................................306
4
Transit (TTH) Canada/United States of America, enUSA, First Printing Table of Contents
Page 11 of 411
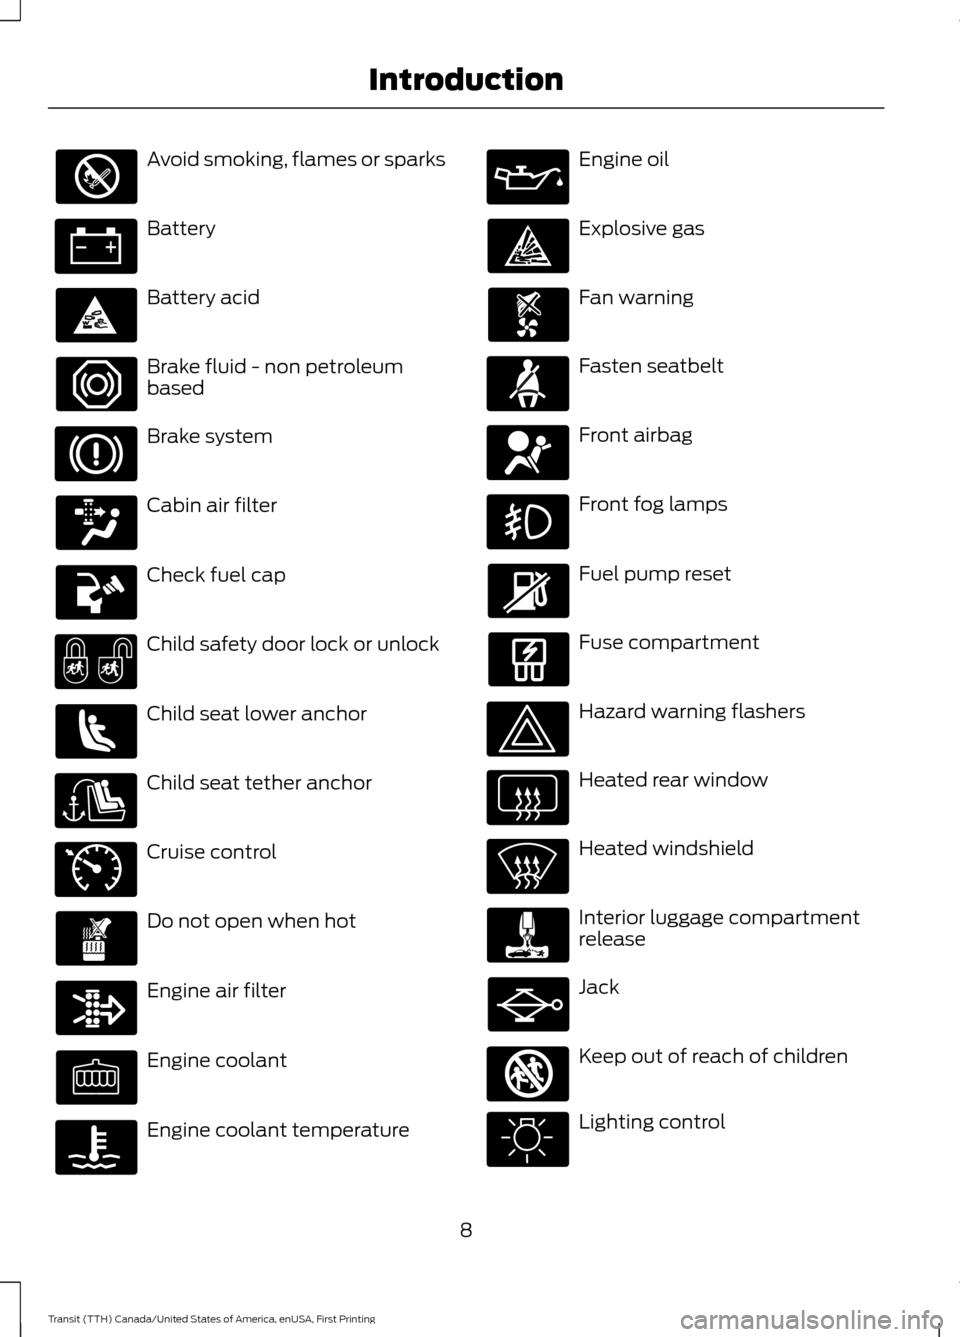
Avoid smoking, flames or sparks
Battery
Battery acid
Brake fluid - non petroleum
based
Brake system
Cabin air filter
Check fuel cap
Child safety door lock or unlock
Child seat lower anchor
Child seat tether anchor
Cruise control
Do not open when hot
Engine air filter
Engine coolant
Engine coolant temperature Engine oil
Explosive gas
Fan warning
Fasten seatbelt
Front airbag
Front fog lamps
Fuel pump reset
Fuse compartment
Hazard warning flashers
Heated rear window
Heated windshield
Interior luggage compartment
release
Jack
Keep out of reach of children
Lighting control
8
Transit (TTH) Canada/United States of America, enUSA, First Printing Introduction E71340 E161353
Page 58 of 411
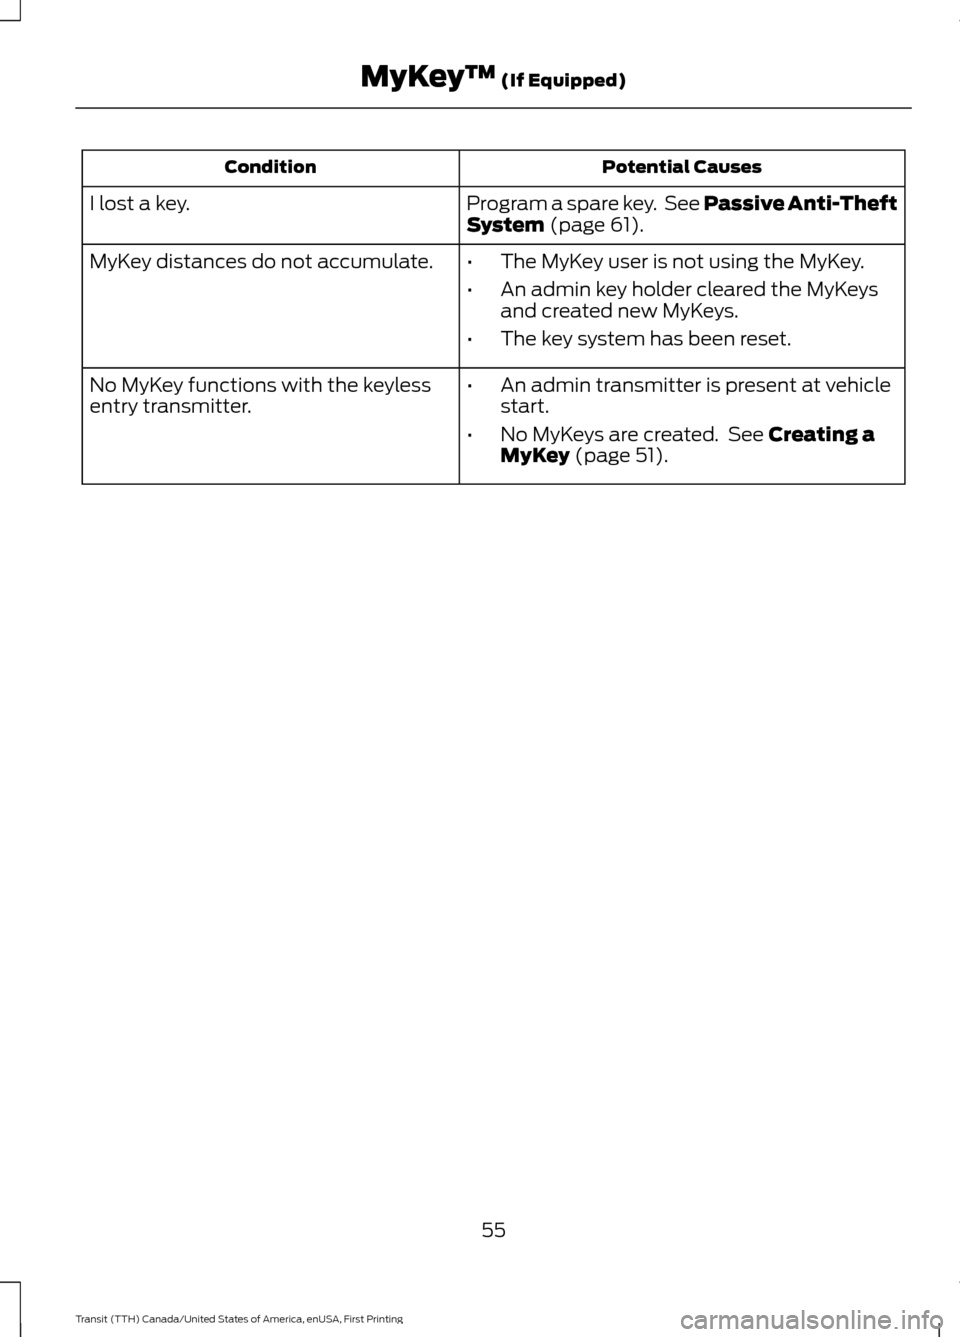
Potential Causes
Condition
Program a spare key. See Passive Anti-Theft
System (page 61).
I lost a key.
MyKey distances do not accumulate.
•The MyKey user is not using the MyKey.
• An admin key holder cleared the MyKeys
and created new MyKeys.
• The key system has been reset.
• An admin transmitter is present at vehicle
start.
• No MyKeys are created. See
Creating a
MyKey (page 51).
No MyKey functions with the keyless
entry transmitter.
55
Transit (TTH) Canada/United States of America, enUSA, First Printing MyKey
™
(If Equipped)
Page 67 of 411
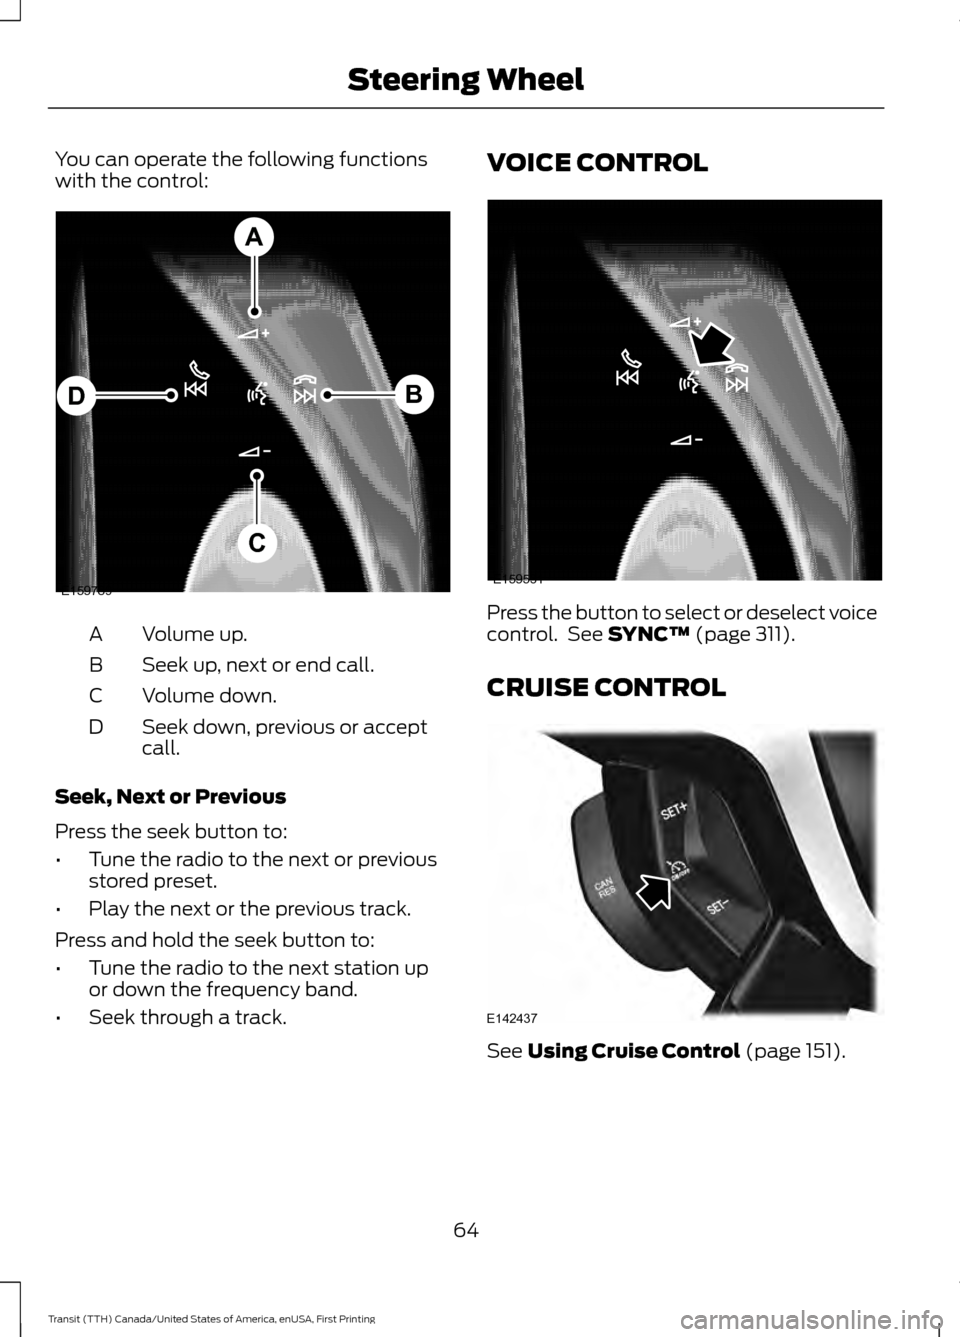
You can operate the following functions
with the control:
Volume up.
A
Seek up, next or end call.
B
Volume down.
C
Seek down, previous or accept
call.
D
Seek, Next or Previous
Press the seek button to:
• Tune the radio to the next or previous
stored preset.
• Play the next or the previous track.
Press and hold the seek button to:
• Tune the radio to the next station up
or down the frequency band.
• Seek through a track. VOICE CONTROL
Press the button to select or deselect voice
control. See SYNC™ (page 311).
CRUISE CONTROL See
Using Cruise Control (page 151).
64
Transit (TTH) Canada/United States of America, enUSA, First Printing Steering WheelE159789
A
B
C
D E159531 E142437
Page 76 of 411
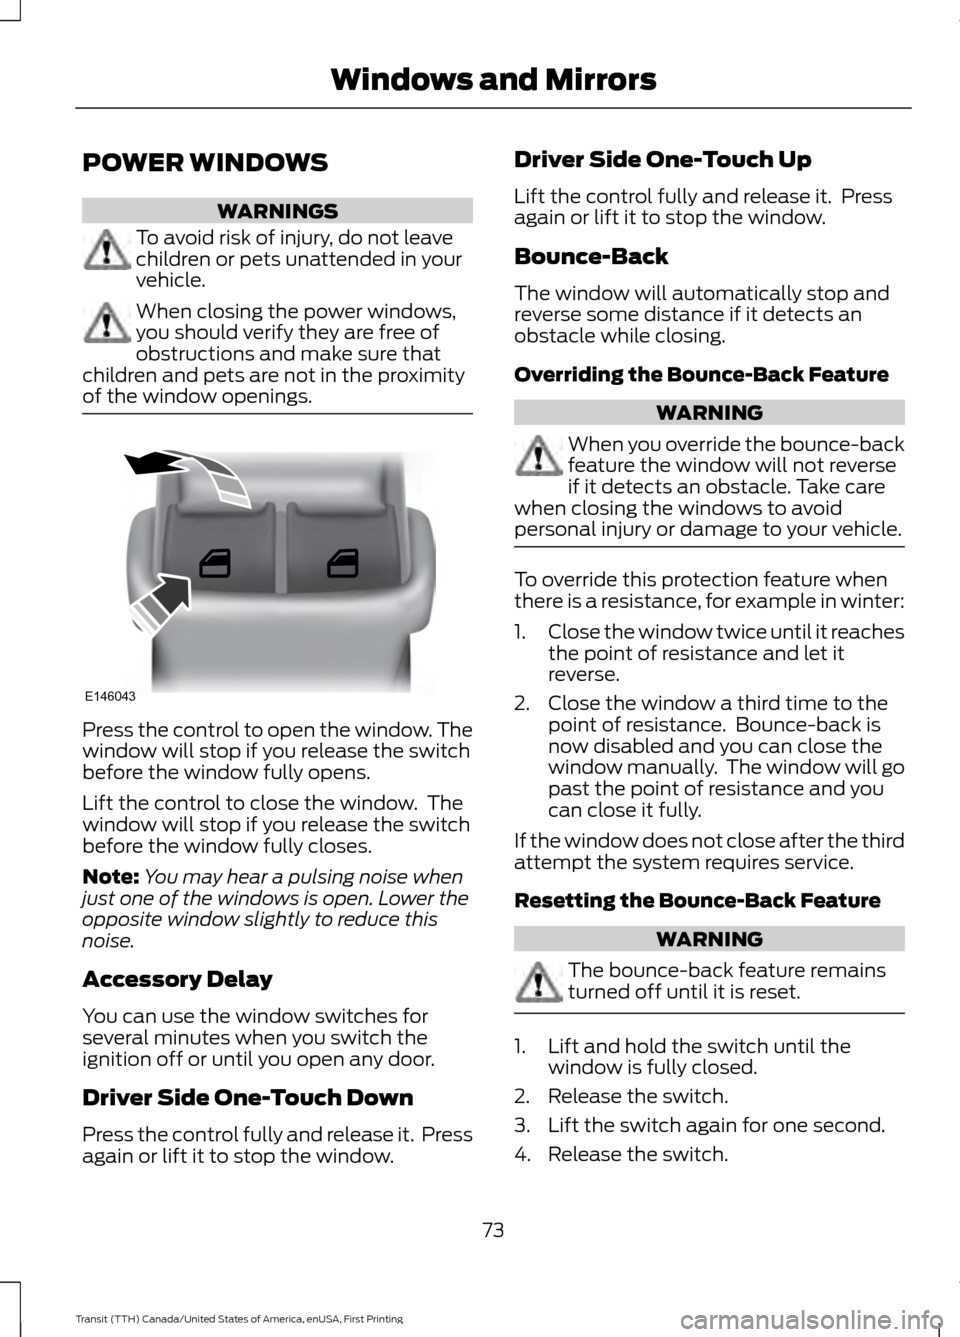
POWER WINDOWS
WARNINGS
To avoid risk of injury, do not leave
children or pets unattended in your
vehicle.
When closing the power windows,
you should verify they are free of
obstructions and make sure that
children and pets are not in the proximity
of the window openings. Press the control to open the window. The
window will stop if you release the switch
before the window fully opens.
Lift the control to close the window. The
window will stop if you release the switch
before the window fully closes.
Note:
You may hear a pulsing noise when
just one of the windows is open. Lower the
opposite window slightly to reduce this
noise.
Accessory Delay
You can use the window switches for
several minutes when you switch the
ignition off or until you open any door.
Driver Side One-Touch Down
Press the control fully and release it. Press
again or lift it to stop the window. Driver Side One-Touch Up
Lift the control fully and release it. Press
again or lift it to stop the window.
Bounce-Back
The window will automatically stop and
reverse some distance if it detects an
obstacle while closing.
Overriding the Bounce-Back Feature
WARNING
When you override the bounce-back
feature the window will not reverse
if it detects an obstacle. Take care
when closing the windows to avoid
personal injury or damage to your vehicle. To override this protection feature when
there is a resistance, for example in winter:
1.
Close the window twice until it reaches
the point of resistance and let it
reverse.
2. Close the window a third time to the point of resistance. Bounce-back is
now disabled and you can close the
window manually. The window will go
past the point of resistance and you
can close it fully.
If the window does not close after the third
attempt the system requires service.
Resetting the Bounce-Back Feature WARNING
The bounce-back feature remains
turned off until it is reset.
1. Lift and hold the switch until the
window is fully closed.
2. Release the switch.
3. Lift the switch again for one second.
4. Release the switch.
73
Transit (TTH) Canada/United States of America, enUSA, First Printing Windows and MirrorsE146043
Page 77 of 411
5. Lift the switch again for one second.
6.
Open the window and then try to close
using the one-touch feature.
7. Repeat the procedure if the window does not close using the one-touch
feature.
Note: If you disconnect the battery, you
must reset the bounce-back memory.
EXTERIOR MIRRORS
Power Exterior Mirrors WARNING
Do not adjust the mirrors when your
vehicle is moving. This could result
in the loss of control of your vehicle,
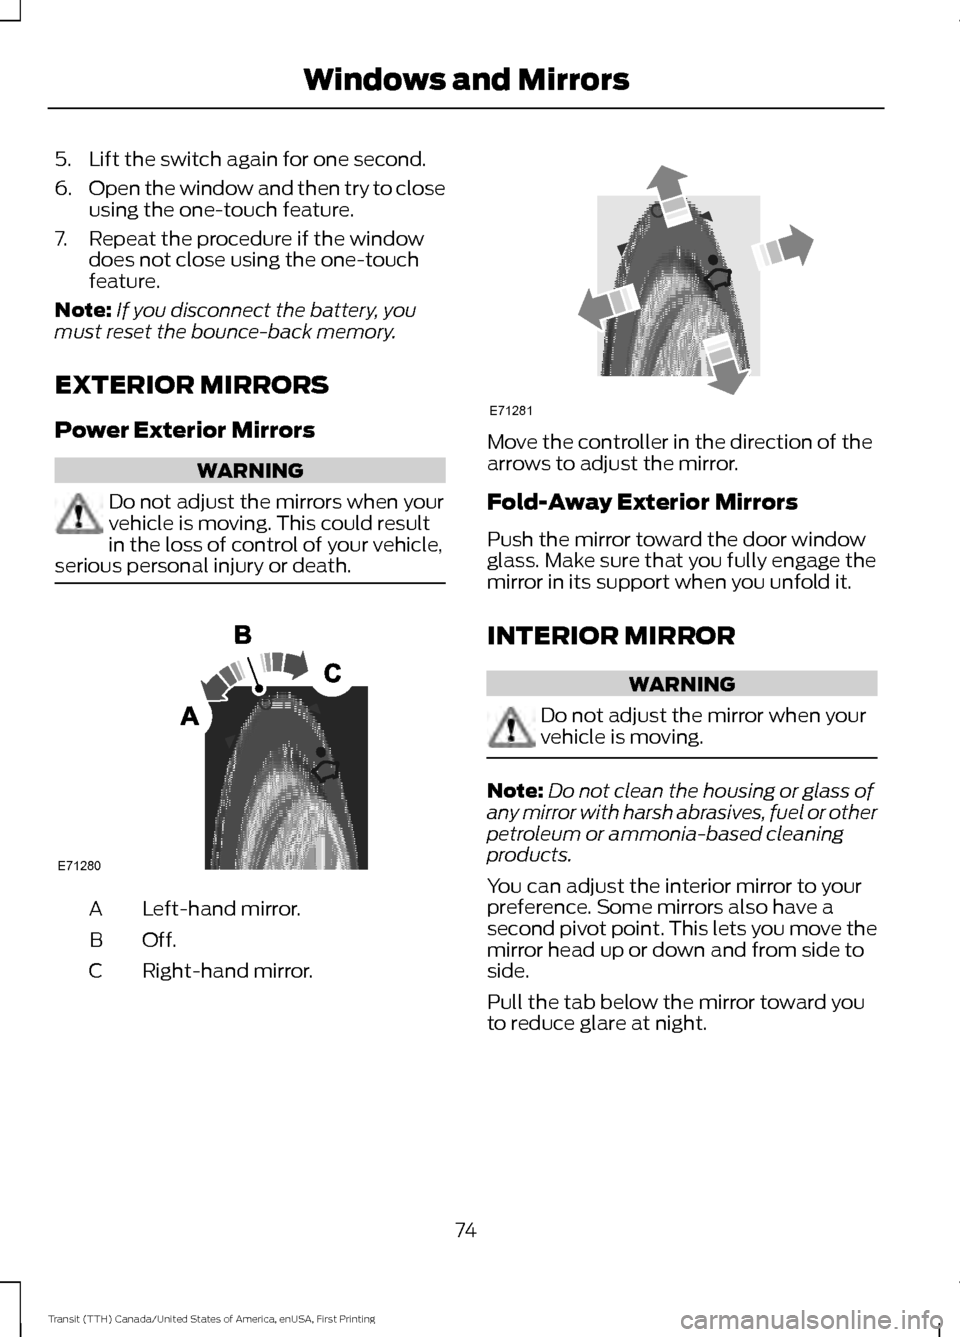
serious personal injury or death. Left-hand mirror.
A
Off.B
Right-hand mirror.
C Move the controller in the direction of the
arrows to adjust the mirror.
Fold-Away Exterior Mirrors
Push the mirror toward the door window
glass. Make sure that you fully engage the
mirror in its support when you unfold it.
INTERIOR MIRROR
WARNING
Do not adjust the mirror when your
vehicle is moving.
Note:
Do not clean the housing or glass of
any mirror with harsh abrasives, fuel or other
petroleum or ammonia-based cleaning
products.
You can adjust the interior mirror to your
preference. Some mirrors also have a
second pivot point. This lets you move the
mirror head up or down and from side to
side.
Pull the tab below the mirror toward you
to reduce glare at night.
74
Transit (TTH) Canada/United States of America, enUSA, First Printing Windows and MirrorsE71280 E71281
Page 79 of 411
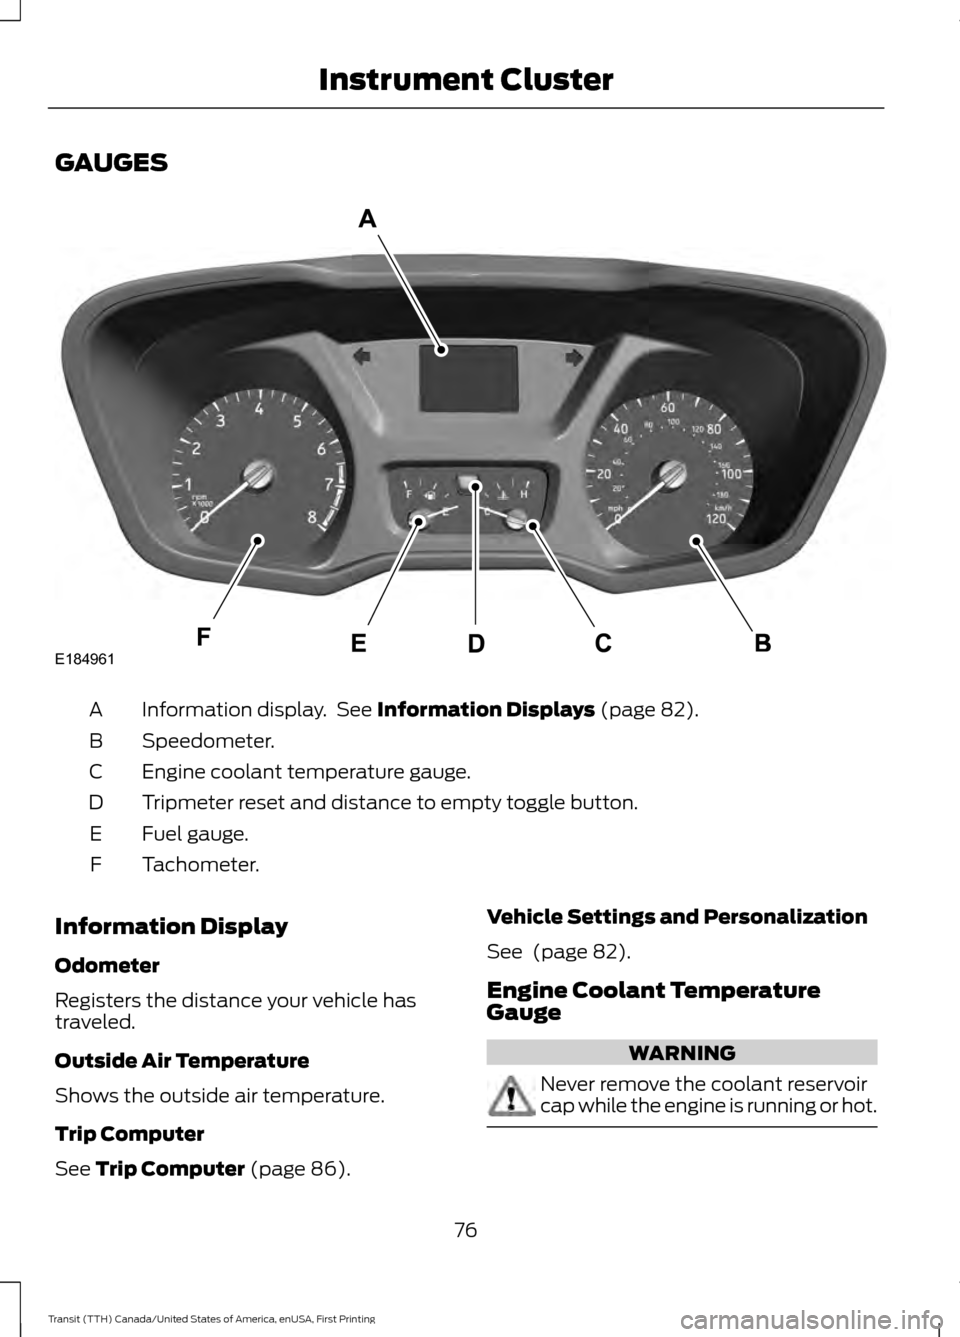
GAUGES
Information display. See Information Displays (page 82).
A
Speedometer.
B
Engine coolant temperature gauge.
C
Tripmeter reset and distance to empty toggle button.
D
Fuel gauge.
E
Tachometer.
F
Information Display
Odometer
Registers the distance your vehicle has
traveled.
Outside Air Temperature
Shows the outside air temperature.
Trip Computer
See
Trip Computer (page 86). Vehicle Settings and Personalization
See
(page 82).
Engine Coolant Temperature
Gauge WARNING
Never remove the coolant reservoir
cap while the engine is running or hot.
76
Transit (TTH) Canada/United States of America, enUSA, First Printing Instrument ClusterE184961
Page 80 of 411
At normal operating temperature, the
needle will remain in the center section.
If the needle enters the red section, the
engine is overheating. Stop your vehicle as
soon as it is safe to do so and switch the
engine off. Determine the cause once the
engine has cooled down. See Engine
Coolant Check (page 214).
Note: Do not restart the engine until the
cause of overheating has been determined
and resolved.
Tripmeter Reset and Distance to
Empty
(If Equipped)
Press the button to change between the
tripmeter and distance to empty
information. Press and hold the button to
reset the tripmeter.
Fuel Gauge
Note: The fuel gauge may vary slightly
when your vehicle is moving or on a gradient. Switch the ignition on. The fuel gauge will
indicate approximately how much fuel is
in the fuel tank. The arrow adjacent to the
fuel pump symbol indicates on which side
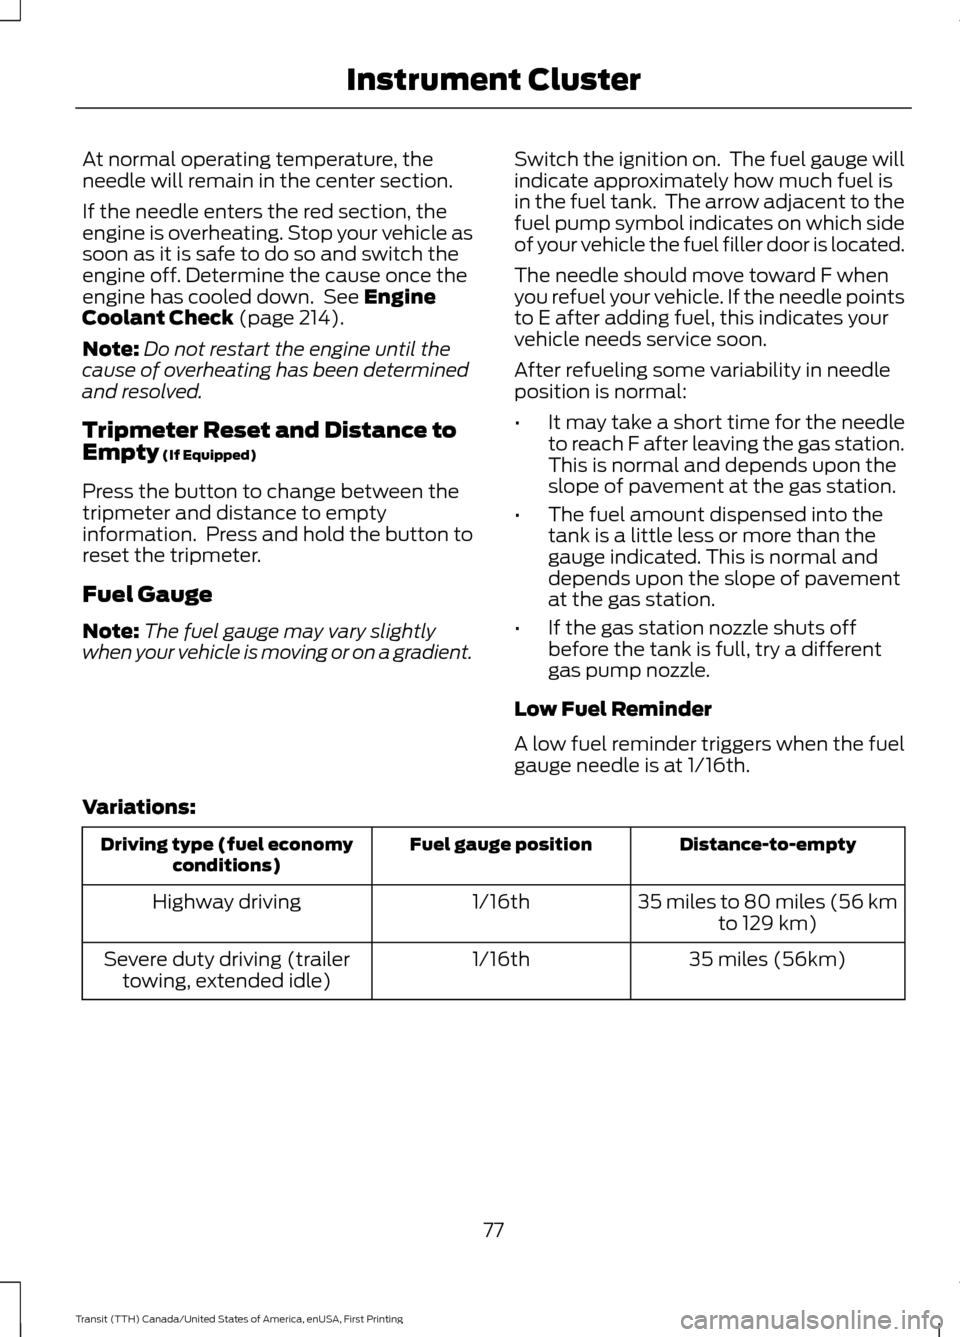
of your vehicle the fuel filler door is located.
The needle should move toward F when
you refuel your vehicle. If the needle points
to E after adding fuel, this indicates your
vehicle needs service soon.
After refueling some variability in needle
position is normal:
•
It may take a short time for the needle
to reach F after leaving the gas station.
This is normal and depends upon the
slope of pavement at the gas station.
• The fuel amount dispensed into the
tank is a little less or more than the
gauge indicated. This is normal and
depends upon the slope of pavement
at the gas station.
• If the gas station nozzle shuts off
before the tank is full, try a different
gas pump nozzle.
Low Fuel Reminder
A low fuel reminder triggers when the fuel
gauge needle is at 1/16th.
Variations: Distance-to-empty
Fuel gauge position
Driving type (fuel economy
conditions)
35 miles to 80 miles (56 kmto 129 km)
1/16th
Highway driving
35 miles (56km)
1/16th
Severe duty driving (trailer
towing, extended idle)
77
Transit (TTH) Canada/United States of America, enUSA, First Printing Instrument Cluster
Page 89 of 411
System Check
All active warnings will display first if
applicable. The system check menu may
appear different based upon equipment
options and current vehicle status. Use the
up and down arrow buttons to scroll
through the list. See Information
Messages (page 87).
TRIP COMPUTER
Resetting the Trip Computer
Press and hold
OK on the current screen
to reset the respective trip, distance, time
and average fuel consumption information.
All Values
Indicates all the respective trip, distance,
time and average fuel consumption
information.
Average Fuel Consumption
Indicates the average fuel consumption
since the function was last reset. Distance to Empty
Indicates the approximate distance your
vehicle will travel on the fuel remaining in
the tank. Changes in driving pattern may
cause the value to vary.
Outside Air Temperature
Shows the outside air temperature.
Trip Odometer
Registers the distance traveled of
individual journeys.
Trip Timer
Registers the elapsed time of individual
journeys or the total time since the function
was last reset.
Digital Speedometer
Provides a digital display of the current
vehicle speed.
PERSONALIZED SETTINGS
Measure Units
You can choose personalized settings
using the information display control on
the steering wheel.
See Information
Displays (page 82).
To swap between imperial and metric units, scroll to: Action and Description
Message
Press the
OK button.
Display
Choose your applicable setting. Press the
OK button.
Measure unit
Swapping between imperial and metric units will affect the
following displays:
•Average fuel consumption.
• Distance to empty.
• Odometer.
86
Transit (TTH) Canada/United States of America, enUSA, First Printing Information Displays
Page 109 of 411
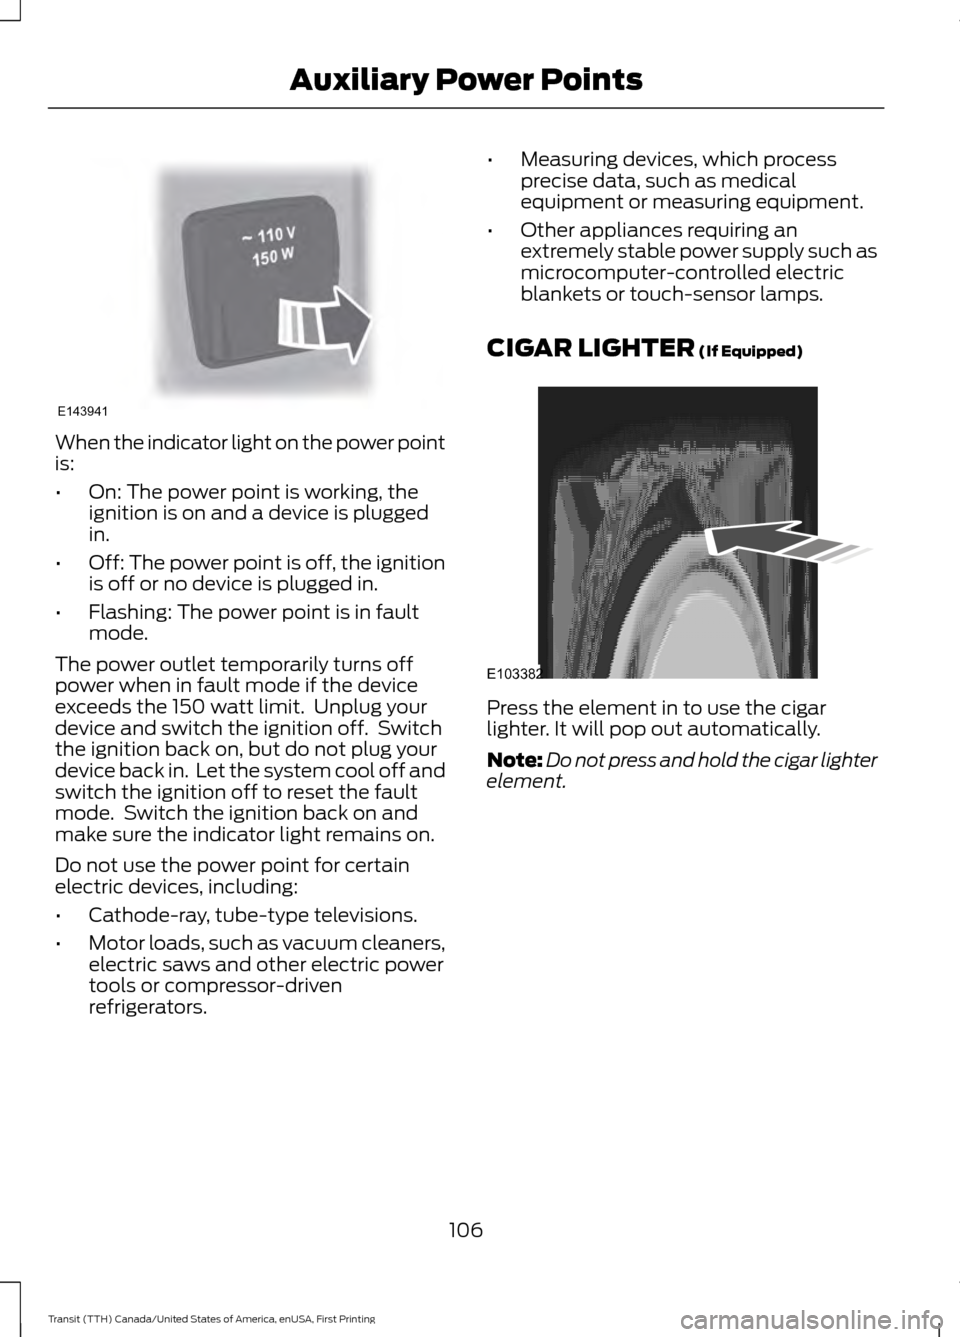
When the indicator light on the power point
is:
•
On: The power point is working, the
ignition is on and a device is plugged
in.
• Off: The power point is off, the ignition
is off or no device is plugged in.
• Flashing: The power point is in fault
mode.
The power outlet temporarily turns off
power when in fault mode if the device
exceeds the 150 watt limit. Unplug your
device and switch the ignition off. Switch
the ignition back on, but do not plug your
device back in. Let the system cool off and
switch the ignition off to reset the fault
mode. Switch the ignition back on and
make sure the indicator light remains on.
Do not use the power point for certain
electric devices, including:
• Cathode-ray, tube-type televisions.
• Motor loads, such as vacuum cleaners,
electric saws and other electric power
tools or compressor-driven
refrigerators. •
Measuring devices, which process
precise data, such as medical
equipment or measuring equipment.
• Other appliances requiring an
extremely stable power supply such as
microcomputer-controlled electric
blankets or touch-sensor lamps.
CIGAR LIGHTER (If Equipped) Press the element in to use the cigar
lighter. It will pop out automatically.
Note:
Do not press and hold the cigar lighter
element.
106
Transit (TTH) Canada/United States of America, enUSA, First Printing Auxiliary Power PointsE143941 E103382