warning FORD TRANSIT CONNECT 2015 2.G Owners Manual
[x] Cancel search | Manufacturer: FORD, Model Year: 2015, Model line: TRANSIT CONNECT, Model: FORD TRANSIT CONNECT 2015 2.GPages: 428, PDF Size: 6.27 MB
Page 193 of 428
WARNINGS
Only add oil when the engine is cold.
If the engine is hot, wait 10 minutes
for the engine to cool down.
Do not remove the filler cap when
the engine is running.
1. Remove the engine oil filler cap.
2. Add engine oil that meets Ford
specifications. See Capacities and
Specifications (page 246).
3. Wipe off any spilled oil.
4. Replace the engine oil filler cap. Turn it clockwise until you feel a strong
resistance.
Note: Do not add oil further than the
maximum mark. Oil levels above the
maximum mark may cause engine damage.
Note: Soak up any spillage with an
absorbent cloth immediately.
OIL CHANGE INDICATOR
RESET
Resetting the Oil Life Monitoring
System
Only reset the oil life monitoring system
after changing the engine oil and oil filter.
1. Switch the ignition on. Do not start the
engine. For vehicles with push-button
start, press and hold the start button
for two seconds without pressing the
brake pedal. Do not start the engine.
2. Press the accelerator and brake pedals
at the same time.
3. Keep the accelerator and brake pedals
fully pressed.
4. After three seconds, a message confirming that the reset is in progress
will be displayed. 5. After 25 seconds, a message
confirming that the reset is complete
will be displayed.
6. Release the accelerator and brake pedals.
7. The message confirming that the reset
is complete will no longer be displayed.
8. Switch the ignition off. For vehicles with
push-button start, press the start
button to switch the ignition off.
ENGINE COOLANT CHECK
Checking the Engine Coolant
When the engine is cold, check the
concentration and level of the engine
coolant at the intervals listed in the
scheduled maintenance information. See
Scheduled Maintenance
(page 399).
Note: Make sure that the level is between
the MIN and MAX marks on the coolant
reservoir.
Note: Coolant expands when it is hot. The
level may extend beyond the MAX mark.
Note: If the level is at the MIN mark, below
the MIN mark, or empty, add coolant
immediately. See
Adding Engine Coolant
in this chapter.
Maintain coolant concentration within
48% to 50%, which equates to a freeze
point between -30°F (-34°C) and -34°F
(-37°C).
Note: For best results, coolant
concentration should be tested with a
refractometer, for example Robinair®
coolant and battery refractometer 75240.
We do not recommend the use of
hydrometers or coolant test strips for
measuring coolant concentrations.
Note: Automotive fluids are not
interchangeable. Do not use engine coolant,
antifreeze or windshield washer fluid outside
of its specified function and vehicle location.
190
Transit Connect (CHC) Canada/United States of America, enUSA, First Printing Maintenance
Page 194 of 428
Adding Engine Coolant
WARNINGS
Do not add engine coolant when the
engine is hot. Steam and scalding
liquids released from a hot cooling
system can burn you badly. Also, spilling
coolant on hot engine parts can burn you. Do not put engine coolant in the
windshield washer fluid reservoir. If
sprayed on the windshield, engine
coolant could make it difficult to see
through the windshield. Do not add coolant further than the
MAX mark.
To reduce the risk of personal injury,
make sure the engine is cool before
unscrewing the coolant pressure
relief cap. The cooling system is under
pressure; steam and hot liquid can come
out forcefully when the cap is loosened
slightly. Note:
Do not use stop leak pellets, cooling
system sealants or additives as they can
cause damage to the engine cooling or
heating systems. The vehicle warranty does
not cover this damage.
Note: During normal vehicle operation, the
engine coolant may change color from
orange to pink or light red. As long as the
engine coolant is clear and uncontaminated,
this color change does not indicate that the
engine coolant has degraded or that you
drain the engine coolant, flush the system
or replace the engine coolant. •
Do not mix different colors or types of
coolant in your vehicle. Make sure the
correct coolant is used. Mixing of
engine coolants may harm the engine ’s
cooling system. The use of incorrect
coolant may harm engine and cooling
system components and may void the
warranty. Use prediluted engine
coolant meeting the Ford specification.
See Capacities and Specifications
(page 246).
• In case of emergency, you can add a
large amount of water without engine
coolant in order to reach a vehicle
service location. In this instance, you
must have the cooling system drained,
chemically cleaned with Motorcraft
Premium Cooling System Flush, and
refilled with engine coolant as soon as
possible. Water alone (without engine
coolant) can cause engine damage, for
example corrosion, overheating or
freezing.
• Do not use alcohol, methanol, brine or
any engine coolants mixed with alcohol
or methanol antifreeze. Alcohol and
other liquids can cause engine damage,
for example overheating or freezing.
• Do not add extra inhibitors or additives
to the coolant. These can be harmful
and compromise the corrosion
protection of the engine coolant.
Unscrew the cap slowly. Any pressure will
escape as you unscrew the cap.
Add prediluted engine coolant meeting the
Ford specification. See
Capacities and
Specifications (page 246).
Whenever you add coolant, check the
coolant level in the coolant reservoir the
next few times you drive the vehicle. If
necessary, add enough prediluted engine
coolant to bring the coolant level to the
correct level.
191
Transit Connect (CHC) Canada/United States of America, enUSA, First Printing Maintenance
Page 196 of 428
CHANGING THE 12V BATTERY
WARNINGS
Batteries normally produce explosive
gases which can cause personal
injury. Therefore, do not allow
flames, sparks or lighted substances to
come near the battery. When working near
the battery, always shield your face and
protect your eyes. Always provide proper
ventilation. When lifting a plastic-cased battery,
excessive pressure on the end walls
could cause acid to flow through the
vent caps, resulting in personal injury and
damage to the vehicle or battery. Lift the
battery with a battery carrier or with your
hands on opposite corners. Keep batteries out of reach of
children. Batteries contain sulfuric
acid. Avoid contact with skin, eyes or
clothing. Shield your eyes when working
near the battery to protect against possible
splashing of acid solution. In case of acid
contact with skin or eyes, flush
immediately with water for a minimum of
15 minutes and get prompt medical
attention. If acid is swallowed, call a
physician immediately. Your vehicle is equipped with a
Motorcraft® maintenance-free battery
which normally does not require additional
water during its life of service.
Note:
If your battery has a cover/shield,
make sure it is reinstalled after the battery
has been cleaned or replaced.
Note: See an authorized dealer for low
voltage battery access, testing, or
replacement. When a low voltage battery replacement
is necessary, see an authorized dealer to
replace the low voltage battery with a Ford
recommended replacement low voltage
battery that matches the electrical
requirements of the vehicle
To ensure proper operation of the battery
management system (BMS), do not allow
a technician to connect any electrical
device ground connection directly to the
low voltage battery negative post. A
connection at the low voltage battery
negative post can cause inaccurate
measurements of the battery condition
and potential incorrect system operation.
Note:
If a person adds electrical or
electronic accessories or components to the
vehicle, the accessories or components may
adversely affect the low voltage battery
performance and durability and may also
affect the performance of other electrical
systems in the vehicle.
For longer, trouble-free operation, keep the
top of the battery clean and dry. Also,
make certain the battery cables are always
tightly fastened to the battery terminals.
If you see any corrosion on the battery or
terminals, remove the cables from the
terminals and clean with a wire brush. You
can neutralize the acid with a solution of
baking soda and water.
When a battery replacement is required,
the battery should only be replaced with
a Ford recommended replacement battery
that matches the electrical requirements
of the vehicle.
Because your vehicle ’s engine is
electronically-controlled by a computer,
some engine control settings are
maintained by power from the low voltage
battery. Some engine computer settings,
like the idle trim and fuel trim strategy,
optimize the driveability and performance
of the engine. Some other computer
settings, like the clock and radio station
193
Transit Connect (CHC) Canada/United States of America, enUSA, First Printing Maintenance
Page 200 of 428
25 feet (7.6 meters)
C
Horizontal reference line
D
Vertical Aim Adjustment Procedure
1. Park your vehicle on level ground approximately 25 feet (7.6 meters)
from a wall or screen.
2. Measure the distance from the ground
to the center of the headlamp bulb and
mark an 8 foot (2.4 meter) long
horizontal reference line on the wall or
screen at this height.
Note: To see a clearer light pattern while
adjusting one headlamp, you may want to
block the light from the other headlamp.
3. Switch on the low beam headlamps and open the hood. 4. On the wall or screen you will observe
a flat zone of high intensity light
located at the top of the beam pattern.
If the top edge of the flat zone of high
intensity light is not on the horizontal
reference line, adjust the aim of the
headlamp beam. 5. Locate the vertical adjuster on each
headlamp. Use a suitable tool, for
example a screwdriver or hexagonal
socket, to turn the adjuster clockwise
or counterclockwise to adjust the
vertical aim of the headlamp. The
horizontal edge of the brighter light
should touch the horizontal reference
line.
6. Close the hood and switch off the lamps.
Horizontal Aim Adjustment
The horizontal aim of the headlamp beam
on your vehicle is not adjustable.
CHANGING A BULB WARNINGS
Switch the lamps and the ignition off.
Failure to do so could result in
serious personal injury.
197
Transit Connect (CHC) Canada/United States of America, enUSA, First Printing MaintenanceE142465 E164485
Page 201 of 428
WARNINGS
Bulbs can become hot, let the bulb
cool down before removing it. Failure
to do so could result in personal
injury. The following instructions describe how to
remove the bulbs. Fit replacements in the
reverse order unless otherwise stated.
You must fit bulbs of the correct
specification. See Bulb Specification
Chart (page 202).
Note: We recommended that you see an
authorized dealer to change the headlamp
bulbs if your vehicle is fitted with air
conditioning. Some bulbs are difficult to
access.
Headlamp
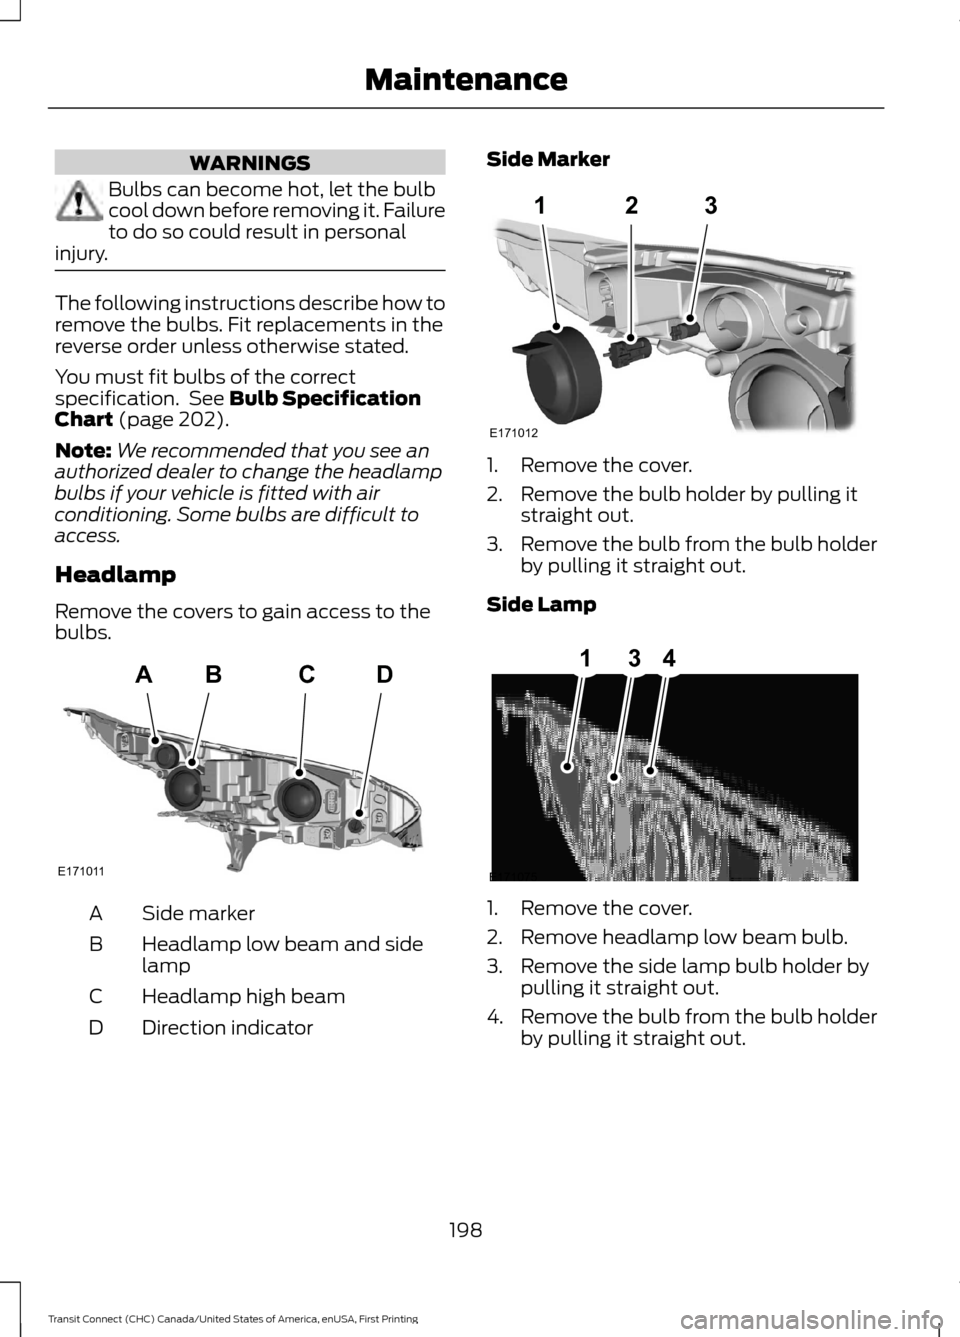
Remove the covers to gain access to the
bulbs. Side marker
A
Headlamp low beam and side
lamp
B
Headlamp high beam
C
Direction indicator
D Side Marker
1. Remove the cover.
2. Remove the bulb holder by pulling it
straight out.
3. Remove the bulb from the bulb holder
by pulling it straight out.
Side Lamp 1. Remove the cover.
2. Remove headlamp low beam bulb.
3. Remove the side lamp bulb holder by
pulling it straight out.
4. Remove the bulb from the bulb holder
by pulling it straight out.
198
Transit Connect (CHC) Canada/United States of America, enUSA, First Printing MaintenanceABCD
E171011 123
E171012 E171075
314
Page 207 of 428
CHANGING THE ENGINE AIR
FILTER
WARNING
To reduce the risk of vehicle damage
and/or personal burn injuries do not
start your engine with the air cleaner
removed and do not remove it while the
engine is running. When changing the air filter element, use
only the air filter element listed. See
Capacities and Specifications (page
246).
For EcoBoost equipped vehicles: When
servicing the air cleaner, it is important that
no foreign material enter the air induction
system. The engine and turbocharger are
susceptible to damage from even small
particles.
Change the air filter element at the proper
interval. See
Maintenance (page 185).
Note: Failure to use the correct air filter
element may result in severe engine
damage. The customer warranty may be
void for any damage to the engine if the
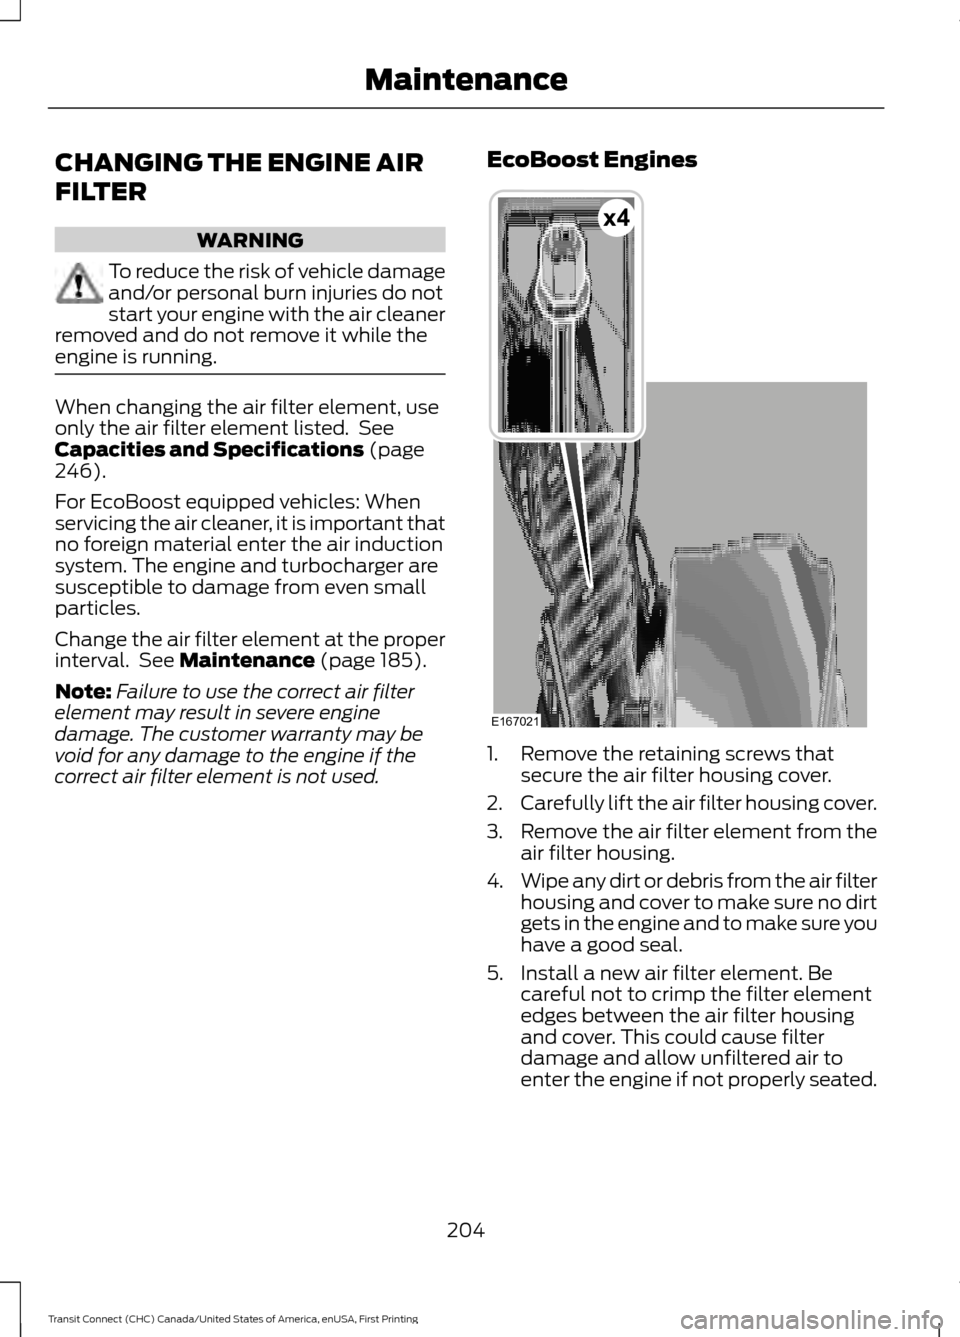
correct air filter element is not used. EcoBoost Engines
1. Remove the retaining screws that
secure the air filter housing cover.
2. Carefully lift the air filter housing cover.
3. Remove the air filter element from the
air filter housing.
4. Wipe any dirt or debris from the air filter
housing and cover to make sure no dirt
gets in the engine and to make sure you
have a good seal.
5. Install a new air filter element. Be careful not to crimp the filter element
edges between the air filter housing
and cover. This could cause filter
damage and allow unfiltered air to
enter the engine if not properly seated.
204
Transit Connect (CHC) Canada/United States of America, enUSA, First Printing MaintenanceE167021
x4
Page 208 of 428
6. Install the air filter housing cover.
7. Install the retaining screws to secure
the air filter housing cover to the air
filter housing.
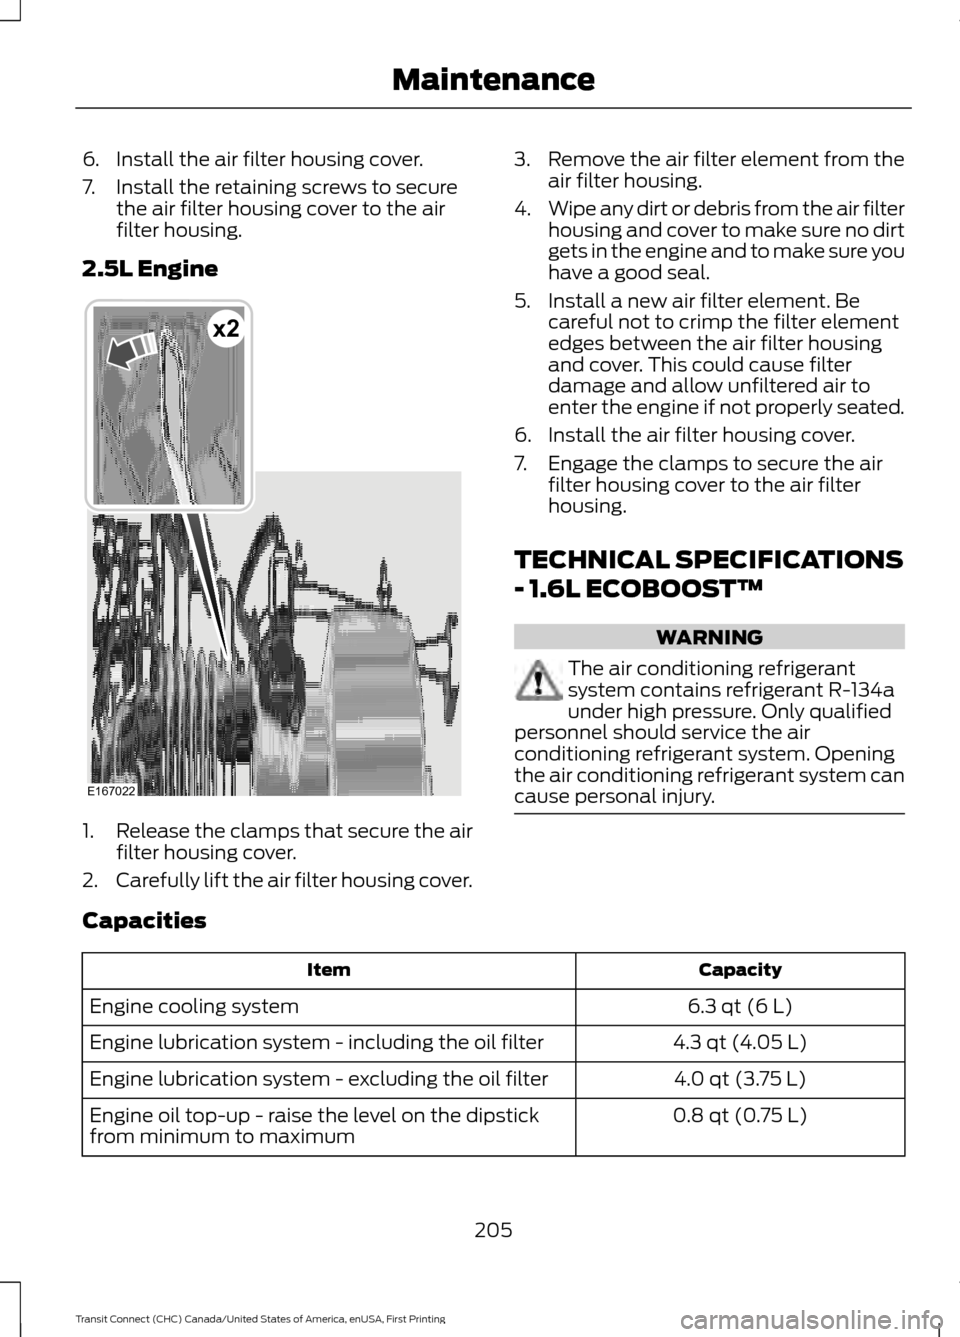
2.5L Engine 1.
Release the clamps that secure the air
filter housing cover.
2. Carefully lift the air filter housing cover. 3.
Remove the air filter element from the
air filter housing.
4. Wipe any dirt or debris from the air filter
housing and cover to make sure no dirt
gets in the engine and to make sure you
have a good seal.
5. Install a new air filter element. Be careful not to crimp the filter element
edges between the air filter housing
and cover. This could cause filter
damage and allow unfiltered air to
enter the engine if not properly seated.
6. Install the air filter housing cover.
7. Engage the clamps to secure the air filter housing cover to the air filter
housing.
TECHNICAL SPECIFICATIONS
- 1.6L ECOBOOST™ WARNING
The air conditioning refrigerant
system contains refrigerant R-134a
under high pressure. Only qualified
personnel should service the air
conditioning refrigerant system. Opening
the air conditioning refrigerant system can
cause personal injury. Capacities
Capacity
Item
6.3 qt (6 L)
Engine cooling system
4.3 qt (4.05 L)
Engine lubrication system - including the oil filter
4.0 qt (3.75 L)
Engine lubrication system - excluding the oil filter
0.8 qt (0.75 L)
Engine oil top-up - raise the level on the dipstick
from minimum to maximum
205
Transit Connect (CHC) Canada/United States of America, enUSA, First Printing MaintenanceE167022
x2
Page 210 of 428
Specification
Name
-
Penetrating and Lock Lubricant
XL-1
If you use oil and fluids that do not meet
the defined specification and viscosity
grade, this may lead to:
• Component damage which is not
covered by the vehicle warranty.
• Longer engine cranking periods.
• Increased emission levels.
• Reduced engine performance.
• Reduced fuel economy.
• Degraded brake performance.
Use of synthetic or synthetic blend motor
oil is not mandatory. Only use fluid that
meets Ford specifications. Motor oils of
the recommended viscosity grade that
meet API SN requirements and display the
API Certification Mark for gasoline engines
are also acceptable. Do not use oil labeled
with API SN service category unless the
label also displays the API certification
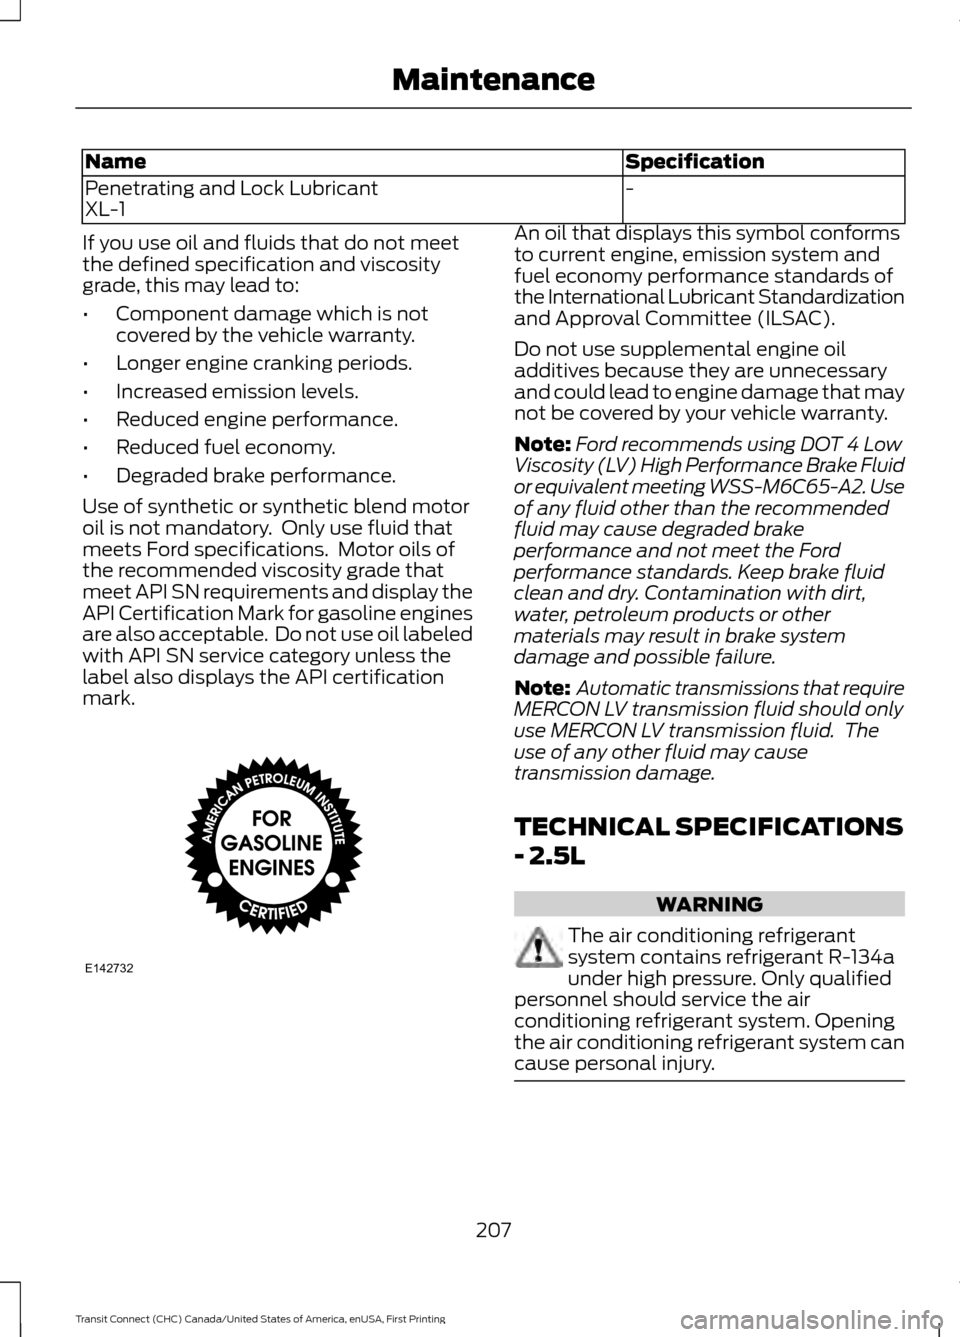
mark. An oil that displays this symbol conforms
to current engine, emission system and
fuel economy performance standards of
the International Lubricant Standardization
and Approval Committee (ILSAC).
Do not use supplemental engine oil
additives because they are unnecessary
and could lead to engine damage that may
not be covered by your vehicle warranty.
Note:
Ford recommends using DOT 4 Low
Viscosity (LV) High Performance Brake Fluid
or equivalent meeting WSS-M6C65-A2. Use
of any fluid other than the recommended
fluid may cause degraded brake
performance and not meet the Ford
performance standards. Keep brake fluid
clean and dry. Contamination with dirt,
water, petroleum products or other
materials may result in brake system
damage and possible failure.
Note: Automatic transmissions that require
MERCON LV transmission fluid should only
use MERCON LV transmission fluid. The
use of any other fluid may cause
transmission damage.
TECHNICAL SPECIFICATIONS
- 2.5L WARNING
The air conditioning refrigerant
system contains refrigerant R-134a
under high pressure. Only qualified
personnel should service the air
conditioning refrigerant system. Opening
the air conditioning refrigerant system can
cause personal injury. 207
Transit Connect (CHC) Canada/United States of America, enUSA, First Printing MaintenanceE142732
Page 216 of 428
•
Never wash or rinse any ignition coil,
spark plug wire or spark plug well, or
the area in and around these locations.
• Cover the battery, power distribution
box, and air filter assembly to prevent
water damage when cleaning the
engine.
CLEANING THE WINDOWS AND
WIPER BLADES
Car wash chemicals and environmental
fallout can result in windshield and wiper
blade contamination. Dirty windshield and
wipers will result in poor windshield wiper
operation. Keep the windshield and wiper
blades clean to maintain windshield wiper
performance.
To clean the windshield and wiper blades:
• Clean the windshield with a
non-abrasive glass cleaner.
• For windshields contaminated with
tree sap, chemicals, wax or bugs, clean
the entire windshield using steel wool
(no greater than 0000 grade) in a
circular motion and rinse with water.
• Clean the wiper blades with isopropyl
rubbing alcohol or windshield washer
concentrate.
Note: Do not use razor blades or other
sharp objects to clean or remove decals
from the inside of the heated rear window.
The vehicle warranty does not cover
damage caused to the heated rear window
grid lines.
CLEANING THE INTERIOR WARNINGS
Do not use cleaning solvents, bleach
or dye on the vehicle
’s safety belts,
as these actions may weaken the
belt webbing. WARNINGS
On vehicles equipped with
seat-mounted airbags, do not use
chemical solvents or strong
detergents. Such products could
contaminate the side airbag system and
affect performance of the side airbag in a
collision. For fabric, carpets, cloth seats, safety belts
and seats equipped with side airbags:
•
Remove dust and loose dirt with a
vacuum cleaner.
• Remove light stains and soil with
Motorcraft Professional Strength
Carpet & Upholstery Cleaner.
• If grease or tar is present on the
material, spot-clean the area first with
Motorcraft Spot and Stain Remover. In
Canada, use Motorcraft Multi-Purpose
Cleaner.
• If a ring forms on the fabric after spot
cleaning, clean the entire area
immediately (but do not oversaturate)
or the ring will set.
• Do not use household cleaning
products or glass cleaners, which can
stain and discolor the fabric and affect
the flame retardant abilities of the seat
materials.
CLEANING THE INSTRUMENT
PANEL AND INSTRUMENT
CLUSTER LENS WARNING
Do not use chemical solvents or
strong detergents when cleaning the
steering wheel or instrument panel
to avoid contamination of the airbag
system. 213
Transit Connect (CHC) Canada/United States of America, enUSA, First Printing Vehicle Care
Page 221 of 428
GENERAL INFORMATION
Notice to Utility Vehicle, Van and
Truck Owners
WARNINGS
Utility vehicles have a significantly
higher rollover rate than other types
of vehicles. To reduce the risk of
serious injury or death from a rollover or
other crash you must avoid sharp turns and
abrupt maneuvers, drive at safe speeds for
the conditions, keep tires properly inflated,
never overload or improperly load your
vehicle, and make sure every passenger is
properly restrained. In a rollover crash, an unbelted
person is significantly more likely to
die than a person wearing a seat belt.
All occupants must wear seat belts.
Children and infants must use appropriate
restraints to minimize the risk of injury or
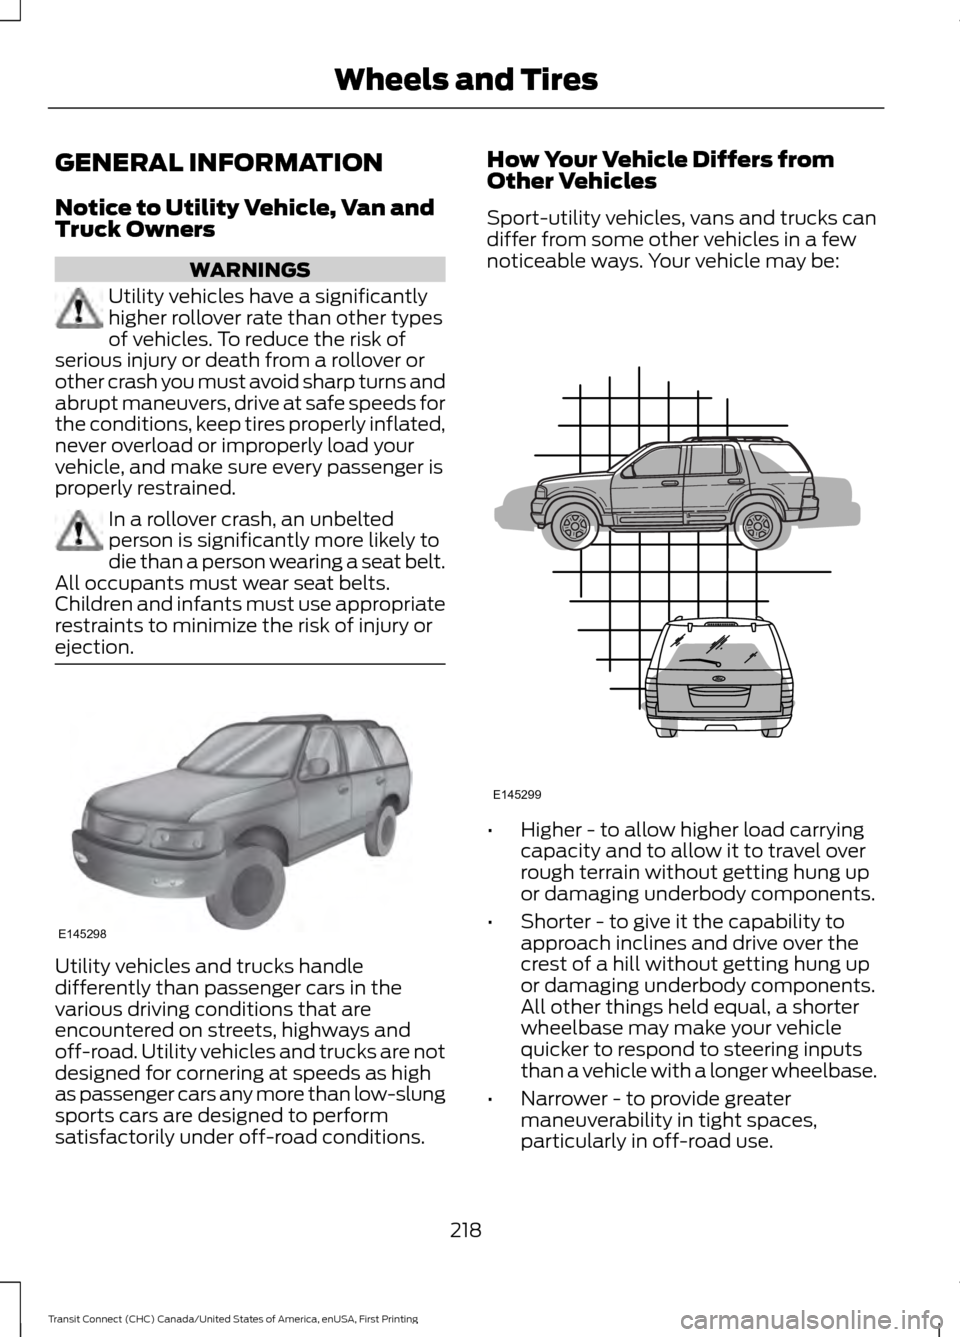
ejection. Utility vehicles and trucks handle
differently than passenger cars in the
various driving conditions that are
encountered on streets, highways and
off-road. Utility vehicles and trucks are not
designed for cornering at speeds as high
as passenger cars any more than low-slung
sports cars are designed to perform
satisfactorily under off-road conditions. How Your Vehicle Differs from
Other Vehicles
Sport-utility vehicles, vans and trucks can
differ from some other vehicles in a few
noticeable ways. Your vehicle may be:
•
Higher - to allow higher load carrying
capacity and to allow it to travel over
rough terrain without getting hung up
or damaging underbody components.
• Shorter - to give it the capability to
approach inclines and drive over the
crest of a hill without getting hung up
or damaging underbody components.
All other things held equal, a shorter
wheelbase may make your vehicle
quicker to respond to steering inputs
than a vehicle with a longer wheelbase.
• Narrower - to provide greater
maneuverability in tight spaces,
particularly in off-road use.
218
Transit Connect (CHC) Canada/United States of America, enUSA, First Printing Wheels and TiresE145298 E145299