clock FORD TRANSIT CONNECT 2015 2.G User Guide
[x] Cancel search | Manufacturer: FORD, Model Year: 2015, Model line: TRANSIT CONNECT, Model: FORD TRANSIT CONNECT 2015 2.GPages: 428, PDF Size: 6.27 MB
Page 202 of 428
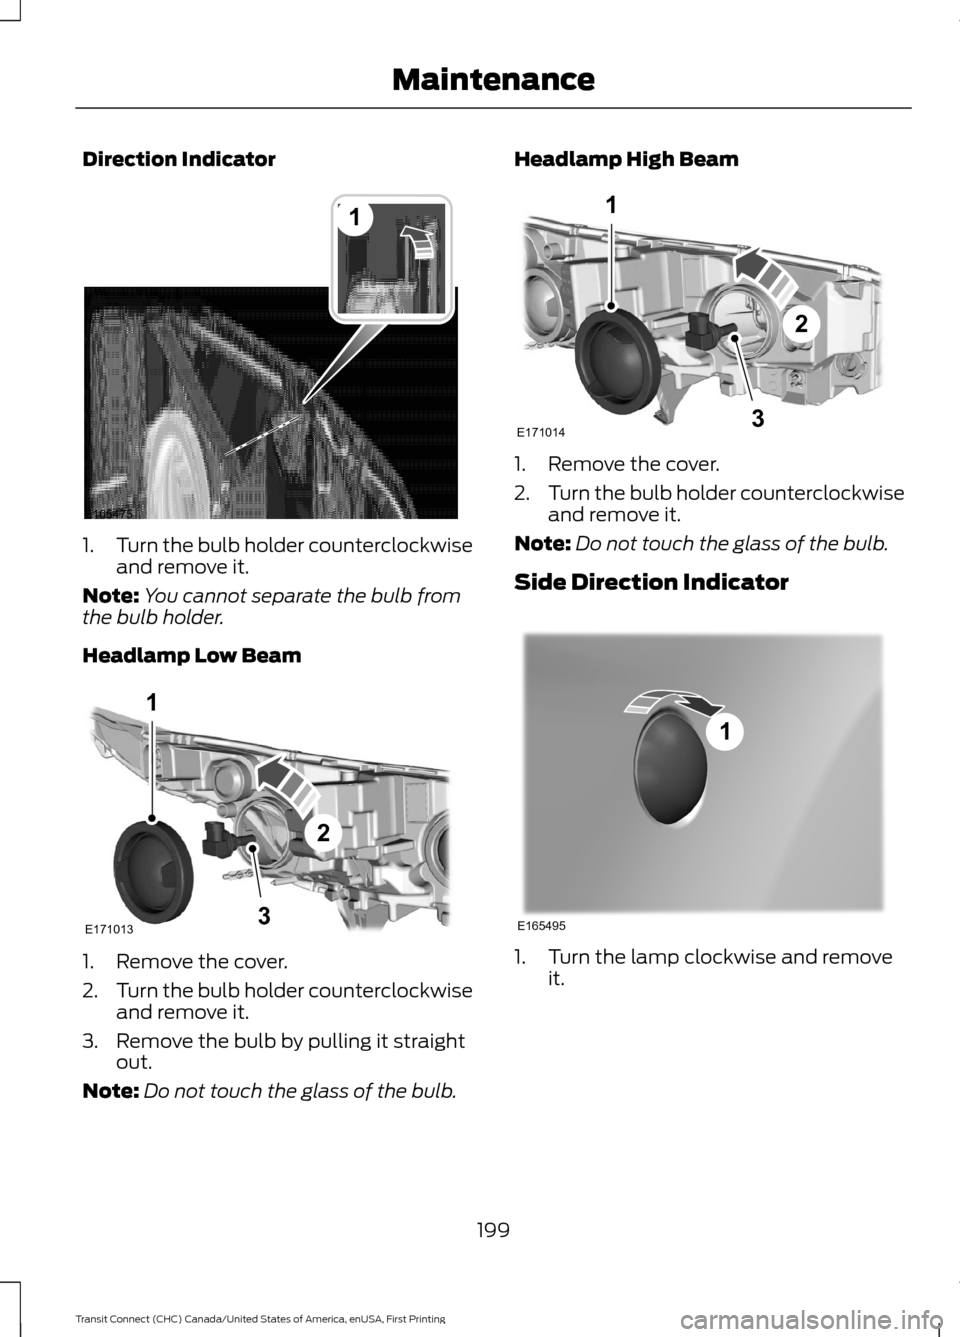
Direction Indicator
1.
Turn the bulb holder counterclockwise
and remove it.
Note: You cannot separate the bulb from
the bulb holder.
Headlamp Low Beam 1. Remove the cover.
2.
Turn the bulb holder counterclockwise
and remove it.
3. Remove the bulb by pulling it straight out.
Note: Do not touch the glass of the bulb. Headlamp High Beam
1. Remove the cover.
2.
Turn the bulb holder counterclockwise
and remove it.
Note: Do not touch the glass of the bulb.
Side Direction Indicator 1. Turn the lamp clockwise and remove
it.
199
Transit Connect (CHC) Canada/United States of America, enUSA, First Printing Maintenance1
E165475 1
3
2
E171013 1
3
2
E171014 1
E165495
Page 203 of 428
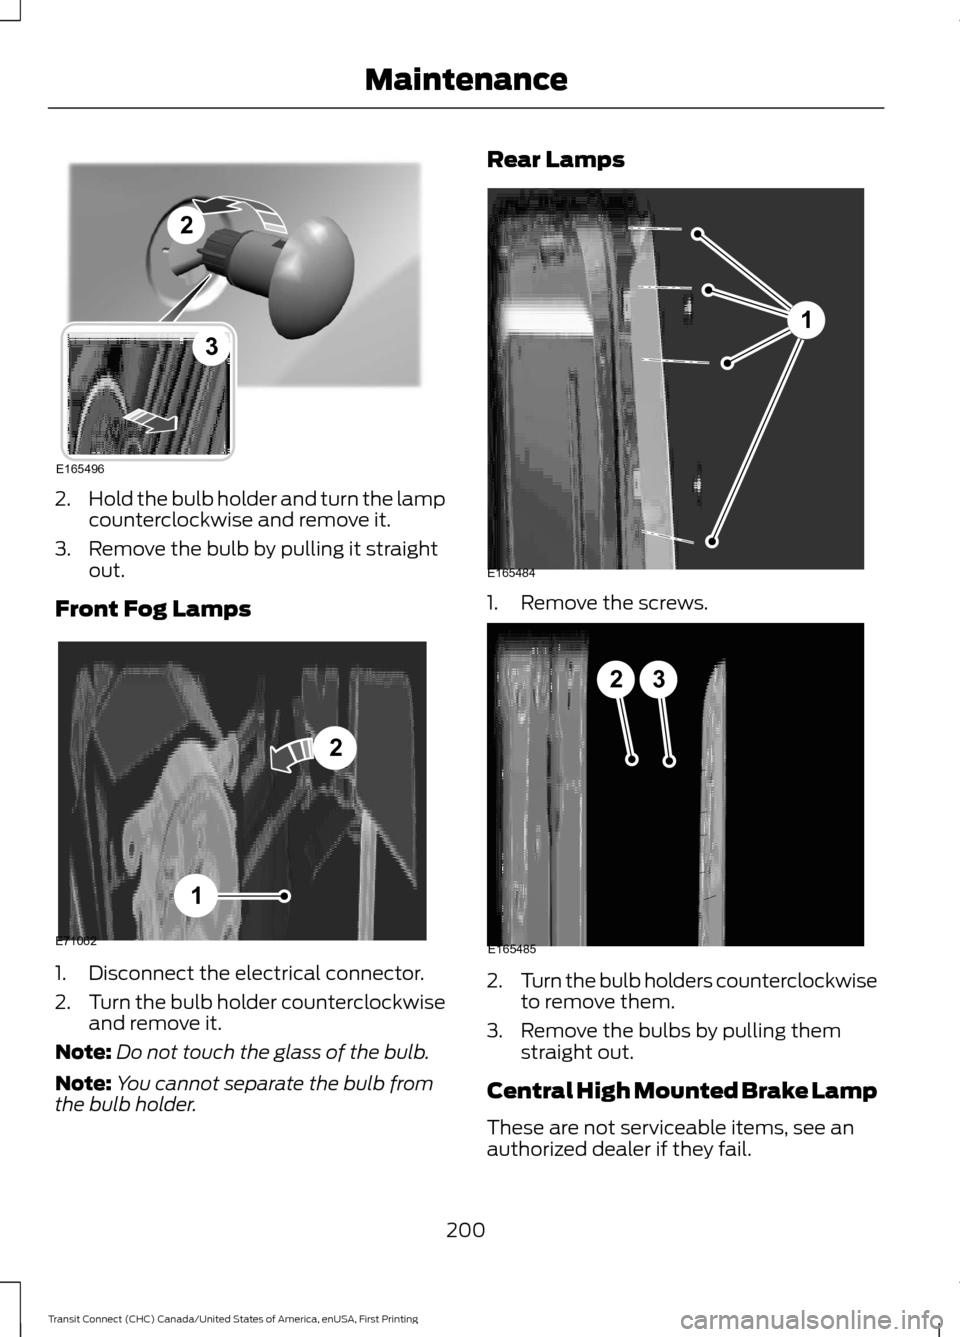
2.
Hold the bulb holder and turn the lamp
counterclockwise and remove it.
3. Remove the bulb by pulling it straight out.
Front Fog Lamps 1. Disconnect the electrical connector.
2.
Turn the bulb holder counterclockwise
and remove it.
Note: Do not touch the glass of the bulb.
Note: You cannot separate the bulb from
the bulb holder. Rear Lamps
1. Remove the screws.
2.
Turn the bulb holders counterclockwise
to remove them.
3. Remove the bulbs by pulling them straight out.
Central High Mounted Brake Lamp
These are not serviceable items, see an
authorized dealer if they fail.
200
Transit Connect (CHC) Canada/United States of America, enUSA, First Printing MaintenanceE165496
2
3 E71062
1
2 1
E165484 23
E165485
Page 204 of 428
License Plate Lamp
These are not serviceable items, see an
authorized dealer if they fail.
Interior Lamps
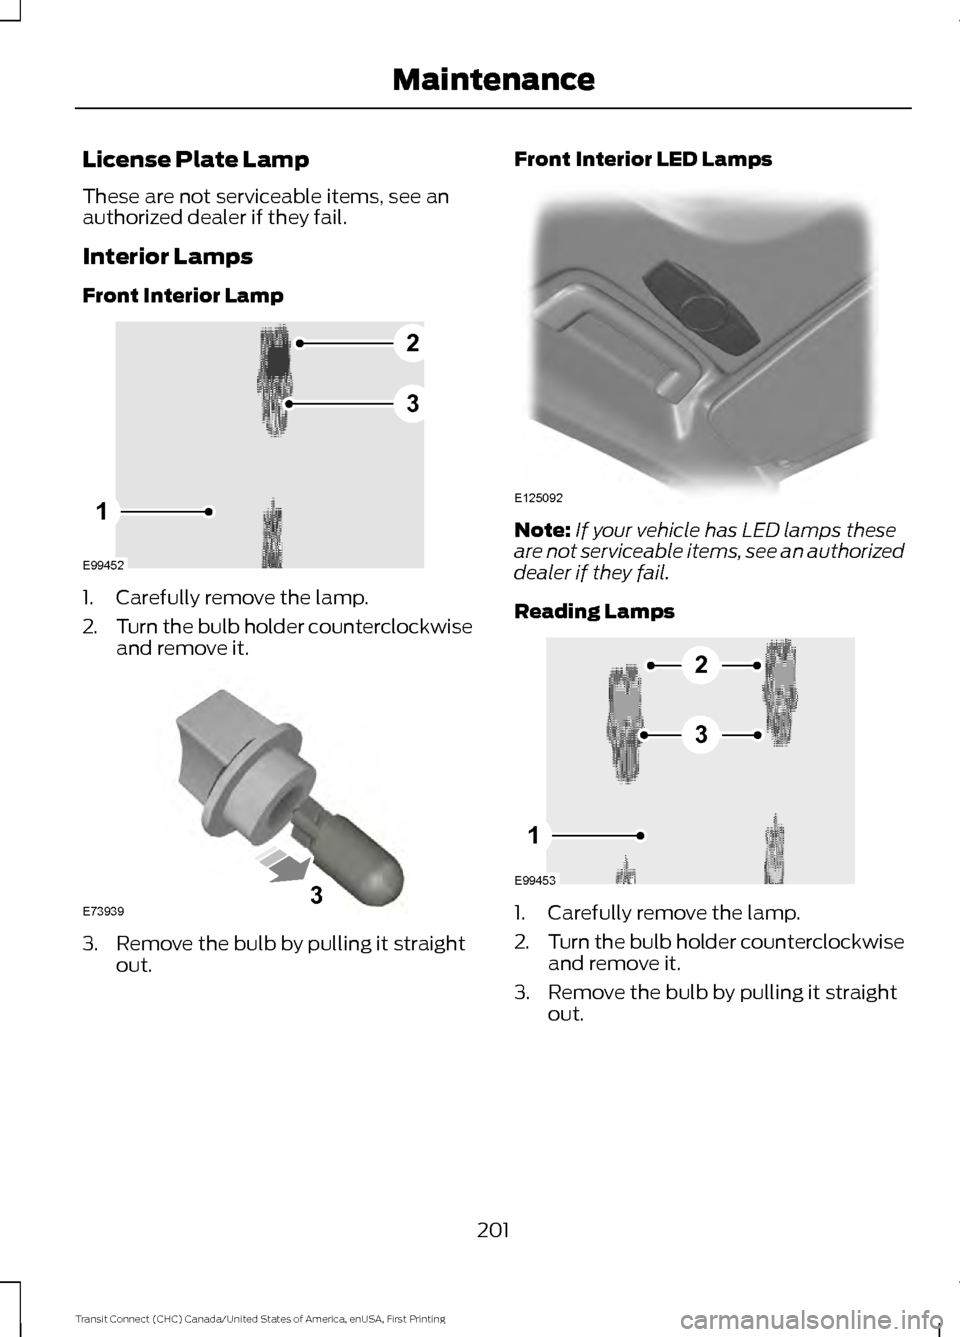
Front Interior Lamp
1. Carefully remove the lamp.
2.
Turn the bulb holder counterclockwise
and remove it. 3. Remove the bulb by pulling it straight
out. Front Interior LED Lamps
Note:
If your vehicle has LED lamps these
are not serviceable items, see an authorized
dealer if they fail.
Reading Lamps 1. Carefully remove the lamp.
2.
Turn the bulb holder counterclockwise
and remove it.
3. Remove the bulb by pulling it straight out.
201
Transit Connect (CHC) Canada/United States of America, enUSA, First Printing MaintenanceE99452
2
3
1 E739393 E125092 E99453
2
3
1
Page 242 of 428
Carrying Out the System Reset
Procedure
Read the entire procedure before carrying
out a system reset.
1. Drive your vehicle above 20 mph (32
km/h) for at least two minutes and
then park in a safe location where you
can easily get to all four tires and have
access to a tire inflation pump.
2. Switch the ignition off.
3. Switch the ignition on with the engine off.
4. Turn the hazard flashers on then off three times, this must be completed
within 10 seconds. If the reset mode
has been entered successfully, the horn
will chirp once and the system indicator
will flash. If this does not occur, repeat
the procedure from step 2. If after
repeated attempts to enter the reset
mode, the horn does not chirp and the
system indicator does not flash, have
your vehicle checked by an authorized
dealer as soon as possible.
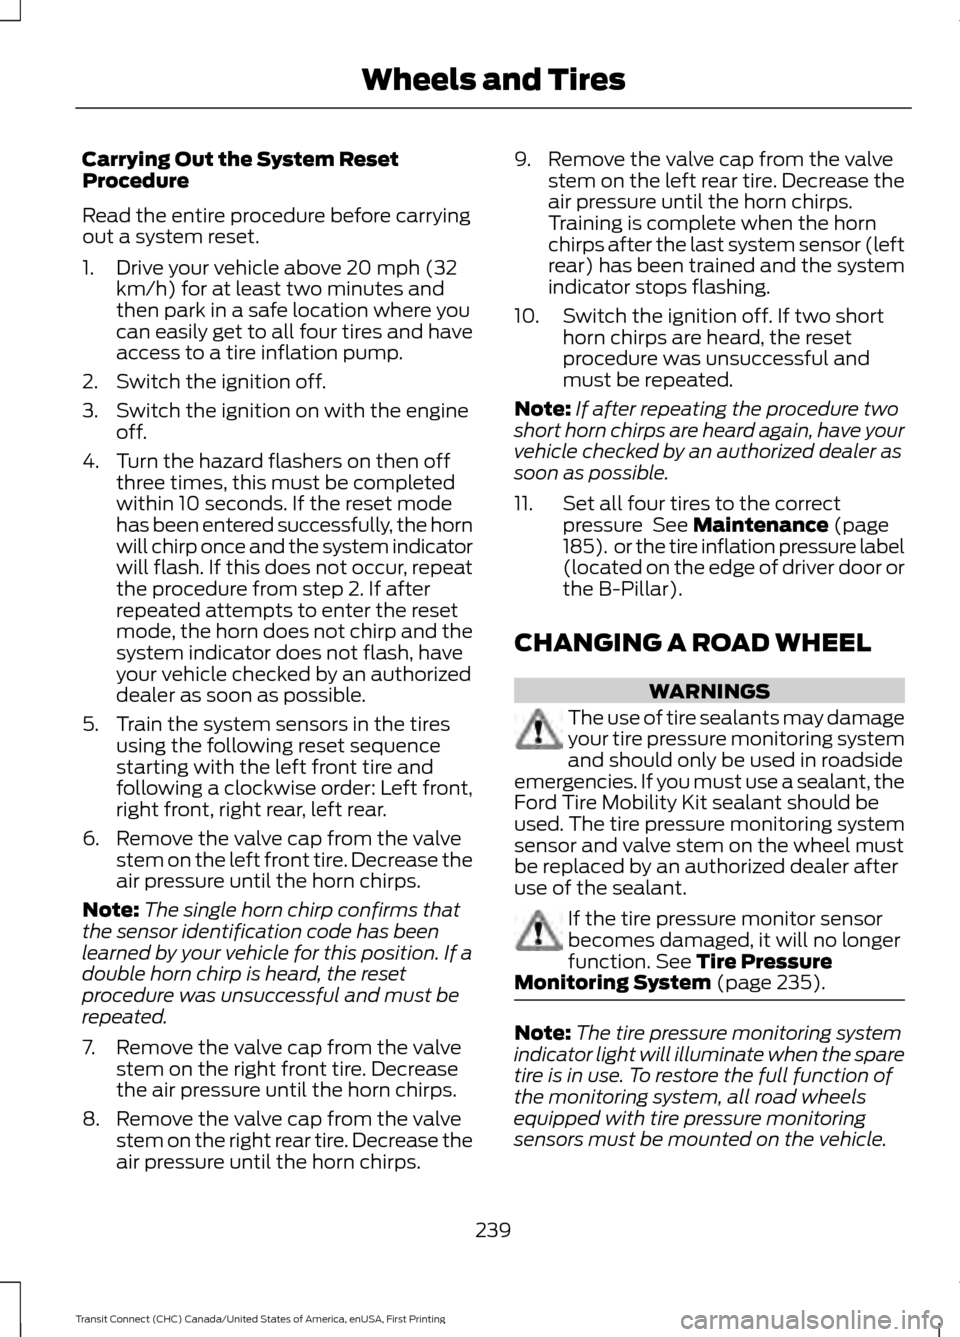
5. Train the system sensors in the tires using the following reset sequence
starting with the left front tire and
following a clockwise order: Left front,
right front, right rear, left rear.
6. Remove the valve cap from the valve stem on the left front tire. Decrease the
air pressure until the horn chirps.
Note: The single horn chirp confirms that
the sensor identification code has been
learned by your vehicle for this position. If a
double horn chirp is heard, the reset
procedure was unsuccessful and must be
repeated.
7. Remove the valve cap from the valve stem on the right front tire. Decrease
the air pressure until the horn chirps.
8. Remove the valve cap from the valve stem on the right rear tire. Decrease the
air pressure until the horn chirps. 9. Remove the valve cap from the valve
stem on the left rear tire. Decrease the
air pressure until the horn chirps.
Training is complete when the horn
chirps after the last system sensor (left
rear) has been trained and the system
indicator stops flashing.
10. Switch the ignition off. If two short horn chirps are heard, the reset
procedure was unsuccessful and
must be repeated.
Note: If after repeating the procedure two
short horn chirps are heard again, have your
vehicle checked by an authorized dealer as
soon as possible.
11. Set all four tires to the correct pressure See Maintenance (page
185). or the tire inflation pressure label
(located on the edge of driver door or
the B-Pillar).
CHANGING A ROAD WHEEL WARNINGS
The use of tire sealants may damage
your tire pressure monitoring system
and should only be used in roadside
emergencies. If you must use a sealant, the
Ford Tire Mobility Kit sealant should be
used. The tire pressure monitoring system
sensor and valve stem on the wheel must
be replaced by an authorized dealer after
use of the sealant. If the tire pressure monitor sensor
becomes damaged, it will no longer
function.
See Tire Pressure
Monitoring System (page 235). Note:
The tire pressure monitoring system
indicator light will illuminate when the spare
tire is in use. To restore the full function of
the monitoring system, all road wheels
equipped with tire pressure monitoring
sensors must be mounted on the vehicle.
239
Transit Connect (CHC) Canada/United States of America, enUSA, First Printing Wheels and Tires
Page 245 of 428
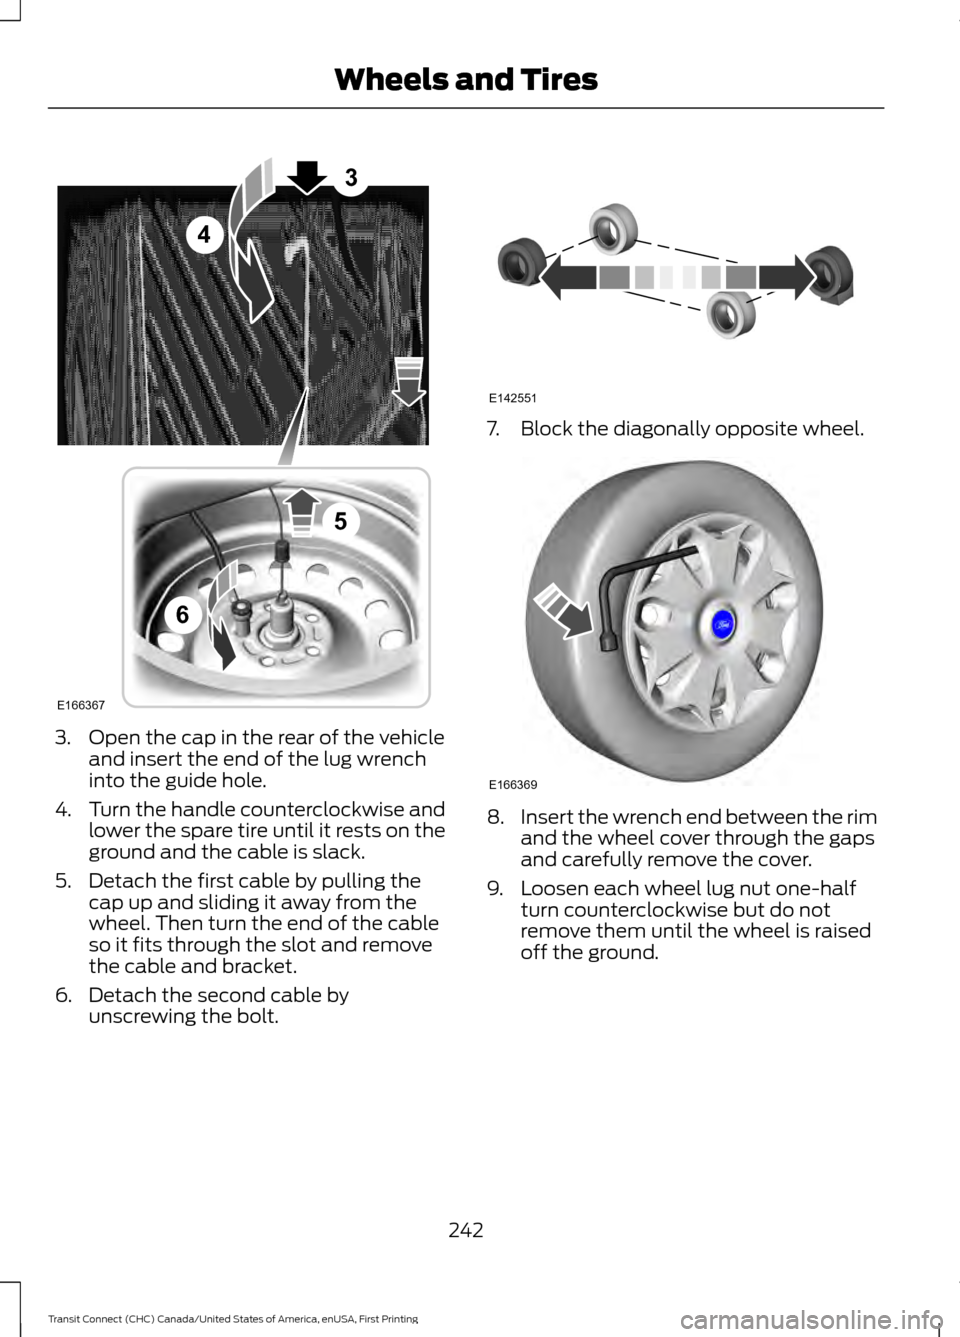
3. Open the cap in the rear of the vehicle
and insert the end of the lug wrench
into the guide hole.
4. Turn the handle counterclockwise and
lower the spare tire until it rests on the
ground and the cable is slack.
5. Detach the first cable by pulling the cap up and sliding it away from the
wheel. Then turn the end of the cable
so it fits through the slot and remove
the cable and bracket.
6. Detach the second cable by unscrewing the bolt. 7. Block the diagonally opposite wheel.
8.
Insert the wrench end between the rim
and the wheel cover through the gaps
and carefully remove the cover.
9. Loosen each wheel lug nut one-half turn counterclockwise but do not
remove them until the wheel is raised
off the ground.
242
Transit Connect (CHC) Canada/United States of America, enUSA, First Printing Wheels and TiresE166367
3
4
5
6 E142551 E166369
Page 246 of 428
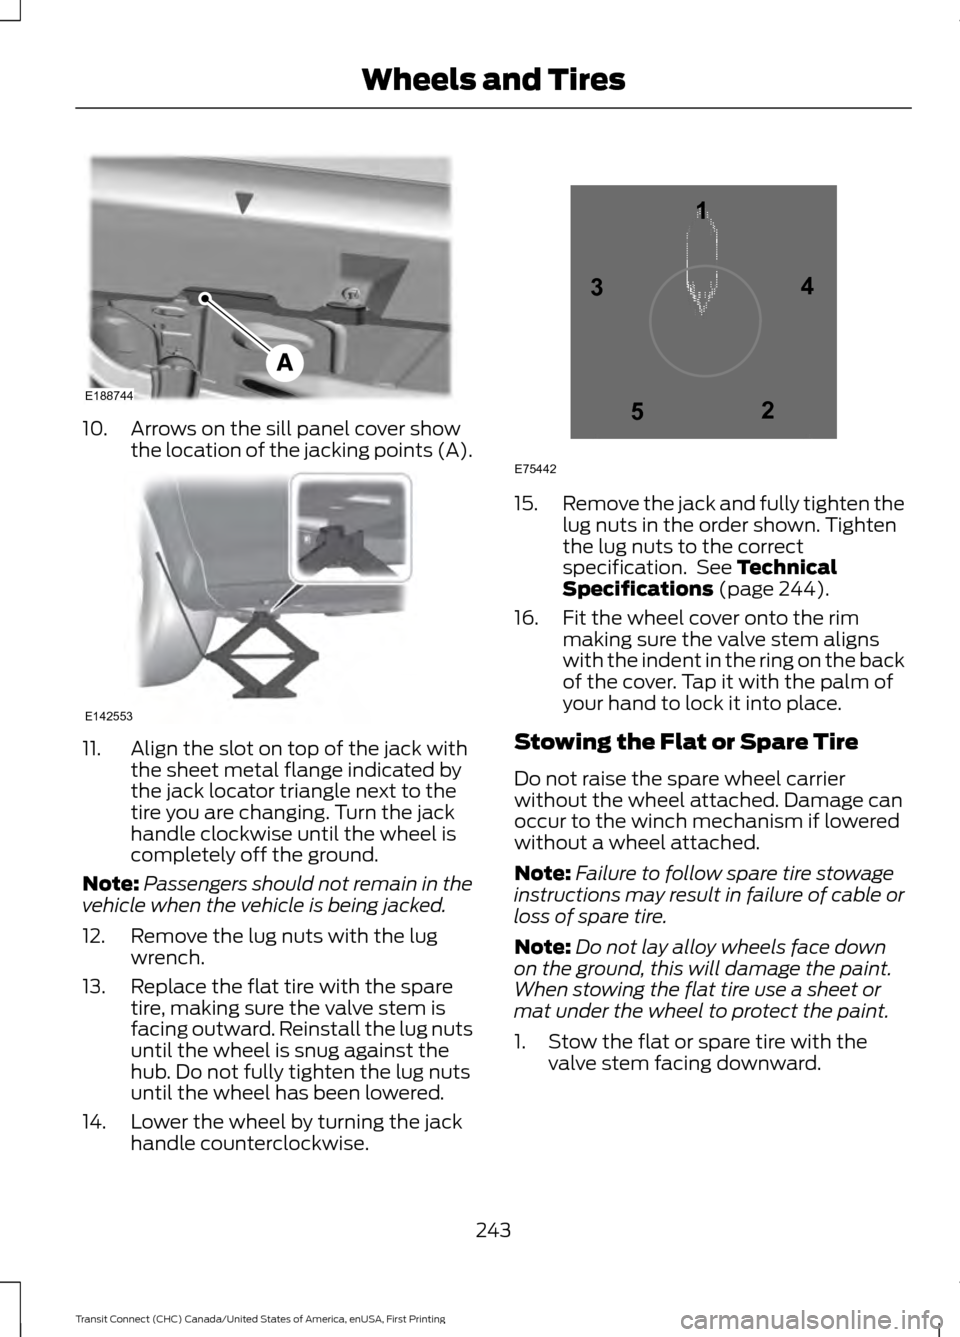
10. Arrows on the sill panel cover show
the location of the jacking points (A). 11. Align the slot on top of the jack with
the sheet metal flange indicated by
the jack locator triangle next to the
tire you are changing. Turn the jack
handle clockwise until the wheel is
completely off the ground.
Note: Passengers should not remain in the
vehicle when the vehicle is being jacked.
12. Remove the lug nuts with the lug wrench.
13. Replace the flat tire with the spare tire, making sure the valve stem is
facing outward. Reinstall the lug nuts
until the wheel is snug against the
hub. Do not fully tighten the lug nuts
until the wheel has been lowered.
14. Lower the wheel by turning the jack handle counterclockwise. 15.
Remove the jack and fully tighten the
lug nuts in the order shown. Tighten
the lug nuts to the correct
specification. See Technical
Specifications (page 244).
16. Fit the wheel cover onto the rim making sure the valve stem aligns
with the indent in the ring on the back
of the cover. Tap it with the palm of
your hand to lock it into place.
Stowing the Flat or Spare Tire
Do not raise the spare wheel carrier
without the wheel attached. Damage can
occur to the winch mechanism if lowered
without a wheel attached.
Note: Failure to follow spare tire stowage
instructions may result in failure of cable or
loss of spare tire.
Note: Do not lay alloy wheels face down
on the ground, this will damage the paint.
When stowing the flat tire use a sheet or
mat under the wheel to protect the paint.
1. Stow the flat or spare tire with the valve stem facing downward.
243
Transit Connect (CHC) Canada/United States of America, enUSA, First Printing Wheels and TiresE188744 E142553 12
3
4
5
E75442
Page 247 of 428
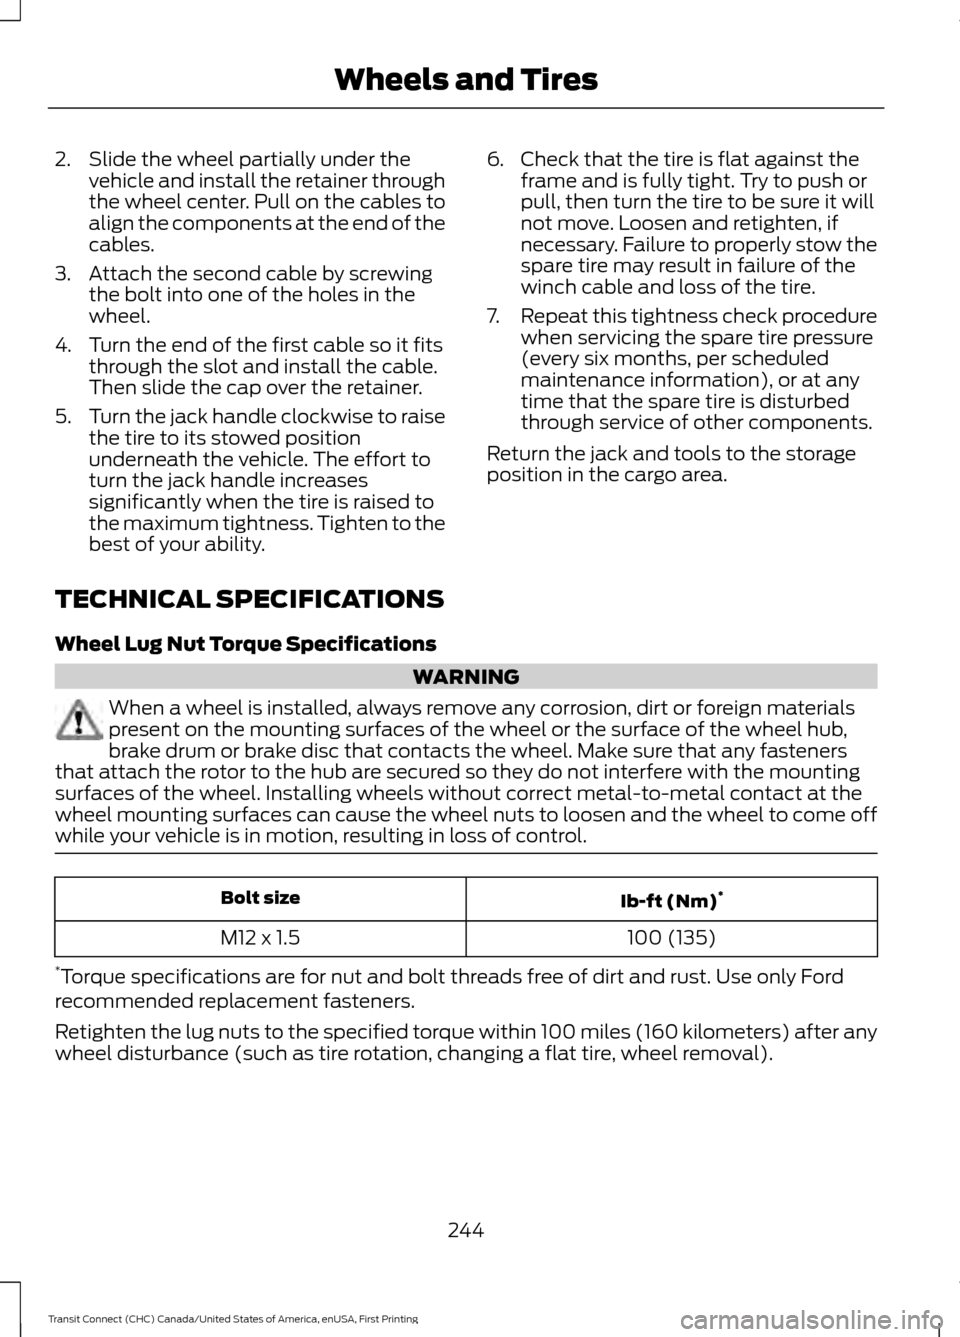
2. Slide the wheel partially under the
vehicle and install the retainer through
the wheel center. Pull on the cables to
align the components at the end of the
cables.
3. Attach the second cable by screwing the bolt into one of the holes in the
wheel.
4. Turn the end of the first cable so it fits through the slot and install the cable.
Then slide the cap over the retainer.
5. Turn the jack handle clockwise to raise
the tire to its stowed position
underneath the vehicle. The effort to
turn the jack handle increases
significantly when the tire is raised to
the maximum tightness. Tighten to the
best of your ability. 6. Check that the tire is flat against the
frame and is fully tight. Try to push or
pull, then turn the tire to be sure it will
not move. Loosen and retighten, if
necessary. Failure to properly stow the
spare tire may result in failure of the
winch cable and loss of the tire.
7. Repeat this tightness check procedure
when servicing the spare tire pressure
(every six months, per scheduled
maintenance information), or at any
time that the spare tire is disturbed
through service of other components.
Return the jack and tools to the storage
position in the cargo area.
TECHNICAL SPECIFICATIONS
Wheel Lug Nut Torque Specifications WARNING
When a wheel is installed, always remove any corrosion, dirt or foreign materials
present on the mounting surfaces of the wheel or the surface of the wheel hub,
brake drum or brake disc that contacts the wheel. Make sure that any fasteners
that attach the rotor to the hub are secured so they do not interfere with the mounting
surfaces of the wheel. Installing wheels without correct metal-to-metal contact at the
wheel mounting surfaces can cause the wheel nuts to loosen and the wheel to come off
while your vehicle is in motion, resulting in loss of control. Ib-ft (Nm)
*
Bolt size
100 (135)
M12 x 1.5
* Torque specifications are for nut and bolt threads free of dirt and rust. Use only Ford
recommended replacement fasteners.
Retighten the lug nuts to the specified torque within 100 miles (160 kilometers) after any
wheel disturbance (such as tire rotation, changing a flat tire, wheel removal).
244
Transit Connect (CHC) Canada/United States of America, enUSA, First Printing Wheels and Tires
Page 256 of 428
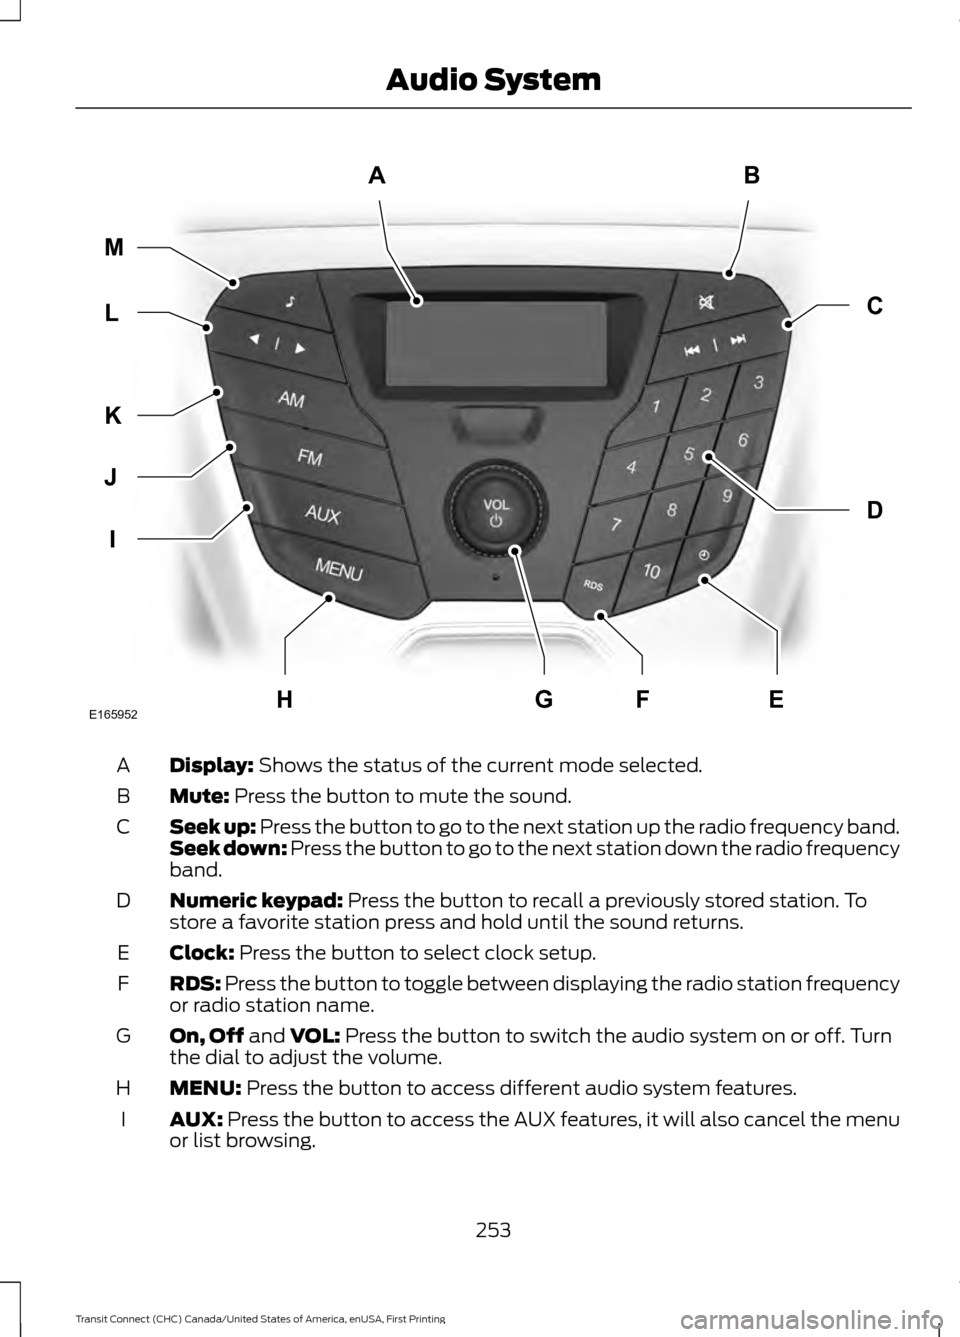
Display: Shows the status of the current mode selected.
A
Mute:
Press the button to mute the sound.
B
Seek up: Press the button to go to the next station up the radio frequency band.
Seek down: Press the button to go to the next station down the radio frequency
band.
C
Numeric keypad:
Press the button to recall a previously stored station. To
store a favorite station press and hold until the sound returns.
D
Clock:
Press the button to select clock setup.
E
RDS:
Press the button to toggle between displaying the radio station frequency
or radio station name.
F
On, Off
and VOL: Press the button to switch the audio system on or off. Turn
the dial to adjust the volume.
G
MENU:
Press the button to access different audio system features.
H
AUX:
Press the button to access the AUX features, it will also cancel the menu
or list browsing.
I
253
Transit Connect (CHC) Canada/United States of America, enUSA, First Printing Audio SystemAB
D
C
I
J
K
L M
EHFGE165952
Page 257 of 428
FM: Press the button to select the FM frequency band.
J
AM:
Press the button to select the AM frequency band.
K
Cursor up
or down: Press the cursor up or down arrow buttons to adjust the
settings within the menus or to move to the next radio station while listening
to the radio on the
FM or AM frequency band.
L
Sound:
Press the button to adjust the sound settings for bass, treble, balance
or fade.
M
Sound Button
This will allow you to adjust the sound
settings for bass, treble, balance or fade.
1. Press the sound button until the required setting is displayed.
2. Use the cursor up or down arrow buttons to select the required level.
Note: Fade settings are only adjustable if
there are speakers in the rear of your vehicle.
Frequency Band Buttons
Press the
FM or AM button to select
frequency band.
You can use the buttons to return to radio
reception when you have been listening to
an
AUX source.
Station Tuning Buttons
Seek Tuning
Select a frequency band and briefly press
one of the seek buttons. The unit will stop
at the first station it finds in the direction
you have chosen.
Manual Tuning
Use the cursor up or down arrow buttons
to tune up or down the frequency band in
small increments, or press and hold to
increment quickly until you find a station
you want to listen to. Station Preset Buttons
This feature allows you to store your
favorite stations. They can be recalled by
selecting the appropriate frequency band
and pressing one of the preset buttons.
1. Select a frequency band.
2. Tune to the station required.
3. Press and hold one of the preset
buttons. The audio unit will also mute
momentarily as confirmation.
You can repeat this on each frequency
band and for each preset button.
Clock Button
This will allow you to adjust the clock
settings.
1. Press the clock button until Set Hour
is displayed.
2. Use the cursor up or down arrow buttons to set the correct hour.
3. Press the clock button again until
Set
Minutes is displayed.
4. Use the cursor up or down arrow buttons to set the correct minutes.
Setting 24 Hour or 12 Hour Display
1. Press the
MENU button until 24 Hour
is displayed.
2. Use the cursor up or down arrow buttons to toggle between 24 hour or
12 hour display.
254
Transit Connect (CHC) Canada/United States of America, enUSA, First Printing Audio System
Page 258 of 428
Menu Button
This will allow you to adjust all of the audio
system settings. Press the button
repeatedly until the required setting is
displayed. Use the cursor up or down arrow
buttons to adjust the following settings:
•
Clock hour
• Clock minutes
• 24 hour, 12 hour
• Bass
• Treble
• Balance
• Fade
• RDS
AUX Button
Connect your media device to the audio
unit. See Media Hub (page 265).
Select your media device as the audio
source by pressing the
AUX button. After
connecting your media device, the first
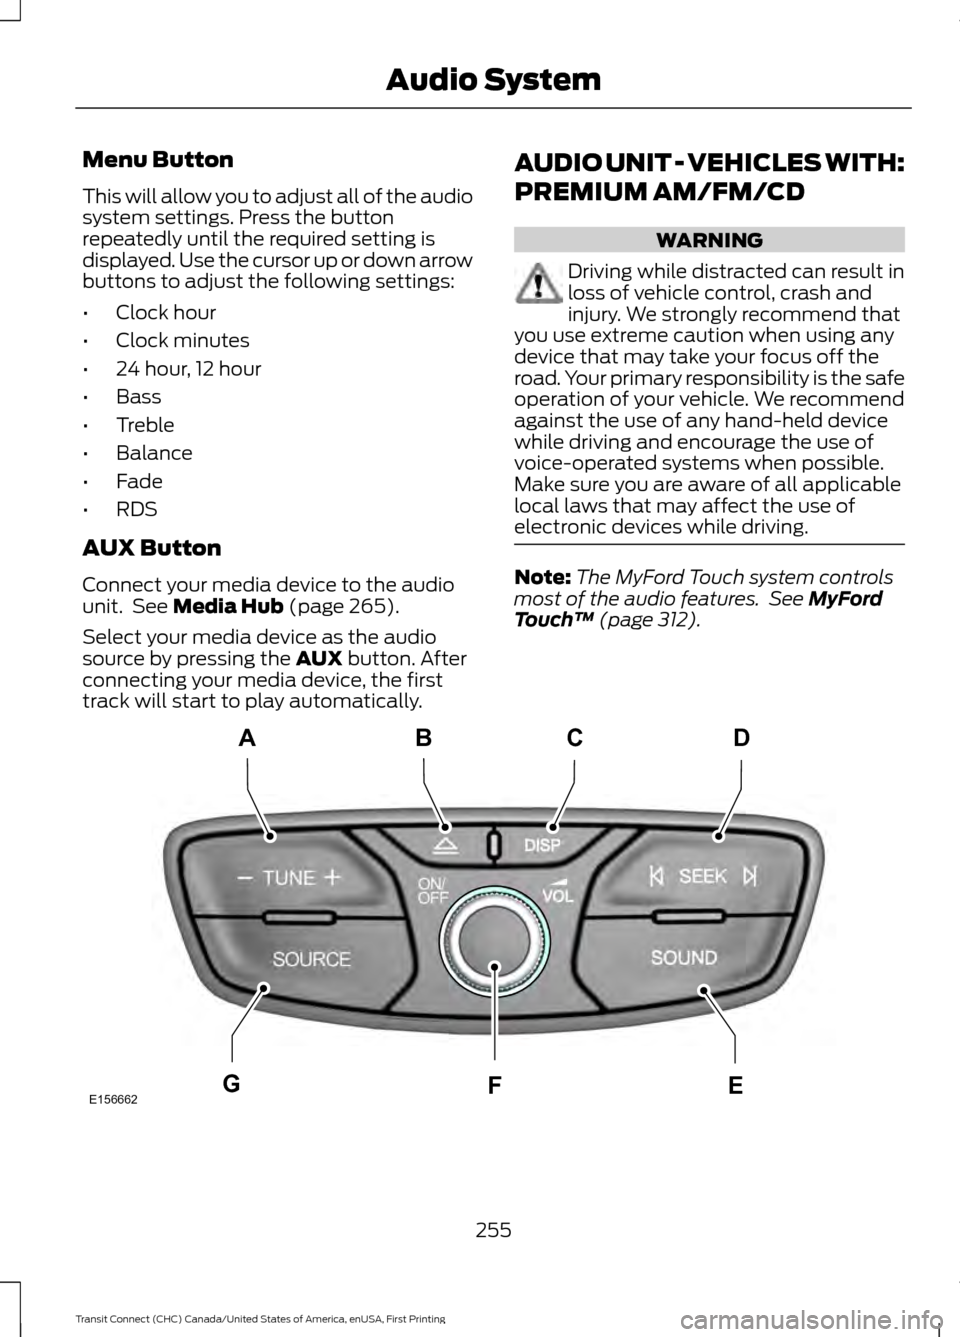
track will start to play automatically. AUDIO UNIT - VEHICLES WITH:
PREMIUM AM/FM/CD WARNING
Driving while distracted can result in
loss of vehicle control, crash and
injury. We strongly recommend that
you use extreme caution when using any
device that may take your focus off the
road. Your primary responsibility is the safe
operation of your vehicle. We recommend
against the use of any hand-held device
while driving and encourage the use of
voice-operated systems when possible.
Make sure you are aware of all applicable
local laws that may affect the use of
electronic devices while driving. Note:
The MyFord Touch system controls
most of the audio features. See
MyFord
Touch ™ (page 312). 255
Transit Connect (CHC) Canada/United States of America, enUSA, First Printing Audio SystemE156662
CD
GEF
B
A