parking brake FORD TRANSIT CONNECT 2015 2.G User Guide
[x] Cancel search | Manufacturer: FORD, Model Year: 2015, Model line: TRANSIT CONNECT, Model: FORD TRANSIT CONNECT 2015 2.GPages: 428, PDF Size: 6.27 MB
Page 129 of 428
AUTOMATIC TRANSMISSION
WARNINGS
Always set the parking brake fully
and make sure the gearshift is
latched in P (Park). Turn the ignition
to the off position and remove the key
whenever you leave your vehicle. Do not apply the brake pedal and
accelerator pedal simultaneously.
Applying both pedals simultaneously
for more than three seconds will limit
engine rpm, which may result in difficulty
maintaining speed in traffic and could lead
to serious injury. Understanding the Positions of
Your Automatic Transmission
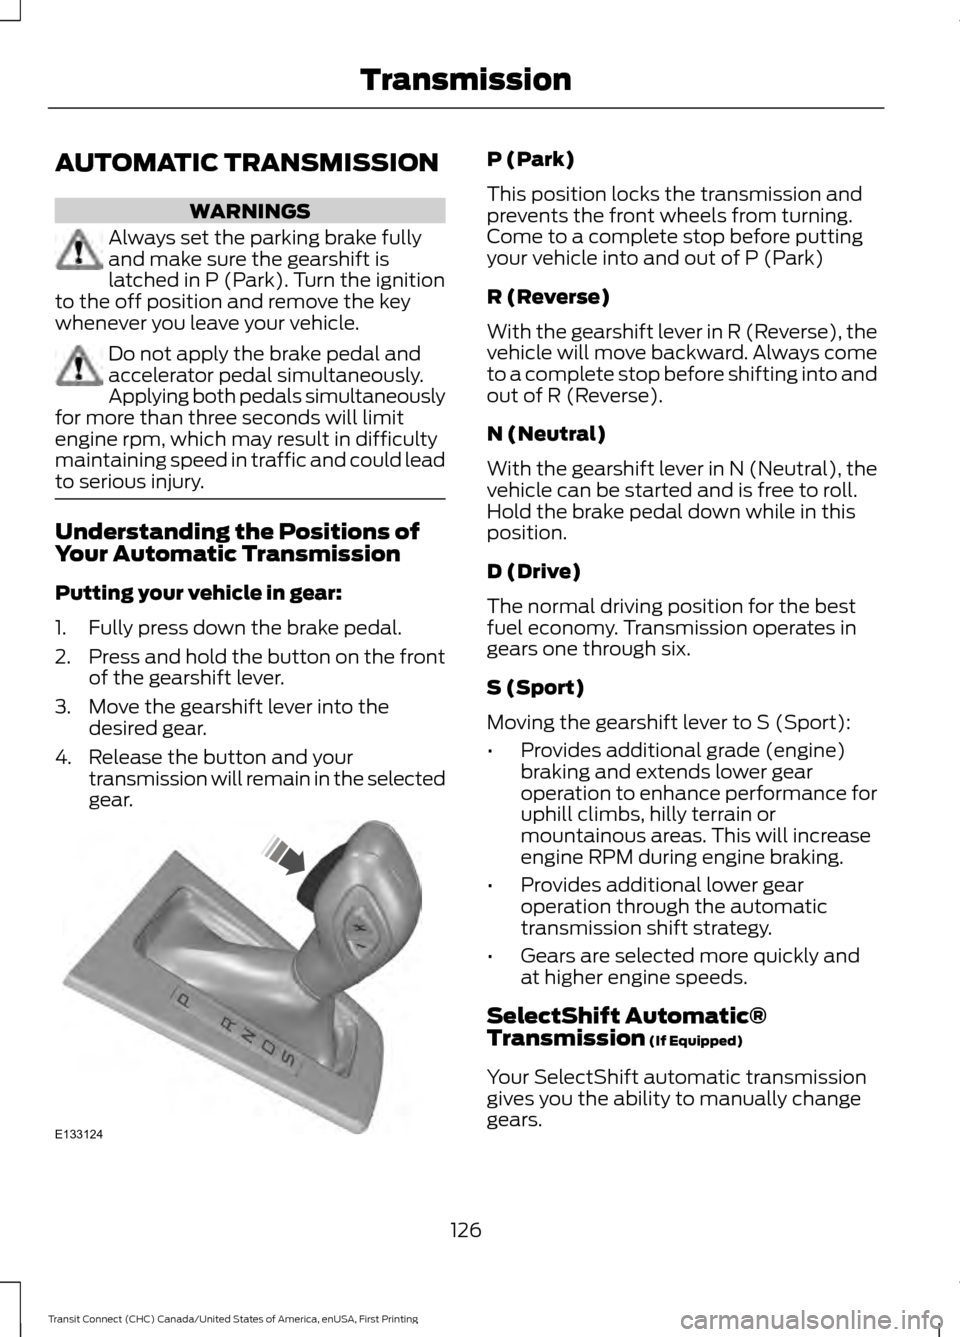
Putting your vehicle in gear:
1. Fully press down the brake pedal.
2.
Press and hold the button on the front
of the gearshift lever.
3. Move the gearshift lever into the desired gear.
4. Release the button and your transmission will remain in the selected
gear. P (Park)
This position locks the transmission and
prevents the front wheels from turning.
Come to a complete stop before putting
your vehicle into and out of P (Park)
R (Reverse)
With the gearshift lever in R (Reverse), the
vehicle will move backward. Always come
to a complete stop before shifting into and
out of R (Reverse).
N (Neutral)
With the gearshift lever in N (Neutral), the
vehicle can be started and is free to roll.
Hold the brake pedal down while in this
position.
D (Drive)
The normal driving position for the best
fuel economy. Transmission operates in
gears one through six.
S (Sport)
Moving the gearshift lever to S (Sport):
•
Provides additional grade (engine)
braking and extends lower gear
operation to enhance performance for
uphill climbs, hilly terrain or
mountainous areas. This will increase
engine RPM during engine braking.
• Provides additional lower gear
operation through the automatic
transmission shift strategy.
• Gears are selected more quickly and
at higher engine speeds.
SelectShift Automatic®
Transmission (If Equipped)
Your SelectShift automatic transmission
gives you the ability to manually change
gears.
126
Transit Connect (CHC) Canada/United States of America, enUSA, First Printing TransmissionE133124
Page 130 of 428
To use SelectShift, move the gearshift
lever into S (Sport). Use the +/- buttons
on the side of your gearshift lever to
manually change gears.
•
Press the (+) button to upshift.
• Press the (-) button to downshift.
Note: After you have assumed manual
control with SelectShift your vehicle will
remain in this mode until you return the
gearshift lever from (S) Sport, back to (D)
Drive.
Upshift to the recommended shift speeds
according to the following chart: Upshifts when accelerating (recom-
mended for best fuel economy)
Shift from:15 mph (24 km/h)
1 - 2
25 mph (40 km/h)
2 - 3
40 mph (64 km/h)
3 - 4
45 mph (72 km/h)
4 - 5
50 mph (80 km/h)
5 - 6
The instrument cluster will display the
selected gear that you are currently in and
a shift indicator arrow to assist in
optimizing shifting.
SelectShift will automatically make some
shifts for you in the event that your engine
speed is running at too high, or to low an
RPM.
Note: Engine damage may occur if
excessive engine revving is held without
shifting.
Brake-Shift Interlock WARNINGS
Do not drive your vehicle until you
verify that the brake lamps are
working. WARNINGS
When doing this procedure, you will
be taking the vehicle out of park
which means the vehicle can roll
freely. To avoid unwanted vehicle
movement, always fully set the parking
brake prior to doing this procedure. Use
wheel chocks if appropriate. If the parking brake is fully released,
but the brake warning lamp remains
illuminated, the brakes may not be
working properly. See your authorized
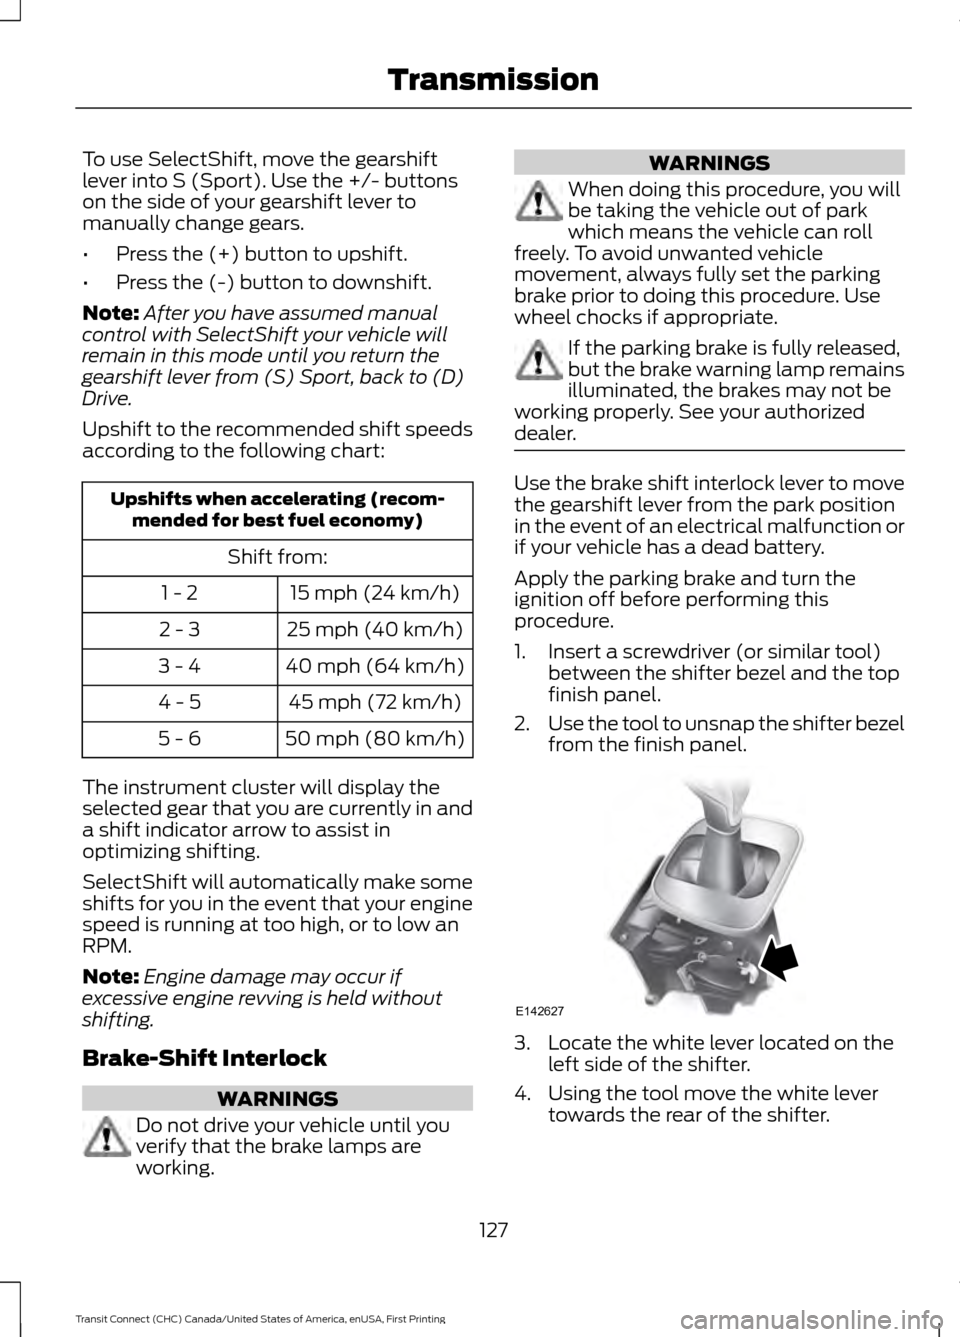
dealer. Use the brake shift interlock lever to move
the gearshift lever from the park position
in the event of an electrical malfunction or
if your vehicle has a dead battery.
Apply the parking brake and turn the
ignition off before performing this
procedure.
1. Insert a screwdriver (or similar tool)
between the shifter bezel and the top
finish panel.
2. Use the tool to unsnap the shifter bezel
from the finish panel. 3. Locate the white lever located on the
left side of the shifter.
4. Using the tool move the white lever towards the rear of the shifter.
127
Transit Connect (CHC) Canada/United States of America, enUSA, First Printing TransmissionE142627
Page 131 of 428
5.
While holding the white lever in the rear
position, move the shifter from the park
position.
6. Press the shifter bezel back into the top
finish panel until it snaps back into
position.
7. Apply the brake pedal, start the vehicle
and release the parking brake.
Note: See your authorized dealer as soon
as possible if this procedure is used.
If Your Vehicle Gets Stuck In Mud
or Snow
Note: Do not rock the vehicle if the engine
is not at normal operating temperature or
damage to the transmission may occur.
Note: Do not rock the vehicle for more than
a minute or damage to the transmission and
tires may occur, or the engine may overheat.
If your vehicle gets stuck in mud or snow,
it may be rocked out by shifting between
forward and reverse gears, stopping
between shifts in a steady pattern. Press
lightly on the accelerator in each gear.
128
Transit Connect (CHC) Canada/United States of America, enUSA, First Printing Transmission
Page 132 of 428
GENERAL INFORMATION
Note:
Occasional brake noise is normal. If
a metal-to-metal, continuous grinding or
continuous squeal sound is present, the
brake linings may be worn-out. Have the
system checked by an authorized dealer. If
your vehicle has continuous vibration or
shudder in the steering wheel while braking,
have it checked by an authorized dealer.
Note: Brake dust may accumulate on the
wheels, even under normal driving
conditions. Some dust is inevitable as the
brakes wear and does not contribute to
brake noise. See Cleaning the Alloy
Wheels (page 215). See
Warning Lamps and
Indicators (page 80).
Wet brakes result in reduced braking
efficiency. Gently press the brake pedal a
few times when driving from a car wash or
standing water to dry the brakes.
Brake Over Accelerator
In the event the accelerator pedal
becomes stuck or entrapped, apply steady
and firm pressure to the brake pedal to
slow the vehicle and reduce engine power.
If you experience this condition, apply the
brakes and bring your vehicle to a safe
stop. Move the transmission to park (P),
switch the engine off and apply the parking
brake. Inspect the accelerator pedal for
any interference. If none are found and the
condition persists, have your vehicle towed
to the nearest authorized dealer.
Brake Assist
Brake assist detects when you brake
rapidly by measuring the rate at which you
press the brake pedal. It provides
maximum braking efficiency as long as you
press the pedal, and can reduce stopping
distances in critical situations. Anti-lock Brake System
This system helps you maintain steering
control during emergency stops by keeping
the brakes from locking. This lamp momentarily
illuminates when you turn the
ignition on. If the light does not
illuminate during start up, remains on or
flashes, the system may be disabled. Have
the system checked by an authorized
dealer. If the anti-lock brake system is
disabled, normal braking is still effective. If the brake warning lamp
illuminates when you release the
parking brake, have the system
checked by an authorized dealer.
HINTS ON DRIVING WITH
ANTI-LOCK BRAKES
Note: When the system is operating, the
brake pedal will pulse and may travel
further. Maintain pressure on the brake
pedal. You may also hear a noise from the
system. This is normal.
The anti-lock braking system will not
eliminate the risks when:
• You drive too closely to the vehicle in
front of you.
• Your vehicle is hydroplaning.
• You take corners too fast.
• The road surface is poor.
PARKING BRAKE WARNING
Always set the parking brake fully
and leave your vehicle with the
transmission selector lever in
position
P. 129
Transit Connect (CHC) Canada/United States of America, enUSA, First Printing BrakesE144522 E144522
Page 133 of 428
Note:
Do not press the release button while
pulling the lever up.
To apply the parking brake:
1. Press the foot brake pedal firmly.
2. Pull the parking brake lever up to its fullest extent.
Note: If you park your vehicle on a hill and
facing uphill, move the transmission selector
lever to position P and turn the steering
wheel away from the curb.
Note: If you park your vehicle on a hill and
facing downhill, move the transmission
selector lever to
P and turn the steering
wheel toward the curb.
To release the parking brake:
1. Press the brake pedal firmly.
2. Pull the lever up slightly.
3. Press the release button and push the lever down.
HILL START ASSIST WARNINGS
The system does not replace the
parking brake. When you leave your
vehicle, always apply the parking
brake. Failure to leave your vehicle securely
parked may lead to a crash or injury. See
Parking Brake
(page 129). You must remain in your vehicle once
the system activates. Failure to
follow this warning could result in
serious personal injury or death. During all times, you are responsible
for controlling your vehicle,
supervising the system and
intervening, if required. Failure to take care
may result in the loss of control of your
vehicle, serious personal injury or death. WARNINGS
The system will turn off if a
malfunction is apparent or if you rev
the engine excessively. Failure to
take care may result in the loss of control
of your vehicle, serious personal injury or
death. The system makes it easier to pull away
when your vehicle is on a slope without the
need to use the parking brake.
When the system is active, your vehicle will
remain stationary on the slope for two to
three seconds after you release the brake
pedal. This allows time to move your foot
from the brake to the accelerator pedal.
The brakes are released automatically
once the engine has developed sufficient
drive to prevent your vehicle from rolling
down the slope. This is an advantage when
pulling away on a slope, for example from
a car park ramp, traffic lights or when
reversing uphill into a parking space.
The system will turn on automatically on
any slope which can result in significant
vehicle rollback.
Using Hill Start Assist
1. Press the brake pedal to bring your
vehicle to a complete standstill. Keep
the brake pedal pressed.
2. If the sensors detect that your vehicle is on a slope, the system will activate
automatically.
3. When you remove your foot from the brake pedal, your vehicle will remain
on the slope without rolling away for
approximately two to three seconds.
This hold time will automatically be
extended if you are in the process of
driving off.
4. Drive off in the normal manner. The brakes will be released automatically.
130
Transit Connect (CHC) Canada/United States of America, enUSA, First Printing Brakes
Page 160 of 428
•
If your vehicle has AdvanceTrac with
RSC and a heavily loaded trailer is on
tow, the system may turn on while
taking corners. This is normal. Taking
corners at slower speeds can reduce
this tendency.
• Allow more distance for stopping with
a trailer attached. Anticipate stops and
brake gradually.
• Avoid parking on a grade. However, if
you must park on a grade:
•Turn the steering wheel to point
your vehicle tires away from traffic
flow.
• Set the vehicle parking brake.
• Place the transmission selector
lever in position P.
• Place wheel chocks in front and
back of the trailer wheels. (Chocks
not included with vehicle.)
Launching or Retrieving a Boat or
Personal Watercraft
Note: Disconnect the trailer wiring
connector before the trailer enters the
water.
Note: Reconnect the trailer wiring
connector after the trailer is removed from
the water.
When backing down a ramp during boat
launching or retrieval:
• Do not allow the static water level to
rise above the bottom edge of the rear
bumper.
• Do not allow waves to break higher
than 6 inches (15 centimeters) above
the bottom edge of the rear bumper.
Note: Exceeding these limits may allow
water to enter your vehicle or its
components, affecting driveability,
emissions and reliability. The vehicle
warranty may not cover component damage
caused by water entry. Replace the rear axle lubricant anytime
the rear axle has been submerged in water.
Water may have contaminated the rear
axle lubricant, which is not normally
checked or changed unless a leak is
suspected or other axle repair is required.
TOWING POINTS
(If Equipped)
WARNING
The screw-in recovery hook has a
left-hand thread. Turn it
counterclockwise to install it. Make
sure that the recovery hook is fully
tightened. Failure to do so could result in
the recovery hook becoming loose. Due to requirements in some countries,
your vehicle may have a recovery hook.
Recovery Hook Storage
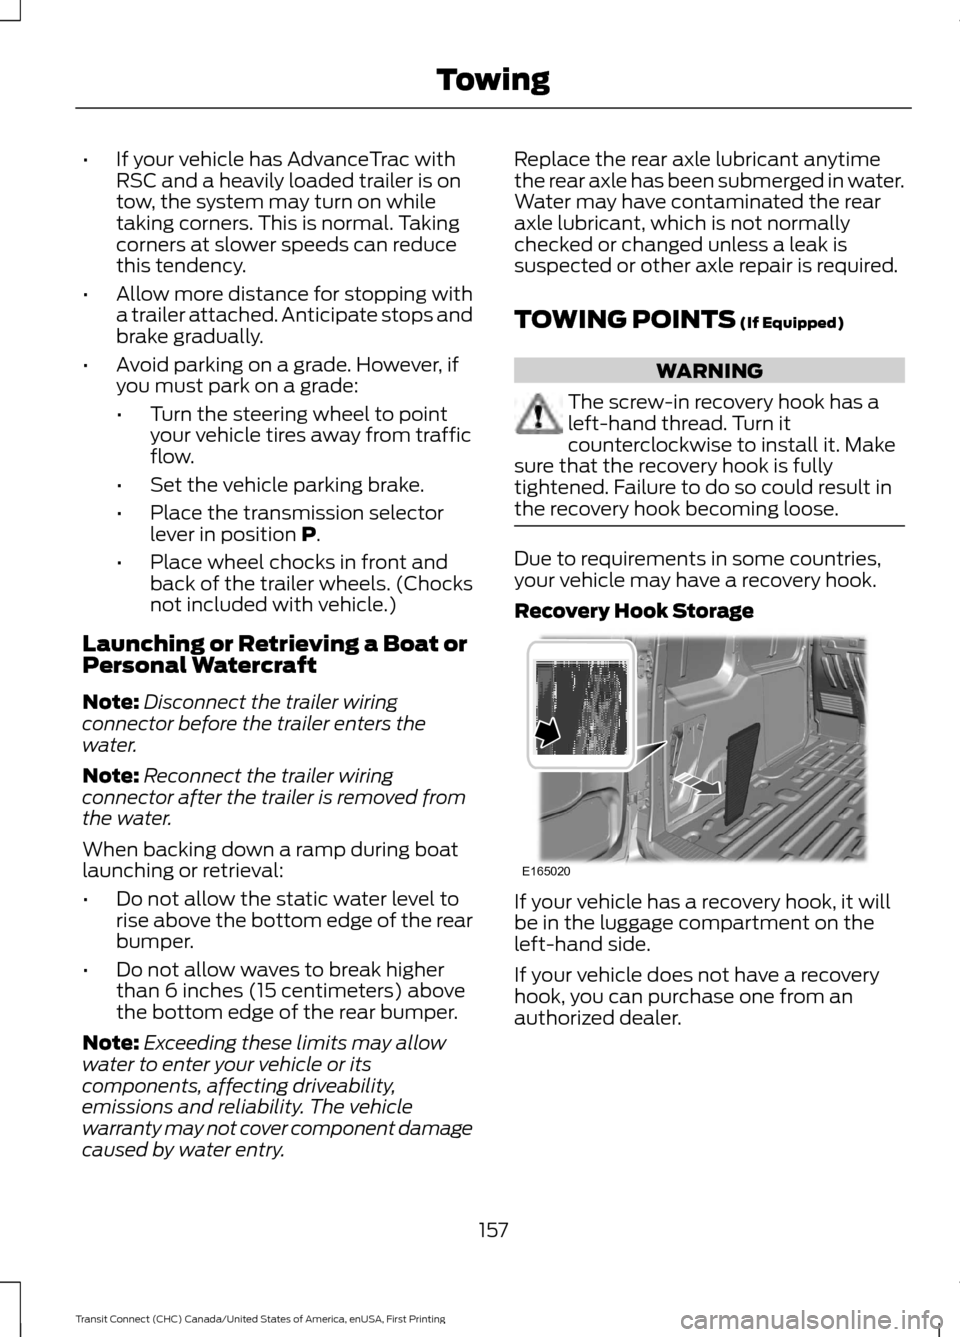
If your vehicle has a recovery hook, it will
be in the luggage compartment on the
left-hand side.
If your vehicle does not have a recovery
hook, you can purchase one from an
authorized dealer.
157
Transit Connect (CHC) Canada/United States of America, enUSA, First Printing TowingE165020
Page 188 of 428
GENERAL INFORMATION
Have your vehicle serviced regularly to help
maintain its roadworthiness and resale
value. There is a large network of
authorized dealers that are there to help
you with their professional servicing
expertise. We believe that their specially
trained technicians are best qualified to
service your vehicle properly and expertly.
They are supported by a wide range of
highly specialized tools developed
specifically for servicing your vehicle.
To help you service your vehicle, we
provide scheduled maintenance
information which makes tracking routine
service easy. See Scheduled
Maintenance (page 399).
If your vehicle requires professional service,
an authorized dealer can provide the
necessary parts and service. Check your
warranty information to find out which
parts and services are covered.
Use only recommended fuels, lubricants,
fluids and service parts conforming to
specifications. Motorcraft® parts are
designed and built to provide the best
performance in your vehicle.
Precautions
• Do not work on a hot engine.
• Make sure that nothing gets caught in
moving parts.
• Do not work on a vehicle with the
engine running in an enclosed space,
unless you are sure you have enough
ventilation.
• Keep all open flames and other burning
material (such as cigarettes) away
from the battery and all fuel related
parts. Working with the Engine Off
1.
Set the parking brake and shift to park
(P).
2. Switch off the engine.
3. Block the wheels.
Working with the Engine On WARNING
To reduce the risk of vehicle damage
and/or personal burn injuries, do not
start your engine with the air cleaner
removed and do not remove it while the
engine is running. 1.
Set the parking brake and shift to park
(P).
2. Block the wheels
OPENING AND CLOSING THE
HOOD
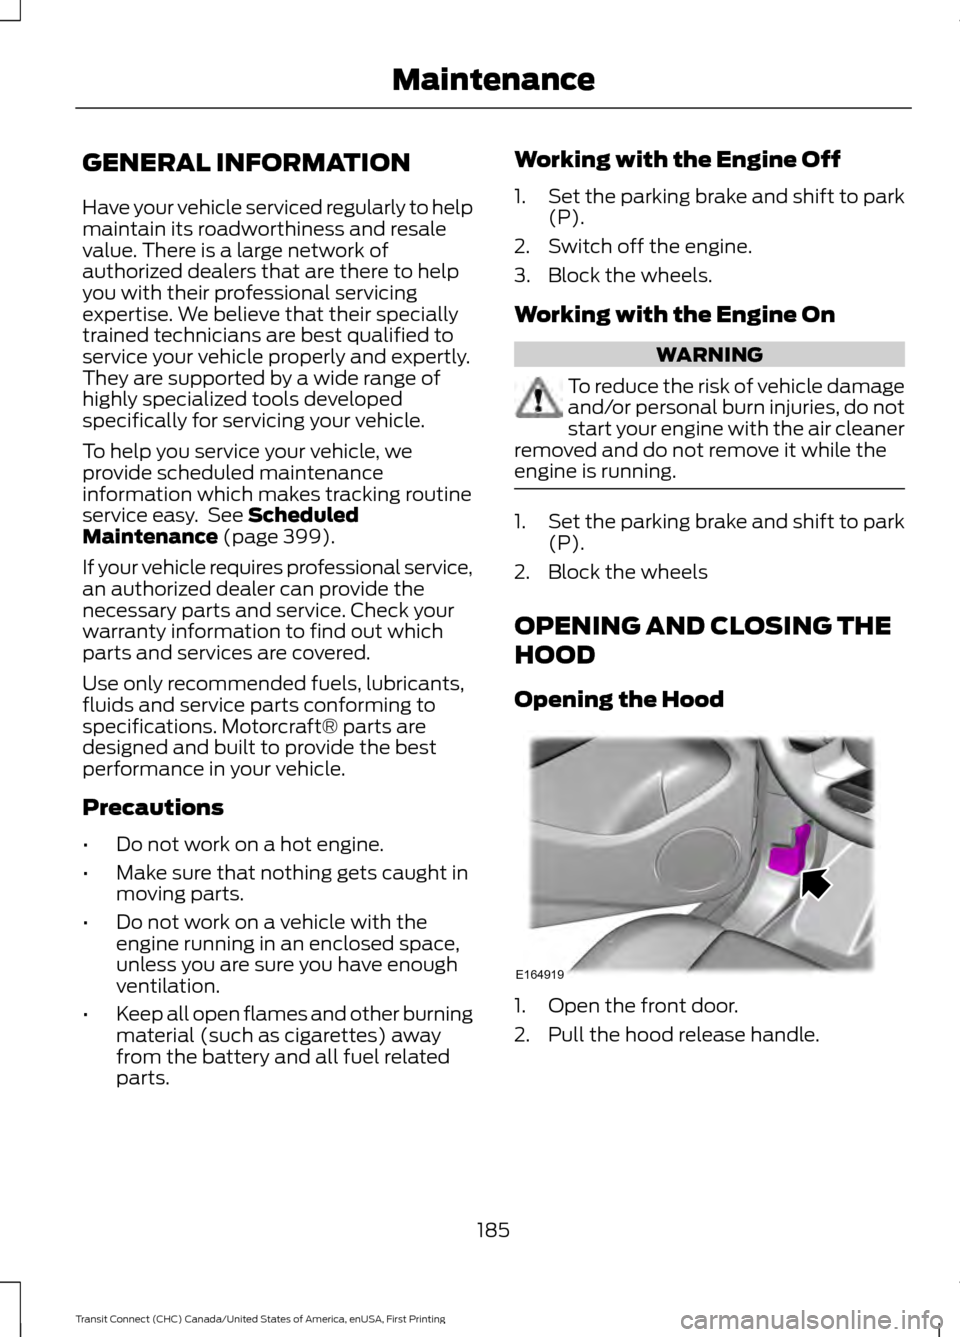
Opening the Hood 1. Open the front door.
2. Pull the hood release handle.
185
Transit Connect (CHC) Canada/United States of America, enUSA, First Printing MaintenanceE164919
Page 197 of 428
presets, are also maintained in memory by
power from the low voltage battery. When
a technician disconnects and connects the
low voltage battery, these settings are
erased. Complete the following procedure
in order to restore the settings:
1. With the vehicle at a complete stop,
set the parking brake.
2. Shift the transmission into P.
3. Turn off all accessories.
4. Step on the brake pedal and start the vehicle.
5. Run the engine until it reaches normal operating temperature. While the
engine is warming up, complete the
following: Reset the clock. See Audio
System (page 251). Reset the power
windows bounce-back feature. See
Windows and Mirrors
(page 73).
Reset the radio station presets. See
Audio System
(page 251).
6. Allow the engine to idle for at least one
minute. If the engine turns off, step on
the accelerator to start the engine.
7. While the engine is running, step on the
brake pedal and shift the transmission
to N.
8. Allow the engine to run for at least one
minute by pressing on the accelerator
pedal.
9. Drive the vehicle at least 10 miles (16 kilometers) to completely relearn the
idle and fuel trim strategy.
Note: If you do not allow the engine to
relearn the idle and fuel trim strategy, the
idle quality of your vehicle may be adversely
affected until the engine computer
eventually relearns the idle trim and fuel
trim strategy. Note:
Always dispose of automotive
batteries in a responsible manner. Follow
your local authorized standards for disposal.
Call your local authorized recycling center
to find out more about recycling automotive
batteries.
Note: It is recommended that the negative
battery cable terminal be disconnected from
the battery if you plan to store your vehicle
for an extended period of time.
CHECKING THE WIPER
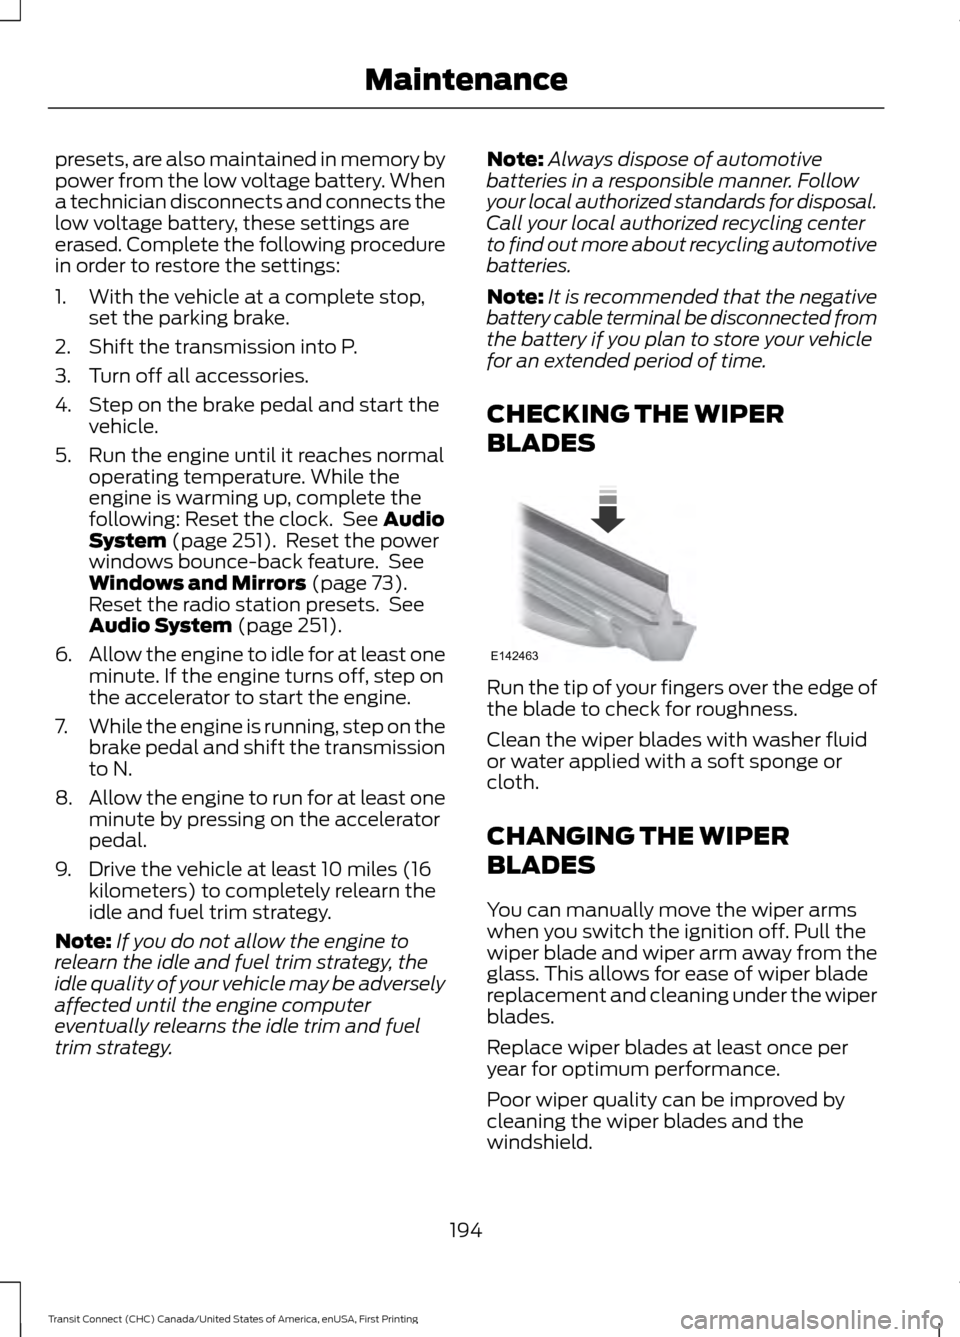
BLADES Run the tip of your fingers over the edge of
the blade to check for roughness.
Clean the wiper blades with washer fluid
or water applied with a soft sponge or
cloth.
CHANGING THE WIPER
BLADES
You can manually move the wiper arms
when you switch the ignition off. Pull the
wiper blade and wiper arm away from the
glass. This allows for ease of wiper blade
replacement and cleaning under the wiper
blades.
Replace wiper blades at least once per
year for optimum performance.
Poor wiper quality can be improved by
cleaning the wiper blades and the
windshield.
194
Transit Connect (CHC) Canada/United States of America, enUSA, First Printing MaintenanceE142463
Page 218 of 428
•
Alcohol solutions.
• Solvents or cleaners intended
specifically for rubber, vinyl and
plastics.
Note: Do not use Motorcraft Premium
Leather and Vinyl Cleaner ZC-56 on Lincoln
Black Label, Presidential or Reserve
Leathers because it can damage those and
other semi-aniline leather seating fabrics.
It can also damage surround microfiber
accent surfaces. To clean Lincoln Black
Label, Presidential or Reserve Leathers, first
vacuum the seats to remove loose dirt. Then
wipe the leather with a clean soft cloth
dampened with lukewarm water and a mild
soap. Wiper the leather again with a slightly
damp cloth to remove soap residue, and dry
with a soft cloth. To maintain the leather's
resiliency, it should be cleaned whenever
soiled.
REPAIRING MINOR PAINT
DAMAGE
You should repair paintwork damage
caused by stones from the road or minor
scratches as soon as possible. A choice of
products are available from an authorized
dealer.
Remove particles such as bird droppings,
tree sap, insect deposits, tar spots, road
salt and industrial fallout before repairing
paint chips.
Always read and follow the manufacturer ’s
instructions before using the products.
CLEANING THE ALLOY
WHEELS
Note: Do not apply a cleaning chemical to
warm or hot wheel rims and covers.
Note: Some automatic car washes may
cause damage to the finish on your wheel
rims and covers. Note:
Industrial-strength or heavy-duty
cleaners in combination with brush agitation
to remove brake dust and dirt, could wear
away the clear coat finish over a period time.
Note: Do not use hydrofluoric acid-based
or high caustic-based wheel cleaners, steel
wool, fuels or strong household detergents.
Note: If you intend parking your vehicle for
an extended period after cleaning the
wheels with a wheel cleaner, drive your
vehicle for a few minutes before doing so.
This will reduce the risk of increased
corrosion of the brake discs.
Alloy wheels and wheel covers are coated
with a clear coat paint finish. To maintain
their condition we recommend that you:
• Clean the wheels weekly using
Motorcraft Wheel and Tire Cleaner.
Apply using manufacturer's
instructions.
• Use a sponge to remove heavy
deposits of dirt and brake dust
accumulation.
• Rinse thoroughly with a strong stream
of water when you have completed the
cleaning process.
• To remove tar and grease, use
Motorcraft Bug and Tar Remover.
VEHICLE STORAGE
If you plan on storing your vehicle for 30
days or more, read the following
maintenance recommendations to make
sure your vehicle stays in good operating
condition.
We engineer and test all motor vehicles
and their components for reliable, regular
driving. Under various conditions,
long-term storage may lead to degraded
engine performance or failure unless you
use specific precautions to preserve engine
components.
215
Transit Connect (CHC) Canada/United States of America, enUSA, First Printing Vehicle Care
Page 219 of 428
General
•
Store all vehicles in a dry, ventilated
place.
• Protect from sunlight, if possible.
• If vehicles are stored outside, they
require regular maintenance to protect
against rust and damage.
Body
• Wash your vehicle thoroughly to
remove dirt, grease, oil, tar or mud from
exterior surfaces, rear-wheel housing
and the underside of front fenders.
• Periodically wash your vehicle if it is
stored in exposed locations.
• Touch-up exposed or primed metal to
prevent rust.
• Cover chrome and stainless steel parts
with a thick coat of auto wax to prevent
discoloration. Re-wax as necessary
when you wash your vehicle.
• Lubricate all hood, door and trunk lid
hinges, and latches with a light grade
oil.
• Cover interior trim to prevent fading.
• Keep all rubber parts free from oil and
solvents.
Engine
• The engine oil and filter should be
changed prior to storage because used
engine oil contains contaminates that
may cause engine damage.
• Start the engine every 15 days for a
minimum of 15 minutes. Run at fast idle
with the climate controls set to defrost
until the engine reaches normal
operating temperature. •
With your foot on the brake, shift
through all the gears while the engine
is running.
• We recommend that you change the
engine oil before you use your vehicle
again.
Fuel system
• Fill the fuel tank with high-quality fuel
until the first automatic shutoff of the
fuel pump nozzle.
Cooling system
• Protect against freezing temperatures.
• When removing your vehicle from
storage, check coolant fluid level.
Confirm that there are no cooling
system leaks and that fluid is at the
recommended level.
Battery
• Check and recharge as necessary. Keep
connections clean.
• If storing your vehicle for more than 30
days without recharging the battery,
we recommend that you disconnect
the battery cables to maintain battery
charge for quick starting.
Note: It is necessary to reset memory
features if battery cables are disconnected.
Brakes
• Make sure the brakes and parking brake
release fully.
Tires
• Maintain recommended air pressure.
216
Transit Connect (CHC) Canada/United States of America, enUSA, First Printing Vehicle Care