Seat FORD TRANSIT CONNECT 2016 2.G Repair Manual
[x] Cancel search | Manufacturer: FORD, Model Year: 2016, Model line: TRANSIT CONNECT, Model: FORD TRANSIT CONNECT 2016 2.GPages: 439, PDF Size: 6.96 MB
Page 216 of 439
6. Install the air filter housing cover.
7. Install the retaining screws to secure
the air filter housing cover to the air
filter housing.
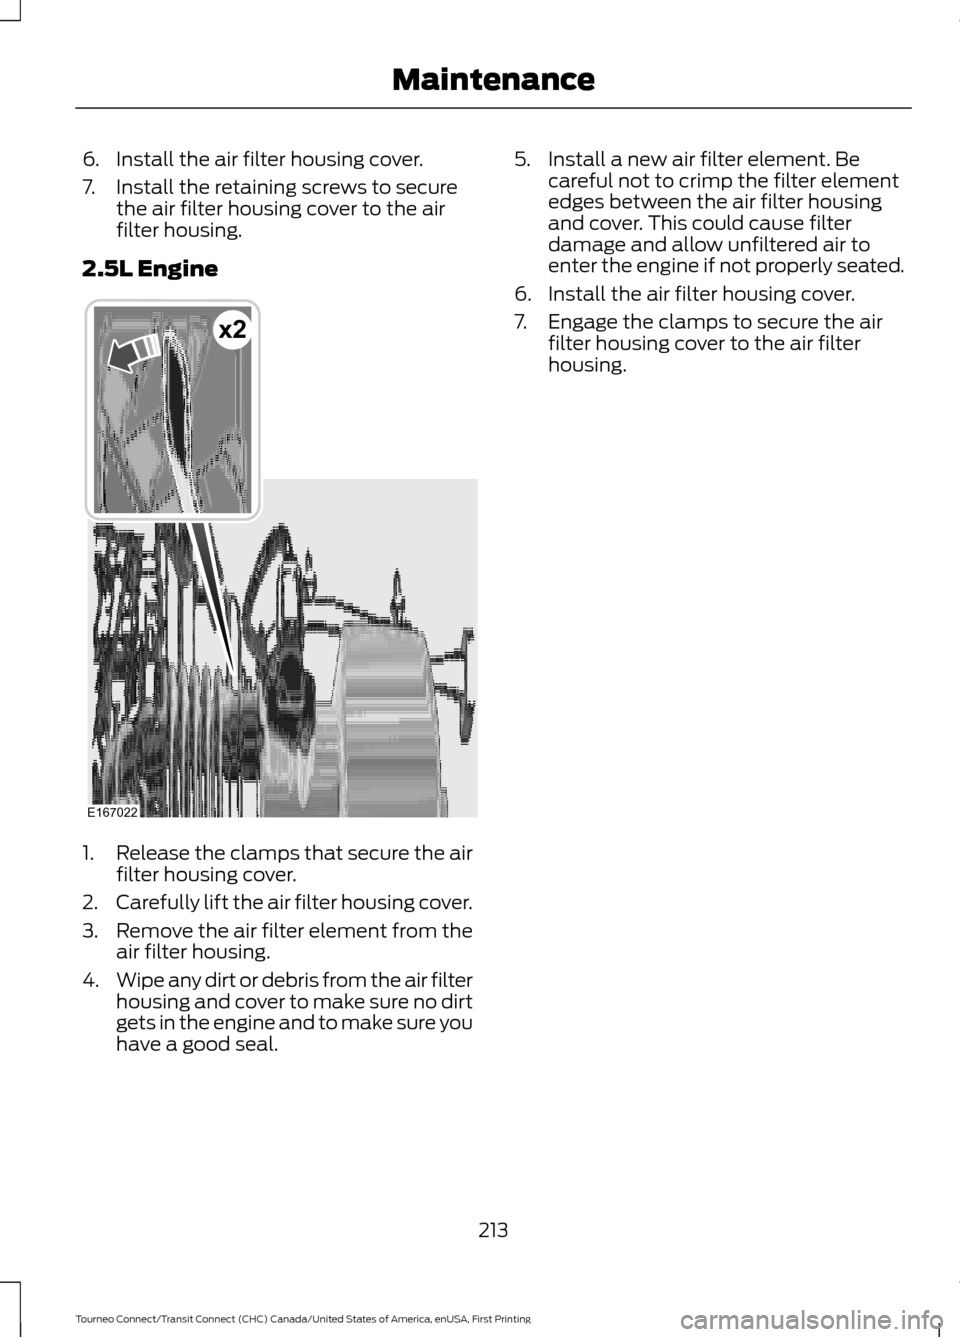
2.5L Engine 1.
Release the clamps that secure the air
filter housing cover.
2. Carefully lift the air filter housing cover.
3. Remove the air filter element from the
air filter housing.
4. Wipe any dirt or debris from the air filter
housing and cover to make sure no dirt
gets in the engine and to make sure you
have a good seal. 5. Install a new air filter element. Be
careful not to crimp the filter element
edges between the air filter housing
and cover. This could cause filter
damage and allow unfiltered air to
enter the engine if not properly seated.
6. Install the air filter housing cover.
7. Engage the clamps to secure the air filter housing cover to the air filter
housing.
213
Tourneo Connect/Transit Connect (CHC) Canada/United States of America, enUSA, First Printing MaintenanceE167022
x2
Page 219 of 439
•
Never wash or rinse any ignition coil,
spark plug wire or spark plug well, or
the area in and around these locations.
• Cover the battery, power distribution
box, and air filter assembly to prevent
water damage when cleaning the
engine.
CLEANING THE WINDOWS AND
WIPER BLADES
Car wash chemicals and environmental
fallout can result in windshield and wiper
blade contamination. Dirty windshield and
wipers will result in poor windshield wiper
operation. Keep the windshield and wiper
blades clean to maintain windshield wiper
performance.
To clean the windshield and wiper blades:
• Clean the windshield with a
non-abrasive glass cleaner. When
cleaning the interior of the windshield,
avoid getting any glass cleaner on the
instrument panel or door panels. Wipe
any glass cleaner off these surfaces
immediately.
• For windshields contaminated with
tree sap, chemicals, wax or bugs, clean
the entire windshield using steel wool
(no greater than 0000 grade) in a
circular motion and rinse with water.
• Clean the wiper blades with isopropyl
rubbing alcohol or windshield washer
concentrate.
Note: Do not use razor blades or other
sharp objects to clean or remove decals
from the inside of the heated rear window.
The vehicle warranty does not cover
damage caused to the heated rear window
grid lines. CLEANING THE INTERIOR WARNINGS
Do not use cleaning solvents, bleach
or dye on the vehicle
’s safety belts,
as these actions may weaken the
belt webbing. On vehicles equipped with
seat-mounted airbags, do not use
chemical solvents or strong
detergents. Such products could
contaminate the side airbag system and
affect performance of the side airbag in a
collision. For fabric, carpets, cloth seats, safety belts
and seats equipped with side airbags:
•
Remove dust and loose dirt with a
vacuum cleaner.
• Remove light stains and soil with
Motorcraft Professional Strength
Carpet & Upholstery Cleaner.
• If grease or tar is present on the
material, spot-clean the area first with
Motorcraft Spot and Stain Remover. In
Canada, use Motorcraft Multi-Purpose
Cleaner.
• If a ring forms on the fabric after spot
cleaning, clean the entire area
immediately (but do not oversaturate)
or the ring will set.
• Do not use household cleaning
products or glass cleaners, which can
stain and discolor the fabric and affect
the flame retardant abilities of the seat
materials.
216
Tourneo Connect/Transit Connect (CHC) Canada/United States of America, enUSA, First Printing Vehicle Care
Page 220 of 439
CLEANING THE INSTRUMENT
PANEL AND INSTRUMENT
CLUSTER LENS
WARNING
Do not use chemical solvents or
strong detergents when cleaning the
steering wheel or instrument panel
to avoid contamination of the airbag
system. Note:
Follow the same procedure as
cleaning leather seats for cleaning leather
instrument panels and leather interior trim
surfaces. See Cleaning Leather Seats
(page 217).
Clean the instrument panel and cluster
lens with a clean, damp and soft cloth,
then use a clean, dry and soft cloth to dry
these areas.
• Avoid cleaners or polishes that increase
the gloss of the upper portion of the
instrument panel. The dull finish in this
area helps protect you from
undesirable windshield reflection.
• Do not use any household cleaning
products or glass cleaners as these
may damage the finish of the
instrument panel, interior trim and
cluster lens.
• Wash or wipe your hands clean if you
have been in contact with certain
products such as insect repellent and
suntan lotion to avoid possible damage
to the interior painted surfaces.
• Do not allow air fresheners and hand
sanitizers to spill onto interior surfaces.
If a spill occurs, wipe off immediately.
Your warranty may not cover these
damages.
If a staining liquid like coffee or juice has
been spilled on the instrument panel or on
interior trim surfaces: 1. Wipe up spilled liquid using a clean,
soft cloth as quickly as possible.
2. Use Motorcraft Premium Leather and Vinyl Cleaner or a commercially
available leather cleaning product for
automotive interiors. Test any cleaner
or stain remover on an inconspicuous
area.
3. Alternatively, wipe the surface with a clean, soft cloth and a mild soap and
water solution. Dry the area with a
clean, soft cloth.
4. If necessary, apply more soap and water solution or cleaning product to
a clean, soft cloth and press it onto the
soiled area. Allow this to set at room
temperature for 30 minutes.
5. Remove the soaked cloth, then with a clean, damp cloth, use a rubbing
motion for 60 seconds on the soiled
area.
6. Dry the area with a clean, soft cloth.
CLEANING LEATHER SEATS
(If
Equipped)
Note: Follow the same procedure as
cleaning leather seats for cleaning leather
instrument panels and leather interior trim
surfaces.
For routine cleaning, wipe the surface with
a soft, damp cloth and a mild soap and
water solution. Dry the area with a clean,
soft cloth.
For cleaning and removing stains such as
dye transfer, use Motorcraft Premium
Leather and Vinyl Cleaner or a
commercially available leather cleaning
product for automotive interiors.
Note: Test any cleaner or stain remover on
an inconspicuous area.
217
Tourneo Connect/Transit Connect (CHC) Canada/United States of America, enUSA, First Printing Vehicle Care
Page 224 of 439
GENERAL INFORMATION
Notice to Utility Vehicle, Van and
Truck Owners
WARNINGS
Utility vehicles have a significantly
higher rollover rate than other types
of vehicles. To reduce the risk of
serious injury or death from a rollover or
other crash you must avoid sharp turns and
abrupt maneuvers, drive at safe speeds for
the conditions, keep tires properly inflated,
never overload or improperly load your
vehicle, and make sure every passenger is
properly restrained. In a rollover crash, an unbelted
person is significantly more likely to
die than a person wearing a seat belt.
All occupants must wear seat belts.
Children and infants must use appropriate
restraints to minimize the risk of injury or
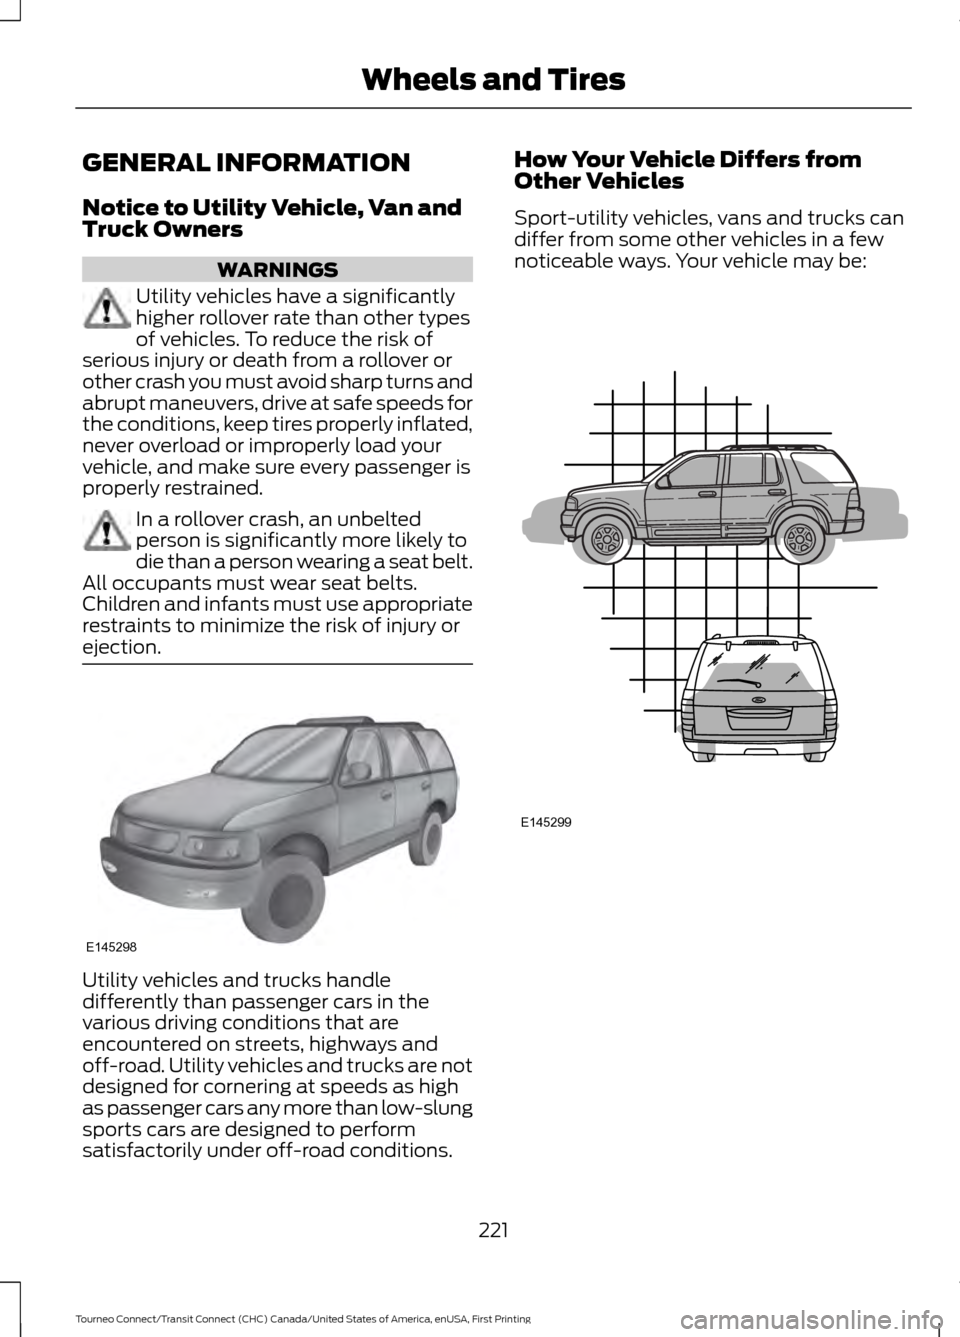
ejection. Utility vehicles and trucks handle
differently than passenger cars in the
various driving conditions that are
encountered on streets, highways and
off-road. Utility vehicles and trucks are not
designed for cornering at speeds as high
as passenger cars any more than low-slung
sports cars are designed to perform
satisfactorily under off-road conditions. How Your Vehicle Differs from
Other Vehicles
Sport-utility vehicles, vans and trucks can
differ from some other vehicles in a few
noticeable ways. Your vehicle may be:
221
Tourneo Connect/Transit Connect (CHC) Canada/United States of America, enUSA, First Printing Wheels and TiresE145298 E145299
Page 227 of 439
Federal Motor Vehicle Safety
Standard No. 139. Grades B and A
represent higher levels of
performance on the laboratory
test wheel than the minimum
required by law.
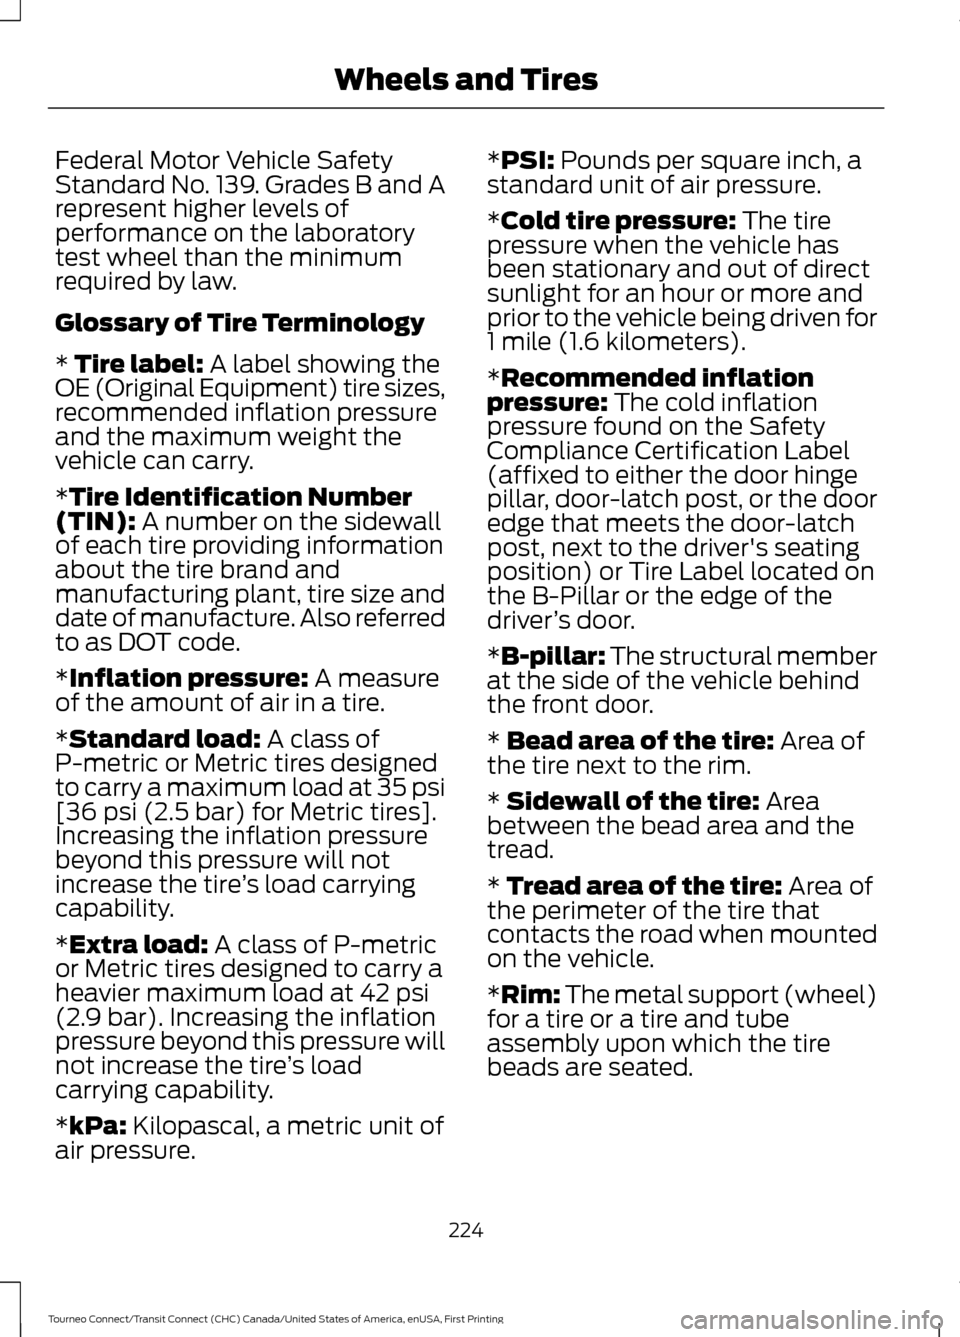
Glossary of Tire Terminology
* Tire label: A label showing the
OE (Original Equipment) tire sizes,
recommended inflation pressure
and the maximum weight the
vehicle can carry.
*
Tire Identification Number
(TIN): A number on the sidewall
of each tire providing information
about the tire brand and
manufacturing plant, tire size and
date of manufacture. Also referred
to as DOT code.
*
Inflation pressure: A measure
of the amount of air in a tire.
*
Standard load: A class of
P-metric or Metric tires designed
to carry a maximum load at 35 psi
[36 psi (2.5 bar) for Metric tires].
Increasing the inflation pressure
beyond this pressure will not
increase the tire ’s load carrying
capability.
*
Extra load: A class of P-metric
or Metric tires designed to carry a
heavier maximum load at 42 psi
(2.9 bar). Increasing the inflation
pressure beyond this pressure will
not increase the tire ’s load
carrying capability.
*
kPa: Kilopascal, a metric unit of
air pressure. *
PSI: Pounds per square inch, a
standard unit of air pressure.
*
Cold tire pressure: The tire
pressure when the vehicle has
been stationary and out of direct
sunlight for an hour or more and
prior to the vehicle being driven for
1 mile (1.6 kilometers).
*
Recommended inflation
pressure: The cold inflation
pressure found on the Safety
Compliance Certification Label
(affixed to either the door hinge
pillar, door-latch post, or the door
edge that meets the door-latch
post, next to the driver's seating
position) or Tire Label located on
the B-Pillar or the edge of the
driver ’s door.
*
B-pillar: The structural member
at the side of the vehicle behind
the front door.
*
Bead area of the tire: Area of
the tire next to the rim.
*
Sidewall of the tire: Area
between the bead area and the
tread.
*
Tread area of the tire: Area of
the perimeter of the tire that
contacts the road when mounted
on the vehicle.
*Rim: The metal support (wheel)
for a tire or a tire and tube
assembly upon which the tire
beads are seated.
224
Tourneo Connect/Transit Connect (CHC) Canada/United States of America, enUSA, First Printing Wheels and Tires
Page 230 of 439
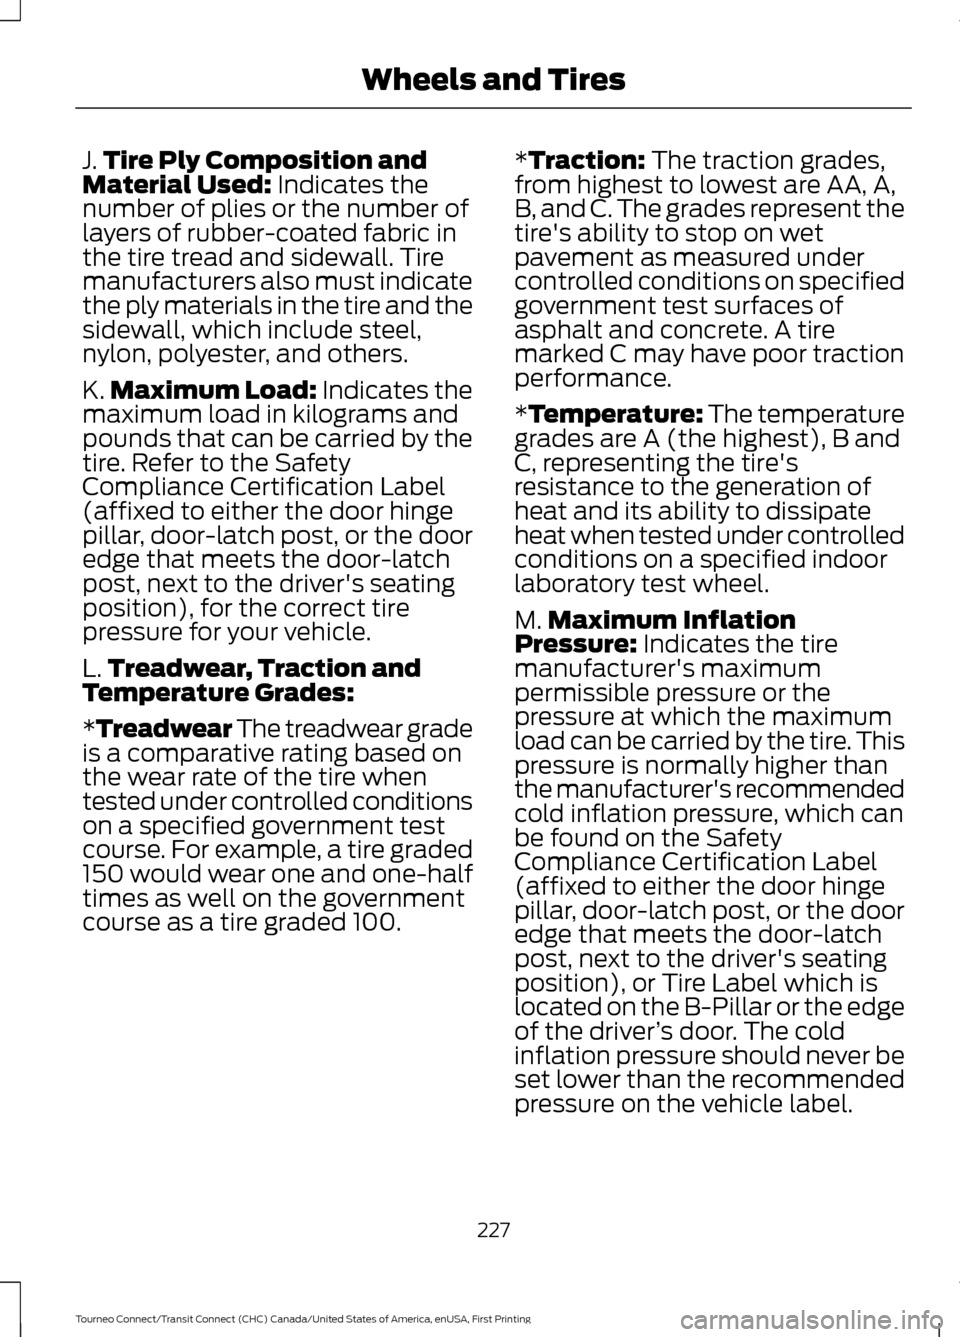
J.
Tire Ply Composition and
Material Used: Indicates the
number of plies or the number of
layers of rubber-coated fabric in
the tire tread and sidewall. Tire
manufacturers also must indicate
the ply materials in the tire and the
sidewall, which include steel,
nylon, polyester, and others.
K. Maximum Load: Indicates the
maximum load in kilograms and
pounds that can be carried by the
tire. Refer to the Safety
Compliance Certification Label
(affixed to either the door hinge
pillar, door-latch post, or the door
edge that meets the door-latch
post, next to the driver's seating
position), for the correct tire
pressure for your vehicle.
L. Treadwear, Traction and
Temperature Grades:
*Treadwear The treadwear grade
is a comparative rating based on
the wear rate of the tire when
tested under controlled conditions
on a specified government test
course. For example, a tire graded
150 would wear one and one-half
times as well on the government
course as a tire graded 100. *Traction: The traction grades,
from highest to lowest are AA, A,
B, and C. The grades represent the
tire's ability to stop on wet
pavement as measured under
controlled conditions on specified
government test surfaces of
asphalt and concrete. A tire
marked C may have poor traction
performance.
*
Temperature: The temperature
grades are A (the highest), B and
C, representing the tire's
resistance to the generation of
heat and its ability to dissipate
heat when tested under controlled
conditions on a specified indoor
laboratory test wheel.
M. Maximum Inflation
Pressure:
Indicates the tire
manufacturer's maximum
permissible pressure or the
pressure at which the maximum
load can be carried by the tire. This
pressure is normally higher than
the manufacturer's recommended
cold inflation pressure, which can
be found on the Safety
Compliance Certification Label
(affixed to either the door hinge
pillar, door-latch post, or the door
edge that meets the door-latch
post, next to the driver's seating
position), or Tire Label which is
located on the B-Pillar or the edge
of the driver ’s door. The cold
inflation pressure should never be
set lower than the recommended
pressure on the vehicle label.
227
Tourneo Connect/Transit Connect (CHC) Canada/United States of America, enUSA, First Printing Wheels and Tires
Page 233 of 439
WARNING
Under-inflation is the most
common cause of tire failures
and may result in severe tire
cracking, tread separation or
blowout, with unexpected loss of
vehicle control and increased risk
of injury. Under-inflation increases
sidewall flexing and rolling
resistance, resulting in heat
buildup and internal damage to
the tire. It also may result in
unnecessary tire stress, irregular
wear, loss of vehicle control and
accidents. A tire can lose up to
half of its air pressure and not
appear to be flat! You are strongly urged to buy a
reliable tire pressure gauge, as
automatic service station gauges
may be inaccurate. Ford
recommends the use of a digital
or dial-type tire pressure gauge
rather than a stick-type tire
pressure gauge.
Use the recommended cold
inflation pressure for optimum tire
performance and wear.
Under-inflation or over-inflation
may cause uneven treadwear
patterns.
Always inflate your tires to the
Ford recommended inflation
pressure even if it is less than the
maximum inflation pressure
information found on the tire. The
Ford recommended tire inflation
pressure is found on the Safety
Compliance Certification Label (affixed to either the door hinge
pillar, door-latch post, or the door
edge that meets the door-latch
post, next to the driver's seating
position), or Tire Label which is
located on the B-Pillar or the edge
of the driver
’s door. Failure to
follow the tire pressure
recommendations can cause
uneven treadwear patterns and
adversely affect the way your
vehicle handles.
Maximum Inflation Pressure is
the tire manufacturer's maximum
permissible pressure or the
pressure at which the maximum
load can be carried by the tire. This
pressure is normally higher than
the manufacturer ’s recommended
cold inflation pressure, which can
be found on the Safety
Compliance Certification Label
(affixed to either the door hinge
pillar, door-latch post, or the door
edge that meets the door-latch
post, next to the driver's seating
position), or Tire Label which is
located on the B-Pillar or the edge
of the driver ’s door. The cold
inflation pressure should never be
set lower than the recommended
pressure on the Safety
Compliance Certification Label or
Tire Label.
230
Tourneo Connect/Transit Connect (CHC) Canada/United States of America, enUSA, First Printing Wheels and Tires
Page 237 of 439
WARNINGS
may be found on either the Safety
Compliance Certification Label
(affixed to either the door hinge
pillar, door-latch post, or the door
edge that meets the door-latch
post, next to the driver's seating
position), or the Tire Label which
is located on the B-Pillar or edge
of the driver ’s door. If this
information is not found on these
labels, then you should contact
your authorized dealer as soon as
possible. Use of any tire or wheel
not recommended by Ford can
affect the safety and performance
of your vehicle, which could result
in an increased risk of loss of
vehicle control, vehicle rollover,
personal injury and death.
Additionally the use of
non-recommended tires and
wheels could cause steering,
suspension, axle, transfer case or
power transfer unit failure. If you
have questions regarding tire
replacement, contact your
authorized dealer as soon as
possible. When mounting replacement
tires and wheels, you should
not exceed the maximum pressure
indicated on the sidewall of the
tire to set the beads without
additional precautions listed
below. If the beads do not seat at
the maximum pressure indicated,
re-lubricate and try again. WARNINGS
When inflating the tire for
mounting pressures up to 20 psi
(1.38 bar) greater than the
maximum pressure on the tire
sidewall, the following
precautions must be taken to
protect the person mounting the
tire:
1. Make sure that you have the
correct tire and wheel size.
2. Lubricate the tire bead and
wheel bead seat area again.
3. Stand at a minimum of 12 ft
(3.66 m) away from the wheel
and tire assembly.
4. Use both eye and ear
protection.
For a mounting pressure more
than 20 psi (1.38 bar) greater than
the maximum pressure, a Ford
dealer or other tire service
professional should do the
mounting.
Always inflate steel carcass tires
with a remote air fill with the
person inflating standing at a
minimum of 12 ft (3.66 m) away
from the wheel and tire assembly. Important: Remember to replace
the wheel valve stems when the
road tires are replaced on your
vehicle.
234
Tourneo Connect/Transit Connect (CHC) Canada/United States of America, enUSA, First Printing Wheels and Tires
Page 244 of 439
When Inflating the Tires
When inflating the tires (for example; at a
gas station), the system may not respond
immediately to the air added to the tires.
It may take up to two minutes of driving
over 20 mph (32 km/h) for the light to turn
off after you have filled your tires to the
recommended inflation pressure.
How Temperature Affects the Tire
Pressures
While driving in a normal manner, tire
pressures may increase up to 4 psi (0.3
bar) from a cold start situation. If the
vehicle is stationary overnight and the
temperature significantly lower than the
daytime temperature, tire pressures may
decrease up to 3 psi (0.2 bar) for a drop of
30°F (17°C) in ambient temperature. This
lower pressure value will be detected by
the system as being significantly lower
than the correct inflation pressure and the
warning light will illuminate.
If the warning light is on:
•
Check each tire to verify that none are
flat.
• If one or more tires are flat, repair as
necessary.
• Check the tire pressures and Inflate all
the tires to the correct pressure.
Tire Pressure Monitoring System
Reset Procedure
Note: The system reset procedure needs
to be carried out after each tire replacement. Overview WARNING
To determine the required
pressure(s) for your vehicle, see the
Safety Compliance Certification
Label (affixed to either the door hinge
pillar, door-latch post, or the door edge
that meets the door-latch post, next to the
driver seating position), or Tire Label
located on the B-Pillar or the edge of the
driver door. To maintain your vehicle
’s load carrying
capability, this vehicle requires different
tire pressures in the front tires compared
to the rear tires. The system on your vehicle
is designed to illuminate the warning light
at different pressures for the front and rear
tires.
The tires need to be periodically rotated
to provide consistent performance and
maximum tire life, the system needs to
know when the tires have been rotated to
determine which set of tires are on the
front and rear axles. With this information,
the system can detect and correctly warn
of low tire pressures.
System Reset Tips:
• To reduce the chance of interference
from another vehicle, the system reset
procedure should be carried out at
least three feet (one meter) away from
another Ford vehicle undergoing the
system reset procedure.
• Do not wait more than two minutes
between resetting each tire sensor or
the system will time-out and the entire
procedure will have to be repeated on
all four wheels. A double horn chirp
indicates the need to repeat the
procedure.
241
Tourneo Connect/Transit Connect (CHC) Canada/United States of America, enUSA, First Printing Wheels and Tires
Page 255 of 439
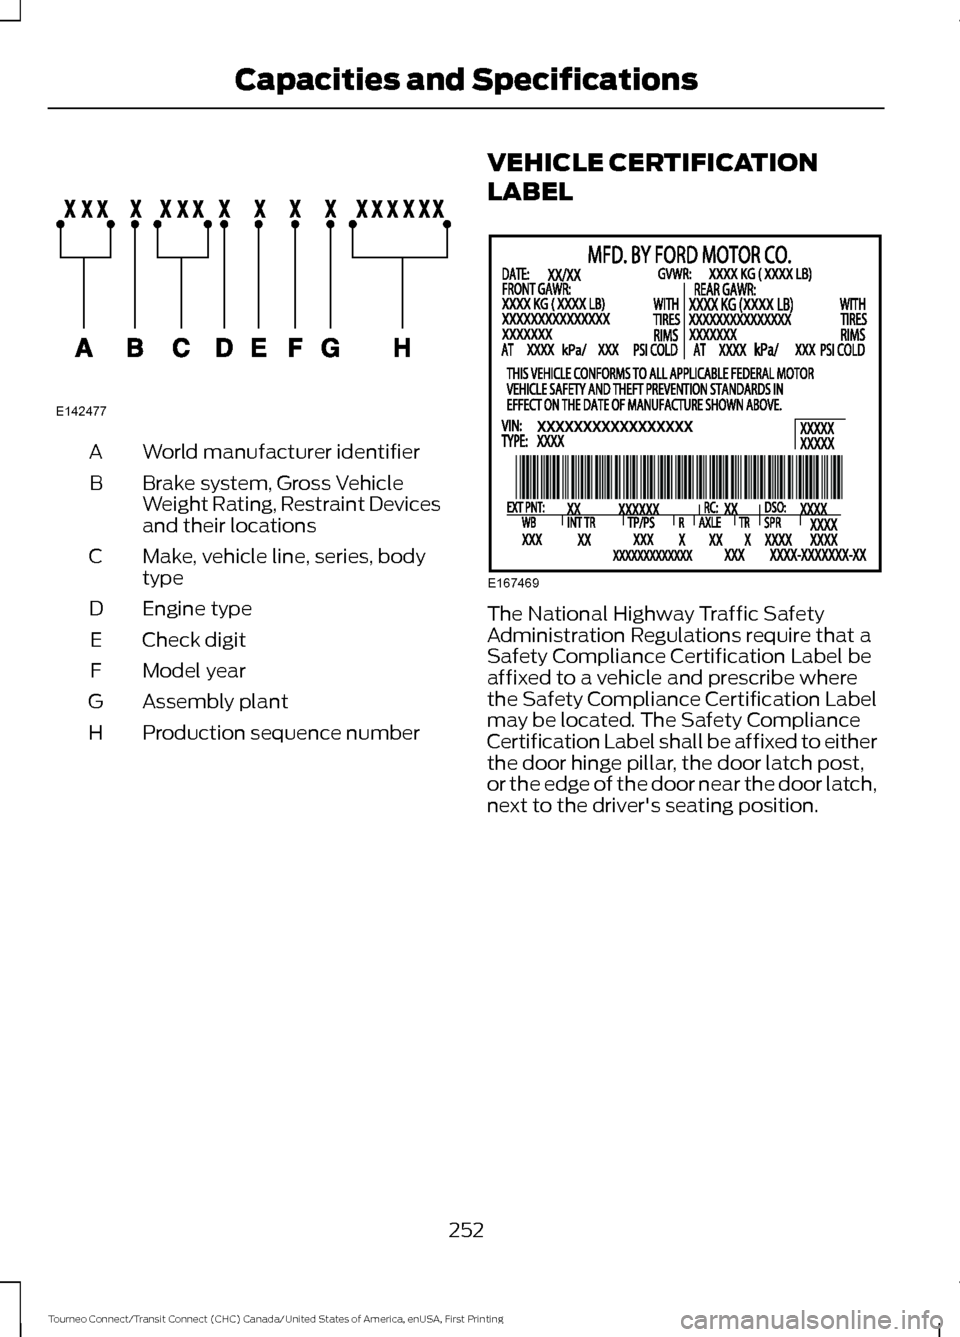
World manufacturer identifier
A
Brake system, Gross Vehicle
Weight Rating, Restraint Devices
and their locations
B
Make, vehicle line, series, body
type
C
Engine type
D
Check digit
E
Model year
F
Assembly plant
G
Production sequence number
H VEHICLE CERTIFICATION
LABEL The National Highway Traffic Safety
Administration Regulations require that a
Safety Compliance Certification Label be
affixed to a vehicle and prescribe where
the Safety Compliance Certification Label
may be located. The Safety Compliance
Certification Label shall be affixed to either
the door hinge pillar, the door latch post,
or the edge of the door near the door latch,
next to the driver's seating position.
252
Tourneo Connect/Transit Connect (CHC) Canada/United States of America, enUSA, First Printing Capacities and SpecificationsE142477 E167469