display FORD TRANSIT CONNECT 2018 Owner's Guide
[x] Cancel search | Manufacturer: FORD, Model Year: 2018, Model line: TRANSIT CONNECT, Model: FORD TRANSIT CONNECT 2018Pages: 449, PDF Size: 6.73 MB
Page 127 of 449
Note:
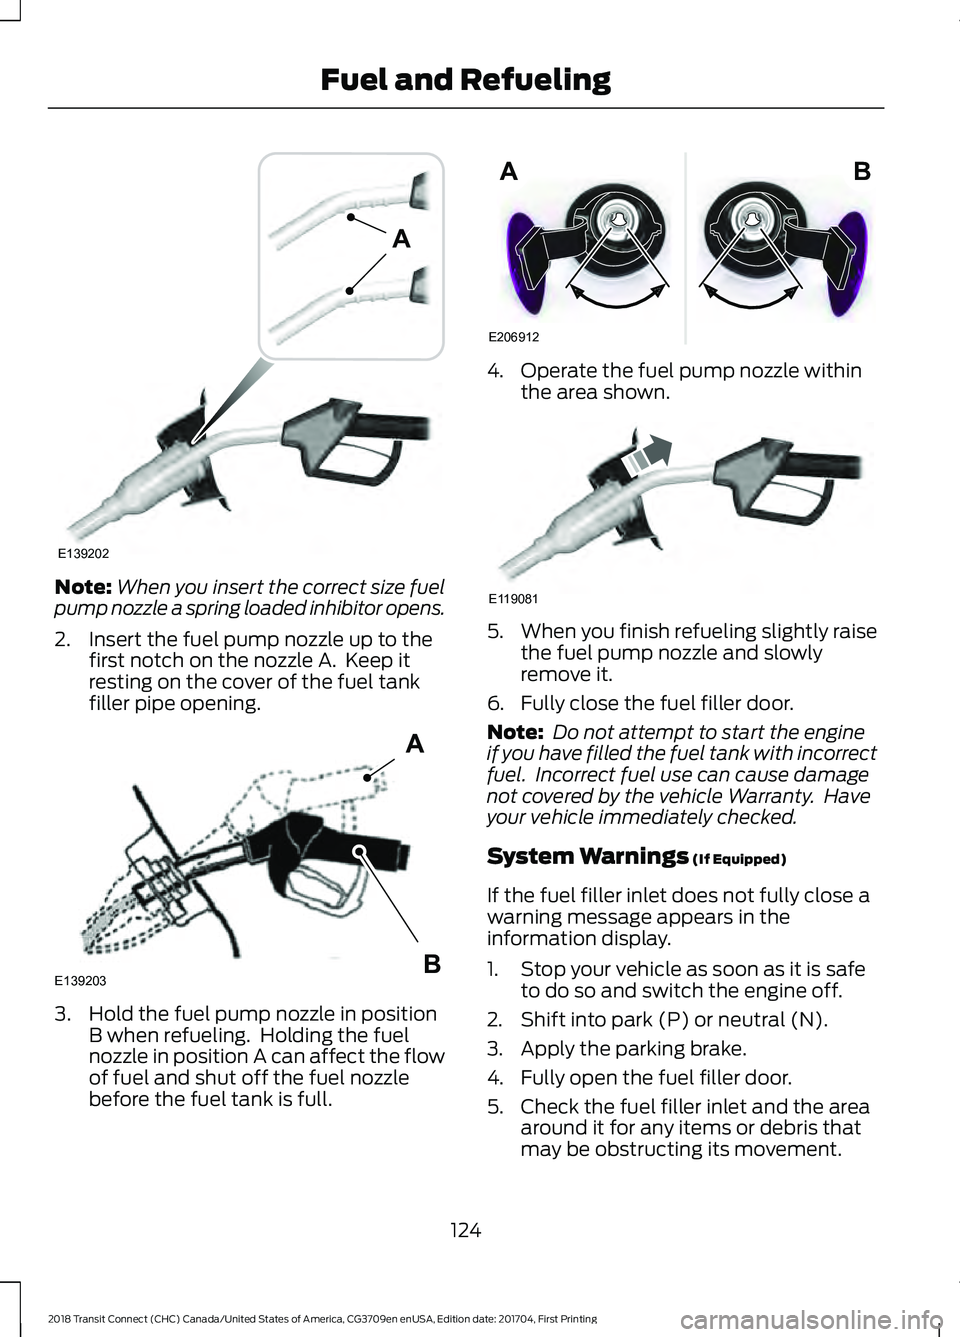
When you insert the correct size fuel
pump nozzle a spring loaded inhibitor opens.
2. Insert the fuel pump nozzle up to the first notch on the nozzle A. Keep it
resting on the cover of the fuel tank
filler pipe opening. 3. Hold the fuel pump nozzle in position
B when refueling. Holding the fuel
nozzle in position A can affect the flow
of fuel and shut off the fuel nozzle
before the fuel tank is full. 4. Operate the fuel pump nozzle within
the area shown. 5.
When you finish refueling slightly raise
the fuel pump nozzle and slowly
remove it.
6. Fully close the fuel filler door.
Note: Do not attempt to start the engine
if you have filled the fuel tank with incorrect
fuel. Incorrect fuel use can cause damage
not covered by the vehicle Warranty. Have
your vehicle immediately checked.
System Warnings (If Equipped)
If the fuel filler inlet does not fully close a
warning message appears in the
information display.
1. Stop your vehicle as soon as it is safe to do so and switch the engine off.
2. Shift into park (P) or neutral (N).
3. Apply the parking brake.
4. Fully open the fuel filler door.
5. Check the fuel filler inlet and the area around it for any items or debris that
may be obstructing its movement.
124
2018 Transit Connect (CHC) Canada/United States of America, CG3709en enUSA, Edition date: 201704, First Printing Fuel and RefuelingE139202
A E139203
A
B E206912
AB E119081
Page 135 of 449
To use SelectShift, move the gearshift
lever into S (Sport). Use the +/- buttons
on the side of your gearshift lever to
manually change gears.
•
Press the (+) button to upshift.
• Press the (-) button to downshift.
Note: After you have assumed manual
control with SelectShift your vehicle will
remain in this mode until you return the
gearshift lever from S (Sport), back to D
(Drive).
Upshift to the recommended shift speeds
according to the following chart: Upshifts when accelerating (recom-
mended for best fuel economy)
Shift from:15 mph (24 km/h)
1 - 2
25 mph (40 km/h)
2 - 3
40 mph (64 km/h)
3 - 4
45 mph (72 km/h)
4 - 5
50 mph (80 km/h)
5 - 6
The instrument cluster will display the
selected gear that you are currently in and
a shift indicator arrow to assist in
optimizing shifting.
SelectShift will automatically make some
shifts for you in the event that your engine
speed is running at too high, or too low an
RPM.
Note: Engine damage may occur if
excessive engine revving is held without
shifting.
Brake-Shift Interlock WARNINGS
Do not drive your vehicle until you
verify that the brake lamps are
working. WARNINGS
When doing this procedure, you will
be taking the vehicle out of park
which means the vehicle can roll
freely. To avoid unwanted vehicle
movement, always fully set the parking
brake prior to doing this procedure. Use
wheel chocks if appropriate. If the parking brake is fully released,
but the brake warning lamp remains
illuminated, the brakes may not be
working properly. See your authorized
dealer. Use the brake shift interlock lever to move
the gearshift lever from the park position
in the event of an electrical malfunction or
if your vehicle has a dead battery.
Apply the parking brake and turn the
ignition off before performing this
procedure.
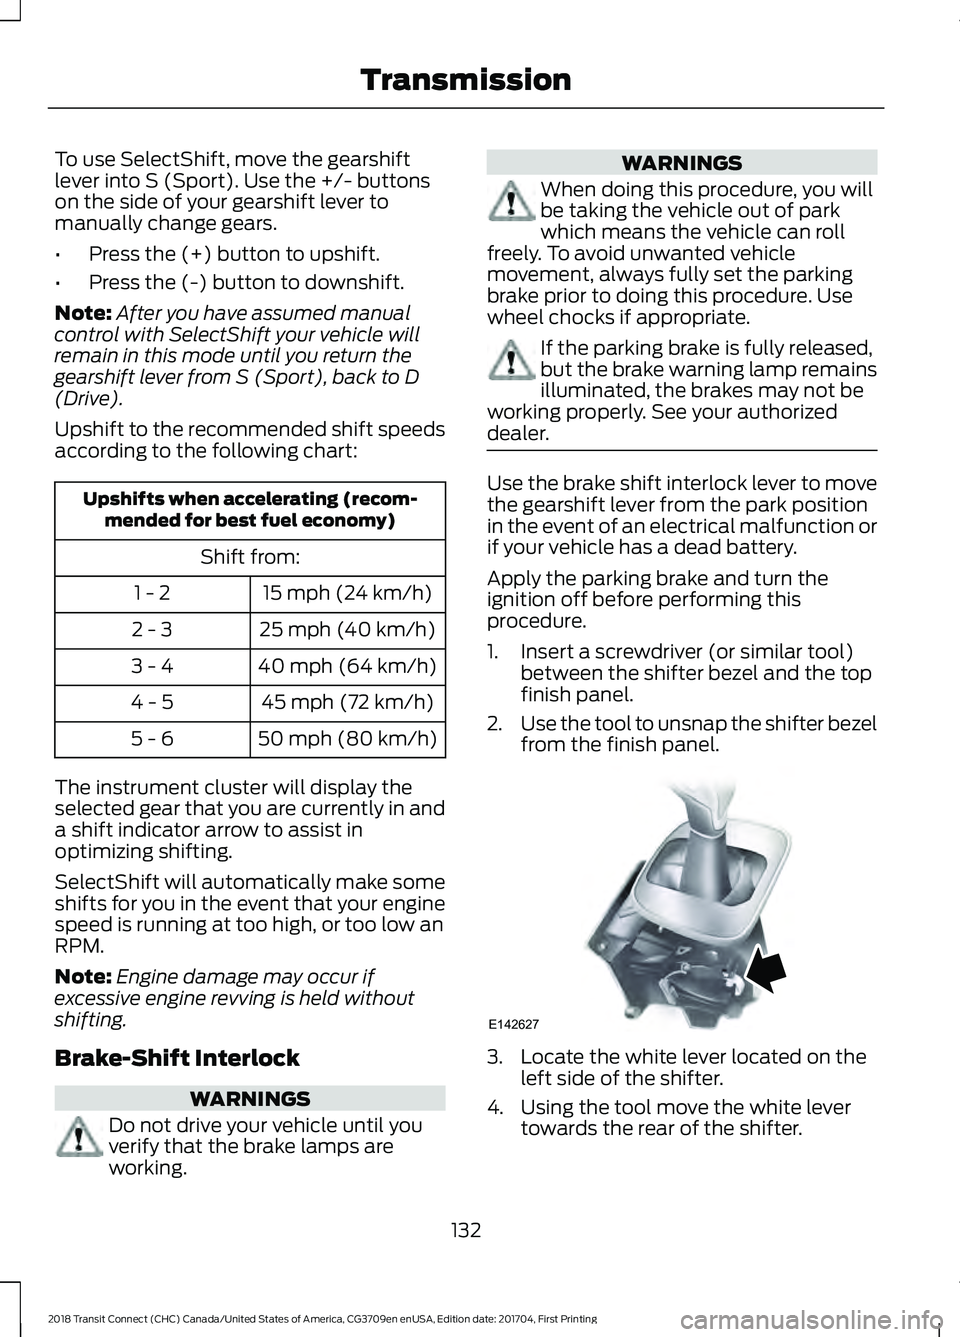
1. Insert a screwdriver (or similar tool)
between the shifter bezel and the top
finish panel.
2. Use the tool to unsnap the shifter bezel
from the finish panel. 3. Locate the white lever located on the
left side of the shifter.
4. Using the tool move the white lever towards the rear of the shifter.
132
2018 Transit Connect (CHC) Canada/United States of America, CG3709en enUSA, Edition date: 201704, First Printing TransmissionE142627
Page 139 of 449
3. When you remove your foot from the
brake pedal, your vehicle will remain
on the slope without rolling away for
approximately two to three seconds.
This hold time will automatically be
extended if you are in the process of
driving off.
4. Drive off in the normal manner. The brakes will be released automatically.
Switching the System On and Off
Vehicles with Manual Transmission
You can switch this feature on or off in the
information display. The system
remembers the last setting when you start
your vehicle.
Vehicles with Automatic Transmission
You cannot turn the system on or off.
When you switch the ignition on, the
system automatically turns on.
136
2018 Transit Connect (CHC) Canada/United States of America, CG3709en enUSA, Edition date: 201704, First Printing Brakes
Page 140 of 449
PRINCIPLE OF OPERATION
The traction control system helps avoid
drive wheel spin and loss of traction.
If your vehicle begins to slide, the system
applies the brakes to individual wheels
and, when needed, reduces engine power
at the same time. If the wheels spin when
accelerating on slippery or loose surfaces,
the system reduces engine power in order
to increase traction.
USING TRACTION CONTROL
WARNING
The stability and traction control
light illuminates steadily if the
system detects a failure. Make sure
you did not manually disable the traction
control system using the information
display controls or the switch. If the
stability control and traction control light
is still illuminating steadily, have the
system serviced by an authorized dealer
immediately. Operating your vehicle with
the traction control disabled could lead to
an increased risk of loss of vehicle control,
vehicle rollover, personal injury and death. The system automatically turns on each
time you switch the ignition on.
If your vehicle is stuck in mud or snow,
switching traction control off may be
beneficial as this allows the wheels to spin.
Note:
When you switch traction control off,
stability control remains fully active.
Switching the System Off
When you switch the system off or on, a
message appears in the information
display showing system status.
You can switch the system off by either
using the information display controls or
the switch. Using the Information Display
Controls
You can switch this feature off or on in the
information display. See General
Information (page 84).
Using a Switch
(If Equipped)
Use the traction control switch on the
instrument panel to switch the system off
or on.
System Indicator Lights and
Messages The stability and traction control
light:
• Temporarily illuminates on engine
start-up.
• Flashes when a driving condition
activates either of the systems.
• Illuminates if a problem occurs in either
of the systems. The stability and traction control
off light temporarily illuminates
on engine start-up and stays on
when you switch the traction control
system off.
137
2018 Transit Connect (CHC) Canada/United States of America, CG3709en enUSA, Edition date: 201704, First Printing Traction ControlE138639 E130458
Page 143 of 449

PRINCIPLE OF OPERATION
WARNINGS
To help avoid personal injury, please
read and understand the limitations
of the system as contained in this
section. Sensing is only an aid for some
(generally large and fixed) objects when
moving on a flat surface at parking speeds.
Certain objects with surfaces that absorb
ultrasonic waves, surrounding vehicle's
parking aid systems, traffic control
systems, fluorescent lamps, inclement
weather, air brakes, and external motors
and fans may also affect the function of
the sensing system; this may include
reduced performance or a false activation. To help avoid personal injury, always
use caution when in reverse (R) and
when using the sensing system.
This system is not designed to
prevent contact with small or moving
objects. The system is designed to
provide a warning to assist the driver in
detecting large stationary objects to avoid
damaging your vehicle. The system may
not detect smaller objects, particularly
those close to the ground. Certain add-on devices such as large
trailer hitches, bike or surfboard racks
and any device that may block the
normal detection zone of the system, may
create false beeps. Note:
Keep the sensors, located on the
bumper or fascia, free from snow, ice and
large accumulations of dirt. If the sensors
are covered, the system ’s accuracy can be
affected. Do not clean the sensors with
sharp objects.
Note: If your vehicle sustains damage to
the bumper or fascia, leaving it misaligned
or bent, the sensing zone may be altered
causing inaccurate measurement of
obstacles or false alarms. Note:
The sensing system cannot be turned
off when a MyKey is present. See Principle
of Operation (page 48).
Note: If you attach certain add-on devices
such as a trailer or bike rack, the rear sensing
system may detect that add-on device and
therefore provide warnings. It is suggested
that you disable the rear sensing system
when you attach an add-on device to your
vehicle to prevent these warnings.
The sensing system warns the driver of
obstacles within a certain range of your
vehicle. The system turns on automatically
whenever you switch the ignition on. You can turn the system on or
off by pressing the parking aid
button. If your vehicle does not
have a parking aid button, the system can
be switched off through the information
display menu or from the pop-up message
that appears once you shift the
transmission into reverse (R). See General
Information
(page 84).
If a fault is present in the system, a warning
message appears in the information
display. See
Information Messages
(page 87).
REAR PARKING AID
The rear parking aid sensors automatically
turn on when you shift into reverse (R).
As your vehicle moves closer to the
obstacle, the rate of the audible warning
increases. When the obstacle is less than
12 in (30 cm)
away, the warning sounds
continuously. If the system detects an
object farther than
12 in (30 cm) from the
corners of the bumper, the tone sounds for
only three seconds. If the system detects
an approaching object the warning sounds
again.
140
2018 Transit Connect (CHC) Canada/United States of America, CG3709en enUSA, Edition date: 201704, First Printing Parking Aids
(If Equipped)E139213
Page 145 of 449
REAR VIEW CAMERA
WARNINGS
The rear view camera system is a
reverse aid supplement device that
still requires the driver to use it in
conjunction with the interior and exterior
mirrors for maximum coverage. The camera may not detect objects
that are very close to your vehicle.
Back up as slow as possible since
higher speeds might limit your
reaction time to stop the vehicle.
Note:
The operation of the camera may
vary depending on the ambient temperature,
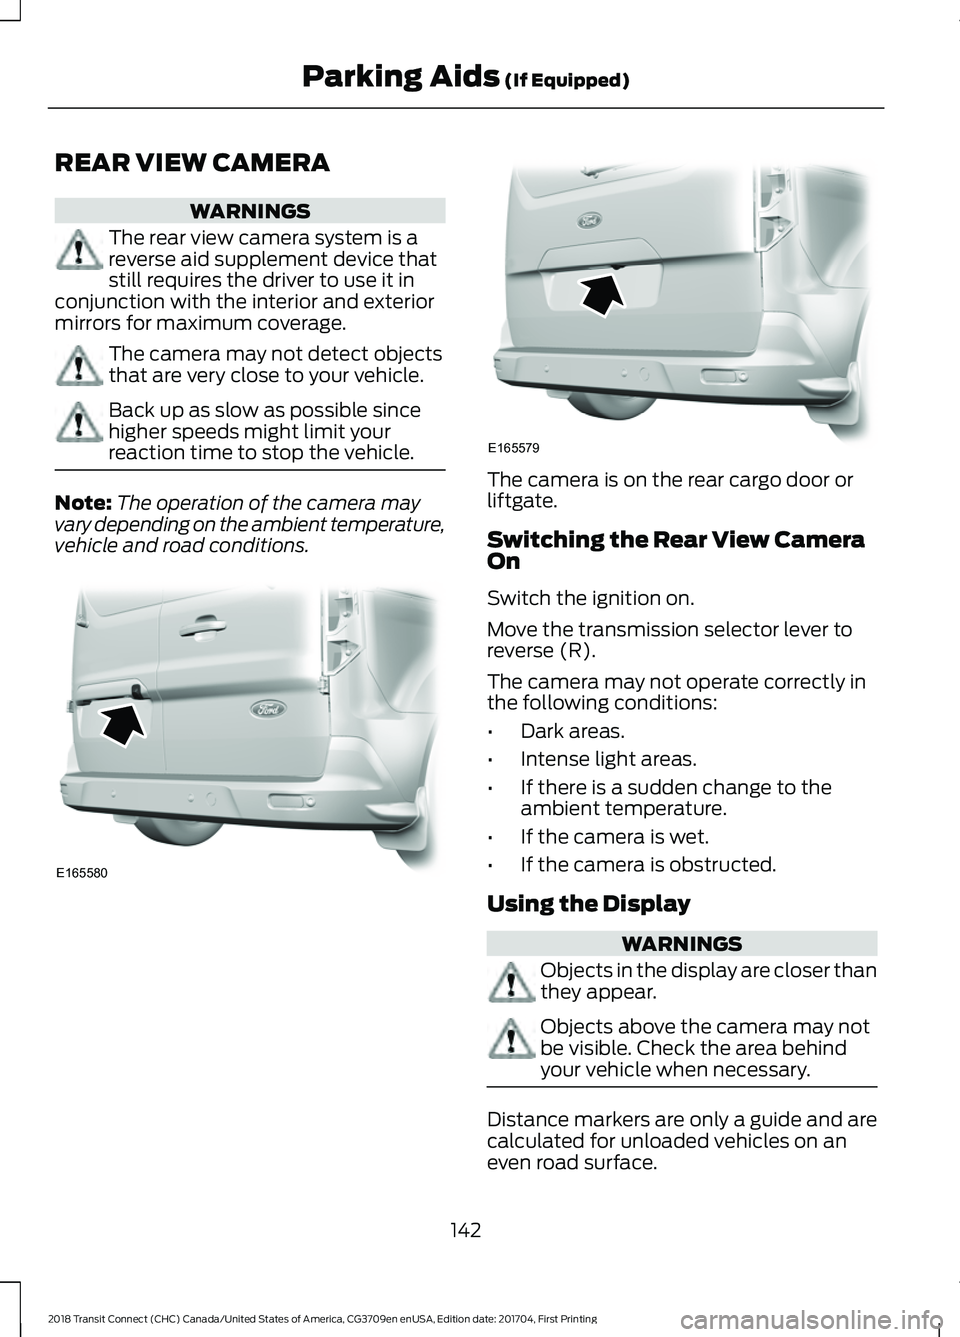
vehicle and road conditions. The camera is on the rear cargo door or
liftgate.
Switching the Rear View Camera
On
Switch the ignition on.
Move the transmission selector lever to
reverse (R).
The camera may not operate correctly in
the following conditions:
•
Dark areas.
• Intense light areas.
• If there is a sudden change to the
ambient temperature.
• If the camera is wet.
• If the camera is obstructed.
Using the Display WARNINGS
Objects in the display are closer than
they appear.
Objects above the camera may not
be visible. Check the area behind
your vehicle when necessary.
Distance markers are only a guide and are
calculated for unloaded vehicles on an
even road surface.
142
2018 Transit Connect (CHC) Canada/United States of America, CG3709en enUSA, Edition date: 201704, First Printing Parking Aids (If Equipped)E165580 E165579
Page 147 of 449
Green - Zone
C
Black - center line of the
projected vehicle path
D
Note: When reversing with a trailer the
camera will show the direction of your
vehicle and not the direction of the trailer.
Note: When reversing with a trailer the
screen does not display the lines.
Switching the Rear View Camera
Off
The image does not display when you
move the gearshift lever into Park (P).
Vehicles With Rear View Camera Delay
To turn this feature on See Settings (page
359).
The display will automatically switch off
after disengaging reverse (R) gear.
The system will automatically switch off
when your vehicle speed is above 5.0 mph
(8 km/h)
.
Note: Depending upon which type of
multimedia display you have, the rear view
camera delay is always on, it cannot be
switched off.
Vehicles With Parking Aid
The display will show a colored distance
bar. This indicates the approximate
distance from the rear bumper to an
object.
These are color coded as follows:
• Red - Zone
• Amber - Zone
• Green - Zone
144
2018 Transit Connect (CHC) Canada/United States of America, CG3709en enUSA, Edition date: 201704, First Printing Parking Aids
(If Equipped)
Page 148 of 449
PRINCIPLE OF OPERATION
Cruise control lets you maintain a set
speed without keeping your foot on the
accelerator pedal. You can use cruise
control when your vehicle speed is greater
than 20 mph (30 km/h).
USING CRUISE CONTROL WARNINGS
Do not use cruise control on winding
roads, in heavy traffic or when the
road surface is slippery. This could
result in loss of vehicle control, serious
injury or death. When you are going downhill, your
vehicle speed could increase above
the set speed. The system does not
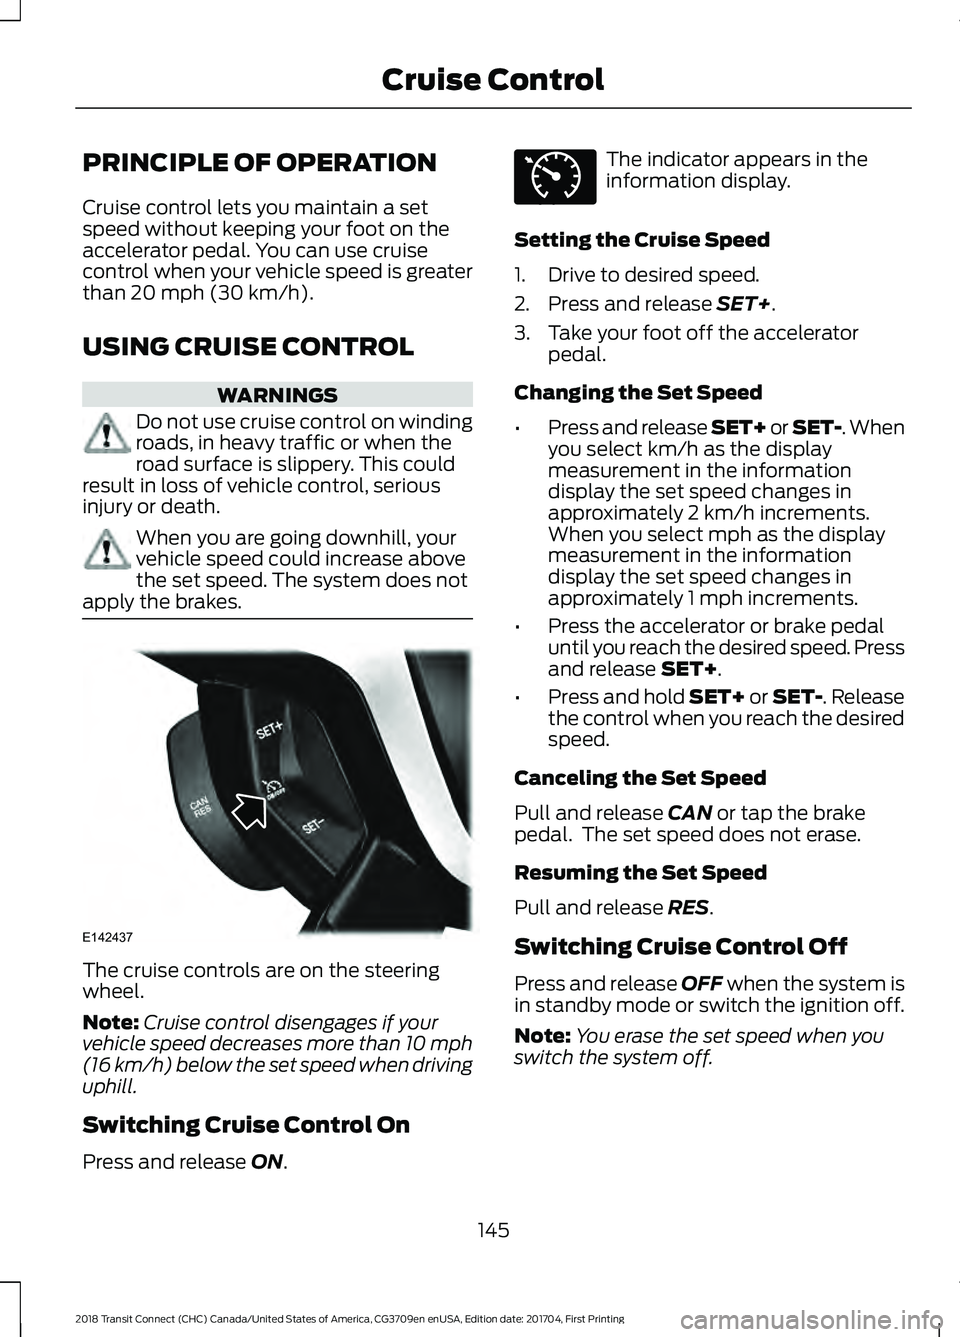
apply the brakes. The cruise controls are on the steering
wheel.
Note:
Cruise control disengages if your
vehicle speed decreases more than 10 mph
(16 km/h) below the set speed when driving
uphill.
Switching Cruise Control On
Press and release
ON. The indicator appears in the
information display.
Setting the Cruise Speed
1. Drive to desired speed.
2. Press and release
SET+.
3. Take your foot off the accelerator pedal.
Changing the Set Speed
• Press and release SET+ or SET-. When
you select km/h as the display
measurement in the information
display the set speed changes in
approximately 2 km/h increments.
When you select mph as the display
measurement in the information
display the set speed changes in
approximately 1 mph increments.
• Press the accelerator or brake pedal
until you reach the desired speed. Press
and release
SET+.
• Press and hold SET+ or SET-. Release
the control when you reach the desired
speed.
Canceling the Set Speed
Pull and release
CAN or tap the brake
pedal. The set speed does not erase.
Resuming the Set Speed
Pull and release
RES.
Switching Cruise Control Off
Press and release
OFF when the system is
in standby mode or switch the ignition off.
Note: You erase the set speed when you
switch the system off.
145
2018 Transit Connect (CHC) Canada/United States of America, CG3709en enUSA, Edition date: 201704, First Printing Cruise ControlE142437 E71340
Page 150 of 449
The Blind Spot Information System
illuminates an amber alert indicator in the
outside mirror on the side of your vehicle
the approaching vehicle is coming from.
When the Blind Spot Information System
is alerting on a vehicle and the
corresponding turn signal is ON, the Blind
Spot Information System alert indicator
flashes as an increased warning level.
The alert indicator dims when the system
detects nighttime darkness.
Note:
The alert indicator flashes in case of
an alert and the turn signal is set to that side
at the same time.
System Sensor Blockage WARNING
To help avoid injuries, NEVER use the
Blind Spot Information System as a
replacement for using the interior
and exterior mirrors or looking over your
shoulder before changing lanes. The Blind
Spot Information System is not a
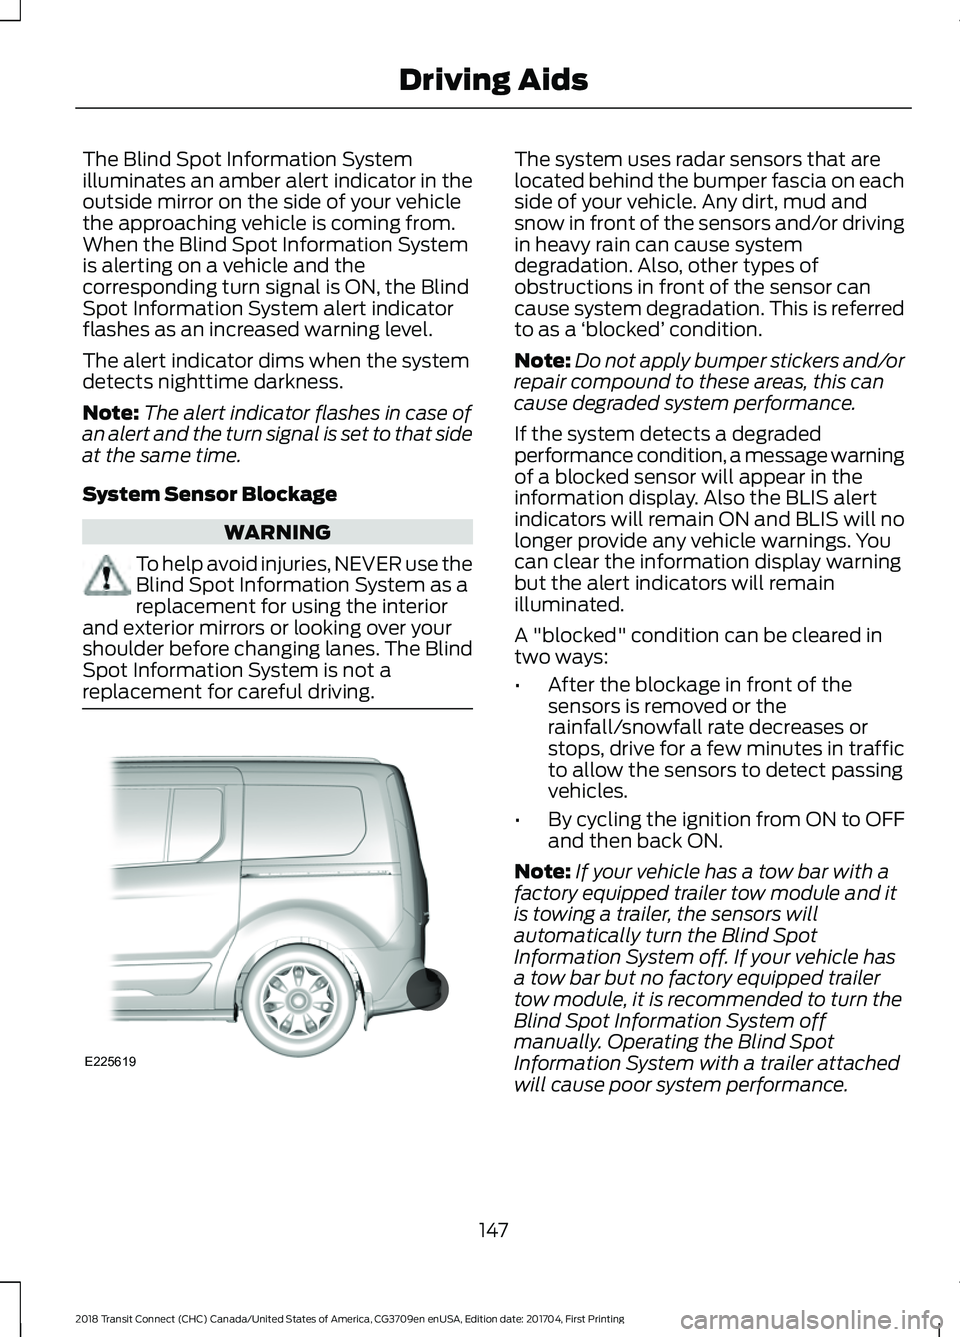
replacement for careful driving. The system uses radar sensors that are
located behind the bumper fascia on each
side of your vehicle. Any dirt, mud and
snow in front of the sensors and/or driving
in heavy rain can cause system
degradation. Also, other types of
obstructions in front of the sensor can
cause system degradation. This is referred
to as a
‘blocked ’ condition.
Note: Do not apply bumper stickers and/or
repair compound to these areas, this can
cause degraded system performance.
If the system detects a degraded
performance condition, a message warning
of a blocked sensor will appear in the
information display. Also the BLIS alert
indicators will remain ON and BLIS will no
longer provide any vehicle warnings. You
can clear the information display warning
but the alert indicators will remain
illuminated.
A "blocked" condition can be cleared in
two ways:
• After the blockage in front of the
sensors is removed or the
rainfall/snowfall rate decreases or
stops, drive for a few minutes in traffic
to allow the sensors to detect passing
vehicles.
• By cycling the ignition from ON to OFF
and then back ON.
Note: If your vehicle has a tow bar with a
factory equipped trailer tow module and it
is towing a trailer, the sensors will
automatically turn the Blind Spot
Information System off. If your vehicle has
a tow bar but no factory equipped trailer
tow module, it is recommended to turn the
Blind Spot Information System off
manually. Operating the Blind Spot
Information System with a trailer attached
will cause poor system performance.
147
2018 Transit Connect (CHC) Canada/United States of America, CG3709en enUSA, Edition date: 201704, First Printing Driving AidsE225619
Page 151 of 449
System Errors
If the system senses a problem with the
left or right sensor, the telltale will
illuminate and a message will appear in
the information display. See Information
Messages (page 87).
Switching the System Off and On
You can temporarily switch the Blind Spot
Information System off in the information
display. See
General Information (page
84). When the Blind Spot Information
System switches off, you will not receive
alerts and the information display shows
a system off message. The telltale in the
cluster also illuminates. When you switch
the Blind Spot Information System on or
off, the alert indicators flash twice.
Note: The Blind Spot Information System
remembers the last selected on or off
setting.
You can also have the Blind Spot
Information System switched off
permanently at an authorized dealer. Once
switched off permanently, the system can
only be switched back on at an authorized
dealer. CROSS TRAFFIC ALERT WARNING
To help avoid personal injury, NEVER
use the Cross Traffic Alert system as
a replacement for using the interior
and exterior mirrors and looking over your
shoulder before backing out of a parking
space. Cross Traffic Alert is not a
replacement for careful driving. Cross Traffic Alert is designed to warn you
of vehicles approaching from the sides
when the transmission is in reverse (R).
Using the System
Cross Traffic Alert turns on when you start
the engine and you shift into reverse (R).
Once shifted out of reverse (R), Cross
Traffic Alert turns off.
Note:
Cross Traffic Alert only functions
while your transmission is in reverse (R).
Cross Traffic Alert is designed to detect
vehicles that approach with a speed up to
37 mph (60 km/h)
. Coverage decreases
when the sensors are partially, mostly or
fully obstructed. Reversing slowly helps
increase the coverage area and
effectiveness.
148
2018 Transit Connect (CHC) Canada/United States of America, CG3709en enUSA, Edition date: 201704, First Printing Driving Aids