automatic transmission FORD TRANSIT CONNECT 2020 User Guide
[x] Cancel search | Manufacturer: FORD, Model Year: 2020, Model line: TRANSIT CONNECT, Model: FORD TRANSIT CONNECT 2020Pages: 509, PDF Size: 7.73 MB
Page 182 of 509

AUTOMATIC TRANSMISSION
- 8-SPEED AUTOMATIC
TRANSMISSION
WARNING: Do not apply the brake
pedal and accelerator pedal
simultaneously. Applying both pedals
simultaneously for more than a few
seconds will limit engine performance,
which may result in difficulty maintaining
speed in traffic and could lead to serious
injury. WARNING:
When your vehicle is
stationary, keep the brake pedal fully
pressed when shifting gears. Failure to
follow this instruction could result in
personal injury, death or property
damage.
Selector Lever Positions
The instrument cluster displays the current
gear.
Park (P)
In park (P), power is not transmitted to the
driven wheels and the transmission is
locked. You can start the engine with the
transmission in this position.
Shift into park (P) only when your vehicle
is stationary.
Reverse (R)
Shift into reverse (R) only when your
vehicle is stationary and the engine is at
idle speed. Neutral (N) WARNING:
In neutral (N) your
vehicle has the ability to roll freely. If you
intend to leave your vehicle, make sure
you apply the parking brake.
In neutral (N), power is not transmitted to
the driven wheels but the transmission is
not locked. You can start the engine with
the transmission in this position.
Drive (D)
Drive (D) is the normal position for driving.
Manual (M)
In manual (M), you can upshift or
downshift using the buttons on the
selector lever.
SelectShift™
About SelectShift™
Use this feature to upshift or downshift
using the buttons on the selector lever.
Using SelectShift™
Shift into manual (M) to switch the feature
on.
• Press the
+ button to upshift.
• Press the
– button to downshift.
Shift into another gear to switch the
feature off.
Brake Shift Interlock
About Brake Shift Interlock
Brake shift interlock prevents you from
shifting out of park (P) when you have
switched the ignition on and not pressed
the brake pedal.
178
2020 Transit Connect (CHC) Canada/United States of America, CG3739en enUSA, Edition date: 201903, First-Printing Transmission
Page 187 of 509
once the engine has developed sufficient
torque to prevent your vehicle from rolling
down the slope. This is an advantage when
pulling away on a slope, for example from
a car park ramp, traffic lights or when
reversing uphill into a parking space.
The system will turn on automatically on
any slope which can result in significant
vehicle rollback.
Using Hill Start Assist
1. Press the brake pedal to bring your
vehicle to a complete standstill. Keep
the brake pedal pressed. If equipped
with a manual transmission, also press
the clutch pedal.
2. If the sensors detect that your vehicle is on a slope, the system will activate
automatically.
3. When you remove your foot from the brake pedal, your vehicle will remain
on the slope without rolling away for
approximately two to three seconds.
This hold time will automatically be
extended if you are in the process of
driving off.
4. Drive off in the normal manner. The brakes will be released automatically.
Switching the System On and Off
Vehicles with Manual Transmission
You can switch this feature on or off in the
information display. The system
remembers the last setting when you start
your vehicle.
Vehicles with Automatic Transmission
You cannot turn the system on or off.
When you switch the ignition on, the
system automatically turns on.
183
2020 Transit Connect (CHC) Canada/United States of America, CG3739en enUSA, Edition date: 201903, First-Printing Brakes
Page 191 of 509
PRINCIPLE OF OPERATION
WARNING: The system may not
detect objects with surfaces that absorb
reflection. Always drive with due care
and attention. Failure to take care may
result in a crash. WARNING: To help avoid personal
injury, always use caution when in
reverse (R) and when using the sensing
system. WARNING:
Traffic control
systems, inclement weather, air brakes,
external motors and fans may affect the
correct operation of the sensing
system.This may cause reduced
performance or false alerts. WARNING:
The system may not
detect small or moving objects,
particularly those close to the ground.
Note: Some accessories such as large
trailer hitches, bike or surfboard racks can
cause reduced performance or false alerts.
Note: Keep the sensors free from snow, ice
and large accumulations of dirt. Blocked
sensors may affect system accuracy. Do
not clean the sensors with sharp objects.
Note: If your vehicle sustains damage
leaving the sensors misaligned, this will
cause inaccurate measurements or false
alerts.
Note: The sensing system cannot be turned
off when a MyKey is present. See Principle
of Operation
(page 59).
We recommend that you take some time
to get to know the system and its
limitations by reading this section. The sensing system warns the driver of
obstacles within a certain range of your
vehicle. The system automatically turns
on each time you switch the ignition on. You can turn the system on or
off by pressing the parking aid
button. If your vehicle does not
have a parking aid button, the system can
be switched off through the information
display menu or from the pop-up message
that appears once you shift the
transmission into reverse (R). See
General Information
(page 98).
If a fault is present in the system, a warning
message appears in the information
display and does not allow you to switch
the system on.
See
Information Messages (page 100).
REAR PARKING AID WARNING:
The system may not
detect objects with surfaces that absorb
reflection. Always drive with due care
and attention. Failure to take care may
result in a crash. WARNING:
The system may not
detect small or moving objects,
particularly those close to the ground. WARNING: To help avoid personal
injury, always use caution when in
reverse (R) and when using the sensing
system. WARNING: The parking aid system
can only assist you to detect objects
when your vehicle is moving at parking
speeds. To help avoid personal injury you
must take care when using the parking
aid system.
187
2020 Transit Connect (CHC) Canada/United States of America, CG3739en enUSA, Edition date: 201903, First-Printing Parking Aids
(If Equipped)E139213
Page 221 of 509
The system is designed to detect vehicles
that may have entered the blind spot zone.
The detection area is on both sides of your
vehicle, extending rearward from the
exterior mirrors to approximately 13 ft
(4 m) beyond the rear bumper. The
detection area extends to approximately
59 ft (18 m)
beyond the rear bumper when
the vehicle speed is greater than 30 mph
(48 km/h) to alert you of faster
approaching vehicles.
Note: The system does not prevent contact
with other vehicles. It is not designed to
detect parked vehicles, pedestrians, animals
or other infrastructures.
Using the Blind Spot Information
System
Vehicles with Automatic Transmission
The system turns on when all of the
following occur:
• You start your vehicle.
• You shift into drive (D).
• The vehicle speed is greater than
6 mph (10 km/h)
.
Note: The system does not operate in park
(P) or reverse (R).
Vehicles with Manual Transmission
The system turns on when all of the
following occur:
• You start your vehicle.
• The vehicle speed is greater than
6 mph (10 km/h)
.
Note: The system does not operate in
reverse (R). System Lights and Messages
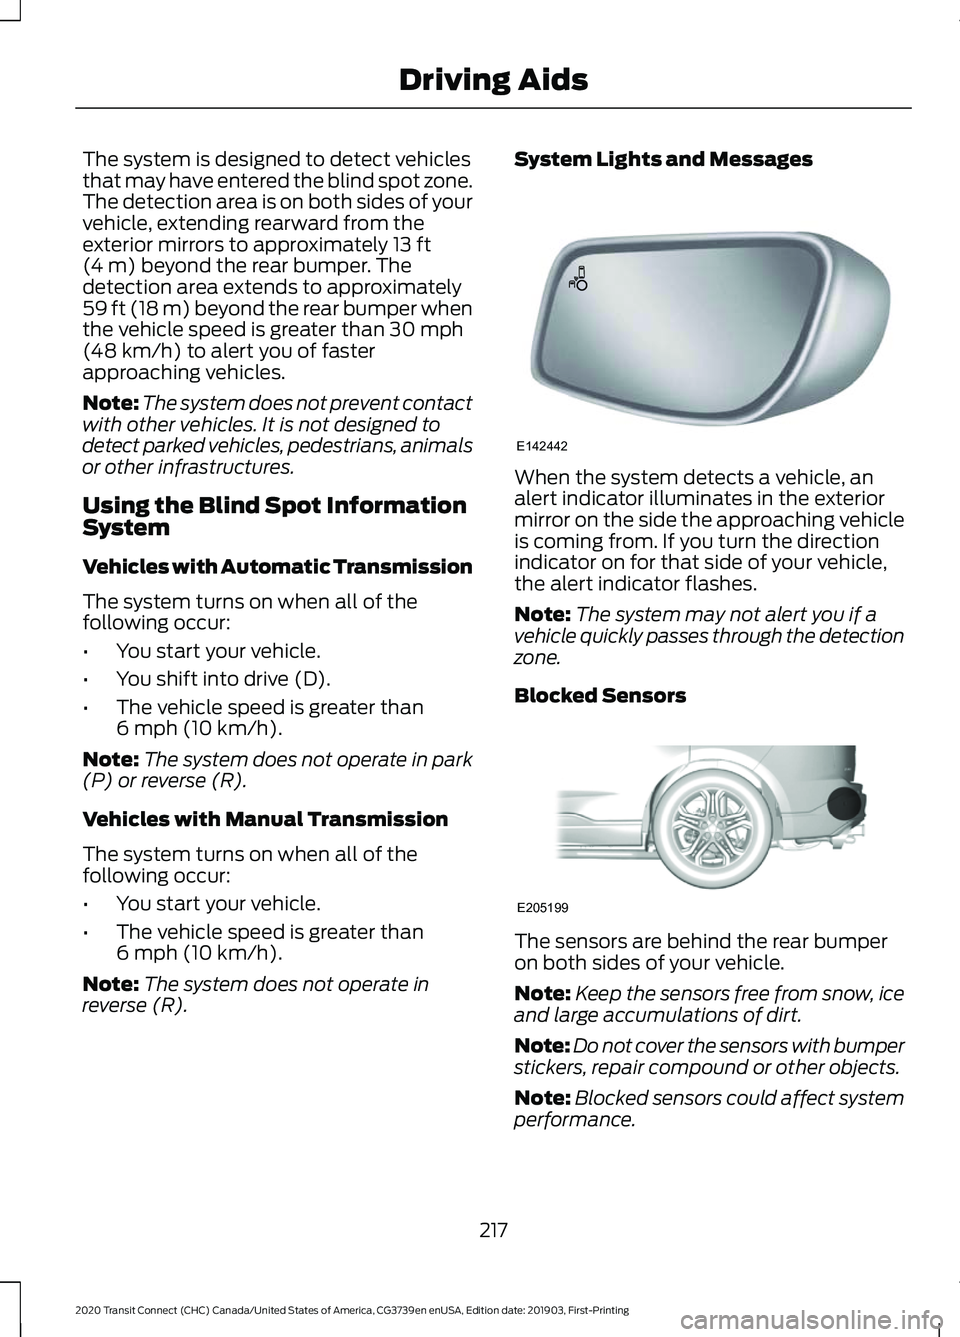
When the system detects a vehicle, an
alert indicator illuminates in the exterior
mirror on the side the approaching vehicle
is coming from. If you turn the direction
indicator on for that side of your vehicle,
the alert indicator flashes.
Note:
The system may not alert you if a
vehicle quickly passes through the detection
zone.
Blocked Sensors The sensors are behind the rear bumper
on both sides of your vehicle.
Note:
Keep the sensors free from snow, ice
and large accumulations of dirt.
Note: Do not cover the sensors with bumper
stickers, repair compound or other objects.
Note: Blocked sensors could affect system
performance.
217
2020 Transit Connect (CHC) Canada/United States of America, CG3739en enUSA, Edition date: 201903, First-Printing Driving AidsE142442 E205199
Page 226 of 509

To view the instantaneous efficiency level, use the information display controls
on the steering wheel to select the following:
Action
Menu Item
Press the menu button.
MyView
Press the OK button.
Eco Coach
Trip Summary
The calculated trip summary is shown as
four colored bars. The bars travel from left
to right as the calculated efficiency levels
increase. The bars indicate the average
efficiency level for acceleration,
deceleration, speed and gear shifting
during the total distance traveled by your
vehicle for the current trip. Note:
Vehicles with an automatic
transmission do not have a bar for gear
shifting.
To view the trip summary, use the information display controls on the steering
wheel to select the following: Action
Menu Item
Press the menu button.
MyView
Press the OK button. Press it again to view the trip summary.
Eco Coach
STEERING
Electric Power Steering
(If Equipped) WARNING:
The electric power
steering system has diagnostic checks
that continuously monitor the system. If
a fault is detected, a message displays
in the information display. Stop your
vehicle as soon as it is safe to do so.
Switch the ignition off. After at least 10 seconds, switch the ignition on and
watch the information display for a
steering system warning message. If a
steering system warning message
returns, have the system checked as
soon as possible.
WARNING: If the system detects
an error, you may not feel a difference in
the steering, however a serious condition
may exist. Have your vehicle checked as
soon as possible. Failure to do so may
result in loss of steering control.
Your vehicle has an electric power steering
system, there is no fluid reservoir, no
maintenance is required.
222
2020 Transit Connect (CHC) Canada/United States of America, CG3739en enUSA, Edition date: 201903, First-Printing Driving Aids
Page 247 of 509
Trailer Brakes
WARNING: Do not connect a
trailer's hydraulic brake system directly
to your vehicle's brake system. Your
vehicle may not have enough braking
power and your chances of having a
collision greatly increase.
Electric brakes and manual, automatic or
surge-type trailer brakes are safe if you
install them correctly and adjust them to
the manufacturer's specifications. The
trailer brakes must meet local and federal
regulations.
The rating for the tow vehicle's braking
system operation is at the gross vehicle
weight rating, not the gross combined
weight rating.
Separate functioning brake systems are
required for safe control of towed vehicles
and trailers weighing more than 1500
pounds (680 kilograms) when loaded.
Trailer Lamps WARNING:
Never connect any
trailer lamp wiring to the vehicle's tail
lamp wiring; this may damage the
electrical system resulting in fire. Contact
your authorized dealer as soon as
possible for assistance in proper trailer
tow wiring installation. Additional
electrical equipment may be required.
Trailer lamps are required on most towed
vehicles. Make sure all running lights, brake
lights, turn signals and hazard warning
flashers are working. Before Towing a Trailer
Practice turning, stopping and backing up
to get the feel of your vehicle-trailer
combination before starting on a trip.
When turning, make wider turns so the
trailer wheels clear curbs and other
obstacles.
When Towing a Trailer
•
Do not drive faster than 70 mph (113
km/h) during the first 500 miles (800
kilometers).
• Do not make full-throttle starts.
• Check the trailer hitch, electrical
connections and trailer wheel lug nuts
thoroughly after you have traveled 50
miles (80 kilometers).
• When stopped in congested or heavy
traffic during hot weather, place the
transmission selector lever in position
P
to aid engine and transmission
cooling and to help A/C performance.
• Turn off the speed control with heavy
loads or in hilly terrain. The speed
control may turn off automatically
when you are towing on long, steep
grades.
• When driving down a long or steep hill,
if your vehicle is fitted with a
SelectShift Automatic® Transmission,
use a low gear. See
Automatic
Transmission (page 176). Do not
apply the brakes continuously, as they
may overheat and become less
effective.
• If the transmission is fitted with Grade
Assist or a Towing feature, use this
feature when towing. This provides
engine braking and helps eliminate
excessive transmission shifting for
optimum fuel economy and
transmission cooling.
243
2020 Transit Connect (CHC) Canada/United States of America, CG3739en enUSA, Edition date: 201903, First-Printing Towing
Page 249 of 509
It is recommended that your vehicle be
towed with a wheel lift and dollies or
flatbed equipment. Do not tow with a
slingbelt. Ford Motor Company has not
approved a slingbelt towing procedure. If
the vehicle is towed incorrectly, or by any
other means, vehicle damage may occur.
Ford Motor Company produces a towing
manual for all authorized tow truck
operators. Have your tow truck operator
refer to this manual for proper hook-up
and towing procedures for your vehicle.
You can tow your vehicle from the front
with wheel lift equipment to raise the front
wheels off the ground. We recommend
that you place the rear wheels on a dolly
to prevent damage to the rear of your
vehicle.
You can tow your vehicle from the rear with
wheel lift equipment.
Note:
You must place the front wheels on
a dolly to prevent damage to the
transmission.
TOWING THE VEHICLE ON
FOUR WHEELS
Emergency Towing WARNING: If your vehicle has a
steering wheel lock make sure the
ignition is in the accessory or on position
when being towed. If your vehicle is disabled and you have no
access to a tow dolly, car-hauling trailer or
a flatbed transport vehicle, it can only be
flat-towed with all wheels on the ground
under the following conditions:
•
Your vehicle is facing forward so that
it is towed in a forward direction.
• The transmission selector lever is
placed in position N
. If the transmission
gear shift lever cannot be moved to
position
N, it may need to be
overridden. See Automatic
Transmission (page 176).
• Maximum speed is 35 mph (56 km/h).
• Maximum distance is
50 mi (80 km).
Drive off slowly and smoothly without
jerking the vehicle you are towing.
You must only use the towing eye that was
delivered with your vehicle. See
Towing
Points (page 254).
Tow ropes or rigid towing bars must be
placed on the same side. For example; right
hand rear towing point to right hand front
towing point.
You must use a tow rope or rigid towing
bar that is of the correct strength for the
weight of the towing vehicle and the
vehicle that is being towed.
The weight of the vehicle that is being
towed must not exceed the weight of the
towing vehicle.
Recreational Vehicle Towing
Note: Put your climate control system in
recirculated air mode to prevent exhaust
fumes from entering the vehicle. See
Climate Control
(page 114).
Follow these guidelines if you have a need
for recreational (RV) towing. An example
of recreational towing would be towing
your vehicle behind a motorhome. We
designed these guidelines to prevent
damage to your transmission.
245
2020 Transit Connect (CHC) Canada/United States of America, CG3739en enUSA, Edition date: 201903, First-Printing Towing
Page 256 of 509
Note:
Various system checks are
automatically carried out before the vehicle
will restart. if your vehicle fails to restart
after the third attempt, the system has
detected a fault that requires service. We
recommend you contact an authorized
dealer.
JUMP STARTING THE VEHICLE WARNING: The gases around the
battery can explode if exposed to flames,
sparks or lit cigarettes. An explosion
could result in personal injury or vehicle
damage. WARNING:
Batteries contain
sulfuric acid which can burn skin, eyes
and clothing, if contacted. WARNING:
Use only an
adequate-sized cable with insulated
clamps.
Note: Do not disconnect the battery from
your vehicle ’s electrical system.
Preparing Your Vehicle
Note: Do not attempt to push-start your
automatic transmission vehicle. Automatic
transmissions do not have push-start
capability. Attempting to push-start a
vehicle with an automatic transmission may
cause transmission damage.
Note: Use only a 12-volt supply to start your
vehicle.
Note: Do not disconnect the battery of the
disabled vehicle as this could damage the
vehicle's electrical system.
Park the booster vehicle close to the hood
of the disabled vehicle, making sure the
two vehicles do not touch, and switch off
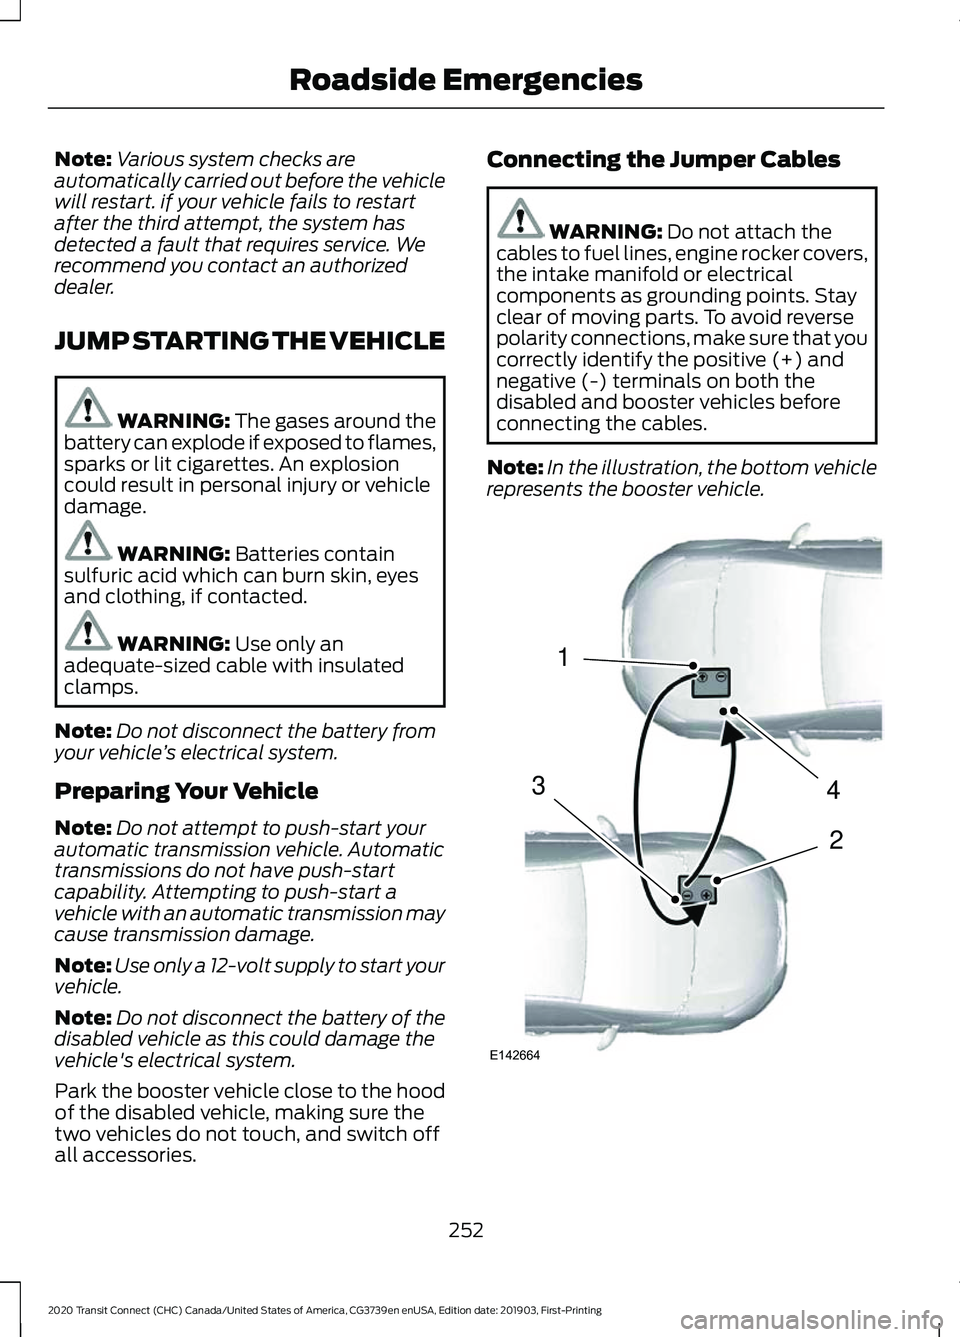
all accessories. Connecting the Jumper Cables WARNING:
Do not attach the
cables to fuel lines, engine rocker covers,
the intake manifold or electrical
components as grounding points. Stay
clear of moving parts. To avoid reverse
polarity connections, make sure that you
correctly identify the positive (+) and
negative (-) terminals on both the
disabled and booster vehicles before
connecting the cables.
Note: In the illustration, the bottom vehicle
represents the booster vehicle. 252
2020 Transit Connect (CHC) Canada/United States of America, CG3739en enUSA, Edition date: 201903, First-Printing Roadside Emergencies4
2
1
3
E142664
Page 286 of 509
Engine Coolant Temperature
Management (If Equipped)
WARNING:
To reduce the risk of
crash and injury, be prepared that the
vehicle speed may reduce and the
vehicle may not be able to accelerate
with full power until the coolant
temperature reduces.
If you tow a trailer with your vehicle, the
engine may temporarily reach a higher
temperature during severe operating
conditions, for example ascending a long
or steep grade in high ambient
temperatures.
At this time, you may notice the coolant
temperature gauge moves toward the red
zone and a message may appear in the
information display.
You may notice a reduction in vehicle
speed caused by reduced engine power in
order to manage the engine coolant
temperature. Your vehicle may enter this
mode if certain high-temperature and
high-load conditions take place. The
amount of speed reduction depends on
vehicle loading, grade and ambient
temperature. If this occurs, there is no
need to stop your vehicle. You can
continue to drive.
The air conditioning may automatically
turn on and off during severe operating
conditions to protect the engine from
overheating. When the coolant
temperature decreases to the normal
operating temperature, the air conditioning
turns on.
If the coolant temperature gauge moves
fully into the red zone, or if the coolant
temperature warning or service engine
soon messages appear in your information
display, do the following: 1. Stop your vehicle as soon as it is safe
to do so. Fully apply the parking brake,
shift into park (P) or neutral (N).
2. Leave the engine running until the coolant temperature gauge needle
returns to the normal position. If the
temperature does not drop after
several minutes, follow the remaining
steps.
3. Switch the engine off and wait for it to
cool. Check the coolant level.
4. If the coolant level is at or below the minimum mark, add prediluted coolant
immediately.
5. If the coolant level is normal, restart the engine and continue.
AUTOMATIC TRANSMISSION
FLUID CHECK
The automatic transmission does not have
a transmission fluid dipstick.
Have an authorized dealer check and
change the transmission fluid at the
correct service interval. See
Scheduled
Maintenance (page 428). Your
transmission does not consume fluid.
However, if the transmission slips, shifts
slowly or if you notice a sign of leaking
fluid, contact an authorized dealer.
Do not use supplemental transmission
fluid additives, treatments or cleaning
agents. The use of these materials may
affect transmission operation and result
in damage to internal transmission
components.
282
2020 Transit Connect (CHC) Canada/United States of America, CG3739en enUSA, Edition date: 201903, First-Printing Maintenance
Page 348 of 509
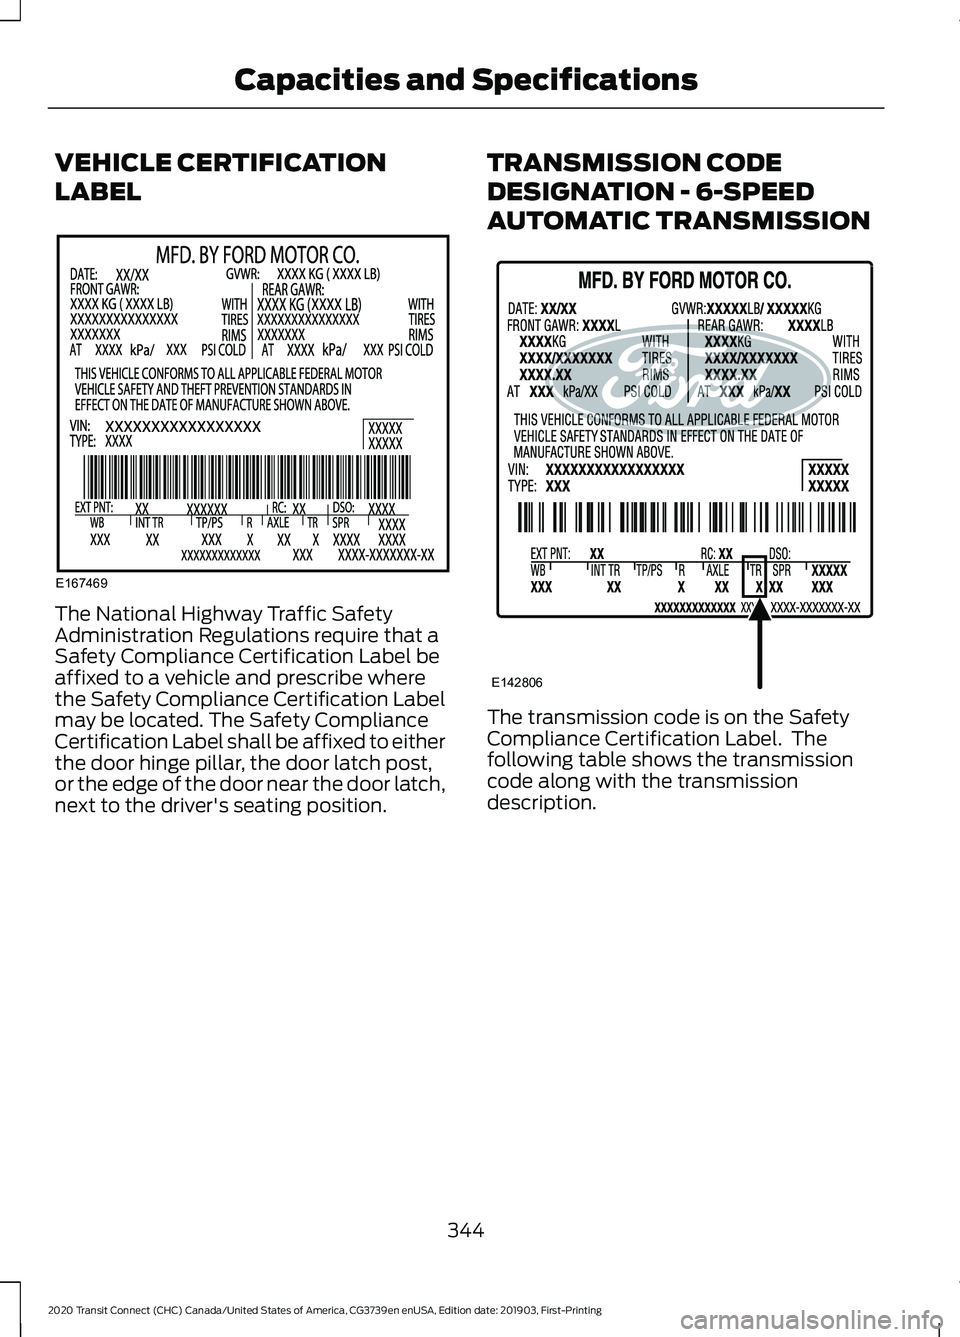
VEHICLE CERTIFICATION
LABEL
The National Highway Traffic Safety
Administration Regulations require that a
Safety Compliance Certification Label be
affixed to a vehicle and prescribe where
the Safety Compliance Certification Label
may be located. The Safety Compliance
Certification Label shall be affixed to either
the door hinge pillar, the door latch post,
or the edge of the door near the door latch,
next to the driver's seating position.
TRANSMISSION CODE
DESIGNATION - 6-SPEED
AUTOMATIC TRANSMISSION
The transmission code is on the Safety
Compliance Certification Label. The
following table shows the transmission
code along with the transmission
description.
344
2020 Transit Connect (CHC) Canada/United States of America, CG3739en enUSA, Edition date: 201903, First-Printing Capacities and SpecificationsE167469 E142806