warning light FORD TRANSIT CONNECT 2020 User Guide
[x] Cancel search | Manufacturer: FORD, Model Year: 2020, Model line: TRANSIT CONNECT, Model: FORD TRANSIT CONNECT 2020Pages: 509, PDF Size: 7.73 MB
Page 52 of 509
•
Wait at least two minutes and verify
that the airbag readiness light is no
longer illuminated.
• If the airbag readiness light remains
illuminated, this may or may not be a
problem due to the front passenger
sensing system.
Do not attempt to repair or service the
system. Take your vehicle immediately to
an authorized dealer.
If it is necessary to modify an advanced
front airbag system to accommodate a
person with disabilities, contact the Ford
Customer Relationship Center. See
Getting the Services You Need (page
256).
SIDE AIRBAGS WARNING:
Do not place objects
or mount equipment on or near the
airbag cover, on the side of the front or
rear seatbacks, or in areas that may
come into contact with a deploying
airbag. Failure to follow these
instructions may increase the risk of
personal injury in the event of a crash. WARNING:
Do not use accessory
seat covers. The use of accessory seat
covers may prevent the deployment of
the side airbags and increase the risk of
injury in an accident. WARNING:
Do not lean your head
on the door. The side airbag could injure
you as it deploys from the side of the
seatback. WARNING:
Do not attempt to
service, repair, or modify the
supplementary restraint system or
associated components. Failure to
follow this instruction could result in
personal injury or death. WARNING:
If a supplementary
restraint system component has
deployed, it will not function again. Have
the system and associated components
inspected as soon as possible. Failure to
follow this instruction could result in
personal injury or death.
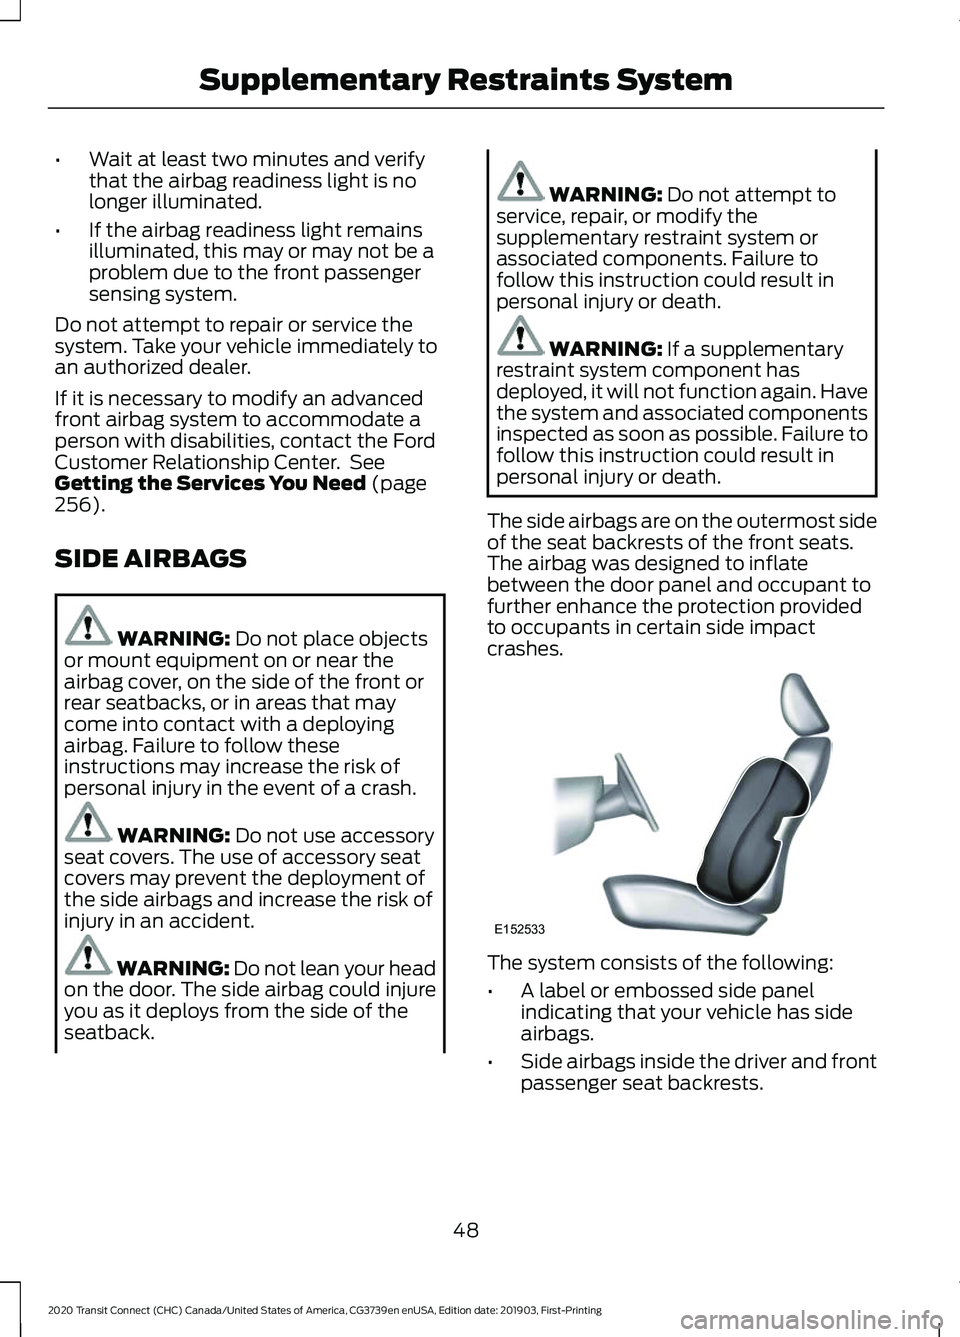
The side airbags are on the outermost side
of the seat backrests of the front seats.
The airbag was designed to inflate
between the door panel and occupant to
further enhance the protection provided
to occupants in certain side impact
crashes. The system consists of the following:
•
A label or embossed side panel
indicating that your vehicle has side
airbags.
• Side airbags inside the driver and front
passenger seat backrests.
48
2020 Transit Connect (CHC) Canada/United States of America, CG3739en enUSA, Edition date: 201903, First-Printing Supplementary Restraints SystemE152533
Page 54 of 509
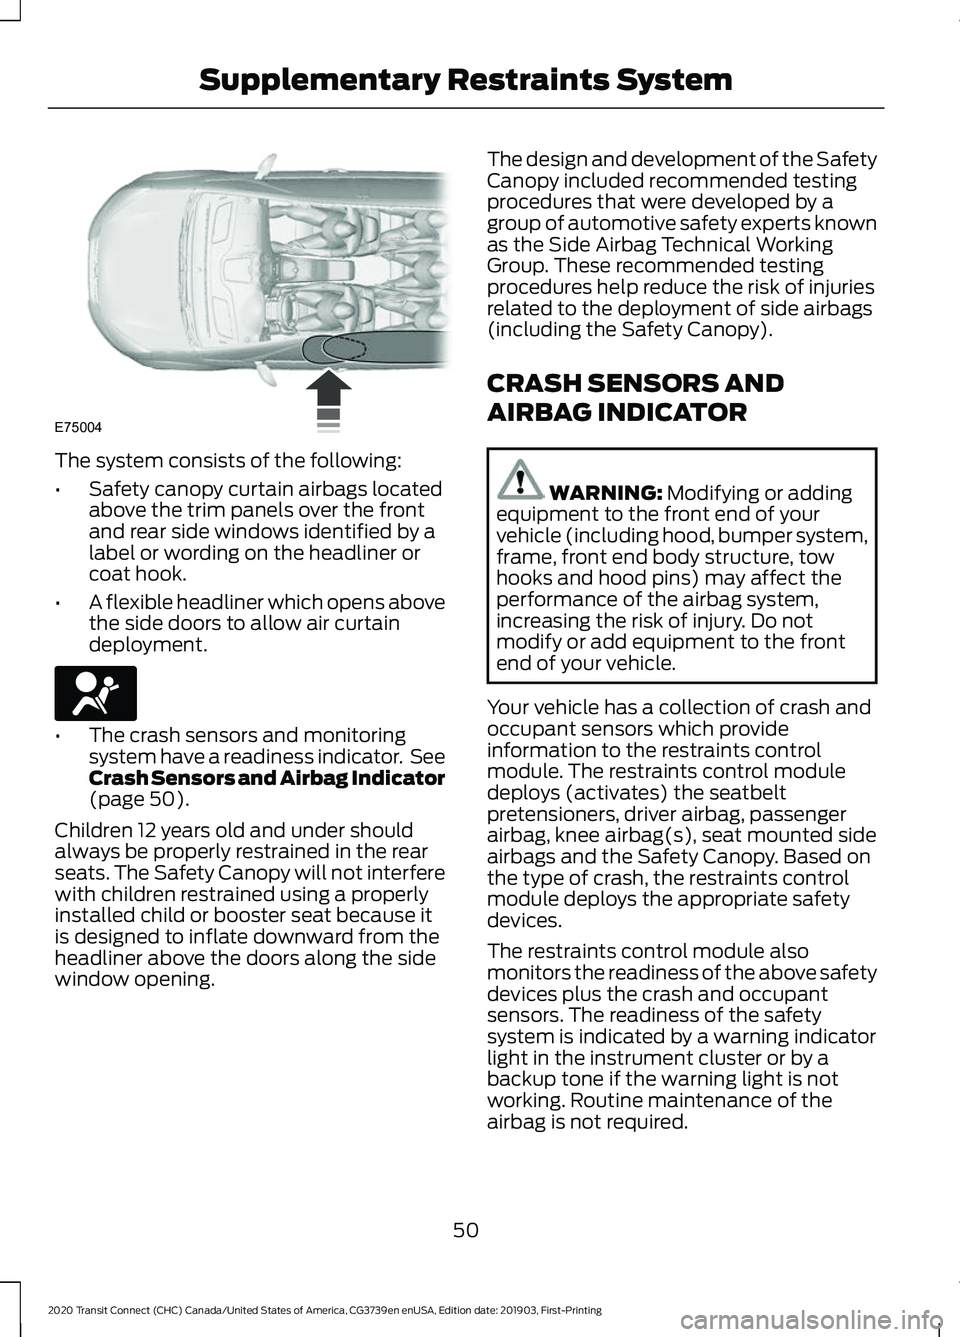
The system consists of the following:
•
Safety canopy curtain airbags located
above the trim panels over the front
and rear side windows identified by a
label or wording on the headliner or
coat hook.
• A flexible headliner which opens above
the side doors to allow air curtain
deployment. •
The crash sensors and monitoring
system have a readiness indicator. See
Crash Sensors and Airbag Indicator
(page 50).
Children 12 years old and under should
always be properly restrained in the rear
seats. The Safety Canopy will not interfere
with children restrained using a properly
installed child or booster seat because it
is designed to inflate downward from the
headliner above the doors along the side
window opening. The design and development of the Safety
Canopy included recommended testing
procedures that were developed by a
group of automotive safety experts known
as the Side Airbag Technical Working
Group. These recommended testing
procedures help reduce the risk of injuries
related to the deployment of side airbags
(including the Safety Canopy).
CRASH SENSORS AND
AIRBAG INDICATOR
WARNING:
Modifying or adding
equipment to the front end of your
vehicle (including hood, bumper system,
frame, front end body structure, tow
hooks and hood pins) may affect the
performance of the airbag system,
increasing the risk of injury. Do not
modify or add equipment to the front
end of your vehicle.
Your vehicle has a collection of crash and
occupant sensors which provide
information to the restraints control
module. The restraints control module
deploys (activates) the seatbelt
pretensioners, driver airbag, passenger
airbag, knee airbag(s), seat mounted side
airbags and the Safety Canopy. Based on
the type of crash, the restraints control
module deploys the appropriate safety
devices.
The restraints control module also
monitors the readiness of the above safety
devices plus the crash and occupant
sensors. The readiness of the safety
system is indicated by a warning indicator
light in the instrument cluster or by a
backup tone if the warning light is not
working. Routine maintenance of the
airbag is not required.
50
2020 Transit Connect (CHC) Canada/United States of America, CG3739en enUSA, Edition date: 201903, First-Printing Supplementary Restraints SystemE75004 E67017
Page 87 of 509
Push the lever away from you to
switch the high beam on.
Push the lever forward again or pull the
lever toward you to switch the high beams
off.
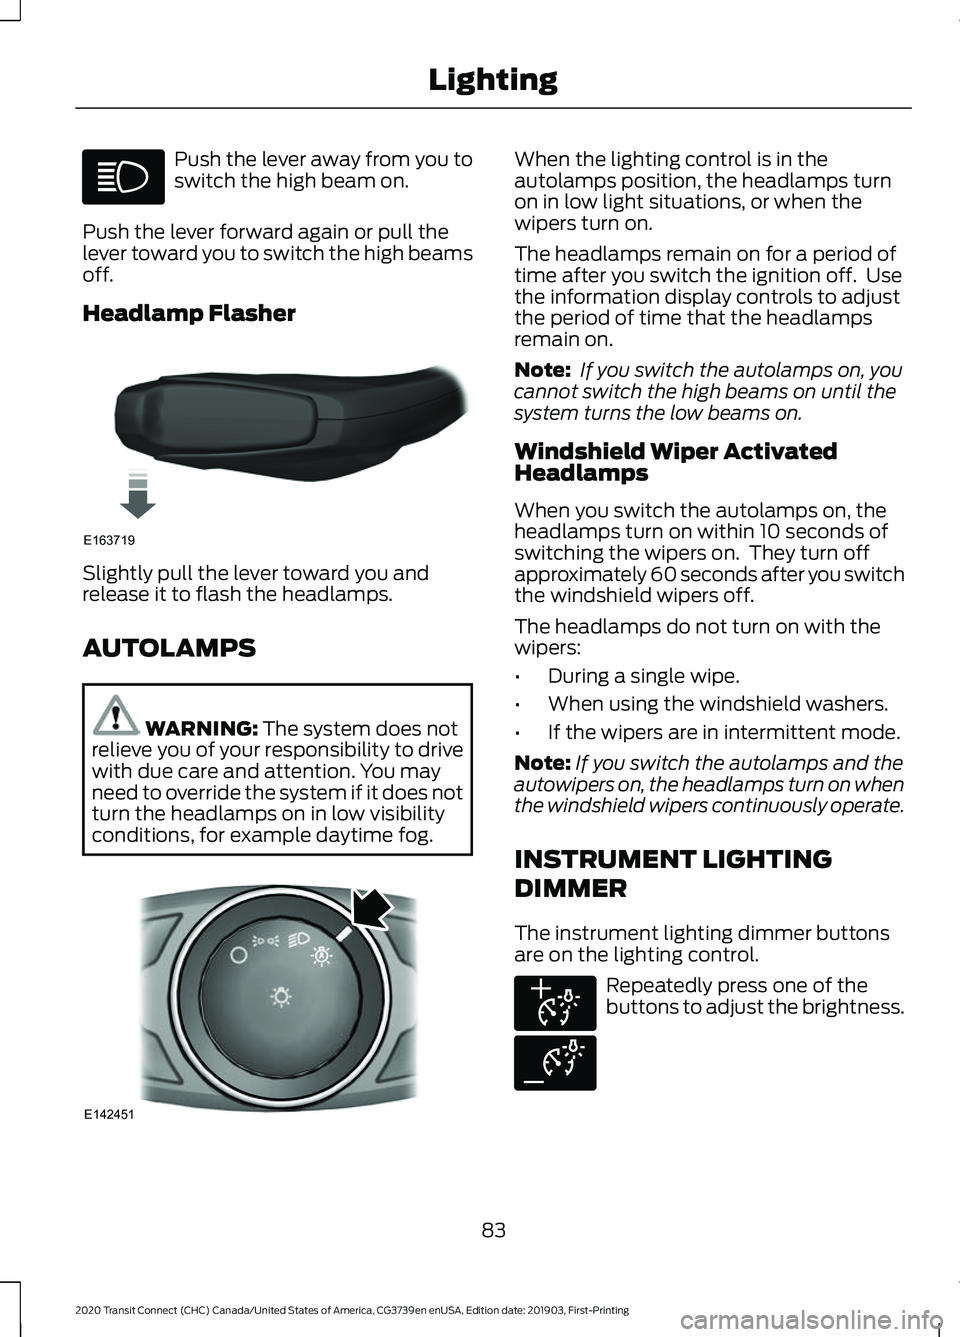
Headlamp Flasher Slightly pull the lever toward you and
release it to flash the headlamps.
AUTOLAMPS
WARNING: The system does not
relieve you of your responsibility to drive
with due care and attention. You may
need to override the system if it does not
turn the headlamps on in low visibility
conditions, for example daytime fog. When the lighting control is in the
autolamps position, the headlamps turn
on in low light situations, or when the
wipers turn on.
The headlamps remain on for a period of
time after you switch the ignition off. Use
the information display controls to adjust
the period of time that the headlamps
remain on.
Note:
If you switch the autolamps on, you
cannot switch the high beams on until the
system turns the low beams on.
Windshield Wiper Activated
Headlamps
When you switch the autolamps on, the
headlamps turn on within 10 seconds of
switching the wipers on. They turn off
approximately 60 seconds after you switch
the windshield wipers off.
The headlamps do not turn on with the
wipers:
• During a single wipe.
• When using the windshield washers.
• If the wipers are in intermittent mode.
Note: If you switch the autolamps and the
autowipers on, the headlamps turn on when
the windshield wipers continuously operate.
INSTRUMENT LIGHTING
DIMMER
The instrument lighting dimmer buttons
are on the lighting control. Repeatedly press one of the
buttons to adjust the brightness.
83
2020 Transit Connect (CHC) Canada/United States of America, CG3739en enUSA, Edition date: 201903, First-Printing Lighting E163719 E142451 E291299 E291298
Page 88 of 509
HEADLAMP EXIT DELAY
After you switch the ignition off, you can
switch the headlamps on by pulling the
direction indicator lever toward you. You
will hear a short tone. The headlamps will
switch off automatically after three
minutes with any door open or 30 seconds
after the last door has been closed. You
can cancel this feature by pulling the
direction indicator toward you again or
switching the ignition on.
DAYTIME RUNNING LAMPS
WARNING: The daytime running
lamps system does not activate the rear
lamps and may not provide adequate
lighting during low visibility driving
conditions. Also, the autolamps switch
position may not activate the headlamps
in all low visibility conditions, such as
daytime fog. Make sure the headlamps
are switched to auto or on, as
appropriate, during all low visibility
conditions. Failure to do so may result in
a crash.
Type 1 - Conventional (Non-
Configurable)
The daytime running lamps turn on when:
1. The ignition is switched to the on position.
2. The lighting control is in the off, parking
lamp or autolamps positions.
3. The headlamps are off.
Type 2 - Configurable
Switch the daytime running lamps on or
off using the information display controls.
See
Information Displays (page 98). The daytime running lamps turn on when:
1.
They are switched on in the information
display. See
Information Displays
(page 98).
2. The ignition is switched to the on position.
3. The lighting control is in the autolamps
position.
4. The headlamps are off.
The other lighting control switch positions
do not activate the daytime running lamps,
and you can use them to temporarily
override autolamp control.
When switched off in the information
display, the daytime running lamps are off
in all lighting control switch positions.
AUTOMATIC HIGH BEAM
CONTROL WARNING:
The system does not
relieve you of your responsibility to drive
with due care and attention. You may
need to override the system if it does not
turn the high beams on or off. WARNING:
You may need to
override the system when approaching
other road users. WARNING:
You may need to
override the system during inclement
weather. WARNING:
Do not use the system
in poor visibility, for example fog, heavy
rain, spray or snow. WARNING:
The system may not
switch the high beams off if the lights of
oncoming vehicles are hidden by
obstacles, for example guard rails.
84
2020 Transit Connect (CHC) Canada/United States of America, CG3739en enUSA, Edition date: 201903, First-Printing Lighting
Page 89 of 509
WARNING: Inspect and replace
the windshield wiper blades regularly to
make sure the camera sensor has a clear
view. The windshield wiper blades must
be the correct length.
The system is designed to turn the high
beams on if all of the following occur:
• You switched the system on in the
information display.
• You set the lighting control to the
autolamps position.
• The ambient light level is low enough
that high beams are required.
• There is no traffic in front of your
vehicle.
• Your vehicle speed is greater than
approximately
32 mph (51 km/h).
The system is designed to turn the high
beams off if any of the following occur:
• You switch the system off in the
information display.
• You set the lighting control to any
position except autolamps. •
You switch the rear fog lamps on.
• The ambient light level is high enough
that high beams are not required.
• The system detects an approaching
vehicle's headlamps or rear lamps.
• The system detects severe rain, snow
or fog.
• The system detects street lighting.
• The camera has reduced visibility.
• Your vehicle speed falls below
approximately
27 mph (44 km/h).
Note: The deactivation speed is lower on
curves.
Note: High beam reactivation may be
delayed in certain curvy road situations.
Note: Using much larger tires or equipping
vehicle accessories such as snowplows can
modify your vehicle's ride height and
degrade automatic high beam control
performance.
Switching Automatic High Beam Control On or Off
To switch the system on or off, use the information display controls on the steering
wheel to select the following: Action
Menu Item
Press the menu button.
Settings
Press the
OK button.
Vehicle Settings
Press the
OK button.
Lighting
Press the
OK button.
Auto Highbeam
85
2020 Transit Connect (CHC) Canada/United States of America, CG3739en enUSA, Edition date: 201903, First-Printing Lighting
Page 93 of 509
POWER WINDOWS - VEHICLES
WITH: REAR POWER
WINDOWS
WARNING: Do not leave children
unattended in your vehicle and do not
let them play with the power windows.
Failure to follow this instruction could
result in personal injury. WARNING:
When closing the
power windows, verify they are free of
obstruction and make sure that children
and pets are not in the proximity of the
window openings. Press the control to open the
window. Lift the control to close
the window.
Note: The power windows operate with the
ignition on, and for several minutes after you
switch the ignition off or until you open a
front door.
To reduce wind noise or pulsing noise when
just one window is open, slightly open the
opposite window.
One-Touch Open
(If Equipped)
Fully press the control and release it. Press
again or lift it to stop the window.
One-Touch Close
(If Equipped)
Fully lift the control and release it. Press
again or lift it to stop the window.
Resetting One-Touch Close
Start the engine.
1. Lift and hold the control until you fully close the window. Continue to hold the
control for a few seconds after you
close the window. 2. Release the control.
3. Press and hold the control until you
fully open the window.
4. Release the control.
5. Lift and hold the control until you fully close the window.
Note: Repeat the procedure if the window
does not close when you use one-touch.
Bounce-Back
The window stops and reverses if it detects
an obstruction.
Overriding Bounce-Back WARNING:
If you override
bounce-back, the window does not
reverse if it detects an obstacle. Take
care when closing the windows to avoid
personal injury or damage to your
vehicle.
1. Close the window until it reaches the point of resistance and let it reverse.
2. Lift the control within a few seconds to override bounce-back and close the
window. Bounce-back is now disabled
and you can close the window
manually.
Note: The window goes past the point of
resistance and you can fully close it.
Note: If the window does not close, have
your vehicle checked as soon as possible.
Resetting Bounce-Back WARNING:
Bounce-back is off
until you reset the memory. Take care
when closing the windows to avoid
personal injury or damage to your
vehicle.
89
2020 Transit Connect (CHC) Canada/United States of America, CG3739en enUSA, Edition date: 201903, First-Printing Windows and Mirrors
Page 94 of 509
Start the engine.
1. Lift and hold the control until you fully
close the window. Continue to hold the
control for a few seconds after you
close the window.
2. Release the control.
3. Press and hold the control until you fully open the window.
4. Release the control.
5. Lift and hold the control until you fully close the window.
Note: Repeat the procedure if the window
does not close when you use one-touch.
Rear Window Lock Press the control to lock or
unlock the rear window controls.
It illuminates when you lock the
rear window controls.
POWER WINDOWS - VEHICLES
WITH: ONE-TOUCH OPEN
DRIVER WINDOW WARNING: Do not leave children
unattended in your vehicle and do not
let them play with the power windows.
Failure to follow this instruction could
result in personal injury. WARNING:
When closing the
power windows, verify they are free of
obstruction and make sure that children
and pets are not in the proximity of the
window openings. Press the control to open the
window. Lift the control to close
the window. Note:
The power windows operate with the
ignition on, and for several minutes after you
switch the ignition off or until you open a
front door.
To reduce wind noise or pulsing noise when
just one window is open, slightly open the
opposite window.
One-Touch Open
(If Equipped)
Fully press the control and release it. Press
again or lift it to stop the window.
GLOBAL OPENING
1. Press and release the unlock button on
the remote control.
2. Press and hold the unlock button on the remote control.
3. Release the button when the windows
start to open.
Press the lock or the unlock button on the
remote control to stop global opening.
Note: You can use global opening for a
short period of time when you unlock your
vehicle using the remote control.
EXTERIOR MIRRORS
Adjusting the Mirrors WARNING:
Do not adjust the
mirrors when your vehicle is moving. This
could result in the loss of control of your
vehicle, serious personal injury or death.
90
2020 Transit Connect (CHC) Canada/United States of America, CG3739en enUSA, Edition date: 201903, First-Printing Windows and Mirrors
Page 95 of 509
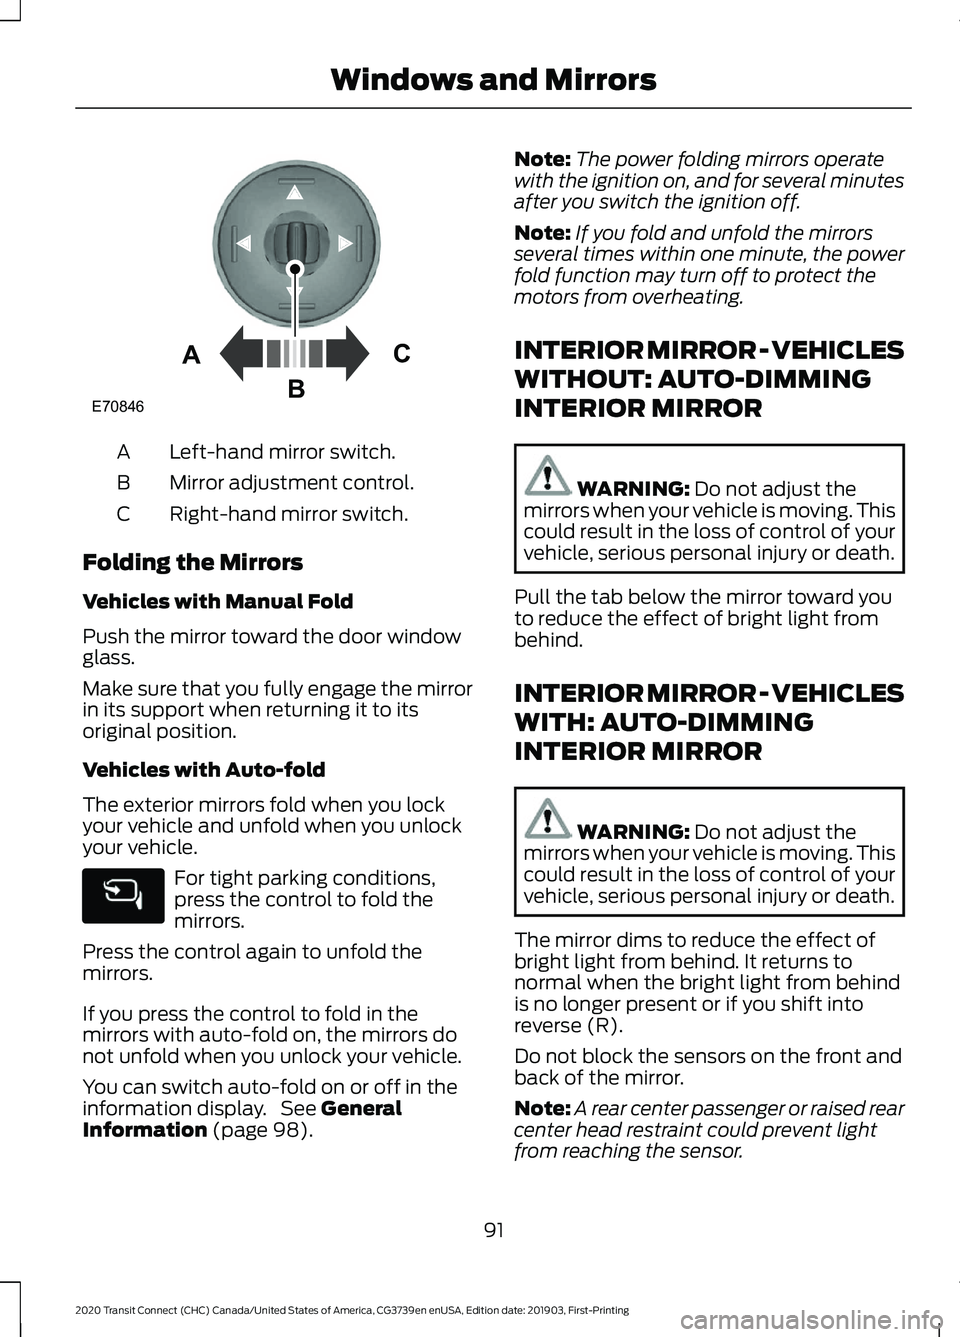
Left-hand mirror switch.
A
Mirror adjustment control.
B
Right-hand mirror switch.
C
Folding the Mirrors
Vehicles with Manual Fold
Push the mirror toward the door window
glass.
Make sure that you fully engage the mirror
in its support when returning it to its
original position.
Vehicles with Auto-fold
The exterior mirrors fold when you lock
your vehicle and unfold when you unlock
your vehicle. For tight parking conditions,
press the control to fold the
mirrors.
Press the control again to unfold the
mirrors.
If you press the control to fold in the
mirrors with auto-fold on, the mirrors do
not unfold when you unlock your vehicle.
You can switch auto-fold on or off in the
information display. See General
Information (page 98). Note:
The power folding mirrors operate
with the ignition on, and for several minutes
after you switch the ignition off.
Note: If you fold and unfold the mirrors
several times within one minute, the power
fold function may turn off to protect the
motors from overheating.
INTERIOR MIRROR - VEHICLES
WITHOUT: AUTO-DIMMING
INTERIOR MIRROR WARNING:
Do not adjust the
mirrors when your vehicle is moving. This
could result in the loss of control of your
vehicle, serious personal injury or death.
Pull the tab below the mirror toward you
to reduce the effect of bright light from
behind.
INTERIOR MIRROR - VEHICLES
WITH: AUTO-DIMMING
INTERIOR MIRROR WARNING:
Do not adjust the
mirrors when your vehicle is moving. This
could result in the loss of control of your
vehicle, serious personal injury or death.
The mirror dims to reduce the effect of
bright light from behind. It returns to
normal when the bright light from behind
is no longer present or if you shift into
reverse (R).
Do not block the sensors on the front and
back of the mirror.
Note: A rear center passenger or raised rear
center head restraint could prevent light
from reaching the sensor.
91
2020 Transit Connect (CHC) Canada/United States of America, CG3739en enUSA, Edition date: 201903, First-Printing Windows and MirrorsE70846A
C
B
Page 124 of 509
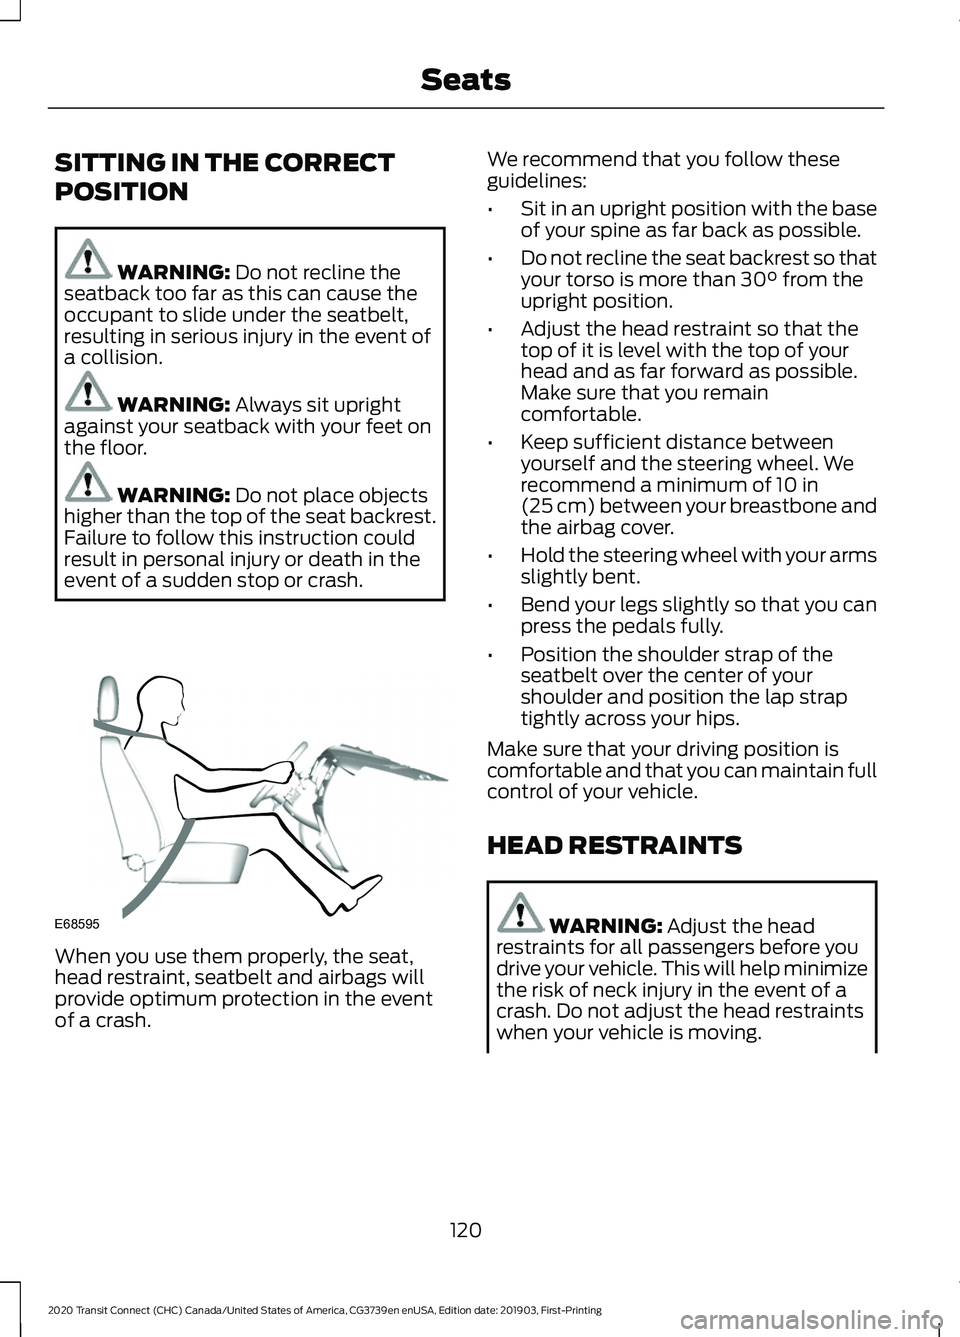
SITTING IN THE CORRECT
POSITION
WARNING: Do not recline the
seatback too far as this can cause the
occupant to slide under the seatbelt,
resulting in serious injury in the event of
a collision. WARNING:
Always sit upright
against your seatback with your feet on
the floor. WARNING:
Do not place objects
higher than the top of the seat backrest.
Failure to follow this instruction could
result in personal injury or death in the
event of a sudden stop or crash. When you use them properly, the seat,
head restraint, seatbelt and airbags will
provide optimum protection in the event
of a crash. We recommend that you follow these
guidelines:
•
Sit in an upright position with the base
of your spine as far back as possible.
• Do not recline the seat backrest so that
your torso is more than
30° from the
upright position.
• Adjust the head restraint so that the
top of it is level with the top of your
head and as far forward as possible.
Make sure that you remain
comfortable.
• Keep sufficient distance between
yourself and the steering wheel. We
recommend a minimum of
10 in
(25 cm) between your breastbone and
the airbag cover.
• Hold the steering wheel with your arms
slightly bent.
• Bend your legs slightly so that you can
press the pedals fully.
• Position the shoulder strap of the
seatbelt over the center of your
shoulder and position the lap strap
tightly across your hips.
Make sure that your driving position is
comfortable and that you can maintain full
control of your vehicle.
HEAD RESTRAINTS WARNING:
Adjust the head
restraints for all passengers before you
drive your vehicle. This will help minimize
the risk of neck injury in the event of a
crash. Do not adjust the head restraints
when your vehicle is moving.
120
2020 Transit Connect (CHC) Canada/United States of America, CG3739en enUSA, Edition date: 201903, First-Printing SeatsE68595
Page 139 of 509
HEATED SEATS
WARNING: People who are unable
to feel pain to their skin because of
advanced age, chronic illness, diabetes,
spinal cord injury, medication, alcohol
use, exhaustion or other physical
conditions, must use caution when using
the heated seat. The heated seat may
cause burns even at low temperatures,
especially if used for long periods of time.
Do not place anything on the seat that
may block the heat, such as a blanket or
cushion. This can cause the heated seat
to overheat. Do not puncture the seat
with pins, needles or other pointed
objects. This damages the heating
element and can cause the heated seat
to overheat. An overheated seat may
cause serious personal injury.
Do not do the following:
• Place heavy objects on the seat.
• Operate the heated seat if water or any
other liquid spills on the seat. Allow the
seat to dry thoroughly.
• Operate the heated seats unless the
engine is running. Doing so can cause
the battery to lose charge. Press the heated seat symbol to cycle
through the various heat settings and off.
More indicator lights indicate warmer
settings.
135
2020 Transit Connect (CHC) Canada/United States of America, CG3739en enUSA, Edition date: 201903, First-Printing SeatsE146322