warning light FORD TRANSIT CONNECT 2020 Service Manual
[x] Cancel search | Manufacturer: FORD, Model Year: 2020, Model line: TRANSIT CONNECT, Model: FORD TRANSIT CONNECT 2020Pages: 509, PDF Size: 7.73 MB
Page 247 of 509
Trailer Brakes
WARNING: Do not connect a
trailer's hydraulic brake system directly
to your vehicle's brake system. Your
vehicle may not have enough braking
power and your chances of having a
collision greatly increase.
Electric brakes and manual, automatic or
surge-type trailer brakes are safe if you
install them correctly and adjust them to
the manufacturer's specifications. The
trailer brakes must meet local and federal
regulations.
The rating for the tow vehicle's braking
system operation is at the gross vehicle
weight rating, not the gross combined
weight rating.
Separate functioning brake systems are
required for safe control of towed vehicles
and trailers weighing more than 1500
pounds (680 kilograms) when loaded.
Trailer Lamps WARNING:
Never connect any
trailer lamp wiring to the vehicle's tail
lamp wiring; this may damage the
electrical system resulting in fire. Contact
your authorized dealer as soon as
possible for assistance in proper trailer
tow wiring installation. Additional
electrical equipment may be required.
Trailer lamps are required on most towed
vehicles. Make sure all running lights, brake
lights, turn signals and hazard warning
flashers are working. Before Towing a Trailer
Practice turning, stopping and backing up
to get the feel of your vehicle-trailer
combination before starting on a trip.
When turning, make wider turns so the
trailer wheels clear curbs and other
obstacles.
When Towing a Trailer
•
Do not drive faster than 70 mph (113
km/h) during the first 500 miles (800
kilometers).
• Do not make full-throttle starts.
• Check the trailer hitch, electrical
connections and trailer wheel lug nuts
thoroughly after you have traveled 50
miles (80 kilometers).
• When stopped in congested or heavy
traffic during hot weather, place the
transmission selector lever in position
P
to aid engine and transmission
cooling and to help A/C performance.
• Turn off the speed control with heavy
loads or in hilly terrain. The speed
control may turn off automatically
when you are towing on long, steep
grades.
• When driving down a long or steep hill,
if your vehicle is fitted with a
SelectShift Automatic® Transmission,
use a low gear. See
Automatic
Transmission (page 176). Do not
apply the brakes continuously, as they
may overheat and become less
effective.
• If the transmission is fitted with Grade
Assist or a Towing feature, use this
feature when towing. This provides
engine braking and helps eliminate
excessive transmission shifting for
optimum fuel economy and
transmission cooling.
243
2020 Transit Connect (CHC) Canada/United States of America, CG3739en enUSA, Edition date: 201903, First-Printing Towing
Page 252 of 509
•
Do not warm up your vehicle on cold
mornings.
• Reduce the use of air conditioning and
heat.
• Avoid using speed control in hilly
terrain.
• Do not rest your foot on the brake
pedal while driving.
• Avoid carrying unnecessary weight.
• Avoid adding particular accessories to
your vehicle (e.g. bug deflectors,
rollbars/light bars, running boards, ski
racks).
• Avoid driving with the wheels out of
alignment.
COLD WEATHER
PRECAUTIONS
The functional operation of some
components and systems can be affected
at temperatures below -13°F (-25°C).
DRIVING THROUGH WATER WARNING:
Do not drive through
flowing or deep water as you may lose
control of your vehicle.
Note: Driving through standing water can
cause vehicle damage.
Note: Engine damage can occur if water
enters the air filter.
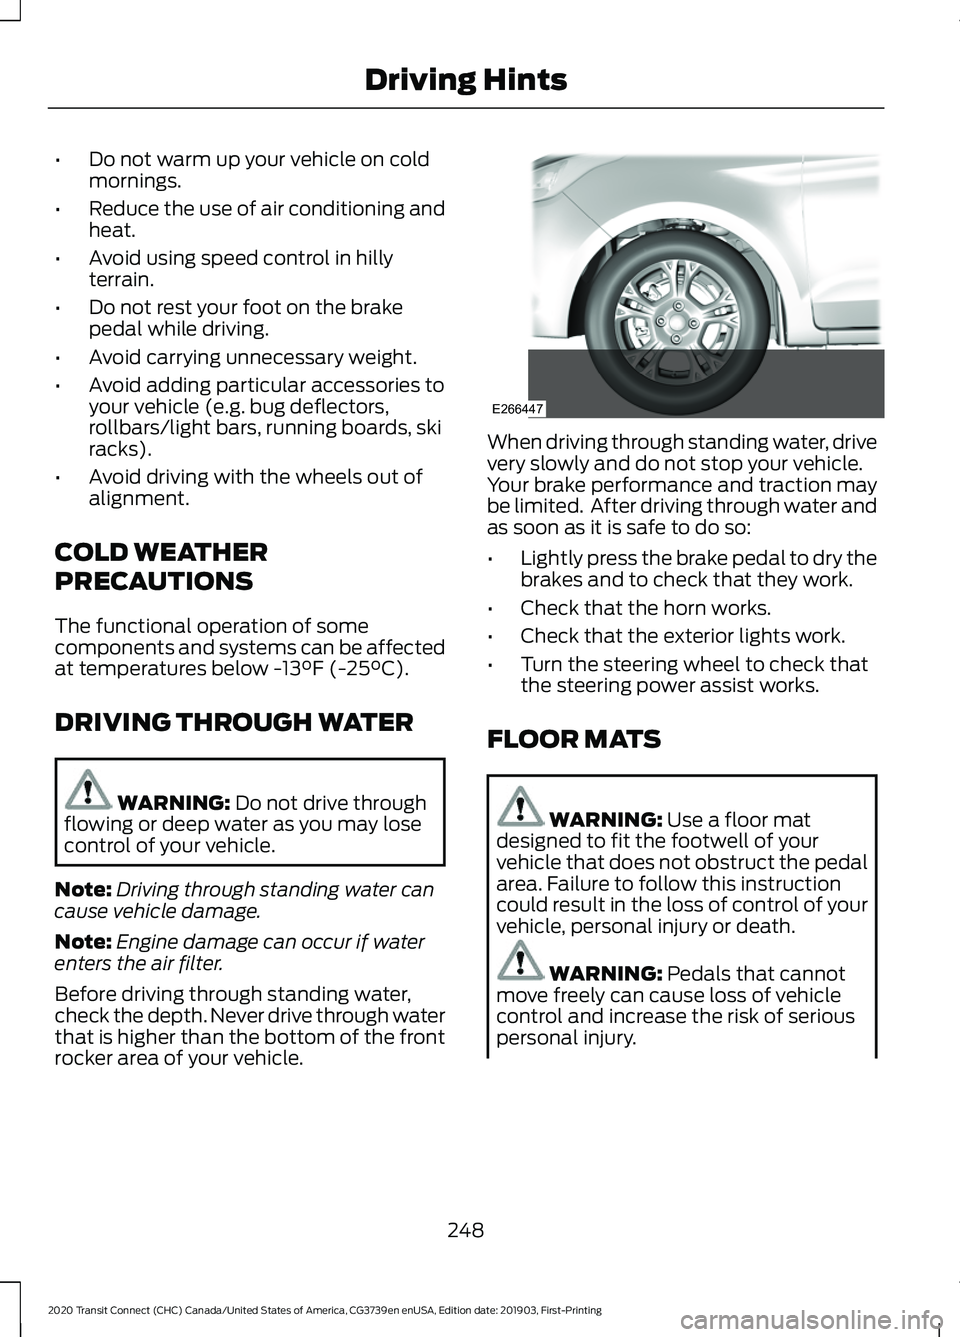
Before driving through standing water,
check the depth. Never drive through water
that is higher than the bottom of the front
rocker area of your vehicle. When driving through standing water, drive
very slowly and do not stop your vehicle.
Your brake performance and traction may
be limited. After driving through water and
as soon as it is safe to do so:
•
Lightly press the brake pedal to dry the
brakes and to check that they work.
• Check that the horn works.
• Check that the exterior lights work.
• Turn the steering wheel to check that
the steering power assist works.
FLOOR MATS WARNING: Use a floor mat
designed to fit the footwell of your
vehicle that does not obstruct the pedal
area. Failure to follow this instruction
could result in the loss of control of your
vehicle, personal injury or death. WARNING:
Pedals that cannot
move freely can cause loss of vehicle
control and increase the risk of serious
personal injury.
248
2020 Transit Connect (CHC) Canada/United States of America, CG3739en enUSA, Edition date: 201903, First-Printing Driving HintsE266447
Page 282 of 509
6. Release the accelerator and brake
pedals.
7. Switch the ignition off.
ENGINE COOLING FAN -
GASOLINE WARNING: Keep your hands and
clothing clear of the engine cooling fan.
Under certain conditions, the engine
cooling fan may continue to run for several
minutes after you switch your vehicle off.
ENGINE COOLING FAN -
DIESEL WARNING:
Keep your hands and
clothing clear of the engine cooling fan.
Under certain conditions, the engine
cooling fan may continue to run for several
minutes after you switch your vehicle off.
This could happen in low ambient
temperatures and independent of the
engine coolant temperature, for example
short journeys or low coolant temperature.
See
Diesel Particulate Filter (page 170). ENGINE COOLANT CHECK WARNING:
Do not remove the
coolant reservoir cap when the engine is
on or the cooling system is hot. Wait 10
minutes for the cooling system to cool
down. Cover the coolant reservoir cap
with a thick cloth to prevent the
possibility of scalding and slowly remove
the cap. Failure to follow this instruction
could result in personal injury. WARNING:
Do not put coolant in
the windshield washer reservoir. If
sprayed on the windshield, coolant could
make it difficult to see through the
windshield. WARNING:
To reduce the risk of
personal injury, make sure the engine is
cool before unscrewing the coolant
pressure relief cap. The cooling system
is under pressure. Steam and hot liquid
can come out forcefully when you loosen
the cap slightly. WARNING:
Do not add coolant
further than the MAX mark.
When the engine is cold, check the
concentration and level of the coolant at
the intervals listed in the scheduled
maintenance information. See Scheduled
Maintenance
(page 428).
Note: Make sure that the coolant level is
between the
MIN and MAX marks on the
coolant reservoir.
Note: Coolant expands when it is hot. The
level may extend beyond the
MAX mark.
278
2020 Transit Connect (CHC) Canada/United States of America, CG3739en enUSA, Edition date: 201903, First-Printing Maintenance
Page 288 of 509

CHANGING THE 12V BATTERY
WARNING: Batteries normally
produce explosive gases which can
cause personal injury. Therefore, do not
allow flames, sparks or lighted
substances to come near the battery.
When working near the battery, always
shield your face and protect your eyes.
Always provide correct ventilation. WARNING:
When lifting a
plastic-cased battery, excessive pressure
on the end walls could cause acid to flow
through the vent caps, resulting in
personal injury and damage to the
vehicle or battery. Lift the battery with a
battery carrier or with your hands on
opposite corners. WARNING:
Keep batteries out of
reach of children. Batteries contain
sulfuric acid. Avoid contact with skin,
eyes or clothing. Shield your eyes when
working near the battery to protect
against possible splashing of acid
solution. In case of acid contact with skin
or eyes, flush immediately with water for
a minimum of 15 minutes and get prompt
medical attention. If acid is swallowed,
call a physician immediately. WARNING:
Battery posts,
terminals and related accessories
contain lead and lead compounds,
chemicals known to the State of
California to cause cancer and
reproductive harm. Wash your hands
after handling
.
Your vehicle has a Motorcraft®
maintenance-free battery which normally
does not require additional water during
its life of service. Note:
If your vehicle's battery has a cover
or shield, make sure it is reinstalled after the
battery has been cleaned or replaced.
Note: See an authorized dealer for low
voltage battery access, testing, or
replacement.
When a low voltage battery replacement
is necessary, see an authorized dealer to
replace the low voltage battery with a Ford
recommended replacement low voltage
battery that matches the electrical
requirements of the vehicle.
To ensure proper operation of the battery
management system (BMS), do not allow
a technician to connect any electrical
device ground connection directly to the
low voltage battery negative post. A
connection at the low voltage battery
negative post can cause inaccurate
measurements of the battery condition
and potential incorrect system operation.
Note: If a person adds electrical or
electronic accessories or components to the
vehicle, the accessories or components may
adversely affect the low voltage battery
performance and durability and may also
affect the performance of other electrical
systems in the vehicle.
For longer, trouble-free operation, keep the
top of the battery clean and dry. Also,
make certain the battery cables are always
tightly fastened to the battery terminals.
If you see any corrosion on the battery or
terminals, remove the cables from the
terminals and clean with a wire brush. You
can neutralize the acid with a solution of
baking soda and water.
When a battery replacement is required,
the battery should only be replaced with
a Ford recommended replacement battery
that matches the electrical requirements
of the vehicle.
284
2020 Transit Connect (CHC) Canada/United States of America, CG3739en enUSA, Edition date: 201903, First-Printing Maintenance
Page 292 of 509
Note:
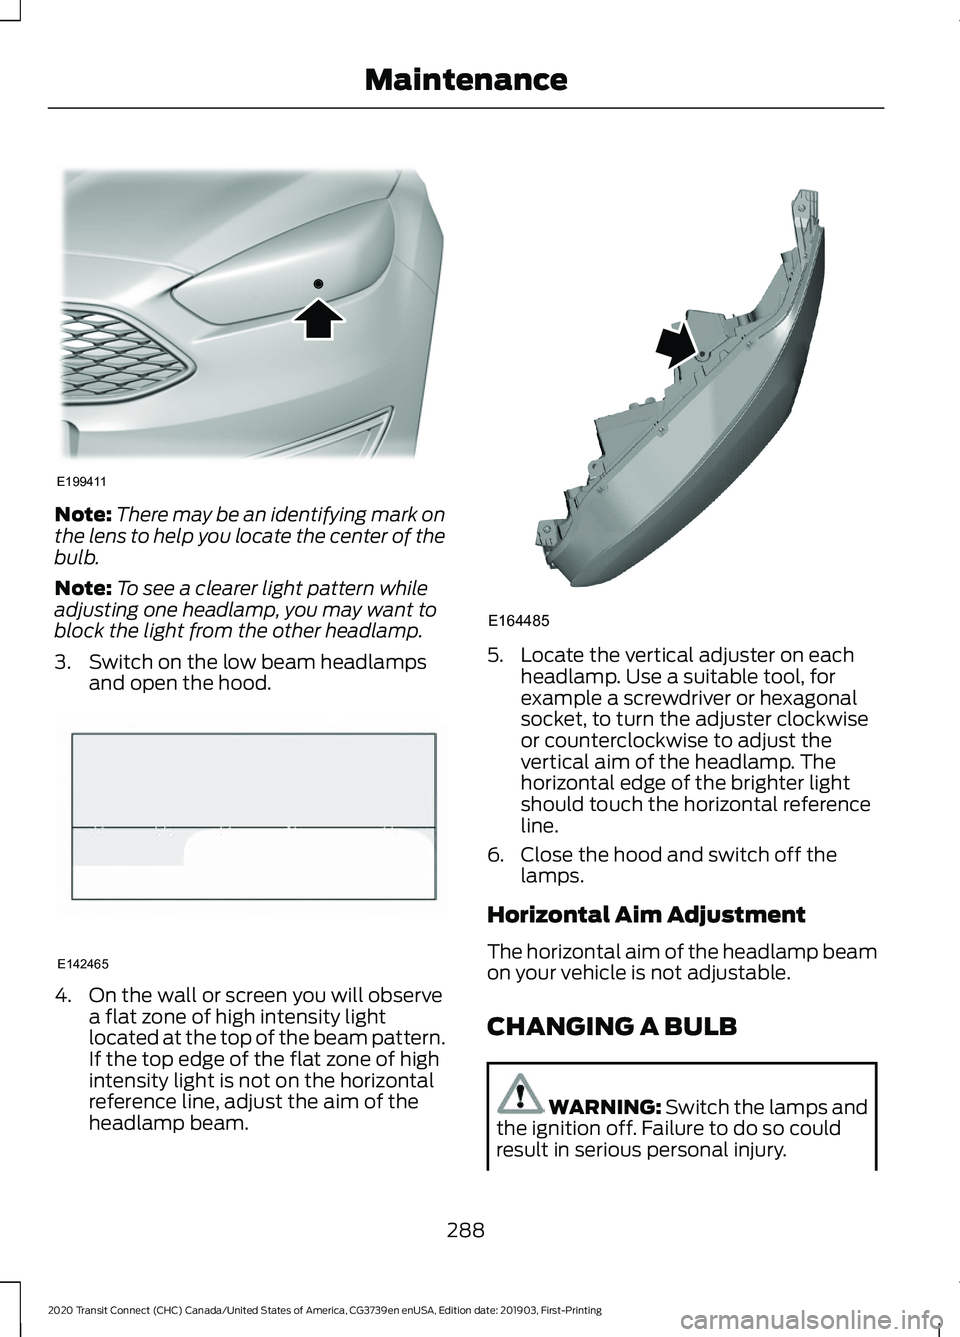
There may be an identifying mark on
the lens to help you locate the center of the
bulb.
Note: To see a clearer light pattern while
adjusting one headlamp, you may want to
block the light from the other headlamp.
3. Switch on the low beam headlamps and open the hood. 4. On the wall or screen you will observe
a flat zone of high intensity light
located at the top of the beam pattern.
If the top edge of the flat zone of high
intensity light is not on the horizontal
reference line, adjust the aim of the
headlamp beam. 5. Locate the vertical adjuster on each
headlamp. Use a suitable tool, for
example a screwdriver or hexagonal
socket, to turn the adjuster clockwise
or counterclockwise to adjust the
vertical aim of the headlamp. The
horizontal edge of the brighter light
should touch the horizontal reference
line.
6. Close the hood and switch off the lamps.
Horizontal Aim Adjustment
The horizontal aim of the headlamp beam
on your vehicle is not adjustable.
CHANGING A BULB WARNING: Switch the lamps and
the ignition off. Failure to do so could
result in serious personal injury.
288
2020 Transit Connect (CHC) Canada/United States of America, CG3739en enUSA, Edition date: 201903, First-Printing MaintenanceE199411 E142465 E164485
Page 331 of 509
This device complies with Part 15 of the
FCC Rules and with License exempt RSS
Standards of Industry Canada. Operation
is subject to the following two conditions:
1. This device may not cause harmful
interference, and
2. This device must accept any interference received, including
interference that may cause undesired
operation.
Note: Changes or modifications not
expressively approved by the party
responsible for compliance could void the
user's authority to operate the equipment.
The term "IC:" before the radio certification
number only signifies that Industry Canada
technical specifications were met.
Changing Tires With a Tire
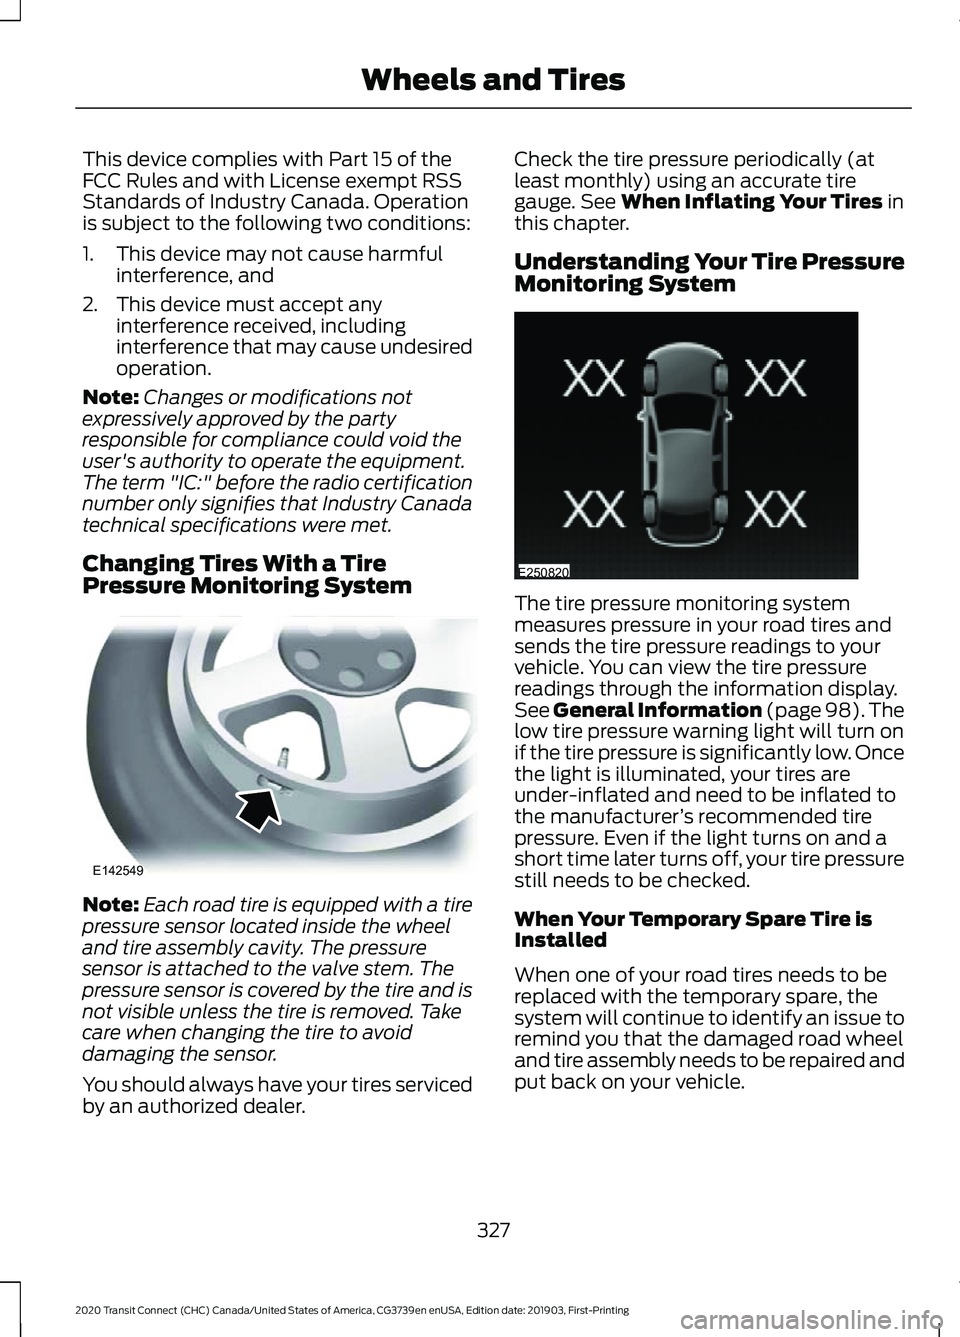
Pressure Monitoring System Note:
Each road tire is equipped with a tire
pressure sensor located inside the wheel
and tire assembly cavity. The pressure
sensor is attached to the valve stem. The
pressure sensor is covered by the tire and is
not visible unless the tire is removed. Take
care when changing the tire to avoid
damaging the sensor.
You should always have your tires serviced
by an authorized dealer. Check the tire pressure periodically (at
least monthly) using an accurate tire
gauge. See When Inflating Your Tires in
this chapter.
Understanding Your Tire Pressure
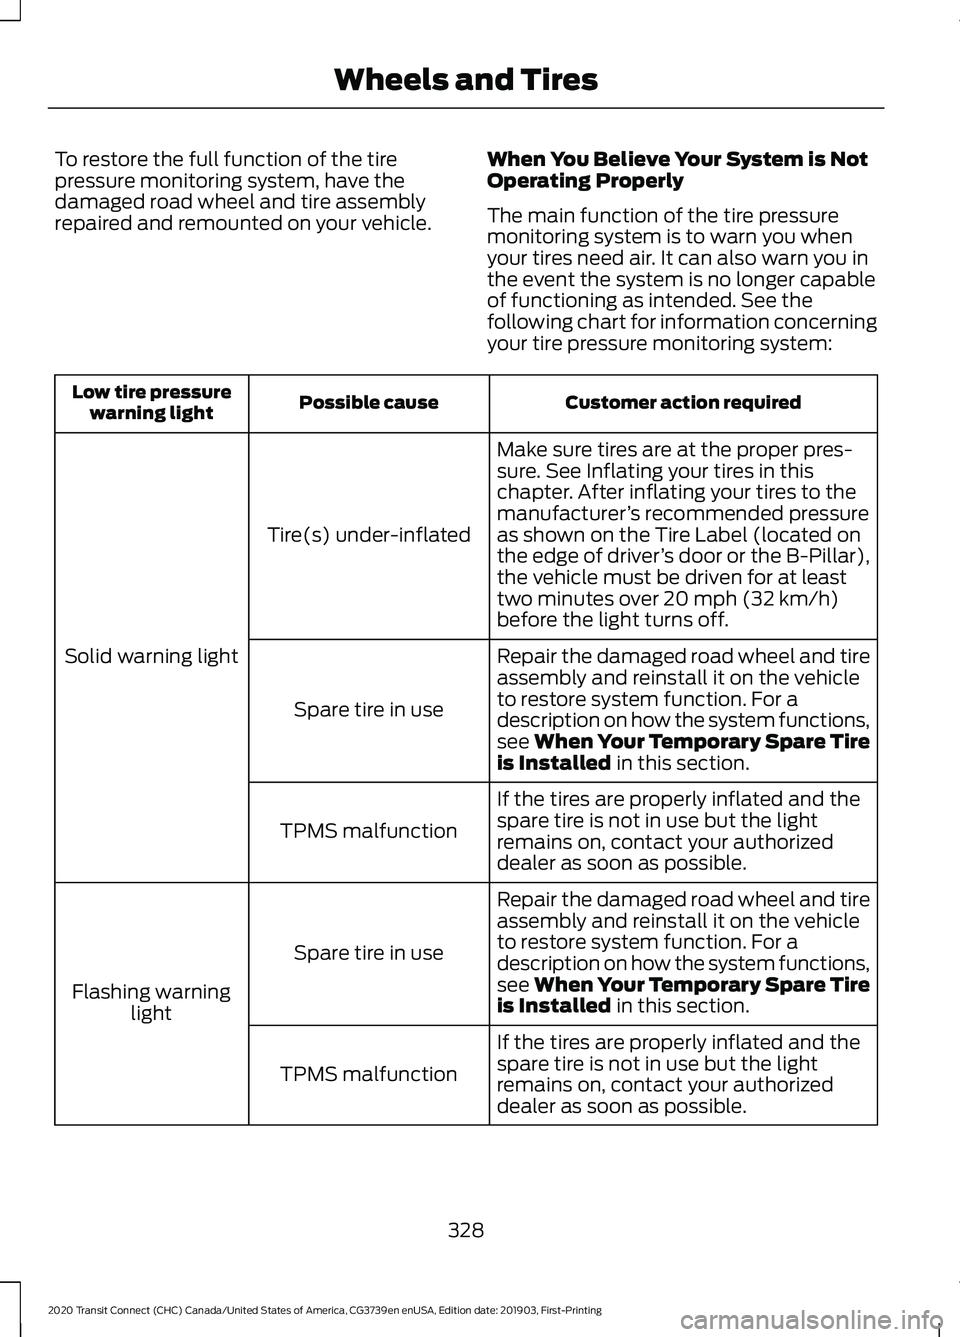
Monitoring System The tire pressure monitoring system
measures pressure in your road tires and
sends the tire pressure readings to your
vehicle. You can view the tire pressure
readings through the information display.
See General Information (page 98). The
low tire pressure warning light will turn on
if the tire pressure is significantly low. Once
the light is illuminated, your tires are
under-inflated and need to be inflated to
the manufacturer
’s recommended tire
pressure. Even if the light turns on and a
short time later turns off, your tire pressure
still needs to be checked.
When Your Temporary Spare Tire is
Installed
When one of your road tires needs to be
replaced with the temporary spare, the
system will continue to identify an issue to
remind you that the damaged road wheel
and tire assembly needs to be repaired and
put back on your vehicle.
327
2020 Transit Connect (CHC) Canada/United States of America, CG3739en enUSA, Edition date: 201903, First-Printing Wheels and TiresE142549 E250820
Page 332 of 509
To restore the full function of the tire
pressure monitoring system, have the
damaged road wheel and tire assembly
repaired and remounted on your vehicle.
When You Believe Your System is Not
Operating Properly
The main function of the tire pressure
monitoring system is to warn you when
your tires need air. It can also warn you in
the event the system is no longer capable
of functioning as intended. See the
following chart for information concerning
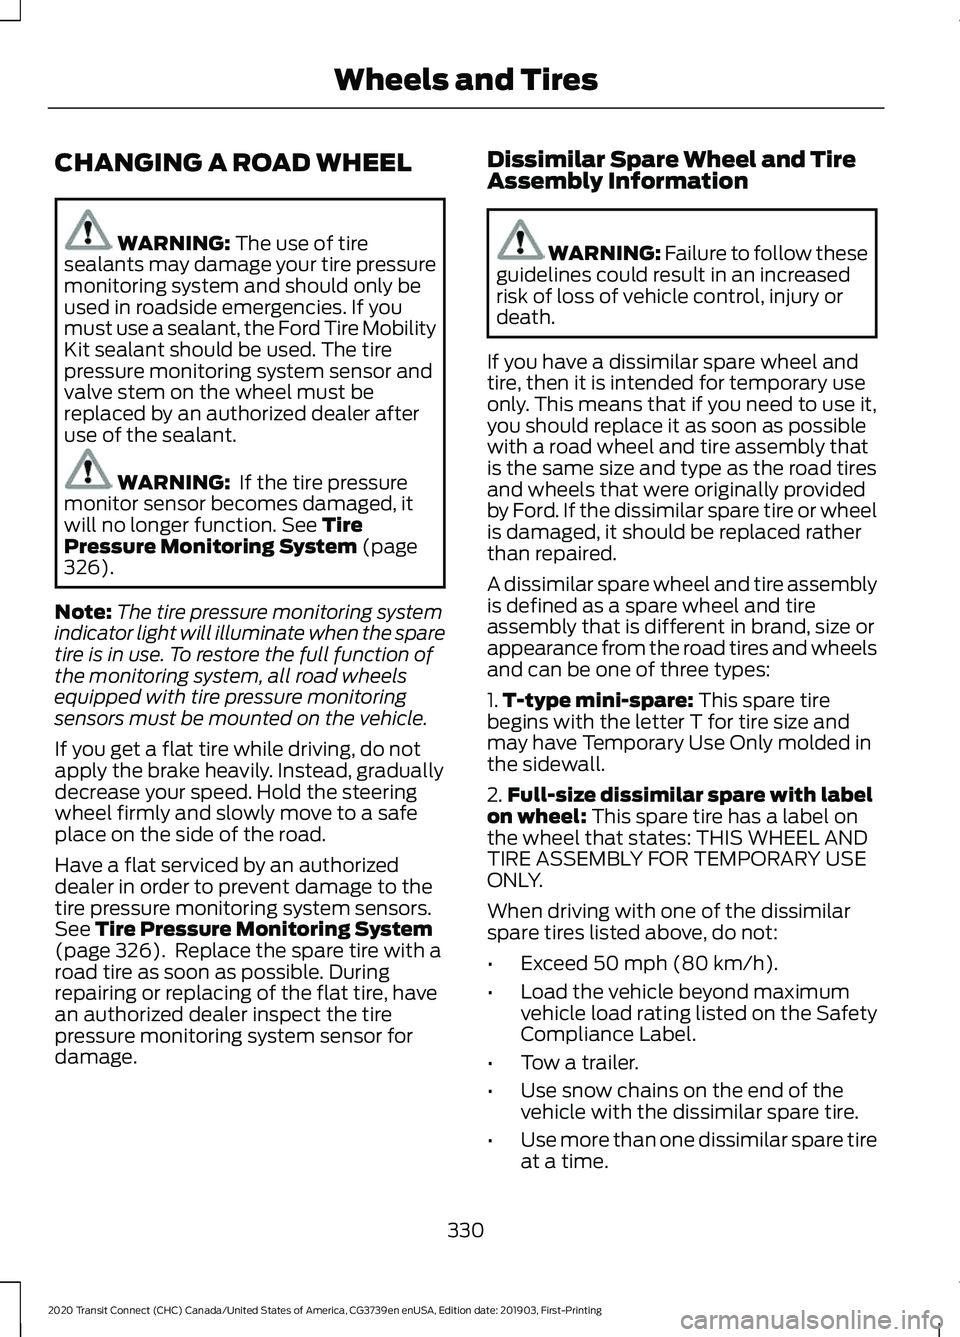
your tire pressure monitoring system: Customer action required
Possible cause
Low tire pressure
warning light
Make sure tires are at the proper pres-
sure. See Inflating your tires in this
chapter. After inflating your tires to the
manufacturer’s recommended pressure
as shown on the Tire Label (located on
the edge of driver ’s door or the B-Pillar),
the vehicle must be driven for at least
two minutes over 20 mph (32 km/h)
before the light turns off.
Tire(s) under-inflated
Solid warning light Repair the damaged road wheel and tire
assembly and reinstall it on the vehicle
to restore system function. For a
description on how the system functions,
see When Your Temporary Spare Tire
is Installed
in this section.
Spare tire in use
If the tires are properly inflated and the
spare tire is not in use but the light
remains on, contact your authorized
dealer as soon as possible.
TPMS malfunction
Repair the damaged road wheel and tire
assembly and reinstall it on the vehicle
to restore system function. For a
description on how the system functions,
see When Your Temporary Spare Tire
is Installed
in this section.
Spare tire in use
Flashing warning light
If the tires are properly inflated and the
spare tire is not in use but the light
remains on, contact your authorized
dealer as soon as possible.
TPMS malfunction
328
2020 Transit Connect (CHC) Canada/United States of America, CG3739en enUSA, Edition date: 201903, First-Printing Wheels and Tires
Page 333 of 509

When Inflating Your Tires
WARNING: Do not use the tire
pressure displayed in the information
display as a tire pressure gauge. Failure
to follow this instruction could result in
personal injury or death.
When putting air into your tires (such as at
a gas station or in your garage), the tire
pressure monitoring system may not
respond immediately to the air added to
your tires.
It may take up to two minutes of driving
over 20 mph (32 km/h) for the light to turn
off after you have filled your tires to the
recommended inflation pressure.
How Temperature Affects Your Tire
Pressure
The tire pressure monitoring system
monitors tire pressure in each pneumatic
tire. While driving in a normal manner, a
typical passenger tire inflation pressure
may increase about
2 –4 psi (14– 28 kPa)
from a cold start situation. If the vehicle is
stationary overnight with the outside
temperature significantly lower than the
daytime temperature, the tire pressure may
decrease about 3 psi (21 kPa) for a drop of
30°F (17°C) in ambient temperature. This
lower pressure value may be detected by
the tire pressure monitoring system as
being significantly lower than the
recommended inflation pressure and
activate the system warning light for low
tire pressure. If the low tire pressure
warning light is on, visually check each tire
to verify that no tire is flat. If one or more
tires are flat, repair as necessary. Check
the air pressure in the road tires. If any tire
is under-inflated, carefully drive the vehicle
to the nearest location where air can be
added to the tires. Inflate all the tires to
the recommended inflation pressure. Tire Pressure Monitoring System
Reset Procedure
Overview
You must carry out the system reset
procedure after each tire replacement or
adjustment of the tire pressures.
To maintain your vehicle load carrying
capability, your vehicle may require
different tire pressures in the front
compared to the rear. In these cases, the
system illuminates the warning lamp at
different pressures for the front and rear
tires.
If the tires are rotated, you need to reset
the system in order to relearn the positions
of the tire pressure sensors. The system
cannot tell which position a tire pressure
sensor is in, and assumes you have set the
tire pressures correctly.
Performing the Reset Procedure
1. Switch the ignition on.
2. Navigate to the tire monitor menu in
the information display. See
Information Messages (page 100).
3. Press and hold the OK button until a confirmation message appears. If your
vehicle has a tire pressure monitoring
system reset button, press and hold
the button until a confirmation
message appears.
329
2020 Transit Connect (CHC) Canada/United States of America, CG3739en enUSA, Edition date: 201903, First-Printing Wheels and Tires
Page 334 of 509
CHANGING A ROAD WHEEL
WARNING: The use of tire
sealants may damage your tire pressure
monitoring system and should only be
used in roadside emergencies. If you
must use a sealant, the Ford Tire Mobility
Kit sealant should be used. The tire
pressure monitoring system sensor and
valve stem on the wheel must be
replaced by an authorized dealer after
use of the sealant. WARNING:
If the tire pressure
monitor sensor becomes damaged, it
will no longer function.
See Tire
Pressure Monitoring System (page
326).
Note: The tire pressure monitoring system
indicator light will illuminate when the spare
tire is in use. To restore the full function of
the monitoring system, all road wheels
equipped with tire pressure monitoring
sensors must be mounted on the vehicle.
If you get a flat tire while driving, do not
apply the brake heavily. Instead, gradually
decrease your speed. Hold the steering
wheel firmly and slowly move to a safe
place on the side of the road.
Have a flat serviced by an authorized
dealer in order to prevent damage to the
tire pressure monitoring system sensors.
See
Tire Pressure Monitoring System
(page 326). Replace the spare tire with a
road tire as soon as possible. During
repairing or replacing of the flat tire, have
an authorized dealer inspect the tire
pressure monitoring system sensor for
damage. Dissimilar Spare Wheel and Tire
Assembly Information WARNING:
Failure to follow these
guidelines could result in an increased
risk of loss of vehicle control, injury or
death.
If you have a dissimilar spare wheel and
tire, then it is intended for temporary use
only. This means that if you need to use it,
you should replace it as soon as possible
with a road wheel and tire assembly that
is the same size and type as the road tires
and wheels that were originally provided
by Ford. If the dissimilar spare tire or wheel
is damaged, it should be replaced rather
than repaired.
A dissimilar spare wheel and tire assembly
is defined as a spare wheel and tire
assembly that is different in brand, size or
appearance from the road tires and wheels
and can be one of three types:
1. T-type mini-spare:
This spare tire
begins with the letter T for tire size and
may have Temporary Use Only molded in
the sidewall.
2. Full-size dissimilar spare with label
on wheel:
This spare tire has a label on
the wheel that states: THIS WHEEL AND
TIRE ASSEMBLY FOR TEMPORARY USE
ONLY.
When driving with one of the dissimilar
spare tires listed above, do not:
• Exceed 50 mph (80 km/h).
• Load the vehicle beyond maximum
vehicle load rating listed on the Safety
Compliance Label.
• Tow a trailer.
• Use snow chains on the end of the
vehicle with the dissimilar spare tire.
• Use more than one dissimilar spare tire
at a time.
330
2020 Transit Connect (CHC) Canada/United States of America, CG3739en enUSA, Edition date: 201903, First-Printing Wheels and Tires
Page 500 of 509
Jump Starting......................................................
253
Preparing Your Vehicle..................................... 252
Removing the Jumper Cables....................... 253
K
Keyless Entry....................................................70
Disabled Keys.......................................................... 71
General Information............................................ 70
Locking and Unlocking the Doors with the Key Blade............................................................ 72
Locking Your Vehicle........................................... 70
Passive Key............................................................. 70
Unlocking Your Vehicle........................................ 71
Keys and Remote Controls.........................54
L
Lane Keeping System..................................212 Lane Keeping System Display........................ 214
Lane Keeping System Messages.................. 216
Lane Keeping System Settings...................... 213
Lane Keeping System Warning Lamps and Indicators.......................................................... 215
Switching Lane Keeping System On or Off........................................................................\
213
Liftgate...............................................................73
Lighting Control..............................................82 Headlamp Flasher............................................... 83
High Beams............................................................ 82
Parking Lamps...................................................... 82
Lighting
..............................................................82
General Information............................................ 82
Load Carriers See: Roof Racks and Load Carriers.............232
Load Carrying
................................................229
Load Limit.......................................................233
Special Loading Instructions for Owners of
Pick-up Trucks and Utility-type
Vehicles............................................................. 237
Vehicle Loading - with and without a Trailer................................................................. 233
Locking and Unlocking................................66 Autolock.................................................................. 68
Autounlock............................................................. 68
Emergency Locking with the Key................... 68
Locking and Unlocking the Doors From Inside................................................................... 66Locking and Unlocking the Doors with the
Key Blade............................................................ 67
Opening the Double Rear Doors.................... 66
Opening the Double Rear Doors From Inside................................................................... 69
Remote Control.................................................... 66
Smart Unlocks for Integrated Keyhead Transmitter......................................................... 67
Unlocking the Doors with the Interior Door Handles............................................................... 67
Luggage Anchor Points.............................229
Lug Nuts See: Changing a Road Wheel....................... 330
Lug Nuts
..........................................................335
M
Maintenance..................................................270 General Information......................................... 270
Manual Climate Control
..............................114
Directing Air to the Footwell Air Vents.........114
Directing Air to the Instrument Panel Air
Vents.................................................................... 114
Directing Air to the Windshield Air Vents.................................................................... 114
Setting the Blower Motor Speed................... 114
Setting the Temperature................................... 115
Switching Maximum Cooling On and Off........................................................................\
. 114
Switching Maximum Defrost On and Off........................................................................\
. 114
Switching the Air Conditioning On and Off........................................................................\
. 114
Switching the Climate Control On and Off........................................................................\
. 114
Switching the Recirculated Air On and Off........................................................................\
. 114
Manual Liftgate
...............................................73
Closing the Liftgate.............................................. 73
Opening the Liftgate........................................... 73
Unlocking the Liftgate......................................... 73
Manual Seats
..................................................122
Adjusting the Lumbar Support...................... 123
Adjusting the Seat Backrest........................... 123
Adjusting the Seat Height................................ 123
Moving the Seat Backward and Forward.............................................................. 122
Single Passenger Seat...................................... 123
496
2020 Transit Connect (CHC) Canada/United States of America, CG3739en enUSA, Edition date: 201903, First-Printing Index