tow bar FORD TRANSIT CONNECT 2020 Owners Manual
[x] Cancel search | Manufacturer: FORD, Model Year: 2020, Model line: TRANSIT CONNECT, Model: FORD TRANSIT CONNECT 2020Pages: 509, PDF Size: 7.73 MB
Page 222 of 509
If the sensors become blocked, a message
may appear in the information display. See
Information Messages (page 100). The
alert indicators remain illuminated but the
system does not alert you.
System Errors
If the system detects a fault, a warning
lamp illuminates and a message displays.
See Information Messages (page 100).
Switching the System On and Off
You can switch the system off using the
information display.
See General
Information (page 98). When you switch
the system off, a warning lamp illuminates
and a message displays. When you switch
the system on or off, the alert indicators
flash twice.
Note: The system remembers the last
setting when you start your vehicle.
Note: The system may not correctly operate
when towing a trailer. For vehicles with a
trailer tow module and tow bar approved
by us, the system turns off when you attach
a trailer. For vehicles with an aftermarket
trailer tow module or tow bar, we
recommend that you switch the system off
when you attach a trailer.
To permanently switch the system off,
contact an authorized dealer. CROSS TRAFFIC ALERT WARNING:
Do not use the cross
traffic alert system as a replacement for
using the interior and exterior mirrors or
looking over your shoulder before
reversing out of a parking space. The
cross traffic alert system is not a
replacement for careful driving. WARNING:
The system may not
operate properly during severe weather
conditions, for example snow, ice, heavy
rain and spray. Always drive with due
care and attention. Failure to take care
may result in a crash.
The system is designed to alert you of
vehicles approaching from the sides behind
your vehicle when you shift into reverse
(R). If you continue to reverse after the
system alerts you, the system is designed
to apply the brakes if it still detects an
approaching vehicle. If the system applies
the brakes, a message appears in the
information display.
Note: The system does not apply the brakes
if you override it by firmly pressing the
accelerator pedal.
Using Cross Traffic Alert
The system is designed to detect vehicles
that approach at a speed between
4 mph
(6 km/h) and 37 mph (60 km/h). Coverage
decreases when the sensors are partially,
mostly or fully obstructed. Slowly reversing
helps increase the coverage area and
effectiveness.
The system turns on when you start the
engine and you shift into reverse (R). The
system turns off when you shift out of
reverse (R).
218
2020 Transit Connect (CHC) Canada/United States of America, CG3739en enUSA, Edition date: 201903, First-Printing Driving Aids
Page 224 of 509
Zone coverage also decreases when
parking at narrow angles. The sensor on
the left-hand side is mostly obstructed and
zone coverage on that side is severely
reduced.
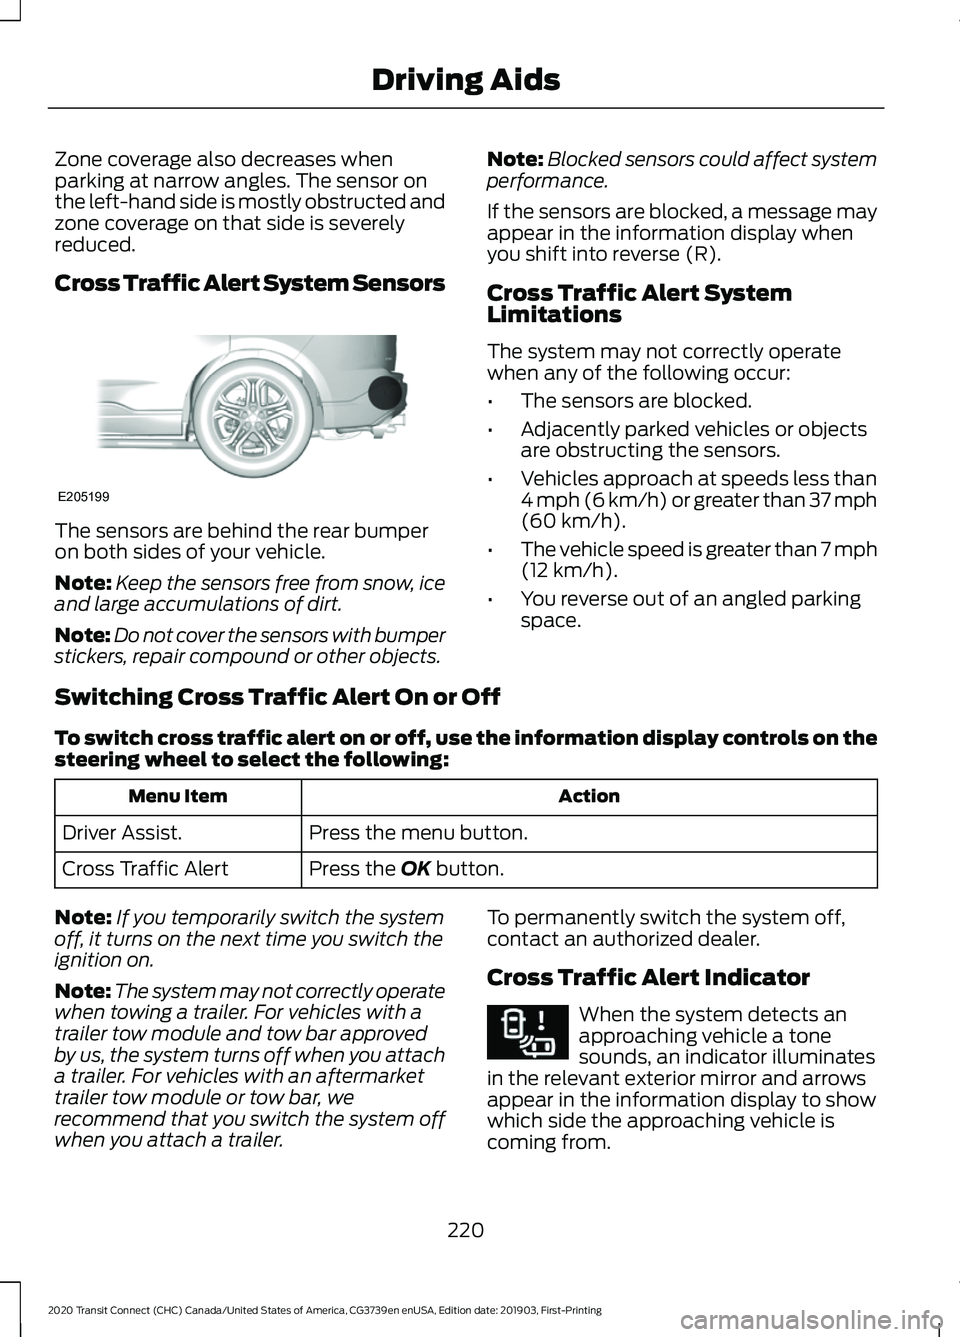
Cross Traffic Alert System Sensors
The sensors are behind the rear bumper
on both sides of your vehicle.
Note:
Keep the sensors free from snow, ice
and large accumulations of dirt.
Note: Do not cover the sensors with bumper
stickers, repair compound or other objects. Note:
Blocked sensors could affect system
performance.
If the sensors are blocked, a message may
appear in the information display when
you shift into reverse (R).
Cross Traffic Alert System
Limitations
The system may not correctly operate
when any of the following occur:
• The sensors are blocked.
• Adjacently parked vehicles or objects
are obstructing the sensors.
• Vehicles approach at speeds less than
4 mph (6 km/h) or greater than 37 mph
(60 km/h).
• The vehicle speed is greater than 7 mph
(12 km/h)
.
• You reverse out of an angled parking
space.
Switching Cross Traffic Alert On or Off
To switch cross traffic alert on or off, use the information display controls on the
steering wheel to select the following: Action
Menu Item
Press the menu button.
Driver Assist.
Press the
OK button.
Cross Traffic Alert
Note: If you temporarily switch the system
off, it turns on the next time you switch the
ignition on.
Note: The system may not correctly operate
when towing a trailer. For vehicles with a
trailer tow module and tow bar approved
by us, the system turns off when you attach
a trailer. For vehicles with an aftermarket
trailer tow module or tow bar, we
recommend that you switch the system off
when you attach a trailer. To permanently switch the system off,
contact an authorized dealer.
Cross Traffic Alert Indicator When the system detects an
approaching vehicle a tone
sounds, an indicator illuminates
in the relevant exterior mirror and arrows
appear in the information display to show
which side the approaching vehicle is
coming from.
220
2020 Transit Connect (CHC) Canada/United States of America, CG3739en enUSA, Edition date: 201903, First-Printing Driving AidsE205199 E268294
Page 234 of 509
Vehicles with the standard size spare tire
can adjust the load floor to two positions.
The front of the load floor can be placed
either on (for high position) or below (for
low position) the ledges behind the rear
seats. The rear of the load floor always sits
on the two small shelves located on the
liftgate trim.
CARGO NETS
Installing the Net (If Equipped)
WARNING:
Always attach and
tighten the net to the luggage anchor
points and do not put more than
22 lb
(10 kg) of cargo behind the net and
above the seat back. Otherwise, the net
could fail and cargo could become a
projectile, which could cause serious
injury. WARNING:
Do not allow people
to ride in the third row seating positions
when the cargo net is installed behind
the second row. Failure to do so may
limit egress from the vehicle in an
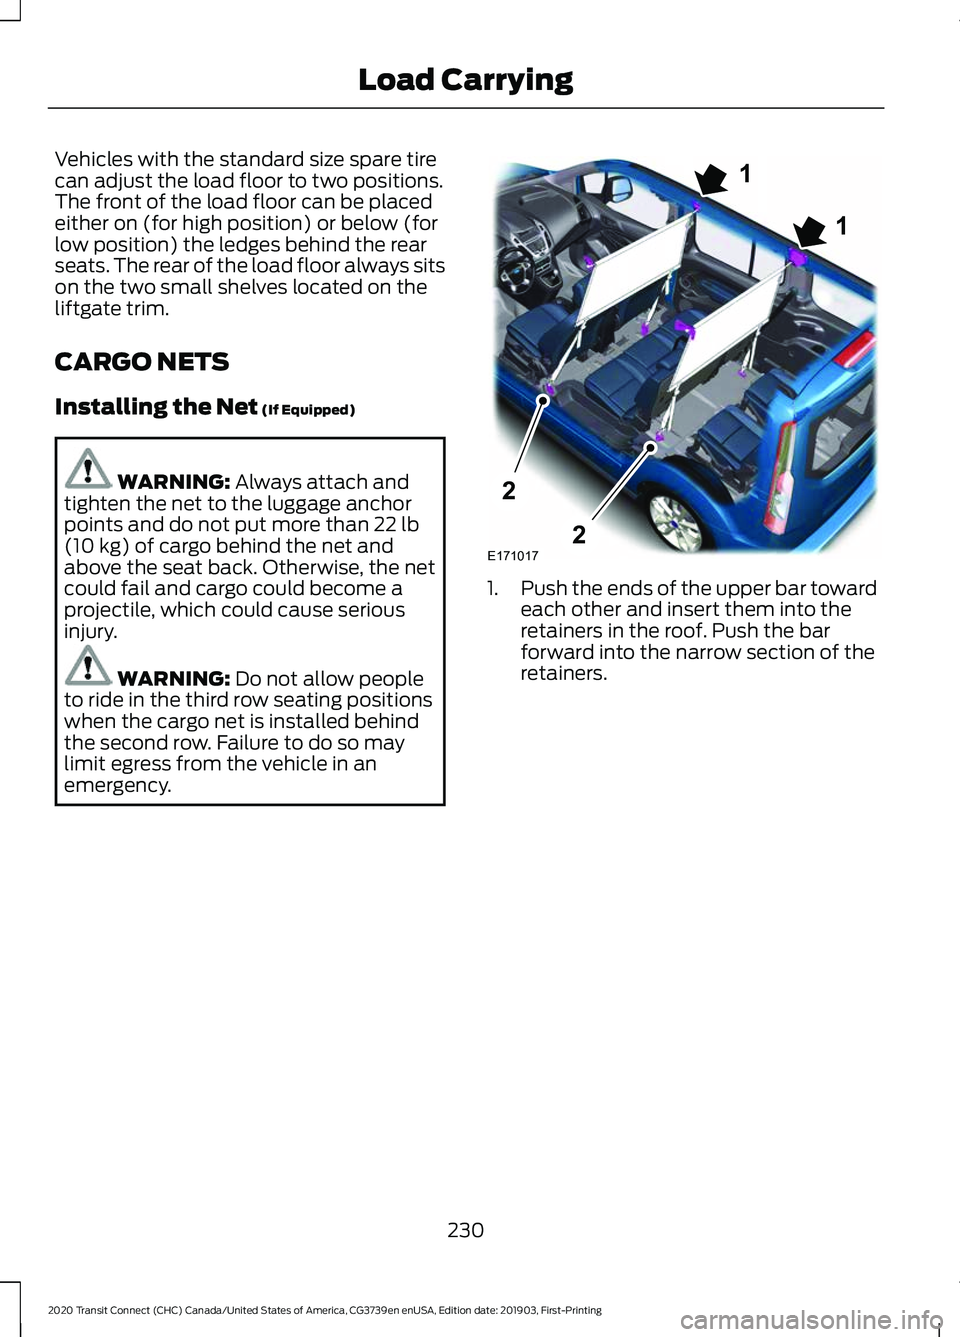
emergency. 1.
Push the ends of the upper bar toward
each other and insert them into the
retainers in the roof. Push the bar
forward into the narrow section of the
retainers.
230
2020 Transit Connect (CHC) Canada/United States of America, CG3739en enUSA, Edition date: 201903, First-Printing Load CarryingE1710171
12
2
Page 244 of 509
Calculating the Maximum
Loaded Trailer Weight
1. Start with the gross combined
weight rating for your vehicle.
See the following chart.
2. Subtract all of the following
that apply to your vehicle:
•Vehicle curb weight
• Hitch hardware weight
including: draw bar, tow ball,
locks and weight distributing
hardware
• Driver and any passengers
weight
• Payload, cargo or luggage
weight
• Aftermarket equipment
weight. 3.
This equals the maximum
loaded trailer weight for this
combination.
Note: Remember to account for
the trailer tongue weight as part of
your vehicle load when calculating
the total vehicle weight.
Note: Consult an authorized dealer
to determine the maximum trailer
weight allowed for your vehicle if
you are not sure. Maximum Loaded
Trailer Weight - lb
(kg) *
Maximum GCWR - lb
(kg)
Powertrain
2,000 (907)
6,061 (2,749)
1.5L SWB Van -
vehicles sold in the
United States
2,000 (907)
6,210 (2,817)
1.5L SWB Wagon
2,000 (907)
6,171 (2,799)
1.5L LWB Van -
vehicles sold in the
United States
2,000 (907)
6,131 (2,781)
1.5L LWB Van -
vehicles sold in
Canada
2,000 (907)
6,499 (2,948)
1.5L LWB Wagon
240
2020 Transit Connect (CHC) Canada/United States of America, CG3739en enUSA, Edition date: 201903, First-Printing Towing
Page 249 of 509
It is recommended that your vehicle be
towed with a wheel lift and dollies or
flatbed equipment. Do not tow with a
slingbelt. Ford Motor Company has not
approved a slingbelt towing procedure. If
the vehicle is towed incorrectly, or by any
other means, vehicle damage may occur.
Ford Motor Company produces a towing
manual for all authorized tow truck
operators. Have your tow truck operator
refer to this manual for proper hook-up
and towing procedures for your vehicle.
You can tow your vehicle from the front
with wheel lift equipment to raise the front
wheels off the ground. We recommend
that you place the rear wheels on a dolly
to prevent damage to the rear of your
vehicle.
You can tow your vehicle from the rear with
wheel lift equipment.
Note:
You must place the front wheels on
a dolly to prevent damage to the
transmission.
TOWING THE VEHICLE ON
FOUR WHEELS
Emergency Towing WARNING: If your vehicle has a
steering wheel lock make sure the
ignition is in the accessory or on position
when being towed. If your vehicle is disabled and you have no
access to a tow dolly, car-hauling trailer or
a flatbed transport vehicle, it can only be
flat-towed with all wheels on the ground
under the following conditions:
•
Your vehicle is facing forward so that
it is towed in a forward direction.
• The transmission selector lever is
placed in position N
. If the transmission
gear shift lever cannot be moved to
position
N, it may need to be
overridden. See Automatic
Transmission (page 176).
• Maximum speed is 35 mph (56 km/h).
• Maximum distance is
50 mi (80 km).
Drive off slowly and smoothly without
jerking the vehicle you are towing.
You must only use the towing eye that was
delivered with your vehicle. See
Towing
Points (page 254).
Tow ropes or rigid towing bars must be
placed on the same side. For example; right
hand rear towing point to right hand front
towing point.
You must use a tow rope or rigid towing
bar that is of the correct strength for the
weight of the towing vehicle and the
vehicle that is being towed.
The weight of the vehicle that is being
towed must not exceed the weight of the
towing vehicle.
Recreational Vehicle Towing
Note: Put your climate control system in
recirculated air mode to prevent exhaust
fumes from entering the vehicle. See
Climate Control
(page 114).
Follow these guidelines if you have a need
for recreational (RV) towing. An example
of recreational towing would be towing
your vehicle behind a motorhome. We
designed these guidelines to prevent
damage to your transmission.
245
2020 Transit Connect (CHC) Canada/United States of America, CG3739en enUSA, Edition date: 201903, First-Printing Towing
Page 314 of 509
11.
Disconnect the tire inflation pipe and
the 12 volt DC power point connector.
Note: Do not remove the sealant bottle
from the compressor.
12. Reinstall the tire valve dust cap.
13. Place the warning label on the steering wheel and correctly stow the
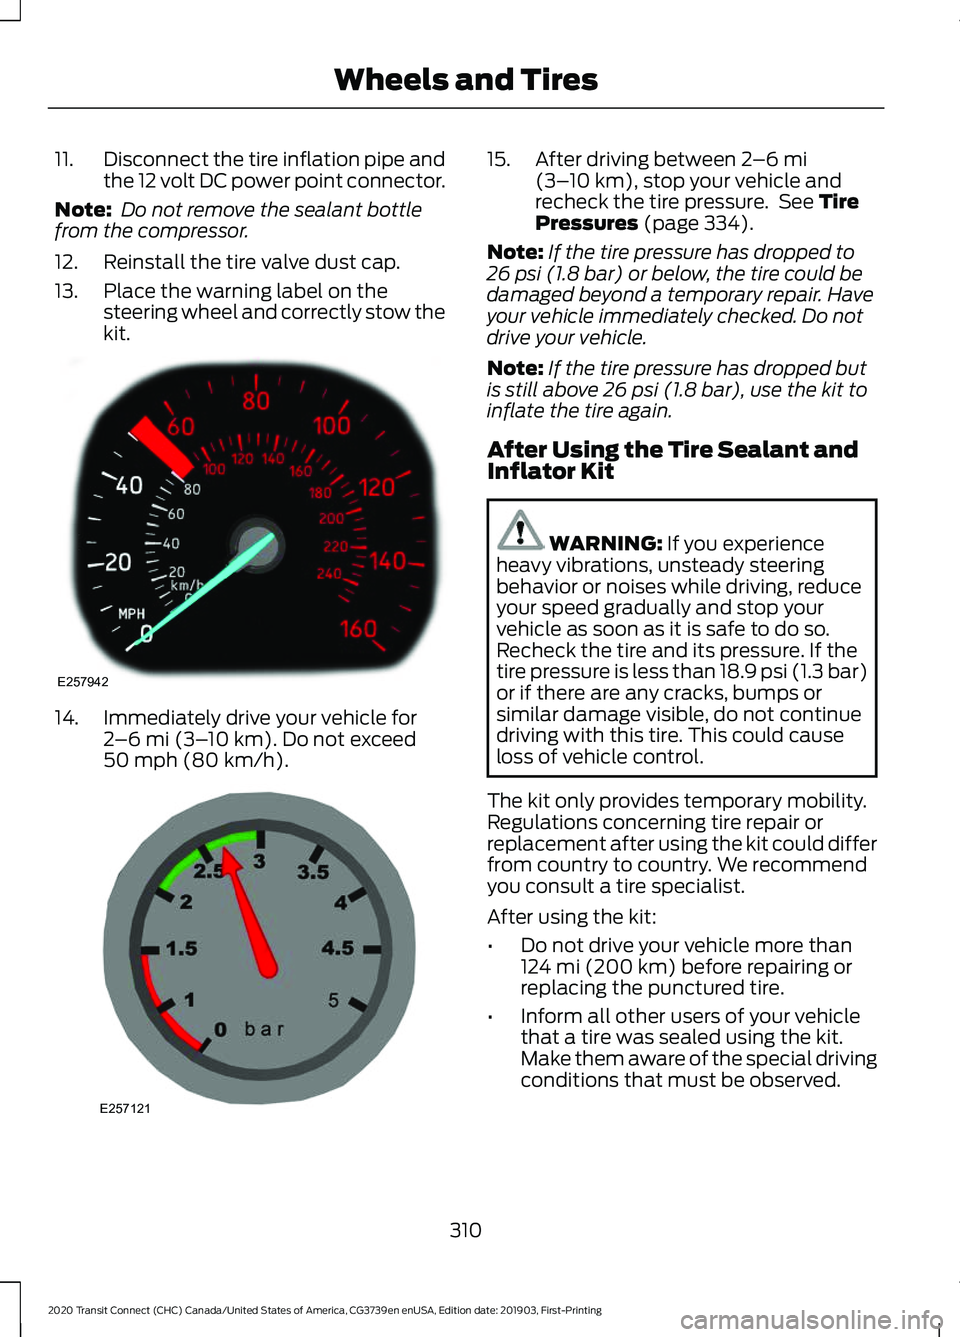
kit.14. Immediately drive your vehicle for
2–6 mi (3– 10 km). Do not exceed
50 mph (80 km/h). 15. After driving between
2
–6 mi
(3– 10 km), stop your vehicle and
recheck the tire pressure. See Tire
Pressures (page 334).
Note: If the tire pressure has dropped to
26 psi (1.8 bar)
or below, the tire could be
damaged beyond a temporary repair. Have
your vehicle immediately checked. Do not
drive your vehicle.
Note: If the tire pressure has dropped but
is still above
26 psi (1.8 bar), use the kit to
inflate the tire again.
After Using the Tire Sealant and
Inflator Kit WARNING:
If you experience
heavy vibrations, unsteady steering
behavior or noises while driving, reduce
your speed gradually and stop your
vehicle as soon as it is safe to do so.
Recheck the tire and its pressure. If the
tire pressure is less than 18.9 psi (1.3 bar)
or if there are any cracks, bumps or
similar damage visible, do not continue
driving with this tire. This could cause
loss of vehicle control.
The kit only provides temporary mobility.
Regulations concerning tire repair or
replacement after using the kit could differ
from country to country. We recommend
you consult a tire specialist.
After using the kit:
• Do not drive your vehicle more than
124 mi (200 km)
before repairing or
replacing the punctured tire.
• Inform all other users of your vehicle
that a tire was sealed using the kit.
Make them aware of the special driving
conditions that must be observed.
310
2020 Transit Connect (CHC) Canada/United States of America, CG3739en enUSA, Edition date: 201903, First-Printing Wheels and TiresE257942 E257121
Page 399 of 509
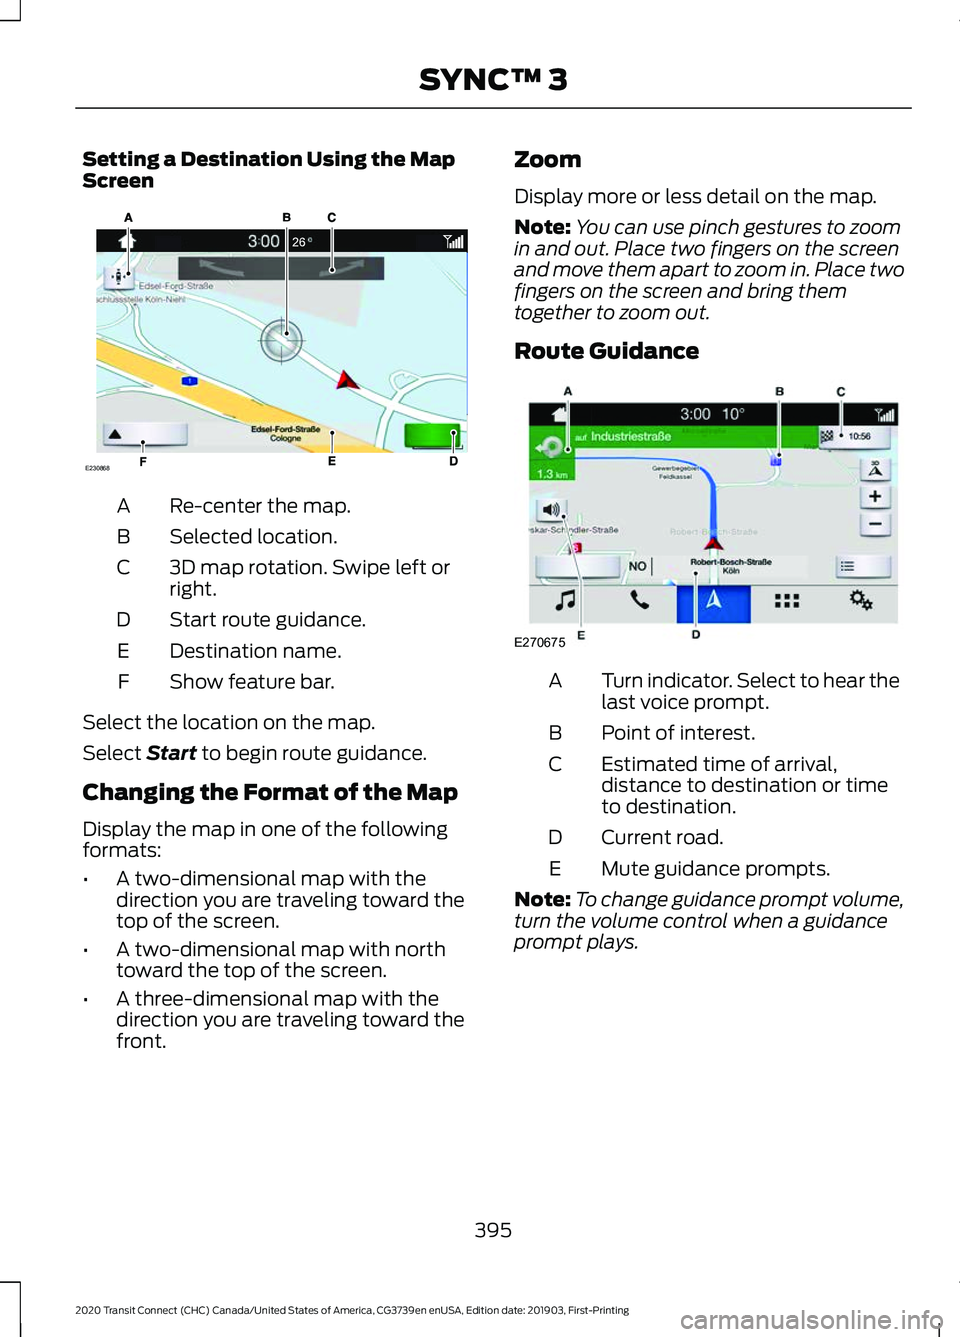
Setting a Destination Using the Map
Screen
Re-center the map.
A
Selected location.
B
3D map rotation. Swipe left or
right.
C
Start route guidance.
D
Destination name.
E
Show feature bar.
F
Select the location on the map.
Select Start to begin route guidance.
Changing the Format of the Map
Display the map in one of the following
formats:
• A two-dimensional map with the
direction you are traveling toward the
top of the screen.
• A two-dimensional map with north
toward the top of the screen.
• A three-dimensional map with the
direction you are traveling toward the
front. Zoom
Display more or less detail on the map.
Note:
You can use pinch gestures to zoom
in and out. Place two fingers on the screen
and move them apart to zoom in. Place two
fingers on the screen and bring them
together to zoom out.
Route Guidance Turn indicator. Select to hear the
last voice prompt.
A
Point of interest.
B
Estimated time of arrival,
distance to destination or time
to destination.
C
Current road.
D
Mute guidance prompts.
E
Note: To change guidance prompt volume,
turn the volume control when a guidance
prompt plays.
395
2020 Transit Connect (CHC) Canada/United States of America, CG3739en enUSA, Edition date: 201903, First-Printing SYNC™ 3E230868 E270675