change time FORD WINDSTAR 2001 2.G Owners Manual
[x] Cancel search | Manufacturer: FORD, Model Year: 2001, Model line: WINDSTAR, Model: FORD WINDSTAR 2001 2.GPages: 288, PDF Size: 2.6 MB
Page 3 of 288

WARNINGS
Warnings provide information which may reduce the risk of personal
injury and prevent possible damage to others, your vehicle and its
equipment.
BREAKING-IN YOUR VEHICLE
There are no particular breaking-in rules for your vehicle. During the
first 1 600 km (1 000 miles) of driving, vary speeds frequently. This is
recommended to give the moving parts a chance to break in.
INFORMATION ABOUT THIS GUIDE
The information found in this guide was in effect at the time of printing.
Ford may change the contents without notice and without incurring
obligation.
EMISSION WARRANTY
The New Vehicle Limited Warranty includes Bumper to Bumper
Coverage, Safety Restraint Coverage, Corrosion Coverage, and 7.3L
Power Stroke Diesel Engine Coverage. In addition, your vehicle is eligible
for Emissions Defect and Emissions Performance Warranties. For a
detailed description of what is covered and what is not covered, refer to
theWarranty Guidethat is provided to you along with your Owner's
Guide.
Introduction
3
Page 43 of 288
information will display for ten seconds, when the radio is turned on, and
then revert to clock information. Anytime that the media is changed,
(new radio station, etc.), the media information will again display for ten
seconds before reverting back to the clock. In media mode, the media
information will always be displayed.
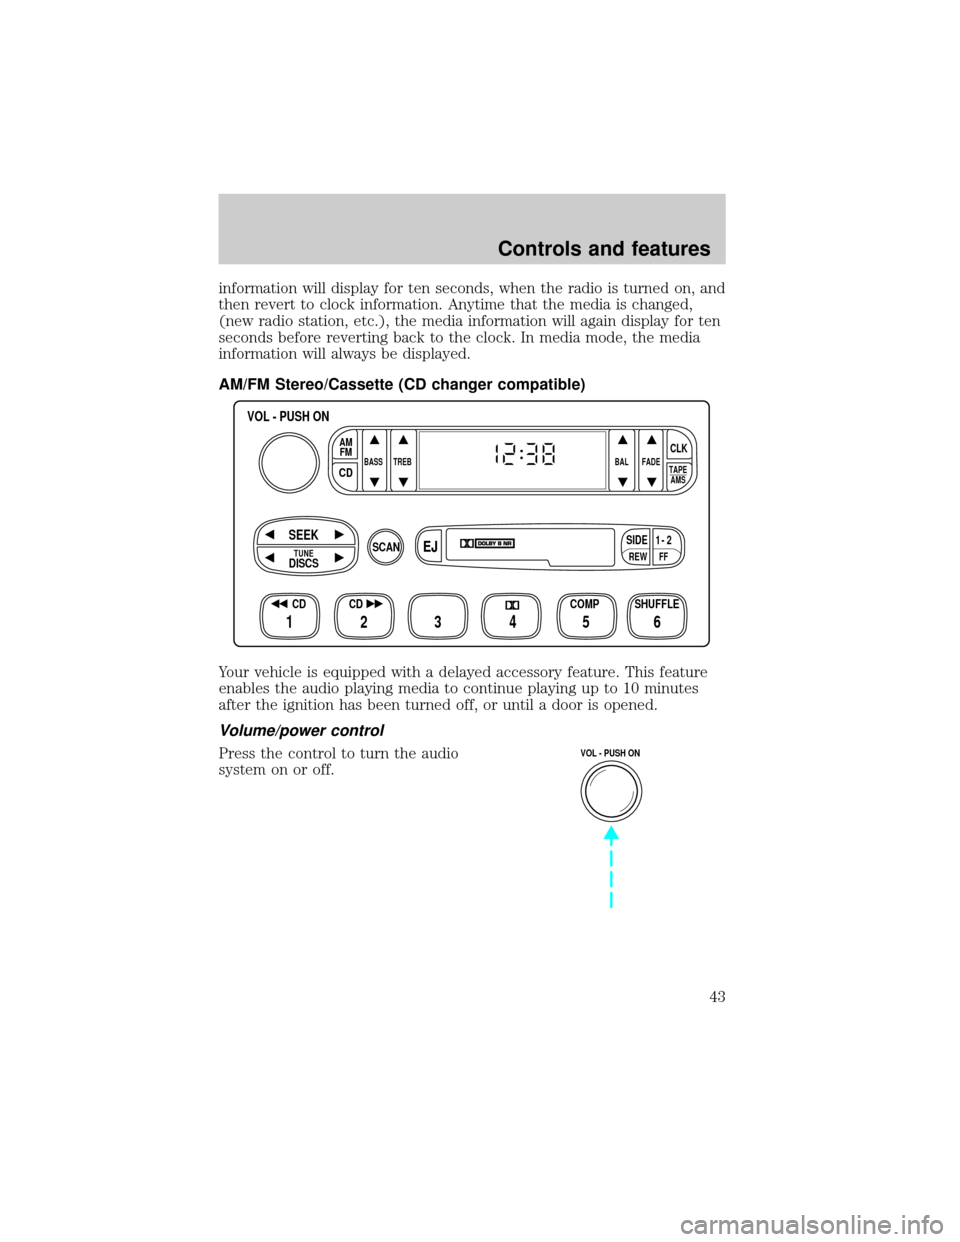
AM/FM Stereo/Cassette (CD changer compatible)
Your vehicle is equipped with a delayed accessory feature. This feature
enables the audio playing media to continue playing up to 10 minutes
after the ignition has been turned off, or until a door is opened.
Volume/power control
Press the control to turn the audio
system on or off.
FFREW
SIDE1 - 2
BASS TREB BAL FADE
TAPE
AMS
AM
FM
CD
CLK
VOL - PUSH ON
SHUFFLE COMP CD
EJ
CDSCAN
DISCS
TUNE
SEEK
3 2 1456
VOL - PUSH ON
Controls and features
43
Page 49 of 288
Fast forward
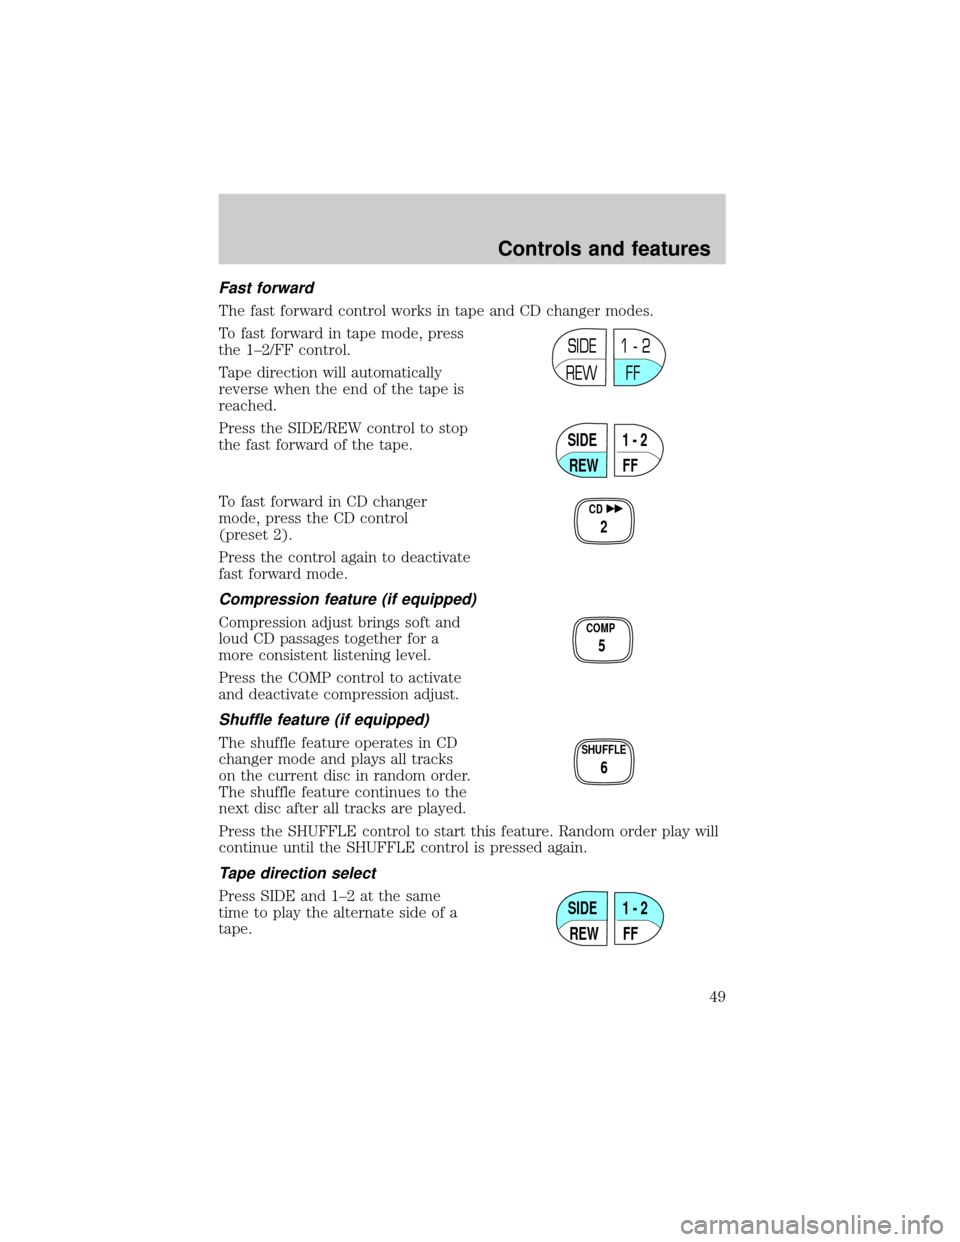
The fast forward control works in tape and CD changer modes.
To fast forward in tape mode, press
the 1±2/FF control.
Tape direction will automatically
reverse when the end of the tape is
reached.
Press the SIDE/REW control to stop
the fast forward of the tape.
To fast forward in CD changer
mode, press the CD control
(preset 2).
Press the control again to deactivate
fast forward mode.
Compression feature (if equipped)
Compression adjust brings soft and
loud CD passages together for a
more consistent listening level.
Press the COMP control to activate
and deactivate compression adjust.
Shuffle feature (if equipped)
The shuffle feature operates in CD
changer mode and plays all tracks
on the current disc in random order.
The shuffle feature continues to the
next disc after all tracks are played.
Press the SHUFFLE control to start this feature. Random order play will
continue until the SHUFFLE control is pressed again.
Tape direction select
Press SIDE and 1±2 at the same
time to play the alternate side of a
tape.
SIDE
REW FF1 - 2
SIDE
REW FF1 - 2
CD
2
COMP
5
SHUFFLE
6
SIDE
REW FF1 - 2
Controls and features
49
Page 51 of 288
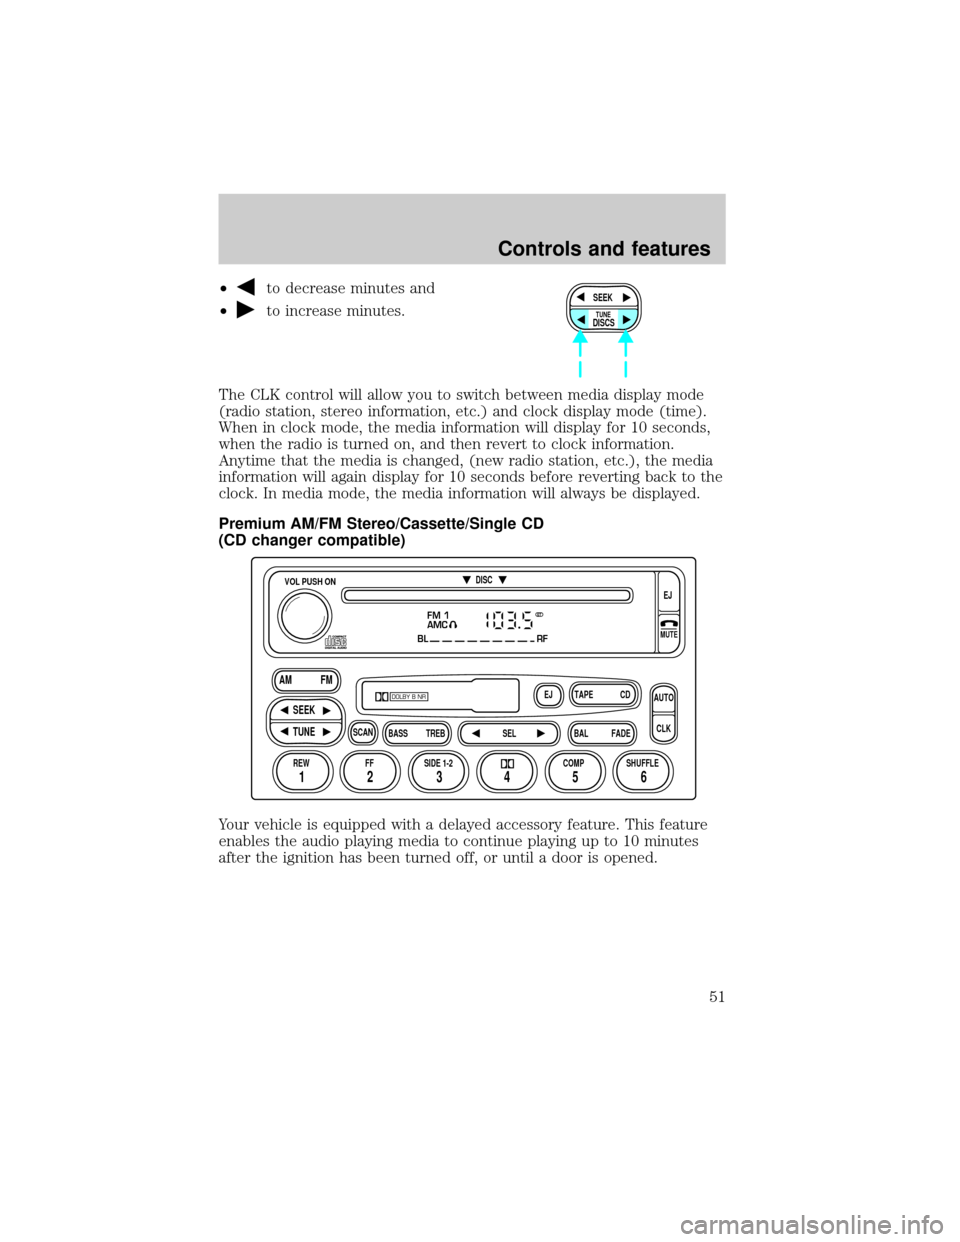
²to decrease minutes and
²
to increase minutes.
The CLK control will allow you to switch between media display mode
(radio station, stereo information, etc.) and clock display mode (time).
When in clock mode, the media information will display for 10 seconds,
when the radio is turned on, and then revert to clock information.
Anytime that the media is changed, (new radio station, etc.), the media
information will again display for 10 seconds before reverting back to the
clock. In media mode, the media information will always be displayed.
Premium AM/FM Stereo/Cassette/Single CD
(CD changer compatible)
Your vehicle is equipped with a delayed accessory feature. This feature
enables the audio playing media to continue playing up to 10 minutes
after the ignition has been turned off, or until a door is opened.SEEK
DISCS
TUNE
FM 1
AMC
BL RF
REW FFSCAN
BASS TREB SEL BALTAPE DISC
EJ CD
FADEAUTO
CLK
SIDE 1-2 COMP SHUFFLEEJ
MUTE
VOL PUSH ON
SEEK
TUNE AM FM
12 3456
DOLBY B NR
ST
Controls and features
51
Page 60 of 288
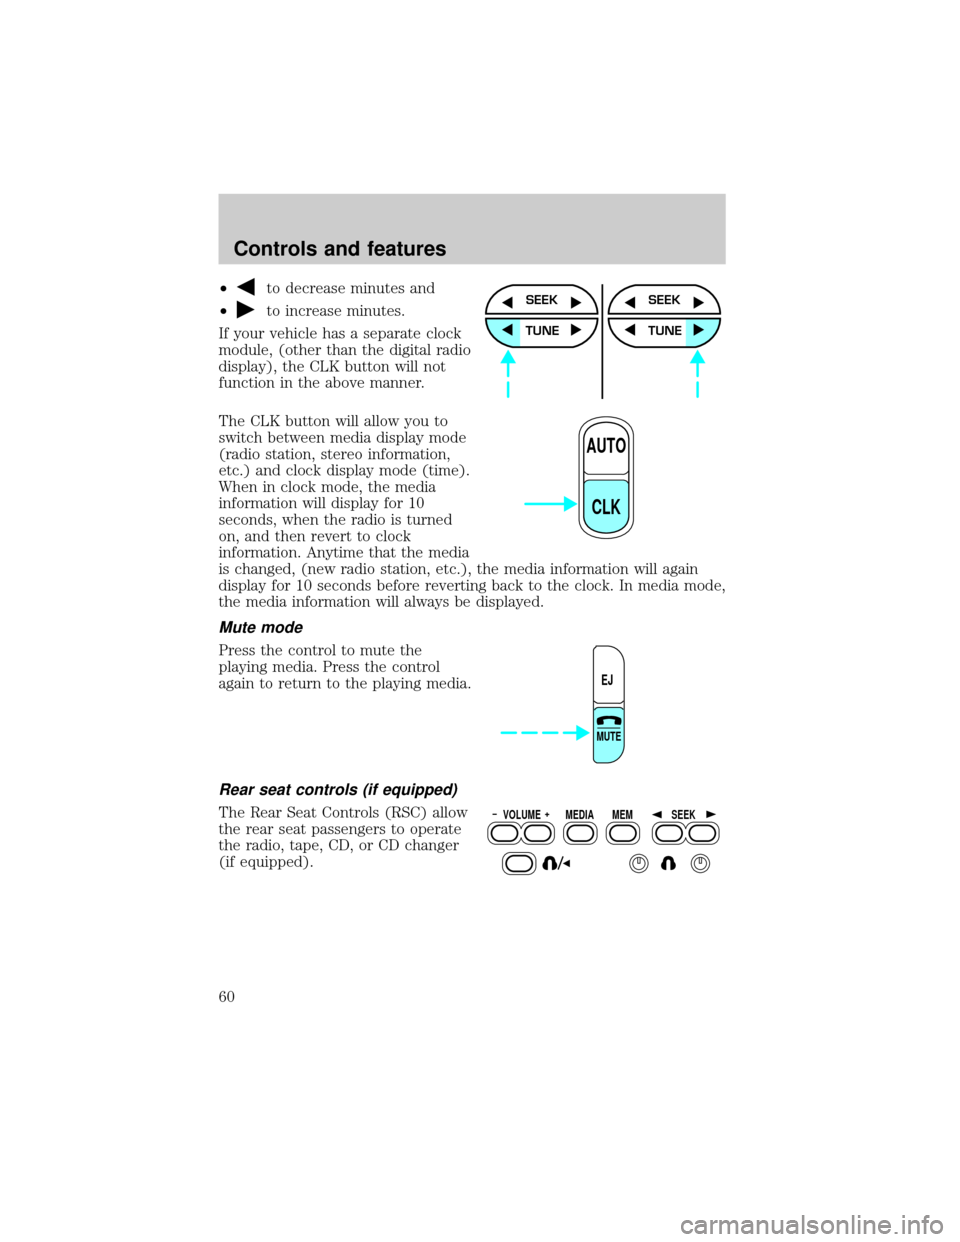
²to decrease minutes and
²
to increase minutes.
If your vehicle has a separate clock
module, (other than the digital radio
display), the CLK button will not
function in the above manner.
The CLK button will allow you to
switch between media display mode
(radio station, stereo information,
etc.) and clock display mode (time).
When in clock mode, the media
information will display for 10
seconds, when the radio is turned
on, and then revert to clock
information. Anytime that the media
is changed, (new radio station, etc.), the media information will again
display for 10 seconds before reverting back to the clock. In media mode,
the media information will always be displayed.
Mute mode
Press the control to mute the
playing media. Press the control
again to return to the playing media.
Rear seat controls (if equipped)
The Rear Seat Controls (RSC) allow
the rear seat passengers to operate
the radio, tape, CD, or CD changer
(if equipped).
SEEK
TUNE
SEEK
TUNE
AUTO
CLK
EJ
MUTE
VOLUME MEDIA
MEMSEEK
Controls and features
60
Page 61 of 288
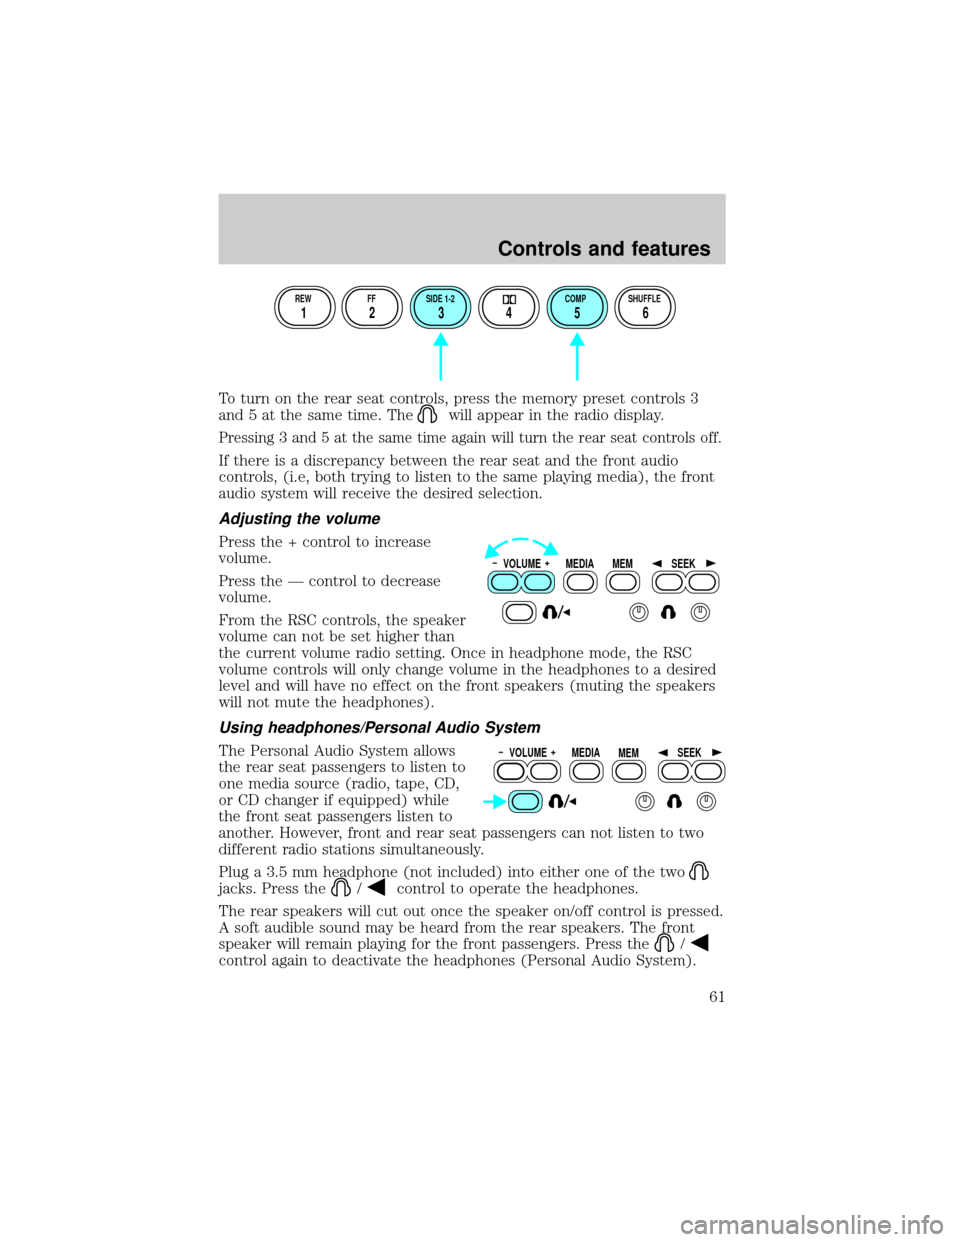
To turn on the rear seat controls, press the memory preset controls 3
and 5 at the same time. The
will appear in the radio display.
Pressing 3 and 5 at the same time again will turn the rear seat controls off.
If there is a discrepancy between the rear seat and the front audio
controls, (i.e, both trying to listen to the same playing media), the front
audio system will receive the desired selection.
Adjusting the volume
Press the + control to increase
volume.
Press the Ð control to decrease
volume.
From the RSC controls, the speaker
volume can not be set higher than
the current volume radio setting. Once in headphone mode, the RSC
volume controls will only change volume in the headphones to a desired
level and will have no effect on the front speakers (muting the speakers
will not mute the headphones).
Using headphones/Personal Audio System
The Personal Audio System allows
the rear seat passengers to listen to
one media source (radio, tape, CD,
or CD changer if equipped) while
the front seat passengers listen to
another. However, front and rear seat passengers can not listen to two
different radio stations simultaneously.
Plug a 3.5 mm headphone (not included) into either one of the two
jacks. Press the/control to operate the headphones.
The rear speakers will cut out once the speaker on/off control is pressed.
A soft audible sound may be heard from the rear speakers. The front
speaker will remain playing for the front passengers. Press the
/
control again to deactivate the headphones (Personal Audio System).
REW FF SIDE 1-2 COMP SHUFFLE
12 3456
VOLUME MEDIA
MEMSEEK
VOLUME MEDIA
MEMSEEK
Controls and features
61
Page 74 of 288
Cleaning compact discs
Inspect all discs for contamination before playing. If necessary, clean
discs only with an approved CD cleaner and wipe from the center out to
the edge. Do not use circular motion.
CD and CD changer care
²Handle discs by their edges only. Never touch the playing surface.
²Do not expose discs to direct sunlight or heat sources for extended
periods of time.
²Do not insert more than one disc into each slot of the CD changer
magazine.
Do not insert any promotional (odd shaped or sized) discs, or discs
with removable labels into the CD player as jamming may occur.
Cleaning cassette player (if equipped)
Clean the tape player head with a cassette cleaning cartridge after 10 to
12 hours of play in order to maintain the best sound and operation.
Cassette and cassette player care
²Use only cassettes that are 90 minutes long or less.
²Do not expose tapes to direct sunlight, high humidity, extreme heat or
extreme cold. Allow tapes that may have been exposed to extreme
temperatures to reach a moderate temperature before playing.
²Tighten very loose tapes by inserting a finger or pencil into the hole
and turning the hub.
²Remove loose labels before inserting tapes.
²Do not leave tapes in the cassette player for a long time when not
being played.
Radio frequency information
The Federal Communications Commission (FCC) and the Canadian Radio
and Telecommunications Commission(CRTC) establish the frequencies AM
and FM stations may use for their broadcasts. Allowable frequencies are:
AM 530, 540±1600, 1610 kHz
FM 87.7, 87.9±107.7, 107.9 MHz
Not all frequencies are used in a given area.
Controls and features
74
Page 89 of 288
MEMORY SEATS/REARVIEW MIRRORS/ADJUSTABLE PEDALS
(IF EQUIPPED)
This system allows automatic
positioning of the driver seat,
outside rearview mirrors, and
adjustable pedals to two
programmable positions.
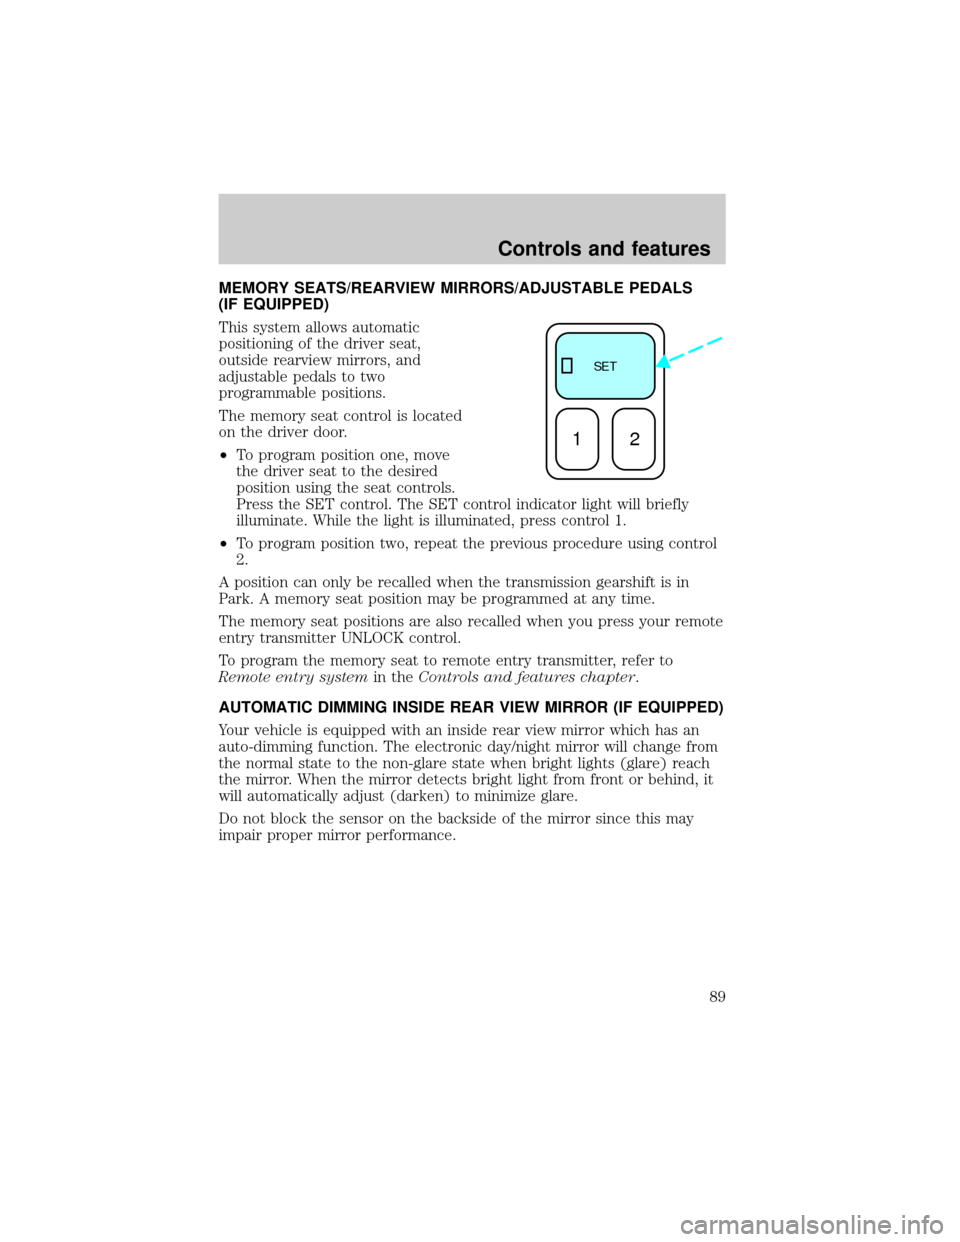
The memory seat control is located
on the driver door.
²To program position one, move
the driver seat to the desired
position using the seat controls.
Press the SET control. The SET control indicator light will briefly
illuminate. While the light is illuminated, press control 1.
²To program position two, repeat the previous procedure using control
2.
A position can only be recalled when the transmission gearshift is in
Park. A memory seat position may be programmed at any time.
The memory seat positions are also recalled when you press your remote
entry transmitter UNLOCK control.
To program the memory seat to remote entry transmitter, refer to
Remote entry systemin theControls and features chapter.
AUTOMATIC DIMMING INSIDE REAR VIEW MIRROR (IF EQUIPPED)
Your vehicle is equipped with an inside rear view mirror which has an
auto-dimming function. The electronic day/night mirror will change from
the normal state to the non-glare state when bright lights (glare) reach
the mirror. When the mirror detects bright light from front or behind, it
will automatically adjust (darken) to minimize glare.
Do not block the sensor on the backside of the mirror since this may
impair proper mirror performance.
SE T
12
Controls and features
89
Page 166 of 288
To prevent electrical shock, do not use your heater with
ungrounded electrical systems or two-pronged (cheater)
adapters.
Guarding against exhaust fumes
Although odorless and colorless, carbon monoxide is present in exhaust
fumes. Take precautions to avoid its dangerous effects.
If you ever smell exhaust fumes of any kind inside your vehicle,
have your dealer inspect and fix your vehicle immediately. Do
not drive if you smell exhaust fumes. These fumes are harmful and
could kill you.
Have the exhaust and body ventilation systems checked whenever:
²the vehicle is raised for service.
²the sound of the exhaust system changes.
²the vehicle has been damaged in a collision.
WARNING:Engine exhaust, some of its constituents, and
certain vehicle components contain or emit chemicals known to
the State of California to cause cancer and birth defects or other
reproductive harm. In addition, certain fluids contained in vehicles and
certain products of component wear contain or emit chemicals known
to the State of California to cause cancer and birth defects or other
reproductive harm.
Important ventilating information
If the engine is idling while the vehicle is stopped in an open area for
long periods of time, open the windows at least 2.5 cm (one inch).
Adjust the heating or air conditioning (if equipped) to bring in fresh air.
Improve vehicle ventilation by keeping all air inlet vents clear of snow,
leaves and other debris.
Starting
166
Page 222 of 288
5. If the fluid is low, add fluid in small amounts, continuously checking
the level until it reaches the correct operating range. Be sure to put the
cap back on the reservoir.
TRANSMISSION FLUID
Checking automatic transmission fluid
Refer to your scheduled maintenance guide for scheduled intervals for
fluid checks and changes. Your transaxle does not consume fluid.
However, the fluid level should be checked if the transaxle is not working
properly, i.e., if the transaxle slips or shifts slowly or if you notice some
sign of fluid leakage.
Automatic transmission fluid expands when warmed. To obtain an
accurate fluid check, drive the vehicle until it is warmed up
(approximately 30 km [20 miles]). If your vehicle has been
operated for an extended period at high speeds, in city traffic
during hot weather or pulling a trailer, the vehicle should be
turned off for about 30 minutes to allow fluid to cool before
checking.
1. Drive the vehicle 30 km (20 miles) or until it reaches normal operating
temperature.
2. Park the vehicle on a level surface and engage the parking brake.
3. With the parking brake engaged and your foot on the brake pedal,
start the engine and move the gearshift lever through all of the gear
ranges. Allow sufficient time for each gear to engage.
4. Latch the gearshift lever in P (Park) and leave the engine running.
5. Remove the dipstick, wiping it clean with a clean, dry lint free rag. If
necessary, refer toIdentifying components in the engine compartment
in this chapter for the location of the dipstick.
6. Install the dipstick making sure it is fully seated in the filler tube.
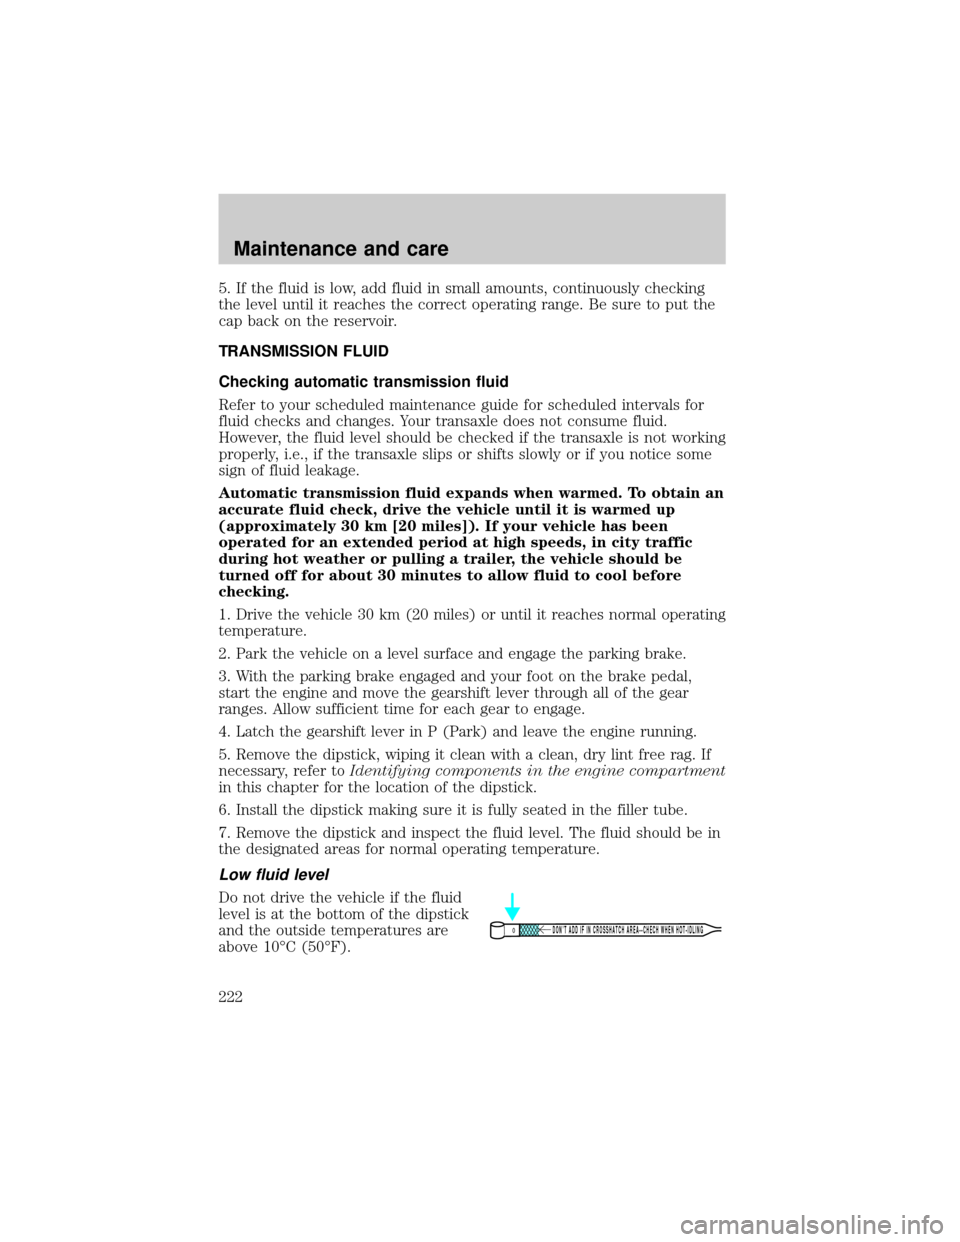
7. Remove the dipstick and inspect the fluid level. The fluid should be in
the designated areas for normal operating temperature.
Low fluid level
Do not drive the vehicle if the fluid
level is at the bottom of the dipstick
and the outside temperatures are
above 10ÉC (50ÉF).
DON’T ADD IF IN CROSSHATCH AREA--CHECH WHEN HOT-IDLING
Maintenance and care
222