warning light GENESIS G80 2021 Workshop Manual
[x] Cancel search | Manufacturer: GENESIS, Model Year: 2021, Model line: G80, Model: GENESIS G80 2021Pages: 604, PDF Size: 11.47 MB
Page 225 of 604

05
5-87
OJX1059063
High Beam Assist is a system that
automatically adjusts the headlamp
range (switches between high beam and
low beam) depending on the brightness
of detected vehicles and certain road
conditions.
Detecting sensor (Front view
camera)
ORG3070003
[1] : Front view camera
The front view camera is used as a
detecting sensor to detect ambient light
and brightness while driving.
Refer to the picture above for the
detailed location of the detecting sensor.
NOTICE
Always keep the front view camera in
good condition to maintain optimal
performance of High Beam Assist.
For more details on the precautions
of the front view camera, refer to
“Forward Collision-Avoidance Assist
(FCA)” section in chapter 7.
System Setting
OJX1059234L
With the Engine Start/Stop button in
the ON position, select ‘Lights → High
Beam Assist (or HBA (High Beam Assist))’
from the Settings menu to turn on High
Beam Assist and deselect to turn off the
system.
WARNING
For your safety, change the Settings
after parking the vehicle at a safe
location.
HIGH BEAM ASSIST (HBA)
Page 226 of 604

Convenient Features
5-88
System Operation
Display and control
• After selecting ‘High Beam Assist’
in the Settings menu, High Beam
Assist will operate by following the
procedure below.
-Place the headlamp switch in
the AUTO position and push
the headlamp lever towards the
instrument cluster. The High Beam
Assist (
) indicator light will
illuminate on the cluster and the
system will be enabled.
- When the system is enabled, high
beam will turn on when vehicle
speed is above 25 mph (40 km/h).
When vehicle speed is below 15
mph (25 km/h), high beam will not
turn on.
-The High Beam () indicator light
will illuminate on the cluster when
high beam is on.
• When High Beam Assist is operating, if
the headlamp lever or switch is used,
the system operates as follow:
- If the headlamp lever is pulled
towards you when the high beam
is off, the high beam will turn on
without High Beam Assist canceled.
When you let go of the headlamp
lever, the lever will move to the
middle and the high beam will turn
off.
-If the headlamp lever is pulled
towards you when the high beam is
on by High Beam Assist, low beam
will be on and the system will turn
off.
-If the headlamp switch is placed
from AUTO to another position
(headlamp/position/off), High
Beam Assist will turn off and the
corresponding lamp will turn on.
• When High Beam Assist is operating,
high beam switches to low beam if
any of the following conditions occur:
-When the headlamp of an
oncoming vehicle is detected.
-When the tail lamp of a vehicle in
front is detected.
-When the headlamp or tail lamp of a
motorcycle or a bicycle is detected.
-When the surrounding ambient light
is bright enough that high beams
are not required.
-When streetlights or other lights are
detected.
System Malfunction and
Limitations
System malfunction
OJX1059235L
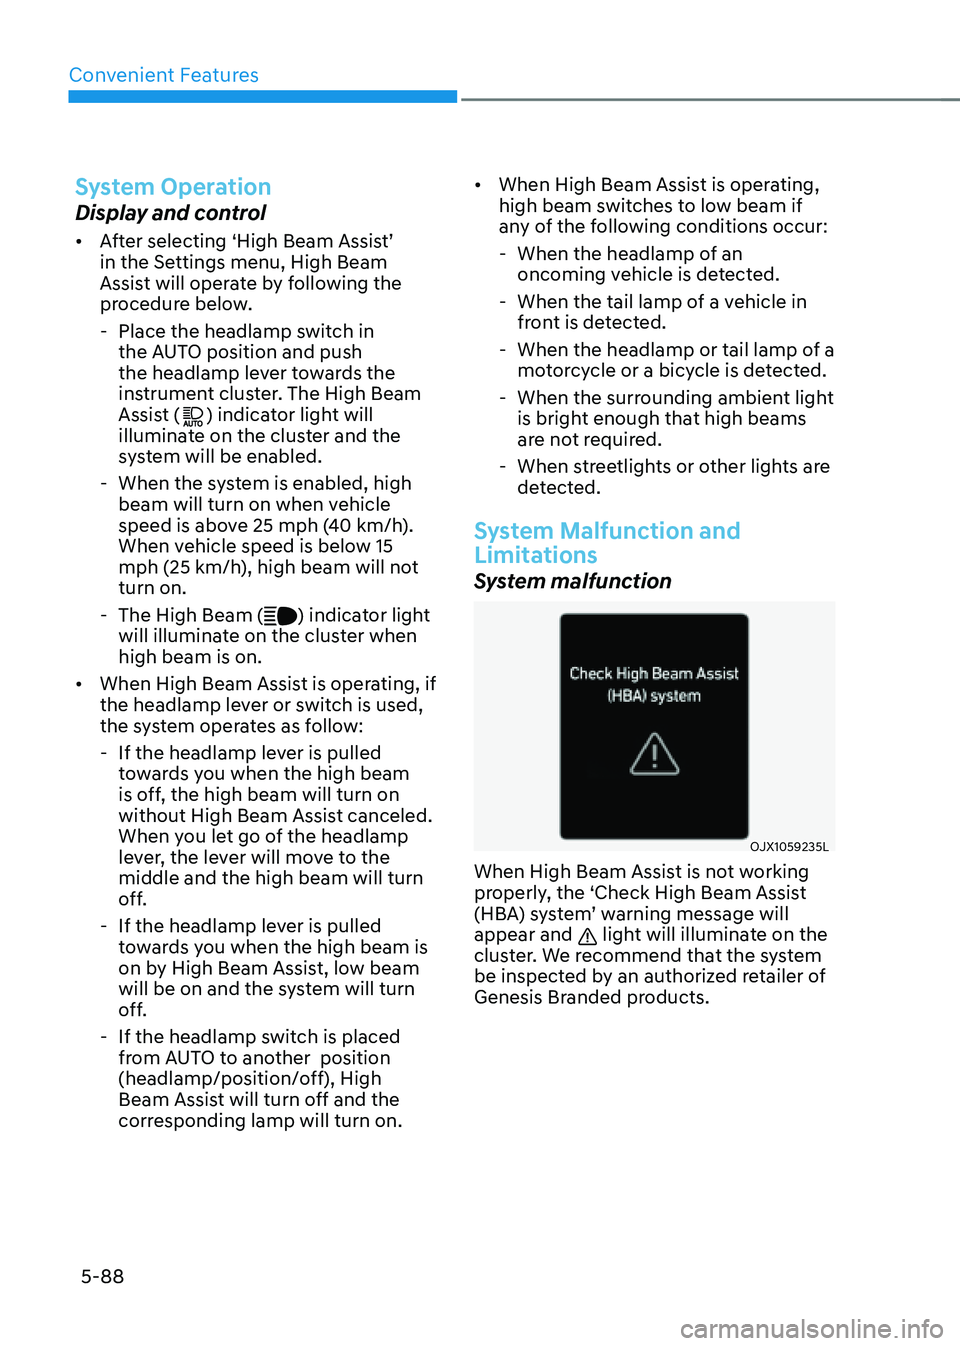
When High Beam Assist is not working
properly, the ‘Check High Beam Assist
(HBA) system’ warning message will
appear and
light will illuminate on the
cluster. We recommend that the system
be inspected by an authorized retailer of
Genesis Branded products.
Page 227 of 604

05
5-89
Limitations of the system
High Beam Assist may not work properly
in the following situations:
• Light from a vehicle is not detected
because of lamp damage, or because
it is hidden from sight, etc.
• Headlamp of a vehicle is covered with
dust, snow or water.
• A vehicle’s headlamps are off but the
fog lamps are on and etc.
• There is a lamp that has a similar
shape as a vehicle’s lamp.
• Headlamps have been damaged or
not repaired properly.
• Headlamps are not aimed properly.
• Driving on a narrow curved road,
rough road, uphill or downhill.
• Vehicle in front is partially visible on a
crossroad or curved road.
• There is a traffic light, reflecting sign,
flashing sign or mirror ahead.
• There is a temporary reflector or flash
ahead (construction area).
• The road conditions are bad such as
being wet, iced or covered with snow.
• A vehicle suddenly appears from a
curve.
• The vehicle is tilted from a flat tire or
is being towed.
• Light from a vehicle is not detected
because of exhaust fume, smoke, fog,
snow, etc.
NOTICE
For more details on the limitations
of the front view camera, refer to
“Forward Collision-Avoidance Assist
(FCA)” section in chapter 7.
WARNING
• At times, High Beam Assist may
not work properly. The system is
for your convenience only. It is the
responsibility of the driver for safe
driving practices and always check
the road conditions for your safety.
• When High Beam Assist does
not operate normally, change
the headlamp position manually
between high beam and low beam.
Page 229 of 604

05
5-91
AUTO (Automatic) control
ORG3050065
The rain sensor located on the upper
end of the windshield glass senses
the amount of rainfall and controls the
wiping cycle for the proper interval.
The wiper operation time will be
automatically controlled depends on
rainfall.
When the rain stops, the wiper stops.
To vary the sensitivity setting, turn the
sensitivity control knob.
If the wiper switch is set in AUTO mode
when the Engine Start/Stop button is in
the ON position, the wiper will operate
once to perform a self-check of the
system. Set the wiper to the OFF position
when the wiper is not in use.
WARNING
To avoid personal injury from the
windshield wipers, when the engine
is running and the windshield wiper
switch is placed in the AUTO mode:
• Do not touch the upper end of the
windshield glass facing the rain
sensor.
• Do not wipe the upper end of the
windshield glass with a damp or wet
cloth.
• Do not put pressure on the
windshield glass.
NOTICE
• When washing the vehicle, set the
wiper switch in the OFF position to
stop the auto wiper operation. The
wiper may operate and be damaged
if the switch is set in the AUTO mode
while washing the vehicle.
• Do not remove the sensor cover
located on the upper end of the
passenger side windshield glass.
Damage to system components
could occur and may not be covered
by your vehicle warranty.
• Because of using a photo sensor,
temporary malfunction could occur
according to sudden ambient light
change made by stone and dust
while driving.
Page 246 of 604

Convenient Features
5-108
WINDSHIELD DEFROSTING AND DEFOGGING
WARNING
Windshield heating
Do not use the
position during cooling operation in extremely humid
weather. The difference between the
temperature of the outside air and that
of the windshield could cause the outer
surface of the windshield to fog up,
causing loss of visibility could cause
an accident resulting in serious injury
or death. In this case, set the mode
selection button to the
position and fan speed control knob to a lower
speed.
• For maximum defrost performance,
set the temperature control to the
highest temperature setting and
the fan speed control to the highest
setting.
• If warm air to the floor is desired while
defrosting or defogging, set the mode
to the floor-defrost position.
• Before driving, clear all snow and ice
from the windshield, rear window,
side view mirrors, and all side
windows.
• Clear all snow and ice from the
hood and air inlet in the cowl grill
to improve heater and defroster
efficiency and to reduce the
probability of fogging up the inside of
the windshield.
NOTICE
If the engine temperature is still cold
after starting, then a brief engine warm
up period may be required for the
vented air flow to become warm or hot.
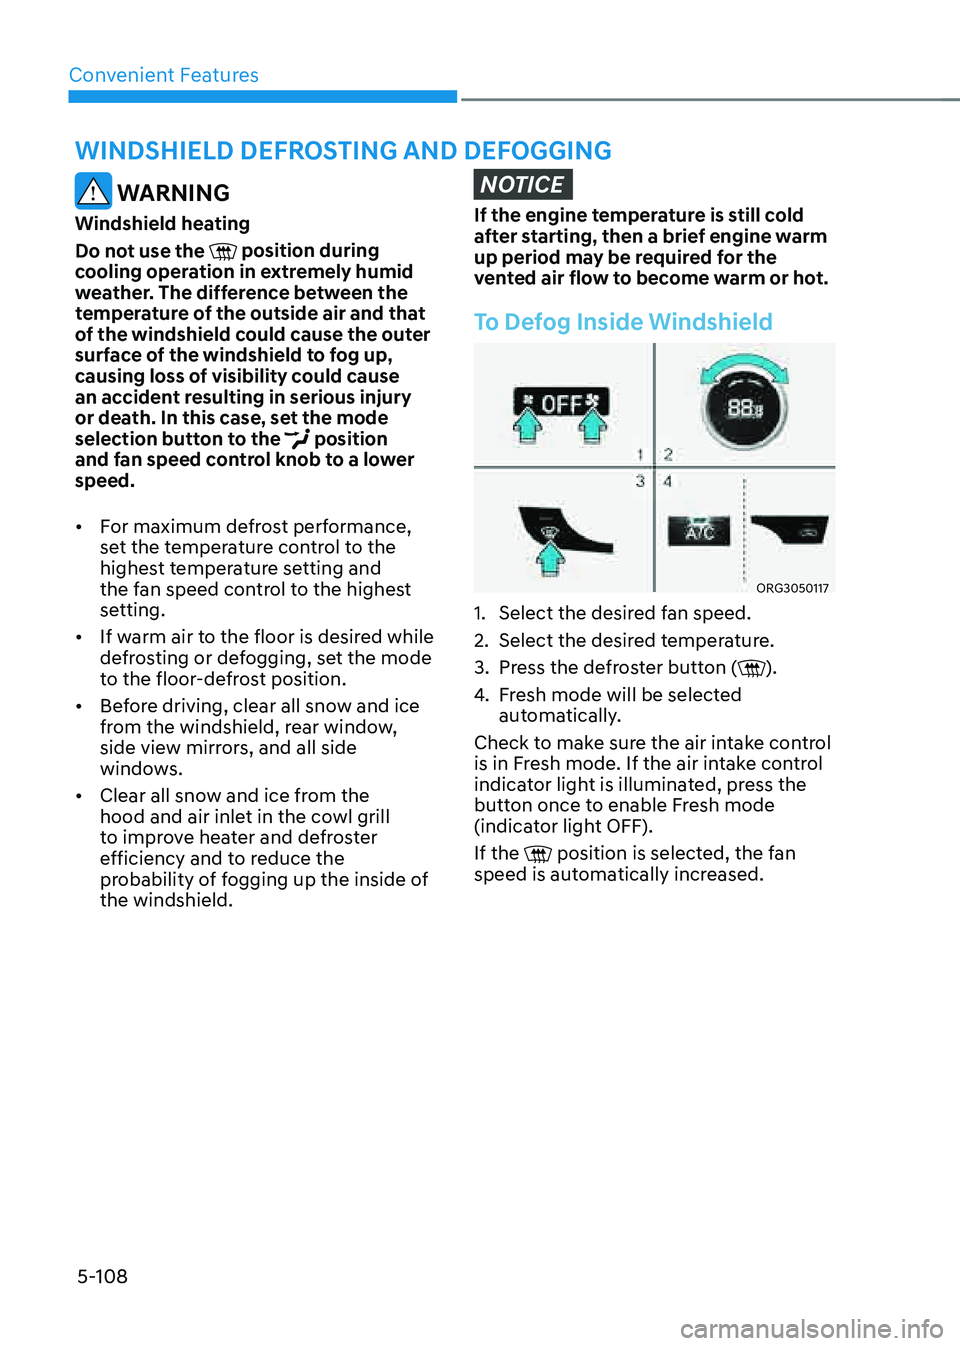
To Defog Inside Windshield
ORG3050117
1. Select the desired fan speed.
2. Select the desired temperature.
3. Press the defroster button ().
4. Fresh mode will be selected
automatically.
Check to make sure the air intake control
is in Fresh mode. If the air intake control
indicator light is illuminated, press the
button once to enable Fresh mode
(indicator light OFF).
If the
position is selected, the fan speed is automatically increased.
Page 252 of 604

Convenient Features
5-114
WARNING
Never store cigarette lighters, propane
cylinders, or other flammable/explosive
materials in the vehicle. These items
may catch fire and/or explode if the
vehicle is exposed to hot temperatures
for extended periods.
WARNING
ALWAYS keep the storage compartment
covers closed securely while driving.
Items inside your vehicle are moving as
fast as the vehicle. If you have to stop
or turn quickly, or if there is a crash, the
items may fly out of the compartment
and may cause an injury if they strike
the driver or a passenger.
NOTICE
To avoid possible theft, do not leave
valuables in the storage compartments.
Center Console Storage
ORG3050070
To open:
Press the button.
Rear Console Storage
ORG3050068
To open:
Press the button.
STORAGE COMPARTMENT
Page 254 of 604
![GENESIS G80 2021 Workshop Manual Convenient Features
5-116
Cup Holder
„„Front
ORG3050071
„„Rear
ORG3050073
[A] : Press
Cups or small beverages cups may be
placed in the cup holders.
WARNING
• Avoid abrupt star GENESIS G80 2021 Workshop Manual Convenient Features
5-116
Cup Holder
„„Front
ORG3050071
„„Rear
ORG3050073
[A] : Press
Cups or small beverages cups may be
placed in the cup holders.
WARNING
• Avoid abrupt star](/img/46/35612/w960_35612-253.png)
Convenient Features
5-116
Cup Holder
„„Front
ORG3050071
„„Rear
ORG3050073
[A] : Press
Cups or small beverages cups may be
placed in the cup holders.
WARNING
• Avoid abrupt starting and braking
when the cup holder is in use to
prevent spilling your drink. If hot
liquid spills, you could be burned.
Such a burn to the driver could cause
loss of vehicle control resulting in an
accident.
• Do not place uncovered or unsecured
cups, bottles, cans, etc., in the cup
holder containing hot liquid while
the vehicle is in motion. Injuries may
result in the event of a sudden stop
or collision.
• Only use soft cups in the cup holders.
Hard objects can injure you in an
accident.
WARNING
Keep cans or bottles out of direct sun
light and do not put them in a hot
vehicle. It may explode.
NOTICE
• Keep your drinks sealed while
driving to prevent spilling your drink.
If liquid spills, it may get into the
vehicle’s electrical/electronic system
and damage electrical/electronic
parts.
• When cleaning spilled liquids do not
use hot air to blow out or dry the cup
holder. This may damage the interior.
INTERIOR FEATURES
Page 262 of 604

Convenient Features
5-124
ORG3050082
• The rear window sunshade will be
lowered automatically when the
vehicle is shifted to R (Reverse) and
raised automatically when the vehicle
is shifted from R (Reverse) to P (Park).
• After the rear window sunshade is
lowered by shifting the vehicle to R
(Reverse), if you drive more than
12 mph (20 km/h) with the shift
lever in D (Drive), the rear window
sunshade will be raised automatically.
NOTICE
Do not apply excessive force while
operating the rear window sunshade.
This could cause damage to the rear
window sunshade.
Luggage Net Holder (if equipped)
ORG3050083
ORG3050084
To keep items from shifting in the
luggage compartment, you can use the 4
holders located in the luggage board to
attach the luggage net.
Make sure the luggage net is securely
attached to the holders in the luggage
board.
If necessary, we recommend that you
contact your authorized retailer of
Genesis Branded products to obtain a
luggage net.
WARNING
Avoid eye injury. DO NOT overstretch
the luggage net. ALWAYS keep your
face and body out of the luggage net’s
recoil path. DO NOT use the luggage net
when the strap has visible signs of wear
or damage.
Use the luggage net to keep only light
items from shifting in the luggage
compartment.
Page 269 of 604

Driving Your Vehicle
6-4
Before Entering the Vehicle
• Be sure all windows, outside mirror(s),
and outside lights are clean and
unobstructed.
• Remove frost, snow, or ice.
• Visually check the tires for uneven
wear and damage.
• Check under the vehicle for any sign
of leaks.
• Be sure there are no obstacles behind
you if you intend to back up.
Before Starting
• Make sure the hood, the trunk, and
the doors are securely closed and
locked.
• Adjust the position of the seat and
steering wheel.
• Adjust the inside and outside rearview
mirrors.
• Verify all the lights work.
• Fasten your seat belt. Check that all
passengers have fastened their seat
belts.
• Check the gauges and indicators
in the instrument panel and the
messages on the instrument display
when the ignition switch is in the ON
position.
• Check that any items you are carrying
are stored properly or fastened down
securely.
WARNING
To reduce the risk of SERIOUS INJURY or
DEATH, take the following precautions:
• ALWAYS wear your seat belt. All
passengers must be properly belted
whenever the vehicle is moving.
For more information, refer to “Seat
Belts” section in chapter 3.
• Always drive defensively. Assume
other drivers or pedestrians may be
careless and make mistakes.
• Stay focused on the task of driving.
Driver distraction can cause
accidents.
• Leave plenty of space between you
and the vehicle in front of you.
WARNING
NEVER drink or take drugs and drive.
Drinking or taking drugs and driving
is dangerous and may result in an
accident and SERIOUS INJURY or
DEATH.
Drunk driving is the number one
contributor to the highway death
toll each year. Even a small amount
of alcohol will affect your reflexes,
perceptions and judgment. Just
one drink can reduce your ability to
respond to changing conditions and
emergencies and your reaction time
gets worse with each additional drink.
Driving while under the influence
of drugs is as dangerous or more
dangerous than driving under the
influence of alcohol.
You are much more likely to have a
serious accident if you drink or take
drugs and drive. If you are drinking or
taking drugs, don’t drive. Do not ride
with a driver who has been drinking
or taking drugs. Choose a designated
driver or call a taxi.
BEFORE DRIVING
Page 271 of 604

Driving Your Vehicle
6-6
Engine Stop/Start Button Positions
Button PositionAction Notes
OFF To turn off the engine, press the
Engine Start/Stop button with the
vehicle shifted to P (Park).
Note if the Engine Start/Stop
button is pressed with the vehicle
shifted to D (Drive) or R (Reverse),
the gear will automatically shift to
P (Park).
If the Engine Start/Stop button is
pressed with the gear shifted to
N (Neutral), the Engine Start/Stop
button will change to the ACC
position.
ACC Press the Engine Start/Stop button
when the button is in the OFF
position without depressing the
brake pedal.
Some of the electrical accessories
are usable. If you leave the Engine Start/Stop
button in the ACC position for
more than one hour, the battery
power will turn off automatically
to prevent the battery from
discharging.
ON Press the Engine Start/Stop button
while it is in the ACC position
without depressing the brake
pedal.
The warning lights can be checked
before the engine is started. Do not leave the Engine Start/Stop
button in the ON position when the
engine is not running to prevent
the battery from discharging.
START To start the engine, depress the
brake pedal and press the Engine
Start/ Stop button with the gear
shifted to the P (Park) or the N
(Neutral) position.
For your safety, start the engine
with the gear shifted to the P
(Park) position. If you press the Engine Start/Stop
button without depressing the
brake pedal, the engine does not
start and the Engine Start/Stop
button changes as follows:
OFF → ACC → ON → OFF or ACC
Ã
To prevent vehicle battery discharge, the Engine Start/Stop button changes to the
OFF position when the Engine Start/Stop button is in the ACC or ON position with
the gear in P (Park) for a certain period of time. When the function operates, the tail
lamps will turn off. To use the tail lamps again, turn the headlamp switch located on
the steering column to the OFF and ON position again.