change time GENESIS G90 2021 User Guide
[x] Cancel search | Manufacturer: GENESIS, Model Year: 2021, Model line: G90, Model: GENESIS G90 2021Pages: 538, PDF Size: 13.02 MB
Page 187 of 538
3-86
Convenient features of your vehicle
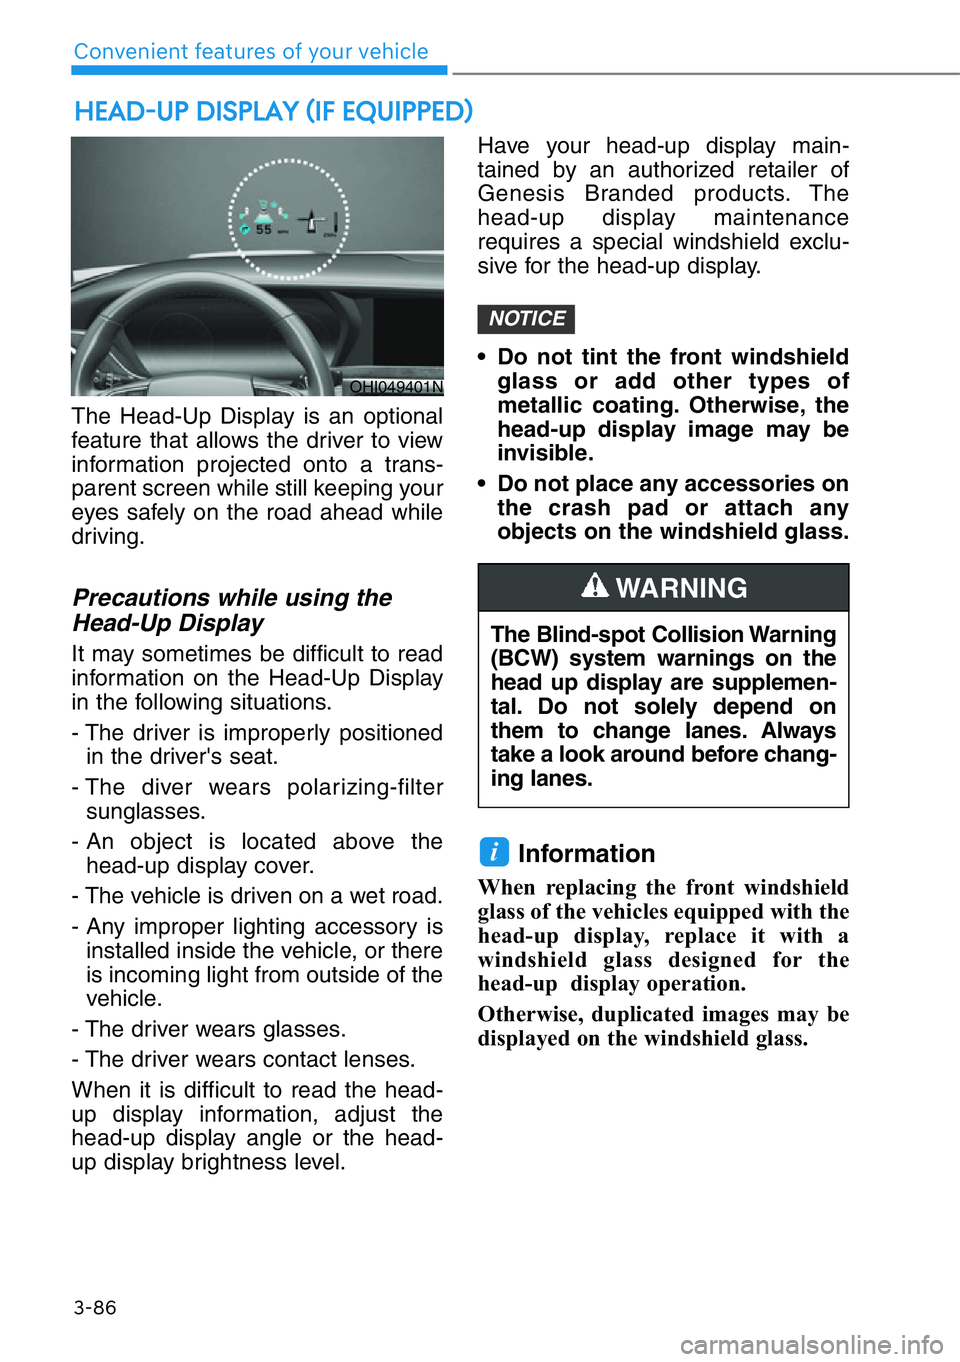
The Head-Up Display is an optional
feature that allows the driver to view
information projected onto a trans-
parent screen while still keeping your
eyes safely on the road ahead while
driving.
Precautions while using the
Head-Up Display
It may sometimes be difficult to read
information on the Head-Up Display
in the following situations.
- The driver is improperly positioned
in the driver's seat.
- The diver wears polarizing-filter
sunglasses.
- An object is located above the
head-up display cover.
- The vehicle is driven on a wet road.
- Any improper lighting accessory is
installed inside the vehicle, or there
is incoming light from outside of the
vehicle.
- The driver wears glasses.
- The driver wears contact lenses.
When it is difficult to read the head-
up display information, adjust the
head-up display angle or the head-
up display brightness level.Have your head-up display main-
tained by an authorized retailer of
Genesis Branded products. The
head-up display maintenance
requires a special windshield exclu-
sive for the head-up display.
• Do not tint the front windshield
glass or add other types of
metallic coating. Otherwise, the
head-up display image may be
invisible.
• Do not place any accessories on
the crash pad or attach any
objects on the windshield glass.
Information
When replacing the front windshield
glass of the vehicles equipped with the
head-up display, replace it with a
windshield glass designed for the
head-up display operation.
Otherwise, duplicated images may be
displayed on the windshield glass.
i
NOTICE
HEAD-UP DISPLAY (IF EQUIPPED)
The Blind-spot Collision Warning
(BCW) system warnings on the
head up display are supplemen-
tal. Do not solely depend on
them to change lanes. Always
take a look around before chang-
ing lanes.
WARNING
OHI049401N
Page 194 of 538
3-93
03
Turn signals and lane change
signals
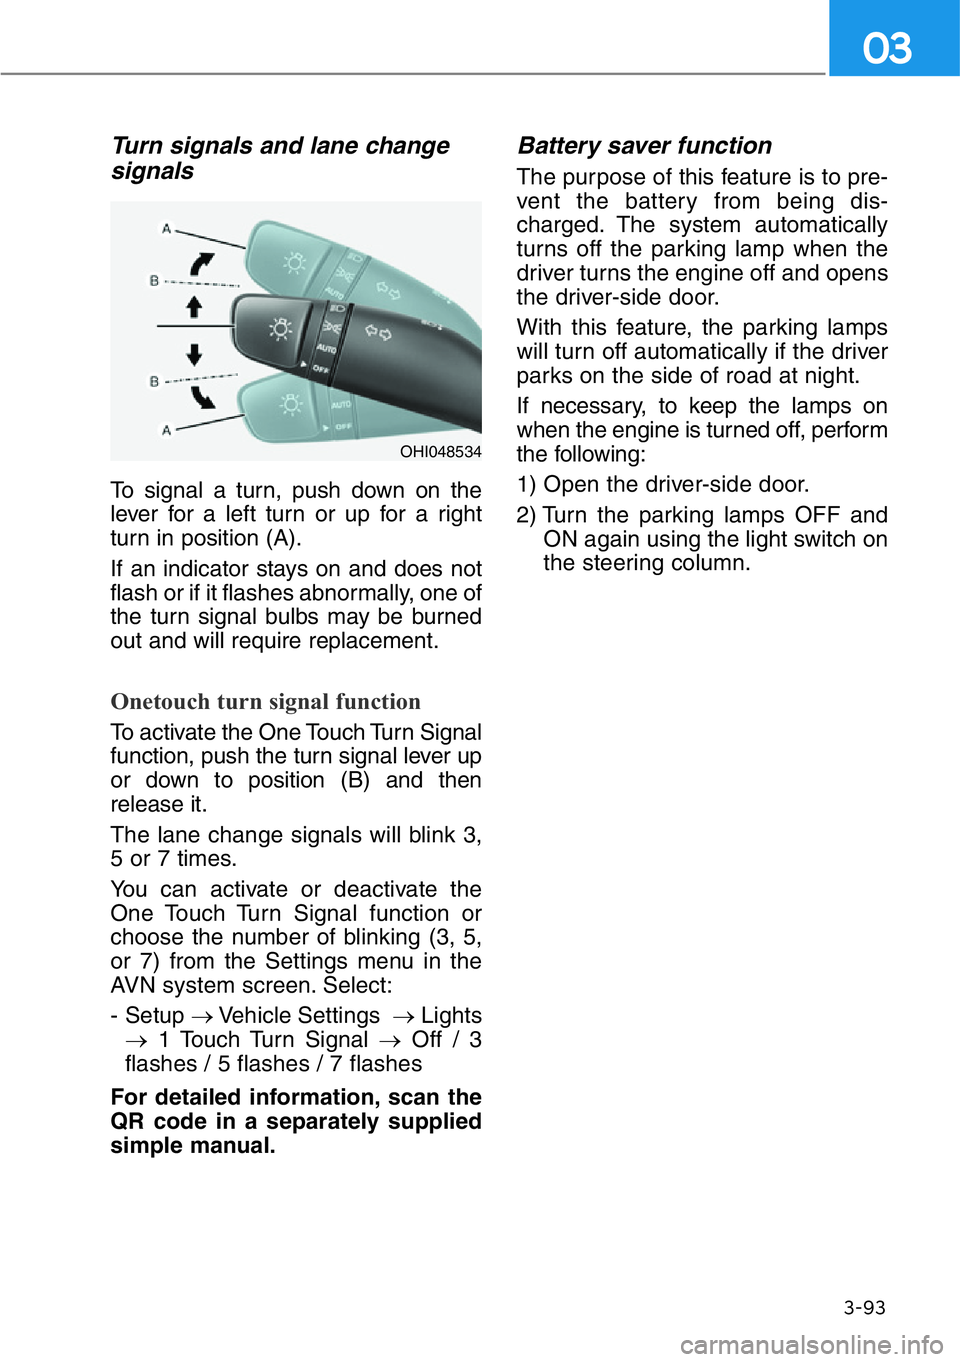
To signal a turn, push down on the
lever for a left turn or up for a right
turn in position (A).
If an indicator stays on and does not
flash or if it flashes abnormally, one of
the turn signal bulbs may be burned
out and will require replacement.
Onetouch turn signal function
To activate the One Touch Turn Signal
function, push the turn signal lever up
or down to position (B) and then
release it.
The lane change signals will blink 3,
5 or 7 times.
You can activate or deactivate the
One Touch Turn Signal function or
choose the number of blinking (3, 5,
or 7) from the Settings menu in the
AVN system screen. Select:
- Setup →Vehicle Settings →Lights
→1 Touch Turn Signal →Off / 3
flashes / 5 flashes / 7 flashes
For detailed information, scan the
QR code in a separately supplied
simple manual.
Battery saver function
The purpose of this feature is to pre-
vent the battery from being dis-
charged. The system automatically
turns off the parking lamp when the
driver turns the engine off and opens
the driver-side door.
With this feature, the parking lamps
will turn off automatically if the driver
parks on the side of road at night.
If necessary, to keep the lamps on
when the engine is turned off, perform
the following:
1) Open the driver-side door.
2) Turn the parking lamps OFF and
ON again using the light switch on
the steering column.
OHI048534
Page 225 of 538
3-124
Convenient features of your vehicle
When using the air conditioning
system, monitor the engine tem-
perature gauge closely while driv-
ing up hills or in heavy traffic when
outside temperatures are high. Air
conditioning system operation
when climbing a steep grade or in
high outside ambient temperatures
can cause engine overheating.
Continue to use the fan, but turn
the air conditioning system off if
the engine temperature gauge
indicates engine overheating.
Air conditioning system operation
tips
• If the vehicle has been parked in
direct sunlight during hot weather,
open the windows for a short time
to let the hot air inside the vehicle
escape.
• After sufficient cooling has been
achieved, switch back from recir-
culation mode to fresh mode.
• To help reduce moisture inside of
the windows on rainy or humid
days, decrease the humidity inside
the vehicle by operating the air
conditioning system with the win-
dows and sunroof closed.
• Use the air conditioning system
every month only for a few minutes
to ensure maximum system per-
formance.
• If you operate air conditioner
excessively, the difference between
the temperature of the outside air
and that of the windshield could
cause the outer surface of the
windshield to fog up, causing loss
of visibility. In this case, set the
mode selection knob or button to
the position and fan speed
control to the lowest speed.
System Maintenance
Cabin air filter
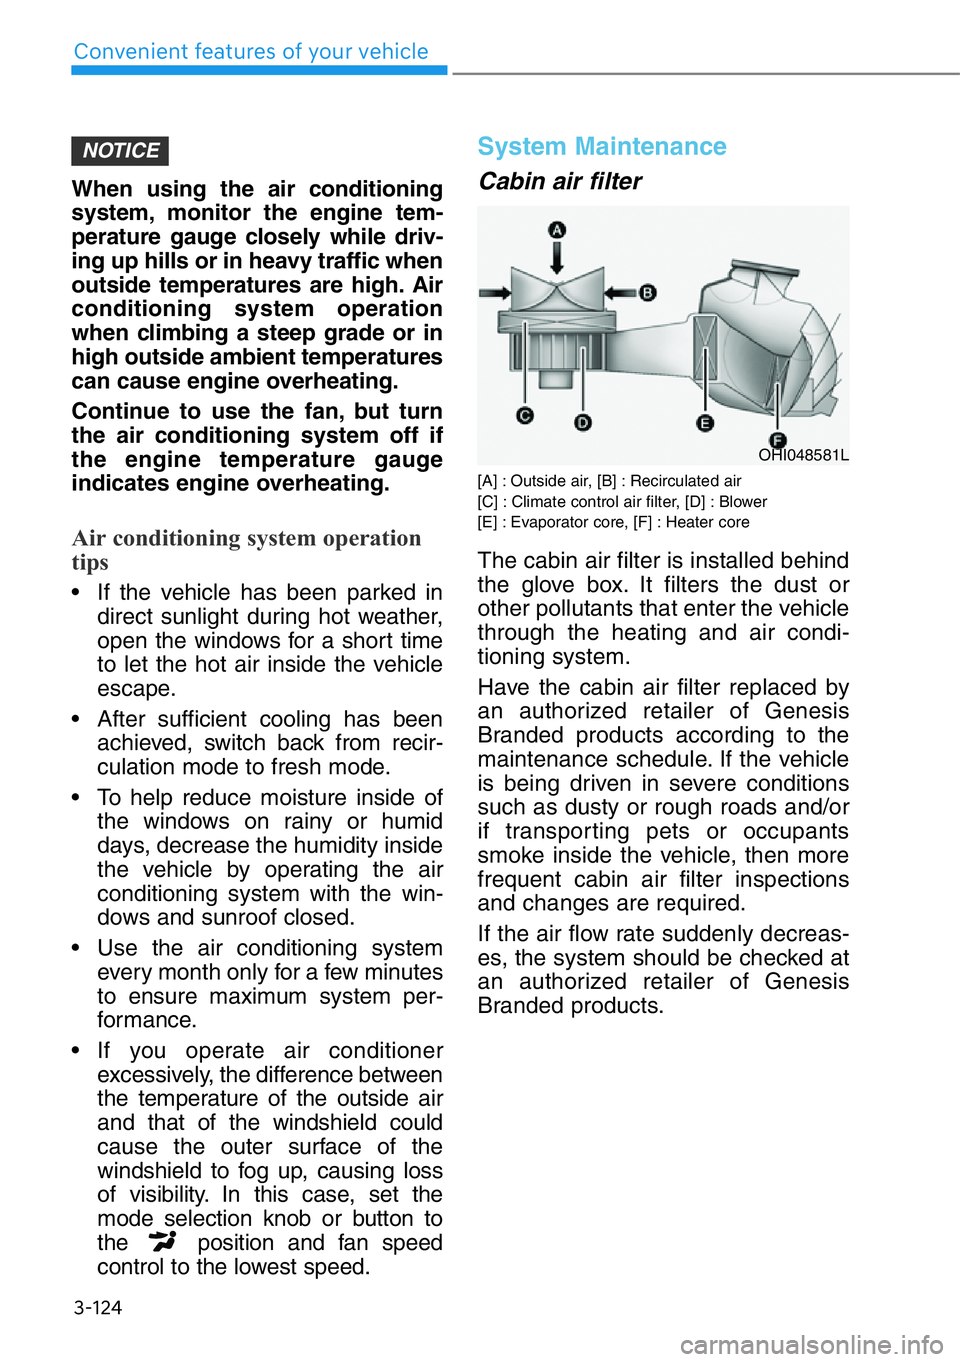
[A] : Outside air, [B] : Recirculated air
[C] : Climate control air filter, [D] : Blower
[E] : Evaporator core, [F] : Heater core
The cabin air filter is installed behind
the glove box. It filters the dust or
other pollutants that enter the vehicle
through the heating and air condi-
tioning system.
Have the cabin air filter replaced by
an authorized retailer of Genesis
Branded products according to the
maintenance schedule. If the vehicle
is being driven in severe conditions
such as dusty or rough roads and/or
if transporting pets or occupants
smoke inside the vehicle, then more
frequent cabin air filter inspections
and changes are required.
If the air flow rate suddenly decreas-
es, the system should be checked at
an authorized retailer of Genesis
Branded products.
NOTICE
OHI048581L
Page 230 of 538

3-129
03
CLIMATE CONTROL ADDITIONAL FEATURES
Auto Defogging System
Auto defogging helps reduce the pos-
sibility of fogging up the inside of the
windshield by automatically sensing
the moisture on inside the windshield.
The auto defogging system operates
when the climate control system is on.
Information
The auto defogging system may not
operate normally, when the outside
temperature is below 14 °F (-10 °C).
When the Auto Defogging
System operates, the indi-
cator will illuminate.
If a high amount of humidity is
detected in the vehicle, the Auto
Defogging System will be enabled.
The following steps will be performed
automatically:
Step 1) The A/C button will turn ON.
Step 2) The air intake control will
change to Fresh mode under
low outside temperature.
Step 3) The mode will be changed to
defrost to direct airflow to the
windshield.
Step 4) The fan speed will be set to
MAX.If the air conditioning is off or recircu-
lation mode is manually selected
while Auto Defogging System is ON,
the Auto Defogging System Indicator
will blink 3 times to signal that the
manual operation has been can-
celed.
To cancel or activate the Auto
Defogging System
Climate control system
• To cancel the auto defogging
system
1. Press the Engine Start/Stop but-
ton to the ON or START position.
2. Press the front defroster button for
approximately 3 seconds.
3. The front defroster button LED will
blink 3 times and then ADS OFF
will illuminate on the climate control
information screen when the auto
defogging system is canceled.
• To reactivate the auto defogging
system
1. Press the Engine Start/Stop but-
ton to the ON or START position.
2. Press the front defroster button for
approximately 3 seconds.
3. The front defroster button LED will
blink 6 times and then ADS OFF
will turn off on the climate control
information screen when the auto
defogging system is reactivated.
i
OHI048309
Page 232 of 538

3-131
03
Sunroof Inside Air
Recirculation (if equipped)
When the sunroof is opened, outside
(fresh) air will be automatically
selected. At this time, if you press the
air intake control button, recirculated
air position will be selected but will
change back to outside (fresh) air
after 3 minutes. When the sunroof is
closed, the air intake position will
return to the original position that
was selected.
Setting the Climate Control
System in the AVN System
Screen
Using the AVN System screen,
select 'Home →Climate'.
The Climate settings screen will be
displayed.
Climate information
Climate information (e.g. temperature,
air-flow direction, fan speed, etc.) of
the driver's/front passenger’s/rear
seats is displayed.
Adjusting the rear climate con-
trol system
Select 'Rear Climate Controls' and
then adjust the temperature, fan
speed and mode selection.
Also, the rear climate controls can be
turned off by selecting OFF.
OHI048181L
OHI048183L
Page 255 of 538

5-3
05
Carbon monoxide (CO) gas is toxic. Breathing CO can cause uncon-
sciousness and death.
Engine exhaust contains carbon monoxide which cannot be seen or
smelled.
Do not inhale engine exhaust.
If at any time you smell engine exhaust inside the vehicle, open the win-
dows immediately. Exposure to CO can cause unconsciousness and death
by asphyxiation.
Be sure the exhaust system does not leak.
The exhaust system should be checked whenever the vehicle is raised to
change the oil or for any other purpose. If you hear a change in the sound
of the exhaust or if you drive over something that strikes the underneath
side of the vehicle, have the exhaust system checked as soon as possible
by an authorized retailer of Genesis Branded products.
Do not run the engine in an enclosed area.
Letting the engine idle in your garage, even with the garage door open, is
a hazardous practice. Run the engine only long enough to start the engine
and to move the vehicle out of the garage.
Avoid idling the engine for prolonged periods with people inside the
vehicle.
If it is necessary to idle the engine for a prolonged period with people inside
the vehicle, be sure to do so only in an open area with the air intake set at
"Fresh" and fan control set to high so fresh air is drawn into the interior.
Keep the air intakes clear.
To assure proper operation of the ventilation system, keep the ventilation
air intakes located in front of the windshield clear of snow, ice, leaves, or
other obstructions.
If you must drive with the trunk open:
Close all windows.
Open instrument panel air vents.
Set the air intake control at "Fresh", the air flow control at "Floor" or "Face",
and the fan control set to high.
WARNING
Page 266 of 538

5-14
Driving your vehicle
Shift-lock System
For your safety, the automatic trans-
mission has a shift-lock system
which prevents shifting the transmis-
sion from P (Park) into R (Reverse)
or D (Drive) unless the UNLOCK but-
ton is pressed while depressing the
brake pedal.
To shift from P (Park) into R
(Reverse) or D (Drive):
1. Depress and hold the brake pedal.
2. Start the engine or place the
Engine Start/Stop button in the
ON position.
3. Move the shift lever to R (Reverse)
or D (Drive) while pressing the
UNLOCK button.
When the Battery is
Discharged
You cannot move the shift lever,
when the battery is discharged.
In emergencies, do the following to
move the shift lever to N (Neutral) on
a level ground.
1. Connect the battery cables from
another vehicle or from a another
battery to the jump-starting termi-
nals inside the engine compart-
ment.
For more details, refer to "Jump
Starting" in chapter 6.
2. Release the parking brake with
the Engine Start/Stop button in the
ON position.
3. Press the Engine Start/Stop but-
ton to the OFF position.
4. Remove the cap-cover (1) and
press the P release button (2)
while depressing the brake pedal.
Then, the gear will change to the N
(Neutral) position. The button (2)
operates only for 20 seconds to
change the gear between P (Park)
and N (Neutral) from the time when
the button (2) is first pressed.
OHI058017L
Page 267 of 538
5-15
05
Information
In situations when the gear needs to be
shifted from P (Park) to N (Neutral)
when the Engine Start/Stop button is
in the OFF position, refer to step 4.
Parking
Always come to a complete stop and
continue to depress the brake pedal.
Shift the vehicle into the P (Park)
position, apply the parking brake,
and place the Engine Start/Stop but-
ton in the OFF position. Take the Key
with you when exiting the vehicle.
Paddle Shifter
(Manual Shift Mode)
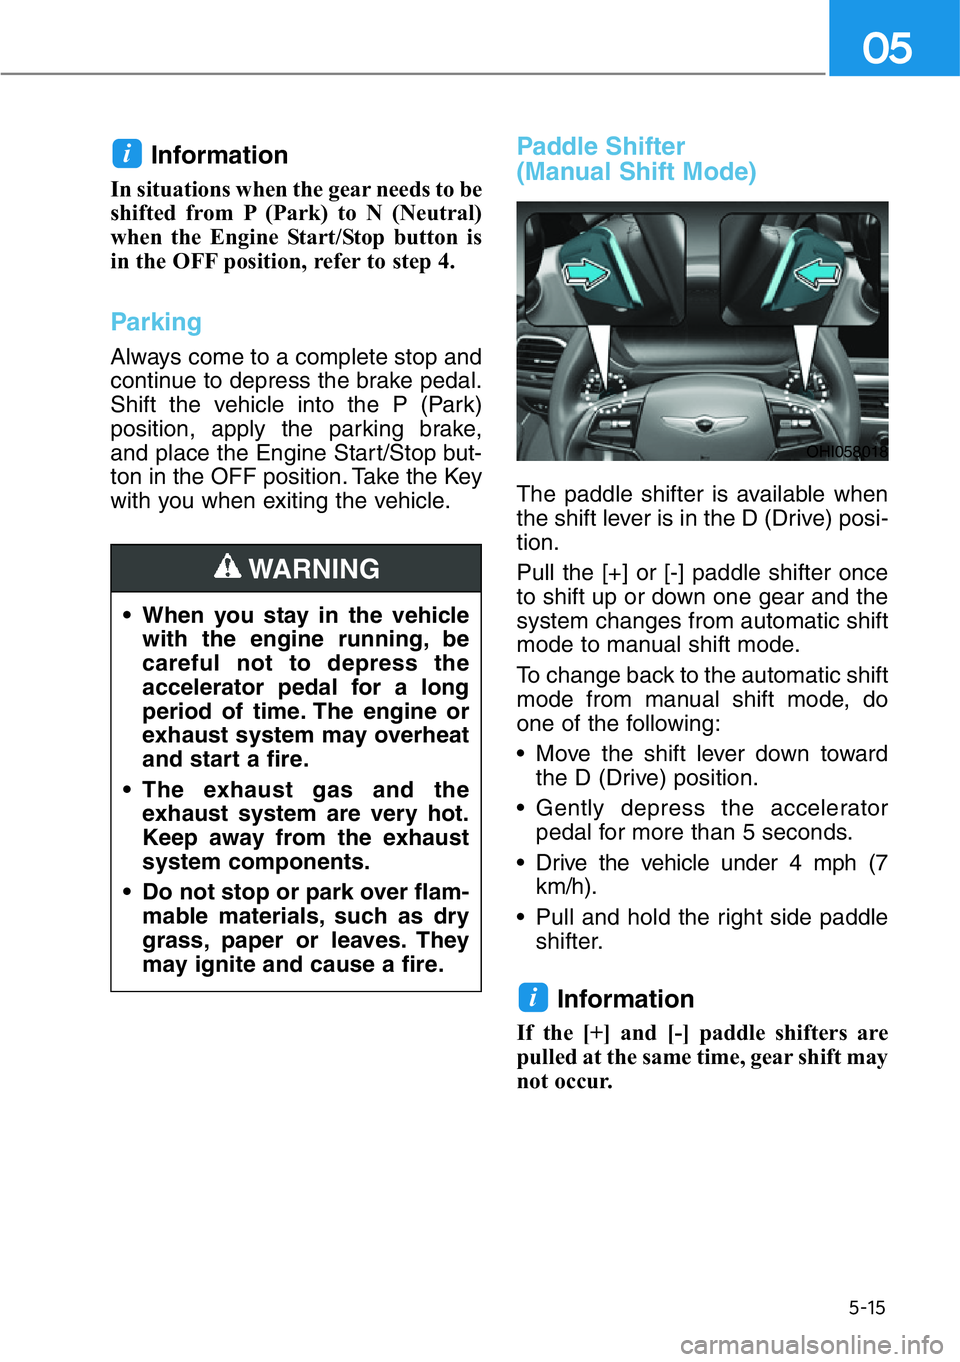
The paddle shifter is available when
the shift lever is in the D (Drive) posi-
tion.
Pull the [+] or [-] paddle shifter once
to shift up or down one gear and the
system changes from automatic shift
mode to manual shift mode.
To change back to the automatic shift
mode from manual shift mode, do
one of the following:
• Move the shift lever down toward
the D (Drive) position.
• Gently depress the accelerator
pedal for more than 5 seconds.
• Drive the vehicle under 4 mph (7
km/h).
• Pull and hold the right side paddle
shifter.
Information
If the [+] and [-] paddle shifters are
pulled at the same time, gear shift may
not occur.
i
i
• When you stay in the vehicle
with the engine running, be
careful not to depress the
accelerator pedal for a long
period of time. The engine or
exhaust system may overheat
and start a fire.
• The exhaust gas and the
exhaust system are very hot.
Keep away from the exhaust
system components.
• Do not stop or park over flam-
mable materials, such as dry
grass, paper or leaves. They
may ignite and cause a fire.
WARNING
OHI058018
Page 271 of 538
5-19
05
Good Driving Practices
• Never shift from P (Park) or N
(Neutral) to any other position with
the accelerator pedal depressed.
• Never shift into P (Park) when the
vehicle is in motion.
Be sure the vehicle is completely
stopped before you attempt to shift
into R (Reverse) or D (Drive).
• Do not move the shift lever to N
(Neutral) when driving. If the shift
lever is moved to N (Neutral) while
driving, the vehicle loses the ability
to provide engine braking. Doing
so may increase the risk of an acci-
dent.
• Driving uphill or downhill, always
shift to D (Drive) when driving for-
ward or to R (Reverse) when driv-
ing backwards, and check the gear
position indicated on the cluster
before driving. If you drive in the
opposite direction of the selected
gear, the engine will turn off and a
serious accident might be occurred
due to the degraded brake per-
formance.
• Do not drive with your foot resting
on the brake pedal. Even light, but
consistent pedal pressure can
result in the brakes overheating,
brake wear and possibly even
brake failure.
• Depressing both accelerator and
brake pedals at the same time can
trigger logic for engine power
reduction to assure vehicle decel-
eration. Vehicle acceleration will
resume after the brake pedal is
released.• When driving in Manual shift mode
with the paddle shifter, slow down
before shifting to a lower gear.
Otherwise, the lower gear may not
be engaged if the engine rpms are
outside of the allowable range.
• Always apply the parking brake
when leaving the vehicle. Do not
depend on placing the transmis-
sion in P (Park) to keep the vehicle
from moving.
• Exercise extreme caution when
driving on a slippery surface. Be
especially careful when braking,
accelerating or shifting gears. On a
slippery surface, an abrupt change
in vehicle speed can cause the
drive wheels to lose traction and
may cause loss of vehicle control
resulting in an accident.
• Optimum vehicle performance and
economy is obtained by smoothly
depressing and releasing the
accelerator.
Page 281 of 538

5-29
05
Information
• The Auto Hold does not operate
when:
- The driver's door is opened
- The engine hood is opened
- The trunk is opened
- The gear is shifted to P (Park)
- EPB is applied
• For your safety, the Auto Hold auto-
matically switches to EPB when:
- The driver's door is opened
- The engine hood is opened with
the shift lever in D (Drive)
- The vehicle is in a standstill for
more than 10 minutes
- The vehicle is standing on a steep
slope
- The vehicle moved several times
In these cases, the parking brake
warning light comes on, the AUTO
HOLD indicator changes from
green to white, and warning sounds
and a message will appear to inform
you that EPB has been automatical-
ly engaged. Before driving again,
depress the brake pedal, check the
surrounding area near your vehicle
and release the parking brake man-
ually with the EPB switch.
• While operating Auto Hold, you may
hear mechanical noise. However, it is
normal operating noise.If the AUTO HOLD indicator
changes to yellow, the Auto Hold
is not working properly. Contact
an authorized retailer of Genesis
Branded products.
If there is a malfunction with the
driver's door or engine hood open
detection system, the Auto Hold
may not work properly.
Contact an authorized retailer of
Genesis Branded products.
NOTICE
NOTICEi
• Depress the accelerator pedal
slowly when you start the
vehicle.
• For your safety, cancel the
Auto Hold when you drive
downhill, back up the vehicle
or park the vehicle.
WARNING