start stop button GENESIS GV80 2021 Workshop Manual
[x] Cancel search | Manufacturer: GENESIS, Model Year: 2021, Model line: GV80, Model: GENESIS GV80 2021Pages: 632, PDF Size: 9.37 MB
Page 222 of 632

Convenient Features
5-80
Front lamps
OJX1050201NOJX1050201N
Front map lamp ():
Touch either icons to turn the map lamp
on or off. This light produces a spot
beam for convenient use as a map lamp
at night or as a personal lamp for the
driver and the front passenger.
Door lamp (
):
The front or rear room lamps come on
when the front or rear doors are opened.
When doors are unlocked by the smart
key, the front and rear lamps come on
for approximately 30 seconds as long as
any door is not opened. The front and
rear room lamps go out gradually after
approximately 30 seconds when the
door is closed. However, if the Engine
Start/Stop button is in the ON position
or all doors are locked, the front and rear
lamps will turn off. If a door is opened
with the Engine Start/Stop button in
the ACC position or the OFF position,
the front and rear lamps will stay on for
about 5 minutes.
Room lamp (
)
Press the button to turn ON the room
lamp for the front/rear seats.
Rear lamps
�
Page 224 of 632

Convenient Features
5-82
Luggage compartment lamp
OJX1059069LOJX1059069L
The lamp turns on when the liftgate is
opened.
Puddle lamp
OJX1059071OJX1059071
Welcome light
When all doors (and liftgate) are closed
and locked, the puddle lamp will turn on
for 15 seconds if the door is unlocked by
the smart key or when you put your hand
in the outside door handle with the smart
key in possession.
For more details, refer to “Welcome
System” in this chapter.
Escort light
When the Engine Start/Stop button is in
the OFF position and the driver’s door is
opened, the puddle lamp will turn on for
30 seconds. If the driver’s door is closed
within the 30 second period, the puddle
lamp will turn off after 15 seconds. If the
driver’s door is closed and locked, the
puddle lamp will turn off immediately.
The Puddle Lamp Escort Light will turn
on only the first time the driver’s door is
opened after the engine is turned off.
Page 226 of 632
Convenient Features
5-84
OJX1059063OJX1059063
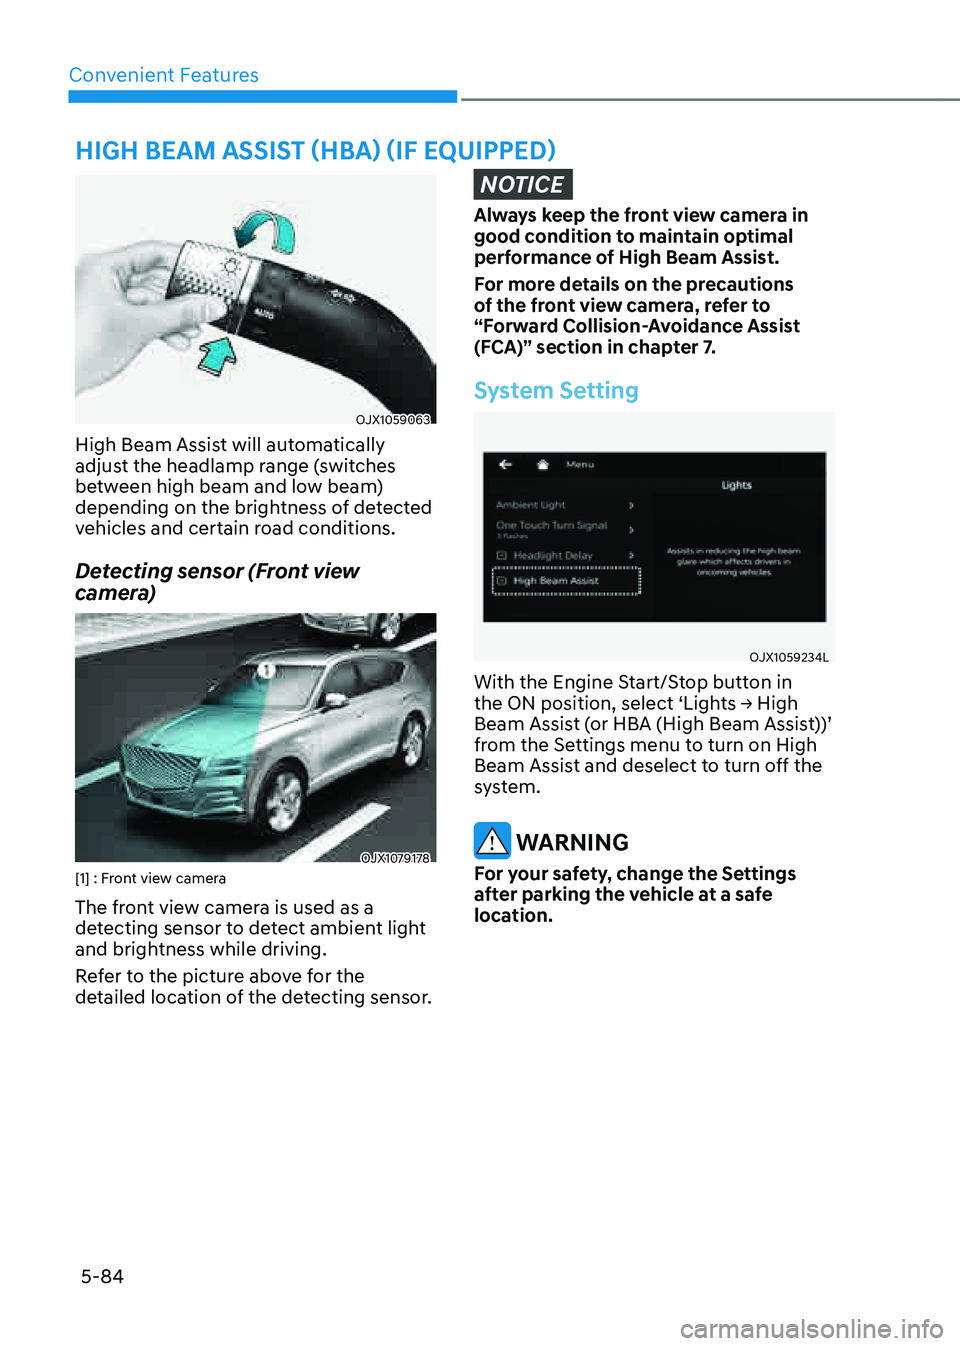
High Beam Assist will automatically
adjust the headlamp range (switches
between high beam and low beam)
depending on the brightness of detected
vehicles and certain road conditions.
Detecting sensor (Front view
camera)
OJX1079178OJX1079178[1] : Front view camera
The front view camera is used as a
detecting sensor to detect ambient light
and brightness while driving.
Refer to the picture above for the
detailed location of the detecting sensor.
NOTICE
Always keep the front view camera in
good condition to maintain optimal
performance of High Beam Assist.
For more details on the precautions
of the front view camera, refer to
“Forward Collision-Avoidance Assist
(FCA)” section in chapter 7.
System Setting
OJX1059234LOJX1059234L
With the Engine Start/Stop button in
the ON position, select ‘Lights → High
Beam Assist (or HBA (High Beam Assist))’
from the Settings menu to turn on High
Beam Assist and deselect to turn off the
system.
WARNING
For your safety, change the Settings
after parking the vehicle at a safe
location.
HIGH BEAM ASSIST (HBA) (IF EQUIPPED)
Page 229 of 632
05
5-87
WIPERS AND WASHERS
OJX1059066OJX1059066
Front Windshield Wipers
Operates as follows when the Engine
Start/Stop button is in the ON position.
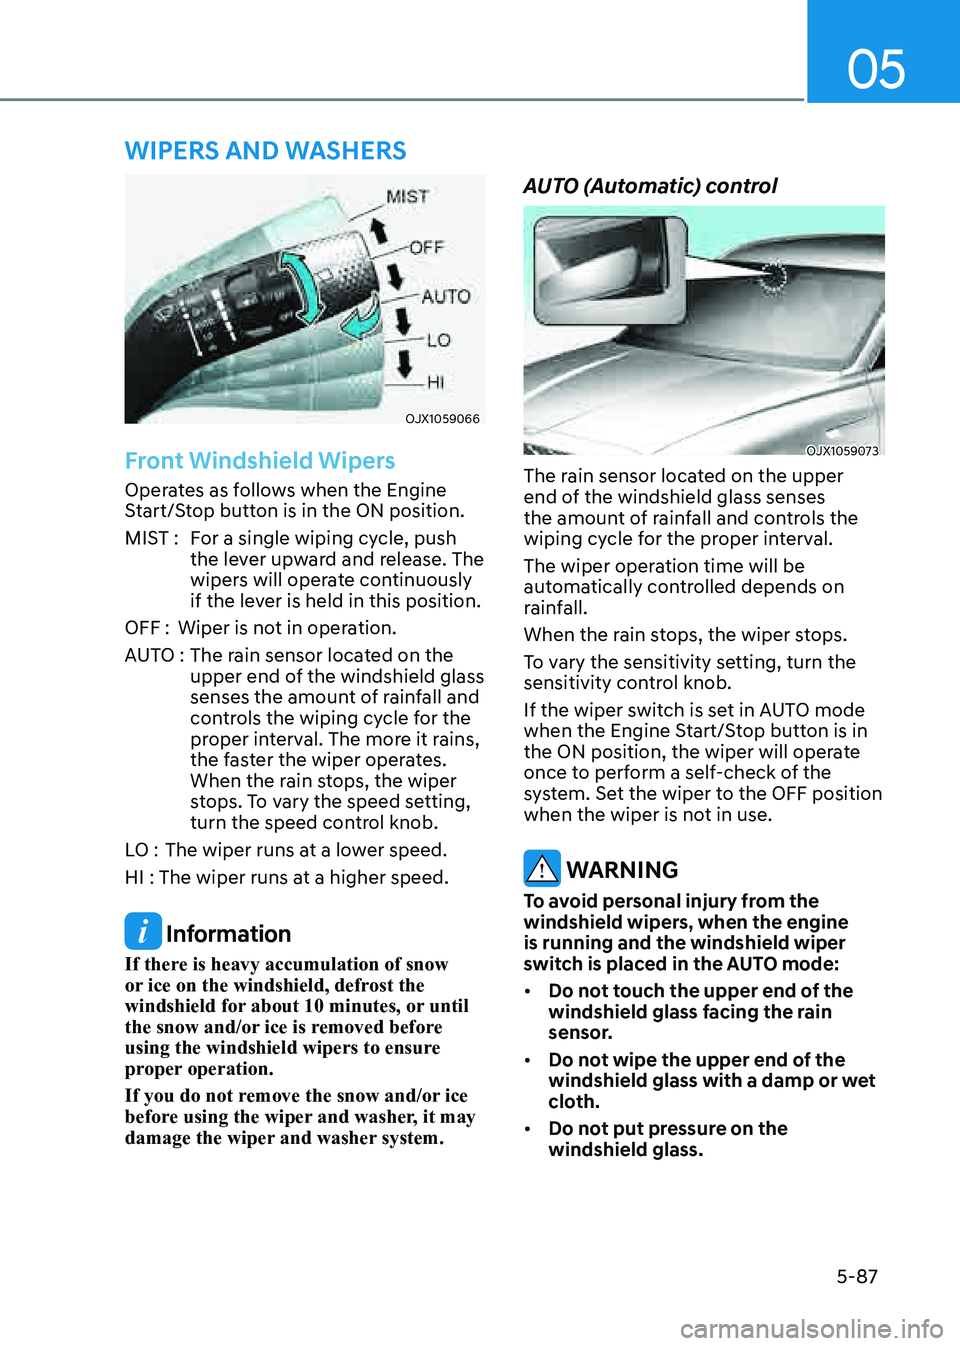
MIST :For a single wiping cycle, push
the lever upward and release. The
wipers will operate continuously
if the lever is held in this position.
OFF : Wiper is not in operation.
AUTO : The rain sensor located on the
upper end of the windshield glass
senses the amount of rainfall and
controls the wiping cycle for the
proper interval. The more it rains,
the faster the wiper operates.
When the rain stops, the wiper
stops. To vary the speed setting,
turn the speed control knob.
LO : The wiper runs at a lower speed.
HI : The wiper runs at a higher speed.
Information
If there is heavy accumulation of snow
or ice on the windshield, defrost the
windshield for about 10 minutes, or until
the snow and/or ice is removed before
using the windshield wipers to ensure
proper operation.
If you do not remove the snow and/or ice
before using the wiper and washer, it may
damage the wiper and washer system.
AUTO (Automatic) control
OJX1059073OJX1059073
The rain sensor located on the upper
end of the windshield glass senses
the amount of rainfall and controls the
wiping cycle for the proper interval.
The wiper operation time will be
automatically controlled depends on
rainfall.
When the rain stops, the wiper stops.
To vary the sensitivity setting, turn the
sensitivity control knob.
If the wiper switch is set in AUTO mode
when the Engine Start/Stop button is in
the ON position, the wiper will operate
once to perform a self-check of the
system. Set the wiper to the OFF position
when the wiper is not in use.
WARNING
To avoid personal injury from the
windshield wipers, when the engine
is running and the windshield wiper
switch is placed in the AUTO mode:
• Do not touch the upper end of the
windshield glass facing the rain
sensor.
• Do not wipe the upper end of the
windshield glass with a damp or wet
cloth.
• Do not put pressure on the
windshield glass.
Page 249 of 632

05
5-107
To Defrost Outside Windshield
OJX1050179NOJX1050179N
1. Set the fan speed to the highest
(extreme right) position.
2. Set the temperature to the extreme
hot (HI) position.
3. Press the defroster button ().
4. Fresh mode will be selected
automatically.
Check to make sure the air intake control
is in Fresh mode. If the air intake control
indicator light is illuminated, press the
button once to enable Fresh mode
(indicator light OFF).
If the
position is selected, lower fan speed is adjusted to a higher fan speed.
Defogging Logic
To reduce the probability of fogging
up the inside of the windshield, the air
intake or air conditioning are controlled
automatically according to certain
conditions such as
positions. To cancel or reset the defogging logic, do
the following.
1. Press the Engine Start/Stop button to
the ON position.
2. Press the defroster button () or
().
3. While pressing the air conditioning
button (A/C), press the air intake
control button at least 5 times within
3 seconds.
The air intake control button indicator
will blink 3 times to indicate that the
defogging logic has been disabled.
Repeat the steps again to re-enable the
defogging logic.
If the battery has been discharged or
disconnected, it resets to the defog logic
status.
Page 250 of 632

Convenient Features
5-108
Rear Window DefrosterNOTICE
To prevent damage to the rear window
defroster conducting elements bonded
to the inside surface of the rear window,
never use sharp instruments or window
cleaners containing abrasives to clean
the window.
OJX1059180OJX1059180
The defroster heats the window to
remove frost, fog and thin ice from the
interior and exterior of the rear window,
while the engine is running.
• To activate the rear window defroster,
press the rear window defroster
button located in the center control
panel. The indicator on the rear
window defroster button illuminates
when the defroster is ON.
• To turn off the defroster, press the rear
window defroster button again.
Information
• If there is heavy accumulation of snow
on the rear window, brush it off before
operating the rear defroster.
• The rear window defroster
automatically turns off after
approximately 20 minutes or when the
Engine Start/Stop button is in the OFF
position.
Side view mirror defroster
If your vehicle is equipped with the side
view mirror defrosters, they will operate
at the same time you turn on the rear
window defroster.
Page 252 of 632
Convenient Features
5-110
Turning the Auto Defogging System
ON or OFF
Climate control system
Press the front windshield defroster
button for 3 seconds when the Engine
Start/Stop button is in the ON position.
When the Auto Defogging System is
turned off, the ADS OFF symbol will blink
3 times and ADS OFF will be displayed on
the climate control information screen.
When the Auto Defogging System is
turned on, the ADS OFF symbol will blink
6 times without a signal.
Infotainment system
Auto Defogging System can be turned
on and off by selecting ‘Setup →
Vehicle Settings → Climate → Defog/
Defrost Options → Auto Defog’ from the
infotainment system screen.
See additional information in supplied
Infotainment Manual.
Information
• When the air conditioning is turned
on by Auto Defogging System, if you
try to turn off the air conditioning, the
indicator will blink 3 times and the air
conditioning will not be turned off.
• To maintain the effectiveness and
efficiency of the Auto Defogging
System, do not select Recirculation
mode while the system is operating.
• When Auto Defogging System is
operating, fan speed adjustment,
temperature adjustment, and air intake
control selection are all disabled.
NOTICE
Do not remove the sensor cover located
on the upper end of the windshield
glass.
Damage to system parts could occur
and may not be covered by your vehicle
warranty.
Auto Dehumidify (if equipped)
To increase cabin air quality and help
reduce windshield misting, Recirculation
mode switches off automatically after
about 5 to 30 minutes, depending on the
outside temperature, and the air intake
will change to Fresh mode.
Turning Auto Dehumidify ON or OFF
Climate control system
To turn the Auto Dehumidify feature
on or off, select Face level (
) mode
and press the air intake control ()
button at least five times within three
seconds. When Auto Dehumidify is
turned on, the air intake control button
indicator will blink 6 times. When turned
off, the indicator will blink 3 times.
Infotainment system
Auto Dehumidify can be turned on and
off by selecting ‘Setup → Vehicle Settings
→ Climate → Automatic Ventilation →
Auto Dehumidify’ from the infotainment
system screen.
See additional information in supplied
Infotainment Manual.
Page 261 of 632
05
5-119
NOTICE
• To prevent the battery from being
discharged, do not use the AC
inverter while the engine is not
running.
• When not using the AC inverter,
make sure to close the AC inverter
cover.
• After using an electric accessory
or equipment, pull the plug out.
Leaving the accessory or equipment
plugged in for a long time may cause
battery discharge.
• Do not use an electric accessory or
equipment the power consumption
of which is greater than 115 volts
(150 watts).
• Some electric accessories or
equipment can cause electronic
interference. It may cause excessive
audio noise and malfunctions in
other electric systems or devices in
the vehicle.
• Do not use broken electric
accessories or equipment, which
may damage the AC inverter and
electrical systems of the vehicle.
• Do not use two or more electric
accessories or equipment at the
same time. It may cause damage to
the electrical systems of the vehicle.
• When the input voltage is lower,
outlet LED will blink and the AC
inverter will turn off automatically. If
the input voltage goes up to normal,
the AC inverter will turn on again.
Wireless Smart Phone Charging
System (if equipped)
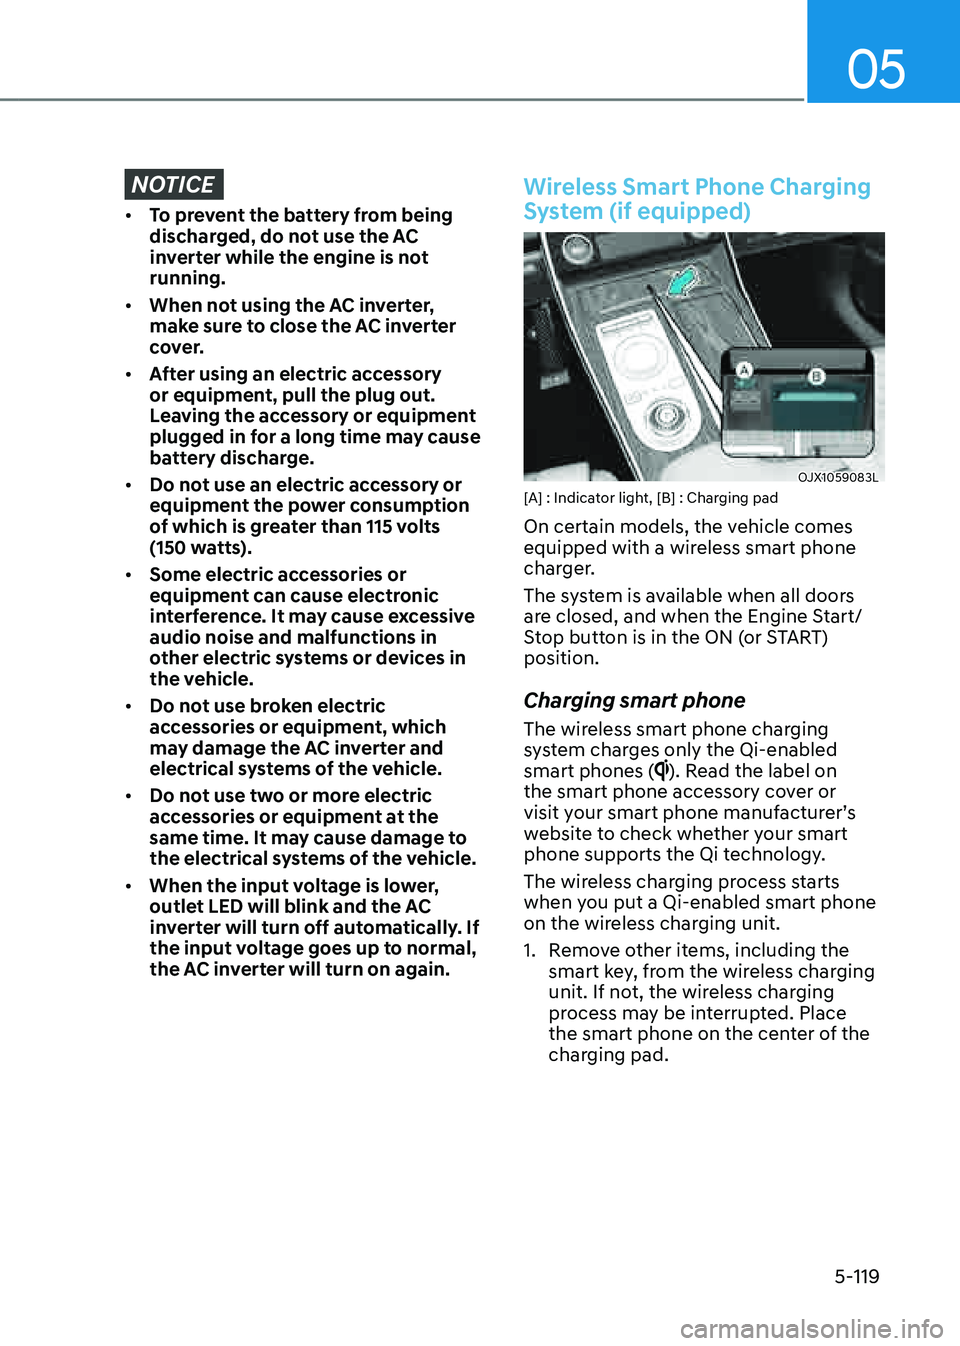
OJX1059083LOJX1059083L[A] : Indicator light, [B] : Charging pad
On certain models, the vehicle comes
equipped with a wireless smart phone
charger.
The system is available when all doors
are closed, and when the Engine Start/
Stop button is in the ON (or START)
position.
Charging smart phone
The wireless smart phone charging
system charges only the Qi-enabled
smart phones (
). Read the label on
the smart phone accessory cover or
visit your smart phone manufacturer’s
website to check whether your smart
phone supports the Qi technology.
The wireless charging process starts
when you put a Qi-enabled smart phone
on the wireless charging unit.
1. Remove other items, including the
smart key, from the wireless charging
unit. If not, the wireless charging
process may be interrupted. Place
the smart phone on the center of the
charging pad.
Page 263 of 632
05
5-121
• When charging some smart phones
with a self-protection feature,
the wireless charging speed may
decrease and the wireless charging
may stop.
• If the smart phone has a thick cover,
the wireless charging may not be
possible.
• If the smart phone is not completely
contacting the charging pad,
wireless charging may not operate
properly.
• Some magnetic items like credit
cards, phone cards or rail tickets may
be damaged if left with the smart
phone during the charging process.
• When any smart phone without
a wireless charging function or a
metallic object is placed on the
charging pad, a small noise may
sound. This small sound is due to the
vehicle discerning compatibility of
the object placed on the charging
pad. It does not affect your vehicle or
the smart phone in any way.
Information
If the Engine Start/Stop button is in the
OFF position, the charging also stops.
Clock
The clock can be set from the
infotainment system.
See additional information in supplied
Infotainment Manual.
WARNING
Do not attempt to adjust the clock
while driving. Doing so may result in
distracted driving which may lead to
an accident involving personal injury or
death.
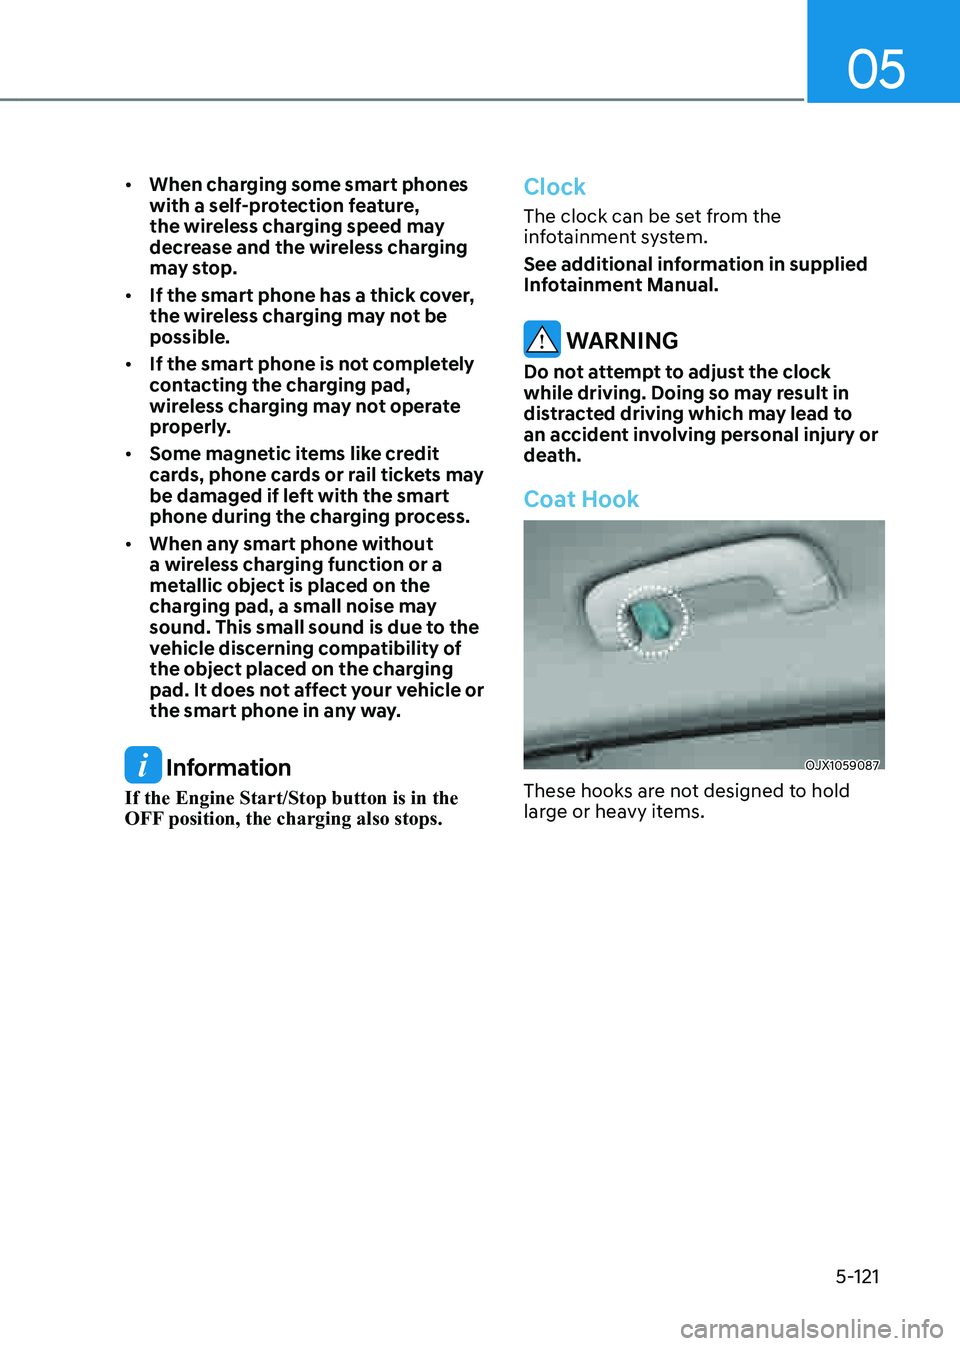
Coat Hook
OJX1059087OJX1059087
These hooks are not designed to hold
large or heavy items.
Page 273 of 632
6
Before Driving ........................................................................\
...........................6-5Before Entering the Vehicle ........................................................................\
.................6-5
Before Starting ........................................................................\
.....................................6-5
Engine Start/Stop Button ........................................................................\
.........6-6Engine Stop/Start Button Positions ........................................................................\
....6 -7
Starting the Engine ........................................................................\
.............................6-8
Turning Off the Engine ........................................................................\
........................6-9
Remote Start ........................................................................\
.......................................6-10
Automatic Transmission ........................................................................\
...........6-11Automatic Transmission Operation ........................................................................\
....6-11
LCD Display Messages (Cluster) ........................................................................\
.........6-17
Paddle Shifter (Manual Shift Mode) ........................................................................\
.6-20
Good Driving Practices ........................................................................\
.....................6-20
Braking System ........................................................................\
.......................6-22Power-Assist Brakes ........................................................................\
...........................6-22
Disc Brakes Wear Indicator ........................................................................\
................ 6-22
High Performance Brake........................................................................\
.................... 6-23
Electronic Parking Brake (EPB)
........................................................................\
..........6-23
Auto Hold ........................................................................\
............................................6-27
Anti-lock Brake System (ABS) ........................................................................\
............6-31
Electronic Stability Control (ESC) ........................................................................\
.....6-32
Vehicle Stability Management (VSM) .......................................................................6-35
Hill-Start Assist Control (HAC) ........................................................................\
..........6-36
Downhill Brake Control (DBC) ........................................................................\
..........6-36
Good Braking Practices ........................................................................\
.....................6-39
All Wheel Drive (AWD) ........................................................................\
............6-40All Wheel Drive (AWD) Operation ........................................................................\
......6-41
Emergency Precautions ........................................................................\
....................6-43
Electronic Limited Slip Differential ................................................................6-45Drive Mode Selection ........................................................................\
........................6-45
Warning Messages ........................................................................\
............................6-45
6. Driving Your Vehicle
Driving Your Vehicle