tow GENESIS GV80 2021 Workshop Manual
[x] Cancel search | Manufacturer: GENESIS, Model Year: 2021, Model line: GV80, Model: GENESIS GV80 2021Pages: 632, PDF Size: 9.37 MB
Page 518 of 632
08
8 -7
WARNING
Never remove the engine coolant cap and/or water-
cooled intercooler coolant
cap or the drain plug while the
engine and radiator are hot.
Hot coolant and steam may blow out
under pressure, causing serious injury.
Turn the engine off and wait until the
engine cools down. Use extreme care
when removing the coolant cap. Wrap
a thick towel around it, and turn it
counterclockwise slowly to the first
stop. Step back while the pressure is
released from the cooling system. When
you are sure all the pressure has been
released, press down on the cap, using
a thick towel, and continue turning
counterclockwise to remove it.
6. If you cannot find the cause of the
overheating, wait until the engine
temperature has returned to normal.
Then, if coolant has been lost,
carefully add coolant to the reservoir
to bring the fluid level in the reservoir
up to the halfway mark.
7. Proceed with caution, keeping alert
for further signs of overheating. If
overheating happens again, call an
authorized retailer of Genesis Branded
products for assistance.
CAUTION
• Serious loss of coolant indicates a
leak in the cooling system and should
be checked as soon as possible by
an authorized retailer of Genesis
Branded products.
• When the engine overheats from
low engine coolant, suddenly
adding engine coolant may cause
cracks in the engine. To prevent
damage, add engine coolant slowly
in small quantities. It may require
several refilling cycles to properly
fill the engine cooling system. If
necessary, an authorized retailer of
Genesis Branded products should be
consulted to perform this task.
Page 522 of 632

08
8-11
TPMS (Tire Pressure
Monitoring System)
Malfunction Indicator
The TPMS Malfunction Indicator
will illuminate after it blinks for
approximately one minute when there
is a problem with the Tire Pressure
Monitoring System.
Have the system checked by an
authorized retailer of Genesis Branded
products as soon as possible.
NOTICE
If there is a malfunction with the TPMS,
the Low Tire Pressure Position Telltale
will not be displayed even though the
vehicle has an under-inflated tire.
NOTICE
The TPMS Malfunction Indicator may
illuminate after blinking for one minute
if the vehicle is near electric power
supply cables or radio transmitters
such as police stations, government
and public offices, broadcasting
stations, military installations, airports,
transmitting towers, etc.
Additionally, the TPMS Malfunction
Indicator may illuminate if snow chains
are used or electronic devices such as
computers, chargers, remote starters,
navigation, etc. This may interfere with
normal operation of the TPMS.
Changing a Tire with TPMS
If you have a flat tire, the Low Tire
Pressure and Position telltales will come
on. Have the flat tire repaired by an
authorized retailer of Genesis Branded
products as soon as possible or replace
the flat tire with the spare tire.
NOTICE
It is recommended that you do not use a
puncture-repairing agent not approved
by an authorized retailer of Genesis
Branded products to repair and/or
inflate a low pressure tire. Tire sealant
not approved by an authorized retailer
of Genesis Branded products may
damage the tire pressure sensor.
The spare tire does not come with a
tire pressure monitoring sensor. When
the low pressure tire or the flat tire is
replaced with the spare tire, the Low
Tire Pressure LCD position indicator will
remain on. Also, the TPMS Malfunction
Indicator will illuminate after blinking
for one minute if the vehicle is driven
at speed above 15.5 mph (25 km/h) for
approximately 20 minutes.
Once the original wheel equipped with
a tire pressure monitoring sensor is
reinflated to the recommended pressure
and reinstalled on the vehicle, the
Low Tire Pressure Telltale and TPMS
Malfunction Indicator will go off within a
few minutes of driving.
Page 525 of 632
Emergency Situations
8-14
Changing Tires
WARNING
A vehicle can slip or roll off of a jack
causing serious injury or death to you or
those nearby. Take the following safety
precautions:
• Do not get under a vehicle that is
supported by a jack.
• NEVER attempt to change a tire in
the lane of traffic. ALWAYS move the
vehicle completely off the road on
level, firm ground away from traffic
before trying to change a tire. If you
cannot find a level, firm place off
the road, call a towing service for
assistance.
• Be sure to use the jack provided with
the vehicle.
• ALWAYS place the jack on the
designated jacking positions on the
vehicle and NEVER on the bumpers
or any other part of the vehicle for
jacking support.
• Do not start or run the engine while
the vehicle is on the jack.
• Do not allow anyone to remain in the
vehicle while it is on the jack.
• Keep children away from the road
and the vehicle.Follow these steps to change your
vehicle’s tire:
1. Park on a level, firm surface.
2. Shift the gear to P (Park), apply the
parking brake, and press the Engine
Start/Stop button to the OFF position.
3. Press the hazard warning flasher
button.
4. Remove the wheel lug wrench, jack,
jack handle, and spare tire from the
vehicle.
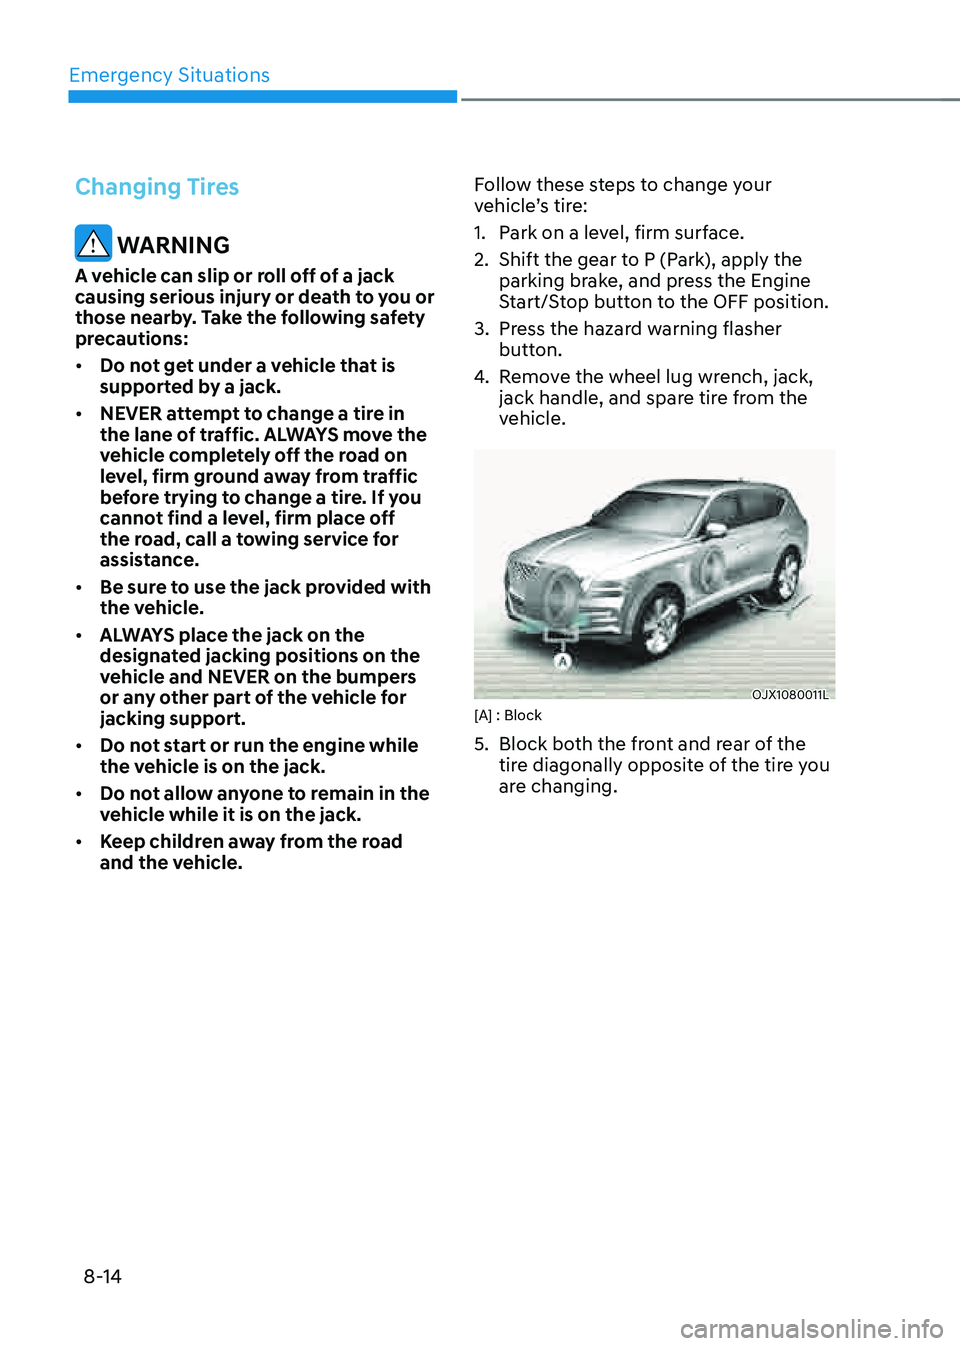
OJX1080011LOJX1080011L[A] : Block
5. Block both the front and rear of the
tire diagonally opposite of the tire you
are changing.
Page 529 of 632
Emergency Situations
8-18
When driving with the compact spare tire
mounted to your vehicle:
• Check the tire pressure after installing
the compact spare tire. The compact
spare tire should be inflated to 60 psi
(420 kPa).
• Do not take this vehicle through
an automatic car wash while the
compact spare tire is installed.
• Do not use the compact spare tire on
any other vehicle because this tire
has been designed especially for your
vehicle.
• The compact spare tire’s tread life is
shorter than a regular tire. Inspect
your compact spare tire regularly and
replace worn compact spare tires with
the same size and design, mounted on
the same wheel.
• Do not use more than one compact
spare tire at a time.
• Do not tow a trailer while the compact
spare tire is installed.
Information
When the original tire and wheel are
repaired and reinstalled on the vehicle, the
wheel bolt torque must be set correctly.
The correct wheel bolt tightening torque is
101~116 lbf.ft (14~16 kgf.m).
NOTICE
To prevent damaging the compact
spare tire and your vehicle:
• Drive slowly enough for the road
conditions to avoid all hazards, such
as a potholes or debris.
• Avoid driving over obstacles. The
compact spare tire diameter is
smaller than the diameter of a
conventional tire and reduces the
ground clearance approximately 1 in.
(25 mm).
• Do not use tire chains on the
compact spare tire. Because of the
smaller size, a tire chain will not fit
properly.
• Do not use the compact spare tire
on any other wheels, nor should
standard tires, snow tires, wheel
covers or trim rings be used with the
compact spare wheel.
Page 536 of 632
08
8-25
WARNING
Do not leave your vehicle running in
a poorly ventilated area for extended
periods of time. Carbon monoxide
poisoning and suffocation can occur.
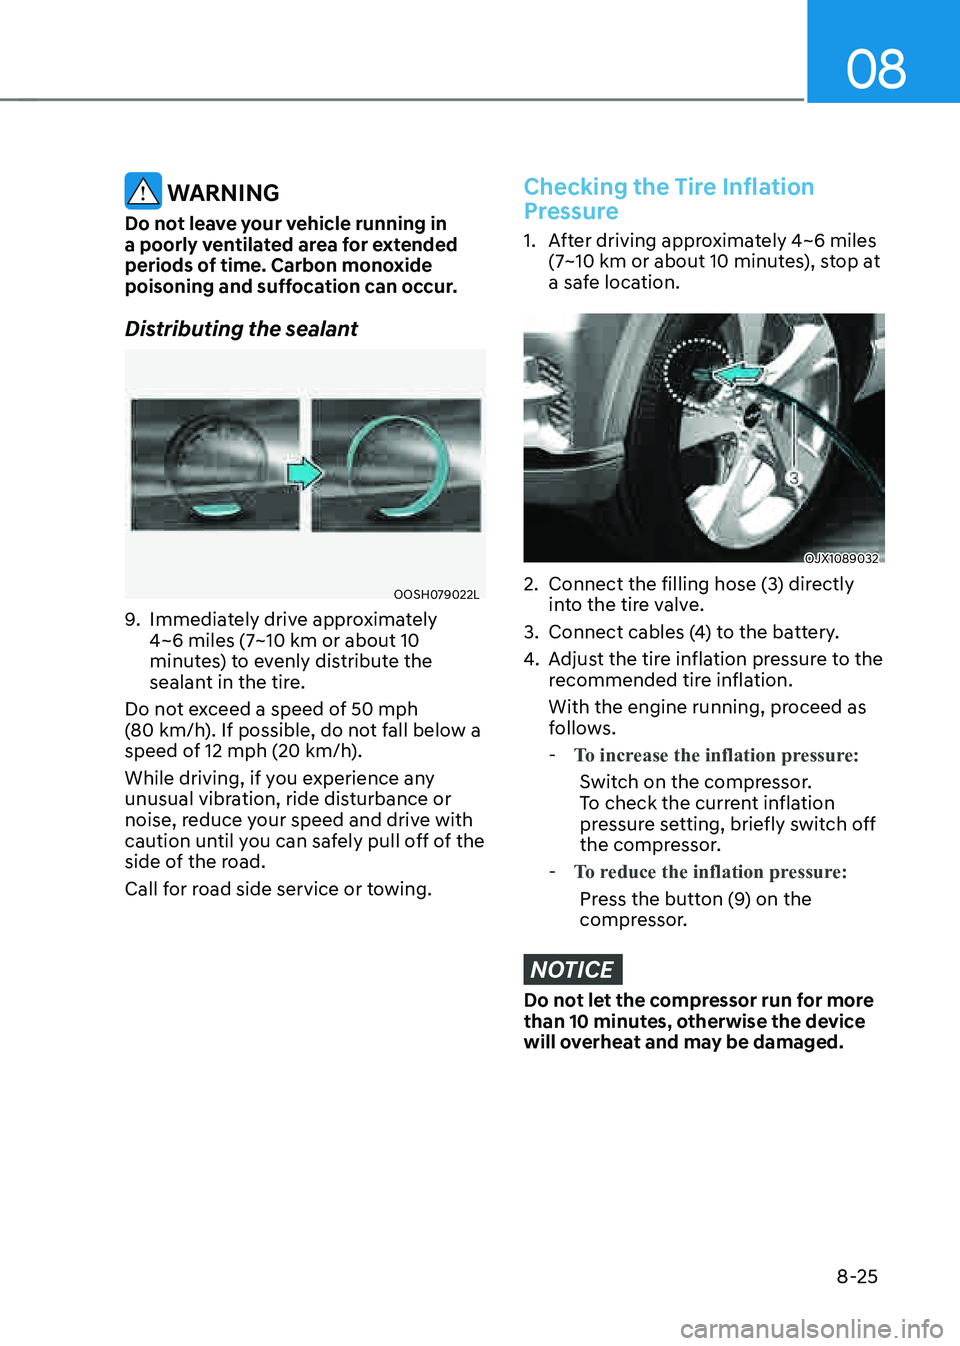
Distributing the sealant
OOSH079022LOOSH079022L
9. Immediately drive approximately 4~6 miles (7~10 km or about 10 minutes) to evenly distribute the
sealant in the tire.
Do not exceed a speed of 50 mph
(80 km/h). If possible, do not fall below a speed of 12 mph (20 km/h).
While driving, if you experience any
unusual vibration, ride disturbance or
noise, reduce your speed and drive with
caution until you can safely pull off of the
side of the road.
Call for road side service or towing.
Checking the Tire Inflation
Pressure
1. After driving approximately 4~6 miles
(7~10 km or about 10 minutes), stop at
a safe location.
OJX1089032OJX1089032
2. Connect the filling hose (3) directly
into the tire valve.
3. Connect cables (4) to the battery.
4. Adjust the tire inflation pressure to the
recommended tire inflation.
With the engine running, proceed as
follows.
- To increase the inflation pressure:
Switch on the compressor.
To check the current inflation
pressure setting, briefly switch off
the compressor.
- To reduce the inflation pressure:
Press the button (9) on the
compressor.
NOTICE
Do not let the compressor run for more
than 10 minutes, otherwise the device
will overheat and may be damaged.
Page 537 of 632
Emergency Situations
8-26
Information
The pressure gauge may show higher than
actual reading when the compressor is
running. To get an accurate tire pressure,
the compressor needs to be turned off.
CAUTION
If the inflation pressure is not
maintained, drive the vehicle a second
time, refer to Distributing the sealant.
Then repeat steps 1 to 4.
Use of the TMK may be ineffectual for
tire damage larger than approximately
0.16 in. (4 mm).
Contact an authorized retailer of
Genesis Branded products if the tire
cannot be made roadworthy with the
Tire Mobility Kit.
WARNING
The tire inflation pressure must be
inflated to the proper pressure (Refer to
“Tire and Wheels” section in chapter 2).
If it is not, do not continue driving.
Call for road side service or towing.
CAUTION
Tire pressure sensor
The sealant on the tire pressure sensor
and wheel should be removed when
you replace the tire with a new one and
inspect the tire pressure sensors at an
authorized retailer of Genesis Branded
products.
Information
When reinstalling the repaired or replaced
tire and wheel on the vehicle, tighten the
wheel bolt to 101~116 lbf·ft (14~16 kgf·m).
Page 538 of 632
![GENESIS GV80 2021 Workshop Manual 08
8-27
TOWING
Towing Service
OJX1089016OJX1089016[A] : Dollies
If emergency towing is necessary,
we recommend having it done by an
authorized retailer of Genesis Branded
products or a commercial t GENESIS GV80 2021 Workshop Manual 08
8-27
TOWING
Towing Service
OJX1089016OJX1089016[A] : Dollies
If emergency towing is necessary,
we recommend having it done by an
authorized retailer of Genesis Branded
products or a commercial t](/img/46/35616/w960_35616-537.png)
08
8-27
TOWING
Towing Service
OJX1089016OJX1089016[A] : Dollies
If emergency towing is necessary,
we recommend having it done by an
authorized retailer of Genesis Branded
products or a commercial tow-truck
service.
Proper lifting and towing procedures
are necessary to prevent damage to
the vehicle. The use of wheel dollies or
flatbed is recommended.
For 2WD vehicles, it is acceptable to tow
the vehicle with the front wheels on the
ground (without dollies) and the rear
wheels off the ground.
If any of the loaded wheels or suspension
components are damaged or the vehicle
is being towed with the rear wheels on
the ground, use a towing dolly under the
rear wheels.
When being towed by a commercial tow
truck and wheel dollies are not used,
the rear of the vehicle should always be
lifted, not the front.
For AWD vehicles, it must be towed
with a wheel lift and dollies or flatbed
equipment with all the wheels off the
ground.
NOTICE
• Do not lift the vehicle by the tow
fitting or body and chassis parts.
Otherwise the vehicle may be
damaged.
• An AWD vehicle should never be
towed with the wheels on the
ground. This can cause serious
damage to the transmission or the
AWD system.
CAUTION
• Do not tow the vehicle with the rear
wheels on the ground as this may
cause damage to the vehicle.
OJX1089019OJX1089019
• Do not tow with sling-type
equipment. Use wheel lift or flatbed
equipment.
OJX1089018OJX1089018
Page 539 of 632
Emergency Situations
8-28
When towing your vehicle in an
emergency without wheel dollies:
1. Release EPB before turning off the
engine.
2. Press the Engine Start/Stop button to
the OFF position.
3. Change the gear to N (Neutral) by
pressing the P release button (need to
remove cap-cover) while pressing the
brake pedal. For more details, refer to
“Automatic Transmission” section in
chapter 6.
4. Press the Engine Start/Stop button to
the ACC position.
CAUTION
Failure to shift the gear to N (Neutral)
may cause internal damage to the
transmission.
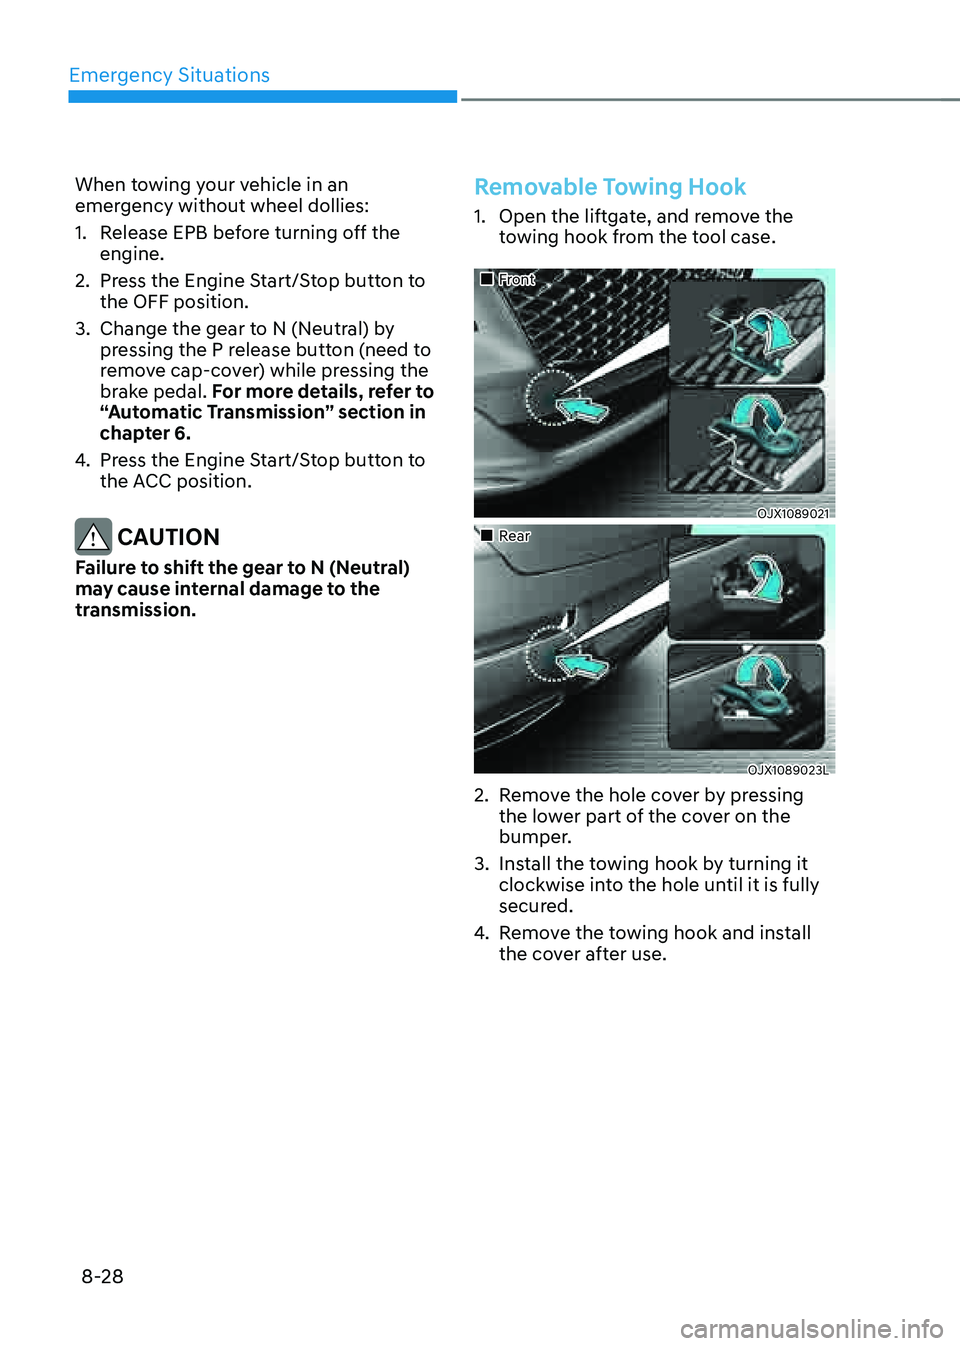
Removable Towing Hook
1. Open the liftgate, and remove the
towing hook from the tool case.
�
Page 540 of 632
08
8-29
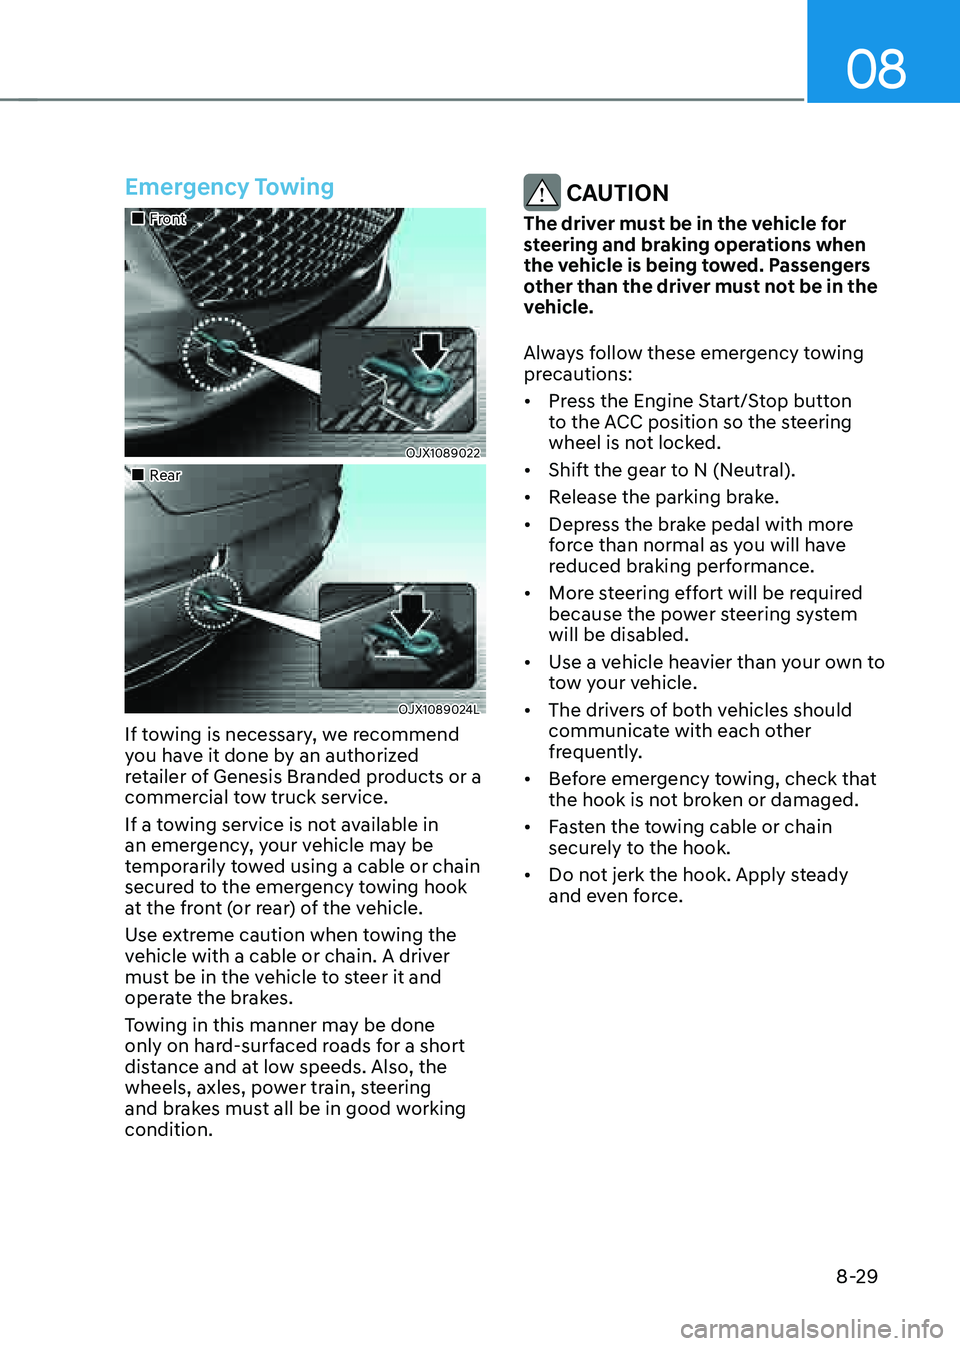
Emergency Towing
�
Page 541 of 632
Emergency Situations
8-30
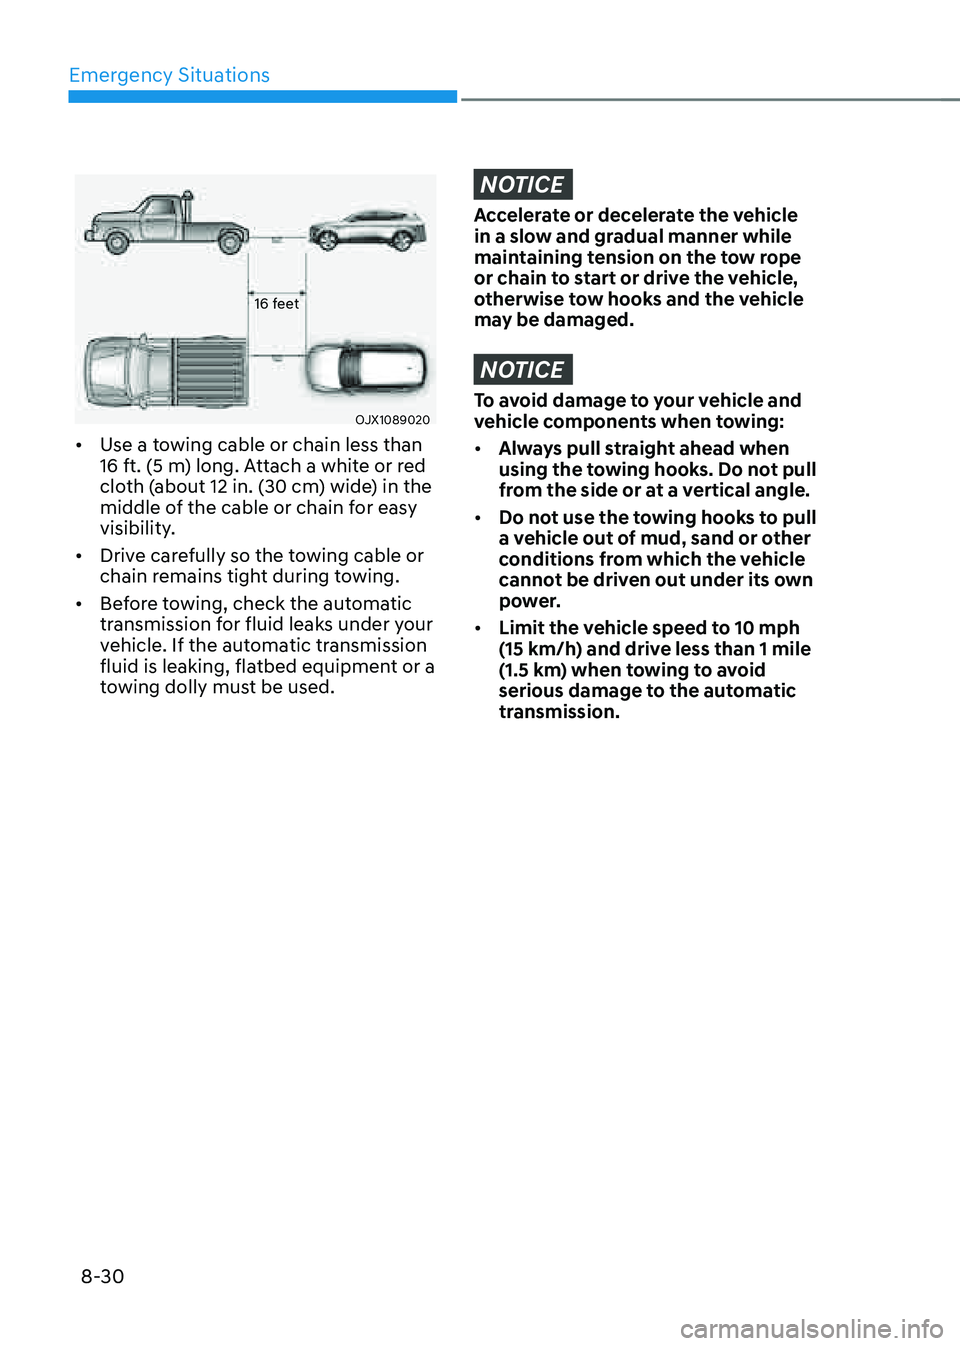
16 feet
OJX1089020OJX1089020
• Use a towing cable or chain less than
16 ft. (5 m) long. Attach a white or red
cloth (about 12 in. (30 cm) wide) in the
middle of the cable or chain for easy
visibility.
• Drive carefully so the towing cable or
chain remains tight during towing.
• Before towing, check the automatic
transmission for fluid leaks under your
vehicle. If the automatic transmission
fluid is leaking, flatbed equipment or a
towing dolly must be used.
NOTICE
Accelerate or decelerate the vehicle
in a slow and gradual manner while
maintaining tension on the tow rope
or chain to start or drive the vehicle,
otherwise tow hooks and the vehicle
may be damaged.
NOTICE
To avoid damage to your vehicle and
vehicle components when towing:
• Always pull straight ahead when
using the towing hooks. Do not pull
from the side or at a vertical angle.
• Do not use the towing hooks to pull
a vehicle out of mud, sand or other
conditions from which the vehicle
cannot be driven out under its own
power.
• Limit the vehicle speed to 10 mph (15 km/h) and drive less than 1 mile (1.5 km) when towing to avoid serious damage to the automatic
transmission.