lights GMC ACADIA 2008 Get To Know Guide
[x] Cancel search | Manufacturer: GMC, Model Year: 2008, Model line: ACADIA, Model: GMC ACADIA 2008Pages: 24, PDF Size: 1.48 MB
Page 3 of 24

3
See Section 3 of your Owner Manual.
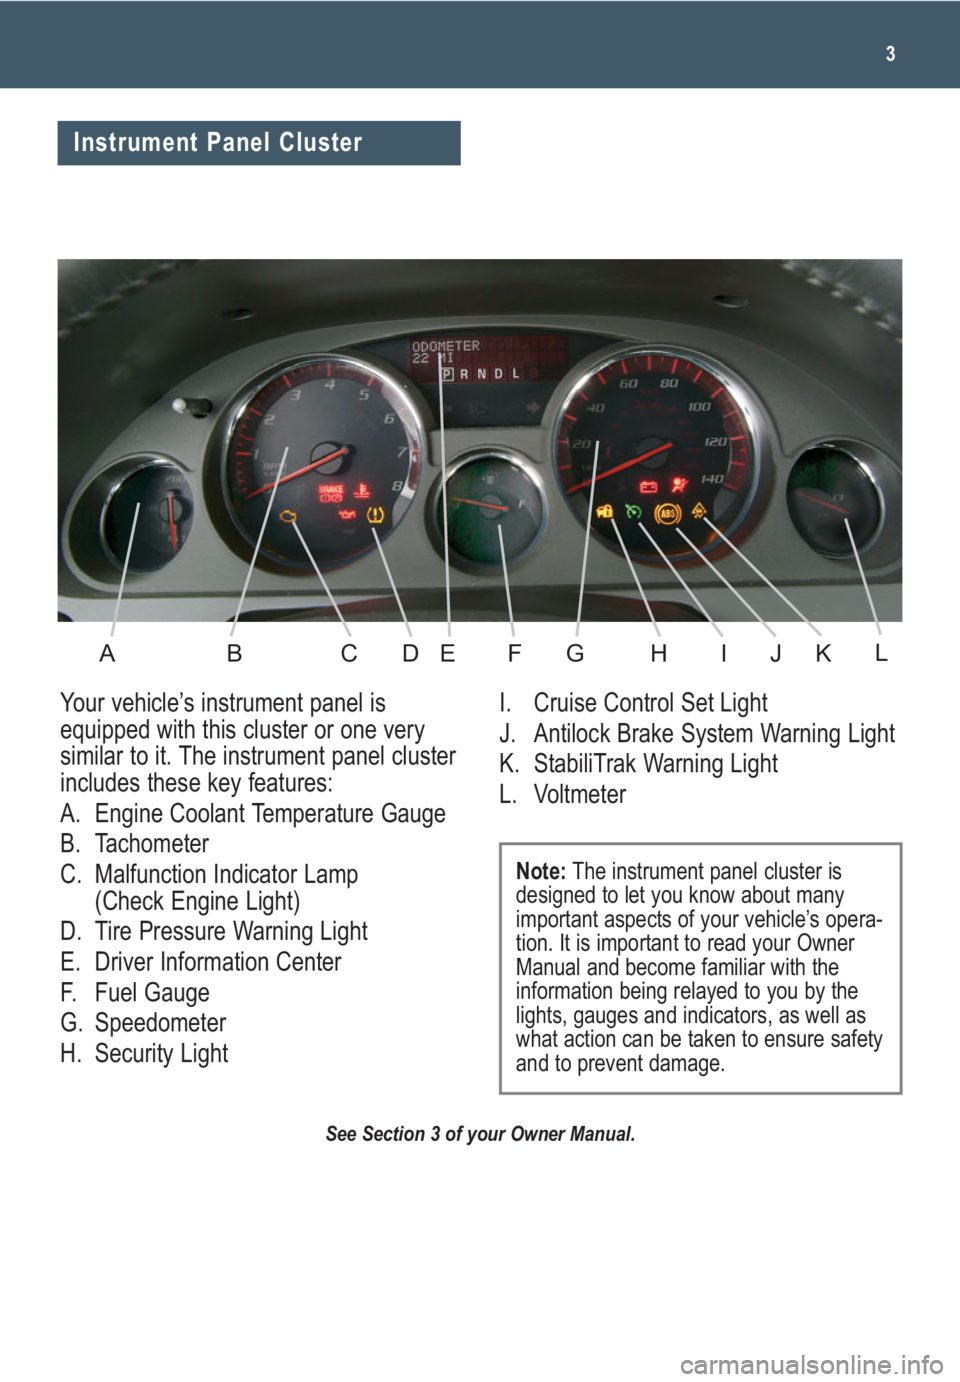
Your vehicle’s instrument panel is
equipped with this cluster or one very
similar to it. The instrument panel cluster
includes these key features:
A. Engine Coolant Temperature Gauge
B. Tachometer
C. Malfunction Indicator Lamp
(Check Engine Light)
D. Tire Pressure Warning Light
E. Driver Information Center
F. Fuel Gauge
G. Speedometer
H. Security LightI. Cruise Control Set Light
J. Antilock Brake System Warning Light
K. StabiliTrak Warning Light
L. Voltmeter
Note:The instrument panel cluster is
designed to let you know about many
important aspects of your vehicle’s opera-
tion. It is important to read your Owner
Manual and become familiar with the
information being relayed to you by the
lights, gauges and indicators, as well as
what action can be taken to ensure safety
and to prevent damage.
Instrument Panel Cluster
ABCDEFGHIKJL
Page 9 of 24

9
3rd-Row Seats
The 3rd-row 60/40 split bench seat
features folding seatbacks. Prior to fold-
ing a seatback, make sure all of the
safety belts are unbuckled, nothing is on
the 3rd-row seat, and the 2nd-row seat
is not reclined.
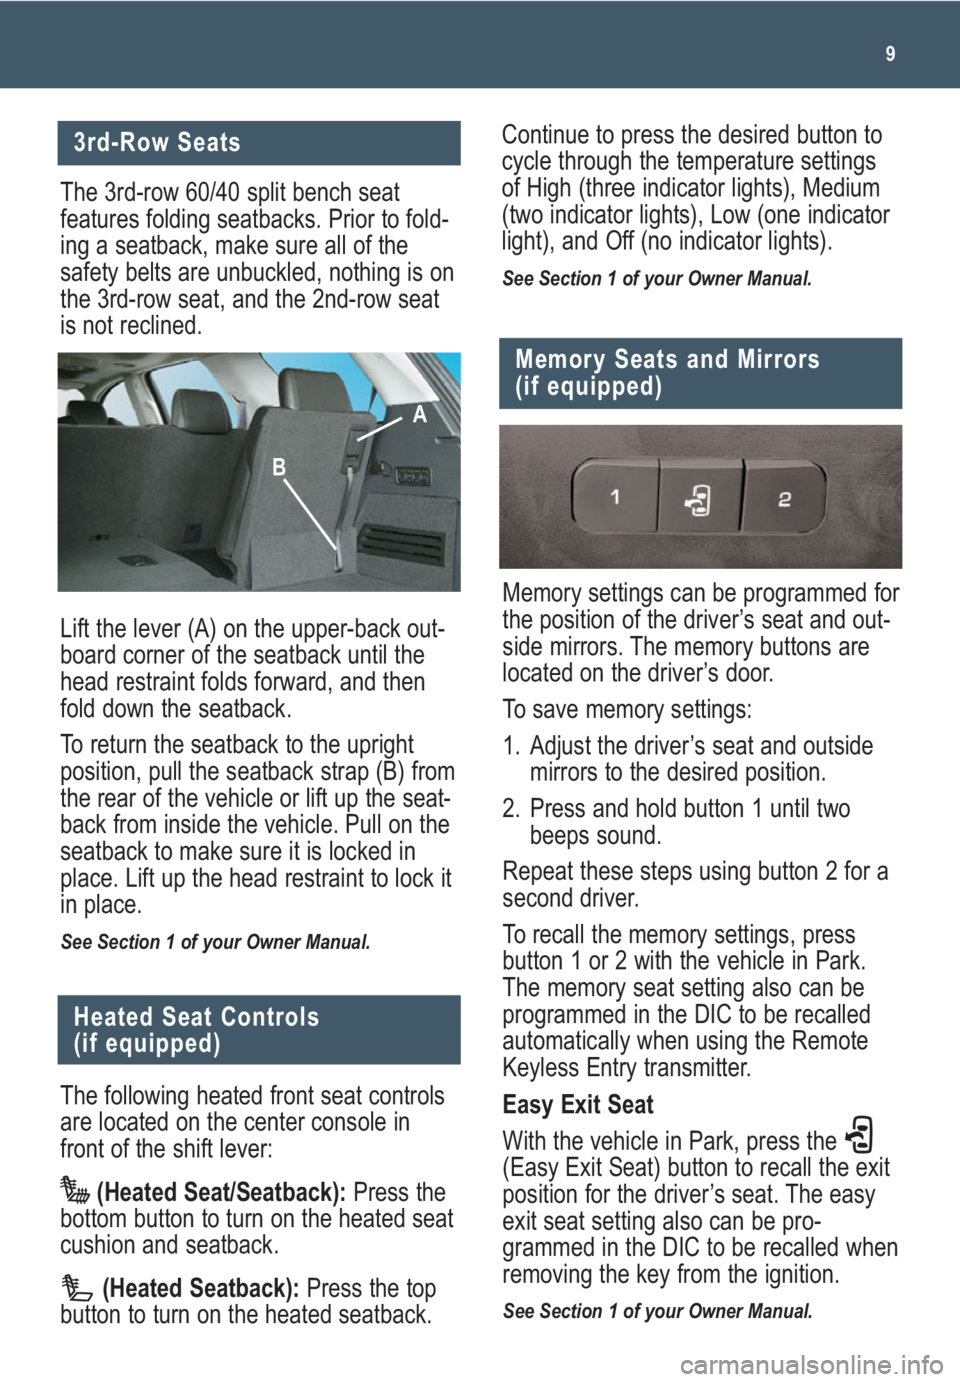
Lift the lever (A) on the upper-back out-
board corner of the seatback until the
head restraint folds forward, and then
fold down the seatback.
To return the seatback to the upright
position, pull the seatback strap (B) from
the rear of the vehicle or lift up the seat-
back from inside the vehicle. Pull on the
seatback to make sure it is locked in
place. Lift up the head restraint to lock it
in place.
See Section 1 of your Owner Manual.
The following heated front seat controls
are located on the center console in
front of the shift lever:
(Heated Seat/Seatback):Press the
bottom button to turn on the heated seat
cushion and seatback.
(Heated Seatback):Press the top
button to turn on the heated seatback.
Heated Seat Controls
(if equipped)
Memory settings can be programmed for
the position of the driver’s seat and out-
side mirrors. The memory buttons are
located on the driver’s door.
To save memory settings:
1. Adjust the driver’s seat and outside
mirrors to the desired position.
2. Press and hold button 1 until two
beeps sound.
Repeat these steps using button 2 for a
second driver.
To recall the memory settings, press
button 1 or 2 with the vehicle in Park.
The memory seat setting also can be
programmed in the DIC to be recalled
automatically when using the Remote
Keyless Entry transmitter.
Easy Exit Seat
With the vehicle in Park, press the
(Easy Exit Seat) button to recall the exit
position for the driver’s seat. The easy
exit seat setting also can be pro-
grammed in the DIC to be recalled when
removing the key from the ignition.
See Section 1 of your Owner Manual.
Memory Seats and Mirrors
(if equipped)
Continue to press the desired button to
cycle through the temperature settings
of High (three indicator lights), Medium
(two indicator lights), Low (one indicator
light), and Off (no indicator lights).
See Section 1 of your Owner Manual.
A
B
Page 17 of 24

17
The Automatic
Headlamp
System turns
on the Daytime
Running Lamps
in the daytime
and the head-
lamps and other
exterior lamps at
night or when necessary.
The system uses a light sensor, located
on top of the instrument panel, to deter-
mine light conditions. For proper opera-
tion, avoid placing any objects on or
near the sensor.
Exterior Lamps Control
The exterior lamps can be operated
using the control knob located on the left
side of the instrument panel. The knob
can be rotated to the following positions:
AUTO (Automatic Lamp Control):
This position enables the Automatic
Headlamp System.
(On/Off):Momentarily turn the knob
to this position to turn the Automatic
Headlamp System off or on again.
(Parking Lamps):This position
turns on the parking lamps and
taillamps.
(Headlamps):This position turns
on the headlamps, parking lamps and
taillamps.
(Fog Lamps)(if equipped): Press
this button on the exterior lamps control
knob to turn the fog lamps on or off.
See Section 3 of your Owner Manual.
Automatic Headlamp System
CONVENIENCEInterior Lighting Features
Instrument Panel Brightness
The (Instrument Panel Brightness)
control knob is located on the left side of
the instrument panel. To brighten or dim
the instrument panel lights, press the
knob; it will pop out. Turn the knob to
adjust the intensity of the lights.
Dome Lamps
The dome lamps will come on when a
door is open. The lamps also can be
turned on by fully rotating the instrument
panel brightness control knob clockwise.
To disable the dome lamps, press the
(Dome Lamp Override) button
located above the instrument panel
brightness control knob.
See Section 3 of your Owner Manual.
Outside Power Foldaway
Mirrors (if equipped)
The following
power fold-
away mirror
controls are
located on the
driver’s door:
(Mirror Selector):Press the left side
of this switch (A) to select the driver’s
side mirror or the right side of this switch
to select the passenger’s side mirror.
(Mirror Adjustment):Press the
four-way control pad (B) to adjust the
selected mirror.
(Foldaway Mirrors)(if equipped):
Press the right side of this switch (C) to
fold the mirrors, and press the left side
of this switch to unfold the mirrors.
See Section 2 of your Owner Manual.
B AC
Page 20 of 24

Getting to Know Your Acadia20
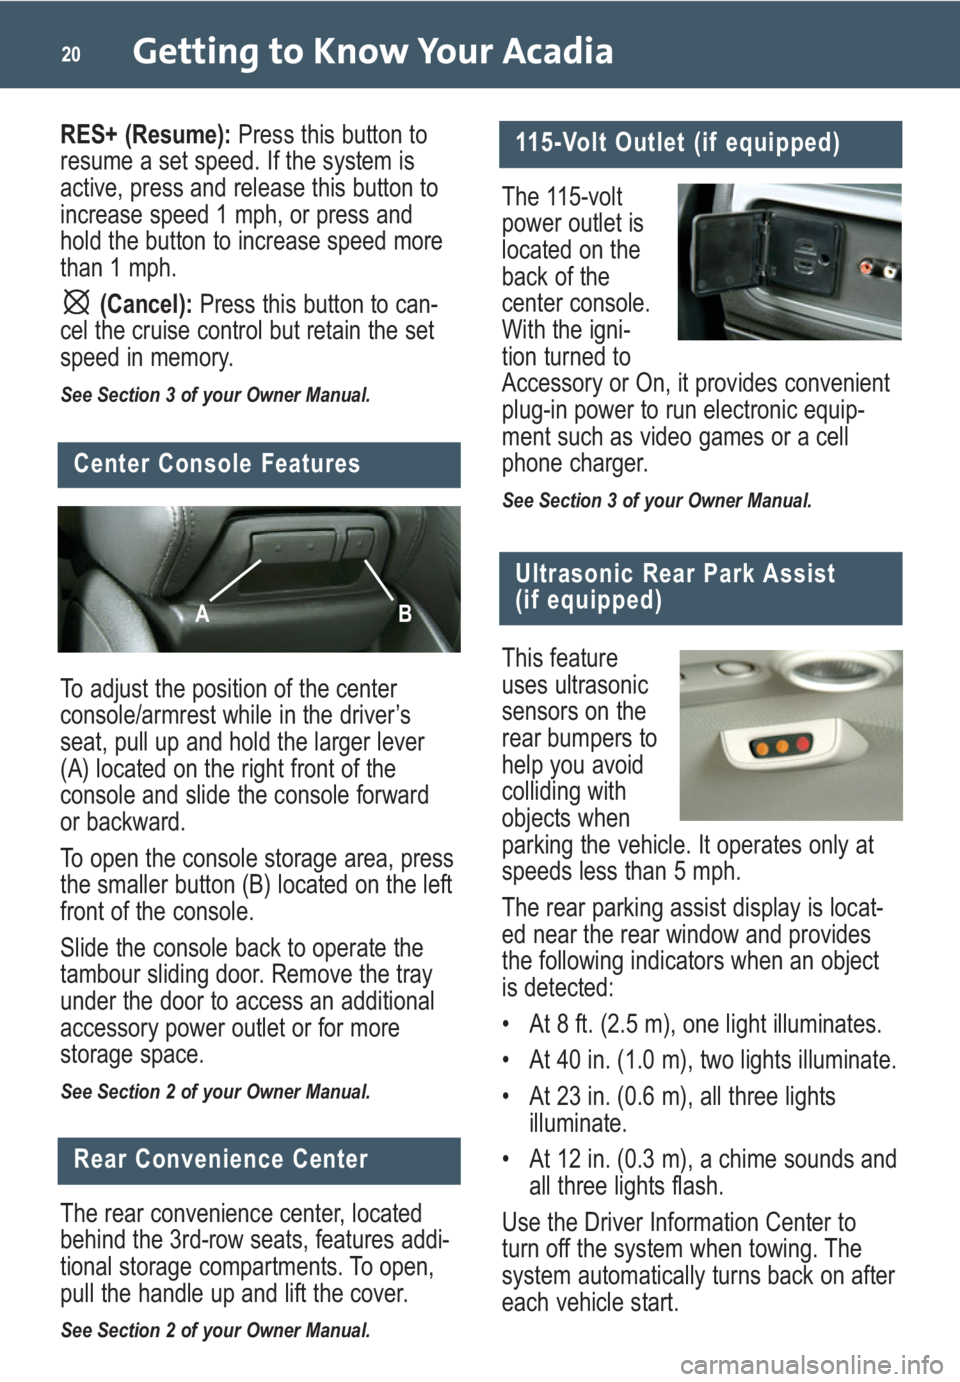
To adjust the position of the center
console/armrest while in the driver’s
seat, pull up and hold the larger lever
(A) located on the right front of the
console and slide the console forward
or backward.
To open the console storage area, press
the smaller button (B) located on the left
front of the console.
Slide the console back to operate the
tambour sliding door. Remove the tray
under the door to access an additional
accessory power outlet or for more
storage space.
See Section 2 of your Owner Manual.
The 115-volt
power outlet is
located on the
back of the
center console.
With the igni-
tion turned to
Accessory or On, it provides convenient
plug-in power to run electronic equip-
ment such as video games or a cell
phone charger.
See Section 3 of your Owner Manual.
115-Volt Outlet (if equipped)
Center Console Features
AB
The rear convenience center, located
behind the 3rd-row seats, features addi-
tional storage compartments. To open,
pull the handle up and lift the cover.
See Section 2 of your Owner Manual.
Rear Convenience Center
Ultrasonic Rear Park Assist
(if equipped)
This feature
uses ultrasonic
sensors on the
rear bumpers to
help you avoid
colliding with
objects when
parking the vehicle. It operates only at
speeds less than 5 mph.
The rear parking assist display is locat-
ed near the rear window and provides
the following indicators when an object
is detected:
• At 8 ft. (2.5 m), one light illuminates.
• At 40 in. (1.0 m), two lights illuminate.
• At 23 in. (0.6 m), all three lights
illuminate.
• At 12 in. (0.3 m), a chime sounds and
all three lights flash.
Use the Driver Information Center to
turn off the system when towing. The
system automatically turns back on after
each vehicle start.
RES+ (Resume):Press this button to
resume a set speed. If the system is
active, press and release this button to
increase speed 1 mph, or press and
hold the button to increase speed more
than 1 mph.
(Cancel): Press this button to can-
cel the cruise control but retain the set
speed in memory.
See Section 3 of your Owner Manual.