center console GMC ACADIA 2020 Get To Know Guide
[x] Cancel search | Manufacturer: GMC, Model Year: 2020, Model line: ACADIA, Model: GMC ACADIA 2020Pages: 20, PDF Size: 8.68 MB
Page 5 of 20
5
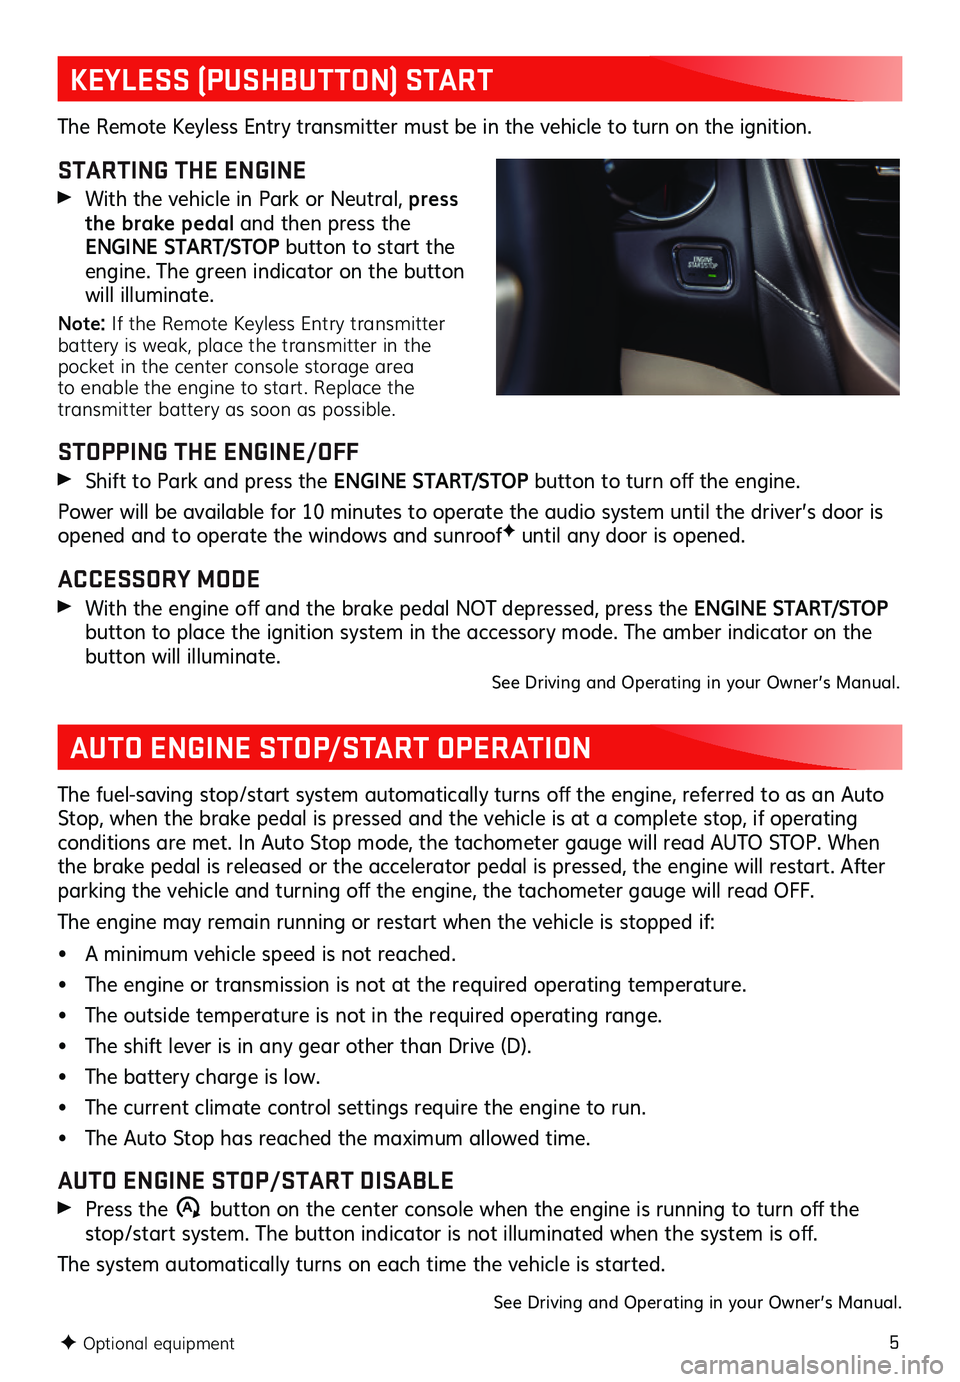
KEYLESS (PUSHBUTTON) START
AUTO ENGINE STOP/START OPERATION
The Remote Keyless Entry transmitter must be in the vehicle to turn on the ignition.
STARTING THE ENGINE
With the vehicle in Park or Neutral, press the brake pedal and then press the ENGINE START/STOP button to start the engine. The green indicator on the button will illuminate.
Note: If the Remote Keyless Entry transmitter battery is weak, place the transmitter in the pocket in the center console storage area to enable the engine to start. Replace the transmitter battery as soon as possible.
STOPPING THE ENGINE/OFF
Shift to Park and press the ENGINE START/STOP button to turn off the engine.
Power will be available for 10 minutes to operate the audio system until the driver’s door is opened and to operate the windows and sunroofF until any door is opened.
ACCESSORY MODE
With the engine off and the brake pedal NOT depressed, press the ENGINE START/STOP
button to place the ignition system in the accessory mode. The amber indicator on the button will illuminate. See Driving and Operating in your Owner’s Manual.
The fuel-saving stop/start system automatically turns off the engine, referred to as an Auto Stop, when the brake pedal is pressed and the vehicle is at a complete stop, if operating conditions are met. In Auto Stop mode, the tachometer gauge will read AUTO STOP. When the brake pedal is released or the accelerator pedal is pressed, the engine will restart. After parking the vehicle and turning off the engine, the tachometer gauge will read OFF.
The engine may remain running or restart when the vehicle is stopped if:
• A minimum vehicle speed is not reached.
• The engine or transmission is not at the required operating temperature.
• The outside temperature is not in the required operating range.
• The shift lever is in any gear other than Drive (D).
• The battery charge is low.
• The current climate control settings require the engine to run.
• The Auto Stop has reached the maximum allowed time.
AUTO ENGINE STOP/START DISABLE
Press the �$ button on the center console when the engine is running to turn off the stop/start system. The button indicator is not illuminated when the system is off.
The system automatically turns on each time the vehicle is started.
See Driving and Operating in your Owner’s Manual.
F Optional equipment
Page 6 of 20
6F Optional equipment
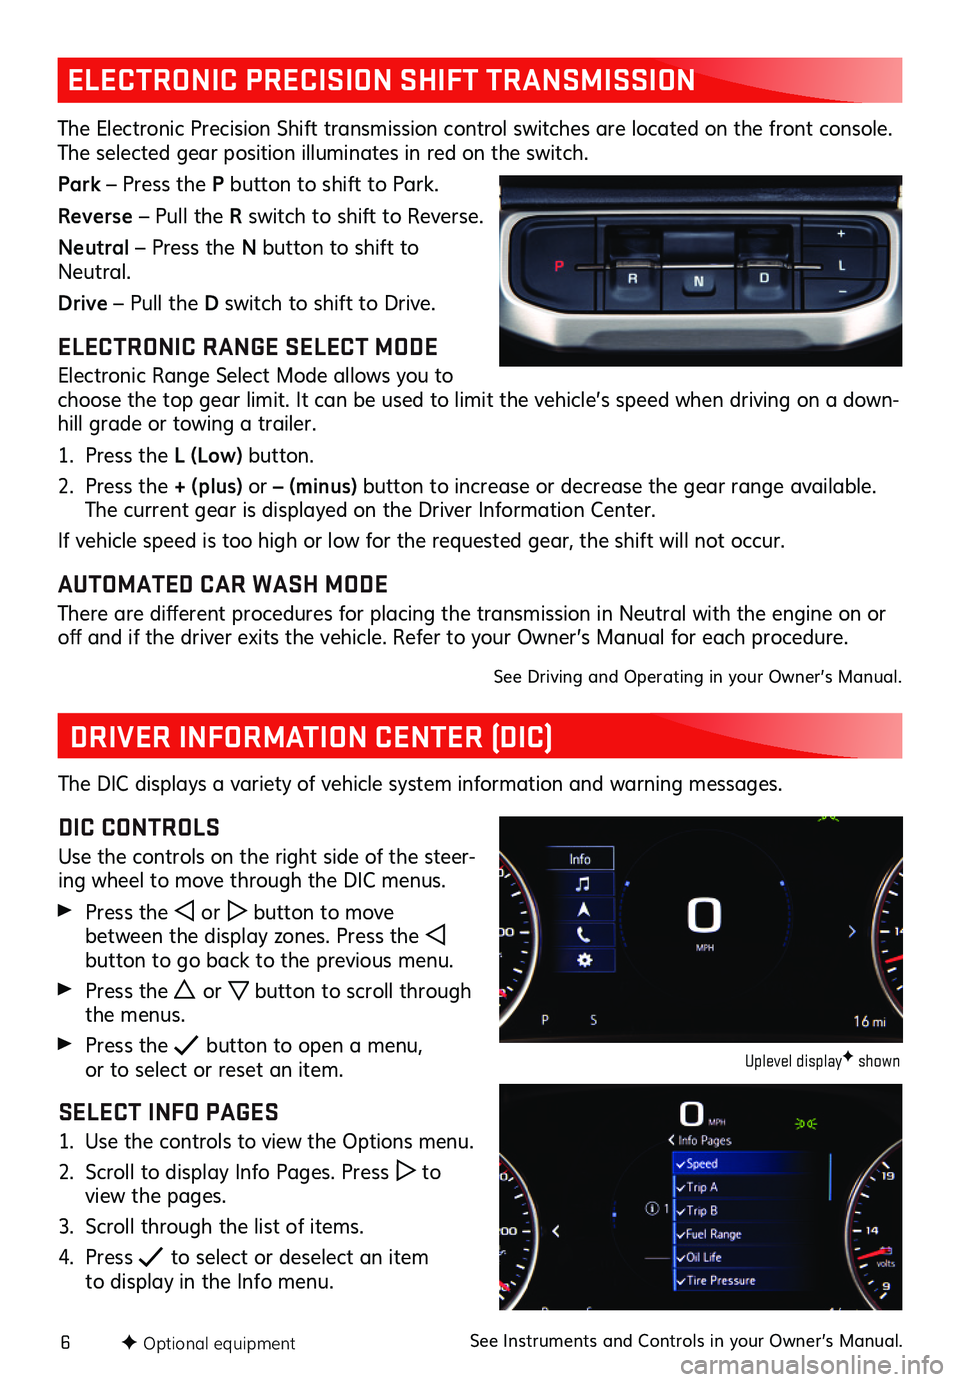
ELECTRONIC PRECISION SHIFT TRANSMISSION
The Electronic Precision Shift transmission control switches are located on the front console. The selected gear position illuminates in red on the switch.
Park – Press the P button to shift to Park.
Reverse – Pull the R switch to shift to Reverse.
Neutral – Press the N button to shift to Neutral.
Drive – Pull the D switch to shift to Drive.
ELECTRONIC RANGE SELECT MODE
Electronic Range Select Mode allows you to choose the top gear limit. It can be used to limit the vehicle’s speed when driving on a down-hill grade or towing a trailer.
1. Press the L (Low) button.
2. Press the + (plus) or – (minus) button to increase or decrease the gear range available. The current gear is displayed on the Driver Information Center.
If vehicle speed is too high or low for the requested gear, the shift will not occur.
AUTOMATED CAR WASH MODE
There are different procedures for placing the transmission in Neutral with the engine on or off and if the driver exits the vehicle. Refer to your Owner’s Manual for each procedure.
See Driving and Operating in your Owner’s Manual.
DRIVER INFORMATION CENTER (DIC)
The DIC displays a variety of vehicle system information and warning messages.
DIC CONTROLS
Use the controls on the right side of the steer-ing wheel to move through the DIC menus.
Press the or button to move between the display zones. Press the button to go back to the previous menu.
Press the or button to scroll through the menus.
Press the button to open a menu, or to select or reset an item.
SELECT INFO PAGES
1. Use the controls to view the Options menu.
2. Scroll to display Info Pages. Press to view the pages.
3. Scroll through the list of items.
4. Press to select or deselect an item to display in the Info menu.
Uplevel displayF shown
See Instruments and Controls in your Owner’s Manual.
Page 14 of 20
14
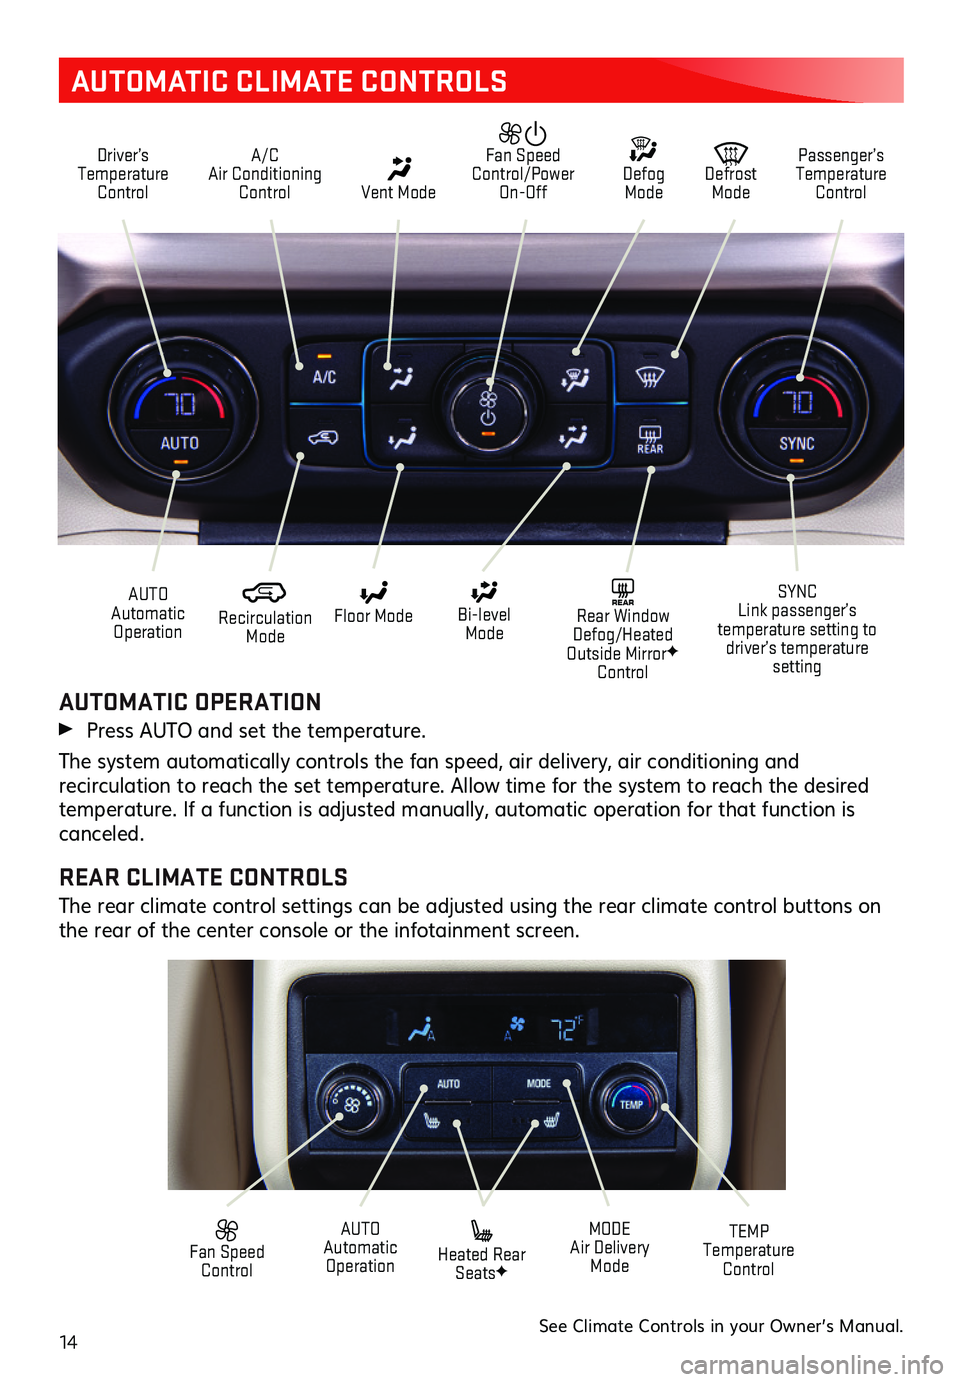
AUTOMATIC CLIMATE CONTROLS
Driver’s Temperature Control
A/C Air Conditioning Control Vent Mode
Defrost Mode
Defog Mode
Passenger’s Temperature Control
Fan Speed Control/Power On-Off
Recirculation Mode
AUTO Automatic Operation
Floor Mode
Heated Rear SeatsF
Bi-level Mode
SYNC Link passenger’s temperature setting to driver’s temperature setting
TEMP Temperature Control
REAR Rear Window Defog/Heated Outside MirrorF Control
MODE Air Delivery Mode
AUTO Automatic Operation
Fan Speed Control
AUTOMATIC OPERATION
Press AUTO and set the temperature.
The system automatically controls the fan speed, air delivery, air conditioning and
recirculation to reach the set temperature. Allow time for the system to reach the desired temperature. If a function is adjusted manually, automatic operation for that function is canceled.
REAR CLIMATE CONTROLS
The rear climate control settings can be adjusted using the rear climate control buttons on the rear of the center console or the infotainment screen.
See Climate Controls in your Owner’s Manual.
Page 16 of 20
16
DRIVER ASSISTANCE SYSTEMS
Safety or driver assistance features are no substitute for the driver’s responsibility to operate the vehicle in a safe manner. The driver should remain attentive to traffic, surroundings and road conditions at all times. Read your Owner’s Manual for important feature limitations and information.
SAFETY ALERT SEATF – The driver’s seat pulses — left side, right side or simultaneously — to alert the driver of the direction of potential hazards.
Audible alerts or seat pulsing alerts may be selected. To change the alert settings, go to Settings > Vehicle > Collision/Detection > Alert Type.
LANE CHANGE ALERT WITH SIDE BLIND ZONE ALERT – While driving, the system displays a warning symbol on the left or right side mirror when a vehicle is detected in that side blind zone area or rapidly approaching that area. The warning symbol flashes if a turn signal is activated when a vehicle has been detected on the same side.
To turn on or off, go to Settings > Vehicle > Collision/Detection > Lane Change Alert.
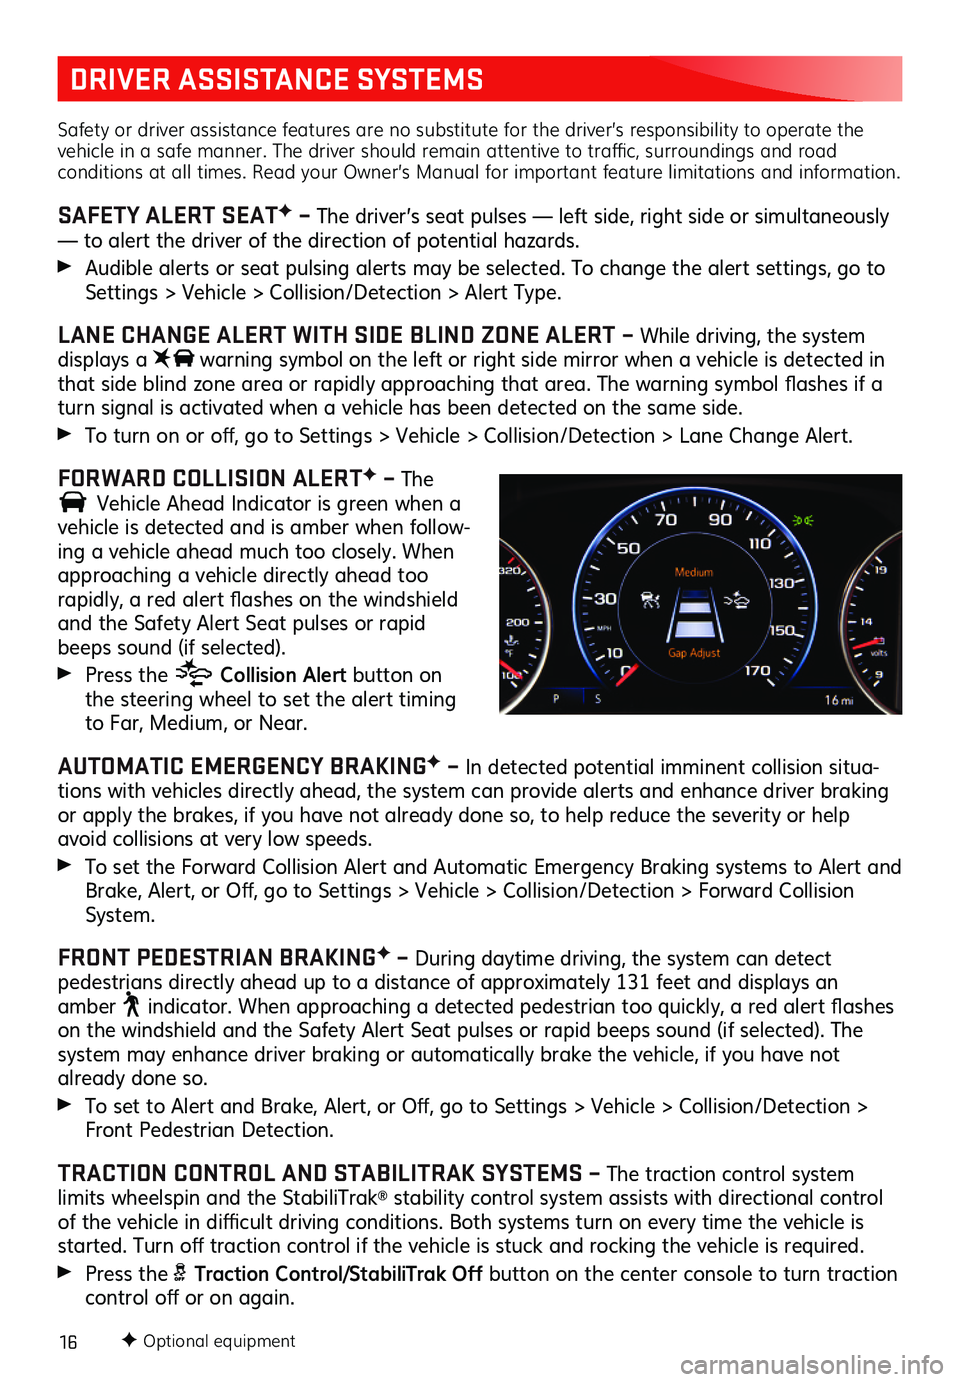
FORWARD COLLISION ALERTF – The
Vehicle Ahead Indicator is green when a
vehicle is detected and is amber when follow-ing a vehicle ahead much too closely. When approaching a vehicle directly ahead too
rapidly, a red alert flashes on the windshield and the Safety Alert Seat pulses or rapid beeps sound (if selected).
Press the Collision Alert button on the steering wheel to set the alert timing to Far, Medium, or Near.
AUTOMATIC EMERGENCY BRAKINGF – In detected potential imminent collision situa-tions with vehicles directly ahead, the system can provide alerts and enhance driver braking or apply the brakes, if you have not already done so, to help reduce the severity or help avoid collisions at very low speeds.
To set the Forward Collision Alert and Automatic Emergency Braking systems to Alert and Brake, Alert, or Off, go to Settings > Vehicle > Collision/Detection > Forward Collision System.
FRONT PEDESTRIAN BRAKINGF – During daytime driving, the system can detect
pedestrians directly ahead up to a distance of approximately 131 feet and displays an amber indicator. When approaching a detected pedestrian too quickly, a red alert flashes on the windshield and the Safety Alert Seat pulses or rapid beeps sound (if selected). The system may enhance driver braking or automatically brake the vehicle, if you have not already done so.
To set to Alert and Brake, Alert, or Off, go to Settings > Vehicle > Collision/Detection > Front Pedestrian Detection.
TRACTION CONTROL AND STABILITRAK SYSTEMS – The traction control system limits wheelspin and the StabiliTrak® stability control system assists with directional control of the vehicle in difficult driving conditions. Both systems turn on every time the vehicle is started. Turn off traction control if the vehicle is stuck and rocking the vehicle is required.
Press the Traction Control/StabiliTrak Off button on the center console to turn traction control off or on again.
F Optional equipment
Page 17 of 20
17
DRIVER ASSISTANCE SYSTEMS
LANE KEEP ASSIST WITH LANE DEPARTURE WARNINGF – The system may help you avoid collisions due to unintentional lane departures. The Lane Keep Assist Indicator is green if the system is available to assist. If the vehicle approaches a detected lane mark-ing without using a turn signal in that direction, the system may assist by gently turning the steering wheel and displaying an amber .
If active driver steering is not detected, the amber may flash and the Safety Alert Seat may pulse or beeps may sound (if selected) on the side of the departure direction as the lane marking is crossed. The Lane Keep Assist system does not continuously steer the vehicle; the driver needs to steer and be in complete control of the vehicle.
To turn on or off, press the Lane Keep Assist button on the center console.
FRONTF AND REAR PARK ASSIST – During low-speed parking maneuvers, the system provides “distance to closest object” information on the Driver Information Center and the Safety Alert Seat pulses or a beep sounds (if selected). When an object is very close, the Safety Alert Seat pulses or 5 beeps sound (if selected).
REAR CROSS TRAFFIC ALERT – When the vehicle is in Reverse, the system warns of cross-traffic approaching in either direction by displaying a red alert on the infotainment screen and the left or right side of the Safety Alert Seat pulses or beeps sound (if selected).
To turn the Park Assist and Rear Cross Traffic Alert systems on or off, press the Park Assist button on the center console.
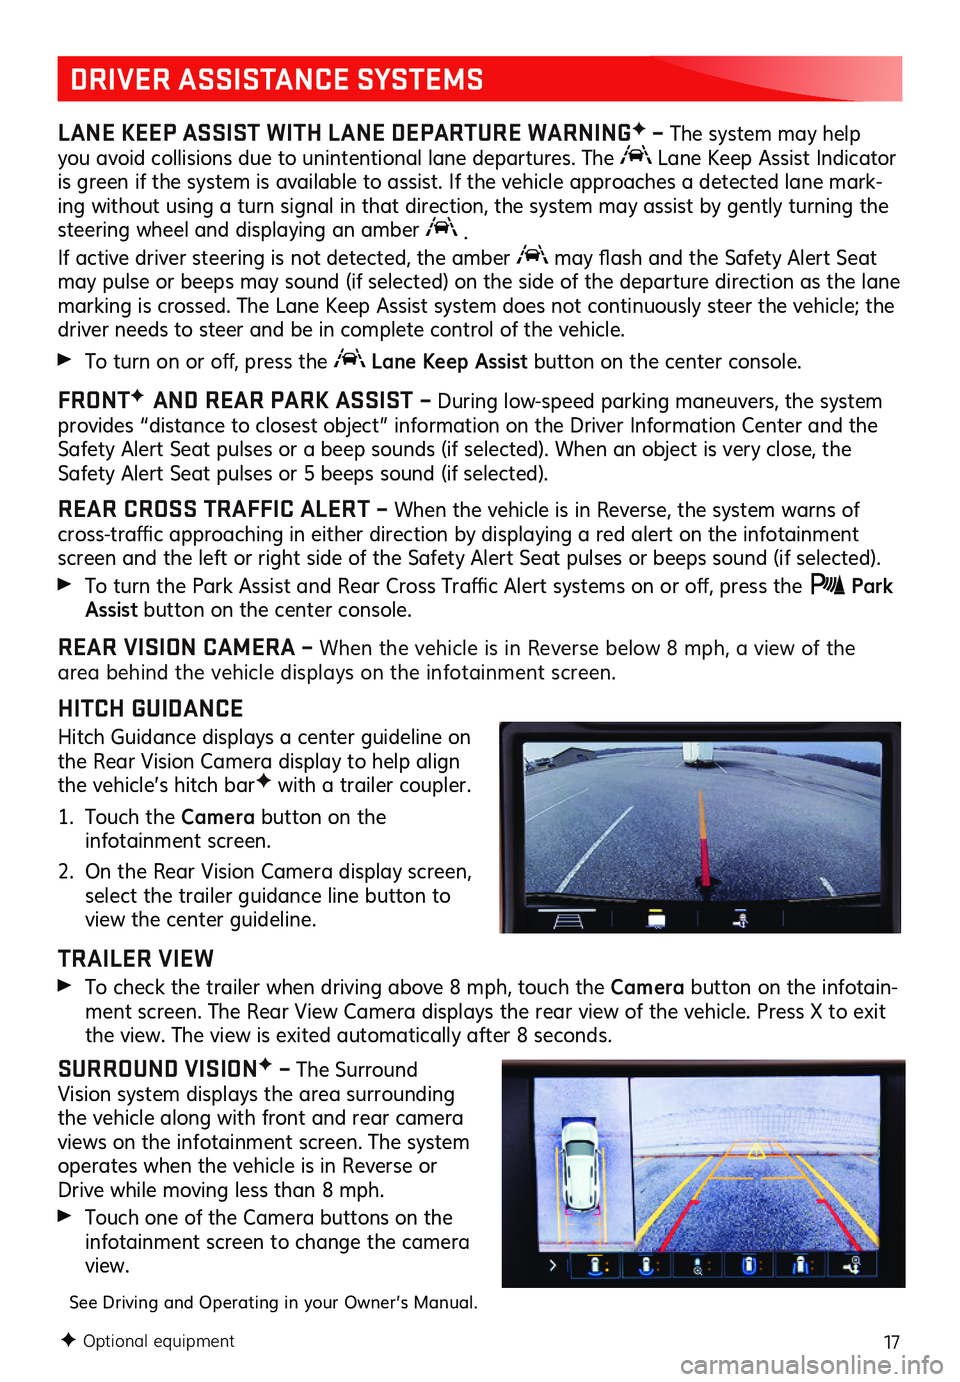
REAR VISION CAMERA – When the vehicle is in Reverse below 8 mph, a view of the area behind the vehicle displays on the infotainment screen.
HITCH GUIDANCE
Hitch Guidance displays a center guideline on the Rear Vision Camera display to help align the vehicle’s hitch barF with a trailer coupler.
1. Touch the Camera button on the infotainment screen.
2. On the Rear Vision Camera display screen, select the trailer guidance line button to view the center guideline.
TRAILER VIEW
To check the trailer when driving above 8 mph, touch the Camera button on the infotain-ment screen. The Rear View Camera displays the rear view of the vehicle. Press X to exit the view. The view is exited auto matically after 8 seconds.
SURROUND VISIONF – The Surround Vision system displays the area surrounding the vehicle along with front and rear camera views on the infotainment screen. The system
operates when the vehicle is in Reverse or Drive while moving less than 8 mph.
Touch one of the Camera buttons on the infotainment screen to change the camera view.
See Driving and Operating in your Owner’s Manual.
F Optional equipment
Page 19 of 20
19
TRACTION SELECT
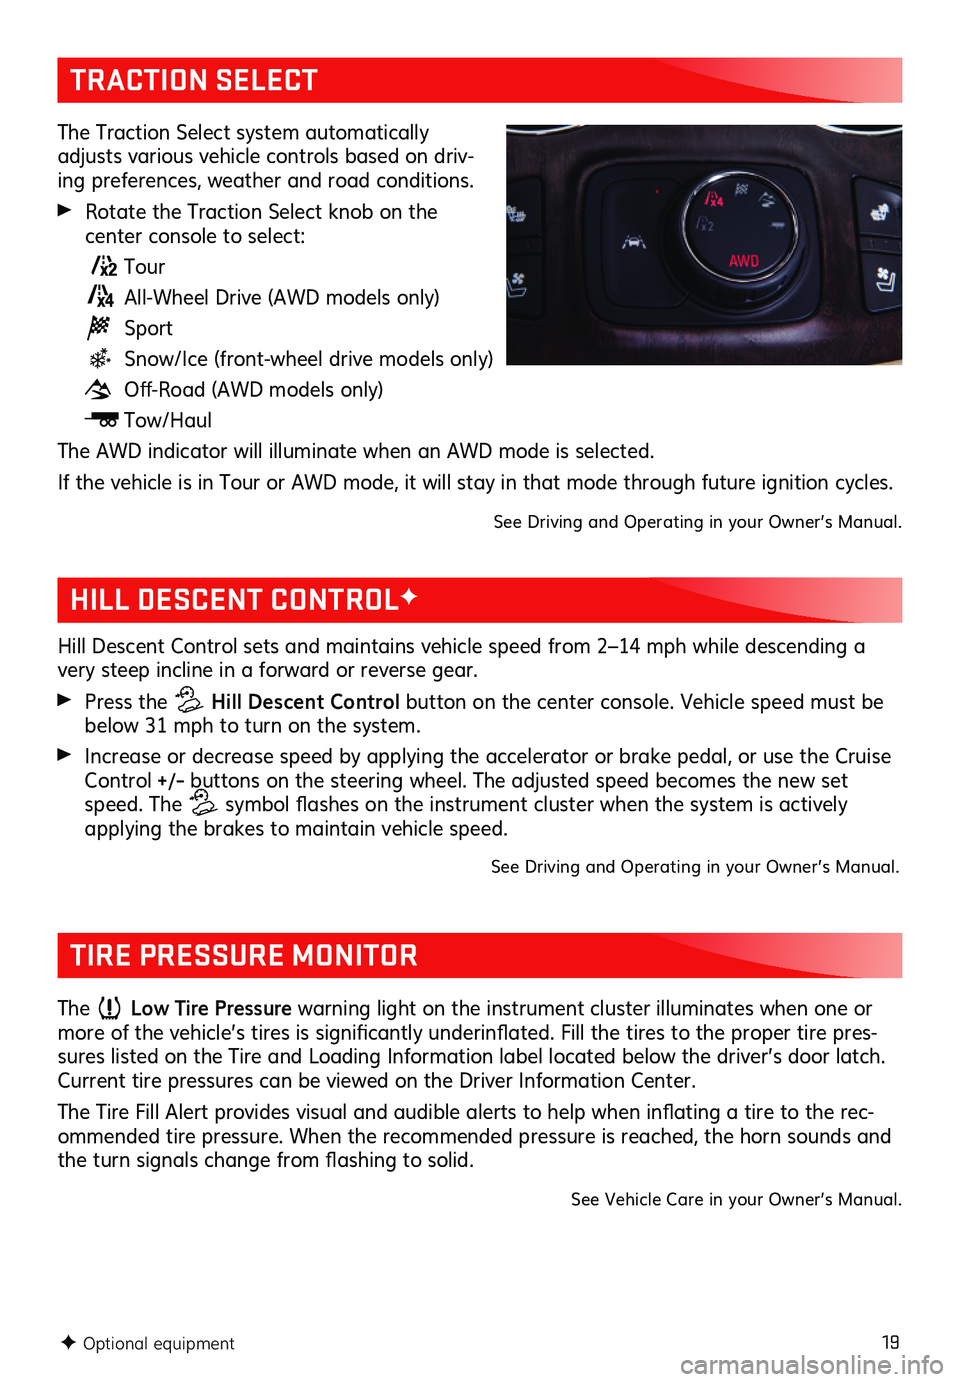
The Traction Select system automatically adjusts various vehicle controls based on driv-ing preferences, weather and road conditions.
Rotate the Traction Select knob on the
center console to select:
Tour
All-Wheel Drive (AWD models only)
Sport
Snow/Ice (front-wheel drive models only)
Off-Road (AWD models only)
Tow/Haul
The AWD indicator will illuminate when an AWD mode is selected.
If the vehicle is in Tour or AWD mode, it will stay in that mode through future ignition cycles.
See Driving and Operating in your Owner’s Manual.
F Optional equipment
HILL DESCENT CONTROLF
Hill Descent Control sets and maintains vehicle speed from 2–14 mph while descending a very steep incline in a forward or reverse gear.
Press the Hill Descent Control button on the center console. Vehicle speed must be below 31 mph to turn on the system.
Increase or decrease speed by applying the accelerator or brake pedal, or use the Cruise Control +/– buttons on the steering wheel. The adjusted speed becomes the new set speed. The symbol flashes on the instrument cluster when the system is actively applying the brakes to maintain vehicle speed.
See Driving and Operating in your Owner’s Manual.
TIRE PRESSURE MONITOR
The Low Tire Pressure warning light on the instrument cluster illuminates when one or more of the vehicle’s tires is significantly underinflated. Fill the tires to the proper tire pres-sures listed on the Tire and Loading Information label located below the driver’s door latch. Current tire pressures can be viewed on the Driver Information Center.
The Tire Fill Alert provides visual and audible alerts to help when inflating a tire to the rec-ommended tire pressure. When the recommended pressure is reached, the horn sounds and the turn signals change from flashing to solid.
See Vehicle Care in your Owner’s Manual.