audio GMC CANYON 2008 Owner's Manual
[x] Cancel search | Manufacturer: GMC, Model Year: 2008, Model line: CANYON, Model: GMC CANYON 2008Pages: 428, PDF Size: 5.82 MB
Page 1 of 428
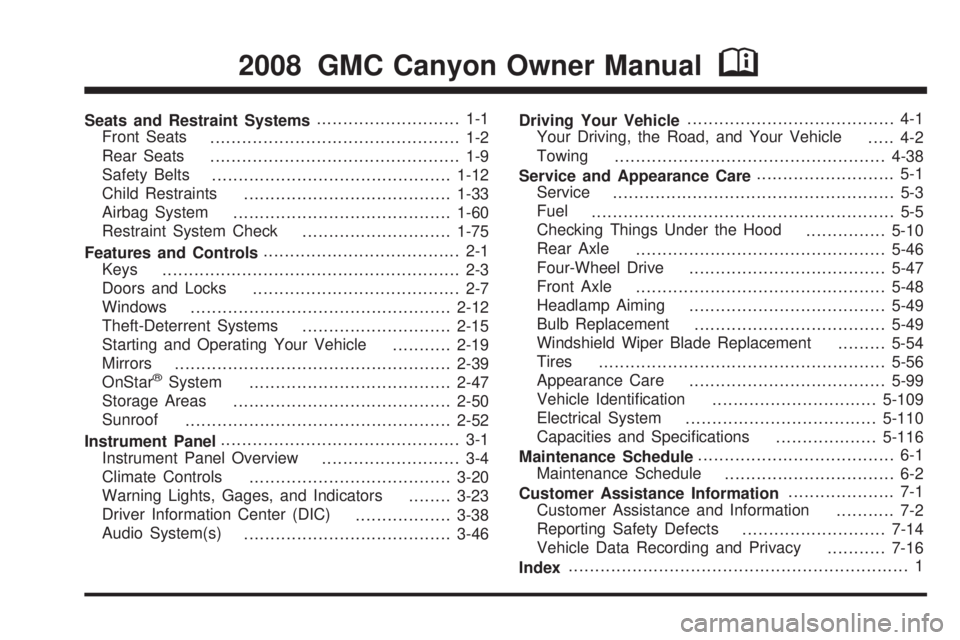
Seats and Restraint Systems........................... 1-1
Front Seats
............................................... 1-2
Rear Seats
............................................... 1-9
Safety Belts
.............................................1-12
Child Restraints
.......................................1-33
Airbag System
.........................................1-60
Restraint System Check
............................1-75
Features and Controls..................................... 2-1
Keys
........................................................ 2-3
Doors and Locks
....................................... 2-7
Windows
.................................................2-12
Theft-Deterrent Systems
............................2-15
Starting and Operating Your Vehicle
...........2-19
Mirrors
....................................................2-39
OnStar
®System
......................................2-47
Storage Areas
.........................................2-50
Sunroof
..................................................2-52
Instrument Panel............................................. 3-1
Instrument Panel Overview
.......................... 3-4
Climate Controls
......................................3-20
Warning Lights, Gages, and Indicators
........3-23
Driver Information Center (DIC)
..................3-38
Audio System(s)
.......................................3-46Driving Your Vehicle....................................... 4-1
Your Driving, the Road, and Your Vehicle
..... 4-2
Towing
...................................................4-38
Service and Appearance Care.......................... 5-1
Service
..................................................... 5-3
Fuel
......................................................... 5-5
Checking Things Under the Hood
...............5-10
Rear Axle
...............................................5-46
Four-Wheel Drive
.....................................5-47
Front Axle
...............................................5-48
Headlamp Aiming
.....................................5-49
Bulb Replacement
....................................5-49
Windshield Wiper Blade Replacement
.........5-54
Tires
......................................................5-56
Appearance Care
.....................................5-99
Vehicle Identi�cation
...............................5-109
Electrical System
....................................5-110
Capacities and Speci�cations
...................5-116
Maintenance Schedule..................................... 6-1
Maintenance Schedule
................................ 6-2
Customer Assistance Information.................... 7-1
Customer Assistance and Information
........... 7-2
Reporting Safety Defects
...........................7-14
Vehicle Data Recording and Privacy
...........7-16
Index................................................................ 1
2008 GMC Canyon Owner ManualM
Page 101 of 428
Retained Accessory Power (RAP)
These vehicle accessories can be used for up to
20 minutes after the engine is turned off:
Audio System
Wipers
Power Windows
These features work when the key is in ON/RUN or
ACC/ACCESSORY. Once the key is turned from
ON/RUN to LOCK/OFF, power to these features
continue to work for up to 20 minutes or until a door
is opened.
Starting the Engine
Place the transmission in the proper gear.
Automatic Transmission
Move the shift lever to PARK (P) or NEUTRAL (N).
The engine will not start in any other position -- this
is a safety feature. To restart when you are already
moving, use NEUTRAL (N) only.
Notice:Do not try to shift to PARK (P) if your
vehicle is moving. If you do, you could damage the
transmission. Shift to PARK (P) only when your
vehicle is stopped.
Manual Transmission
The shift lever should be in neutral position and the
parking brake engaged. Hold the clutch pedal down to
the �oor and start the engine. Your vehicle will not start
if the clutch pedal is not all the way down. That is a
safety feature.
Starting Procedure
1. With your foot off the accelerator pedal, turn the
ignition key to START. When the engine starts,
let go of the key. The idle speed will go down as
your engine gets warm. Do not race the engine
immediately after starting it. Operate the engine and
transmission gently to allow the oil to warm up and
lubricate all moving parts.
Your vehicle has a Computer-Controlled Cranking
System. This feature assists in starting the engine
and protects components. If the ignition key is turned
to the START position, and then released when the
engine begins cranking, the engine will continue
cranking for a few seconds or until the vehicle starts.
2-21
Page 134 of 428
Up-Shift Light...............................................3-30
Brake System Warning Light..........................3-31
Antilock Brake System Warning Light...............3-32
Traction Control System (TCS)
Warning Light...........................................3-32
Engine Coolant Temperature Gage..................3-33
Tire Pressure Light.......................................3-33
Malfunction Indicator Lamp.............................3-34
Oil Pressure Light.........................................3-36
Security Light...............................................3-37
Cruise Control Light......................................3-37
Highbeam On Light.......................................3-37
Fuel Gage...................................................3-38Driver Information Center (DIC).......................3-38
DIC Operation and Displays...........................3-38
DIC Warnings and Messages.........................3-42
Audio System(s).............................................3-46
Setting the Time...........................................3-47
Radio(s)......................................................3-48
Using an MP3..............................................3-64
XM Radio Messages.....................................3-68
Theft-Deterrent Feature..................................3-69
Radio Reception...........................................3-69
Fixed Mast Antenna......................................3-70
XM™ Satellite Radio Antenna System..............3-70
Chime Level Adjustment................................3-70
Section 3 Instrument Panel
3-2
Page 137 of 428
The main components of your vehicle’s instrument panel are the following:
A. Air Outlets. SeeOutlet Adjustment on page 3-22.
B. Turn Signal/Multifunction Lever. SeeTurn
Signal/Multifunction Lever on page 3-7.
C. Instrument Panel Cluster. SeeInstrument Panel
Cluster on page 3-24.
D. Hazard Warning Flasher Button. SeeHazard
Warning Flashers on page 3-6.
E. Passenger Side Airbag. SeeAirbag System on
page 1-60.
F. Exterior Lamp Controls. SeeExterior Lamps on
page 3-13. Fog Lamps (If Equipped). SeeFog
Lamps on page 3-16. Exterior Cargo Lamps.
SeeExterior Cargo Lamps on page 3-16.
G. Parking Brake Release. SeeParking Brake on
page 2-32.H. Horn. SeeHorn on page 3-6.
I. Traction Control Button or Four-Wheel Drive Buttons.
SeeTraction Control System (TCS) on page 4-5
andFour-Wheel Drive on page 2-28.
J. Audio System. SeeAudio System(s) on page 3-46.
K. Cigarette Lighter (If Equipped). SeeAshtray(s)
and Cigarette Lighter on page 3-19.
L. Climate Control System. SeeClimate Control
System on page 3-20.
M. Accessory Power Outlet. SeeAccessory Power
Outlet(s) on page 3-18.
N. Passenger Air Bag Status Indicator. SeePassenger
Airbag Status Indicator on page 3-28.
O. Glove Box. SeeGlove Box on page 2-50.
3-5
Page 178 of 428
Audio System(s)
Determine which radio your vehicle has and then read
the pages following to familiarize yourself with its
features.
{CAUTION:
This system provides you with far greater
access to audio stations and song listings.
Giving extended attention to entertainment
tasks while driving can cause a crash and you
or others can be injured or killed. Always keep
your eyes on the road and your mind on the
drive — avoid engaging in extended searching
while driving.
Keeping your mind on the drive is important for
safe driving. SeeDefensive Driving on page 4-2.
Here are some ways in which you can help avoid
distraction while driving.While your vehicle is parked:
Familiarize yourself with all of its controls.
Familiarize yourself with its operation.
Set up your audio system by presetting your
favorite radio stations, setting the tone, and
adjusting the speakers. Then, when driving
conditions permit, you can tune to your favorite
radio stations using the presets and steering
wheel controls if the vehicle has them.
Notice:Before adding any sound equipment to
your vehicle, such as an audio system, CD player,
CB radio, mobile telephone, or two-way radio, make
sure that it can be added by checking with your
dealer/retailer. Also, check federal rules covering
mobile radio and telephone units. If sound equipment
can be added, it is very important to do it properly.
Added sound equipment may interfere with the
operation of your vehicle’s engine, radio, or other
systems, and even damage them. Your vehicle’s
systems may interfere with the operation of sound
equipment that has been added.
3-46
Page 181 of 428
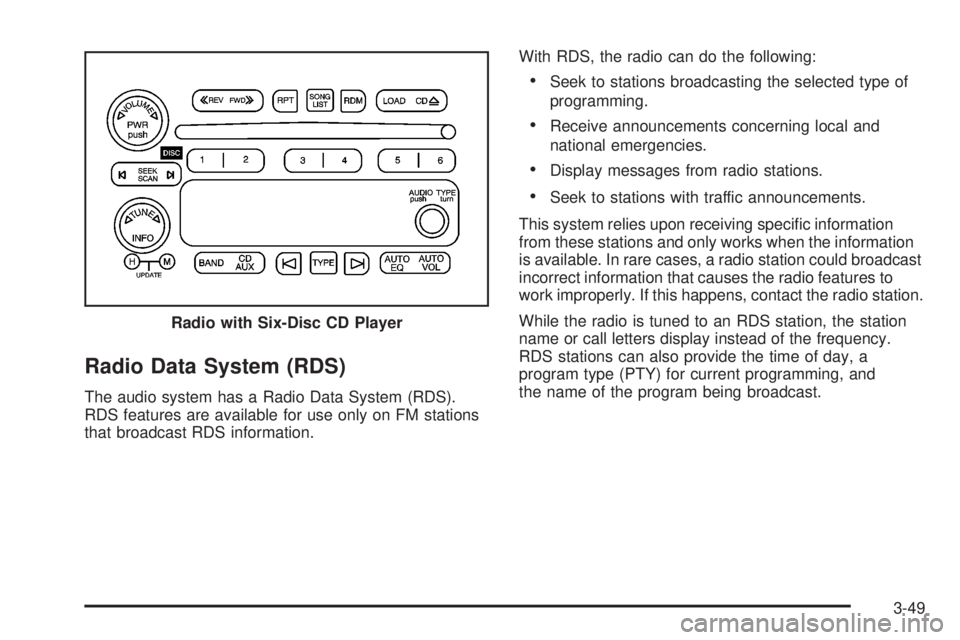
Radio Data System (RDS)
The audio system has a Radio Data System (RDS).
RDS features are available for use only on FM stations
that broadcast RDS information.With RDS, the radio can do the following:
Seek to stations broadcasting the selected type of
programming.
Receive announcements concerning local and
national emergencies.
Display messages from radio stations.
Seek to stations with traffic announcements.
This system relies upon receiving speci�c information
from these stations and only works when the information
is available. In rare cases, a radio station could broadcast
incorrect information that causes the radio features to
work improperly. If this happens, contact the radio station.
While the radio is tuned to an RDS station, the station
name or call letters display instead of the frequency.
RDS stations can also provide the time of day, a
program type (PTY) for current programming, and
the name of the program being broadcast. Radio with Six-Disc CD Player
3-49
Page 182 of 428
Playing the Radio
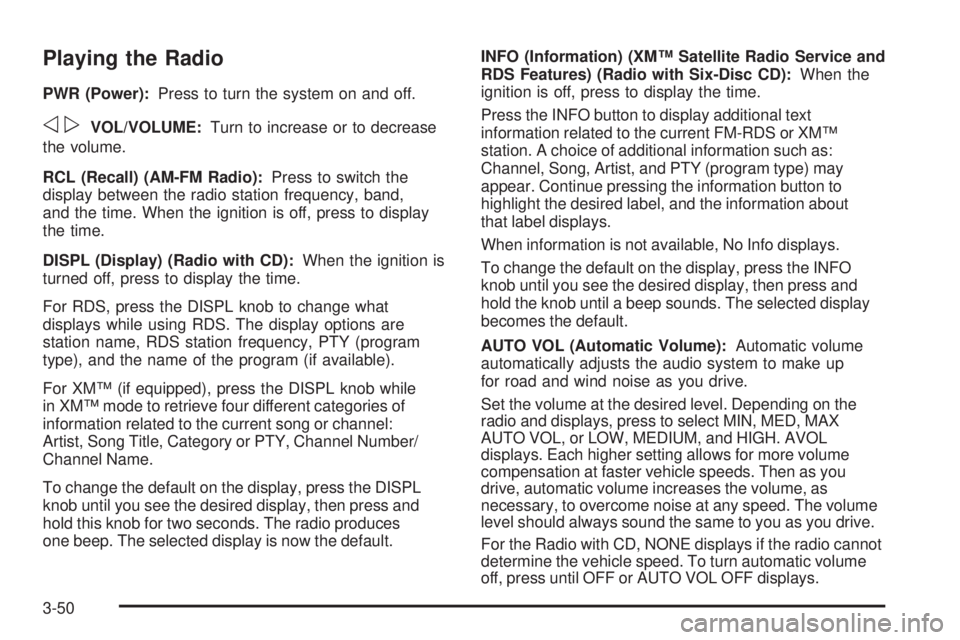
PWR (Power):Press to turn the system on and off.
opVOL/VOLUME:Turn to increase or to decrease
the volume.
RCL (Recall) (AM-FM Radio):Press to switch the
display between the radio station frequency, band,
and the time. When the ignition is off, press to display
the time.
DISPL (Display) (Radio with CD):When the ignition is
turned off, press to display the time.
For RDS, press the DISPL knob to change what
displays while using RDS. The display options are
station name, RDS station frequency, PTY (program
type), and the name of the program (if available).
For XM™ (if equipped), press the DISPL knob while
in XM™ mode to retrieve four different categories of
information related to the current song or channel:
Artist, Song Title, Category or PTY, Channel Number/
Channel Name.
To change the default on the display, press the DISPL
knob until you see the desired display, then press and
hold this knob for two seconds. The radio produces
one beep. The selected display is now the default.INFO (Information) (XM™ Satellite Radio Service and
RDS Features) (Radio with Six-Disc CD):When the
ignition is off, press to display the time.
Press the INFO button to display additional text
information related to the current FM-RDS or XM™
station. A choice of additional information such as:
Channel, Song, Artist, and PTY (program type) may
appear. Continue pressing the information button to
highlight the desired label, and the information about
that label displays.
When information is not available, No Info displays.
To change the default on the display, press the INFO
knob until you see the desired display, then press and
hold the knob until a beep sounds. The selected display
becomes the default.
AUTO VOL (Automatic Volume):Automatic volume
automatically adjusts the audio system to make up
for road and wind noise as you drive.
Set the volume at the desired level. Depending on the
radio and displays, press to select MIN, MED, MAX
AUTO VOL, or LOW, MEDIUM, and HIGH. AVOL
displays. Each higher setting allows for more volume
compensation at faster vehicle speeds. Then as you
drive, automatic volume increases the volume, as
necessary, to overcome noise at any speed. The volume
level should always sound the same to you as you drive.
For the Radio with CD, NONE displays if the radio cannot
determine the vehicle speed. To turn automatic volume
off, press until OFF or AUTO VOL OFF displays.
3-50
Page 184 of 428
Setting Preset Stations
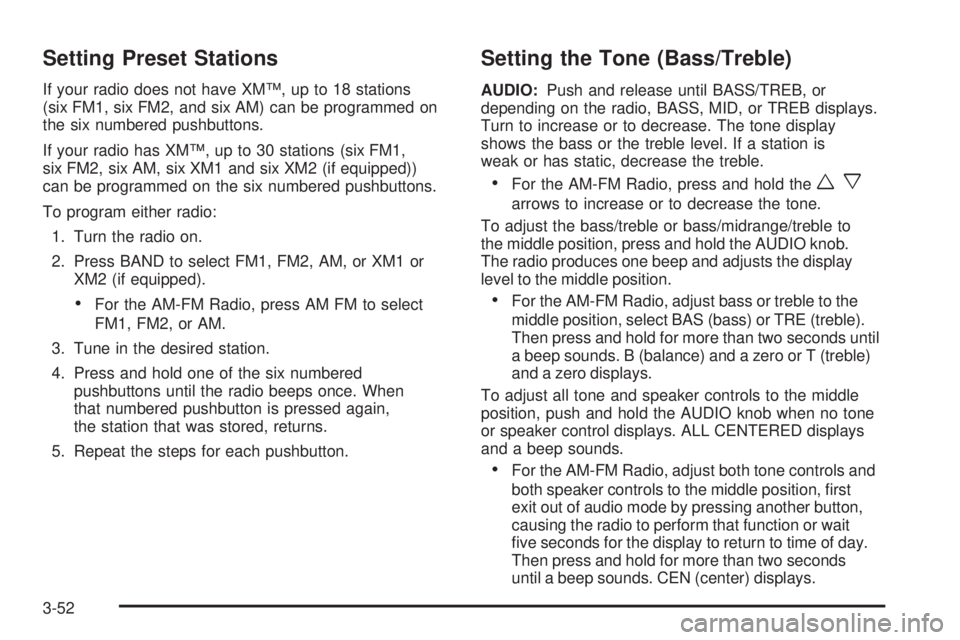
If your radio does not have XM™, up to 18 stations
(six FM1, six FM2, and six AM) can be programmed on
the six numbered pushbuttons.
If your radio has XM™, up to 30 stations (six FM1,
six FM2, six AM, six XM1 and six XM2 (if equipped))
can be programmed on the six numbered pushbuttons.
To program either radio:
1. Turn the radio on.
2. Press BAND to select FM1, FM2, AM, or XM1 or
XM2 (if equipped).
For the AM-FM Radio, press AM FM to select
FM1, FM2, or AM.
3. Tune in the desired station.
4. Press and hold one of the six numbered
pushbuttons until the radio beeps once. When
that numbered pushbutton is pressed again,
the station that was stored, returns.
5. Repeat the steps for each pushbutton.
Setting the Tone (Bass/Treble)
AUDIO:Push and release until BASS/TREB, or
depending on the radio, BASS, MID, or TREB displays.
Turn to increase or to decrease. The tone display
shows the bass or the treble level. If a station is
weak or has static, decrease the treble.
For the AM-FM Radio, press and hold thewx
arrows to increase or to decrease the tone.
To adjust the bass/treble or bass/midrange/treble to
the middle position, press and hold the AUDIO knob.
The radio produces one beep and adjusts the display
level to the middle position.
For the AM-FM Radio, adjust bass or treble to the
middle position, select BAS (bass) or TRE (treble).
Then press and hold for more than two seconds until
a beep sounds. B (balance) and a zero or T (treble)
and a zero displays.
To adjust all tone and speaker controls to the middle
position, push and hold the AUDIO knob when no tone
or speaker control displays. ALL CENTERED displays
and a beep sounds.
For the AM-FM Radio, adjust both tone controls and
both speaker controls to the middle position, �rst
exit out of audio mode by pressing another button,
causing the radio to perform that function or wait
�ve seconds for the display to return to time of day.
Then press and hold for more than two seconds
until a beep sounds. CEN (center) displays.
3-52
Page 185 of 428
AUTO EQ (Automatic Equalization):Press to
select customized equalization settings designed for
country/western, jazz, talk, pop, rock, and classical.
To return to the manual mode, press the AUTO EQ
button until CUSTOM displays. Then manually adjust
the bass/treble, or bass/midrange/treble by using the
AUDIO knob.
Adjusting the Speakers (Balance/Fade)
AUDIO:To adjust the balance between the right and
the left speakers, push and release until BAL (balance)
displays. Turn to move the sound toward the right or the
left speakers.
For the AM-FM Radio, press and hold
the
wxarrows to move the sound toward
the right or the left speakers.
To adjust the fade between the front and the rear
speakers, push and release the AUDIO knob until FADE
or depending on the radio, FAD displays. Turn the knob
to move the sound toward the front or the rear speakers.
For the AM-FM Radio, press and hold
the
wxarrows to move the sound toward
the right or the left speakers.To adjust the balance or the fade to the middle position,
push the AUDIO knob to select BAL or FADE/FAD,
then push it again and hold it until one beep sounds.
For the AM-FM Radio, adjust balance or fade to the
middle position by selecting BAL or FAD. Press and
hold AUDIO for more than two seconds until a
beep sounds. B (balance) and a zero or F (fade)
and a zero displays.
To adjust all tone and speaker controls to the middle
position, push and hold the AUDIO knob when no tone
or speaker control is displayed. ALL CENTERED
displays and a beep sounds.
For the AM-FM Radio, adjust both tone controls
and both speaker controls to the middle position
by exiting out of audio mode. To do this, press
any button for the radio to perform that function
or wait �ve seconds for the display to return to
time of day. Then press and hold AUDIO for
more than two seconds until a beep sounds.
CEN (center) displays.
Fade might not be available if the vehicle is a
regular cab model.
3-53
Page 188 of 428
Once the complete message has displayed, the
information symbol or INFO disappears from the display
until another new message is received. The last message
can be displayed by pressing the INFO button. The last
message stays on the display until a new message is
received or the radio is tuned to a different station.
When a message is not available from a station,
NO INFO displays.
TRAF (Traffic):For the Radio with CD, if TRAF displays,
the tuned station broadcasts traffic announcements.
When a traffic announcement is broadcast on this
station you will hear it.
If the station does not broadcast traffic announcements,
press the TRAF button and the radio seeks to a station
that does. When a station that broadcasts traffic
announcements is found, the radio stops seeking and
TRAF displays. If no station is found that broadcasts
traffic announcements, NO TRAF displays.
If TRAF displays, press the TRAF button to turn off the
traffic announcements.
The radio plays the traffic announcement if the volume is
low. The radio interrupts the play of a CD if the last tuned
station broadcasts traffic announcements.
This function does not apply to XM™ Satellite Radio
Service.Radio Messages
CAL ERR or CAL (Calibration Error):The audio
system has been calibrated for your vehicle from the
factory. If CAL or CAL ERR displays it means that
the radio has not been con�gured properly for your
vehicle and it must be returned to your dealer/retailer
for service.
LOC or LOCKED:This message displays when the
THEFTLOCK
®system has locked up. Take your vehicle
to your dealer/retailer for service.
If any error occurs repeatedly or if an error cannot be
corrected, contact your dealer/retailer.
XM™ Satellite Radio Service
XM™ is a satellite radio service that is based in the
48 contiguous United States and 10 Canadian provinces.
XM™ Satellite Radio has a wide variety of programming
and commercial-free music, coast-to-coast, and in
digital-quality sound. During your trial or when you
subscribe, you will get unlimited access to XM™ Radio
Online for when you are not in your vehicle. A service
fee is required to receive the XM™ service. For more
information, contact XM™ at www.xmradio.com or call
1-800-929-2100 in the U.S. and www.xmradio.ca or call
1-877-438-9677 in Canada.
3-56