check engine light GMC CANYON 2021 User Guide
[x] Cancel search | Manufacturer: GMC, Model Year: 2021, Model line: CANYON, Model: GMC CANYON 2021Pages: 359, PDF Size: 7.37 MB
Page 95 of 359
GMC Canyon/Canyon Denali Owner Manual (GMNA-Localizing-U.S./Canada-
14430430) - 2021 - CRC - 9/9/20
94 Instruments and Controls
The light goes out when the cruise control is
turned off. SeeCruise Control0206.
Door Ajar Light (Uplevel Cluster)
This light comes on when a door is open or
not securely latched. Before driving, check
that all doors are properly closed.
Information Displays
Driver Information Center (DIC)
(Base Level)
The DIC displays information about your
vehicle. It also displays warning messages if
a system problem is detected. See Vehicle
Messages 098. All messages appear in the
DIC display in the center of the instrument
cluster.
DIC Operation and Displays
The DIC has different displays which can be
accessed by using the DIC buttons on the
turn signal lever.
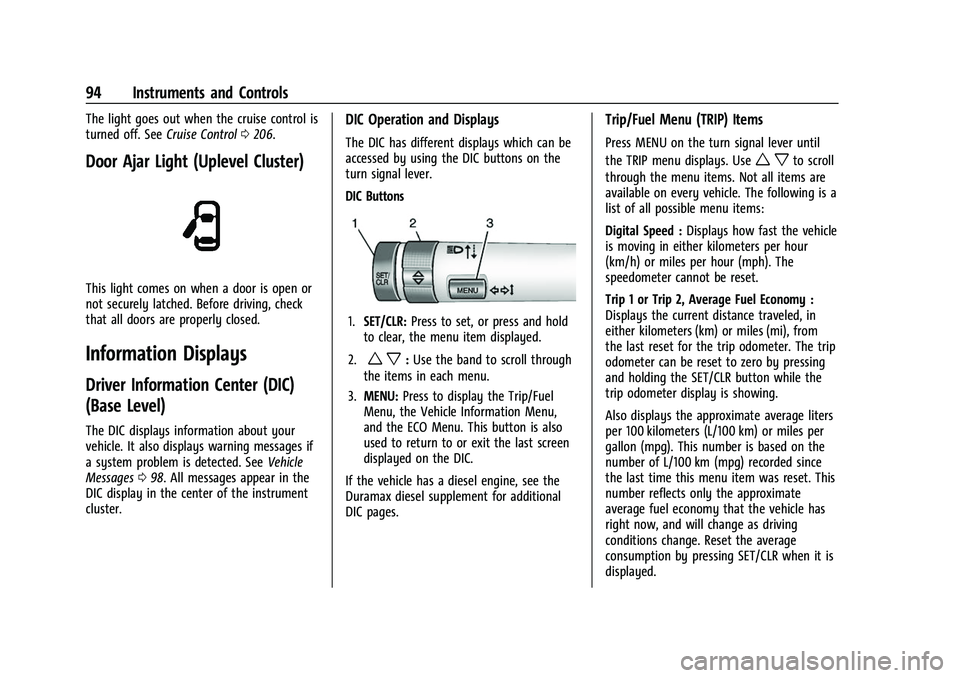
DIC Buttons
1. SET/CLR: Press to set, or press and hold
to clear, the menu item displayed.
2.
w x: Use the band to scroll through
the items in each menu.
3. MENU: Press to display the Trip/Fuel
Menu, the Vehicle Information Menu,
and the ECO Menu. This button is also
used to return to or exit the last screen
displayed on the DIC.
If the vehicle has a diesel engine, see the
Duramax diesel supplement for additional
DIC pages.
Trip/Fuel Menu (TRIP) Items
Press MENU on the turn signal lever until
the TRIP menu displays. Use
w xto scroll
through the menu items. Not all items are
available on every vehicle. The following is a
list of all possible menu items:
Digital Speed : Displays how fast the vehicle
is moving in either kilometers per hour
(km/h) or miles per hour (mph). The
speedometer cannot be reset.
Trip 1 or Trip 2, Average Fuel Economy :
Displays the current distance traveled, in
either kilometers (km) or miles (mi), from
the last reset for the trip odometer. The trip
odometer can be reset to zero by pressing
and holding the SET/CLR button while the
trip odometer display is showing.
Also displays the approximate average liters
per 100 kilometers (L/100 km) or miles per
gallon (mpg). This number is based on the
number of L/100 km (mpg) recorded since
the last time this menu item was reset. This
number reflects only the approximate
average fuel economy that the vehicle has
right now, and will change as driving
conditions change. Reset the average
consumption by pressing SET/CLR when it is
displayed.
Page 98 of 359
GMC Canyon/Canyon Denali Owner Manual (GMNA-Localizing-U.S./Canada-
14430430) - 2021 - CRC - 9/9/20
Instruments and Controls 97
1. Pressoorpto scroll to the Options
application.
2. Scroll to Info Page Options and press
V.
3. Press
worxto move through the list
of possible information displays.
4. Press
Vwhile an item is highlighted to
select or deselect that item. When an
item is selected, a checkmark will appear
next to it.
DIC Info Pages
The following is the list of all possible DIC
info page displays. Some may not be
available for your particular vehicle. Some
items may not be turned on by default but
can be turned on through the Settings app.
See “DIC Info Page Options” earlier in this
section.
Speed : Shows the vehicle speed in either
kilometers per hour (km/h) or miles per
hour (mph). If equipped, press
Vto open
the menu and select to display speed limit
signs. The sign will show “− −”when there
is no detected speed limit or the system is
unavailable. Trip 1 or Trip 2 :
Shows the current distance
traveled, in either kilometers (km) or
miles (mi), since the trip odometer was last
reset.
This also shows the approximate average
liters per 100 kilometers (L/100 km) or miles
per gallon (mpg). This number is calculated
based on the number of L/100 km (mpg)
recorded since the last time this menu item
was reset. This number reflects only the
approximate average fuel economy that the
vehicle has right now, and will change as
driving conditions change.
Press and hold
Vwhile this display is active
to reset the trip odometer and the average
fuel economy. Trip 1 and Trip 2 can also be
reset by pressing
Vand choosing reset.
Fuel Range : Shows the approximate
distance the vehicle can be driven without
refueling. LOW will be displayed when the
vehicle is low on fuel. The fuel range
estimate is based on an average of the
vehicle's fuel economy over recent driving
history and the amount of fuel remaining in
the fuel tank. Oil Life :
Shows an estimate of the oil's
remaining useful life. If REMAINING OIL LIFE
99% is displayed, that means 99% of the
current oil life remains.
When the remaining oil life is low, the
CHANGE ENGINE OIL SOON message will
appear on the display. The oil should be
changed as soon as possible. See Engine Oil
0 240. In addition to the engine oil life
system monitoring the oil life, additional
maintenance is recommended. See
Maintenance Schedule 0310.
The Oil Life display must be reset after each
oil change. It will not reset itself. Do not to
reset the Oil Life display at any time other
than when the oil has just been changed.
It cannot be reset accurately until the next
oil change. To reset the engine oil life
system, press and hold
Vfor several
seconds while the Oil Life display is active.
See Engine Oil Life System 0242.
Tire Pressure : Shows the approximate
pressures of all four tires. Tire pressure is
displayed in either kilopascal (kPa) or in
pounds per square inch (psi). If the pressure
is low, the value for that tire is shown in
amber. See Tire Pressure Monitor System
0 273 and
Tire Pressure Monitor Operation 0274.
Page 178 of 359
GMC Canyon/Canyon Denali Owner Manual (GMNA-Localizing-U.S./Canada-
14430430) - 2021 - CRC - 9/9/20
Driving and Operating 177
This affects steering, accelerating, and
braking. Drive at a reduced speed and avoid
sharp turns or abrupt maneuvers.
Traction is reduced on hard packed snow
and ice and it is easy to lose control. Reduce
vehicle speed when driving on hard packed
snow and ice.
{Warning
Driving on frozen lakes, ponds, or rivers
can be dangerous. Ice conditions vary
greatly and the vehicle could fall through
the ice; you and your passengers could
drown. Drive your vehicle on safe
surfaces only.
Driving in Water
{Warning
Driving through rushing water can be
dangerous. Deep water can sweep your
vehicle downstream and you and your
passengers could drown. If it is only
shallow water, it can still wash away the
ground from under your tires. Traction
could be lost, and the vehicle could roll
over. Do not drive through rushing water.
Caution
Do not drive through standing water if it
is deep enough to cover the wheel hubs,
axles, or exhaust pipe. Deep water can
damage the axle and other vehicle parts.
If the standing water is not too deep, drive
through it slowly. At faster speeds, water
can get into the engine and cause it to stall.
Stalling can occur if the exhaust pipe is
under water. Do not turn off the ignition
when driving through water. If the exhaust
pipe is under water, the engine will not
start. When going through water, the brakes
get wet and it may take longer to stop. See
“Driving on Wet Roads” later in this section.
After Off-Road Driving
Remove any brush or debris that has
collected on the underbody or chassis,
or under the hood. These accumulations can
be a fire hazard.
After operation in mud or sand, have the
brake linings cleaned and checked. These
substances can cause glazing and uneven
braking. Check the body structure, driveline,
steering, suspension, wheels, tires, and exhaust system for damage and check the
fuel lines and cooling system for any
leakage.
More frequent maintenance service is
required. See the
Maintenance Schedule
0 310.
Driving on Wet Roads
Rain and wet roads can reduce vehicle
traction and affect your ability to stop and
accelerate. Always drive slower in these
types of driving conditions and avoid driving
through large puddles and deep-standing or
flowing water.
{Warning
Wet brakes can cause crashes. They
might not work as well in a quick stop
and could cause pulling to one side. You
could lose control of the vehicle.
After driving through a large puddle of
water or a car/vehicle wash, lightly apply
the brake pedal until the brakes work
normally.
(Continued)
Page 203 of 359
GMC Canyon/Canyon Denali Owner Manual (GMNA-Localizing-U.S./Canada-
14430430) - 2021 - CRC - 9/9/20
202 Driving and Operating
With the vehicle moving less than 5 km/h
(3 mph), and the transmission in N (Neutral),
attempt the shift again.
Shifting Into N (Neutral)
To shift:1. Park the vehicle on a level surface.
2. Set the parking brake and press and hold the brake pedal. See Parking Brake
0 203.
3. Start the vehicle or turn the ignition on.
4. Shift the transmission to N (Neutral).
5. Shift the transfer case to 2
m.
6. Turn the transfer case knob clockwise to N (Neutral) until it stops and hold it
there until the N (Neutral) light starts
flashing. This will take at least
10 seconds. Then slowly release the knob
to the 4
nposition. The N (Neutral) light
will come on when the transfer case
shift to N (Neutral) is complete.
7. With the engine running, verify that the transfer case is in N (Neutral) by shifting
the transmission to R (Reverse), then
shift the transmission to D (Drive). There
should be no movement of the vehicle
while shifting the transmission. 8. Turn the engine off, and the ignition to
ACC/ACCESSORY.
9. Place the transmission shift lever in P (Park). See Recreational Vehicle Towing
0 297.
10. Turn the ignition to off.
Shifting Out of N (Neutral)
To shift:1. Set the parking brake and apply the brake pedal.
2. Turn the ignition on with the engine off.
3. Shift the transmission to N (Neutral).
4. Turn the transfer case knob to the desired setting.
After the transfer case has shifted out of
N (Neutral), the N (Neutral) light will
go out.
5. Release the parking brake.
6. Start the engine and shift the transmission to the desired gear.
Brakes
Antilock Brake System (ABS)
The Antilock Brake System (ABS) helps
prevent a braking skid and maintain steering
while braking hard.
ABS performs a system check when the
vehicle is first driven. A momentary motor
or clicking noise may be heard while this
test is going on, and the brake pedal may
move slightly. This is normal.
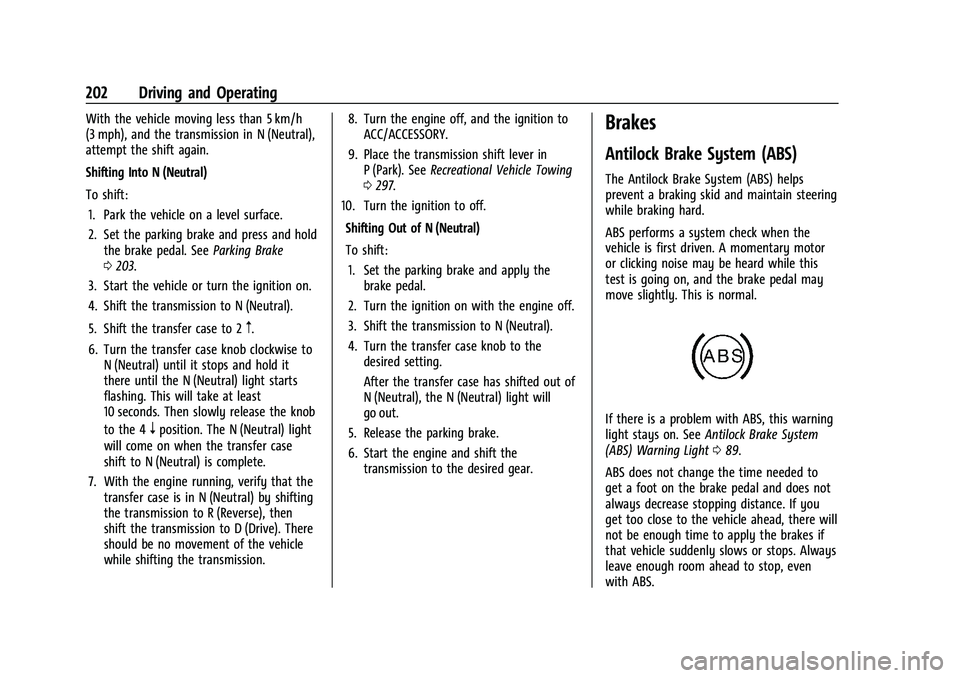
If there is a problem with ABS, this warning
light stays on. See Antilock Brake System
(ABS) Warning Light 089.
ABS does not change the time needed to
get a foot on the brake pedal and does not
always decrease stopping distance. If you
get too close to the vehicle ahead, there will
not be enough time to apply the brakes if
that vehicle suddenly slows or stops. Always
leave enough room ahead to stop, even
with ABS.
Page 205 of 359

GMC Canyon/Canyon Denali Owner Manual (GMNA-Localizing-U.S./Canada-
14430430) - 2021 - CRC - 9/9/20
204 Driving and Operating
pedal release to accelerator pedal apply. The
brakes release when the accelerator pedal is
applied or automatically release after a few
seconds. The brakes may also release under
other conditions. Do not rely on HSA to hold
the vehicle.
HSA is available when the vehicle is facing
uphill in a forward gear, or when facing
downhill in R (Reverse). The vehicle must
come to a complete stop on a grade for HSA
to activate.
Ride Control Systems
Traction Control/Electronic
Stability Control
System Operation
The vehicle has a Traction Control System
(TCS) and StabiliTrak/Electronic Stability
Control (ESC) an electronic stability control
system. These systems help limit wheel slip
and assist the driver in maintaining control,
especially on slippery road conditions.
TCS activates if it senses that any of the
drive wheels are spinning or beginning to
lose traction. When this happens, TCSapplies the brakes to the spinning wheels
and reduces engine power to limit
wheel spin.
StabiliTrak/ESC activates when the vehicle
senses a difference between the intended
path and the direction the vehicle is actually
traveling. StabiliTrak/ESC selectively applies
braking pressure to any one of the vehicle
wheel brakes to assist the driver in keeping
the vehicle on the intended path.
If cruise control is being used and traction
control or StabiliTrak/ESC begins to limit
wheel spin, cruise control will disengage.
Cruise control may be turned back on when
road conditions allow.
Both systems come on automatically when
the vehicle is started and begins to move.
The systems may be heard or felt while
they are operating or while performing
diagnostic checks. This is normal and does
not mean there is a problem with the
vehicle.
It is recommended to leave both systems on
for normal driving conditions, but it may be
necessary to turn TCS off if the vehicle gets
stuck in sand, mud, ice, or snow. See
If the
Vehicle Is Stuck 0179 and “Turning the
Systems Off and On” later in this section. When the transfer case (if equipped) is in
Four-Wheel Drive Low, the stability system
is automatically disabled, and
gcomes on
in the instrument cluster. Both traction
control and StabiliTrak/ESC are automatically
disabled in this condition.
The indicator light for both systems is in the
instrument cluster. This light will:
.Flash when TCS is limiting wheel spin.
.Flash when StabiliTrak/ESC is activated.
.Turn on and stay on when either system
is not working.
If either system fails to turn on or to
activate, a message displays in the Driver
Information Center (DIC), and
dcomes on
and stays on to indicate that the system is
inactive and is not assisting the driver in
maintaining control. The vehicle is safe to
drive, but driving should be adjusted
accordingly.
Page 231 of 359
GMC Canyon/Canyon Denali Owner Manual (GMNA-Localizing-U.S./Canada-
14430430) - 2021 - CRC - 9/9/20
230 Driving and Operating
If the CHECK TRAILER WIRING message only
reappears when connecting the trailer wiring
harness to the vehicle, the electrical fault is
on the trailer side.
SERVICE TRAILER BRAKE SYSTEM: This
message will display when there is a
problem with the ITBC system. If this
message continues over multiple ignition
cycles, have the vehicle serviced.
If either the CHECK TRAILER WIRING or
SERVICE TRAILER BRAKE SYSTEM message
displays while driving, the ITBC system may
not be fully functional or may not function
at all. When traffic conditions allow,
carefully pull the vehicle over to the side of
the road and turn the ignition off. Check the
wiring connection to the trailer and turn the
ignition back on. If either of these messages
continues, either the vehicle or trailer needs
service.
A GM dealer may be able to diagnose and
repair problems with the trailer. However,
any diagnosis and repair of the trailer is not
covered under the vehicle warranty. Contact
your trailer dealer for assistance with trailer
repairs and trailer warranty information.Trailer Sway Control (TSC)
Vehicles with StabiliTrak/Electronic Stability
Control (ESC) have a Trailer Sway Control
(TSC) feature. Trailer sway is unintended
side-to-side motion of a trailer while towing.
If the vehicle is towing a trailer and the TSC
detects that sway is increasing, the vehicle
brakes are selectively applied at each wheel,
to help reduce excessive trailer sway.
If equipped with the Integrated Trailer Brake
Control (ITBC) system, and the trailer has an
electric brake system, StabiliTrak/ESC may
also apply the trailer brakes.
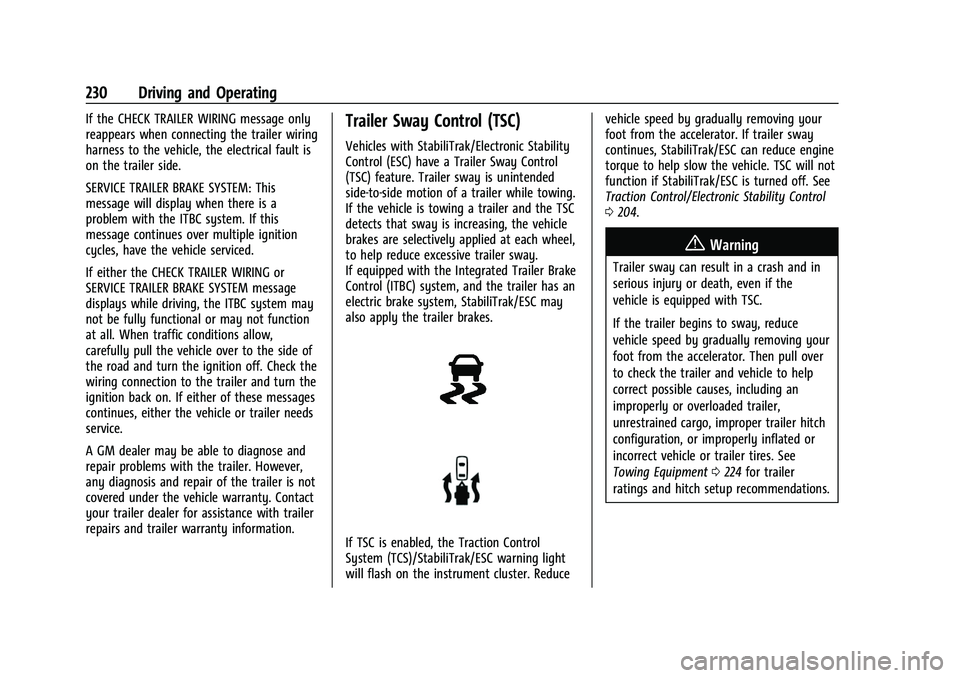
If TSC is enabled, the Traction Control
System (TCS)/StabiliTrak/ESC warning light
will flash on the instrument cluster. Reducevehicle speed by gradually removing your
foot from the accelerator. If trailer sway
continues, StabiliTrak/ESC can reduce engine
torque to help slow the vehicle. TSC will not
function if StabiliTrak/ESC is turned off. See
Traction Control/Electronic Stability Control
0
204.
{Warning
Trailer sway can result in a crash and in
serious injury or death, even if the
vehicle is equipped with TSC.
If the trailer begins to sway, reduce
vehicle speed by gradually removing your
foot from the accelerator. Then pull over
to check the trailer and vehicle to help
correct possible causes, including an
improperly or overloaded trailer,
unrestrained cargo, improper trailer hitch
configuration, or improperly inflated or
incorrect vehicle or trailer tires. See
Towing Equipment 0224 for trailer
ratings and hitch setup recommendations.
Page 233 of 359
GMC Canyon/Canyon Denali Owner Manual (GMNA-Localizing-U.S./Canada-
14430430) - 2021 - CRC - 9/9/20
232 Driving and Operating
Conversions and Add-Ons
Add-On Electrical Equipment
{Warning
The Data Link Connector (DLC) is used for
vehicle service and Emission Inspection/
Maintenance testing. SeeMalfunction
Indicator Lamp (Check Engine Light) 087.
A device connected to the DLC —such as
an aftermarket fleet or driver-behavior
tracking device —may interfere with
vehicle systems. This could affect vehicle
operation and cause a crash. Such devices
may also access information stored in the
vehicle’s systems.
Caution
Some electrical equipment can damage
the vehicle or cause components to not
work and would not be covered by the
vehicle warranty. Always check with your
dealer before adding electrical equipment. Add-on equipment can drain the vehicle's
12-volt battery, even if the vehicle is not
operating.
The vehicle has an airbag system. Before
attempting to add anything electrical to the
vehicle, see
Servicing the Airbag-Equipped
Vehicle 042 and
Adding Equipment to the Airbag-Equipped
Vehicle 043.
Page 244 of 359
GMC Canyon/Canyon Denali Owner Manual (GMNA-Localizing-U.S./Canada-
14430430) - 2021 - CRC - 9/9/20
Vehicle Care 243
Automatic Transmission Fluid
How to Check Automatic Transmission
Fluid
It is not necessary to check the transmission
fluid level. A transmission fluid leak is the
only reason for fluid loss. If a leak occurs,
take the vehicle to your dealer and have it
repaired as soon as possible.
There is a special procedure for checking and
changing the transmission fluid. Because this
procedure is difficult, this should be done at
your dealer. Contact your dealer for
additional information.
Caution
Use of the incorrect automatic
transmission fluid may damage the
vehicle, and the damage may not be
covered by the vehicle warranty. Always
use the correct automatic transmission
fluid. SeeRecommended Fluids and
Lubricants 0319.
Change the fluid and filter at the intervals
listed in Maintenance Schedule 0310, and
be sure to use the fluid listed in
Recommended Fluids and Lubricants 0319.
Engine Air Cleaner/Filter
The engine air cleaner/filter is in the engine
compartment on the passenger side of the
vehicle. See Engine Compartment Overview
0 237.
When to Inspect/Replace the Engine Air
Cleaner/Filter
For intervals on changing and inspecting the
engine air cleaner/filter, see Maintenance
Schedule 0310.
How to Inspect/Replace the Engine Air
Cleaner/Filter
Do not start the engine or have the engine
running with the engine air cleaner/filter
housing open. Before removing the engine
air cleaner/filter, make sure that the engine
air cleaner/filter housing and nearby
components are free of dirt and debris.
Remove the engine air cleaner/filter. Lightly
tap and shake the engine air cleaner/filter
(away from the vehicle), to release loose
dust and dirt. Inspect the engine air cleaner/
filter for damage, and replace if damaged.
Do not clean the engine air cleaner/filter or
components with water or compressed air. To inspect or replace the air cleaner/filter:
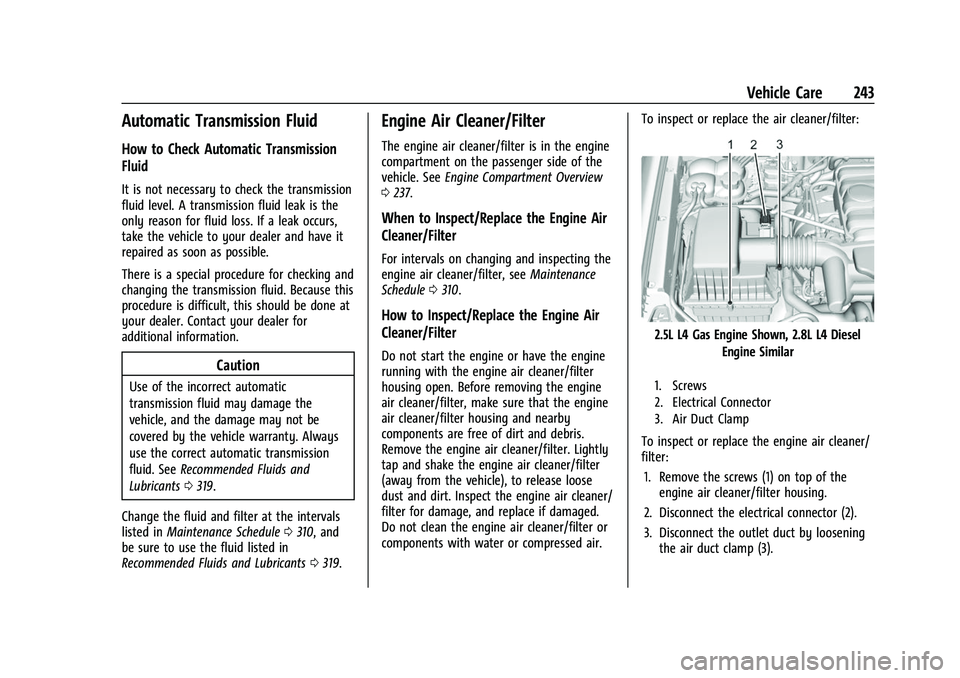
2.5L L4 Gas Engine Shown, 2.8L L4 Diesel
Engine Similar
1. Screws
2. Electrical Connector
3. Air Duct Clamp
To inspect or replace the engine air cleaner/
filter:
1. Remove the screws (1) on top of the engine air cleaner/filter housing.
2. Disconnect the electrical connector (2).
3. Disconnect the outlet duct by loosening the air duct clamp (3).
Page 251 of 359
GMC Canyon/Canyon Denali Owner Manual (GMNA-Localizing-U.S./Canada-
14430430) - 2021 - CRC - 9/9/20
250 Vehicle Care
{Warning
The brake wear warning sound means
that soon the brakes will not work well.
That could lead to a crash. When the
brake wear warning sound is heard, have
the vehicle serviced.
Caution
Continuing to drive with worn-out brake
pads could result in costly brake repair.
Some driving conditions or climates can
cause a brake squeal when the brakes are
first applied or lightly applied. This does not
mean something is wrong with the brakes.
Properly torqued wheel nuts are necessary
to help prevent brake pulsation. When tires
are rotated, inspect brake pads for wear and
evenly tighten wheel nuts in the proper
sequence to torque specifications in
Capacities and Specifications 0324.
Brake linings should always be replaced as
complete axle sets.
Brake Pedal Travel
See your dealer if the brake pedal does not
return to normal height, or if there is a
rapid increase in pedal travel. This could be
a sign that brake service may be required.
Replacing Brake System Parts
Always replace brake system parts with
new, approved replacement parts. If this is
not done, the brakes may not work
properly. The braking performance expected
can change in many other ways if the
wrong replacement brake parts are installed
or parts are improperly installed.
Brake Fluid
The brake master cylinder reservoir is filled
with GM approved DOT 3 brake fluid as
indicated on the reservoir cap. See Engine
Compartment Overview 0237 for the
location of the reservoir. Checking Brake Fluid
With the vehicle in P (Park) on a level
surface, the brake fluid level should be
between the minimum and maximum marks
on the brake fluid reservoir.
There are only two reasons why the brake
fluid level in the reservoir may go down:
.Normal brake lining wear. When new
linings are installed, the fluid level goes
back up.
.A fluid leak in the brake hydraulic system.
Have the brake hydraulic system fixed.
With a leak, the brakes will not
work well.
Always clean the brake fluid reservoir cap
and the area around the cap before
removing it.
Do not top off the brake fluid. Adding fluid
does not correct a leak. If fluid is added
when the linings are worn, there will be too
much fluid when new brake linings are
installed. Add or remove fluid, as necessary,
only when work is done on the brake
hydraulic system.
Page 296 of 359
GMC Canyon/Canyon Denali Owner Manual (GMNA-Localizing-U.S./Canada-
14430430) - 2021 - CRC - 9/9/20
Vehicle Care 295
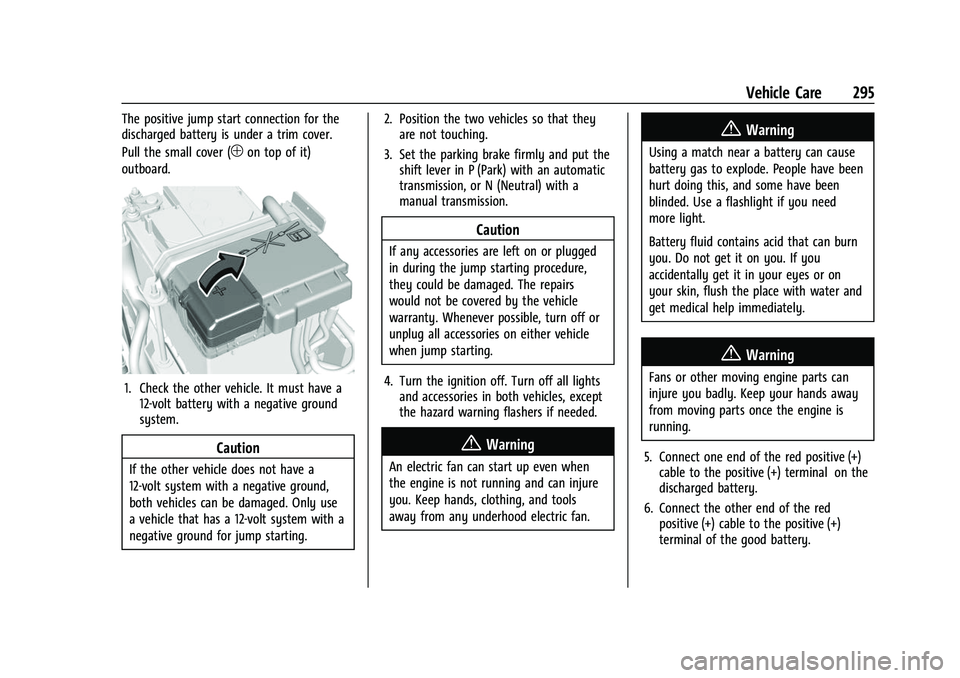
The positive jump start connection for the
discharged battery is under a trim cover.
Pull the small cover (
1on top of it)
outboard.
1. Check the other vehicle. It must have a 12-volt battery with a negative ground
system.
Caution
If the other vehicle does not have a
12-volt system with a negative ground,
both vehicles can be damaged. Only use
a vehicle that has a 12-volt system with a
negative ground for jump starting. 2. Position the two vehicles so that they
are not touching.
3. Set the parking brake firmly and put the shift lever in P (Park) with an automatic
transmission, or N (Neutral) with a
manual transmission.
Caution
If any accessories are left on or plugged
in during the jump starting procedure,
they could be damaged. The repairs
would not be covered by the vehicle
warranty. Whenever possible, turn off or
unplug all accessories on either vehicle
when jump starting.
4. Turn the ignition off. Turn off all lights and accessories in both vehicles, except
the hazard warning flashers if needed.
{Warning
An electric fan can start up even when
the engine is not running and can injure
you. Keep hands, clothing, and tools
away from any underhood electric fan.
{Warning
Using a match near a battery can cause
battery gas to explode. People have been
hurt doing this, and some have been
blinded. Use a flashlight if you need
more light.
Battery fluid contains acid that can burn
you. Do not get it on you. If you
accidentally get it in your eyes or on
your skin, flush the place with water and
get medical help immediately.
{Warning
Fans or other moving engine parts can
injure you badly. Keep your hands away
from moving parts once the engine is
running.
5. Connect one end of the red positive (+) cable to the positive (+) terminal on the
discharged battery.
6. Connect the other end of the red positive (+) cable to the positive (+)
terminal of the good battery.