audio GMC ENVOY 1998 Owners Manual
[x] Cancel search | Manufacturer: GMC, Model Year: 1998, Model line: ENVOY, Model: GMC ENVOY 1998Pages: 386, PDF Size: 20.33 MB
Page 2 of 386
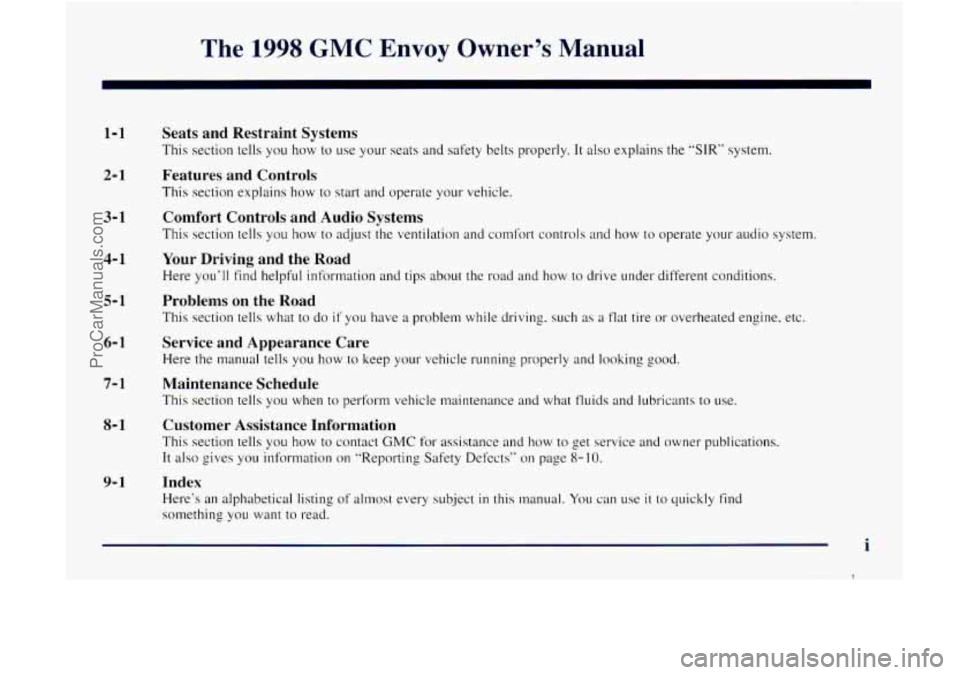
The 1998 GMC Envoy Owner’s Manual
1-1
2- 1
3- 1
4- 1
5- 1
6-1
7- 1
8- 1
9-1
Seats and Restraint Systems
This section tells you how to use your seats and safe.ty belts properly. It also explains the “SIR” system.
Features and Controls
This section explains how to start and operate your vehicle.
Comfort Controls and Audio Systems
This section tells you how to adjust the ventilation and comf‘orr controls and how to operate your audio system.
Your Driving and the Road
Here you’ll find helpful information and tips about. the road and how to drive under different conditions.
Problems on the Road
This section tells what to do if you have a problem while driving, such as a flat tire or overheated engine, etc.
Service and Appearance Care
Here the manual tells you how to keep your vehicle running properly and looking good.
Maintenance Schedule
This section tells you when to perform vehicle maintenance and what fluids and lubricants to use.
Customer Assistance Information
This section tells you how to contact GMC for assistance and how to get service and owner publications.
It also gives you information on “Reporting Safety Defects” on page 8- 10.
Index
Heree‘s an alphabetical listing of almost every subject in this manual. You can use it to quickly find
something you want to read.
i
I
ProCarManuals.com
Page 107 of 386
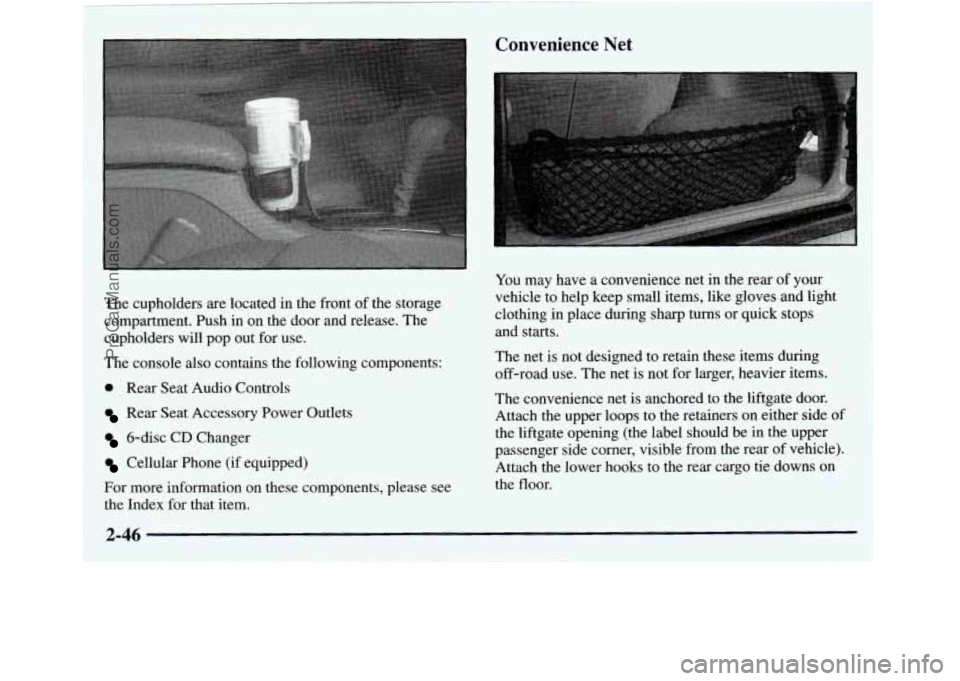
Convenience Net
The cupholders are located in the front of the storage
compartment. Push in on the door and release. The
cupholders will pop out for use.
The console also contains the following components:
0 Rear Seat Audio Controls
Rear Seat Accessory Power Outlets
6-disc CD Changer
Cellular Phone (if equipped)
For more information on these components, please see
the Index for that item. You
may have
a convenience net in the rear of your
vehicle to help keep small items, like gloves and light
clothing in place during sharp turns or quick stops
and starts.
The net is not designed
to retain these items during
off-road use. The net is not for larger, heavier items.
The convenience net is anchored
to the liftgate door.
Attach the upper loops to the retainers on either side of
the liftgate opening (the label should be in the upper
passenger side corner, visible from the rear of vehicle).
Attach the lower hooks to the rear cargo tie downs on
the floor.
2-46
ProCarManuals.com
Page 120 of 386
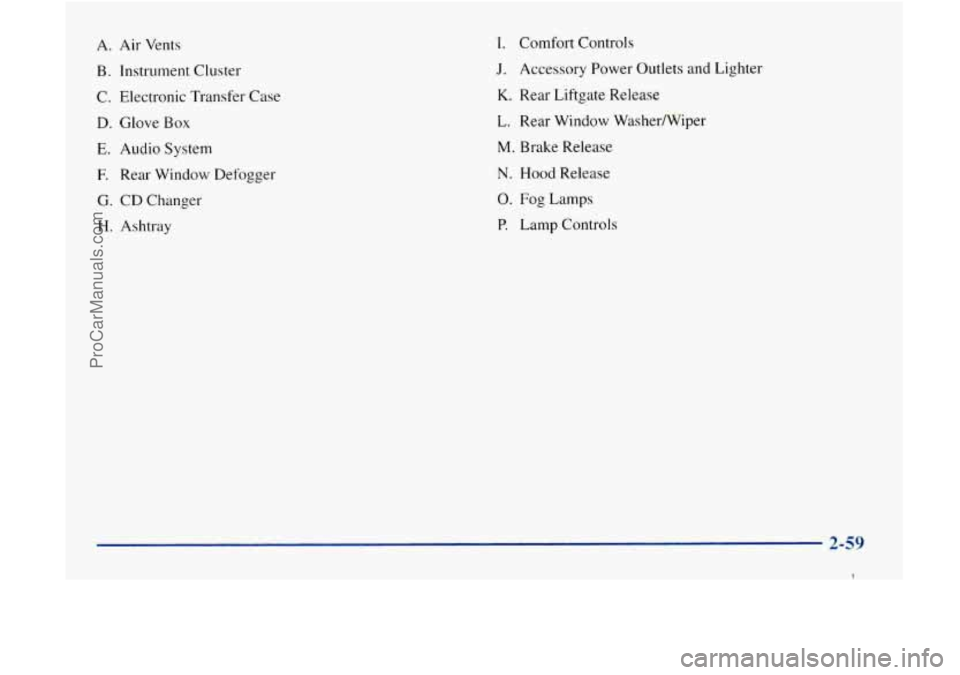
A. Air Vents
B. Instrument Cluster
C. Electronic Transfer Case
D. Glove Box
E. Audio System
E Rear Window Defogger
G. CD Changer
H. Ashtray
1. Comfort Controls
J. Accessory Power Outlets and Lighter
K. Rear Liftgate Release
L. Rear Window Washerwiper
M. Brake Release
N. Hood Release
0. Fog Lamps
P. Lamp Controls
2-59
I
ProCarManuals.com
Page 134 of 386
Section 3 Comfort Controls and Audio Systems
In this section, you’ll find out how to operate the comfort control and audio systems offered with your vehicle. Be
sure to read about the particular systems supplied with your vehicle.
3-2
3-2
3
-5
3-5
3-5
3-6
3-7
3-8
3-8
3-8
Comfort Controls Electronic Climate Control System
Air Conditioning
Heating
Ventilation System
Defogging and Defrosting
Rear Window Defogger
Audio Systems Setting the Clock
AM-FM Stereo with Cassette
Tape Player 3- 12
3- 16
3-18
3-2 1
3-23
3-23
3-24
3-26
3-26
3-26
AM-FM Stereo with Compact Disc Player
(If Equipped)
Rear Seat Audio (RSA)
Console-Mounted CD Changer
Theft-Deterrent Feature
Understanding Radio Reception
Tips About Your Audio System
Care of Your Cassette Tape Player
Care
of Your Compact Discs
Care of Your Compact Disc Player
Fixed Mast Antenna
3-1
ProCarManuals.com
Page 141 of 386

Audio Systems
Your Delco Electronics audio system has been designed
to operate easily and give years
of listening pleasure.
You will get the most enjoyment out of it if you acquaint
yourself with
it first. Find out what your Delco
Electronics system can do and how to operate all its
controls, to be sure you’re getting the most
out of the
advanced engineering that went into it.
Setting the Clock
Press and hold HR until the correct hour appears on the
display. Press and hold
MN until the correct minute
appears
on the display. To display the clock with the
ignition
off, press RECALL or HR/MN and the time
will be displayed for
a few seconds. There is an initial
two-second delay before the clock goes into the
time-set mode.
AM-FM Stereo with Cassette Tape Player
Included with the AM-FM Stereo with Cassette Tape
Player are six
Base@ high performance speakers and a six
channel Bose amplifier. Please see your dealer for details.
Playing the Radio
PWR-VOL: Press this knob to turn the system on and
off.
To increase volume, turn the knob to the right. Turn
it to the left to decrease volume. The knob is capable of
being rotated continuously.
REAR DSPL: When the primary radio is turned on,
press
this button to turn the rear seat audio display on.
Press
it again to turn the rear seat audio display off.
3-8
ProCarManuals.com
Page 142 of 386

RECALL: Display the time with the ignition off by
pressing this button. When the radio is playing, press
this button
to recall the station frequency.
SCV Your system has a feature called
Speed-Compensated-Volume (SCV). With
SCV, your
audio system adjusts automatically
to make up for road
and wind noise as
you drive. Set the volume at the
desired level. Move
the control ring behind the upper
knob to
the right to adjust the SCV. Then, as you drive,
SCV automatically increases the volume, as necessary,
to overcome noise at any particular speed. The volume
level should always sound the same to you as you drive.
If you don't want
to use SCV, turn the control all the
way down. Each notch on
the control ring allows for
more volume compensation at faster vehicle speeds.
Finding a Station
AM-FM: Press this button to switch between AM, FMl
and FM2. The display will show your selection.
TUNE: Press this knob lightly so it extends. Turn it to
choose radio stations. Push the knob back into its stored
position when you're not using it.
SEEK: Press the right arrow to tune to the next higher
station and the left arrow to tune to
the next lower station
and stay there. The sound will mute while seeking.
SCAN: Press and hold SEEK for two seconds until
SCAN appears
on the display. SCAN allows you to
listen to stations for a few seconds. The receiver will
continue to scan and momentarily stop at each station
until
you press the button again. The sound will mute
while scanning.
PUSHBUTTONS: The six numbered pushbuttons let
you return to your favorite stations. You can set up to
18 stations (six
AM, six FM 1 and six FM2). Just:
1. Turn the radio on.
2. Press AM-FM to select the band.
3. Tune in the desired station.
4. Press and hold one of the six pushbuttons. The sound
will mute. When it returns, release the button.
Whenever you press that numbered button, the
station you set will return.
5. Repeat the steps for each pushbutton.
3-9
I
ProCarManuals.com
Page 146 of 386

Playing the Radio
PWR-VOL:
Press this knob to turn the system on and
off. To increase volume, turn this knob
to the right. Turn
it to the left to decrease volume. The knob is capable of
rotating continuously.
REAR DSPL: When the primary radio is turned on,
press this button to turn the rear seat audio display on.
Press
it again to turn the rear seat audio display off.
RECALL: Display the time with the ignition off by
pressing this button. When the radio is playing, press
this button
to recall the station frequency.
SCV Your system has a feature called
Speed-Compensated-Volume (SCV). With SCV, your
audio system adjusts automatically to make
up for road
and wind noise
as you drive. Set the volume at the
desired level. Move the control ring behind the upper
knob to
the right to adjust the SCV. Then, as you drive,
SCV automatically increases the volume, as necessary,
to overcome noise at any particular speed. The volume
level should always sound the same to you as you drive.
If you don't want to use SCV, turn the control all the
way down. Each notch on the control ring allows for
more volume compensation at faster vehicle speeds.
Finding a Station
AM-FM:
Press this button to switch between AM, FMl
and FM2. The display will show your selection.
TUNE: Press this knob lightly so it extends. Turn it to
choose radio stations. Push the knob back into its stored
position when you're not using
it.
SEEK: Press the right arrow to tune to the next higher
station and the left arrow
to tune to the next lower station
and stay there. The sound will mute while seeking.
SCAN: Press and hold SEEK for two seconds until
SCAN appears on the display. SCAN allows you to
listen to stations for a few seconds. The receiver will
continue to scan and momentarily stop at each station
until you press the button again. The sound will mute
while scanning.
PUSHBUTTONS: The six numbered pushbuttons let
you return to your favorite stations. You can set up to
18 stations (six AM, six FMl and six FM2). Just:
1. Turn the radio on.
2. Press AM-FM to select the band.
3. Tune in the desired station.
3- 13
I
ProCarManuals.com
Page 149 of 386
AM-FM: While in the CD mode, press this button to
stop playing the CD and play the radio. The
CD symbol
will still display but
the word CD will be replaced with
either
AM, FM1 or FM2. (If the radio is turned off, the
disc stays in the player and will resume playing at the
point where it stopped.)
CD AUX: Press this button if you have a disc loaded in
the CD player and the radio is turned on, to play a
compact disc. Press
AM-F" to return to the radio when
a compact disc is playing. Press CD
AUX to switch
between the compact disc player and console-mounted CD changer if both are loaded. When a disc is playing,
the letters CD and the CD symbol will appear on the
display. (If the radio is turned off, the disc stays in the
player and will resume playing at the point where
it stopped.)
EJECT: Press this button to eject the disc from the
player and play the radio. When the same or a new disc
is inserted, the disc will start playing on track one. If a
compact disc is left sitting in the opening for more than
a few seconds, the player will pull the
CD back in. The
radio will continue playing. When the ignition is off,
press this button to load a CD.
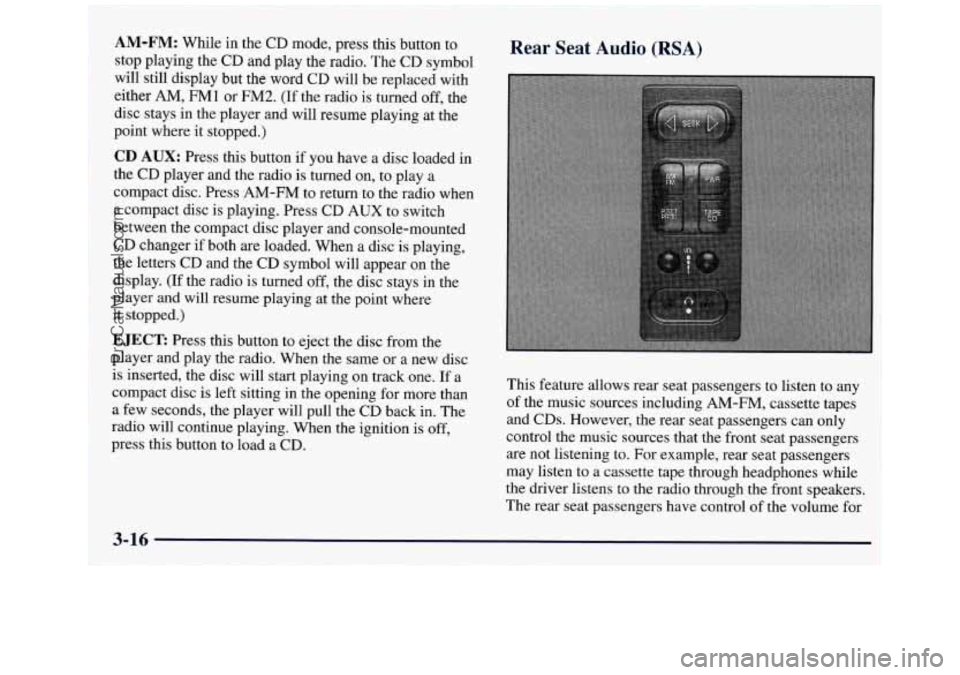
Rear Seat Audio (RSA)
This feature allows rear seat passengers to listen to any
of the music sources including
AM-FM, cassette tapes
and CDs. However, the rear seat passengers can only
control the music sources that the front seat passengers
are not listening to. For example, rear seat passengers
may listen to a cassette tape through headphones while
the driver listens to the radio through the front speakers.
The rear seat passengers have control
of the volume for
3-16
ProCarManuals.com
Page 150 of 386
each set of headphones. Be aware that the front seat
audio controls always override the Rear Seat Audio
(RSA) controls. The rear speakers will be muted when
the RSA power is turned on. You may operate the RSA
functions even when the primary radio power is off.
luote that this feature is intended for rear seat passengers.
The following function is controlled by the primary
radio knob:
PWR-VOL: Push this knob twice to turn RSA off.
The following functions are controlled by the RSA
system buttons:
PWR: Press this button to turn RSA on or off.
VOL: Press this knob lightly so it extends. Turn the
knob to the right to increase volume and to the left to
decrease volume. Push the knob back into its stored
position when you’re not using it. The left
VOL knob
controls
the left headphone and the right VOL knob
controls the right headphone.
AM-FM: Press this button to switch between AM, FMl
and FM2.
If the front passengers are already listening to
AM-FM, the RSA controller will not switch between the
bands and cannot change the frequency.
SEEK: While listening to AM-FM, press the right
arrow
to tune to the next higher station and stay there.
Press the
left arrow to tune to the next lower station and
stay there. The sound will mute while seeking. The
SEEK button is inactive if the AM-FM mode on the
front radio is
in use.
While listening to a cassette tape, press the right arrow
to hear the next selection
on the tape. Press the left
arrow to go back to the previous selection. The
SEEK
button is inactive if the tape mode on the front radio is
in use.
While listening to a CD, press the right arrow to hear the
next selection
on the CD. Press the left arrow to go back
to the start of the current selection (if more than eight
seconds have played). The
SEEK button is inactive if
the CD mode on the front radio
(if equipped) or the CD
changer is
in use.
SCAN: Press and hold SEEK until the radio goes into
SCAN mode. SCAN allows you to listen to stations for
a few seconds. The receiver will continue to scan and
momentarily stop at each station
until you press SEEK
again. The SCAN function is inactive if the AM-FM
mode on the front radio
is in use.
3-17
I
ProCarManuals.com
Page 156 of 386

Disabling the Theft-Deterrent Feature
Enter your secret code as follows; pause no more than
15 seconds between steps:
1. Turn the ignition to ACCESSORY or RUN.
2. Turn the radio off.
3. Press the 1 and 4 buttons together. Hold them down
until SEC shows on the display.
4. Press MN and 000 will appear on the display.
5. Press MN again to make the last two digits agree
with your code.
6. Press HR to make the first one or two digits agree
with your code.
7. Press AM-FM after you have confirmed that the
code matches the secret code
you have written down.
The display will show
---, indicating that the radio is
no longer secured.
If the code entered is incorrect, SEC will appear
on the
display. The radio will remain secured
until the correct
code
is entered.
When battery power is removed and later applied to
a
secured radio, the radio won’t turn on and LOC will
appear on the display.
To unlock a secured radio, see “Unlocking the
Theft-Deterrent Feature After a Power
Loss” earlier in
this section.
Understanding Radio Reception
AM
The range for most AM stations is greater than for FM,
especially at night. The longer range, however, can
cause stations to interfere with each other. AM can pick
up noise from things like storms and power lines. Try
reducing the treble to reduce this noise
if you ever get it.
FM Stereo
FM stereo will give you the best sound, but FM signals
will reach
only about 10 to 40 miles (1 6 to 65 km). Tall
buildings or hills can interfere with
FM signals, causing
the sound to come and go.
Tips About Your Audio System
Hearing damage from loud noise is almost undetectable
until it is too late. Your hearing can adapt to higher
volumes
of sound. Sound that seems normal can be loud
and harmful to your hearing. Take precautions by
adjusting the volume control on your radio to a safe
sound level before your hearing adapts to
it.
3-23
I
ProCarManuals.com