engine coolant GMC ENVOY XUV 2005 Owner's Manual
[x] Cancel search | Manufacturer: GMC, Model Year: 2005, Model line: ENVOY XUV, Model: GMC ENVOY XUV 2005Pages: 474, PDF Size: 2.67 MB
Page 69 of 474
Keys...............................................................2-3
Remote Keyless Entry System.........................2-5
Remote Keyless Entry System Operation...........2-6
Doors and Locks.............................................2-8
Door Locks....................................................2-8
Power Door Locks..........................................2-9
Delayed Locking.............................................2-9
Programmable Automatic Door Locks..............2-10
Rear Door Security Locks..............................2-12
Lockout Protection........................................2-12
Midgate.......................................................2-13
Tailgate.......................................................2-14
Power Roof.................................................2-18
Windows........................................................2-20
Power Windows............................................2-21
Sun Visors...................................................2-22
Theft-Deterrent Systems..................................2-22
Content Theft-Deterrent.................................2-22
Passlock
®....................................................2-24
Starting and Operating Your Vehicle................2-24
New Vehicle Break-In....................................2-24
Ignition Positions..........................................2-25Retained Accessory Power (RAP)...................2-25
Starting Your Engine.....................................2-26
Adjustable Throttle and Brake Pedal................2-27
Engine Coolant Heater..................................2-27
Displacement on Demand (DoD).....................2-28
Automatic Transmission Operation...................2-29
Four-Wheel Drive..........................................2-32
Parking Brake..............................................2-36
Shifting Into Park (P).....................................2-37
Shifting Out of Park (P).................................2-39
Parking Over Things That Burn.......................2-39
Engine Exhaust............................................2-40
Running Your Engine While You Are Parked.......2-40
Mirrors...........................................................2-42
Manual Rearview Mirror.................................2-42
Manual Rearview Mirror with OnStar
®..............2-42
Manual Rearview Mirror with Compass............2-42
Manual Rearview Mirror with OnStar
®and
Compass.................................................2-44
Manual Rearview Mirror with Compass and
Temperature.............................................2-46
Manual Rearview Mirror with OnStar
®,
Compass, and Temperature Display.............2-48
Section 2 Features and Controls
2-1
Page 95 of 474

Adjustable Throttle and Brake Pedal
If your vehicle has this feature, you can change the
position of the throttle and brake pedals. This feature is
designed for shorter drivers, since the pedals cannot
move farther away from the standard position, but can
move closer for better pedal reach. This feature can
be programmed to work with the memory function
(if equipped) on your vehicle. SeeMemory Seat on
page 2-63.
The vehicle must be in PARK (P) for this feature
to operate.
The toggle switch used
to adjust the pedals
is located on the
steering column.
Press the switch towards you to move the pedals
closer. Press the switch away from you to move the
pedals away from you.
Engine Coolant Heater
Your vehicle has an engine coolant heater. In very cold
weather, 0°F (–18°C) or colder, the engine coolant
heater can help. You will get easier starting and better
fuel economy during engine warm-up. Usually, the
coolant heater should be plugged in a minimum
of four hours prior to starting your vehicle.
At temperatures above 32°F (0°C), use of the coolant
heater is not required.
2-27
Page 96 of 474
To Use the Engine Coolant Heater
1. Turn off the engine.
2. Open the hood and unwrap the electrical cord.
The cord is located on the driver’s side of the
engine compartment, behind the battery.
3. Plug it into a normal, grounded 110-volt AC outlet.
{CAUTION:
Plugging the cord into an ungrounded outlet
could cause an electrical shock. Also, the
wrong kind of extension cord could overheat
and cause a �re. You could be seriously
injured. Plug the cord into a properly grounded
three-prong 110-volt AC outlet. If the cord will
not reach, use a heavy-duty three-prong
extension cord rated for at least 15 amps.
4. Before starting the engine, be sure to unplug and
store the cord as it was before to keep it away
from moving engine parts. If you do not, it could
be damaged.How long should you keep the coolant heater plugged
in? The answer depends on the outside temperature,
the kind of oil you have, and some other things.
Instead of trying to list everything here, we ask that
you contact your dealer in the area where you will be
parking your vehicle. The dealer can give you the
best advice for that particular area.
Displacement on Demand (DoD)
Your vehicle’s engine may be equipped with
Displacement on Demand (DoD). This system allows
the engine to operate on either four or eight cylinders,
depending on your driving demands.
The system determines when to switch into and out of
the four-cylinder mode by �rst making sure that
certain enabling criteria are met, such as coolant and
oil temperatures, and the transmission being in
either THIRD (3) or FOURTH (4) gear.
When greater power demands are required, such as
accelerating from a stop, passing, or merging onto
a freeway, the system will maintain eight-cylinder
operation. When less power is required, such a
cruising at a constant vehicle speed, the system will
automatically enable the four-cylinder mode, allowing
your vehicle to achieve better fuel economy.
2-28
Page 133 of 474
Instrument Panel Overview...............................3-4
Hazard Warning Flashers................................3-6
Other Warning Devices...................................3-6
Horn.............................................................3-6
Tilt Wheel.....................................................3-6
Turn Signal/Multifunction Lever.........................3-7
Turn and Lane-Change Signals........................3-7
Headlamp High/Low-Beam Changer..................3-8
Flash-to-Pass.................................................3-8
Windshield Wipers..........................................3-9
Rainsense™ Wipers.......................................3-9
Windshield Washer.......................................3-10
Headlamp Washer........................................3-11
Cruise Control..............................................3-12
Headlamps..................................................3-15
Daytime Running Lamps (DRL).......................3-16
Automatic Headlamp System..........................3-16
Fog Lamps..................................................3-17
Instrument Panel Brightness...........................3-17
Dome Lamps...............................................3-17
Dome Lamp Override....................................3-18
Entry Lighting...............................................3-18
Exit Lighting.................................................3-18
Reading Lamps............................................3-18
Battery Run-Down Protection..........................3-19
Accessory Power Outlets...............................3-19
Ashtrays and Cigarette Lighter........................3-20Climate Controls............................................3-20
Dual Climate Control System..........................3-20
Dual Automatic Climate Control System...........3-23
Outlet Adjustment.........................................3-27
Rear Climate Control System.........................3-28
Climate Controls Personalization.....................3-29
Warning Lights, Gages, and Indicators............3-30
Instrument Panel Cluster................................3-31
Speedometer and Odometer...........................3-32
Trip Odometer..............................................3-32
Tachometer.................................................3-32
Safety Belt Reminder Light.............................3-33
Passenger Safety Belt Reminder Light.............3-33
Airbag Readiness Light..................................3-34
Passenger Airbag Status Indicator...................3-35
Charging System Light..................................3-36
Voltmeter Gage............................................3-37
Brake System Warning Light..........................3-38
Anti-Lock Brake System Warning Light.............3-39
Engine Coolant Temperature Gage..................3-39
Malfunction Indicator Lamp.............................3-40
Oil Pressure Gage........................................3-43
Change Engine Oil Light................................3-44
Security Light...............................................3-44
Cruise Control Light......................................3-45
Reduced Engine Power Light.........................3-45
Section 3 Instrument Panel
3-1
Page 153 of 474

To change the current mode, select one of the following:
H(Vent):This mode directs air to the instrument
panel outlets.
)(Bi-Level):This mode directs about half of the air
to the instrument panel outlets; then directs most of
the remaining air to the �oor outlets. A little air is
directed toward the windshield and the side window
outlets. Cooler air is directed to the upper vents
and warmer air to the �oor outlets.
6(Floor):This mode directs most of the air to the
�oor outlets with a little air directed to the windshield
and the side window outlets. The recirculation button
cannot be selected while in �oor mode.
h(Recirculation):Recirculation mode is used to
recirculate the air inside of your vehicle. When this
button is pressed, an indicator light in the button
will come on to let you know that it is active. Use this
mode to help prevent outside odors and/or dust
from entering your vehicle or to help cool the air inside
of your vehicle more quickly. The air conditioning
compressor will also come on when this mode is
activated. While in recirculation mode, the windows
may fog when the weather is cold and damp. To clear
the fog, select either the defog or defrost mode and
increase fan speed.Driver’s Side Temperature Knob:The lever on the
left side of the climate control panel is used to raise or
lower the temperature on the driver’s side of the
vehicle. Slide the lever up or down to adjust the
temperature.
Passenger’s Side Temperature Knob:The lever on
the right side of the climate control panel is used to raise
or lower the temperature on the passenger’s side of
the vehicle. Slide the lever up or down to adjust
the temperature. This lever also adjusts the temperature
to the rear seat outlets.
When the temperature outside is 0°F (–18°C) or lower,
use the engine coolant heater, if equipped, to provide
warmer air, faster to your vehicle.#(Air Conditioning):Press this button to turn the
air-conditioning system on or off. When the button is
pressed, an indicator light will come on and the system
will begin to cool and dehumidify the air inside of
your vehicle. You may notice a slight change in engine
performance when the air conditioning compressor
shuts off and turns on again. This is normal.
3-21
Page 171 of 474

Anti-Lock Brake System
Warning Light
With the anti-lock brake
system, this light will come
on when you start your
engine and may stay on
for several seconds.
That’s normal. A chime
may also sound when the
light comes on.
If the light stays on, or comes on when you’re driving,
your vehicle needs service. If the regular brake
system warning light isn’t on, you still have brakes, but
you don’t have anti-lock brakes. If the regular brake
system warning light is also on, you don’t have anti-lock
brakes and there’s a problem with your regular brakes.
SeeBrake System Warning Light on page 3-38earlier
in this section.
The anti-lock brake system warning light should come
on brie�y when you turn the ignition key to RUN.
If the light doesn’t come on then, have it �xed so it will
be ready to warn you if there is a problem.
Engine Coolant Temperature Gage
This gage shows the engine coolant temperature. If the
gage pointer moves into the red area, it means that
your engine coolant has overheated. If you have been
operating your vehicle under normal driving conditions,
you should pull off the road, stop your vehicle and
turn off the engine as soon as possible.
SeeEngine Overheating on page 5-28for more
information.
United StatesCanada
3-39
Page 178 of 474
Service Four-Wheel Drive
Warning Light
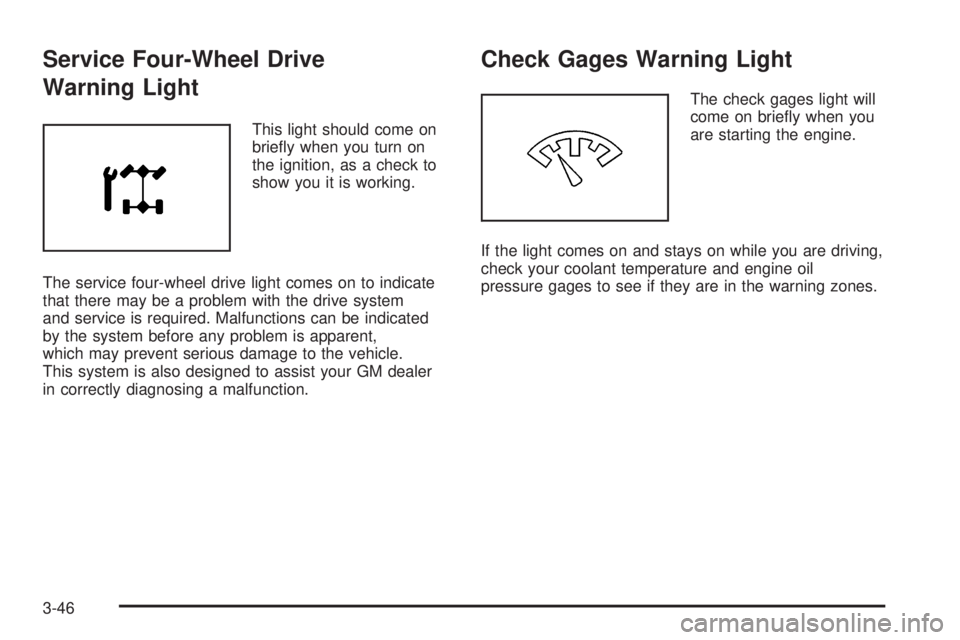
This light should come on
brie�y when you turn on
the ignition, as a check to
show you it is working.
The service four-wheel drive light comes on to indicate
that there may be a problem with the drive system
and service is required. Malfunctions can be indicated
by the system before any problem is apparent,
which may prevent serious damage to the vehicle.
This system is also designed to assist your GM dealer
in correctly diagnosing a malfunction.
Check Gages Warning Light
The check gages light will
come on brie�y when you
are starting the engine.
If the light comes on and stays on while you are driving,
check your coolant temperature and engine oil
pressure gages to see if they are in the warning zones.
3-46
Page 185 of 474

CLOSE THE ROOF
The roof must be closed to enable future roof and/or
tailgate operations. SeePower Roof on page 2-18
for more information.
CLOSE THE TAILGATE
The tailgate must be closed to operate the tailgate
glass. SeeTailgate on page 2-14.
CURB VIEW ACTIVATED
The curb view activated message is displayed when the
passenger outside rearview mirror moves into the
curb view position. SeeOutside Curb View Assist Mirror
on page 2-51for more information.
DRIVER DOOR AJAR
If the driver’s door is not fully closed, this message will
appear on the display and you will hear a chime.
Stop and turn off the vehicle, check the door for
obstacles, and close the door again. Check to see if the
message still appears on the DIC. Pressing the select
button will acknowledge this message and clear it
from the DIC display.
ENGINE COOLANT HOT/ENGINE
OVERHEATED
If the cooling system temperature gets hot, this message
will appear in the DIC and you will hear a chime.
SeeEngine Overheating on page 5-28for the proper
course of action. This message will clear when the
coolant temperature drops to a safe operating
temperature.
FUEL LEVEL LOW
If the fuel level is low in the vehicle’s gas tank this
message will appear on the DIC and you will hear a
chime. Refuel as soon as possible. Pressing the select
button will acknowledge this message and clear it
from the DIC display. SeeLow Fuel Warning Light on
page 3-47,Filling Your Tank on page 5-8andFuel
on page 5-5for more information.
ICE POSSIBLE
If the outside temperature reaches a level where ice
could form on the roadway, this message may appear
on the DIC. If the temperature rises to a safe level,
the message will clear. Pressing the select button will
acknowledge this message and clear it from the
DIC display.
3-53
Page 317 of 474
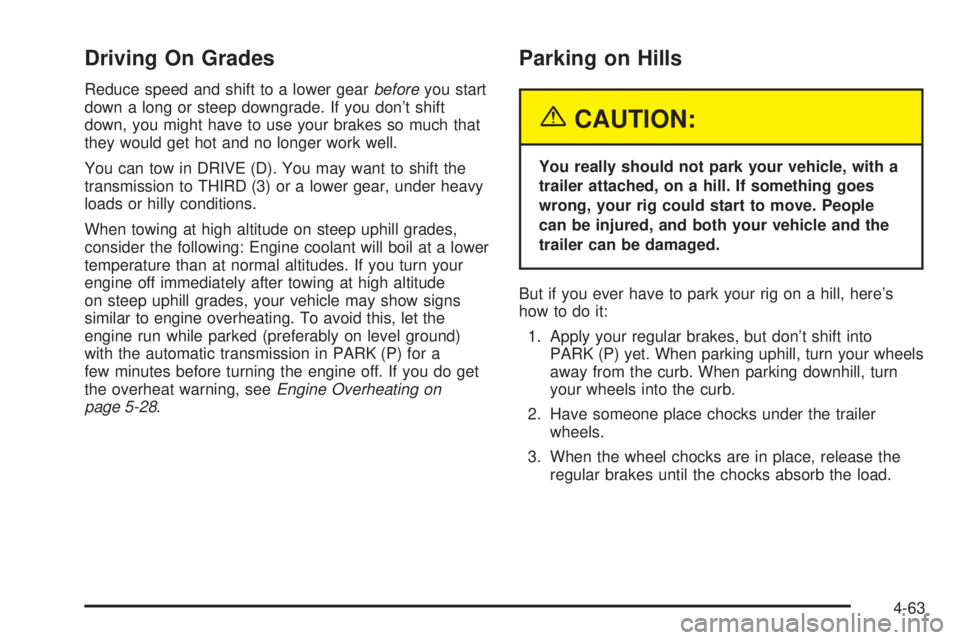
Driving On Grades
Reduce speed and shift to a lower gearbeforeyou start
down a long or steep downgrade. If you don’t shift
down, you might have to use your brakes so much that
they would get hot and no longer work well.
You can tow in DRIVE (D). You may want to shift the
transmission to THIRD (3) or a lower gear, under heavy
loads or hilly conditions.
When towing at high altitude on steep uphill grades,
consider the following: Engine coolant will boil at a lower
temperature than at normal altitudes. If you turn your
engine off immediately after towing at high altitude
on steep uphill grades, your vehicle may show signs
similar to engine overheating. To avoid this, let the
engine run while parked (preferably on level ground)
with the automatic transmission in PARK (P) for a
few minutes before turning the engine off. If you do get
the overheat warning, seeEngine Overheating on
page 5-28.
Parking on Hills
{CAUTION:
You really should not park your vehicle, with a
trailer attached, on a hill. If something goes
wrong, your rig could start to move. People
can be injured, and both your vehicle and the
trailer can be damaged.
But if you ever have to park your rig on a hill, here’s
how to do it:
1. Apply your regular brakes, but don’t shift into
PARK (P) yet. When parking uphill, turn your wheels
away from the curb. When parking downhill, turn
your wheels into the curb.
2. Have someone place chocks under the trailer
wheels.
3. When the wheel chocks are in place, release the
regular brakes until the chocks absorb the load.
4-63
Page 321 of 474
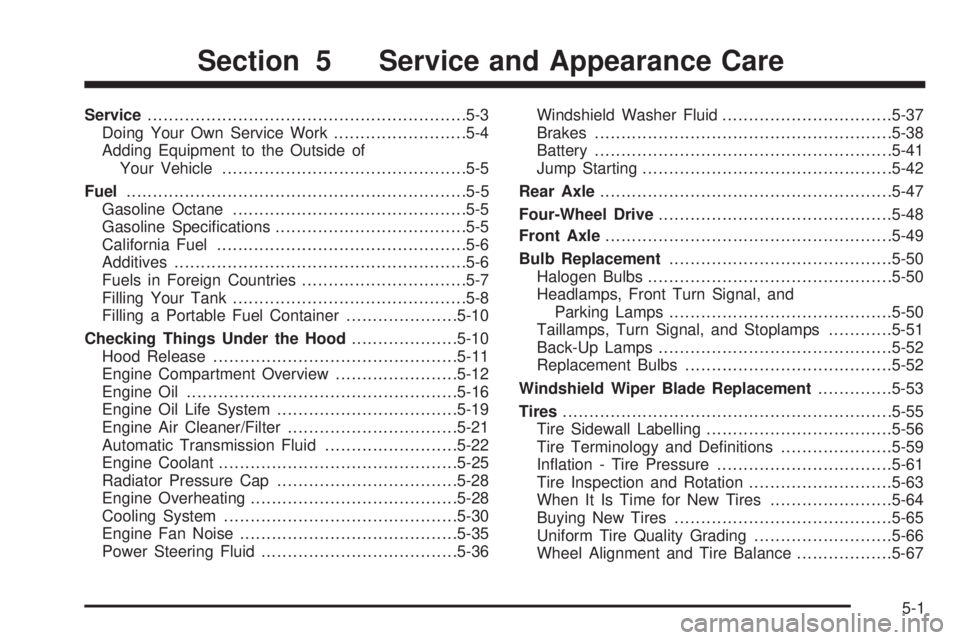
Service............................................................5-3
Doing Your Own Service Work.........................5-4
Adding Equipment to the Outside of
Your Vehicle..............................................5-5
Fuel................................................................5-5
Gasoline Octane............................................5-5
Gasoline Speci�cations....................................5-5
California Fuel...............................................5-6
Additives.......................................................5-6
Fuels in Foreign Countries...............................5-7
Filling Your Tank............................................5-8
Filling a Portable Fuel Container.....................5-10
Checking Things Under the Hood....................5-10
Hood Release..............................................5-11
Engine Compartment Overview.......................5-12
Engine Oil...................................................5-16
Engine Oil Life System..................................5-19
Engine Air Cleaner/Filter................................5-21
Automatic Transmission Fluid.........................5-22
Engine Coolant.............................................5-25
Radiator Pressure Cap..................................5-28
Engine Overheating.......................................5-28
Cooling System............................................5-30
Engine Fan Noise.........................................5-35
Power Steering Fluid.....................................5-36Windshield Washer Fluid................................5-37
Brakes........................................................5-38
Battery........................................................5-41
Jump Starting...............................................5-42
Rear Axle.......................................................5-47
Four-Wheel Drive............................................5-48
Front Axle......................................................5-49
Bulb Replacement..........................................5-50
Halogen Bulbs..............................................5-50
Headlamps, Front Turn Signal, and
Parking Lamps..........................................5-50
Taillamps, Turn Signal, and Stoplamps............5-51
Back-Up Lamps............................................5-52
Replacement Bulbs.......................................5-52
Windshield Wiper Blade Replacement..............5-53
Tires..............................................................5-55
Tire Sidewall Labelling...................................5-56
Tire Terminology and De�nitions.....................5-59
In�ation - Tire Pressure.................................5-61
Tire Inspection and Rotation...........................5-63
When It Is Time for New Tires.......................5-64
Buying New Tires.........................................5-65
Uniform Tire Quality Grading..........................5-66
Wheel Alignment and Tire Balance..................5-67
Section 5 Service and Appearance Care
5-1