oil GMC SAVANA 2006 Owner's Guide
[x] Cancel search | Manufacturer: GMC, Model Year: 2006, Model line: SAVANA, Model: GMC SAVANA 2006Pages: 394, PDF Size: 2.56 MB
Page 265 of 394
To reset the change engine oil light, do the following:
1. Turn the ignition key to RUN with the engine off.
2. Fully press and release the accelerator pedal slowly
three times within five seconds.
3. If the Change Engine Oil light flashes for five
seconds, the system is reset.
4. Turn the key to LOCK.
If the change engine oil light comes back on when you
start your vehicle, the engine oil life system has not
reset. Repeat the procedure. If it still does not reset, see
your dealer for service. SeeChange Engine Oil Light
on page 3-39.
What to Do with Used Oil
Used engine oil contains certain elements that may be
unhealthy for your skin and could even cause cancer.
Do not let used oil stay on your skin for very long. Clean
your skin and nails with soap and water, or a good
hand cleaner. Wash or properly dispose of clothing or
rags containing used engine oil. See the manufacturer’s
warnings about the use and disposal of oil products.
Used oil can be a threat to the environment. If you
change your own oil, be sure to drain all the oil from the
filter before disposal. Never dispose of oil by putting it
in the trash, pouring it on the ground, into sewers, or intostreams or bodies of water. Instead, recycle it by taking
it to a place that collects used oil. If you have a
problem properly disposing of your used oil, ask your
dealer, a service station or a local recycling center
for help.
Engine Air Cleaner/Filter
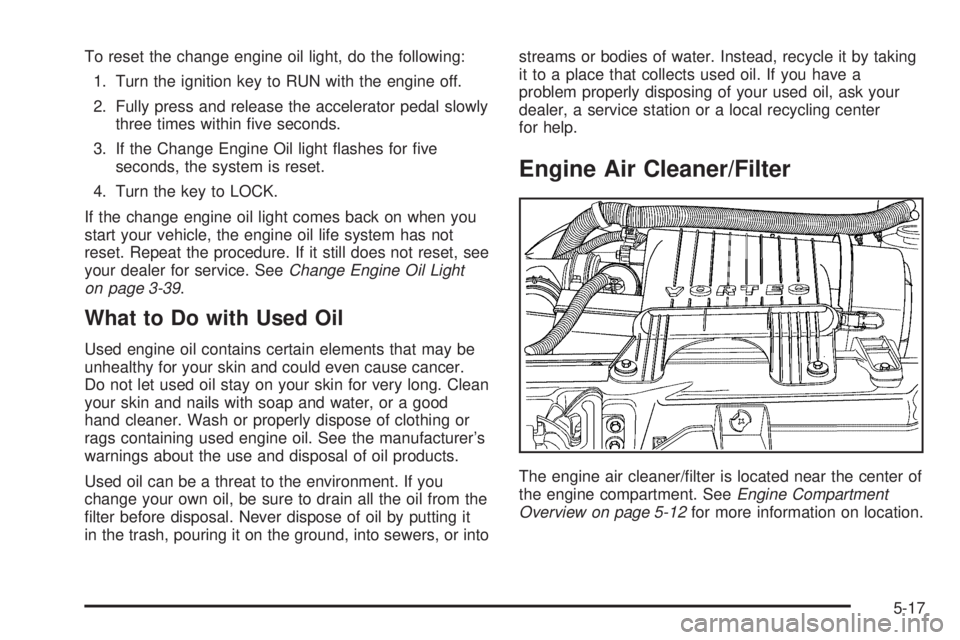
The engine air cleaner/filter is located near the center of
the engine compartment. SeeEngine Compartment
Overview on page 5-12for more information on location.
5-17
Page 266 of 394
When to Inspect the Engine Air
Cleaner/Filter
Inspect the air cleaner/filter at the MaintenanceII
intervals and replace it at the first oil change after each
50,000 mile (83 000 km) interval. SeeScheduled
Maintenance (Gasoline Engine) on page 6-4for more
information. If you are driving in dusty/dirty conditions,
inspect the filter at each engine oil change.
How to Inspect the Engine Air
Cleaner/Filter
To inspect the air cleaner/filter, remove the filter from
the vehicle and lightly shake the filter to release
loose dust and dirt. If the filter remains caked with dirt,
a new filter is required.
To inspect or replace the engine air cleaner/filter,
do the following:
1. Unhook the retainer clips and remove the cover.
2. Lift the filter out of the engine air cleaner/filter
housing. Care should be taken to dislodge as
little dirt as possible.
3. Clean the engine air cleaner/filter housing.4. Inspect or replace the engine air cleaner/filter. Make
sure that the filter fits properly into the housing.
5. Reinstall the cover and fasten the retaining clips.
{CAUTION:
Operating the engine with the air cleaner/lter
off can cause you or others to be burned.
The air cleaner not only cleans the air; it helps
to stop ames if the engine backres. If it is
not there and the engine backres, you could
be burned. Do not drive with it off, and be
careful working on the engine with the air
cleaner/lter off.
Notice:If the air cleaner/lter is off, a backre can
cause a damaging engine re. And, dirt can
easily get into your engine, which will damage it.
Always have the air cleaner/lter in place when you
are driving.
5-18
Page 267 of 394
Automatic Transmission Fluid
When to Check and Change Automatic
Transmission Fluid
A good time to check your automatic transmission fluid
level is when the engine oil is changed.
Change the fluid and filter at the intervals listed in
Additional Required Services (Gasoline Engine) on
page 6-6, and be sure to use the transmission fluid listed
inRecommended Fluids and Lubricants (Gasoline
Engine) on page 6-13.
How to Check Automatic Transmission
Fluid
Because this operation can be a little difficult, you may
choose to have this done at the dealership service
department.
If you do it yourself, be sure to follow all the instructions
here, or you could get a false reading on the dipstick.
Notice:Too much or too little uid can damage
your transmission. Too much can mean that some
of the uid could come out and fall on hot engine
part or exhaust system parts, starting a re.
Too little uid could cause the transmission to
overheat. Be sure to get an accurate reading if you
check your transmission uid.Wait at least 30 minutes before checking the
transmission fluid level if you have been driving:
•When outside temperatures are above 90°F (32°C).
•At high speed for quite a while.
•In heavy traffic — especially in hot weather.
•While pulling a trailer.
To get the right reading, the fluid should be at normal
operating temperature, which is 180°F to 200°F
(82°C to 93°C).
Get the vehicle warmed up by driving about 15 miles
(24 km) when outside temperatures are above 50°F
(10°C). If it is colder than 50°F (10°C), drive the vehicle
in DRIVE (D) until the engine temperature gage
moves and then remains steady for 10 minutes.
A cold fluid check can be made after the vehicle has
been sitting for eight hours or more with the engine off,
but this is used only as a reference. Let the engine
run at idle for five minutes if outside temperatures are
50°F (10°C) or more. If it is colder than 50°F (10°C), you
may have to idle the engine longer. Should the fluid
level be low during this cold check, you must check the
fluid hot before adding fluid. Checking the fluid hot
will give you a more accurate reading of the fluid level.
5-19
Page 269 of 394
How to Add Automatic Transmission
Fluid
Refer to the Maintenance Schedule to determine what
kind of transmission fluid to use. SeeRecommended
Fluids and Lubricants (Gasoline Engine) on page 6-13.
Using a funnel, add fluid down the transmission
dipstick tube only after checking the transmission fluid
while it is hot. A cold check is used only as a reference.
If the fluid level is low, add only enough of the proper
fluid to bring the level up to the HOT area for a hot
check. It does not take much fluid, generally less than
one pint (0.5 L). Do not overfill.
Notice:Use of the incorrect automatic transmission
uid may damage your vehicle, and the damages
may not be covered by your warranty. Always
use the automatic transmission uid listed in
Recommended Fluids and Lubricants (Gasoline
Engine) on page 6-13.
•After adding fluid, recheck the fluid level as
described under “How to Check Automatic
Transmission Fluid,” earlier in this section.
•When the correct fluid level is obtained, push the
dipstick back in all the way; then flip the handle
down to lock the dipstick in place.
Engine Coolant
The cooling system in your vehicle is filled with
DEX-COOL®engine coolant. This coolant is designed
to remain in your vehicle for five years or 150,000 miles
(240 000 km), whichever occurs first, if you add only
DEX-COOL
®extended life coolant.
The following explains your cooling system and how to
add coolant when it is low. If you have a problem
with engine overheating, seeEngine Overheating on
page 5-24.
A 50/50 mixture of clean, drinkable water and
DEX-COOL
®coolant will:
•Give freezing protection down to−34°F (−37°C).
•Give boiling protection up to 265°F (129°C).
•Protect against rust and corrosion.
•Help keep the proper engine temperature.
•Let the warning lights and gages work as
they should.
Notice:Using coolant other than DEX-COOL
®may
cause premature engine, heater core, radiator
and fuel operated heater (FOH) corrosion. In
addition, the engine coolant may require changing
sooner, at 30,000 miles (50 000 km) or 24 months,
whichever occurs rst. Any repairs would not
be covered by your warranty. Always use
DEX-COOL
®(silicate-free) coolant in your vehicle.
5-21
Page 270 of 394
What to Use
Use a mixture of one-half clean, drinkable water and
one-half DEX-COOL®coolant which will not damage
aluminum parts. If you use this coolant mixture, you do
not need to add anything else.
{CAUTION:
Adding only plain water to your cooling
system can be dangerous. Plain water, or
some other liquid such as alcohol, can boil
before the proper coolant mixture will. Your
vehicle’s coolant warning system is set for the
proper coolant mixture. With plain water or the
wrong mixture, your engine could get too hot
but you would not get the overheat warning.
Your engine could catch re and you or others
could be burned. Use a 50/50 mixture of clean,
drinkable water and the proper coolant.Notice:If you use an improper coolant mixture,
your engine could overheat and be badly damaged.
The repair cost would not be covered by your
warranty. Too much water in the mixture can freeze
and crack the engine, radiator, heater core and
other parts.
If you have to add coolant more than four times a year,
have your dealer check your cooling system.
Notice:If you use extra inhibitors and/or additives
in your vehicle’s cooling system, you could
damage your vehicle. Use only the proper mixture
of the engine coolant listed in this manual for
the cooling system. SeeRecommended Fluids and
Lubricants (Gasoline Engine) on page 6-13for
more information.
5-22
Page 274 of 394
Cooling System
If your vehicle has a diesel engine, see “Van Models”
under “Cooling System” in the DURAMAX®Diesel
Supplement.
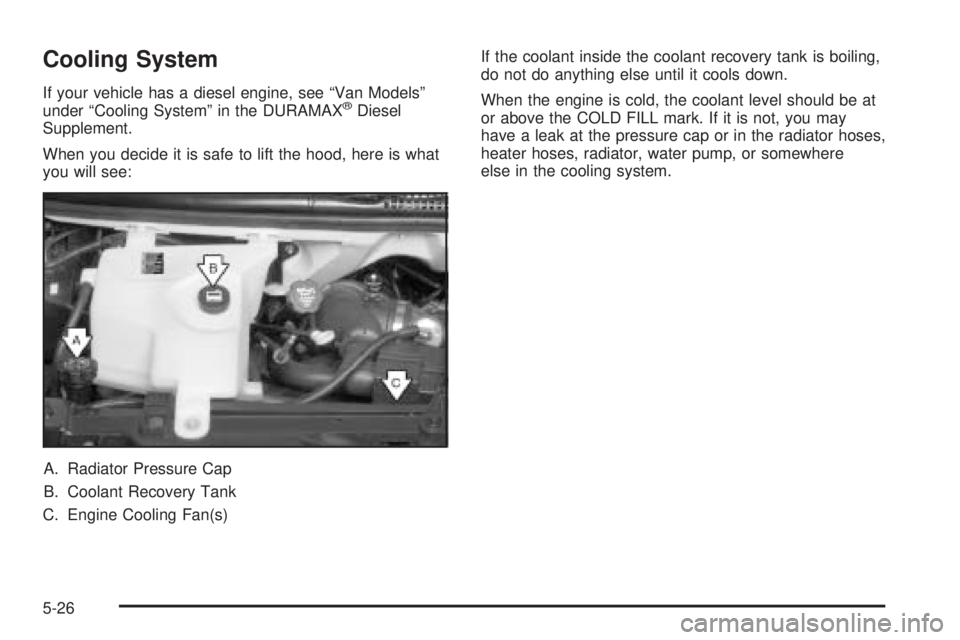
When you decide it is safe to lift the hood, here is what
you will see:
A. Radiator Pressure Cap
B. Coolant Recovery Tank
C. Engine Cooling Fan(s)If the coolant inside the coolant recovery tank is boiling,
do not do anything else until it cools down.
When the engine is cold, the coolant level should be at
or above the COLD FILL mark. If it is not, you may
have a leak at the pressure cap or in the radiator hoses,
heater hoses, radiator, water pump, or somewhere
else in the cooling system.
5-26
Page 276 of 394
How to Add Coolant to the Coolant
Recovery Tank for Gasoline Engines
If your vehicle has a diesel engine, see “How to
Add Coolant to the Coolant Recovery Tank” under “Van
Models” in the Cooling System section of the
DURAMAX
®Diesel Supplement for the proper coolant
fill procedure.
If you have not found a problem yet, but the coolant
level is not at the COLD FILL mark, add a 50/50 mixture
of clean, drinkable water and DEX-COOL
®engine
coolant at the coolant recovery tank. SeeEngine
Coolant on page 5-21for more information.
{CAUTION:
Adding only plain water to your cooling
system can be dangerous. Plain water, or
some other liquid such as alcohol, can boil
before the proper coolant mixture will. Your
vehicle’s coolant warning system is set for the
proper coolant mixture. With plain water or the
wrong mixture, your engine could get too hot
but you would not get the overheat warning.
Your engine could catch re and you or others
could be burned. Use a 50/50 mixture of clean,
drinkable water and DEX-COOL
®coolant.
Notice:
When using concentrated washer uid, follow the
manufacturer’s instructions for adding water.
Do not mix water with ready-to-use washer uid.
Water can cause the solution to freeze and
damage your washer uid tank and other parts of
the washer system. Also, water does not clean as
well as washer uid.
5-28
Page 284 of 394
Checking Brake Fluid
You can check the brake fluid without taking off the cap.
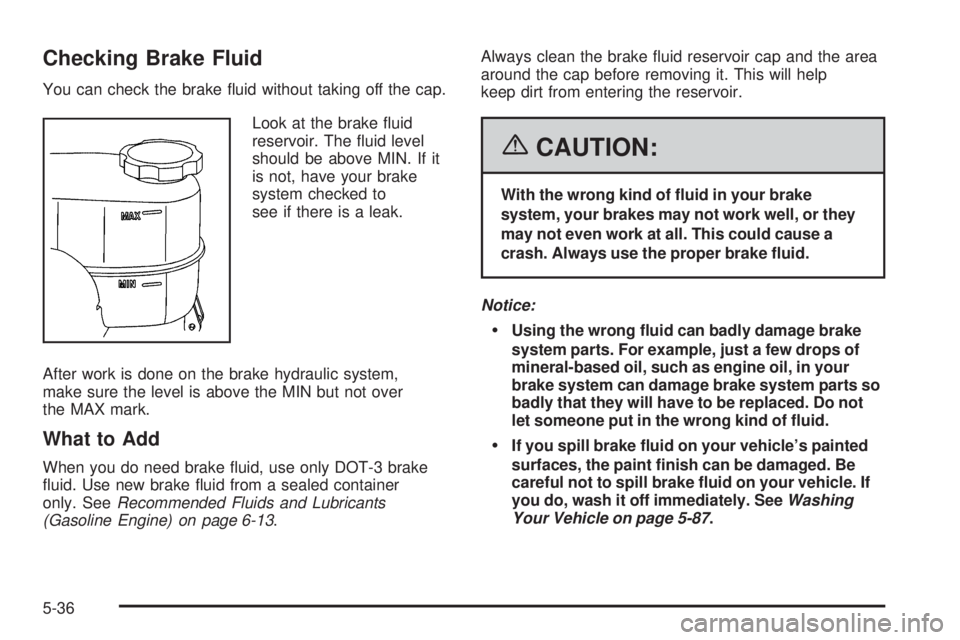
Look at the brake fluid
reservoir. The fluid level
should be above MIN. If it
is not, have your brake
system checked to
see if there is a leak.
After work is done on the brake hydraulic system,
make sure the level is above the MIN but not over
the MAX mark.
What to Add
When you do need brake fluid, use only DOT-3 brake
fluid. Use new brake fluid from a sealed container
only. SeeRecommended Fluids and Lubricants
(Gasoline Engine) on page 6-13.Always clean the brake fluid reservoir cap and the area
around the cap before removing it. This will help
keep dirt from entering the reservoir.
{CAUTION:
With the wrong kind of uid in your brake
system, your brakes may not work well, or they
may not even work at all. This could cause a
crash. Always use the proper brake uid.
Notice:
Using the wrong uid can badly damage brake
system parts. For example, just a few drops of
mineral-based oil, such as engine oil, in your
brake system can damage brake system parts so
badly that they will have to be replaced. Do not
let someone put in the wrong kind of uid.
If you spill brake uid on your vehicle’s painted
surfaces, the paint nish can be damaged. Be
careful not to spill brake uid on your vehicle. If
you do, wash it off immediately. SeeWashing
Your Vehicle on page 5-87.
5-36
Page 304 of 394
(E) Rim Diameter:Diameter of the wheel in inches.
(F) Service Description:The service description
indicates the load range and speed rating of a tire. The
load index can range from 1 to 279. Speed ratings
range from A to Z.
Tire Terminology and Denitions
Air Pressure:The amount of air inside the tire pressing
outward on each square inch of the tire. Air pressure
is expressed in pounds per square inch (psi) or
kilopascal (kPa).
Accessory Weight:This means the combined weight
of optional accessories. Some examples of optional
accessories are, automatic transmission, power steering,
power brakes, power windows, power seats, and air
conditioning.
Aspect Ratio:The relationship of a tire’s height
to its width.
Belt:A rubber coated layer of cords that is located
between the plies and the tread. Cords may be made
from steel or other reinforcing materials.Bead:The tire bead contains steel wires wrapped by
steel cords that hold the tire onto the rim.
Bias Ply Tire:A pneumatic tire in which the plies are
laid at alternate angles less than 90 degrees to the
centerline of the tread.
Cold Ination Pressure:The amount of air pressure in
a tire, measured in pounds per square inch (psi) or
kilopascals (kPa) before a tire has built up heat
from driving. SeeInation - Tire Pressure on page 5-59.
Curb Weight:This means the weight of a motor
vehicle with standard and optional equipment including
the maximum capacity of fuel, oil and coolant, but
without passengers and cargo.
DOT Markings:A code molded into the sidewall of a
tire signifying that the tire is in compliance with the U.S.
Department of Transportation (DOT) motor vehicle
safety standards. The DOT code includes the Tire
Identification Number (TIN), an alphanumeric designator
which can also identify the tire manufacturer, production
plant, brand and date of production.
GVWR:Gross Vehicle Weight Rating, seeLoading
Your Vehicle on page 4-30.
5-56
Page 326 of 394
{CAUTION:
Never use oil or grease on studs or nuts. If
you do, the nuts might come loose. Your wheel
could fall off, causing a serious accident.
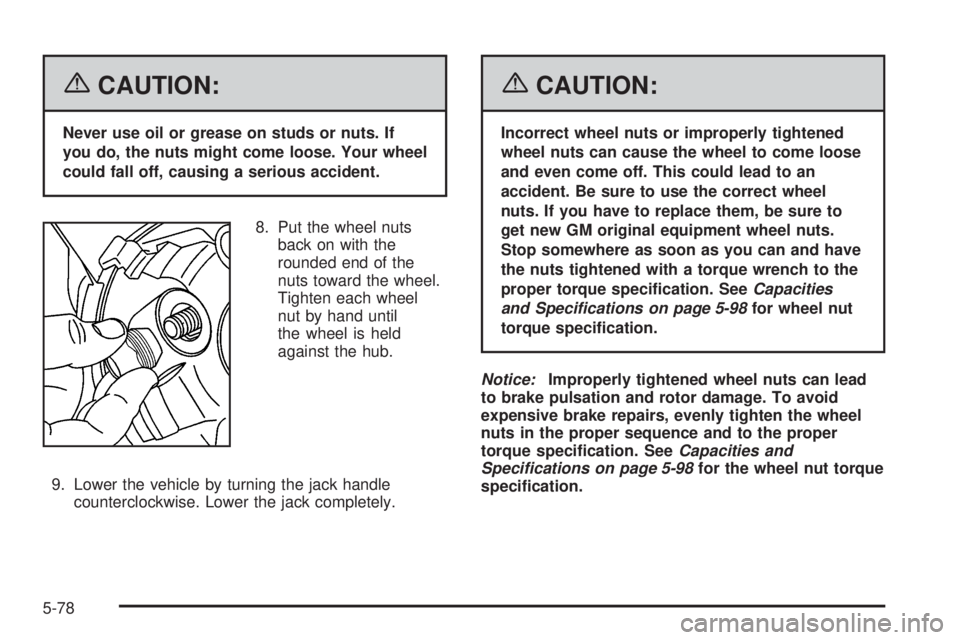
8. Put the wheel nuts
back on with the
rounded end of the
nuts toward the wheel.
Tighten each wheel
nut by hand until
the wheel is held
against the hub.
9. Lower the vehicle by turning the jack handle
counterclockwise. Lower the jack completely.
{CAUTION:
Incorrect wheel nuts or improperly tightened
wheel nuts can cause the wheel to come loose
and even come off. This could lead to an
accident. Be sure to use the correct wheel
nuts. If you have to replace them, be sure to
get new GM original equipment wheel nuts.
Stop somewhere as soon as you can and have
the nuts tightened with a torque wrench to the
proper torque specication. SeeCapacities
and Specifications on page 5-98for wheel nut
torque specication.
Notice:Improperly tightened wheel nuts can lead
to brake pulsation and rotor damage. To avoid
expensive brake repairs, evenly tighten the wheel
nuts in the proper sequence and to the proper
torque specication. SeeCapacities and
Specifications on page 5-98for the wheel nut torque
specication.
5-78