parking brake GMC SAVANA PASSENGER 2010 User Guide
[x] Cancel search | Manufacturer: GMC, Model Year: 2010, Model line: SAVANA PASSENGER, Model: GMC SAVANA PASSENGER 2010Pages: 424, PDF Size: 2.38 MB
Page 174 of 424
The vehicle can be only driven for a short time with the
reading in either warning zone. If it must be driven,
turn off all unnecessary accessories.
Readings in either warning zone indicate a possible
problem in the electrical system. Have the vehicle
serviced as soon as possible.
Brake System Warning Light
The vehicle’s hydraulic brake system is divided into
two parts. If one part is not working, the other part can
still work and stop the vehicle. For good braking,
both need to work.
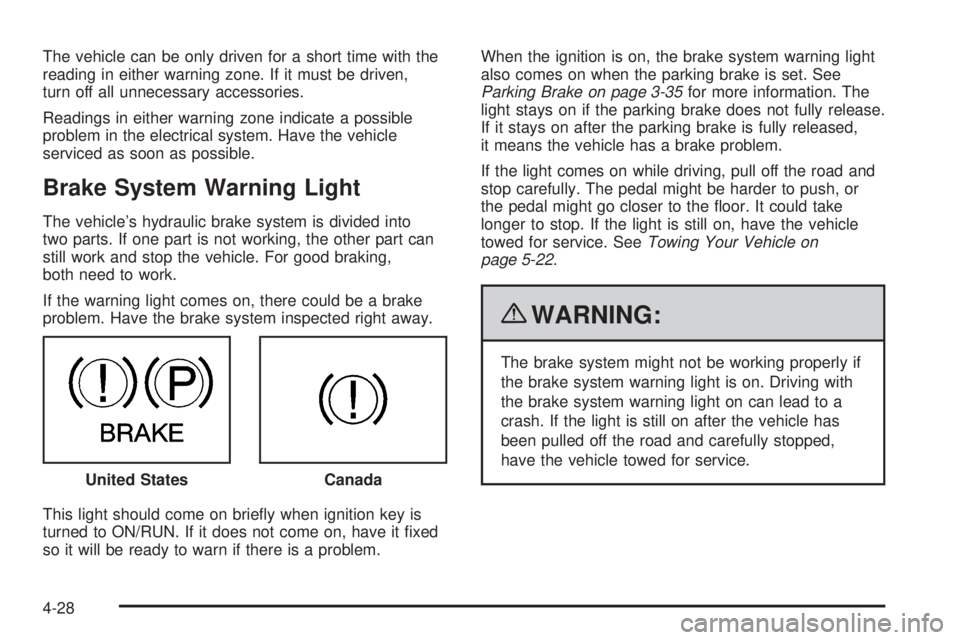
If the warning light comes on, there could be a brake
problem. Have the brake system inspected right away.
This light should come on briefly when ignition key is
turned to ON/RUN. If it does not come on, have it fixed
so it will be ready to warn if there is a problem.When the ignition is on, the brake system warning light
also comes on when the parking brake is set. See
Parking Brake on page 3-35for more information. The
light stays on if the parking brake does not fully release.
If it stays on after the parking brake is fully released,
it means the vehicle has a brake problem.
If the light comes on while driving, pull off the road and
stop carefully. The pedal might be harder to push, or
the pedal might go closer to the floor. It could take
longer to stop. If the light is still on, have the vehicle
towed for service. SeeTowing Your Vehicle on
page 5-22.
{WARNING:
The brake system might not be working properly if
the brake system warning light is on. Driving with
the brake system warning light on can lead to a
crash. If the light is still on after the vehicle has
been pulled off the road and carefully stopped,
have the vehicle towed for service.
United States
Canada
4-28
Page 205 of 424
Audio System(s)
If the vehicle came without a radio, the wiring provisions
for a radio and an antenna were installed at the
assembly plant, so that if you want, a radio can be
installed at the dealer/retailer.
Determine which radio the vehicle has and read the
following pages to become familiar with its features.
{WARNING:
Taking your eyes off the road for extended periods
could cause a crash resulting in injury or death to
you or others. Do not give extended attention to
entertainment tasks while driving.
This system provides access to many audio and non
audio listings.
To minimize taking your eyes off the road while driving,
do the following while the vehicle is parked:
•Become familiar with the operation and controls of
the audio system.
•Set up the tone, speaker adjustments, and preset
radio stations.For more information, seeDefensive Driving on
page 5-2.
Notice:Contact your dealer/retailer before adding
any equipment.
Adding audio or communication equipment could
interfere with the operation of the vehicle’s engine,
radio, or other systems, and could damage them.
Follow federal rules covering mobile radio and
telephone equipment.
Notice:The chime signals related to safety belts,
parking brake, and other functions of your vehicle
operate through the radio/entertainment system.
If that equipment is replaced or additional equipment
is added to your vehicle, the chimes may not
work. Make sure that replacement or additional
equipment is compatible with your vehicle before
installing it. SeeAccessories and Modifications
on page 6-3.
The vehicle has Retained Accessory Power (RAP). With
RAP, the audio system can be played even after the
ignition is turned off. SeeRetained Accessory Power
(RAP) on page 3-23for more information.
4-59
Page 249 of 424
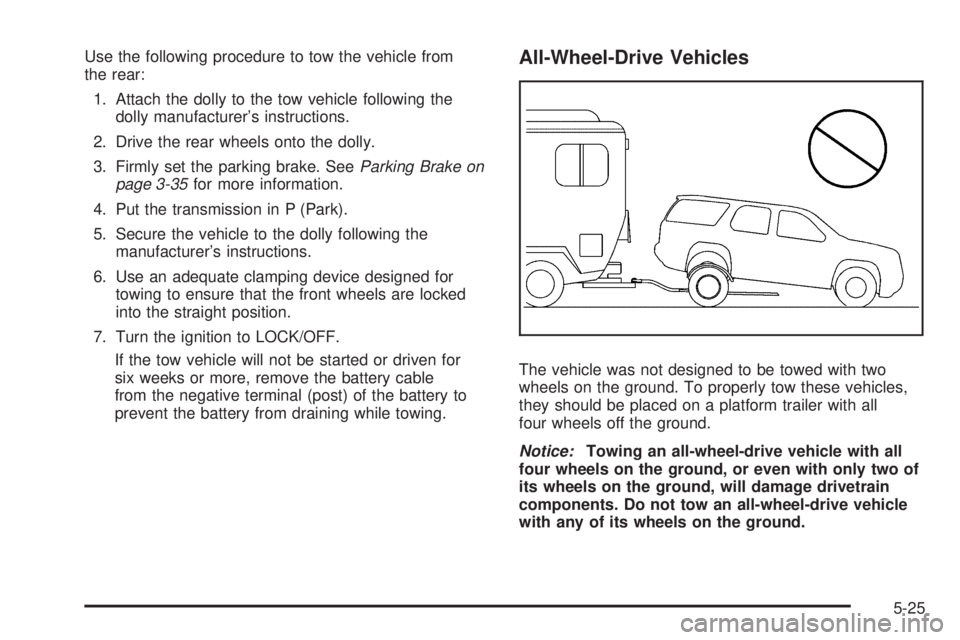
Use the following procedure to tow the vehicle from
the rear:
1. Attach the dolly to the tow vehicle following the
dolly manufacturer’s instructions.
2. Drive the rear wheels onto the dolly.
3. Firmly set the parking brake. SeeParking Brake on
page 3-35for more information.
4. Put the transmission in P (Park).
5. Secure the vehicle to the dolly following the
manufacturer’s instructions.
6. Use an adequate clamping device designed for
towing to ensure that the front wheels are locked
into the straight position.
7. Turn the ignition to LOCK/OFF.
If the tow vehicle will not be started or driven for
six weeks or more, remove the battery cable
from the negative terminal (post) of the battery to
prevent the battery from draining while towing.All-Wheel-Drive Vehicles
The vehicle was not designed to be towed with two
wheels on the ground. To properly tow these vehicles,
they should be placed on a platform trailer with all
four wheels off the ground.
Notice:Towing an all-wheel-drive vehicle with all
four wheels on the ground, or even with only two of
its wheels on the ground, will damage drivetrain
components. Do not tow an all-wheel-drive vehicle
with any of its wheels on the ground.
5-25
Page 258 of 424
Tow/Haul is designed to be most effective when the
vehicle and trailer combined weight is at least 75 percent
of the vehicle’s Gross Combined Weight Rating (GCWR).
See “Weight of the Trailer” later in the section. Tow/Haul
is most useful under the following driving conditions:
•When pulling a heavy trailer or a large or heavy load
through rolling terrain.
•When pulling a heavy trailer or a large or heavy load
in stop and go traffic.
•When pulling a heavy trailer or a large or heavy load
in busy parking lots where improved low speed
control of the vehicle is desired.
Operating the vehicle in Tow/Haul when lightly loaded
or with no trailer at all will not cause damage. However,
there is no benefit to the selection of Tow/Haul when
the vehicle is unloaded. Such a selection when unloaded
may result in unpleasant engine and transmission
driving characteristics and reduced fuel economy.
Tow/Haul is recommended only when pulling a heavy
trailer or a large or heavy load.
Trailer Brakes
A loaded trailer that weighs more than 1,500 lbs
(680 kg) needs to have its own brake system that is
adequate for the weight of the trailer. Be sure to read
and follow the instructions for the trailer brakes so
they are installed, adjusted and maintained properly.
Driving with a Trailer
{WARNING:
When towing a trailer, exhaust gases may collect
at the rear of the vehicle and enter if the liftgate,
trunk/hatch, or rear-most window is open.
Engine exhaust contains carbon monoxide (CO)
which cannot be seen or smelled. It can cause
unconsciousness and even death.
To maximize safety when towing a trailer:
•Have the exhaust system inspected for leaks
and make necessary repairs before starting
a trip.
•Never drive with the liftgate, trunk/hatch, or
rear-most window open.
•Fully open the air outlets on or under the
instrument panel.
•Adjust the Climate Control system to a setting
that brings in only outside air and set the fan
speed to the highest setting. See Climate
Control System in the Index.
For more information about carbon monoxide, see
Engine Exhaust on page 3-38
5-34
Page 260 of 424
Driving On Grades
Reduce speed and shift to a lower gearbeforestarting
down a long or steep downgrade. If the transmission is
not shifted down, the brakes might have to be used so
much that they would get hot and no longer work well.
The vehicle can tow in D (Drive). Shift the transmission
to a lower gear if the transmission shifts too often
under heavy loads and/or hilly conditions.
When towing at high altitude on steep uphill grades,
consider the following: Engine coolant will boil at a lower
temperature than at normal altitudes. If the engine is
turned off immediately after towing at high altitude
on steep uphill grades, the vehicle may show signs
similar to engine overheating. To avoid this, let
the engine run while parked, preferably on level ground,
with the automatic transmission in P (Park) for a
few minutes before turning the engine off. If the overheat
warning comes on, seeEngine Overheating on
page 6-33.
Parking on Hills
{WARNING:
Parking the vehicle on a hill with the trailer
attached can be dangerous. If something goes
wrong, the rig could start to move. People can be
injured, and both the vehicle and the trailer can be
damaged. When possible, always park the rig on a
flat surface.
If parking the rig on a hill:
1. Press the brake pedal, but do not shift the
transmission into P (Park) yet. Turn the wheels into
the curb if facing downhill or into traffic if facing
uphill.
2. Have someone place chocks under the trailer
wheels.
3. When the wheel chocks are in place, release the
brake pedal until the chocks absorb the load.
4. Reapply the brake pedal. Then apply the parking
brake and shift into P (Park).
5. Release the brake pedal.
5-36
Page 261 of 424
Leaving After Parking on a Hill
1. Apply and hold the brake pedal while you:
•start the engine,
•shift into a gear, and
•release the parking brake.
2. Let up on the brake pedal.
3. Drive slowly until the trailer is clear of the chocks.
4. Stop and have someone pick up and store the
chocks.
Maintenance When Trailer Towing
The vehicle needs service more often when pulling a
trailer. See this manual’s Maintenance Schedule
or Index for more information. Things that are especially
important in trailer operation are automatic transmission
fluid, engine oil, axle lubricant, belts, cooling system
and brake system. It is a good idea to inspect
these before and during the trip.
Check periodically to see that all hitch nuts and bolts
are tight.
Trailer Wiring Harness
The optional heavy-duty trailer wiring package includes
a wiring harness, with a seven-pin connector at the
rear of the vehicle and a four-wire harness assembly
under the driver side of the instrument panel. The
four-wire harness assembly comes without a connector.
If the vehicle does not have a trailer hitch, the
seven-wire harness assembly with connector is taped
together and located in a frame pocket at the driver side
rear left corner of the frame.
If the vehicle has a trailer hitch, the seven-wire harness
assembly with connector is attached to a bracket on
the hitch platform. In both cases, the seven-wire harness
has a connector and includes a 30-amp feed wire.
5-37
Page 263 of 424
Service............................................................6-3
Accessories and Modifications..........................6-3
California Proposition 65 Warning.....................6-4
California Perchlorate Materials Requirements.....6-4
Doing Your Own Service Work.........................6-4
Adding Equipment to the Outside of the
Vehicle......................................................6-5
Fuel................................................................6-5
Gasoline Octane............................................6-6
Gasoline Specifications....................................6-6
California Fuel...............................................6-7
Additives.......................................................6-7
Fuel E85 (85% Ethanol)..................................6-8
Fuels in Foreign Countries...............................6-9
Filling the Tank............................................6-10
Filling a Portable Fuel Container.....................6-12
Checking Things Under the Hood....................6-12
Hood Release..............................................6-13
Engine Compartment Overview.......................6-14
Engine Oil...................................................6-15
Engine Oil Life System..................................6-18
Engine Air Cleaner/Filter................................6-19
Automatic Transmission Fluid (4-Speed
Transmission)...........................................6-20
Automatic Transmission Fluid (6-Speed
Transmission)...........................................6-23Cooling System............................................6-26
Engine Coolant.............................................6-28
Engine Overheating.......................................6-33
Engine Fan Noise.........................................6-34
Power Steering Fluid.....................................6-35
Windshield Washer Fluid................................6-36
Brakes........................................................6-37
Battery........................................................6-40
Jump Starting...............................................6-41
All-Wheel Drive.............................................
.6-45
Rear Axle.......................................................6-46
Front Axle......................................................6-46
Noise Control System.....................................6-47
Tampering with Noise Control System
Prohibited.................................................6-47
Bulb Replacement..........................................6-48
Halogen Bulbs..............................................6-49
Headlamps..................................................6-49
Front Turn Signal, Sidemarker and Parking
Lamps .....................................................6-51
Center High-Mounted Stoplamp (CHMSL).........6-51
Taillamps.....................................................6-52
License Plate Lamp......................................6-53
Replacement Bulbs.......................................6-53
Windshield Wiper Blade Replacement..............6-54
Section 6 Service and Appearance Care
6-1
Page 284 of 424
Checking the Fluid Level
Prepare your vehicle as follows:
1. Park your vehicle on a level place. Keep the engine
running.
2. With the parking brake applied, place the shift lever
in P (Park).
3. With your foot on the brake pedal, move the shift
lever through each gear range, pausing for about
three seconds in each range. Then, position
the shift lever in P (Park).
4. Let the engine run at idle for three minutes or more.
Then, without shutting off the engine, follow these
steps:
The transmission dipstick
is located near the center
of the engine compartment
and will be labeled with
the graphic shown.SeeEngine Compartment Overview on page 6-14for
more information on location.
1. Flip the handle up and then pull out the dipstick
and wipe it with a clean rag or paper towel.
2. Push it back in all the way, wait three seconds and
then pull it back out again.
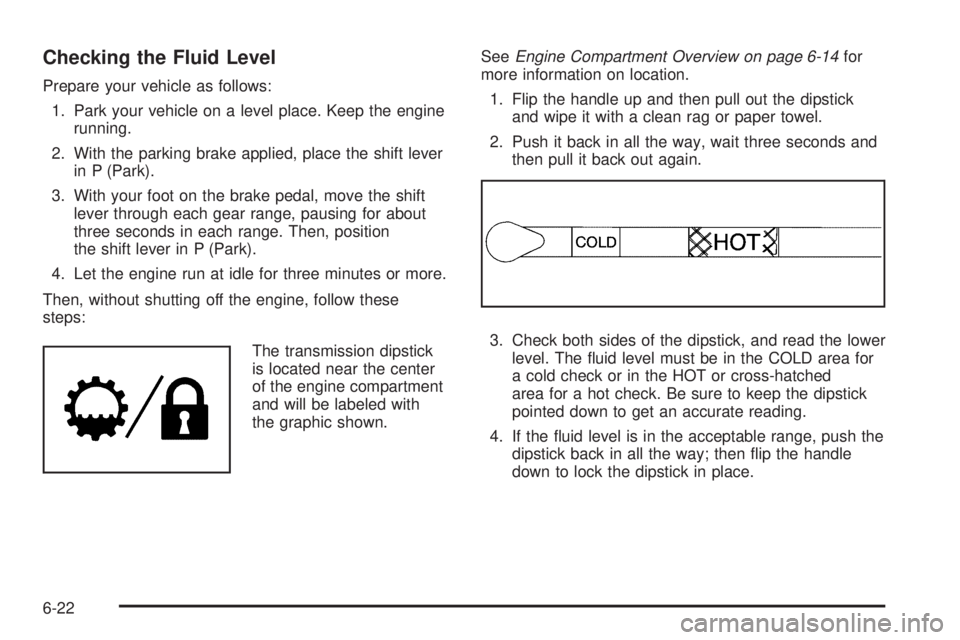
3. Check both sides of the dipstick, and read the lower
level. The fluid level must be in the COLD area for
a cold check or in the HOT or cross-hatched
area for a hot check. Be sure to keep the dipstick
pointed down to get an accurate reading.
4. If the fluid level is in the acceptable range, push the
dipstick back in all the way; then flip the handle
down to lock the dipstick in place.
6-22
Page 286 of 424
If it is decided to check the fluid level, be sure to follow
all the instructions here, or a false reading on the
dipstick may occur.
Notice:Too much or too little uid can damage
your transmission. Too much can mean that some
of the uid could come out and fall on hot engine
parts or exhaust system parts, starting a re.
Too little uid could cause the transmission to
overheat. Be sure to get an accurate reading if you
check your transmission uid.
Wait at least 30 minutes with the engine Off, before
checking the transmission fluid level if the vehicle has
been driven:
•In hot weather, when outside temperatures are
above 32°C (90°F).
•The vehicle is heavily loaded.
•At high speed for quite a while in hot weather.
•In heavy traffic and hot weather.
•While pulling a trailer.
After driving under these conditions, a hot check can be
performed. The fluid should be Hot, which is 71°C
to 93°C (160°F to 200°F).
A cold fluid level check can be performed after the
vehicle has been sitting for eight hours or more with the
engine Off, but this is used only as a reference. Letthe engine run at idle for five minutes if outside
temperatures is between 15°C to 32°C (60°F to 90°F).
Should the fluid level be low during this cold check,
the fluid must be checked Warm or Hot before adding
fluid. If the outside temperature is colder than 15°C
(60°F) or hotter than 32°C (90°F), a cold check cannot
be performed.
A warm fluid level check can be performed by driving
the vehicle under lightly loaded conditions and outside
temperatures between 10°C to 27°C (50°F to 80°F). The
vehicle should be driven for at least 15 miles before
performing a warm check. Checking the fluid Warm or
Hot will give a more accurate reading of the fluid
level than a cold check.
Because the vehicle is equipped with a high-efficiency
air-to-oil cooler, the transmission fluid temperature
may not reach the required Hot fluid level checking
temperature under normal lightly loaded driving vehicle
conditions.Checking the Fluid Level
Prepare the vehicle as follows:
1. Park the vehicle on a level place. Keep the engine
running.
2. With the parking brake applied, place the shift lever
in P (Park).
6-24
Page 303 of 424
Jump Starting
If the vehicle battery has run down, you may want to
use another vehicle and some jumper cables to
start your vehicle. Be sure to use the following steps to
do it safely.
{WARNING:
Batteries can hurt you. They can be dangerous
because:
•They contain acid that can burn you.
•They contain gas that can explode or ignite.
•They contain enough electricity to burn you.
If you do not follow these steps exactly, some or
all of these things can hurt you.
Notice:Ignoring these steps could result in costly
damage to the vehicle that would not be covered
by the warranty.
Trying to start the vehicle by pushing or pulling it
will not work, and it could damage the vehicle.
1. Check the other vehicle. It must have a 12-volt
battery with a negative ground system.Notice:If the other vehicle’s system is not a 12-volt
system with a negative ground, both vehicles can
be damaged. Only use vehicles with 12-volt systems
with negative grounds to jump start your vehicle.
2. Get the vehicles close enough so the jumper cables
can reach, but be sure the vehicles are not touching
each other. If they are, it could cause a ground
connection you do not want. You would not be able
to start your vehicle, and the bad grounding
could damage the electrical systems.
To avoid the possibility of the vehicles rolling, set
the parking brake firmly on both vehicles involved in
the jump start procedure. Put an automatic
transmission in P (Park) or a manual transmission
in N (Neutral) before setting the parking brake.
Notice:If you leave the radio or other accessories
on during the jump starting procedure, they
could be damaged. The repairs would not be
covered by the warranty. Always turn off the radio
and other accessories when jump starting the
vehicle.
3. Turn off the ignition on both vehicles. Unplug
unnecessary accessories plugged into the cigarette
lighter or the accessory power outlet. Turn off
the radio and all lamps that are not needed. This
will avoid sparks and help save both batteries. And
it could save the radio!
6-41