lights GMC SIERRA 1995 Owners Manual
[x] Cancel search | Manufacturer: GMC, Model Year: 1995, Model line: SIERRA, Model: GMC SIERRA 1995Pages: 488, PDF Size: 26.01 MB
Page 13 of 488
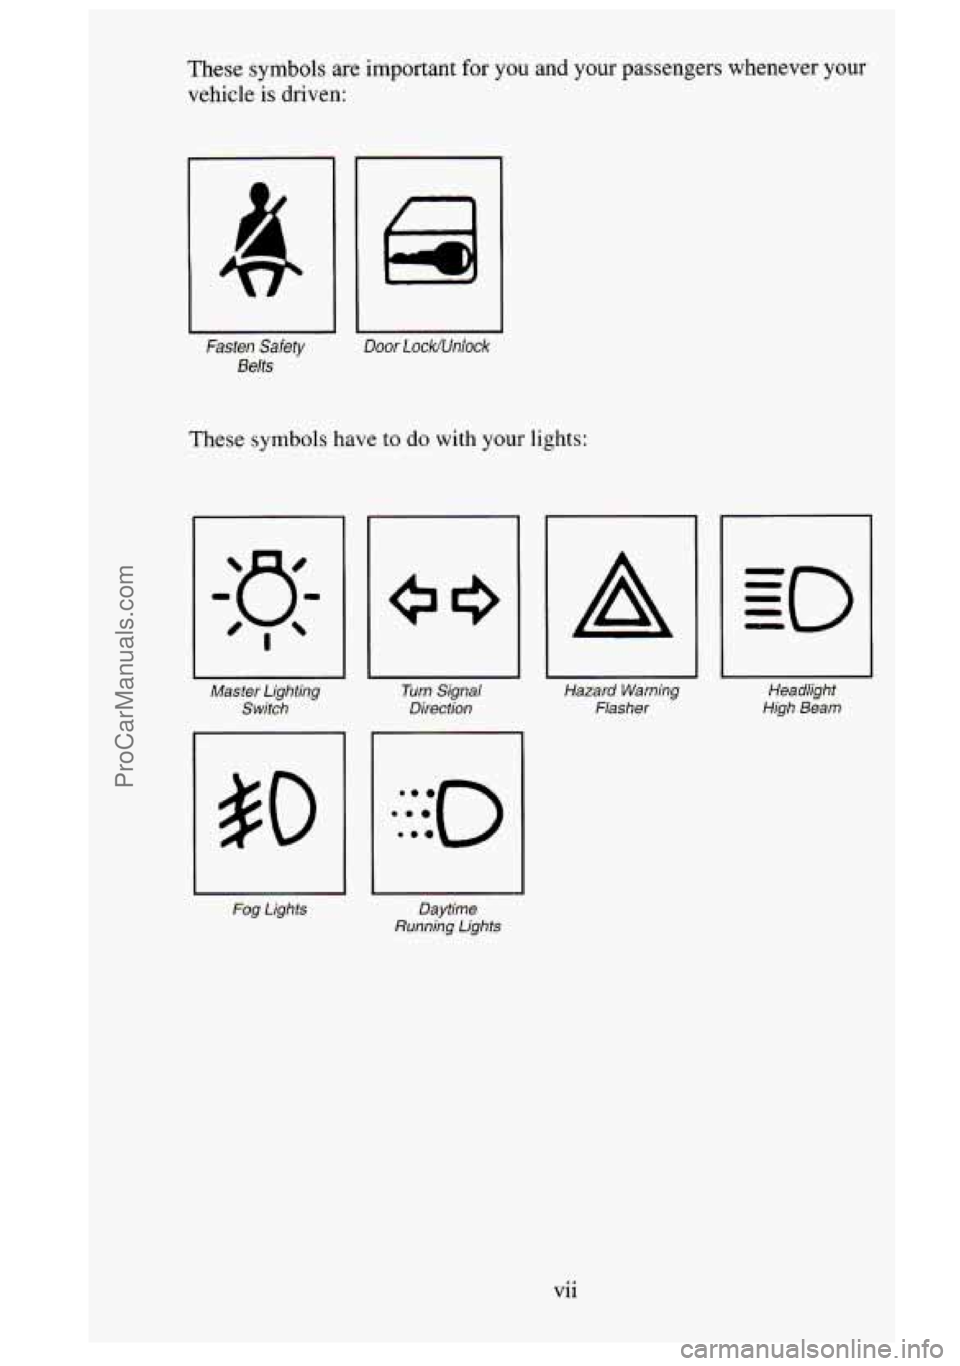
These symbols are important for you and your passengers whenever your
vehicle is driven:
~~ ~
Fasten Safety Door Lock/Unlock
Belts
These symbols have to do with your lights:
Master Lighting
Switch Turn
Signal
Direction
Fog Lights Daytime
Running Lights
A
I
Hazard Warning
Flasher Headlight
High Beam
vii
ProCarManuals.com
Page 14 of 488
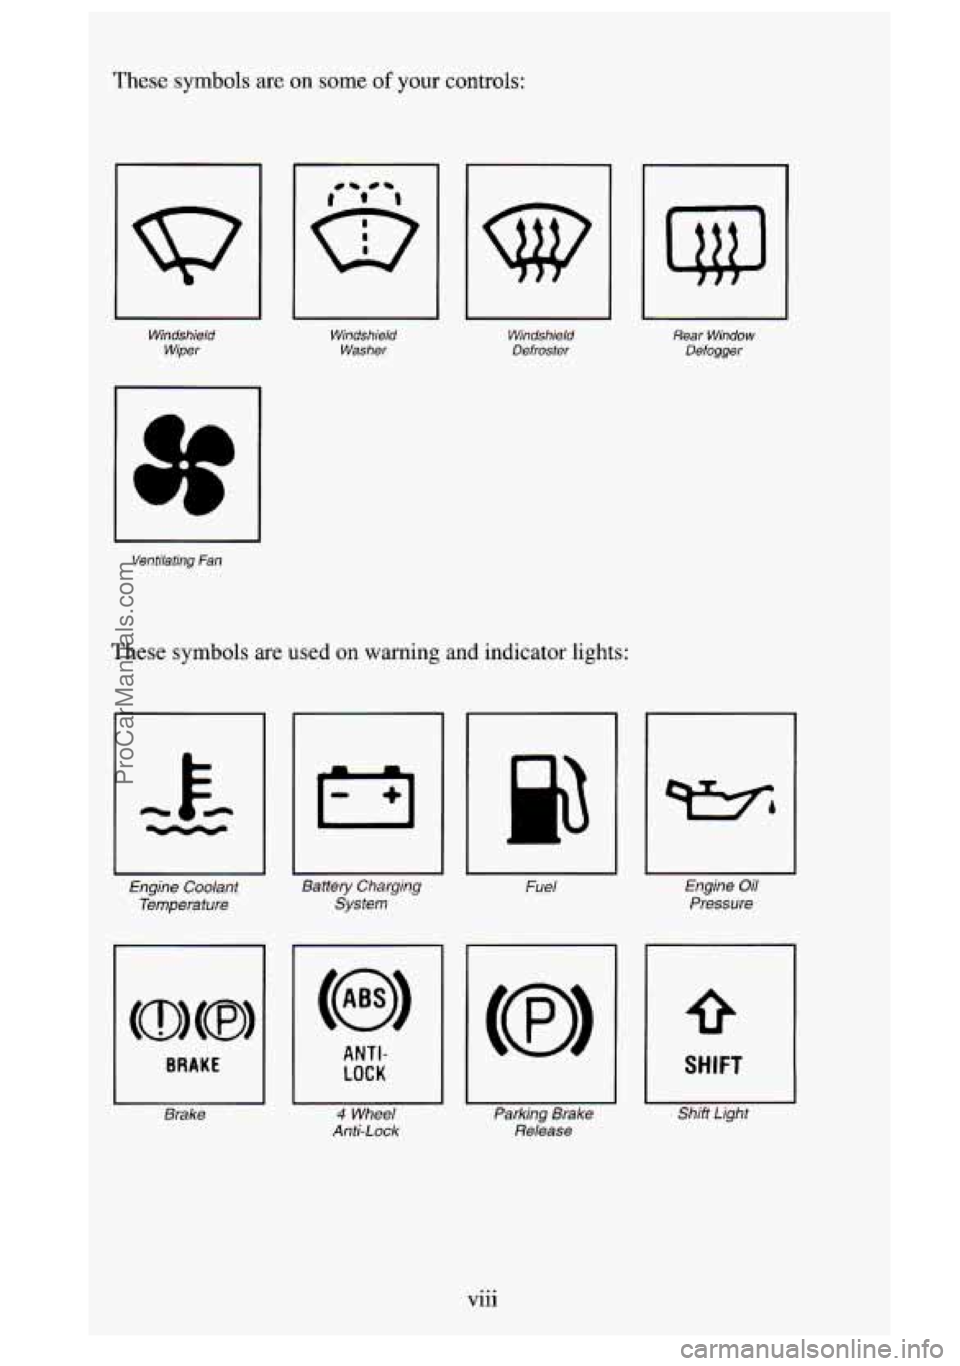
These symbols are on some of your controls:
uu
Windshield Wiper Windshield
Washer
I I
Windshield Defroster
Ventilating Fan
These symbols are used on warning and indicator lights:
Engine Coolant
Temperature
~~
Battery Charging
System
BRAKE
Brake
ANTI-
LOCK
4 Wheel
Anti-Lock
I 1
Rear Window
Defogger
Fuel
Parking Brake
Release
Engine Oil
Pressure
SHIFT
Shift Lighf
Vlll . ..
ProCarManuals.com
Page 110 of 488
To Erase Speed Memory
When you turn off' the Cruise Control or the ignition. your Cruise Control
set speed memory
is erased.
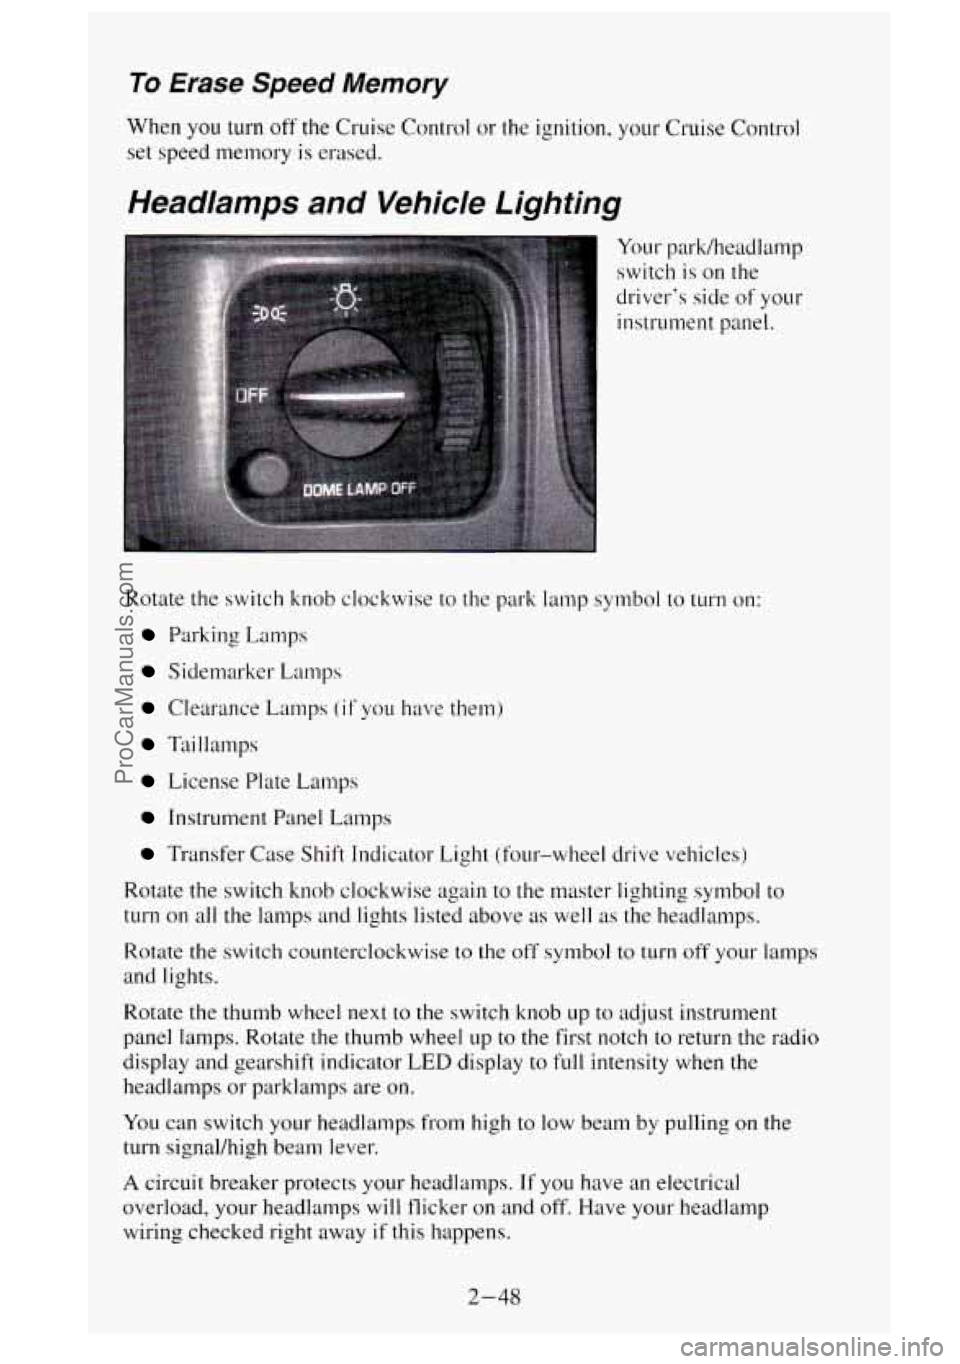
Headlamps and Vehicle Lighting
Your park/headlamp
switch is on the
driver's side of your
instrument panel.
Rotate the switch knob clockwise to the park lamp symbol to
turn on:
Parking Lamps
Sidemarker Lamps
Clearance Lamps (if you have them)
Taillamps
License Plate L.amps
Instrument Panel Lamps
Transfer Case Shift Indicator Light (four-wheel drive vehicles)
Rotate the switch knob clockwise again to the master lighting symbol to
turn on all the lamps and lights listed above as well as the headlamps.
Rotate the switch counterclockwise to the off symbol to turn off your lamps
and lights.
Rotate the thumb wheel next to the switch knob up
to adjust instrument
panel lamps. Rotate
the thumb wheel up to the first notch to return the radio
display and gearshift indicator
LED display to full intensity when the
headlamps or parklamps are
on.
You can switch your headlamps from high to low beam by pulling on the
turn signal/high beam lever.
A circuit breaker protects your headlamps. If you have an electrical
overload, your headlamps will flicker on and off. Have your headlamp
wiring checked right away if this happens.
2-48
ProCarManuals.com
Page 116 of 488
Electrochromic Inside Rearview Mirror with Compass (Option)
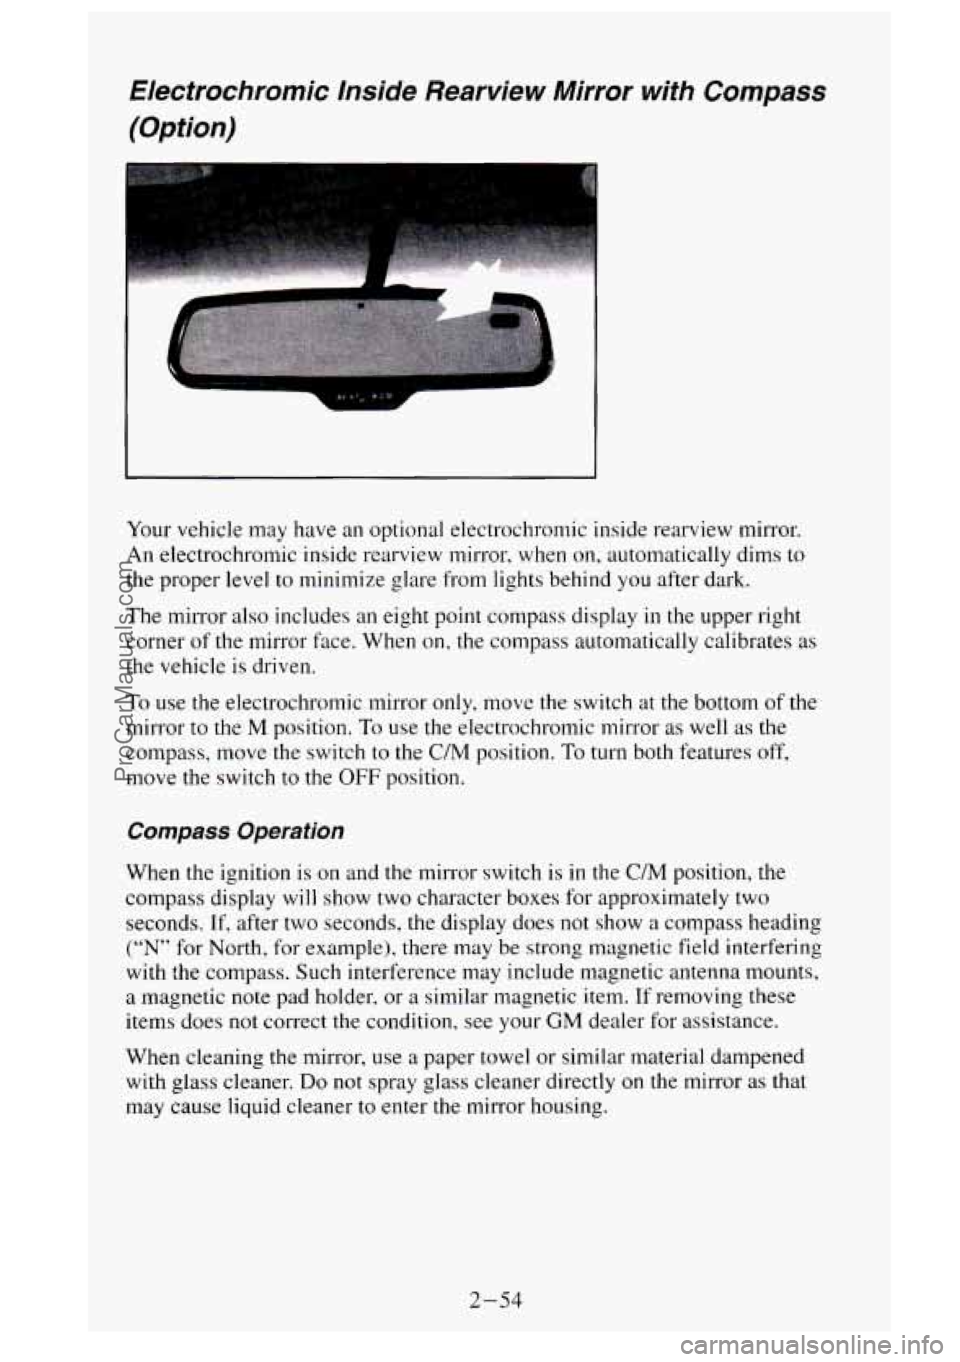
Your vehicle may have an optional electrochromic inside rearview mirror.
An electrochromic inside rearview mirror, when
on, automatically dims to
the proper level to minimize glare from lights behind you after dark.
The mirror also includes an eight point compass display in the upper right
corner
of the mirror face. When on, the compass automatically calibrates as
the vehicle is driven.
To use the electrochromic mirror only, move the switch at the bottom of the
mirror to the
M position. To use the electrochromic mirror as well as the
compass, move the switch to the
C/M position. To turn both features off,
move the switch to the OFF position.
Compass Operation
When the ignition is on and the mirror switch is in the C/M position, the
compass display
will show two character boxes for approximately two
seconds.
If, after two seconds, the display does not show a compass heading
(“N” for North, for example), there may be strong magnetic field interfering
with the compass. Such interference may include magnetic antenna mounts,
a magnetic note pad holder, or a similar magnetic item. If removing these
items does not correct the condition, see your
GM dealer for assistance.
When cleaning
the mirror, use a paper towel or similar material dampened
with glass cleaner.
Do not spray glass cleaner directly on the mirror as that
may cause liquid cleaner to enter the mirror housing.
2-54
ProCarManuals.com
Page 120 of 488
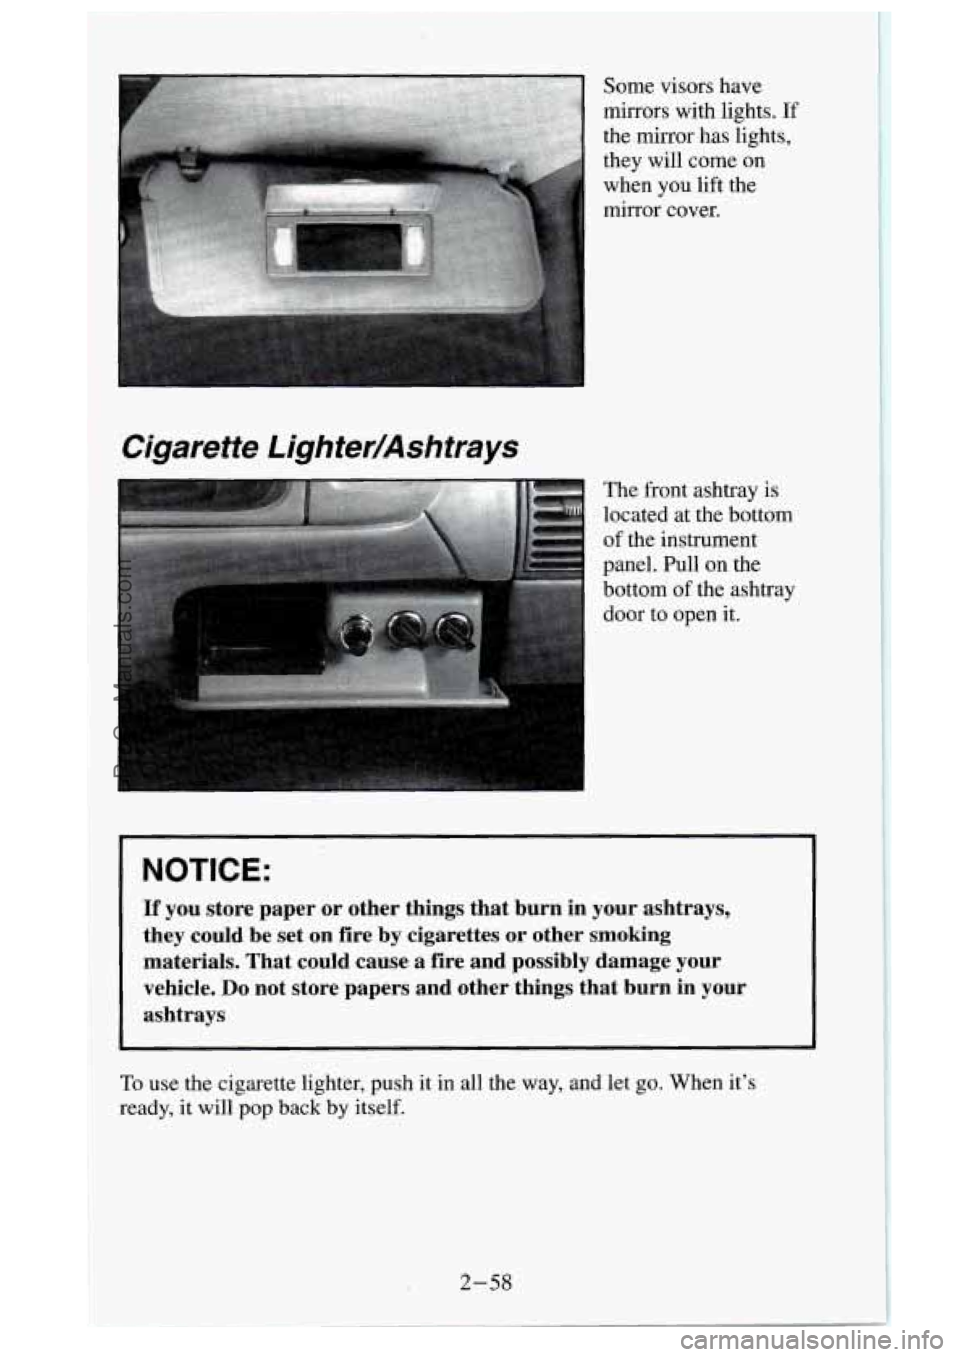
Cigarette Lighter/Ashtrays
The front ashtray is
located at the bottom
of the instrument
panel. Pull on the
bottom
of the ashtray
door to open it.
Some visors have
mirrors with
lights. If
the mirror has lights,
they will come on
when you lift the
mirror cover.
NOTICE:
If you store paper or other things that burn in your ashtrays,
they could be set on fire by cigarettes or other smoking
materials. That could cause a fire and possibly damage your vehicle.
Do not store papers and other things that burn in your
ashtrays
To use the cigarette lighter, push it in all the way, and let go. When it’s
ready,
it will pop back by itself.
2-58
ProCarManuals.com
Page 132 of 488
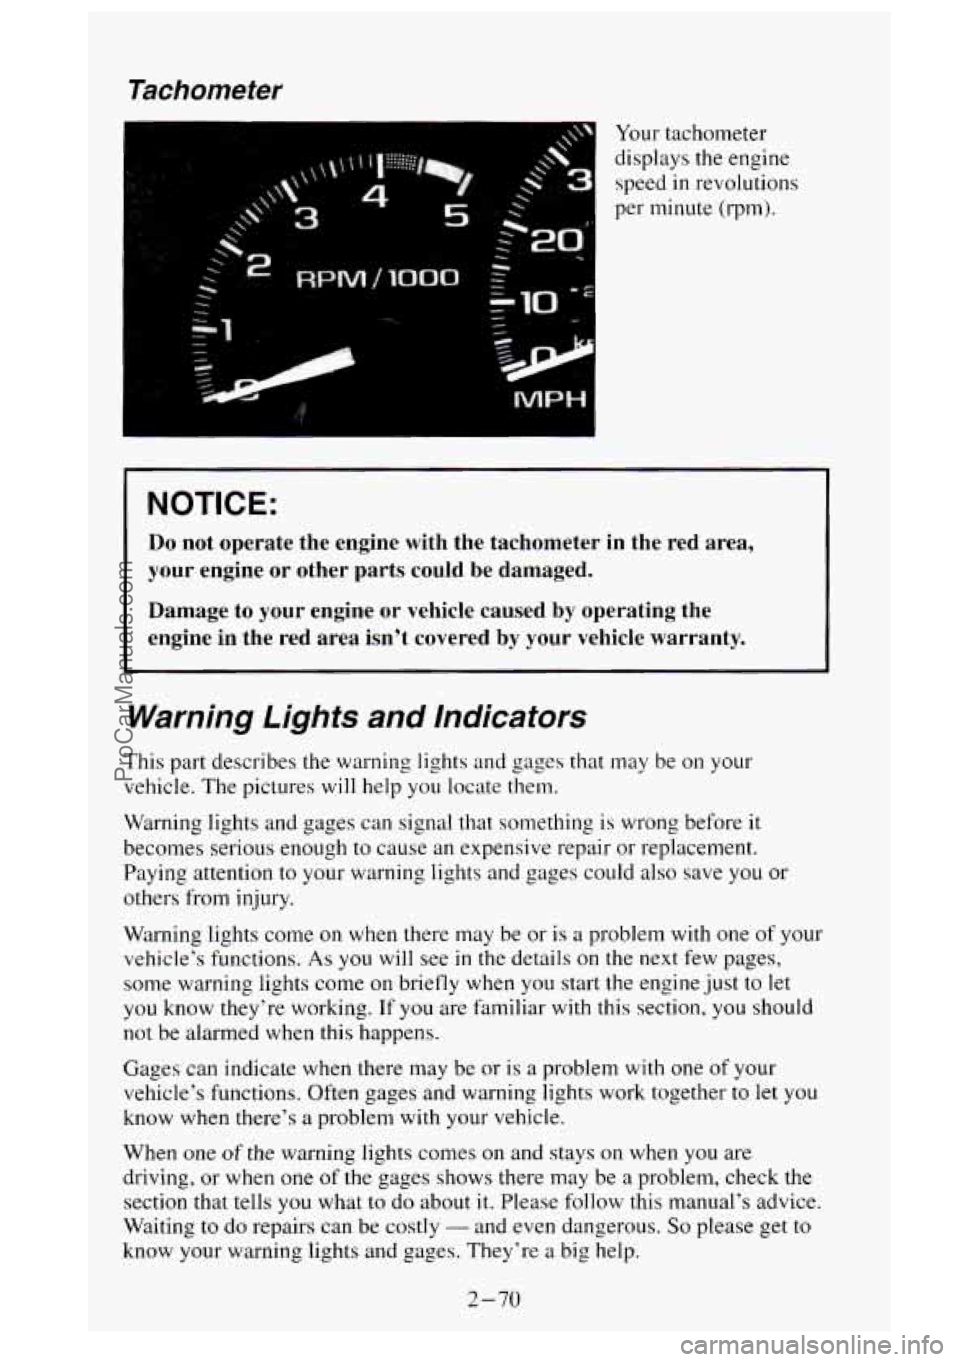
Tachometer
. :i
Your tachometer
displays the engine
speed
in revolutions
per minute (rpm).
1 NOTICE:
Do not operate the engine with the tachometer in the red area\
,
your engine
or other parts could be damaged.
Damage to your engine or vehicle caused
by operating the
engine
in the red area isn’t covered by your vehicle warranty.
Warning Lights and Indicators
This part describes the warning lights and gages that may be on your
vehicle. The pictures will help you locate them.
Warning lights and gages can signal that something is wrong before
it
becomes serious enough to cause an expensive repair or replacement.
Paying attention to your warning lights and gages could also save you or
others from injury.
Warning lights come on when there may be or is a problem
with one of your
vehicle’s functions.
As you will see in the details on the next few pages,
some warning lights come on briefly when you start the engine just
to let
you know they’re working. If you are familiar
with this section, you should
not be alarmed when
this happens.
Gages can indicate when there may be or is a problem with one of your
vehicle’s functions. Often gages and warning lights work together to let you
know when there’s
a problem with your vehicle.
When one
of the warning lights comes on and stays on when you are
driving, or when one
of the gages shows there may be a problem, check the
section that tells you what
to do about it. Please follow this manual‘s advice.
Waiting to
do repairs can be costly - and even dangerous. So please get to
know your warning lights and gages. They’re a big help.
2-70
ProCarManuals.com
Page 141 of 488
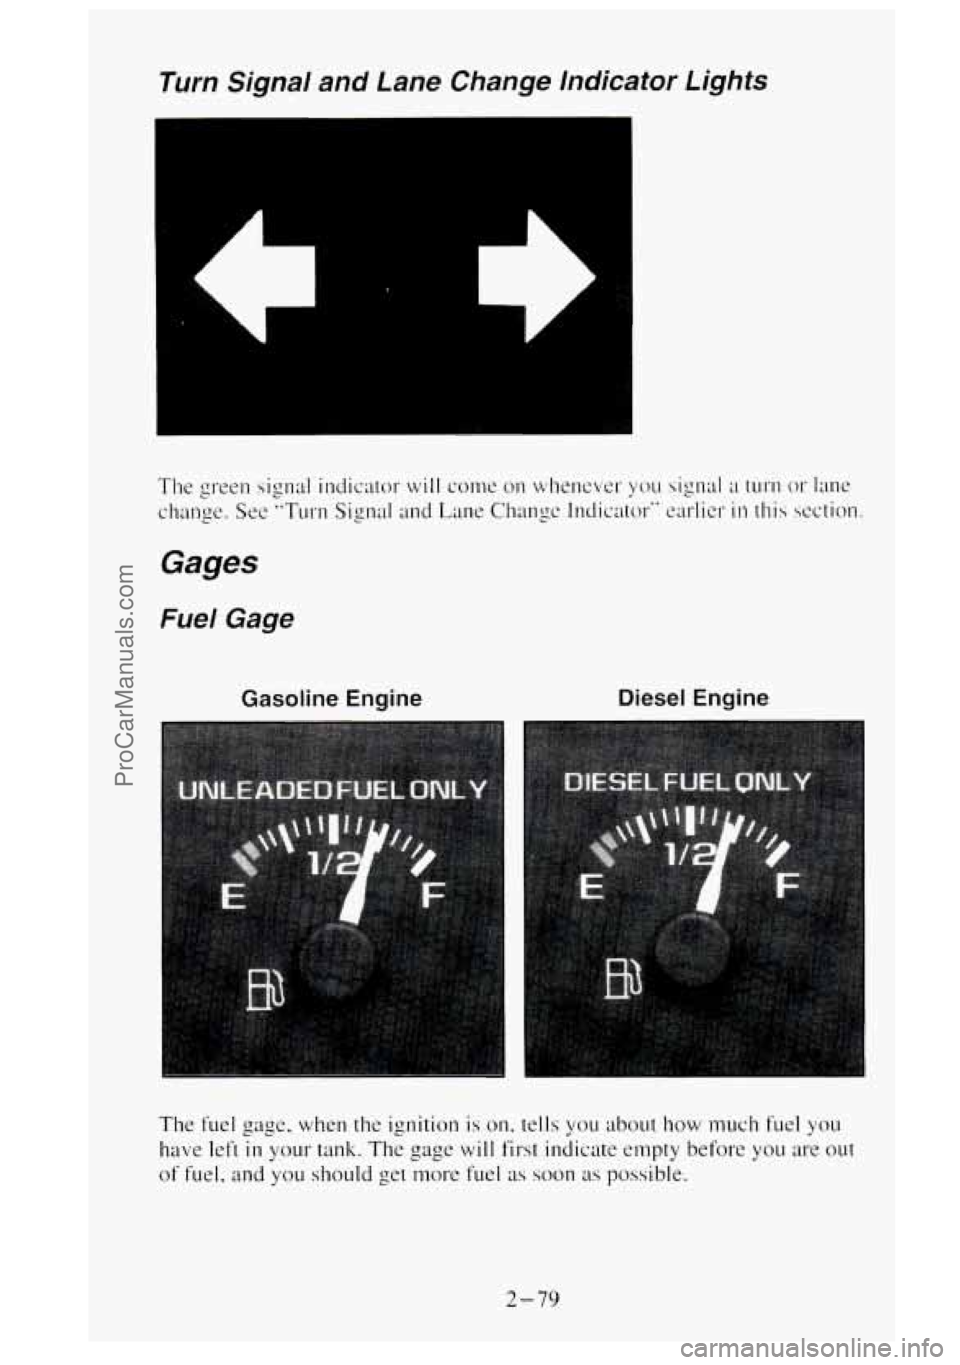
Turn Signal and Lane Change lndicator Lights
Gasoline Engine Diesel Engine
The fuel gage, when the ignition is on. tells you about how much fuel you
have left
in your tank. The gage will first indicate empty before you are out
of fuel. and you should get nmre fuel as soon as possible.
2-79
ProCarManuals.com
Page 185 of 488
Try not to pass more than one vehicle at a time on two-lane roads.
Reconsider before passing the next vehicle.
0 Don’t overtake a slowly moving vehicle too rapidly. Even though the
brake lights are
not flashing, it may be slowing down or starting to turn.
If you’re being passed, make it easy for the following driver to get
ahead
of you. Perhaps you can ease a little to the right.
Loss of Control
Let’s review what driving experts say about what happens when the three
control systems (brakes, steering and acceleration) don’t have enough
friction where the tires meet the road
to do what the driver has asked.
In any emergency, don’t give up. Keep trying
to steer and constantly seek an
escape route or area of less danger.
Skidding
In a skid, a driver can lose control of the vehicle. Defensive drivers avoid
most skids by taking reasonable care suited
to existing conditions, and by
not “overdriving” those conditions. But skids are always possible.
The three types of skids correspond to your vehicle’s three control systems.
In the braking skid your wheels aren’t rolling. In the steering or cornering
skid, too much speed or steering in
a curve causes tires to slip and lose
cornering force. And
in the acceleration skid too much throttle causes the
driving wheels to spin.
A cornering skid and an acceleration skid are best handled by easing your
foot off the accelerator pedal.
If your vehicle starts to slide, ease your foot
off the accelerator pedal and
quickly steer the way you want the vehicle
to go. If you start steering
quickly enough, your vehicle may straighten out. Always be ready for
a
second skid if it occurs.
Of course, traction is reduced when water, snow, ice, gravel, or other
material is on
the road. For safety, you’ll want to slow down and adjust your
driving to these conditions. It is important to slow down on slippery
surfaces because stopping distance will be longer and vehicle control more
limited.
While driving on a surface
with reduced traction, try your best to avoid
sudden steering, acceleration. or braking (including engine braking
by
shifting to a lower gear). Any sudden changes could cause the tires to slide.
You may not realize the surface is slippery until your vehicle
is skidding.
Learn
to recognize warning clues - such as enough water, ice or packed
snow
on the road to make a “mirrored surface” - and slow down when you
have any doubt.
Remember:
Any anti-lock brake system (ABS) helps avoid only the braking
skid.
4-13
ProCarManuals.com
Page 189 of 488
When you drive over bumps, rocks, or other obstacles, your wheels can
leave the ground. If this happens, even with
one or two wheels, you can’t
control
the vehicle as well or at all.
Because
you will be on an unpaved surface, it’s especially important to
avoid sudden acceleration, sudden turns, or sudden braking.
In a way, off-road driving requires a different kind
of alertness from driving
on paved roads and highways. There are
no road signs, posted speed limits
or signal lights. You have to use your own good judgment about what is safe
and what isn’t.
Drinking and driving can be very dangerous on any road. And this is
certainly true for off-road driving. At the very time
you need special
alertness and driving skills, your reflexes, perceptions and judgment can be
affected by even a small amount of alcohol.
You could have a serious - or
even fatal
- accident if you drink and drive or ride with a driver who has
been drinking. (See “Drunken Driving” in the Index.)
Driving On Off-Road Hills
Off-road driving often takes you up, down, or across a hill. Driving safely
on hills requires good judgment and an understanding
of what your vehicle
can and can’t do. There are some hills that simply can’t be driven, no matter
how well built the vehicle.
A CAUTION:
Many hills are simply too steep for any vehicle, If you drive up
them, you will stall, If you drive
down them, you can’t control
your speed. If you drive across them, you will roll over. You
could be seriously injured
or killed. If you have any doubt about
the steepness, don’t drive the hill.
Approaching a Hill
When you approach a hill, you need to decide if it’s one of those hills that’s
just
too steep to climb, descend, or cross. Steepness can be hard to judge.
On
a very small hill, for example, there may be a smooth, constant incline
with only a small change in elevation where you can easily see all the way
to the top. On
a large hill, the incline may get steeper as you near the top,
but you may
not see this because the crest of the hill is hidden by bushes,
grass, or shrubs.
4-15
ProCarManuals.com
Page 190 of 488
Here are some other things to consider as you approach a hill.
Is there a constant incline, or does the hill get sharply steeper in places?
Is there good traction on the hillside, or will the surface cause tire
slipping?
Is there a straight path up or down the hill so you won’t have to make
0 Are there obstructions on the hill that can block your path (boulders,
turning maneuvers?
trees,
logs or ruts)?
What’s beyond the hill? Is there a cliff, an embankment, a drop-off, a
fence? Get out and walk
the hill if you don’t know. It’s the smart way
to find out.
Is the hill simply too rough? Steep hills often have ruts, gullies, troughs
and exposed rocks because they are more susceptible
to the effects of
erosion.
Driving Uphi//
Once you decide you can safely drive up the hill, you need to take some
special steps.
0 Use a low gear and get a firm grip on the steering wheel.
0 Get a smooth start up the hill and try to maintain your speed. Don’t use
more power than you need, because you don’t want your wheels
to start
spinning or sliding.
Try to drive straight up the hill if at all possible. If the path twists and
turns, you might want to find another route.
1 A CAUTION:
nrning or driving across steep hills can be dangerous. You
could lose traction, slide sideways, and possibly
roll over. You
could be seriously injured or killed. When driving up hills,
always try to
go straight up.
Ease up on your speed as you approach the top of the hill.
0 Attach a flag to the vehicle to make you more visible to approaching
traffic on trails
or hills.
Sound the horn as you approach the top of the hill to let opposing
traffic
know you’re there.
to oncoming traffic.
Use your headlights even during the day. They make you more visible
4- 16
ProCarManuals.com