fog light GMC SIERRA 2004 Owner's Manual
[x] Cancel search | Manufacturer: GMC, Model Year: 2004, Model line: SIERRA, Model: GMC SIERRA 2004Pages: 588, PDF Size: 3.74 MB
Page 181 of 588
To idle an automatic transmission equipped vehicle with
the DRL off, set the parking brake. Shifting the
transmission into PARK (P) will also allow you to idle
the vehicle with the DRL off. The DRL will stay off until
you release the parking brake or shift the transmission
out of PARK (P).
To idle a manual transmission equipped vehicle with the
DRL off, set the parking brake. The DRL will stay off
until you release the parking brake.
Fog Lamps
If your vehicle has fog lamps, use them for better vision
in foggy or misty conditions.
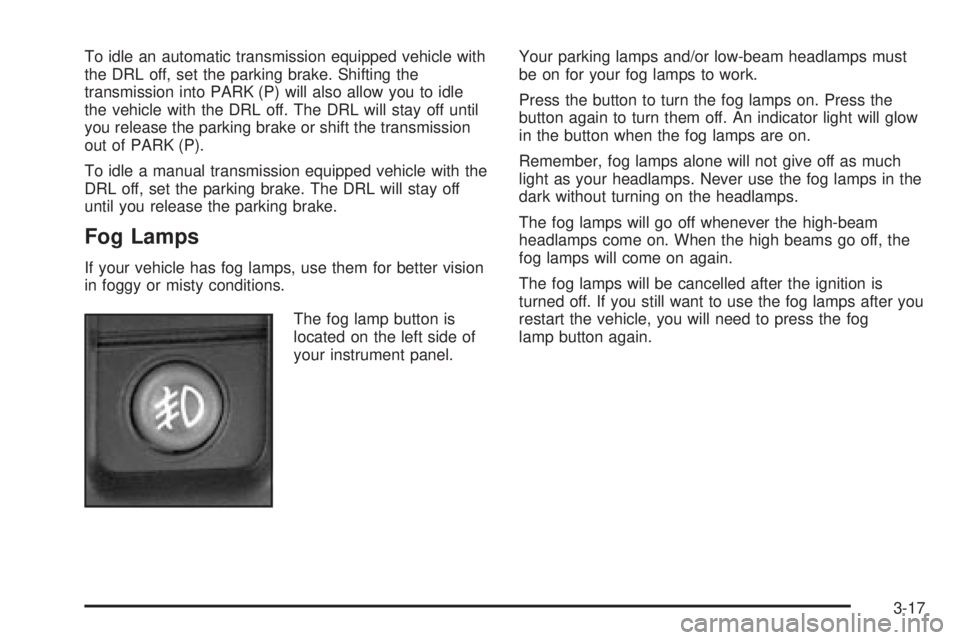
The fog lamp button is
located on the left side of
your instrument panel.Your parking lamps and/or low-beam headlamps must
be on for your fog lamps to work.
Press the button to turn the fog lamps on. Press the
button again to turn them off. An indicator light will glow
in the button when the fog lamps are on.
Remember, fog lamps alone will not give off as much
light as your headlamps. Never use the fog lamps in the
dark without turning on the headlamps.
The fog lamps will go off whenever the high-beam
headlamps come on. When the high beams go off, the
fog lamps will come on again.
The fog lamps will be cancelled after the ignition is
turned off. If you still want to use the fog lamps after you
restart the vehicle, you will need to press the fog
lamp button again.
3-17
Page 187 of 588
Turn the right knob clockwise or counterclockwise to
direct the air¯ow inside of your vehicle.
To change the current mode, select one of the following:
H(Vent):This mode directs air to the instrument
panel vents.
)(Bi-Level):This mode directs half of the air to the
instrument panel vents; then directs most of the
remaining air to the ¯oor vents. A little air is directed
toward the windshield and the side window vents. Cooler
air is directed to the upper vents and warmer air to
the ¯oor vents.
6(Floor):This mode directs most of the air to the
¯oor vents with a little air directed to the windshield and
the side window vents.
h(Recirculation):The recirculation mode is used
to recirculate the air inside of your vehicle. Use this
mode to help prevent outside odors and/or dust
from entering your vehicle or to help cool the air inside
of your vehicle more quickly. Press this button to
turn the recirculation mode on or off. The light on the
recirculation button will illuminate. Recirculation cannot
be used in ¯oor, blend or defrost modes. An indicatoron the button will light up, ¯ash three times and turn off
when recirculation is selected in these modes.The
air-conditioning compressor will also come on when this
mode is activated. While in recirculation mode the
windows may fog when the weather is cold and damp.
To clear the fog, select either the blend or defrost
mode and increase fan speed.
Temperature Control
Driver's Side:The lever on the left side of the climate
control panel is used to raise or lower the temperature
on the driver's side of the vehicle. This lever also adjusts
the temperature to the center console outlets
(if equipped).
Passenger's Side:The lever on the right side of the
climate control panel is used to raise or lower the
temperature on the passenger's side of the vehicle.#(Air Conditioning):Press this button to turn the
air-conditioning system on or off. When the button is
pressed, an indicator light will come on and the system
will begin to cool and dehumidify the air inside of your
vehicle. You may notice a slight change in engine
performance when the air conditioning compressor shuts
off and turns on again. This is normal.
3-23
Page 188 of 588
Defogging and Defrosting
Fog on the inside of the windows is a result of high
humidity (moisture) condensing on the cool window
glass. This can be minimized if the climate control
system is used properly. There are two modes to choose
from to clear fog or frost from your windshield. Use
the defog mode to clear the windows of fog or moisture
and warm the passengers. Use the defrost mode to
remove fog or frost from the windshield more quickly.
Turn the right knob clockwise or counterclockwise
to select one of the following modes:
-(Defog):This mode directs the air to the ¯oor outlets,
windshield and the side window vents. The air
conditioning compressor will run automatically to
dehumidify the air to prevent window fogging. The
recirculation mode cannot be selected while in the
defog mode.
1(Defrost):This mode directs most of the air to the
windshield and the side window vents, with only a
little air directed to the ¯oor vents. The air conditioning
compressor will run automatically to dehumidify the
air to prevent window fogging. The recirculation mode
cannot be selected while in defrost mode.
Do not drive the vehicle until all the windows are clear.
Rear Window Defogger
The lines you see on the rear window warm the glass.
The rear window defogger uses a warming grid to
remove fog from the rear window.
<(Rear):Press this button to turn the rear window
defogger on or off. An indicator light in the button
will come on to let you know that the rear window
defogger is activated.
The rear window defogger will automatically turn off
several minutes after the button is pressed. Pressing the
button while the defogger is running can also turn off
the defogger.
If your vehicle is equipped with heated mirrors this
button will activate them.
Notice:Don't use anything sharp on the inside of
the rear window. If you do, you could cut or damage
the warming grid, and the repairs wouldn't be
covered by your warranty. Do not attach a temporary
vehicle license, tape, a decal or anything similar
to the defogger grid.
3-24
Page 193 of 588
@(Recirculation):Press this button to limit the
amount of outside air entering your vehicle. The light on
the recirculation button will glow. This is helpful when you
are trying to limit odors entering your vehicle and for
maximum air conditioning performance in hot weather.
Press this button again to allow outside air to enter the
vehicle. The light on the recirculation button will go off.
Pressing this button also cancels the auto recirculation
feature. To resume the auto recirculation function, press
the AUTO button. Each time the vehicle is started, the
system will revert to the auto recirculation function.
If you select recirculation while in defrost, defog or ¯oor,
the light in the button will ¯ash and then go out to let you
know that this is not allowed. This is normal and helps to
prevent fogging.
When the weather is cool or damp, operating the system
in recirculation for extended periods of time may cause
fogging of the vehicle's windows. To clear the fog, select
either defog or front defrost.
You may also notice that the A/C compressor will run
while in recirculation mode. This is normal and helps to
prevent fogging.9(Off):Press this button to turn off the entire climate
control system. Outside air will still enter the vehicle, and
will be directed to the ¯oor. This direction can be changed
by pressing the mode button. The temperature can also
be adjusted using either temperature knob. Press the up
or down arrows on the fan switch, the defrost button, the
AUTO button, or the air conditioning button to turn the
system on when it is off.
Display
If you press the MODE button to select an air delivery
mode, the display will change to show you the selected
air delivery mode. After ten seconds, the display will
change to show the driver temperature setting and the
selected mode.
If you press the up or down arrows on the fan switch,
the display will change to show the selected fan speed.
After ten seconds, the display will change to show
the driver temperature setting and the selected mode.
3-29
Page 196 of 588
Rear Window Defogger
If your vehicle has this feature, the lines you see on the
rear window warm the glass. The rear window
defogger uses a warming grid to remove fog from the
rear window.
<(Rear):Press this button to turn the rear window
defogger on or off. An indicator light in the button
will come on to let you know that the rear window
defogger is activated.
The rear window defogger will turn off about 10 minutes
after the button is pressed. If you need additional
warming time, press the button again.
If your vehicle is equipped with heated mirrors this
button will activate them.
Notice:Using a razor blade or sharp object to clear
the inside rear window may damage the rear
window defogger. Repairs would not be covered by
your warranty. Do not clear the inside of the rear
window with sharp objects.
Outlet Adjustment
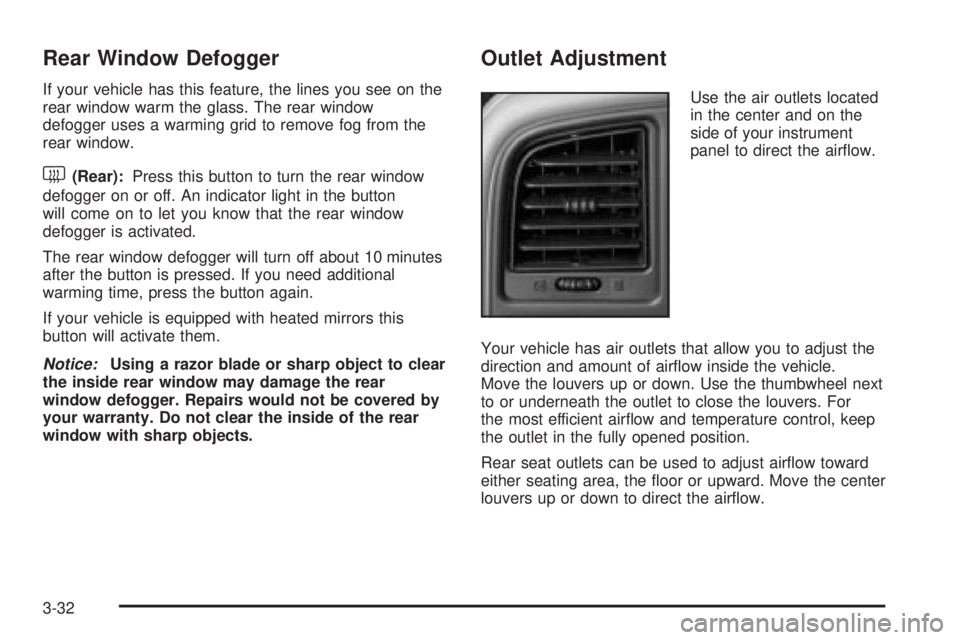
Use the air outlets located
in the center and on the
side of your instrument
panel to direct the air¯ow.
Your vehicle has air outlets that allow you to adjust the
direction and amount of air¯ow inside the vehicle.
Move the louvers up or down. Use the thumbwheel next
to or underneath the outlet to close the louvers. For
the most efficient air¯ow and temperature control, keep
the outlet in the fully opened position.
Rear seat outlets can be used to adjust air¯ow toward
either seating area, the ¯oor or upward. Move the center
louvers up or down to direct the air¯ow.
3-32
Page 197 of 588
Operation Tips
·
Keep the hood and front air inlets free of ice, snow,
or any other obstruction (such as leaves). The
heater and defroster will work far better, reducing
the chance of fogging the inside of your windows.
·Keep the air path under the front seats clear
of objects. This helps air to circulate throughout your
vehicle.
·Adding outside equipment to the front of your
vehicle, such as hood-air de¯ectors, etc., may affect
the performance of the heating and air conditioning
system. Check with your dealer before adding
equipment to the outside of your vehicle.
Warning Lights, Gages and
Indicators
Warning Lights, Gages, and
Indicators
This part describes the warning lights and gages that
may be on your vehicle. The pictures will help you
locate them.Warning lights and gages can signal that something is
wrong before it becomes serious enough to cause
an expensive repair or replacement. Paying attention to
your warning lights and gages could also save you
or others from injury.
Warning lights come on when there may be or is a
problem with one of your vehicle's functions. As you will
see in the details on the next few pages, some
warning lights come on brie¯y when you start the
engine just to let you know they're working. If you are
familiar with this section, you should not be alarmed
when this happens.
Gages can indicate when there may be or is a problem
with one of your vehicle's functions. Often gages
and warning lights work together to let you know when
there's a problem with your vehicle.
When one of the warning lights comes on and stays on
when you are driving, or when one of the gages shows
there may be a problem, check the section that tells you
what to do about it. Please follow this manual's advice.
Waiting to do repairs can be costly ± and even
dangerous. So please get to know your warning lights
and gages. They're a big help.
Your vehicle also has a driver information system that
works along with the warning lights and gages. See
Driver Information Center (DIC) on page 3-55.
3-33
Page 533 of 588
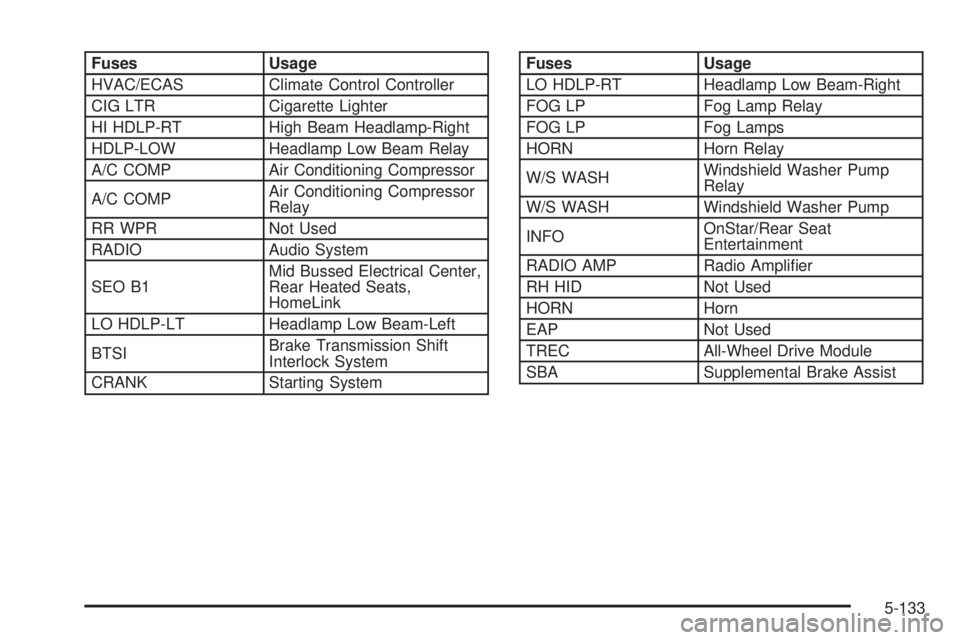
Fuses Usage
HVAC/ECAS Climate Control Controller
CIG LTR Cigarette Lighter
HI HDLP-RT High Beam Headlamp-Right
HDLP-LOW Headlamp Low Beam Relay
A/C COMP Air Conditioning Compressor
A/C COMPAir Conditioning Compressor
Relay
RR WPR Not Used
RADIO Audio System
SEO B1Mid Bussed Electrical Center,
Rear Heated Seats,
HomeLink
LO HDLP-LT Headlamp Low Beam-Left
BTSIBrake Transmission Shift
Interlock System
CRANK Starting SystemFuses Usage
LO HDLP-RT Headlamp Low Beam-Right
FOG LP Fog Lamp Relay
FOG LP Fog Lamps
HORN Horn Relay
W/S WASHWindshield Washer Pump
Relay
W/S WASH Windshield Washer Pump
INFOOnStar/Rear Seat
Entertainment
RADIO AMP Radio Ampli®er
RH HID Not Used
HORN Horn
EAP Not Used
TREC All-Wheel Drive Module
SBA Supplemental Brake Assist
5-133
Page 577 of 588
Fluid (cont.)
Windshield Washer......................................5-46
FM Stereo....................................................3-129
Fog Lamps....................................................3-17
Folding the Rear Seat....................................... 1-9
Following Distance..........................................4-92
Four-Wheel Drive....................................2-35, 5-60
Four-Wheel-Drive Light....................................3-53
Front Axle......................................................5-61
Front Axle Locking Feature...............................2-35
Front Reading Lamps......................................3-19
Front Storage Area.........................................2-67
Fuel............................................................... 5-4
Additives...................................................... 5-6
California Fuel.............................................. 5-5
Filling a Portable Fuel Container..................... 5-9
Filling Your Tank........................................... 5-7
Fuels in Foreign Countries.............................. 5-6
Gage.........................................................3-54
Gasoline Octane........................................... 5-4
Gasoline Speci®cations.................................. 5-5
Low Warning Light.......................................3-54
Fuel Information Button....................................3-58
FUEL LEVEL LOW.........................................3-68
Fuses
Fuses and Circuit Breakers.........................5-126
Windshield Wiper.......................................5-126G
Gage
Engine Coolant Temperature.........................3-46
Fuel..........................................................3-54
Oil Pressure...............................................3-52
Speedometer..............................................3-35
Tachometer.................................................3-35
Transmission Temperature.............................3-47
Voltmeter Gage...........................................3-42
Gasoline
Octane........................................................ 5-4
Speci®cations............................................... 5-5
Getting Familiar with Off-Road Driving................4-24
Glove Box.....................................................2-66
GM Mobility Program for Persons with
Disabilities.................................................... 7-5
H
Hazard Warning Flashers................................... 3-6
Head Restraints............................................... 1-8
Headlamp High/Low-Beam Changer.................... 3-9
Headlamps....................................................5-64
Bulb Replacement.......................................5-64
7
Page 583 of 588
Rear Seat Entertainment System.....................3-115
Rear Seat Operation......................................... 1-9
Rear Seat Outside Passenger Positions
(Extended Cab and Crew Cab)......................1-27
Rear Seat Passengers, Safety Belts..................1-27
Rear Seat Top Strap Anchors (Extended Cab
Models)......................................................1-46
Rear Seat Top Strap Anchors
(Crew Cab Models)......................................1-47
Rear Window Defogger............................3-24, 3-32
Rearview Mirror, Automatic Dimming with
Compass and Temperature Display................2-57
Rearview Mirror, Automatic Dimming with
OnStar
ž, Compass and Temperature Display . . . 2-55
Rearview Mirrors.............................................2-54
Reclining Seatbacks.......................................... 1-6
Recommended Fluids and Lubricants.................6-14
Recreational Vehicle Towing.............................4-54
REDUCED ENGINE POWER...........................3-70
Regular Cab and Extended Cab Models.............1-76
Remote Alarm.................................................. 2-6
Remote Control.............................................3-119
Remote Keyless Entry System............................ 2-4
Remote Keyless Entry System, Operation............ 2-5
Removing the Flat Tire and Installing the
Spare Tire................................................5-101
Removing the Spare Tire and Tools...................5-97
Replacement Bulbs.........................................5-74
Replacing Brake System Parts..........................5-52
Replacing Restraint System Parts After a Crash.....1-88Reporting Safety Defects
Canadian Government..................................7-11
General Motors...........................................7-11
United States Government............................7-11
Restraint System Check
Checking Your Restraint Systems...................1-87
Replacing Restraint System Parts After a
Crash.....................................................1-88
Restraint Systems
Checking....................................................1-87
Replacing Parts...........................................1-88
Resynchronization............................................. 2-7
Retained Accessory Power (RAP)......................2-23
Right Front Passenger Position, Safety Belts......1-25
Right Front Passenger Position Top Strap Anchor
(Regular and Extended Models).....................1-45
RIGHT REAR DOOR AJAR (Crew Cab).............3-70
Roadside
Assistance Program....................................... 7-6
Rocking Your Vehicle To Get It Out...................4-52
Running Your Engine While You Are Parked.......2-53
S
Safety Belt
Reminder Light............................................3-36
Safety Belts
Care of....................................................5-119
Center Passenger Position............................1-25
13