fuel pressure GMC SIERRA 2004 Owner's Manual
[x] Cancel search | Manufacturer: GMC, Model Year: 2004, Model line: SIERRA, Model: GMC SIERRA 2004Pages: 588, PDF Size: 3.74 MB
Page 165 of 588
Instrument Panel Overview...............................3-4
Hazard Warning Flashers................................3-6
Other Warning Devices...................................3-6
Horn.............................................................3-7
Tilt Wheel.....................................................3-7
Turn Signal/Multifunction Lever.........................3-7
Exterior Lamps.............................................3-14
Interior Lamps..............................................3-19
Accessory Power Outlets...............................3-20
Ashtrays and Cigarette Lighter........................3-21
Climate Controls............................................3-21
Climate Control System.................................3-21
Dual Climate Control System..........................3-22
Dual Automatic Climate Control System...........3-26
Warning Lights, Gages and Indicators.............3-33
Warning Lights, Gages, and Indicators.............3-33
Instrument Panel Cluster................................3-34
Speedometer and Odometer...........................3-35
Tachometer.................................................3-35
Safety Belt Reminder Light.............................3-36
Air Bag Readiness Light................................3-36Air Bag Off Light..........................................3-37
Passenger Air Bag Status Indicator.................3-40
Battery Warning Light....................................3-42
Voltmeter Gage............................................3-42
Up-Shift Light...............................................3-43
Brake System Warning Light..........................3-43
Anti-Lock Brake System Warning Light.............3-45
Traction Off Light..........................................3-45
Engine Coolant Temperature Gage..................3-46
Transmission Temperature Gage.....................3-47
Malfunction Indicator Lamp.............................3-49
Oil Pressure Gage........................................3-52
Cruise Control Light......................................3-53
Four-Wheel-Drive Light..................................3-53
Tow/Haul Mode Light....................................3-53
Overdrive Disable.........................................3-53
Fuel Gage...................................................3-54
Low Fuel Warning Light.................................3-54
Driver Information Center (DIC).......................3-55
DIC Operation and Displays...........................3-55
DIC Warnings and Messages.........................3-66
Section 3 Instrument Panel
3-1
Page 219 of 588
Driver Information Center (DIC)
The DIC display is located on the instrument panel
cluster above the steering wheel. The DIC can display
information such as the trip odometer, fuel economy and
personalization features.
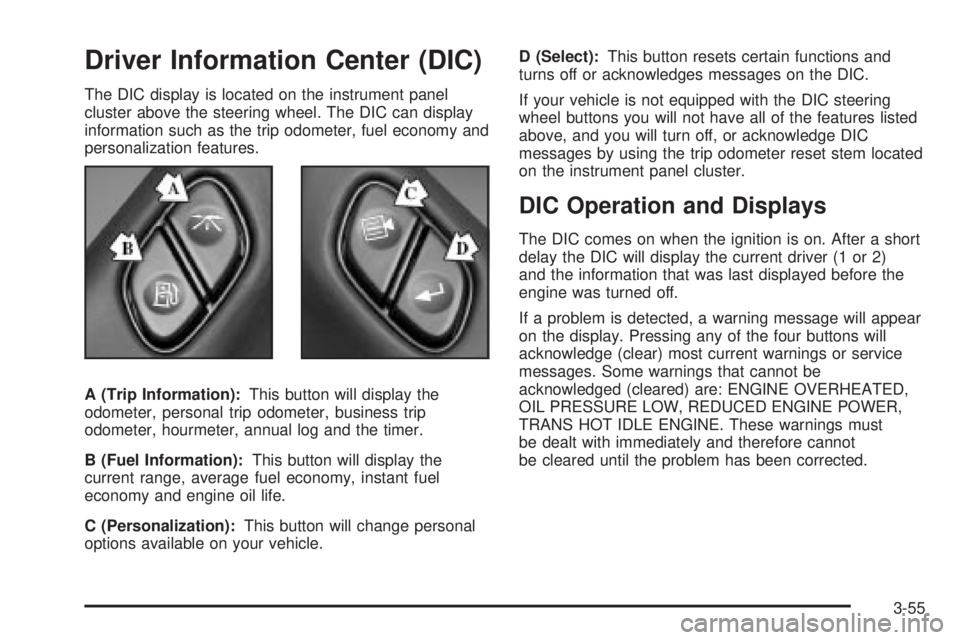
A (Trip Information):This button will display the
odometer, personal trip odometer, business trip
odometer, hourmeter, annual log and the timer.
B (Fuel Information):This button will display the
current range, average fuel economy, instant fuel
economy and engine oil life.
C (Personalization):This button will change personal
options available on your vehicle.D (Select):This button resets certain functions and
turns off or acknowledges messages on the DIC.
If your vehicle is not equipped with the DIC steering
wheel buttons you will not have all of the features listed
above, and you will turn off, or acknowledge DIC
messages by using the trip odometer reset stem located
on the instrument panel cluster.
DIC Operation and Displays
The DIC comes on when the ignition is on. After a short
delay the DIC will display the current driver (1 or 2)
and the information that was last displayed before the
engine was turned off.
If a problem is detected, a warning message will appear
on the display. Pressing any of the four buttons will
acknowledge (clear) most current warnings or service
messages. Some warnings that cannot be
acknowledged (cleared) are: ENGINE OVERHEATED,
OIL PRESSURE LOW, REDUCED ENGINE POWER,
TRANS HOT IDLE ENGINE. These warnings must
be dealt with immediately and therefore cannot
be cleared until the problem has been corrected.
3-55
Page 340 of 588
Reduce your speed according to your speedometer, not
to your sense of motion. After driving for any distance
at higher speeds, you may tend to think you are
going slower than you actually are.
Before Leaving on a Long Trip
Make sure you are ready. Try to be well rested. If you
must start when you are not fresh Ð such as after
a day's work Ð do not plan to make too many miles that
®rst part of the journey. Wear comfortable clothing
and shoes you can easily drive in.
Is your vehicle ready for a long trip? If you keep it
serviced and maintained, it is ready to go. If it needs
service, have it done before starting out. Of course, you
will ®nd experienced and able service experts in GM
dealerships all across North America. They will be ready
and willing to help if you need it.
Here are some things you can check before a trip:
·Windshield Washer Fluid:Is the reservoir full? Are
all windows clean inside and outside?
·Wiper Blades:Are they in good shape?
·Fuel, Engine Oil, Other Fluids:Have you checked
all levels?
·Lamps:Are they all working? Are the lenses clean?
·Tires:They are vitally important to a safe,
trouble-free trip. Is the tread good enough for
long-distance driving? Are the tires all in¯ated to the
recommended pressure?
·Weather Forecasts:What is the weather outlook
along your route? Should you delay your trip a
short time to avoid a major storm system?
·Maps:Do you have up-to-date maps?
Highway Hypnosis
Is there actually such a condition as ªhighway
hypnosisº? Or is it just plain falling asleep at the wheel?
Call it highway hypnosis, lack of awareness, or
whatever.
There is something about an easy stretch of road with
the same scenery, along with the hum of the tires on the
road, the drone of the engine, and the rush of the
wind against the vehicle that can make you sleepy. Do
not let it happen to you! If it does, your vehicle can
leave the road in
less than a second,and you could
crash and be injured.
What can you do about highway hypnosis? First, be
aware that it can happen.
4-44
Page 357 of 588
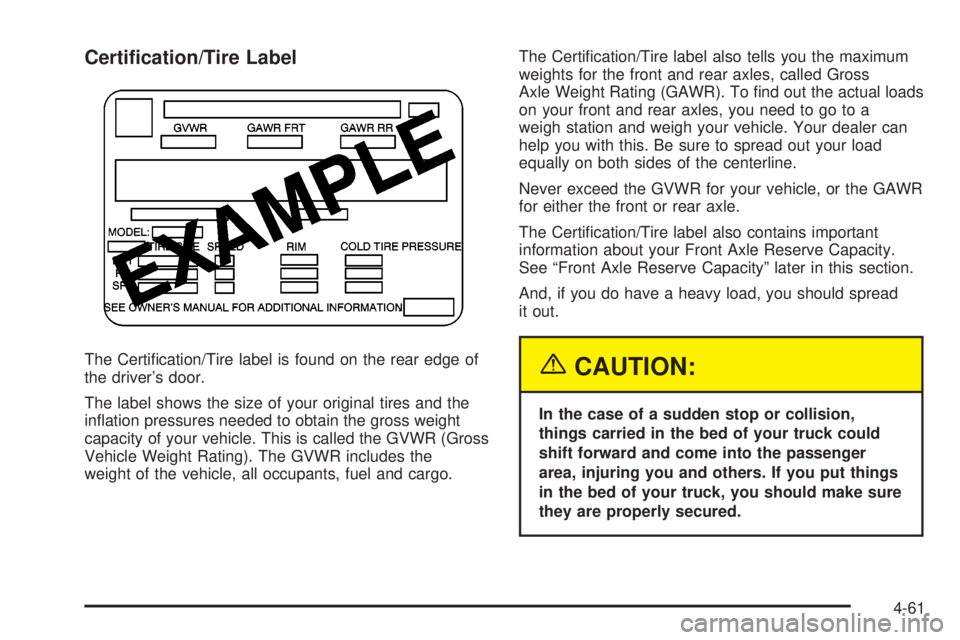
Certi®cation/Tire Label
The Certi®cation/Tire label is found on the rear edge of
the driver's door.
The label shows the size of your original tires and the
in¯ation pressures needed to obtain the gross weight
capacity of your vehicle. This is called the GVWR (Gross
Vehicle Weight Rating). The GVWR includes the
weight of the vehicle, all occupants, fuel and cargo.The Certi®cation/Tire label also tells you the maximum
weights for the front and rear axles, called Gross
Axle Weight Rating (GAWR). To ®nd out the actual loads
on your front and rear axles, you need to go to a
weigh station and weigh your vehicle. Your dealer can
help you with this. Be sure to spread out your load
equally on both sides of the centerline.
Never exceed the GVWR for your vehicle, or the GAWR
for either the front or rear axle.
The Certi®cation/Tire label also contains important
information about your Front Axle Reserve Capacity.
See ªFront Axle Reserve Capacityº later in this section.
And, if you do have a heavy load, you should spread
it out.{CAUTION:
In the case of a sudden stop or collision,
things carried in the bed of your truck could
shift forward and come into the passenger
area, injuring you and others. If you put things
in the bed of your truck, you should make sure
they are properly secured.
4-61
Page 401 of 588
Service............................................................5-3
Doing Your Own Service Work.........................5-3
Adding Equipment to the Outside of Your
Vehicle......................................................5-4
Fuel................................................................5-4
Gasoline Octane............................................5-4
Gasoline Speci®cations....................................5-5
California Fuel...............................................5-5
Additives.......................................................5-6
Fuels in Foreign Countries...............................5-6
Filling Your Tank............................................5-7
Filling a Portable Fuel Container.......................5-9
Checking Things Under the Hood....................5-10
Hood Release..............................................5-10
Engine Compartment Overview.......................5-12
Engine Oil...................................................5-18
Engine Air Cleaner/Filter................................5-23
Automatic Transmission Fluid (Except Allison
Transmission
ž) ..........................................5-25
Automatic Transmission Fluid (Allison
Transmission
ž) ..........................................5-28
Manual Transmission Fluid.............................5-31
Hydraulic Clutch...........................................5-32
Engine Coolant.............................................5-33
Coolant Surge Tank Pressure Cap..................5-36
Engine Overheating.......................................5-36Cooling System............................................5-39
Engine Fan Noise.........................................5-44
Power Steering Fluid.....................................5-45
Windshield Washer Fluid................................5-46
Brakes........................................................5-48
Battery........................................................5-52
Jump Starting...............................................5-53
Rear Axle.......................................................5-59
Four-Wheel Drive............................................5-60
Noise Control System.....................................5-62
Tampering with Noise Control System
Prohibited.................................................5-62
Bulb Replacement..........................................5-64
Halogen Bulbs..............................................5-64
Headlamps..................................................5-64
Front Turn Signal, Sidemarker and Daytime
Running Lamps.........................................5-66
Roof Marker Lamps......................................5-67
Center High-Mounted Stoplamp (CHMSL) and
Cargo Lamp.............................................5-69
Pickup Box Identi®cation and Fender Marker
Lamps.....................................................5-70
Taillamps.....................................................5-71
Replacement Bulbs.......................................5-74
Section 5 Service and Appearance Care
5-1
Page 444 of 588
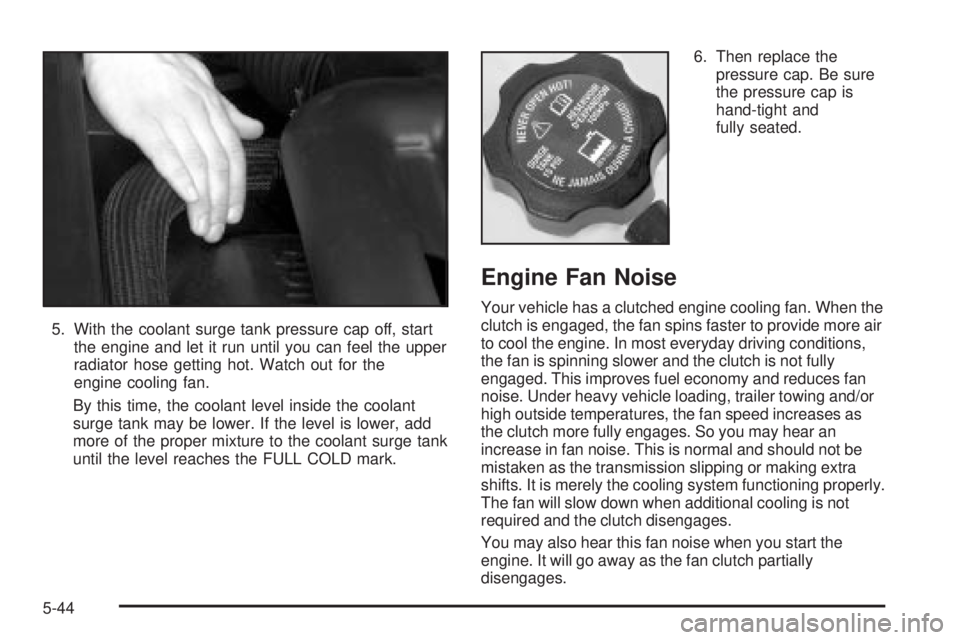
5. With the coolant surge tank pressure cap off, start
the engine and let it run until you can feel the upper
radiator hose getting hot. Watch out for the
engine cooling fan.
By this time, the coolant level inside the coolant
surge tank may be lower. If the level is lower, add
more of the proper mixture to the coolant surge tank
until the level reaches the FULL COLD mark.6. Then replace the
pressure cap. Be sure
the pressure cap is
hand-tight and
fully seated.
Engine Fan Noise
Your vehicle has a clutched engine cooling fan. When the
clutch is engaged, the fan spins faster to provide more air
to cool the engine. In most everyday driving conditions,
the fan is spinning slower and the clutch is not fully
engaged. This improves fuel economy and reduces fan
noise. Under heavy vehicle loading, trailer towing and/or
high outside temperatures, the fan speed increases as
the clutch more fully engages. So you may hear an
increase in fan noise. This is normal and should not be
mistaken as the transmission slipping or making extra
shifts. It is merely the cooling system functioning properly.
The fan will slow down when additional cooling is not
required and the clutch disengages.
You may also hear this fan noise when you start the
engine. It will go away as the fan clutch partially
disengages.
5-44
Page 482 of 588
Belt:A rubber coated layer of cords that is located
between the plies and the tread. Cords may be made
from steel or other reinforcing materials.
Bead:The tire bead contains steel wires wrapped by
steel cords that hold the tire onto the rim.
Bias Ply Tire:A pneumatic tire in which the plies are
laid at alternate angles less than 90 degrees to the
centerline of the tread.
Cold In¯ation Pressure:The amount of air pressure in
a tire, measured in pounds per square inch (psi) or
kilopascals (kPa) before a tire has built up heat
from driving. See
In¯ation - Tire Pressure on page 5-84.
Curb Weight:This means the weight of a motor
vehicle with standard and optional equipment including
the maximum capacity of fuel, oil and coolant, but
without passengers and cargo.
DOT Markings:A code molded into the sidewall of a
tire signifying that the tire is in compliance with the U.S.
Department of Transportation motor vehicle safety
standards. The DOT code includes the Tire Identi®cation
Number (TIN), an alphanumeric designator which can
also identify the tire manufacturer, production plant,
brand and date of production.
GVWR:Gross Vehicle Weight Rating, see
Loading
Your Vehicle on page 4-57.GAWR FRT:Gross Axle Weight Rating for the front
axle, see
Loading Your Vehicle on page 4-57.
GAWR RR:Gross Axle Weight Rating for the rear axle,
see
Loading Your Vehicle on page 4-57.
Intended Outboard Sidewall:The side of an
asymmetrical tire, that must always face outward when
mounted on a vehicle.
Kilopascal (kPa):The metric unit for air pressure.
There are 6.9 kPa's to one psi.
Light Truck (LT-Metric) Tire:A tire used on light duty
trucks and some multipurpose passenger vehicles.
Load Index:An assigned number ranging from 1 to 279
that corresponds to the load carrying capacity of a
tire.
Maximum In¯ation Pressure:The maximum air
pressure to which a cold tire may be in¯ated. The
maximum air pressure is molded onto the sidewall.
Maximum Load Rating:The load rating for a tire at the
maximum permissible in¯ation pressure for that tire.
Maximum Loaded Vehicle Weight:The sum of curb
weight; accessory weight; vehicle capacity weight;
and production options weight.
5-82
Page 484 of 588
Vehicle Capacity Weight:The number of designated
seating positions multiplied by 150 lbs. (68 kg) plus
the rated cargo load. See
Loading Your Vehicle
on page 4-57.
Vehicle Maximum Load on the Tire:Load on an
individual tire due to curb weight, accessory weight,
occupant weight and cargo weight.
Vehicle Placard:A label permanently attached to a
vehicle showing the original equipment tire size
and recommended in¯ation pressure. See
Loading Your
Vehicle on page 4-57.
In¯ation - Tire Pressure
The tire and loading information label, shows the correct
in¯ation pressures for your tires when they're cold.
ªColdº means your vehicle has been sitting for at least
three hours or driven no more than 1 mile (1.6 km). See
Loading Your Vehicle on page 4-57, for the location
of your vehicle's tire and loading information label.
Notice:Don't let anyone tell you that underin¯ation
or overin¯ation is all right. It's not. If your tires
don't have enough air (underin¯ation), you can get
the following:
·Too much ¯exing
·Too much heat
·Tire overloading
·Bad wear
·Bad handling
·Bad fuel economy
If your tires have too much air (overin¯ation), you
can get the following:
·Unusual wear
·Bad handling
·Rough ride
·Needless damage from road hazards
5-84
Page 545 of 588
(b)Visually inspect front and rear suspension and
steering system for damaged, loose or missing parts,
signs of wear or lack of lubrication. Inspect power
steering lines and hoses for proper hook-up, binding,
leaks, cracks, cha®ng, etc. Visually check constant
velocity joints, rubber boots and axle seals for leaks.
(c)Visually inspect hoses and have them replaced if they
are cracked, swollen or deteriorated. Inspect all pipes,
®ttings and clamps; replace with genuine GM parts as
needed. To help ensure proper operation, a pressure test
of the cooling system and pressure cap and cleaning the
outside of the radiator and air conditioning condenser is
recommended at least once a year.
(d)Visually inspect wiper blades for wear or cracking.
Replace blade inserts that appear worn or damaged
or that streak or miss areas of the windshield.
(e)Make sure the safety belt reminder light and all your
belts, buckles, latch plates, retractors and anchorages
are working properly. Look for any other loose or
damaged safety belt system parts. If you see anything
that might keep a safety belt system from doing its
job, have it repaired. Have any torn or frayed safety belts
replaced. Also look for any opened or broken air bag
coverings, and have them repaired or replaced. (The air
bag system does not need regular maintenance.)
(f)Lubricate all key lock cylinders, body door hinges,
hood latch assembly, secondary latch, pivots, spring
anchor, release pawl, tailgate hinges, tailgatelinkage,
tailgate handle pivot points, latch bolt, fuel door
hinge, locks and folding seat hardware. More frequent
lubrication may be required when exposed to a corrosive
environment. Applying silicone grease on weatherstrips
with a clean cloth will make them last longer, seal
better and not stick or squeak.
(g)Add ¯uid as needed. A ¯uid loss could indicate a
problem; repair as needed. Check vent hose at transfer
case for kinks and proper installation.
(h)Change automatic transmission ¯uid and ®lter if the
vehicle GVWR is over 8600 lbs. or if the vehicle is
mainly driven under one or more of these conditions:
þIn heavy city traffic where the outside temperature
regularly reaches 90ÉF (32ÉC) or higher.
þIn hilly or mountainous terrain.
þWhen doing frequent trailer towing.
þUses such as found in taxi, police or delivery
service.
(i)Drain, ¯ush and re®ll cooling system. See Engine
Coolant on page 5-33for what to use. Inspect hoses.
Clean radiator, condenser, pressure cap and ®ller neck.
Pressure test the cooling system and pressure cap.
6-9
Page 547 of 588
At the First 100, 1,000 and 6,000
Miles (160, 1 600 and 10 000km)
Check dual wheel nut torque. For proper torque, seeCapacities and Speci®cations on page 5-134.
At Each Fuel Fill
It is important to perform these underhood checks at
each fuel ®ll.
Engine Oil Level Check
Check the engine oil level and add the proper oil if
necessary. SeeEngine Oil on page 5-18for further
details.
Notice:It is important to check your oil regularly
and keep it at the proper level. Failure to keep your
engine oil at the proper level can cause damage
to your engine not covered by your warranty.
Engine Coolant Level Check
Check the engine coolant level and add
DEX-COOLžcoolant mixture if necessary. SeeEngine
Coolant on page 5-33for further details.
Windshield Washer Fluid Level Check
Check the windshield washer ¯uid level in the windshield
washer tank and add the proper ¯uid if necessary.
At Least Once a Month
Tire In¯ation Check
Visually inspect your tires and make sure tires are
in¯ated to the correct pressures. Do not forget to check
your spare tire. See
Tires on page 5-76for further
details. Check to make sure the spare tire is stored
securely. Push, pull and then try to rotate or turn
the spare tire. If it moves, tighten it. See
Changing a
Flat Tire on page 5-96.
6-11