sensor GMC SIERRA 2008 User Guide
[x] Cancel search | Manufacturer: GMC, Model Year: 2008, Model line: SIERRA, Model: GMC SIERRA 2008Pages: 578, PDF Size: 6.47 MB
Page 191 of 578
When it begins to get dark, the automatic headlamp
system will switch from DRL to the headlamps.
To turn off the DRL lamps, turn the exterior lamps
control to the OFF position and then release. For
vehicles �rst sold in Canada, the transmission must be
in the PARK (P) position, before the DRL lamps can
be turned off.
Automatic Headlamp System
When it is dark enough outside, the automatic headlamp
system will turn on the headlamps at the normal
brightness, along with the taillamps, sidemarker, parking
lamps, and the instrument panel lights. The radio
lights will also be dim.
To turn off the automatic headlamp system, turn the
exterior lamps switch to the off position and then release
it. For vehicles �rst sold in Canada, the transmission
must be in the PARK (P) position, before the automatic
headlamp system can be turned off.
The vehicle has a light sensor located on the top of the
instrument panel in the defroster grille that regulates
when the automatic headlamps turn on. Be sure it is not
covered, or the headlamps will come on whenever
the ignition is on.
The system may also turn on the headlamps when
driving through a parking garage, heavy overcast
weather, or a tunnel. This is normal.There is a delay in the transition between the daytime
and nighttime operation of the Daytime Running
Lamps (DRL) and the automatic headlamp systems so
that driving under bridges or bright overhead street
lights does not affect the system. The DRL and
automatic headlamp system will only be affected when
the light sensor detects a change in lighting lasting
longer than the delay.
If the vehicle is started in a dark garage, the automatic
headlamp system will come on immediately. Once
the vehicle leaves the garage, it takes approximately
one minute for the automatic headlamp system to
change to DRL if it is bright enough outside. During that
delay, the instrument panel cluster may not be as
bright as usual. Make sure the instrument panel
brightness control is in the full bright position. See
Instrument Panel Brightness on page 3-21.
To idle the vehicle with the automatic headlamp system
off, turn the control to the off position.
The headlamps will also stay on after you exit the
vehicle. This feature can be programmed using the
Driver Information Center (DIC). SeeDIC Vehicle
Customization (With DIC Buttons) on page 3-72.
The regular headlamp system can be turned on
when needed.
3-19
Page 202 of 578

Be careful not to cover the solar sensor located on the
top of the instrument panel near the windshield. This
sensor regulates air temperature based on sun load. For
more information on the solar sensor, see “Sensors”
later in this section.
To avoid blowing cold air in cold weather, the system
delays turning the fan on until warm air is available. The
length of delay depends on the engine coolant
temperature. Pressing the fan switch overrides this
delay and changes the fan to a selected speed.
O(On/Off):Press this button to turn off the climate
control system. Outside air still enters the vehicle, and is
directed to the �oor. This direction can be changed by
pressing the mode button. Recirculation can be selected
once you have selected vent or bi-level mode. The
temperature can also be adjusted using either
temperature button. If the air delivery mode or
temperature settings are adjusted with the system off,
the display illuminates brie�y to show the settings
and then returns to off. Press the on/off button or the up
down arrows on the fan switch, the defrost button,
AUTO button, or the air conditioning button to turn the
system on when it is off.
Manual Operation
The air delivery mode or fan speed can be manually
adjusted.
DC(Fan):These buttons let you manually adjust the
fan speed. Press
Dto increase fan speed andC
to decrease fan speed.
Pressing either fan button while the system is off turns
the system on. Pressing either fan button while in
automatic control places the fan under manual control.
The fan setting remains displayed and the AUTO
light turns off. The air delivery mode remains under
automatic control.
HG(Mode):PressHandGto manually change the
direction of the air�ow in the vehicle. Repeatedly
press either button until the desired mode appears on
the display. Pressing either mode button while the
system is off changes the air delivery mode without
turning the system on. Pressing either mode button
while in automatic control places the mode under
manual control.
The air delivery mode setting is displayed and the
AUTO light turns off. The fan remains under automatic
control.
H(Vent):Air is directed to the instrument panel
outlets.
3-30
Page 204 of 578
On hot days, open the windows long enough to let hot
inside air escape. This helps to reduce the time it
takes for the vehicle to cool down. It also helps the
system to operate more efficiently.
The air conditioning system removes moisture from the
air, so a small amount of water might drip underneath
the vehicle while idling or after turning off the engine.
This is normal.
Sensors
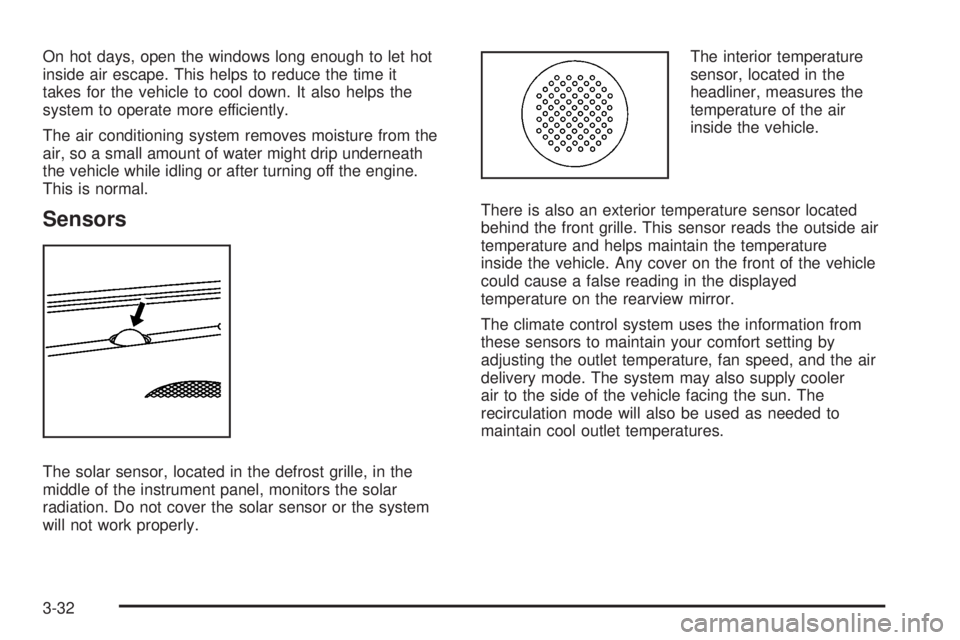
The solar sensor, located in the defrost grille, in the
middle of the instrument panel, monitors the solar
radiation. Do not cover the solar sensor or the system
will not work properly.The interior temperature
sensor, located in the
headliner, measures the
temperature of the air
inside the vehicle.
There is also an exterior temperature sensor located
behind the front grille. This sensor reads the outside air
temperature and helps maintain the temperature
inside the vehicle. Any cover on the front of the vehicle
could cause a false reading in the displayed
temperature on the rearview mirror.
The climate control system uses the information from
these sensors to maintain your comfort setting by
adjusting the outlet temperature, fan speed, and the air
delivery mode. The system may also supply cooler
air to the side of the vehicle facing the sun. The
recirculation mode will also be used as needed to
maintain cool outlet temperatures.
3-32
Page 210 of 578
Airbag Readiness Light
There is an airbag readiness light on the instrument
panel cluster, which shows the airbag symbol. The
system checks the airbag’s electrical system for
malfunctions. The light tells you if there is an electrical
problem. The system check includes the airbag
sensor, the pretensioners, the airbag modules, the
wiring and the crash sensing and diagnostic module.
For more information on the airbag system, seeAirbag
System on page 1-68.
This light will come on
when you start your
vehicle, and it will �ash
for a few seconds.
The light should go out
and the system is ready.
If the airbag readiness light stays on after you start the
vehicle or comes on when you are driving, your
airbag system may not work properly. Have your vehicle
serviced right away.{CAUTION:
If the airbag readiness light stays on after you
start your vehicle, it means the airbag system
may not be working properly. The airbags in
your vehicle may not in�ate in a crash, or they
could even in�ate without a crash. To help
avoid injury to yourself or others, have your
vehicle serviced right away if the airbag
readiness light stays on after you start your
vehicle.
The airbag readiness light should �ash for a few
seconds when you start the engine. If the light does not
come on then, have it �xed immediately. If there is a
problem with the airbag system, an airbag Driver
Information Center (DIC) message may also come on.
SeeDIC Warnings and Messages on page 3-63for
more information.
3-38
Page 234 of 578
OUTPUT shows the power output to the trailer anytime
a trailer with electric brakes is connected. Output is
displayed in 0 to 10 bars. Dashes may appear in
the OUTPUT display. See “Integrated Trailer Brake
Control System” underTowing a Trailer on page 4-55
for more information.
Oil Life
To access this display, the vehicle must be in PARK (P).
Press the trip odometer reset stem until OIL LIFE
REMAINING displays. This display shows an estimate
of the oil’s remaining useful life. If you see 99% OIL LIFE
REMAINING on the display, that means 99% of the
current oil life remains. The engine oil life system
will alert you to change the oil on a schedule consistent
with your driving conditions.
When the remaining oil life is low, the CHANGE
ENGINE OIL SOON message will appear on the display.
See “CHANGE ENGINE OIL SOON” underDIC
Warnings and Messages on page 3-63. You should
change the oil as soon as you can. SeeEngine
Oil (Gasoline Engine) on page 5-15. In addition to the
engine oil life system monitoring the oil life, additional
maintenance is recommended in the Maintenance
Schedule in this manual. SeeScheduled Maintenance
(Gasoline Engine) on page 6-4for more information.
Remember, you must reset the OIL LIFE display
yourself after each oil change. It will not reset itself.Also, be careful not to reset the OIL LIFE display
accidentally at any time other than when the oil has just
been changed. It cannot be reset accurately until the
next oil change. To reset the engine oil life system, see
Engine Oil Life System on page 5-18.
Relearn Tire Positions
Your vehicle may have this display. To access this
display, the vehicle must be in PARK (P). If your vehicle
has the Tire Pressure Monitor System (TPMS), after
rotating the tires or after replacing a tire or sensor, the
system must re-learn the tire positions. To re-learn
the tire positions, seeTire Pressure Monitor System on
page 5-76. SeeTire Inspection and Rotation on
page 5-81andDIC Warnings and Messages on
page 3-63for more information.
Relearn Remote Key
To access this display, the vehicle must be in PARK (P).
This display allows you to match Remote Keyless
Entry (RKE) transmitters to your vehicle. To match an
RKE transmitter to your vehicle:
1. Press the trip odometer reset stem until RELEARN
REMOTE KEY displays.
2. Press and hold the trip odometer reset stem for
three seconds.
The message REMOTE KEY LEARNING ACTIVE
will display.
3-62
Page 243 of 578
TIRE LEARNING ACTIVE
If your vehicle has the Tire Pressure Monitor System
(TPMS), this message displays when the system
is re-learning the tire positions on your vehicle. See
“DIC Operation and Displays (Without DIC Buttons)”
earlier in this section for more information. The tire
positions must be re-learned after rotating the tires or
after replacing a tire or sensor. SeeTire Inspection and
Rotation on page 5-81,Tire Pressure Monitor System
on page 5-76, andInflation - Tire Pressure on page 5-74
for more information.
TRACTION CONTROL OFF
If your vehicle has StabiliTrak®, this message displays
when the Traction Control System (TCS) is turned
off. Adjust your driving accordingly. SeeStabiliTrak
®
System on page 4-6for more information.
TRAILER CONNECTED
On vehicles with the Integrated Trailer Brake Control
(ITBC) system, this message displays brie�y when
a trailer with electric brakes is �rst connected to
the vehicle.
This message clears itself after several seconds. This
message also clears if you acknowledge it. After
this message clears, the TRAILER GAIN/OUTPUT
display appears in the DIC.See “TRAILER GAIN/OUTPUT” underDIC Operation
and Displays (With DIC Buttons) on page 3-55or
DIC Operation and Displays (Without DIC Buttons) on
page 3-60and “Integrated Trailer Brake Control System”
underTowing a Trailer on page 4-55for more
information.
TRANSMISSION HOT IDLE ENGINE
Notice:If you drive your vehicle while the
transmission �uid is overheating and the
transmission temperature warning is displayed on
the instrument panel cluster and/or DIC, you
can damage the transmission. This could lead to
costly repairs that would not be covered by
your warranty. Do not drive your vehicle with
overheated transmission �uid or while the
transmission temperature warning is displayed.
This message displays along with a continuous chime if
the transmission �uid in the vehicle gets hot. Driving
with the transmission �uid temperature high can cause
damage to the vehicle. Stop the vehicle and let it
idle to allow the transmission to cool. This message
clears and the chime stops when the �uid temperature
reaches a safe level.
3-71
Page 421 of 578
CAUTION: (Continued)
but you would not get the overheat warning.
Your engine could catch �re and you or others
could be burned. Use a 50/50 mixture of clean,
drinkable water and DEX-COOL
®coolant.
Notice:If you use an improper coolant mixture,
your engine could overheat and be badly damaged.
The repair cost would not be covered by your
warranty. Too much water in the mixture can freeze
and crack the engine, radiator, heater core, and
other parts.
If you have to add coolant more than four times a year,
have your dealer/retailer check your cooling system.
Notice:If you use extra inhibitors and/or additives
in your vehicle’s cooling system, you could damage
your vehicle. Use only the proper mixture of the
engine coolant listed in this manual for the cooling
system. SeeRecommended Fluids and Lubricants on
page 6-15for more information.
Checking Coolant
The coolant surge tank is located in the engine
compartment on the passenger’s side of the vehicle.
SeeEngine Compartment Overview on page 5-14
for more information on location.
{CAUTION:
Turning the surge tank pressure cap when the
engine and radiator are hot can allow steam
and scalding liquids to blow out and burn
you badly. Never turn the surge tank pressure
cap — even a little — when the engine and
radiator are hot.
The vehicle must be on a level surface. When your
engine is cold, the coolant level should be at the FULL
COLD mark on the coolant surge tank.
If your vehicle has a low coolant sensor and the LOW
COOLANT LEVEL message comes on and stays on, it
means you are low on engine coolant. See “LOW
COOLANT LEVEL” underDIC Warnings and Messages
on page 3-63.
5-29
Page 468 of 578
Dual Tire Operation
When the vehicle is new, or whenever a wheel,
wheel bolt or wheel nut is replaced, check the wheel
nut torque after 100, 1,000 and 6,000 miles
(160, 1 600 and 10 000 km) of driving. For proper
torque and wheel nut tightening information, see
Removing the Spare Tire and Tools on page 5-93.
The outer tire on a dual wheel setup generally wears
faster than the inner tire. Your tires will wear more
evenly and last longer if you rotate the tires periodically,
seeTire Inspection and Rotation on page 5-81. Also see
Scheduled Maintenance (Gasoline Engine) on page 6-4.
{CAUTION:
If you operate your vehicle with a tire that is
badly underin�ated, the tire can overheat. An
overheated tire can lose air suddenly or catch
�re. You or others could be injured. Be sure all
tires (including the spare) are properly in�ated.
SeeInflation - Tire Pressure on page 5-74, for
information on proper tire in�ation.
Tire Pressure Monitor System
The Tire Pressure Monitor System (TPMS) uses radio
and sensor technology to check tire pressure levels. The
TPMS sensors monitor the air pressure in your vehicle’s
tires and transmit tire pressure readings to a receiver
located in the vehicle.
Each tire, including the spare (if provided), should be
checked monthly when cold and in�ated to the in�ation
pressure recommended by the vehicle manufacturer
on the vehicle placard or tire in�ation pressure label.
(If your vehicle has tires of a different size than the size
indicated on the vehicle placard or tire in�ation pressure
label, you should determine the proper tire in�ation
pressure for those tires.)
As an added safety feature, your vehicle has been
equipped with a tire pressure monitoring system (TPMS)
that illuminates a low tire pressure telltale when one or
more of your tires is signi�cantly under-in�ated.
Accordingly, when the low tire pressure telltale
illuminates, you should stop and check your tires as
soon as possible, and in�ate them to the proper
pressure. Driving on a signi�cantly under-in�ated tire
causes the tire to overheat and can lead to tire failure.
Under-in�ation also reduces fuel efficiency and tire
tread life, and may affect the vehicle’s handling and
stopping ability.
5-76
Page 470 of 578
Tire Pressure Monitor Operation
The Tire Pressure Monitor System (TPMS), if your
vehicle has this feature, is designed to warn the driver
when a low tire pressure condition exists. TPMS sensors
are mounted onto each tire and wheel assembly,
excluding the spare tire and wheel assembly. The TPMS
sensors monitor the air pressure in the vehicle’s tires
and transmits the tire pressure readings to a receiver
located in the vehicle.
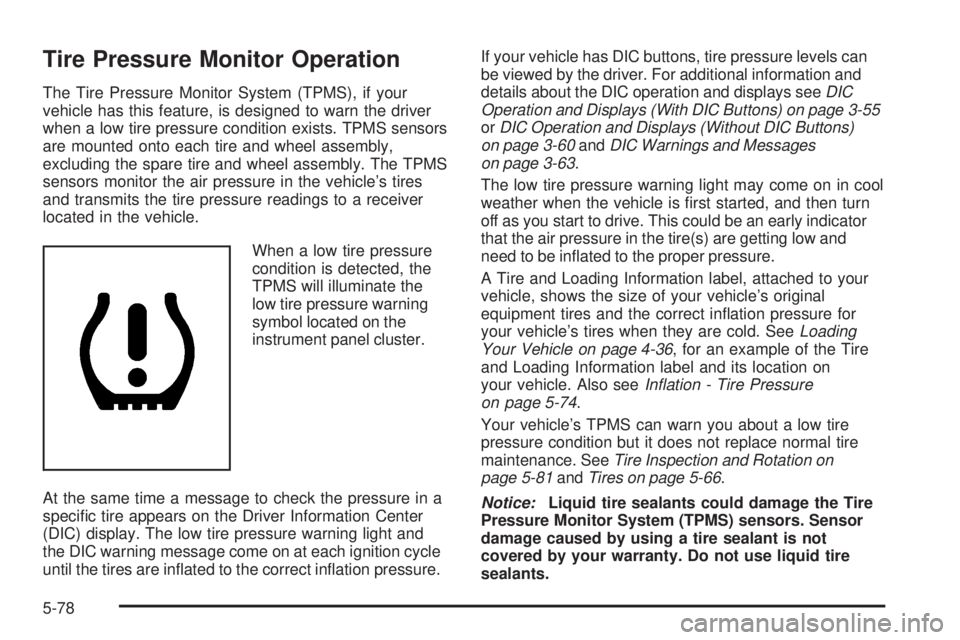
When a low tire pressure
condition is detected, the
TPMS will illuminate the
low tire pressure warning
symbol located on the
instrument panel cluster.
At the same time a message to check the pressure in a
speci�c tire appears on the Driver Information Center
(DIC) display. The low tire pressure warning light and
the DIC warning message come on at each ignition cycle
until the tires are in�ated to the correct in�ation pressure.If your vehicle has DIC buttons, tire pressure levels can
be viewed by the driver. For additional information and
details about the DIC operation and displays seeDIC
Operation and Displays (With DIC Buttons) on page 3-55
orDIC Operation and Displays (Without DIC Buttons)
on page 3-60andDIC Warnings and Messages
on page 3-63.
The low tire pressure warning light may come on in cool
weather when the vehicle is �rst started, and then turn
off as you start to drive. This could be an early indicator
that the air pressure in the tire(s) are getting low and
need to be in�ated to the proper pressure.
A Tire and Loading Information label, attached to your
vehicle, shows the size of your vehicle’s original
equipment tires and the correct in�ation pressure for
your vehicle’s tires when they are cold. SeeLoading
Your Vehicle on page 4-36, for an example of the Tire
and Loading Information label and its location on
your vehicle. Also seeInflation - Tire Pressure
on page 5-74.
Your vehicle’s TPMS can warn you about a low tire
pressure condition but it does not replace normal tire
maintenance. SeeTire Inspection and Rotation on
page 5-81andTires on page 5-66.
Notice:Liquid tire sealants could damage the Tire
Pressure Monitor System (TPMS) sensors. Sensor
damage caused by using a tire sealant is not
covered by your warranty. Do not use liquid tire
sealants.
5-78
Page 471 of 578
TPMS Malfunction Light and Message
The TPMS will not function properly if one or more of the
TPMS sensors are missing or inoperable. When the
system detects a malfunction, the low tire warning light
�ashes for about one minute and then stays on for the
remainder of the ignition cycle. A DIC warning message
is also displayed. The low tire warning light and DIC
warning message come on at each ignition cycle until the
problem is corrected. Some of the conditions that can
cause the malfunction light and DIC message to
come on are:
One of the road tires has been replaced with the
spare tire. The spare tire does not have a TPMS
sensor. The TPMS malfunction light and DIC
message should go off once you re-install the road
tire containing the TPMS sensor.
The TPMS sensor matching process was started but
not completed or not completed successfully after
rotating the vehicle’s tires. The DIC message and
TPMS malfunction light should go off once the TPMS
sensor matching process is performed successfully.
See “TPMS Sensor Matching Process” later in this
section.
One or more TPMS sensors are missing or
damaged. The DIC message and the TPMS
malfunction light should go off when the TPMS
sensors are installed and the sensor matching
process is performed successfully. See your
dealer/retailer for service.
Replacement tires or wheels do not match your
vehicle’s original equipment tires or wheels. Tires
and wheels other than those recommended for your
vehicle could prevent the TPMS from functioning
properly. SeeBuying New Tires on page 5-84.
Operating electronic devices or being near facilities
using radio wave frequencies similar to the TPMS
could cause the TPMS sensors to malfunction.
If the TPMS is not functioning it cannot detect or signal
a low tire condition. See your dealer/retailer for service if
the TPMS malfunction light and DIC message comes on
and stays on.
5-79