remote start GMC SIERRA 2010 User Guide
[x] Cancel search | Manufacturer: GMC, Model Year: 2010, Model line: SIERRA, Model: GMC SIERRA 2010Pages: 630, PDF Size: 4.65 MB
Page 144 of 630
3. If it is the first remote start since the vehicle hasbeen driven, repeat these steps, while the engine
is still running, to extend the engine running time
by 10 minutes. Remote start can be extended
one time.
After entering the vehicle during a remote start, insert
and turn the key to RUN to drive the vehicle.
To manually shut off a remote start, do any of the
following:
.Aim the RKE transmitter at the vehicle and press
the remote start button until the parking lamps
turn off.
.Turn on the hazard warning flashers.
.Turn the ignition switch on and then off.
The vehicle can be remote started two separate times
between driving sequences. The engine will run for
10 minutes after each remote start.
Or, you can extend the engine run time by another
10 minutes within the first 10 minute remote start time
frame, and before the engine stops.
For example, if the lock button and then the remote start
buttons are pressed again after the vehicle has been
running for five minutes, 10 minutes are added, allowing
the engine to run for 15 minutes.
The additional ten minutes are considered a second
remote vehicle start. Once two remote starts, or a single remote start with
one time extension has been done, the vehicle must be
started with the key. After the key is removed from the
ignition, the vehicle can be remote started again.
The vehicle cannot be remote started if the key is in the
ignition, the hood is not closed, or if there is an
emission control system malfunction and the check
engine light comes on.
Also, the engine will turn off during a remote vehicle
start if the coolant temperature gets too high or if the oil
pressure gets low.
Vehicles that have the remote vehicle start feature are
shipped from the factory with the remote vehicle start
system enabled. The system may be enabled or
disabled through the DIC. See
“REMOTE START”
under DIC Vehicle Customization (With DIC Buttons)
on
page 4‑75for additional information. If your vehicle
does not have DIC buttons, see your dealer/retailer to
enable or disable the remote vehicle start system.
Remote Start Ready
If your vehicle does not have the remote vehicle start
feature, it may have the remote start ready feature.
This feature allows your dealer/retailer to add the
manufacturer's remote vehicle start feature.
See your dealer/retailer if you would like to add the
manufacturer's remote vehicle start feature to your
vehicle.
3-8
Page 153 of 630
Sun Visors
Pull the sun visor down to block glare. Swing the sun
visor to the side to cover the side window.
The passenger's side sun visor may have a vanity
mirror.
Theft-Deterrent Systems
Vehicle theft is big business, especially in some cities.
This vehicle has theft-deterrent features, however, they
do not make it impossible to steal.
Content Theft-Deterrent
Your vehicle may have a content theft-deterrent alarm
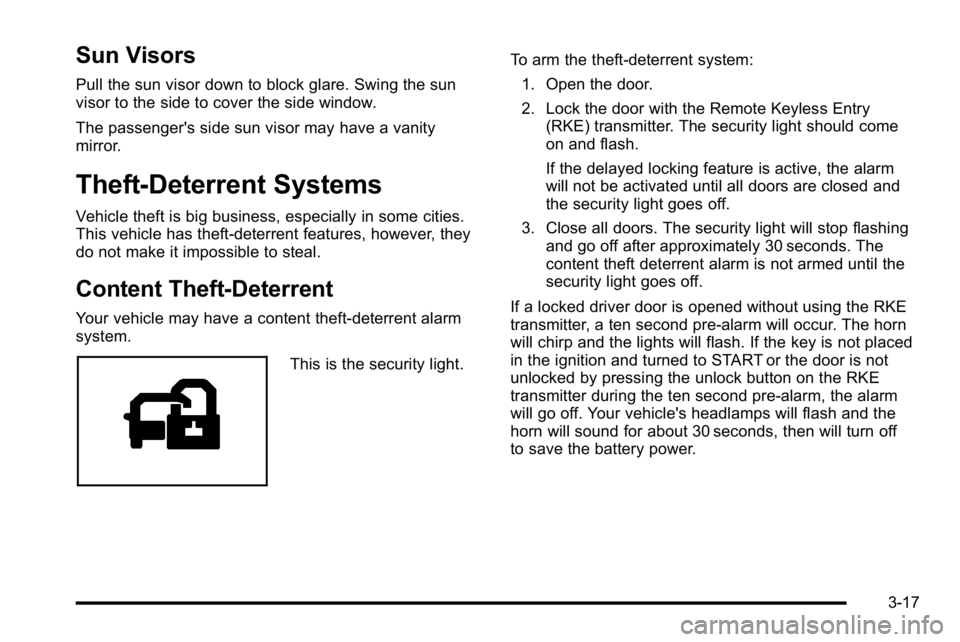
system.
This is the security light.To arm the theft-deterrent system:
1. Open the door.
2. Lock the door with the Remote Keyless Entry (RKE) transmitter. The security light should come
on and flash.
If the delayed locking feature is active, the alarm
will not be activated until all doors are closed and
the security light goes off.
3. Close all doors. The security light will stop flashing and go off after approximately 30 seconds. The
content theft deterrent alarm is not armed until the
security light goes off.
If a locked driver door is opened without using the RKE
transmitter, a ten second pre-alarm will occur. The horn
will chirp and the lights will flash. If the key is not placed
in the ignition and turned to START or the door is not
unlocked by pressing the unlock button on the RKE
transmitter during the ten second pre-alarm, the alarm
will go off. Your vehicle's headlamps will flash and the
horn will sound for about 30 seconds, then will turn off
to save the battery power.
3-17
Page 206 of 630
Programming Universal Home
Remote—Rolling Code
For questions or help programming the Universal
Home Remote System, call 1-866-572-2728 or go to
learcar2u.com.
Most garage door openers sold after 1996 are Rolling
Code units.
Programming a garage door opener involves
time-sensitive actions, so read the entire procedure
before starting. Otherwise, the device will time out and
the procedure will have to be repeated.
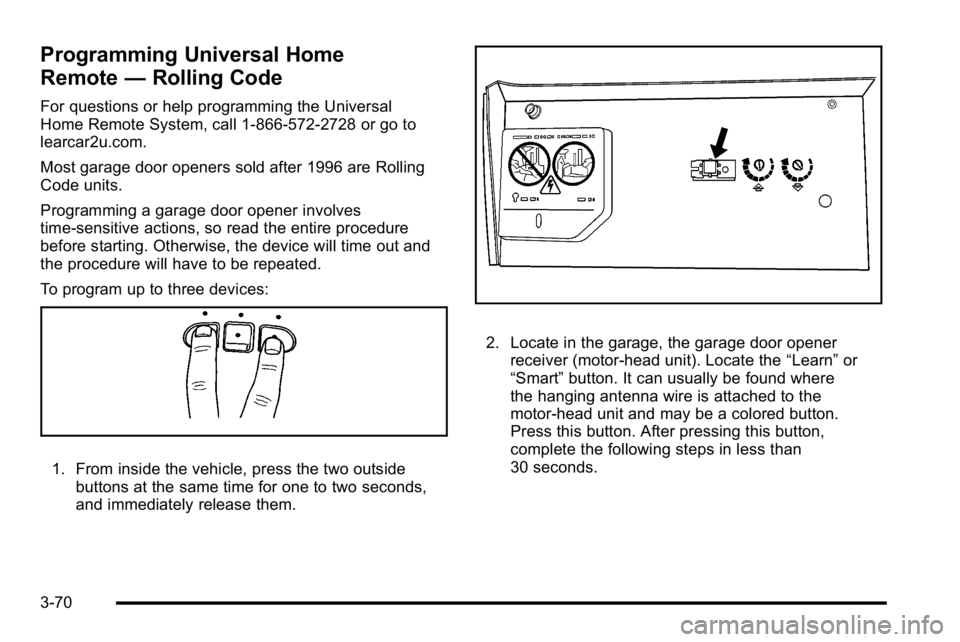
To program up to three devices:
1. From inside the vehicle, press the two outside
buttons at the same time for one to two seconds,
and immediately release them.
2. Locate in the garage, the garage door openerreceiver (motor-head unit). Locate the “Learn”or
“Smart” button. It can usually be found where
the hanging antenna wire is attached to the
motor-head unit and may be a colored button.
Press this button. After pressing this button,
complete the following steps in less than
30 seconds.
3-70
Page 207 of 630
3. Immediately return to the vehicle. Press and holdthe Universal Home Remote button that will be
used to control the garage door until the garage
door moves. The indicator light, above the selected
button, should slowly blink. This button may need
to be held for up to 20 seconds.
4. Immediately, within one second, release the button when the garage door moves. The indicator light
will blink rapidly until programming is complete.
5. Press and release the same button again. The garage door should move, confirming that
programming is successful and complete.
To program another Rolling Code device such as an
additional garage door opener, a security device,
or home automation device, repeat Steps 1 through 5,
choosing a different function button in Step 3 than what
was used for the garage door opener.
If these instructions do not work, the garage door
opener is probably a Fixed Code unit. Follow the
Programming instructions that follow for a Fixed Code
garage door opener.
Programming Universal Home
Remote —Fixed Code
For questions or help programming the Universal
Home Remote System, call 1-866-572-2728 or go to
learcar2u.com. Most garage door openers sold before 1996 are
Fixed Code units.
Programming a garage door opener involves
time-sensitive actions, so read the entire procedure
before starting. Otherwise, the device will time out
and the procedure will have to be repeated.
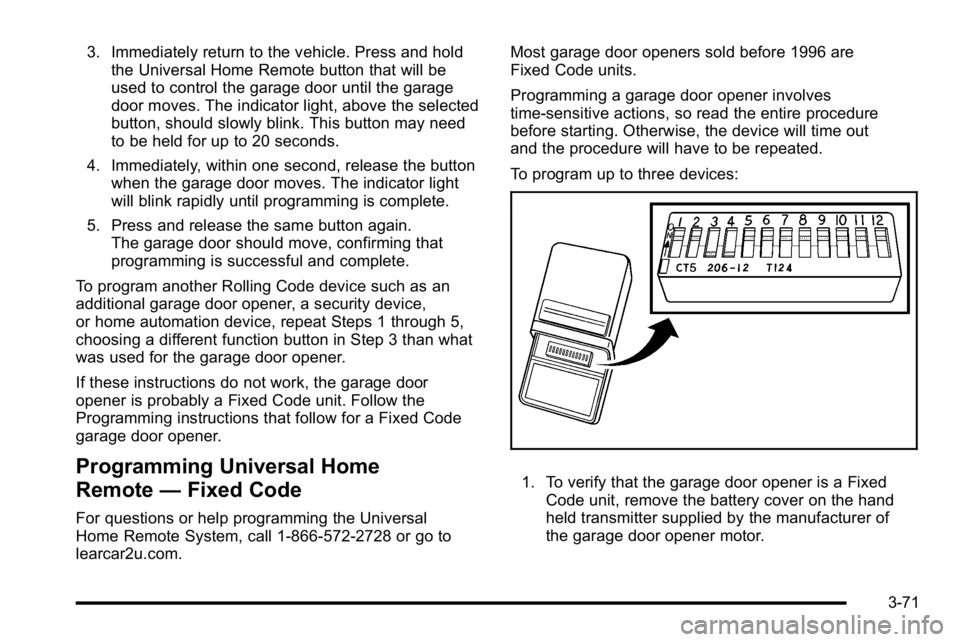
To program up to three devices:
1. To verify that the garage door opener is a Fixed
Code unit, remove the battery cover on the hand
held transmitter supplied by the manufacturer of
the garage door opener motor.
3-71
Page 231 of 630

If the vehicle is started in a dark garage, the automatic
headlamp system comes on immediately. Once the
vehicle leaves the garage, it takes approximately
one minute for the automatic headlamp system to
change to DRL if it is bright enough outside. During that
delay, the instrument panel cluster may not be as bright
as usual. Make sure the instrument panel brightness
control is in the full bright position. SeeInstrument
Panel Brightness on page 4‑14.
To idle the vehicle with the automatic headlamp system
off, turn the control to the off position.
The headlamps will also stay on after you exit the
vehicle. This feature can be programmed using the
Driver Information Center (DIC), if equipped. See DIC
Vehicle Customization (With DIC Buttons)
on
page 4‑75.
If the vehicle is not equipped with DIC buttons, exit
lighting is automatic. When it is dark enough outside,
the exterior lamps remain on for 30 seconds after the
ignition is moved from ON/RUN to LOCK/OFF.
For vehicles without a radio, the instrument panel light
remains on for 30 seconds with the driver's door closed.
For vehicles with a radio, the instrument panel light
remains on for 10 minutes with the driver's door closed.
See Retained Accessory Power (RAP) on page 3‑23.
The regular headlamp system can be turned on when
needed.
Puddle Lamps
If the vehicle has puddle lamps, they come on when the
unlock button on the Remote Keyless Entry (RKE)
Transmitter is pressed. The lamps time out or turn off
once the engine is started.
Fog Lamps
For vehicles with fog lamps, the control is located next
to the exterior lamps control on the instrument panel,
to the left of the steering column.
The ignition must be in the ON/RUN position for the
fog lamps to come on.
#(Fog Lamps): Press to turn the fog lamps on or off.
A light will come on in the instrument panel cluster.
When the fog lamps are turned on, the parking lamps
automatically turn on.
When the headlamps are changed to high-beam, the
fog lamps also go off. When the high-beam headlamps
are turned off, the fog lamps will come on again.
Some localities have laws that require the headlamps
to be on along with the fog lamps.
4-13
Page 287 of 630
PASSENGER DOOR OPEN
This message displays and a chime may sound if the
front passenger door is not fully closed and the vehicle
is shifted out of P (Park). Stop and turn off the vehicle,
check the door for obstructions, and close the door
again. Check to see if the message still appears on
the DIC.
REMOTE KEY LEARNING ACTIVE
This message may display while you are matching a
Remote Keyless Entry (RKE) transmitter to your
vehicle. See“Matching Transmitter(s) to Your Vehicle”
under Remote Keyless Entry (RKE) System Operation
on page 3‑4andDIC Operation and Displays (With
DIC Buttons)on page 4‑51or DIC Operation and
Displays (Without DIC Buttons)on page 4‑58for more
information.
REPLACE BATTERY IN REMOTE KEY
This message displays if a Remote Keyless Entry
(RKE) transmitter battery is low. The battery needs to
be replaced in the transmitter. See “Battery
Replacement” underRemote Keyless Entry (RKE)
System Operation on page 3‑4.
RIGHT REAR DOOR OPEN (Crew Cab)
This message displays and a chime may sound if the
passenger side rear door is not fully closed and the
vehicle is shifted out of P (Park). Stop and turn off the
vehicle, check the door for obstructions, and close the
door again. Check to see if the message still appears
on the DIC.
SERVICE 4 WHEEL DRIVE
If the vehicle has four-wheel drive, this message may
display if a problem occurs with the four-wheel-drive
system. If this message appears, stop as soon as
possible and turn off the vehicle. Make sure the key is
in the LOCK/OFF position for at least one minute and
then restart the vehicle and check for the message on
the DIC display. If the message is still displayed or
appears again when you begin driving, the
four-wheel-drive system needs service. See your
dealer/retailer.
SERVICE AIR BAG
This message displays if there is a problem with the
airbag system. Have your dealer/retailer inspect the
system for problems. See Airbag Readiness Light
on
page 4‑33and Airbag Systemon page 2‑73for more
information.
4-69
Page 300 of 630
MEMORY SEAT RECALL
If your vehicle has this feature, it allows you to select
your preference for the remote memory seat recall
feature. SeeMemory Seat, Mirrors, and Pedals
on
page 2‑8for more information.
Press the customization button until MEMORY SEAT
RECALL appears on the DIC display. Press the set/
reset button once to access the settings for this feature.
Then press the customization button to scroll through
the following settings:
OFF (default) : No remote memory seat recall
will occur.
ON : The driver's seat and, on some vehicles, the
outside mirrors will automatically move to the stored
driving position when the unlock button on the Remote
Keyless Entry (RKE) transmitter is pressed. On some
vehicles with the adjustable throttle and brake pedal
feature, the pedals will also automatically move.
See “Relearn Remote Key” underDIC Operation and
Displays (With DIC Buttons)
on page 4‑51or DIC
Operation and Displays (Without DIC Buttons)on
page 4‑58for more information on matching
transmitters to driver ID numbers. NO CHANGE :
No change will be made to this feature.
The current setting will remain.
To select a setting, press the set/reset button while the
desired setting is displayed on the DIC.
REMOTE START
If your vehicle has this feature, it allows you to turn the
remote start off or on. The remote start feature allows
you to start the engine from outside of the vehicle
using the Remote Keyless Entry (RKE) transmitter.
See Remote Vehicle Start
on page 3‑7for more
information.
Press the customization button until REMOTE START
appears on the DIC display. Press the set/reset button
once to access the settings for this feature. Then press
the customization button to scroll through the following
settings:
OFF : The remote start feature will be disabled.
ON (default) : The remote start feature will be enabled.
NO CHANGE : No change will be made to this feature.
The current setting will remain.
To select a setting, press the set/reset button while the
desired setting is displayed on the DIC.
4-82
Page 320 of 630

Playing a DVD
DVD/CD AUX (Auxiliary) :Press this button to cycle
through DVD, CD, or Auxiliary when listening to the
radio. The DVD/CD text tab and a message showing
track or chapter number displays when a disc is in
either slot. Press this button again and the system
automatically searches for an auxiliary input device,
such as a portable audio player. If a portable audio
player is not connected, “No Aux Input Device”displays.
If a disc is in both the DVD slot and the CD slot the
DVD/CD AUX button cycles between the two sources
and not indicate “No Aux Input Device”. If a front
auxiliary device is connected, the DVD/CD AUX button
cycles through all available options, such as: DVD slot,
CD slot, Front Auxiliary, and Rear Auxiliary (if available).
See “Using the Auxiliary Input Jack(s)” later in this
section, or “Audio/Video (A/V) Jacks” under,Rear Seat
Entertainment (RSE) System
on page 4‑134for more
information.
O(Power): Press to turn the radio on or off. Turn this
knob clockwise or counterclockwise to increase or
decrease the volume. Press and hold for more than
two seconds to turn off the entire radio and Rear Seat
Entertainment (RSE) system and to start the parental
control feature. Parental control prevents the rear seat
occupant from operating the Rear Seat Audio (RSA)
system or remote control. A lock symbol displays next to the clock display.
The parental control feature remains on until the knob
is pressed and held for more than two seconds again,
or until the driver turns the ignition off and exits the
vehicle.
f(Tune):
Turn to change tracks on a CD or DVD, to
manually tune a radio station, or to change clock or
date settings, while in the clock or date setting mode.
See the information given earlier in this section specific
to the radio, CD, and the DVD. Also, see “Setting the
Time” in the index, for setting the clock and date.
©SEEK (Previous Track/Chapter): Press the left
arrow to return to the start of the current track or
chapter. Press the left arrow again to go to the previous
track or chapter. This button might not work when the
DVD is playing the copyright information or the
previews.
SEEK
¨(Next Track/Chapter): Press the right arrow
to go to the next track or chapter. This button might not
work when the DVD is playing the copyright information
or the previews.
sREV (Fast Reverse): Press to quickly reverse the
CD or DVD at five times the normal speed. The radio
displays the elapsed time while in fast reverse. To stop
fast reversing, press again. This button might not work
when the DVD is playing the copyright information or
the previews.
4-102
Page 321 of 630
\FWD (Fast Forward):Press to fast forward the
CD or DVD. The radio displays the elapsed time and
fast forwards five times the normal speed. To stop fast
forwarding, press again. This button might not work
when the DVD is playing the copyright information or
the previews.
Z(Eject): Press to eject a CD or DVD. If a CD or
DVD is ejected, but not removed, the player
automatically pulls it back in after 15 seconds.
If loading and reading of a CD cannot be completed,
because of an unknown format, etc., and the disc fails
to eject, press and hold for more than five seconds to
force the disc to eject.
DVD-V (Video) Display Buttons
Once a DVD-V is inserted, the radio display menu
shows several tag options for DVD playing. Press the
softkey located under any desired tag option during
DVD playback. See the tag options listed after, for
more information.
The rear seat passenger can navigate the DVD-V
menus and controls through the remote control. See
“Remote Control”, under Rear Seat Entertainment
(RSE) System
on page 4‑134for more information.
The Video Screen automatically turns on when the
DVD-V is inserted into the DVD slot.
r/j(Play/Pause): Press either the play or pause
icon displayed on the radio system, to toggle between
pausing or restarting playback of a DVD. If the forward
arrow is showing on display, the system is in pause
mode. If the pause icon is showing on display, the
system is in playback mode. If the DVD screen is off,
press the play button to turn the screen on.
Some DVDs begin playing after the previews have
finished, although there could be a delay of up to
30 seconds. If the DVD does not begin playing the
movie automatically, press the softkey located under
the play/pause symbol tag displayed on the radio.
If the DVD still does not play, refer to the on-screen
instructions, if available.
c(Stop): Press to stop playing, rewinding, or fast
forwarding a DVD.
r(Enter): Press to select the choices that are
highlighted in any menu.
y(Menu): Press to access the DVD menu. The DVD
menu is different on every DVD. Use the softkeys
located under the navigation arrows to navigate the
cursor through the DVD menu. After making a selection
press this button. This button only operates when using
a DVD.
4-103
Page 322 of 630
Nav (Navigate) :Press to display directional arrows
for navigating through the menus.
q(Return): Press to exit the current active menu and
return to the previous menu. This button operates only
when a DVD is playing and a menu is active.
DVD-A (Audio) Display Buttons
Once a DVD-A is inserted, radio display menu shows
several tag options for DVD playing. Press the softkeys
located under any desired tag option during DVD
playback. See the tag options listed after, for more
information.
The rear seat operator can navigate the DVD-A menus
and controls through the remote control. See “Remote
Control”, under Rear Seat Entertainment (RSE) System
on page 4‑134for more information. The Video Screen
does not automatically power on when the DVD-A is
inserted into the DVD slot. It must be manually turned
on by the rear seat occupant through the remote control
power button.
r/j(Play/Pause): Press either the play or pause
icon displayed on the radio system, to toggle between
pausing or restarting playback of a DVD. If the forward
arrow is showing on the display, the system is in pause
mode. If the pause icon is showing on the display, the
system is in playback mode.
qGroupr: Press to cycle through musical
groupings on the DVD-A disc.
Nav (Navigate) : Press to display directional arrows for
navigating through the menus.
e(Audio Stream): Press to cycle through audio
stream formats located on the DVD-A disc. The video
screen shows the audio stream changing.
Inserting a Disc
To play a disc, gently insert the disc, with the label side
up, into the loading slot. The DVD player might not
accept some paper labeled media. The player starts
loading the disc into the system and show “Loading
Disc” on the radio display. At the same time, the radio
displays a softkey menu of option(s). Some discs
automatically play the movie while others default to the
softkey menu display, which requires the Play, Enter,
or Navigation softkeys to be pressed; either by softkey
or by the rear seat passenger using the remote control.
Loading a disc into the system, depending on media
type and format, ranges from 5 to 20 seconds for a
CD, and up to 30 seconds for a DVD.
4-104