overheating GMC SIERRA 2021 Owner's Manual
[x] Cancel search | Manufacturer: GMC, Model Year: 2021, Model line: SIERRA, Model: GMC SIERRA 2021Pages: 461, PDF Size: 11.84 MB
Page 122 of 461
GMC Sierra/Sierra Denali 1500 Owner Manual (GMNA-Localizing-U.S./
Canada/Mexico-14632426) - 2021 - CRC - 11/5/20
Instruments and Controls 121
serviced by your dealer. If the system is
working normally, the indicator light then
turns off. This light comes on when the
Electronic Stability Control (ESC) system is
turned off. If ESC is off, the Traction Control
System (TCS) is also off. To turn ESC off and
on, seeTraction Control/Electronic Stability
Control 0248.
If ESC and TCS are off, the systems do not
assist in controlling the vehicle. Adjust
driving accordingly.
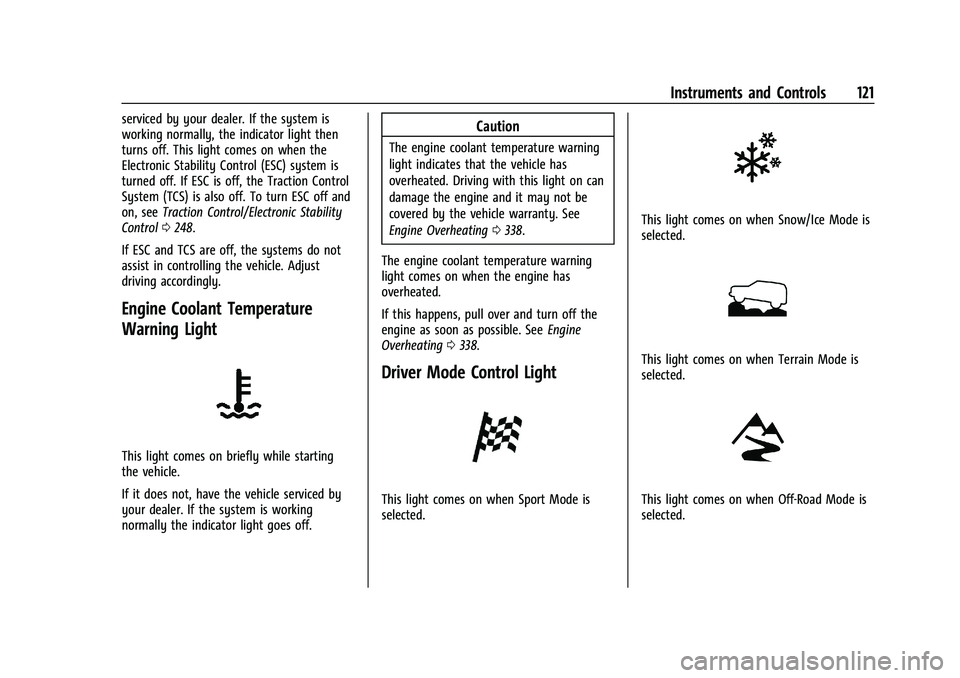
Engine Coolant Temperature
Warning Light
This light comes on briefly while starting
the vehicle.
If it does not, have the vehicle serviced by
your dealer. If the system is working
normally the indicator light goes off.
Caution
The engine coolant temperature warning
light indicates that the vehicle has
overheated. Driving with this light on can
damage the engine and it may not be
covered by the vehicle warranty. See
Engine Overheating 0338.
The engine coolant temperature warning
light comes on when the engine has
overheated.
If this happens, pull over and turn off the
engine as soon as possible. See Engine
Overheating 0338.
Driver Mode Control Light
This light comes on when Sport Mode is
selected.
This light comes on when Snow/Ice Mode is
selected.
This light comes on when Terrain Mode is
selected.
This light comes on when Off-Road Mode is
selected.
Page 221 of 461
GMC Sierra/Sierra Denali 1500 Owner Manual (GMNA-Localizing-U.S./
Canada/Mexico-14632426) - 2021 - CRC - 11/5/20
220 Driving and Operating
{Warning
Using the brakes to slow the vehicle on a
long downhill slope can cause brake
overheating, can reduce brake
performance, and could result in a loss of
braking. Shift the transmission to a lower
gear to let the engine assist the brakes
on a steep downhill slope.
{Warning
Coasting downhill in N (Neutral) or with
the ignition off is dangerous. This can
cause overheating of the brakes and loss
of steering assist. Always have the engine
running and the vehicle in gear.
.Drive at speeds that keep the vehicle in
its own lane. Do not swing wide or cross
the center line.
.Be alert on top of hills; something could
be in your lane (e.g., stalled car, crash).
.Pay attention to special road signs (e.g.,
falling rocks area, winding roads, long
grades, passing or no-passing zones) and
take appropriate action.
Winter Driving
Driving on Snow or Ice
Snow or ice between the tires and the road
creates less traction or grip, so drive
carefully. Wet ice can occur at about 0 °C
(32 °F) when freezing rain begins to fall.
Avoid driving on wet ice or in freezing rain
until roads can be treated.
For Slippery Road Driving:
.Accelerate gently. Accelerating too quickly
causes the wheels to spin and makes the
surface under the tires slick.
.Turn on Traction Control. SeeTraction
Control/Electronic Stability Control 0248.
.The Antilock Brake System (ABS) improves
vehicle stability during hard stops, but
the brakes should be applied sooner than
when on dry pavement. See Antilock
Brake System (ABS) 0246.
.Allow greater following distance and
watch for slippery spots. Icy patches can
occur on otherwise clear roads in shaded
areas. The surface of a curve or an
overpass can remain icy when the
surrounding roads are clear. Avoid sudden
steering maneuvers and braking while
on ice.
.Turn off cruise control.
Blizzard Conditions
Stop the vehicle in a safe place and signal
for help. Stay with the vehicle unless there
is help nearby. If possible, use Roadside
Assistance. See Roadside Assistance Program
0 431. To get help and keep everyone in the
vehicle safe:
.Turn on the hazard warning flashers.
.Tie a red cloth to an outside mirror.
{Warning
Snow can trap engine exhaust under the
vehicle. This may cause exhaust gases to
get inside. Engine exhaust contains
carbon monoxide (CO), which cannot be
seen or smelled. It can cause
unconsciousness and even death.
If the vehicle is stuck in snow:
.Clear snow from the base of the
vehicle, especially any blocking the
exhaust pipe.
.Open a window about 5 cm (2 in) on
the vehicle side that is away from the
wind, to bring in fresh air.
(Continued)
Page 236 of 461
GMC Sierra/Sierra Denali 1500 Owner Manual (GMNA-Localizing-U.S./
Canada/Mexico-14632426) - 2021 - CRC - 11/5/20
Driving and Operating 235
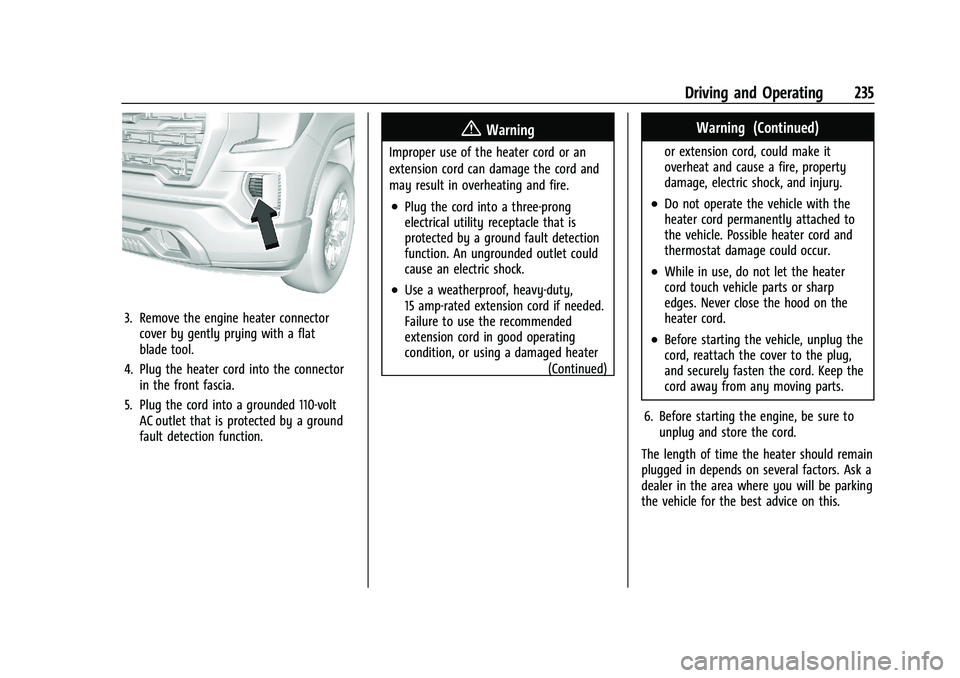
3. Remove the engine heater connectorcover by gently prying with a flat
blade tool.
4. Plug the heater cord into the connector in the front fascia.
5. Plug the cord into a grounded 110-volt AC outlet that is protected by a ground
fault detection function.
{Warning
Improper use of the heater cord or an
extension cord can damage the cord and
may result in overheating and fire.
.Plug the cord into a three-prong
electrical utility receptacle that is
protected by a ground fault detection
function. An ungrounded outlet could
cause an electric shock.
.Use a weatherproof, heavy-duty,
15 amp-rated extension cord if needed.
Failure to use the recommended
extension cord in good operating
condition, or using a damaged heater
(Continued)
Warning (Continued)
or extension cord, could make it
overheat and cause a fire, property
damage, electric shock, and injury.
.Do not operate the vehicle with the
heater cord permanently attached to
the vehicle. Possible heater cord and
thermostat damage could occur.
.While in use, do not let the heater
cord touch vehicle parts or sharp
edges. Never close the hood on the
heater cord.
.Before starting the vehicle, unplug the
cord, reattach the cover to the plug,
and securely fasten the cord. Keep the
cord away from any moving parts.
6. Before starting the engine, be sure to unplug and store the cord.
The length of time the heater should remain
plugged in depends on several factors. Ask a
dealer in the area where you will be parking
the vehicle for the best advice on this.
Page 251 of 461
GMC Sierra/Sierra Denali 1500 Owner Manual (GMNA-Localizing-U.S./
Canada/Mexico-14632426) - 2021 - CRC - 11/5/20
250 Driving and Operating
Caution
Do not repeatedly brake or accelerate
heavily when TCS is off. The vehicle
driveline could be damaged.
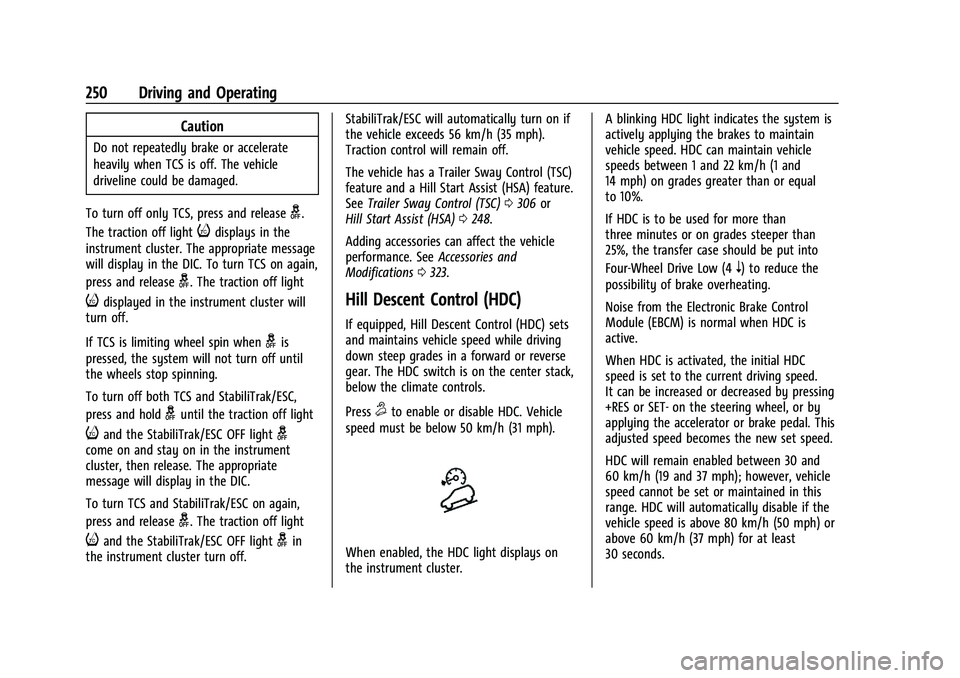
To turn off only TCS, press and release
g.
The traction off light
idisplays in the
instrument cluster. The appropriate message
will display in the DIC. To turn TCS on again,
press and release
g. The traction off light
idisplayed in the instrument cluster will
turn off.
If TCS is limiting wheel spin when
gis
pressed, the system will not turn off until
the wheels stop spinning.
To turn off both TCS and StabiliTrak/ESC,
press and hold
guntil the traction off light
iand the StabiliTrak/ESC OFF lightgcome on and stay on in the instrument
cluster, then release. The appropriate
message will display in the DIC.
To turn TCS and StabiliTrak/ESC on again,
press and release
g. The traction off light
iand the StabiliTrak/ESC OFF lightgin
the instrument cluster turn off. StabiliTrak/ESC will automatically turn on if
the vehicle exceeds 56 km/h (35 mph).
Traction control will remain off.
The vehicle has a Trailer Sway Control (TSC)
feature and a Hill Start Assist (HSA) feature.
See
Trailer Sway Control (TSC) 0306 or
Hill Start Assist (HSA) 0248.
Adding accessories can affect the vehicle
performance. See Accessories and
Modifications 0323.
Hill Descent Control (HDC)
If equipped, Hill Descent Control (HDC) sets
and maintains vehicle speed while driving
down steep grades in a forward or reverse
gear. The HDC switch is on the center stack,
below the climate controls.
Press
5to enable or disable HDC. Vehicle
speed must be below 50 km/h (31 mph).
When enabled, the HDC light displays on
the instrument cluster. A blinking HDC light indicates the system is
actively applying the brakes to maintain
vehicle speed. HDC can maintain vehicle
speeds between 1 and 22 km/h (1 and
14 mph) on grades greater than or equal
to 10%.
If HDC is to be used for more than
three minutes or on grades steeper than
25%, the transfer case should be put into
Four-Wheel Drive Low (4
n) to reduce the
possibility of brake overheating.
Noise from the Electronic Brake Control
Module (EBCM) is normal when HDC is
active.
When HDC is activated, the initial HDC
speed is set to the current driving speed.
It can be increased or decreased by pressing
+RES or SET- on the steering wheel, or by
applying the accelerator or brake pedal. This
adjusted speed becomes the new set speed.
HDC will remain enabled between 30 and
60 km/h (19 and 37 mph); however, vehicle
speed cannot be set or maintained in this
range. HDC will automatically disable if the
vehicle speed is above 80 km/h (50 mph) or
above 60 km/h (37 mph) for at least
30 seconds.
Page 292 of 461
GMC Sierra/Sierra Denali 1500 Owner Manual (GMNA-Localizing-U.S./
Canada/Mexico-14632426) - 2021 - CRC - 11/5/20
Driving and Operating 291
Driving on Grades
Reduce speed and shift to a lower gear
before starting down a long or steep
downhill grade. If the transmission is not
shifted down, the brakes may overheat and
result in reduced braking efficiency.
The vehicle can tow in D (Drive). Shift the
transmission to a lower gear if the
transmission shifts too often under heavy
loads and/or hilly conditions.
When towing at higher altitudes, engine
coolant will boil at a lower temperature
than at lower altitudes. If the engine is
turned off immediately after towing at high
altitude on steep uphill grades, the vehicle
could show signs similar to engine
overheating. To avoid this, let the engine
run, preferably on level ground, with the
transmission in P (Park) for a few minutes
before turning the engine off. If the
overheat warning comes on, seeEngine
Overheating 0338.
Viewing Systems
If equipped, the viewing systems on the
vehicle can improve visibility while hitching,
backing, and driving with a trailer. See
Driver Assistance Systems 0265.
Parking on Hills
{Warning
To prevent serious injury or death,
always park your vehicle and trailer on a
level surface when possible.
When parking your vehicle and your trailer
on a hill: 1. Press the brake pedal, but do not shift into P (Park) yet. Turn the wheels into
the curb if facing downhill or into traffic
if facing uphill.
2. Have someone place chocks under the trailer wheels.
3. Gradually release the brake pedal to allow the chocks to absorb the load of
the trailer.
4. Reapply the brake pedal. Then apply the parking brake and shift into P (Park).
5. Release the brake pedal.
Leaving After Parking on a Hill
1. Apply and hold the brake pedal.
.Start the engine.
.Shift into a gear.
.Release the parking brake. 2. Let up on the brake pedal.
3. Drive slowly until the trailer is clear of
the chocks.
4. Stop and have someone pick up and store the chocks.
Launching and Retrieving a Boat
Backing the Trailer into the Water
{Warning
.Have all passengers get out of the
vehicle before backing onto the sloped
part of the ramp. Lower the driver and
passenger side windows before
backing onto the ramp. This will
provide a means of escape in the
unlikely event the vehicle slides into
the water.
.If the boat launch surface is slippery,
have the driver remain in the vehicle
with the brake pedal applied while the
boat is being launched. The boat
launch can be especially slippery at
low tide when part of the ramp was
previously submerged at high tide. Do
not back onto the ramp to launch the
boat if you are not sure the vehicle
can maintain traction.
(Continued)
Page 293 of 461
GMC Sierra/Sierra Denali 1500 Owner Manual (GMNA-Localizing-U.S./
Canada/Mexico-14632426) - 2021 - CRC - 11/5/20
292 Driving and Operating
Warning (Continued)
.Do not move the vehicle if someone is
in the path of the trailer. Some parts
of the trailer might be underwater and
not visible to people who are assisting
in launching the boat.
Disconnect the wiring to the trailer before
backing the trailer into the water to prevent
damage to the electrical circuits on the
trailer. Reconnect the wiring to the trailer
after removing the trailer from the water.
If the trailer has electric brakes that can
function when the trailer is submerged, it
might help to leave the electrical trailer
connector attached to maintain trailer brake
functionality while on the boat ramp.
To back the trailer into the water: 1. If equipped, place the vehicle in four-wheel-drive high.
2. Slowly back down the boat ramp until the boat is floating, but no further than
necessary.
3. Press and hold the brake pedal, but do not shift into P (Park) yet.
4. Have someone place chocks under the front wheels of the vehicle. 5. Gradually release the brake pedal to
allow the chocks to absorb the load of
the trailer.
6. Reapply the brake pedal. Then apply the parking brake and shift into P (Park).
7. Release the brake pedal.
Pulling the Trailer from the Water
To pull the trailer out of the water: 1. Press and hold the brake pedal.
2. Start the engine and shift into gear.
3. Release the parking brake.
4. Let up on the brake pedal.
5. Drive slowly until the tires are clear of the chocks.
6. Stop and have someone pick up and store the chocks.
7. Slowly pull the trailer from the water.
8. Once the vehicle and trailer have been driven from the sloped part of the boat
ramp, the vehicle can be shifted from
four-wheel-drive high. Shift into the drive
mode that is appropriate for the road
conditions.
Caution
If the vehicle tires begin to spin and the
vehicle begins to slide toward the water,
remove your foot from the accelerator
pedal and apply the brake pedal. Seek
help to have the vehicle towed up
the ramp.
Maintenance when Trailer Towing
The vehicle needs service more often when
used to tow trailers. See Maintenance
Schedule 0409. It is especially important to
check the engine oil, axle lubricant, belts,
cooling system, and brake system before
and during each trip.
Check periodically to see that all nuts and
bolts on the trailer hitch are tight.
Engine Cooling When Trailer Towing
The cooling system may temporarily
overheat during severe operating conditions.
See Engine Overheating 0338.
Page 322 of 461
GMC Sierra/Sierra Denali 1500 Owner Manual (GMNA-Localizing-U.S./
Canada/Mexico-14632426) - 2021 - CRC - 11/5/20
Vehicle Care 321
Vehicle Care
General Information
General Information . . . . . . . . . . . . . . . . . . . 322
California Proposition 65 Warning . . . . . 322
California Perchlorate MaterialsRequirements . . . . . . . . . . . . . . . . . . . . . . . . 322
Accessories and Modifications . . . . . . . . . 323
Vehicle Checks
Doing Your Own Service Work . . . . . . . . . 323
Hood . . . . . . . . . . . . . . . . . . . . . . . . . . . . . . . . . . 323
Engine Compartment Overview . . . . . . . . 325
Engine Oil . . . . . . . . . . . . . . . . . . . . . . . . . . . . . 330
Engine Oil Life System . . . . . . . . . . . . . . . . . 332
Automatic Transmission Fluid . . . . . . . . . . 333
Engine Air Filter Life System . . . . . . . . . . . 333
Engine Air Cleaner/Filter . . . . . . . . . . . . . . . 334
Cooling System . . . . . . . . . . . . . . . . . . . . . . . . 335
Engine Overheating . . . . . . . . . . . . . . . . . . . 338
Overheated Engine Protection Operating Mode . . . . . . . . . . . . . . . . . . . . . 340
Engine Fan . . . . . . . . . . . . . . . . . . . . . . . . . . . . 340
Washer Fluid . . . . . . . . . . . . . . . . . . . . . . . . . . 340
Brakes . . . . . . . . . . . . . . . . . . . . . . . . . . . . . . . . . 341
Brake Pad Life System . . . . . . . . . . . . . . . . . 342
Brake Fluid . . . . . . . . . . . . . . . . . . . . . . . . . . . . 343
Battery - North America . . . . . . . . . . . . . . . 343 Four-Wheel Drive . . . . . . . . . . . . . . . . . . . . . . 346
Front Axle . . . . . . . . . . . . . . . . . . . . . . . . . . . . . 346
Rear Axle . . . . . . . . . . . . . . . . . . . . . . . . . . . . . . 346
Starter Switch Check . . . . . . . . . . . . . . . . . . 347
Automatic Transmission Shift Lock
Control Function Check . . . . . . . . . . . . . . 347
Ignition Transmission Lock Check . . . . . . 347
Park Brake and P (Park) Mechanism Check . . . . . . . . . . . . . . . . . . . . . . . . . . . . . . . . 347
Wiper Blade Replacement . . . . . . . . . . . . . 348
Glass Replacement . . . . . . . . . . . . . . . . . . . . 348
Windshield Replacement . . . . . . . . . . . . . . 348
Gas Strut(s) . . . . . . . . . . . . . . . . . . . . . . . . . . . 349
Headlamp Aiming
Front Headlamp Aiming . . . . . . . . . . . . . . . 350
Bulb Replacement
Bulb Replacement . . . . . . . . . . . . . . . . . . . . . 350
Halogen Bulbs . . . . . . . . . . . . . . . . . . . . . . . . . 350
LED Lighting . . . . . . . . . . . . . . . . . . . . . . . . . . . 350
Headlamps, Front Turn Signal, Sidemarker, and Parking Lamps . . . . . . 350
Taillamps, Turn Signal, Stoplamps, and Back-Up Lamps . . . . . . . . . . . . . . . . . . . . . . . 351
Center High-Mounted Stoplamp (CHMSL) and Cargo Lamp . . . . . . . . . . . . 352
License Plate Lamp . . . . . . . . . . . . . . . . . . . . 352
Electrical System
Electrical System Overload . . . . . . . . . . . . . 352
Fuses and Circuit Breakers . . . . . . . . . . . . . 353
Engine Compartment Fuse Block . . . . . . . 353
Instrument Panel Fuse Block (Left) . . . . . 357
Instrument Panel Fuse Block (Right) . . . 358
Wheels and Tires
Tires . . . . . . . . . . . . . . . . . . . . . . . . . . . . . . . . . . 360
All-Season Tires . . . . . . . . . . . . . . . . . . . . . . . . 361
Winter Tires . . . . . . . . . . . . . . . . . . . . . . . . . . . 361
All-Terrain Tires . . . . . . . . . . . . . . . . . . . . . . . 362
Tire Sidewall Labeling . . . . . . . . . . . . . . . . . 362
Tire Designations . . . . . . . . . . . . . . . . . . . . . . 364
Tire Terminology and Definitions . . . . . . 365
Tire Pressure . . . . . . . . . . . . . . . . . . . . . . . . . . 367
Tire Pressure Monitor System . . . . . . . . . 368
Tire Pressure Monitor Operation . . . . . . 369
Tire Inspection . . . . . . . . . . . . . . . . . . . . . . . . . 373
Tire Rotation . . . . . . . . . . . . . . . . . . . . . . . . . . 374
When It Is Time for New Tires . . . . . . . . 375
Buying New Tires . . . . . . . . . . . . . . . . . . . . . 376
Different Size Tires and Wheels . . . . . . . . 377
Uniform Tire Quality Grading . . . . . . . . . . 377
Wheel Alignment and Tire Balance . . . . 378
Wheel Replacement . . . . . . . . . . . . . . . . . . . 378
Tire Chains . . . . . . . . . . . . . . . . . . . . . . . . . . . . 379
If a Tire Goes Flat . . . . . . . . . . . . . . . . . . . . . 380
Tire Changing . . . . . . . . . . . . . . . . . . . . . . . . . . 381
Full-Size Spare Tire . . . . . . . . . . . . . . . . . . . . 390
Page 337 of 461
GMC Sierra/Sierra Denali 1500 Owner Manual (GMNA-Localizing-U.S./
Canada/Mexico-14632426) - 2021 - CRC - 11/5/20
336 Vehicle Care
{Warning
Do not touch heater, radiator, a/c pipes
or hoses, or other engine parts. They can
be very hot and can burn you. Do not
run the engine if there is a leak; all
coolant could leak out. That could cause
an engine fire and can burn you. Fix any
leak before driving the vehicle.
Engine Coolant
The cooling system in the vehicle is filled
with DEX-COOL engine coolant. This coolant
is designed to remain in the vehicle for
5 years or 240 000 km (150,000 mi),
whichever occurs first.
The following explains the cooling system
and how to check and add coolant when it
is low. If there is a problem with engine
overheating, seeEngine Overheating 0338.
What to Use
{Warning
Plain water, or other liquids such as
alcohol, can boil before the proper
coolant mixture will. With plain water or
(Continued)
Warning (Continued)
the wrong mixture, the engine could get
too hot but there would not be an
overheat warning. The engine could catch
fire and you or others could be burned.
Use a 50/50 mixture of clean, drinkable
water and DEX-COOL coolant. This mixture:
.Gives freezing protection down to −37 °C
(−34 °F), outside temperature.
.Gives boiling protection up to 129 °C
(265 °F), engine temperature.
.Protects against rust and corrosion.
.Will not damage aluminum parts.
.Helps keep the proper engine
temperature.
Caution
Do not use anything other than a mix of
DEX-COOL coolant that meets GM
Standard GMW3420 and clean, drinkable
water. Anything else can cause damage
to the engine cooling system and the
vehicle, which would not be covered by
the vehicle warranty. Never dispose of engine coolant by putting
it in the trash, or by pouring it on the
ground, or into sewers, streams, or bodies of
water. Have the coolant changed by an
authorized service center, familiar with legal
requirements regarding used coolant
disposal. This will help protect the
environment and your health.
Checking Coolant
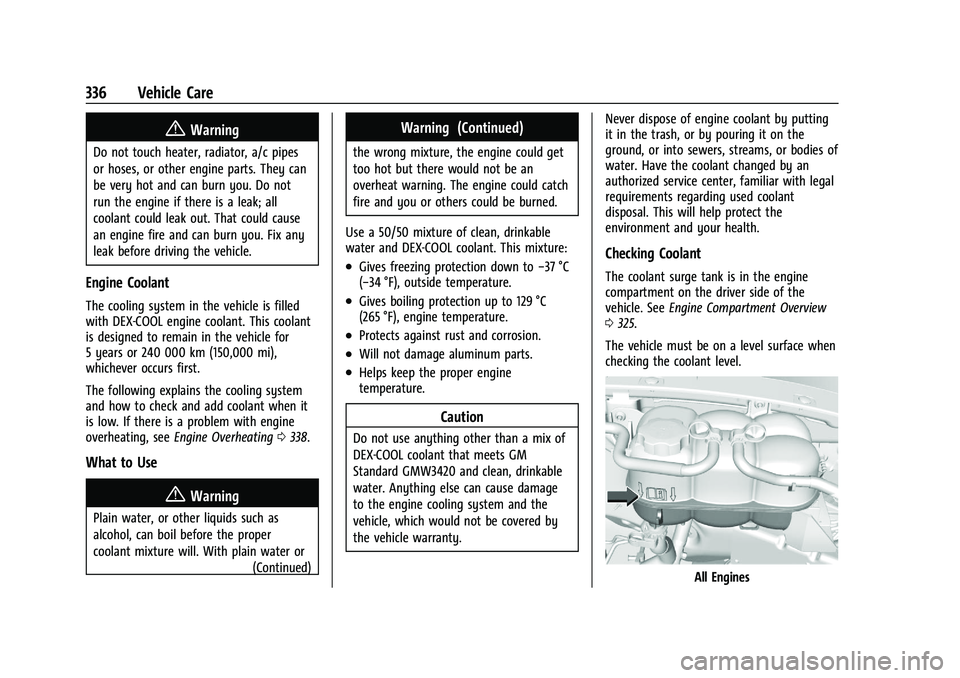
The coolant surge tank is in the engine
compartment on the driver side of the
vehicle. See
Engine Compartment Overview
0 325.
The vehicle must be on a level surface when
checking the coolant level.
All Engines
Page 339 of 461
GMC Sierra/Sierra Denali 1500 Owner Manual (GMNA-Localizing-U.S./
Canada/Mexico-14632426) - 2021 - CRC - 11/5/20
338 Vehicle Care
{Warning
Steam and scalding liquids from a hot
cooling system are under pressure.
Turning the pressure cap, even a little,
can cause them to come out at high
speed and you could be burned. Never
turn the cap when the cooling system,
including the pressure cap, is hot. Wait
for the cooling system and pressure cap
to cool.
Caution
Failure to follow the specific coolant fill
procedure could cause the engine to
overheat and could cause system
damage. If coolant is not visible in the
surge tank, contact your dealer.
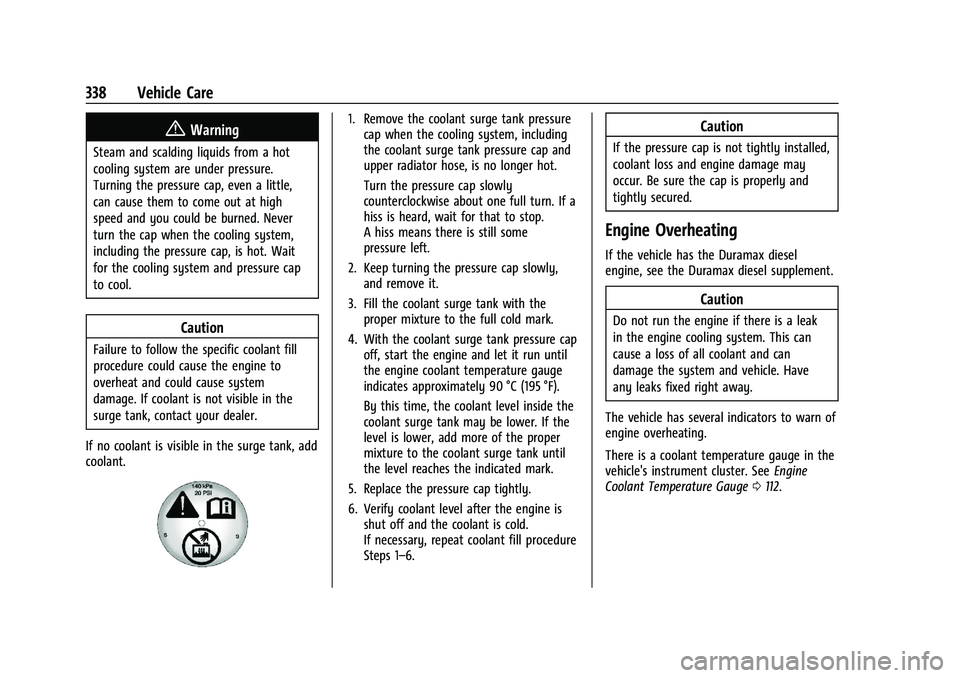
If no coolant is visible in the surge tank, add
coolant.
1. Remove the coolant surge tank pressure cap when the cooling system, including
the coolant surge tank pressure cap and
upper radiator hose, is no longer hot.
Turn the pressure cap slowly
counterclockwise about one full turn. If a
hiss is heard, wait for that to stop.
A hiss means there is still some
pressure left.
2. Keep turning the pressure cap slowly, and remove it.
3. Fill the coolant surge tank with the proper mixture to the full cold mark.
4. With the coolant surge tank pressure cap off, start the engine and let it run until
the engine coolant temperature gauge
indicates approximately 90 °C (195 °F).
By this time, the coolant level inside the
coolant surge tank may be lower. If the
level is lower, add more of the proper
mixture to the coolant surge tank until
the level reaches the indicated mark.
5. Replace the pressure cap tightly.
6. Verify coolant level after the engine is shut off and the coolant is cold.
If necessary, repeat coolant fill procedure
Steps 1–6.Caution
If the pressure cap is not tightly installed,
coolant loss and engine damage may
occur. Be sure the cap is properly and
tightly secured.
Engine Overheating
If the vehicle has the Duramax diesel
engine, see the Duramax diesel supplement.
Caution
Do not run the engine if there is a leak
in the engine cooling system. This can
cause a loss of all coolant and can
damage the system and vehicle. Have
any leaks fixed right away.
The vehicle has several indicators to warn of
engine overheating.
There is a coolant temperature gauge in the
vehicle's instrument cluster. See Engine
Coolant Temperature Gauge 0112.
Page 340 of 461
GMC Sierra/Sierra Denali 1500 Owner Manual (GMNA-Localizing-U.S./
Canada/Mexico-14632426) - 2021 - CRC - 11/5/20
Vehicle Care 339
In addition, there are ENGINE OVERHEATED
STOP ENGINE, ENGINE OVERHEATED IDLE
ENGINE, and ENGINE POWER IS REDUCED
messages in the Driver Information
Center (DIC).
If the decision is made not to lift the hood
when this warning appears, get service help
right away. SeeRoadside Assistance Program
0 431.
If the decision is made to lift the hood,
make sure the vehicle is parked on a level
surface.
2.7L L4, 4.3L V6, 5.3L V8, and 6.2L V8 Engines
Check to see if the engine cooling fans are
running. If the engine is overheating, the
fans should be running. If they are not, do
not continue to run the engine and have the
vehicle serviced.
If the engine or transmission detects an
impending hot fluid condition, then the
transmission may force upshifts to limit
temperatures. Downshifts may also be
prevented in this instance. Normal operation
may continue unless the display indicates
there is a hot condition and engine should
be idled.If Steam is Coming from the Engine
Compartment
{Warning
Steam and scalding liquids from a hot
cooling system are under pressure.
Turning the pressure cap, even a little,
can cause them to come out at high
speed and you could be burned. Never
turn the cap when the cooling system,
including the pressure cap, is hot. Wait
for the cooling system and pressure cap
to cool.
If No Steam is Coming from the Engine
Compartment
The ENGINE OVERHEATED STOP ENGINE or
the ENGINE OVERHEATED IDLE ENGINE
message, along with a low coolant
condition, can indicate a serious problem.
The 2.7L L4 engine will shut down
automatically if the ENGINE OVERHEATED
STOP ENGINE message displays.
If there is an engine overheat warning, but
no steam is seen or heard, the problem may
not be too serious. Sometimes the engine
can get a little too hot when the vehicle:
.Climbs a long hill on a hot day.
.Stops after high-speed driving.
.Idles for long periods in traffic.
.Tows a trailer; see Trailer Towing0293.
If the ENGINE OVERHEATED STOP ENGINE or
the ENGINE OVERHEATED IDLE ENGINE
message appears with no sign of steam, try
this for a minute or so: 1. Turn the air conditioning off.
2. Turn the heater on to the highest temperature and to the highest fan
speed. Open the windows as necessary.
3. When it is safe to do so, pull off the road, shift to P (Park) or N (Neutral) and
let the engine idle.
If the temperature overheat gauge is no
longer in the overheat zone or an overheat
warning no longer displays, the vehicle can
be driven. Continue to drive the vehicle
slowly for about 10 minutes. Keep a safe
vehicle distance from the vehicle in front.
If the warning does not come back on,
continue to drive normally and have the
cooling system checked for proper fill and
function.
If the warning continues, pull over, stop, and
park the vehicle right away.