GMC SIERRA 2023 Owner's Guide
Manufacturer: GMC, Model Year: 2023, Model line: SIERRA, Model: GMC SIERRA 2023Pages: 430, PDF Size: 18.76 MB
Page 31 of 430
GMC Sierra/Sierra Denali 2500 HD/3500 HD Owner Manual (GMNA-
Localizing-U.S./Canada-16504257) - 2023 - CRC - 5/9/22
30 Keys, Doors, and Windows
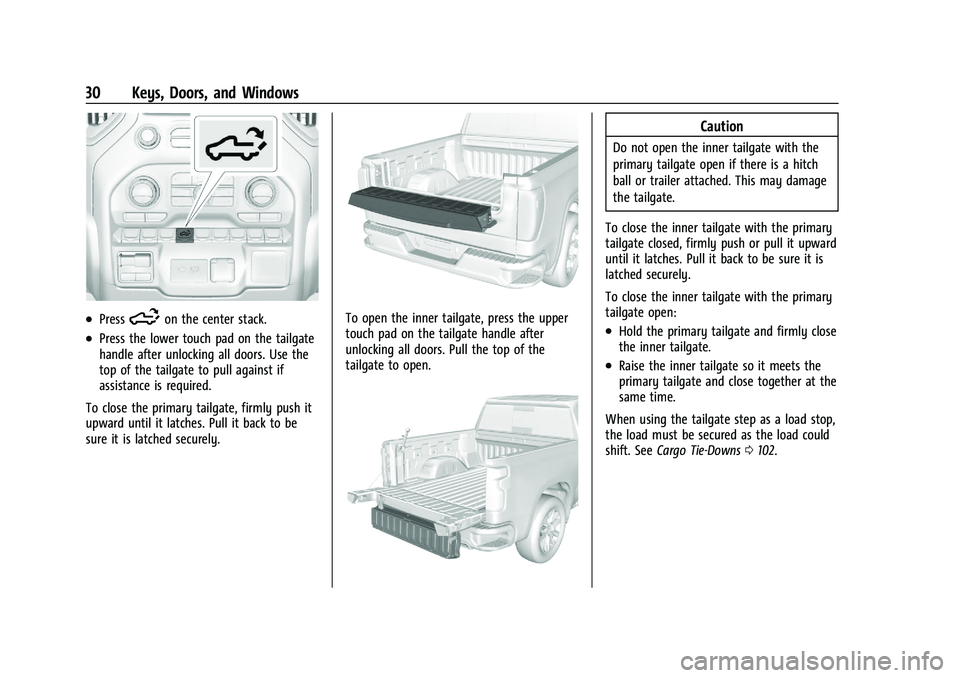
.Press5on the center stack.
.Press the lower touch pad on the tailgate
handle after unlocking all doors. Use the
top of the tailgate to pull against if
assistance is required.
To close the primary tailgate, firmly push it
upward until it latches. Pull it back to be
sure it is latched securely.
To open the inner tailgate, press the upper
touch pad on the tailgate handle after
unlocking all doors. Pull the top of the
tailgate to open.
Caution
Do not open the inner tailgate with the
primary tailgate open if there is a hitch
ball or trailer attached. This may damage
the tailgate.
To close the inner tailgate with the primary
tailgate closed, firmly push or pull it upward
until it latches. Pull it back to be sure it is
latched securely.
To close the inner tailgate with the primary
tailgate open:
.Hold the primary tailgate and firmly close
the inner tailgate.
.Raise the inner tailgate so it meets the
primary tailgate and close together at the
same time.
When using the tailgate step as a load stop,
the load must be secured as the load could
shift. See Cargo Tie-Downs 0102.
Page 32 of 430
GMC Sierra/Sierra Denali 2500 HD/3500 HD Owner Manual (GMNA-
Localizing-U.S./Canada-16504257) - 2023 - CRC - 5/9/22
Keys, Doors, and Windows 31
MultiPro Inner Tailgate Enable/Disable
The MultiPro inner tailgate may be equipped
with an enable/disable feature to prevent
the inner tailgate from being opened when
a hitch or other equipment is installed that
could damage the inner tailgate.
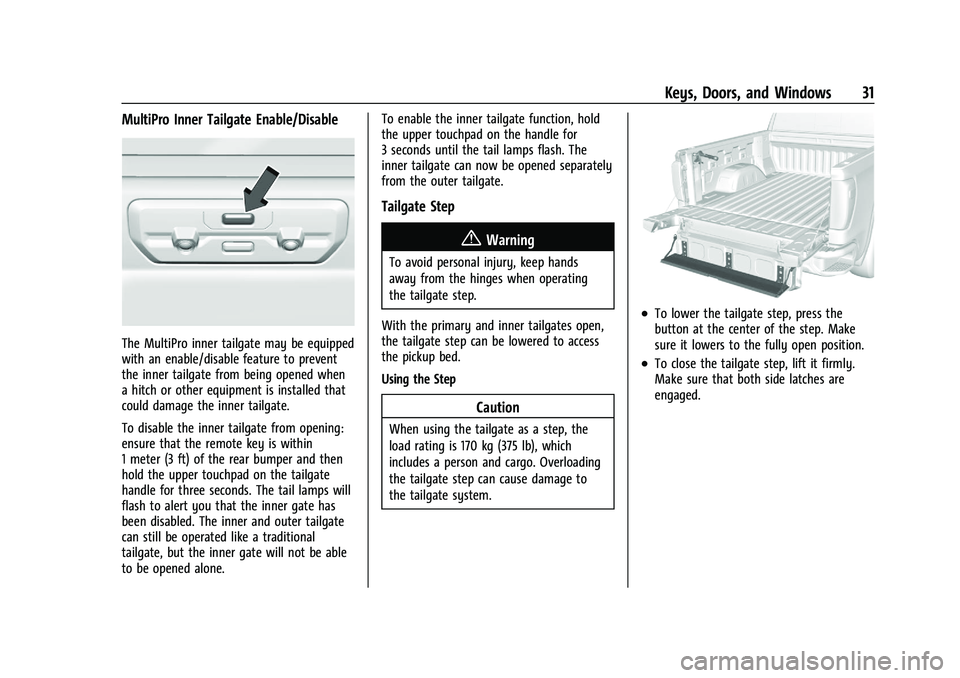
To disable the inner tailgate from opening:
ensure that the remote key is within
1 meter (3 ft) of the rear bumper and then
hold the upper touchpad on the tailgate
handle for three seconds. The tail lamps will
flash to alert you that the inner gate has
been disabled. The inner and outer tailgate
can still be operated like a traditional
tailgate, but the inner gate will not be able
to be opened alone.To enable the inner tailgate function, hold
the upper touchpad on the handle for
3 seconds until the tail lamps flash. The
inner tailgate can now be opened separately
from the outer tailgate.
Tailgate Step
{Warning
To avoid personal injury, keep hands
away from the hinges when operating
the tailgate step.
With the primary and inner tailgates open,
the tailgate step can be lowered to access
the pickup bed.
Using the Step
Caution
When using the tailgate as a step, the
load rating is 170 kg (375 lb), which
includes a person and cargo. Overloading
the tailgate step can cause damage to
the tailgate system.
.To lower the tailgate step, press the
button at the center of the step. Make
sure it lowers to the fully open position.
.To close the tailgate step, lift it firmly.
Make sure that both side latches are
engaged.
Page 33 of 430
GMC Sierra/Sierra Denali 2500 HD/3500 HD Owner Manual (GMNA-
Localizing-U.S./Canada-16504257) - 2023 - CRC - 5/9/22
32 Keys, Doors, and Windows
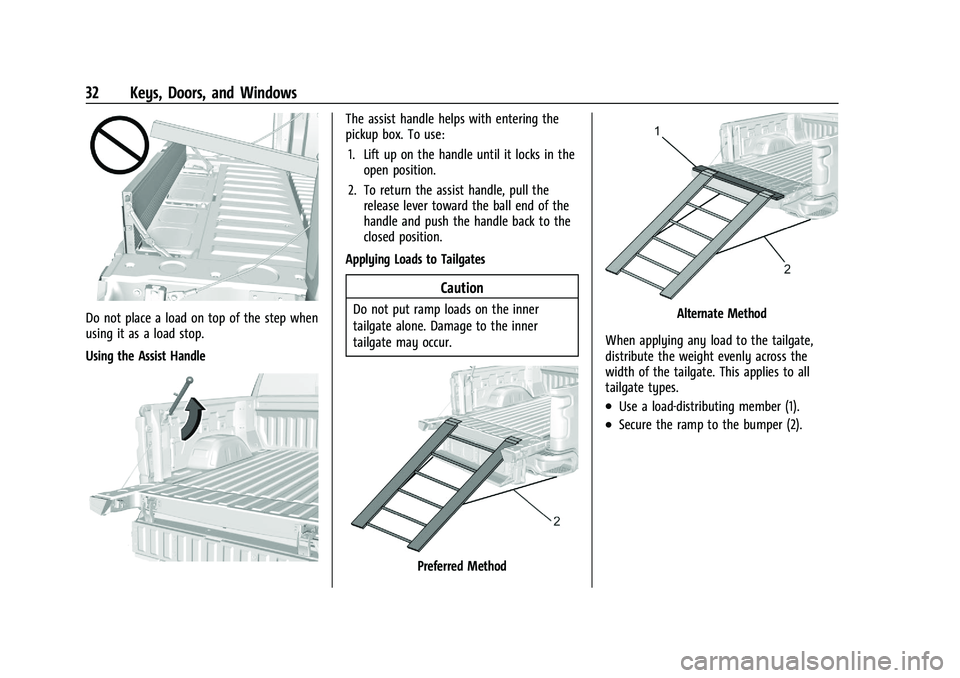
Do not place a load on top of the step when
using it as a load stop.
Using the Assist Handle
The assist handle helps with entering the
pickup box. To use:1. Lift up on the handle until it locks in the open position.
2. To return the assist handle, pull the release lever toward the ball end of the
handle and push the handle back to the
closed position.
Applying Loads to Tailgates
Caution
Do not put ramp loads on the inner
tailgate alone. Damage to the inner
tailgate may occur.
Preferred Method
Alternate Method
When applying any load to the tailgate,
distribute the weight evenly across the
width of the tailgate. This applies to all
tailgate types.
.Use a load-distributing member (1).
.Secure the ramp to the bumper (2).
Page 34 of 430
GMC Sierra/Sierra Denali 2500 HD/3500 HD Owner Manual (GMNA-
Localizing-U.S./Canada-16504257) - 2023 - CRC - 5/9/22
Keys, Doors, and Windows 33
Transporting Items That Can
Catch Fire
{Warning
To avoid personal injury and/or vehicle
damage when transporting items that
can catch fire, such as leaves, mulch, hay,
or cardboard, in the truck bed:
.Make sure items are securely
contained inside the truck bed. Never
allow them to hang over the sides or
fall in between the truck bed and
the cab.
.Never place items between the cab
and the truck bed. They could touch
hot exhaust parts and ignite.
{Warning
Keep cigarettes, sparks, and other ignition
sources away from the area between the
bed of the truck and cab. They could fall
onto the fuel system below and start a
fire. You or others could be injured and/
or the vehicle damaged.
Power Assist Steps
{Warning
To avoid personal injury or property
damage, before entering or exiting the
vehicle, be sure the power assist step is
fully extended. Do not step on the power
assist step while it is moving. Never place
hands or other body parts between the
extended power assist step and the
vehicle.
If equipped, the power assist steps will
deploy when the door is opened and
automatically retract three seconds after the
door is closed. The power assist steps will
retract immediately if the vehicle starts
moving. Check the step position before
exiting the vehicle.
Disable the power assist steps before jacking
or placing any object under the vehicle.
Too much ice buildup may prevent
deployment of the power assist steps. If this
happens, disable the power assist steps,
clear the ice, then enable the assist steps
and confirm normal function prior to use. Keep hands, children, pets, objects, and
clothing clear of the power assist steps
when in motion. The steps will reverse
direction if they encounter an obstruction
when opening or closing. Remove the
obstruction, then open and close the door
on the same side to complete the motion of
the assist steps. If the obstruction is not
cleared, the assist steps remain extended
while driving.
Extend or retract both power assist steps for
cleaning through the vehicle settings menu.
To view available settings from the
infotainment screen, touch Settings >
Vehicle > Comfort and Convenience.
Enable/Disable
The power assist steps can be enabled or
disabled through the vehicle settings menu.
To view available settings from the
infotainment screen, touch Settings >
Vehicle > Comfort and Convenience.
Page 35 of 430
GMC Sierra/Sierra Denali 2500 HD/3500 HD Owner Manual (GMNA-
Localizing-U.S./Canada-16504257) - 2023 - CRC - 5/9/22
34 Keys, Doors, and Windows
Vehicle Security
This vehicle has theft-deterrent features;
however, they do not make the vehicle
impossible to steal.
Vehicle Alarm System
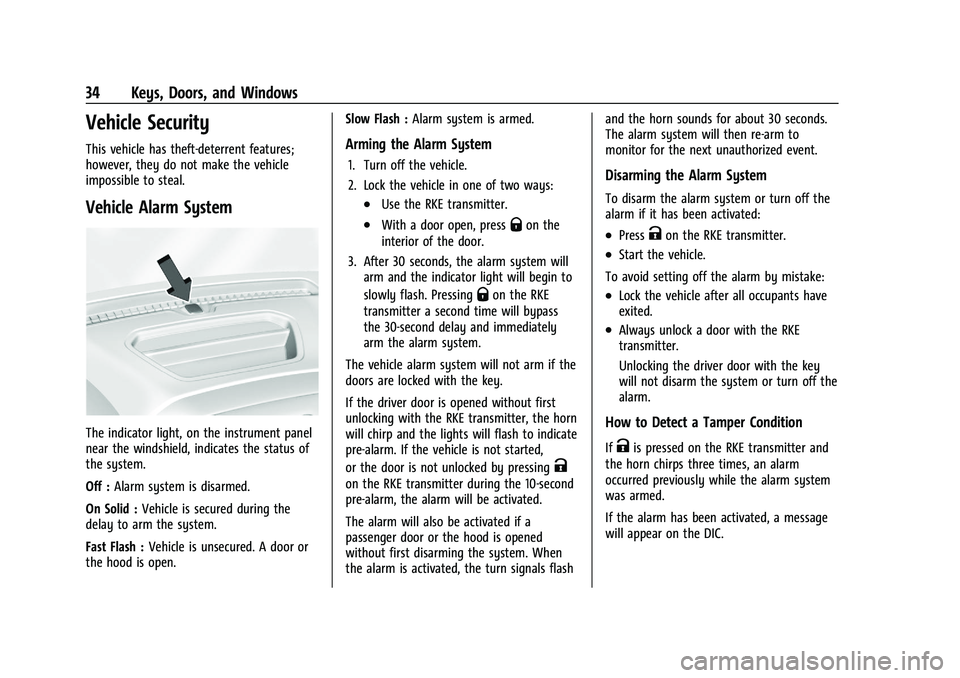
The indicator light, on the instrument panel
near the windshield, indicates the status of
the system.
Off :Alarm system is disarmed.
On Solid : Vehicle is secured during the
delay to arm the system.
Fast Flash : Vehicle is unsecured. A door or
the hood is open. Slow Flash :
Alarm system is armed.
Arming the Alarm System
1. Turn off the vehicle.
2. Lock the vehicle in one of two ways:
.Use the RKE transmitter.
.With a door open, pressQon the
interior of the door.
3. After 30 seconds, the alarm system will arm and the indicator light will begin to
slowly flash. Pressing
Qon the RKE
transmitter a second time will bypass
the 30-second delay and immediately
arm the alarm system.
The vehicle alarm system will not arm if the
doors are locked with the key.
If the driver door is opened without first
unlocking with the RKE transmitter, the horn
will chirp and the lights will flash to indicate
pre-alarm. If the vehicle is not started,
or the door is not unlocked by pressing
K
on the RKE transmitter during the 10-second
pre-alarm, the alarm will be activated.
The alarm will also be activated if a
passenger door or the hood is opened
without first disarming the system. When
the alarm is activated, the turn signals flash and the horn sounds for about 30 seconds.
The alarm system will then re-arm to
monitor for the next unauthorized event.
Disarming the Alarm System
To disarm the alarm system or turn off the
alarm if it has been activated:
.PressKon the RKE transmitter.
.Start the vehicle.
To avoid setting off the alarm by mistake:
.Lock the vehicle after all occupants have
exited.
.Always unlock a door with the RKE
transmitter.
Unlocking the driver door with the key
will not disarm the system or turn off the
alarm.
How to Detect a Tamper Condition
IfKis pressed on the RKE transmitter and
the horn chirps three times, an alarm
occurred previously while the alarm system
was armed.
If the alarm has been activated, a message
will appear on the DIC.
Page 36 of 430
GMC Sierra/Sierra Denali 2500 HD/3500 HD Owner Manual (GMNA-
Localizing-U.S./Canada-16504257) - 2023 - CRC - 5/9/22
Keys, Doors, and Windows 35
Steering Column Lock
If equipped, the steering column lock is a
theft-deterrent device. This feature locks the
steering column when the vehicle is turned
off and the driver door is opened, or when
the driver door is opened and then the
vehicle is turned off. The steering column
unlocks when the vehicle is turned on.
The Driver Information Center (DIC) may
display one of these messages:
.A message to service the steering column
lock indicates that an issue has been
detected with the column lock feature
and the vehicle should be serviced.
.A message that the steering column is
locked indicates that the engine is
running, but the steering column is still
locked. It is normal for the column to be
locked during a remote start, but the
column should unlock after the brake
pedal is pressed and the vehicle is started.
No message will display during a remote
start.
.A message that the steering wheel must
be turned and the vehicle must be started
again indicates that the column lock
mechanism is bound, the column locking
device was unable to unlock the steeringcolumn, and the vehicle did not start.
If this happens, immediately turn the
steering wheel from side to side to
unbind the column lock. If this does not
unlock the steering column, turn the
vehicle off and open the driver door to
reset the system. Then turn the vehicle
on and immediately turn the steering
wheel side to side for about 15 seconds.
In some cases, it may take significant
force to unbind the column.
To keep the steering column from binding,
straighten the front wheels before turning
off the vehicle.
Immobilizer
See Radio Frequency Statement 0404.
Immobilizer Operation
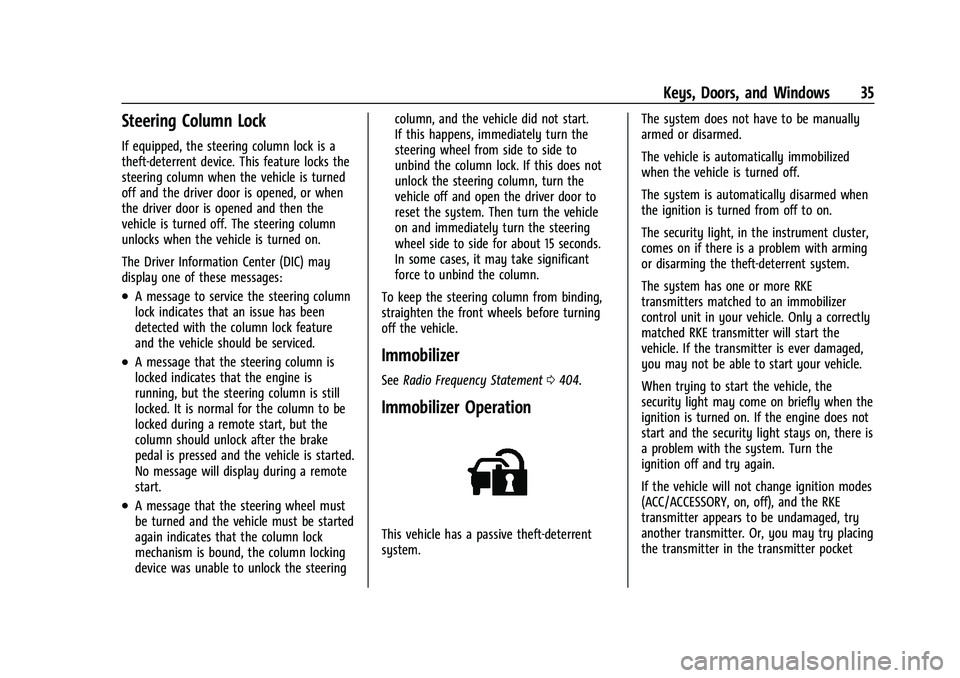
This vehicle has a passive theft-deterrent
system. The system does not have to be manually
armed or disarmed.
The vehicle is automatically immobilized
when the vehicle is turned off.
The system is automatically disarmed when
the ignition is turned from off to on.
The security light, in the instrument cluster,
comes on if there is a problem with arming
or disarming the theft-deterrent system.
The system has one or more RKE
transmitters matched to an immobilizer
control unit in your vehicle. Only a correctly
matched RKE transmitter will start the
vehicle. If the transmitter is ever damaged,
you may not be able to start your vehicle.
When trying to start the vehicle, the
security light may come on briefly when the
ignition is turned on. If the engine does not
start and the security light stays on, there is
a problem with the system. Turn the
ignition off and try again.
If the vehicle will not change ignition modes
(ACC/ACCESSORY, on, off), and the RKE
transmitter appears to be undamaged, try
another transmitter. Or, you may try placing
the transmitter in the transmitter pocket
Page 37 of 430
GMC Sierra/Sierra Denali 2500 HD/3500 HD Owner Manual (GMNA-
Localizing-U.S./Canada-16504257) - 2023 - CRC - 5/9/22
36 Keys, Doors, and Windows
located in the center console. SeeRemote
Keyless Entry (RKE) System Operation (Key
Access) 012 or
Remote Keyless Entry (RKE) System
Operation (Keyless Access) 014.
If the ignition mode will not change with
the other transmitter or with the
transmitter in the transmitter pocket, your
vehicle needs service. If the ignition does
change modes, the first transmitter may be
faulty. See your dealer who can service the
theft-deterrent system and have a new RKE
transmitter programmed to the vehicle.
It is possible for the immobilizer system to
learn new or replacement RKE transmitters.
Up to eight transmitters can be
programmed for the vehicle. To program
additional transmitters, see "Programming
Transmitters to the Vehicle" under Remote
Keyless Entry (RKE) System Operation (Key
Access) 012 or
Remote Keyless Entry (RKE) System
Operation (Keyless Access) 014
Do not leave the transmitter or device that
disarms or deactivates the vehicle theft
system in the vehicle. When equipped with a key, if the engine
still does not start, and the key appears to
be undamaged, try another ignition key.
It may be necessary to check the fuse. See
Fuses and Circuit Breakers
0329. If the
engine still does not start with the other
key, the vehicle needs service. If the vehicle
does start, the first key may be faulty. See
your dealer. It is possible for the
immobilizer system to learn new or
replacement keys. Up to eight keys can be
programmed for the vehicle. To program
additional keys, see Keys (Key Access)08or
Keys (Keyless Access) 011. Do not leave the
key or device that disarms or deactivates
the vehicle theft system in the vehicle.
See your dealer to get a new key blank cut
exactly as the ignition key that operates the
system.Exterior Mirrors
Convex Mirrors
{Warning
A convex mirror can make things, like
other vehicles, look farther away than
they really are. If you cut too sharply
into the right lane, you could hit a
vehicle on the right. Check the inside
mirror or glance over your shoulder
before changing lanes.
Standard Mirrors
The passenger side mirror is convex shaped.
A convex mirror surface is curved so more
can be seen from the driver seat.
Trailer-Tow Mirrors
The upper portion of both the driver and
passenger mirrors is flat.
The lower portion of both the driver and
passenger mirrors is convex. A convex mirror
surface is curved so more can be seen from
the driver seat. The lower portion is
adjusted manually.
Page 38 of 430
GMC Sierra/Sierra Denali 2500 HD/3500 HD Owner Manual (GMNA-
Localizing-U.S./Canada-16504257) - 2023 - CRC - 5/9/22
Keys, Doors, and Windows 37
Manual Mirrors
If equipped, adjust manual mirrors by
moving the mirror up and down or left to
right to see a little of the side of the vehicle
and to have a clear view behind the vehicle.
Using hood-mounted air deflectors and
add-on convex mirror attachments could
decrease mirror performance.
Trailer-Tow Mirrors
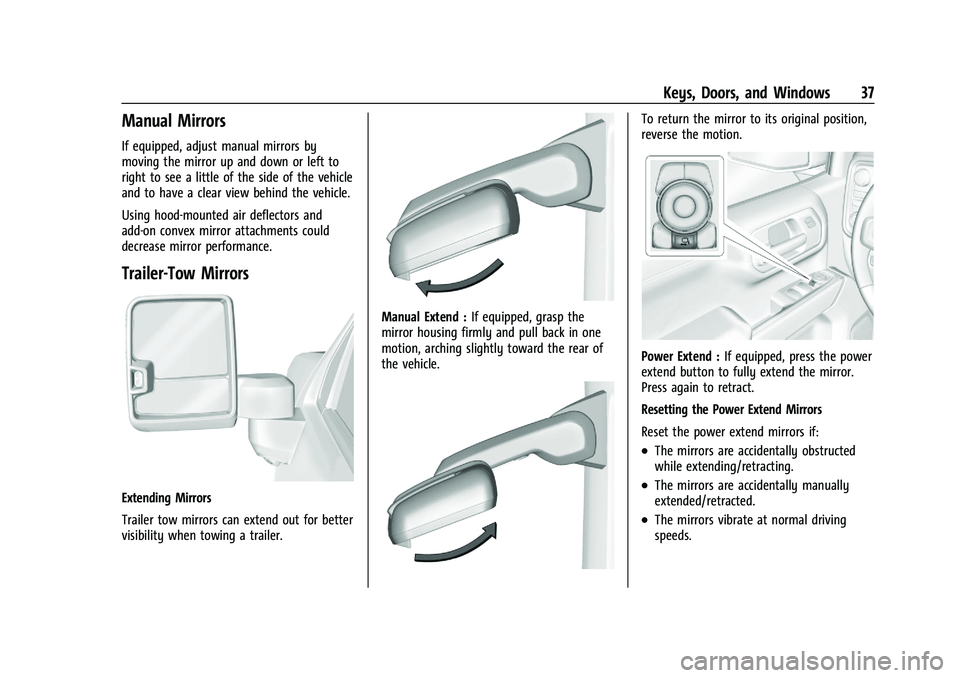
Extending Mirrors
Trailer tow mirrors can extend out for better
visibility when towing a trailer.
Manual Extend :If equipped, grasp the
mirror housing firmly and pull back in one
motion, arching slightly toward the rear of
the vehicle.
To return the mirror to its original position,
reverse the motion.
Power Extend : If equipped, press the power
extend button to fully extend the mirror.
Press again to retract.
Resetting the Power Extend Mirrors
Reset the power extend mirrors if:
.The mirrors are accidentally obstructed
while extending/retracting.
.The mirrors are accidentally manually
extended/retracted.
.The mirrors vibrate at normal driving
speeds.
Page 39 of 430
GMC Sierra/Sierra Denali 2500 HD/3500 HD Owner Manual (GMNA-
Localizing-U.S./Canada-16504257) - 2023 - CRC - 5/9/22
38 Keys, Doors, and Windows
If a popping noise from the mirror is heard,
this sound is normal as the manual detents
are aligning after a manual extend/retract
operation has occurred.
Auxiliary Cargo Mirror Lamps
If equipped, cargo mirror lamps face
rearward to provide more light on the sides
of the vehicle, if needed. SeeExterior Cargo
Lamps 0144.
Advanced Trailering Vision System Side
Cameras
If equipped, the Advanced Trailering Vision
System side cameras are on the bottom of
the outside mirrors. See “Surround Vision
(360 Degrees)” underAssistance Systems for
Parking or Backing 0248.Power Mirrors
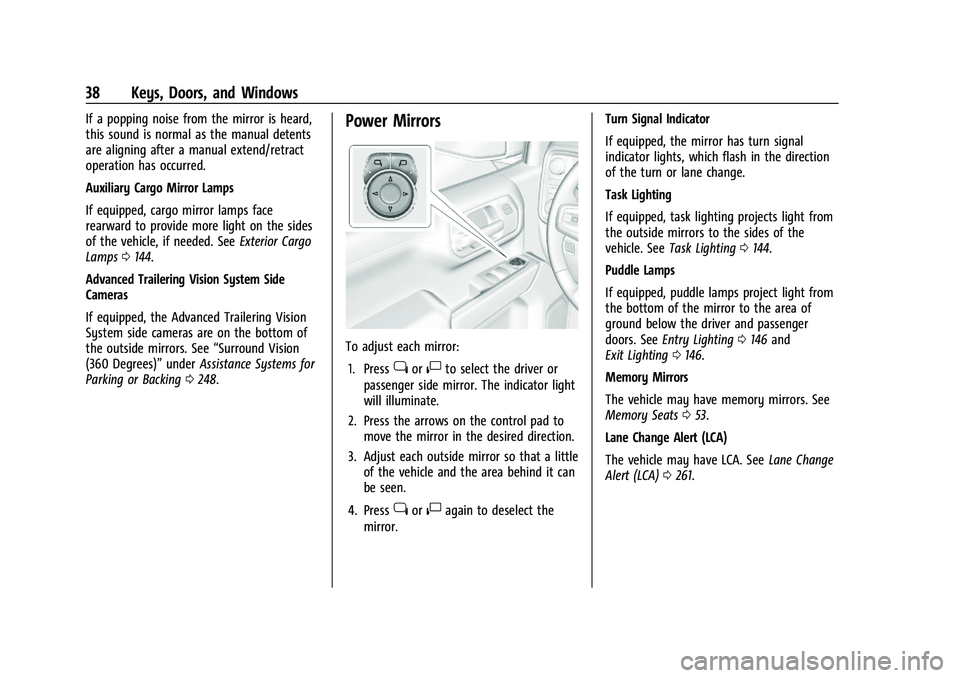
To adjust each mirror:
1. Press
jor|to select the driver or
passenger side mirror. The indicator light
will illuminate.
2. Press the arrows on the control pad to move the mirror in the desired direction.
3. Adjust each outside mirror so that a little of the vehicle and the area behind it can
be seen.
4. Press
jor|again to deselect the
mirror. Turn Signal Indicator
If equipped, the mirror has turn signal
indicator lights, which flash in the direction
of the turn or lane change.
Task Lighting
If equipped, task lighting projects light from
the outside mirrors to the sides of the
vehicle. See
Task Lighting 0144.
Puddle Lamps
If equipped, puddle lamps project light from
the bottom of the mirror to the area of
ground below the driver and passenger
doors. See Entry Lighting 0146 and
Exit Lighting 0146.
Memory Mirrors
The vehicle may have memory mirrors. See
Memory Seats 053.
Lane Change Alert (LCA)
The vehicle may have LCA. See Lane Change
Alert (LCA) 0261.
Page 40 of 430
GMC Sierra/Sierra Denali 2500 HD/3500 HD Owner Manual (GMNA-
Localizing-U.S./Canada-16504257) - 2023 - CRC - 5/9/22
Keys, Doors, and Windows 39
Folding Mirrors
Manual Folding Mirrors
If equipped, push the mirror toward the
vehicle to fold. Push the mirror outward to
return to its original position.
Manually fold the mirrors inward to prevent
damage when going through an automatic
car wash.
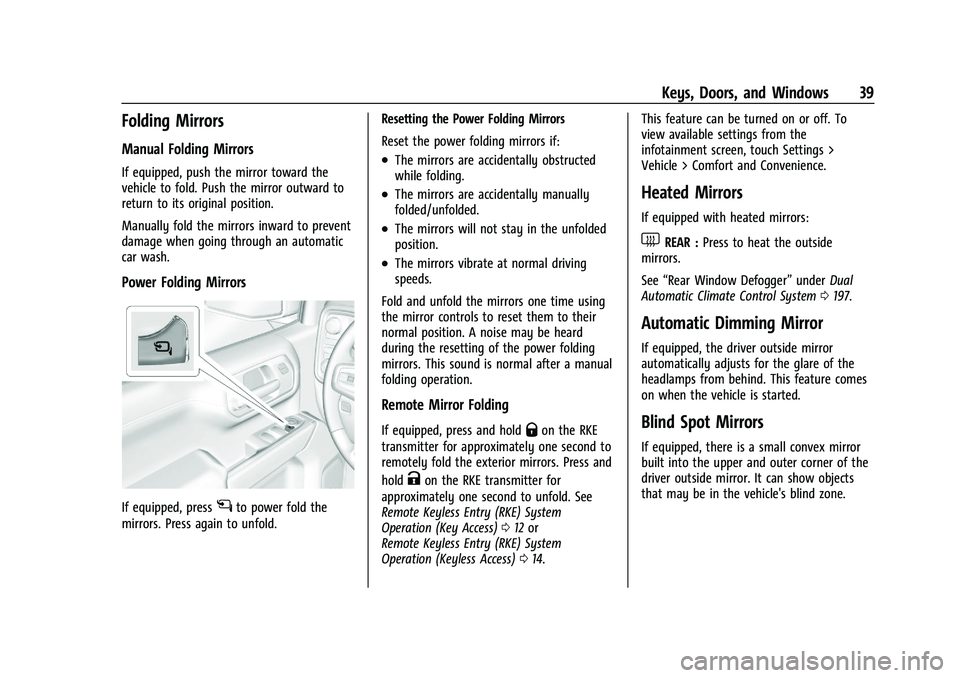
Power Folding Mirrors
If equipped, pressgto power fold the
mirrors. Press again to unfold. Resetting the Power Folding Mirrors
Reset the power folding mirrors if:
.The mirrors are accidentally obstructed
while folding.
.The mirrors are accidentally manually
folded/unfolded.
.The mirrors will not stay in the unfolded
position.
.The mirrors vibrate at normal driving
speeds.
Fold and unfold the mirrors one time using
the mirror controls to reset them to their
normal position. A noise may be heard
during the resetting of the power folding
mirrors. This sound is normal after a manual
folding operation.
Remote Mirror Folding
If equipped, press and holdQon the RKE
transmitter for approximately one second to
remotely fold the exterior mirrors. Press and
hold
Kon the RKE transmitter for
approximately one second to unfold. See
Remote Keyless Entry (RKE) System
Operation (Key Access) 012 or
Remote Keyless Entry (RKE) System
Operation (Keyless Access) 014. This feature can be turned on or off. To
view available settings from the
infotainment screen, touch Settings >
Vehicle > Comfort and Convenience.
Heated Mirrors
If equipped with heated mirrors:
1REAR :
Press to heat the outside
mirrors.
See “Rear Window Defogger” underDual
Automatic Climate Control System 0197.
Automatic Dimming Mirror
If equipped, the driver outside mirror
automatically adjusts for the glare of the
headlamps from behind. This feature comes
on when the vehicle is started.
Blind Spot Mirrors
If equipped, there is a small convex mirror
built into the upper and outer corner of the
driver outside mirror. It can show objects
that may be in the vehicle's blind zone.