CD changer GMC SIERRA DENALI 2003 Owners Manual
[x] Cancel search | Manufacturer: GMC, Model Year: 2003, Model line: SIERRA DENALI, Model: GMC SIERRA DENALI 2003Pages: 428, PDF Size: 20.35 MB
Page 126 of 428
Section 3 Instrument Panel
I~s~Pu~~~IP Panel OWWV~~W ............................... 3.2
Hazard Warning Flashers
................................ 3.3
Other Warning Devices ................................... 3.4
Horn
............................................................. 3.4
Tilt Wheel
..................................................... 3.4
Turn SignaVMultifunction Lever
......................... 3.5
Exterior Lamps
............................................. 3.11
Interior Lamps
.............................................. 3.15
Accessory Power Outlets
............................... 3.16
Ashtrays and Cigarette Lighter
........................ 3.17
Climate Controls
............................................ 3.18
Dual Automatic Climate Control System
........... 3.18
Warning Lights, Gages and Indicators
............. 3.24
Instrument Panel Cluster
................................ 3.25
Speedometer and Odometer
........................... 3.26
Tachometer
................................................ -3-26
Safety Belt Reminder Light
............................. 3.26
Air Bag Readiness Light
................................ 3-27
Passenger Air Bag Status Indicator
................. 3.30
Battery Warning Light
.................................... 3.33
Brake System Warning Light
.......................... 3.34
Anti-Lock Brake System Warning Light
............. 3.35
Air
Bag
Off Light .......................................... 3-28
Voltmeter Gage
............................................ 3-33
Engine Coolant Temperature Gage
..... ..... 3.36 Transmission Temperature
Gage
..................... 3.36
Malfunction Indicator Lamp
............................. 3.38
Oil Pressure Gage
........................................ 3-40
Cruise Control Light
...................................... 3.41
Tow/Haul Mode Light
.................................... 3-41
Fuel Gage
................................................... 3.42
Driver Information Center (DIC)
....................... 3.43
DIC Operation and Displays
........................... 3.43
DIC Warnings and Messages
......................... 3.53
Audio System(s)
............................................. 3.61
Setting the Time
...................... .......... 3.6 1
Radio with Cassette and CD ..... .............. 3.62
Rear Seat Audio (RSA)
............................. 3.76
CD Changer
................................................ 3-78
Theft-Deterrent Feature
................................. -3-81
Audio Steering Wheel Controls
....................... 3.81
Understanding Radio Reception
...................... 3-82
Care of Your Cassette Tape Player
................ -3-83
Care of Your CDs
......................................... 3.84
Care of Your CD Player
................................ 3.84
Fixed Mast Antenna
...................................... 3.84
XMTM Satellite Radio Antenna System
............. 3.84
DAB Radio Antenna System
........................... 3.84
Low Fuel Warning Light
................................. 3-42
Page 128 of 428
Hazard Warning Flashers The main components of your instrument panel are the
following:
A. Dome Lamp Override Button
9. Exterior Lamp Control
C. Air Outlets
D. Storage Compartment
E. Multifunction Lever
F. Instrument Panel Cluster
G. Shift Lever
H. Tow/Haul Selector Switch (If Equipped)
I. Audio System
J. Comfort Control System
K. Instrument Panel Fuse Block
L. Hood Release
M. Audio Steering Wheel Controls
(If Equipped)
N. Center Instrument Panel Fuse Block
0. Tilt Lever
P. Parking Brake Release
Q. Compact Disc Changer (If Equipped)
R. Ashtray
S. Accessory Power Outlet
1. Air Bag Off Switch and 4-Wheel Steer Button
U. Glovebox Your hazard
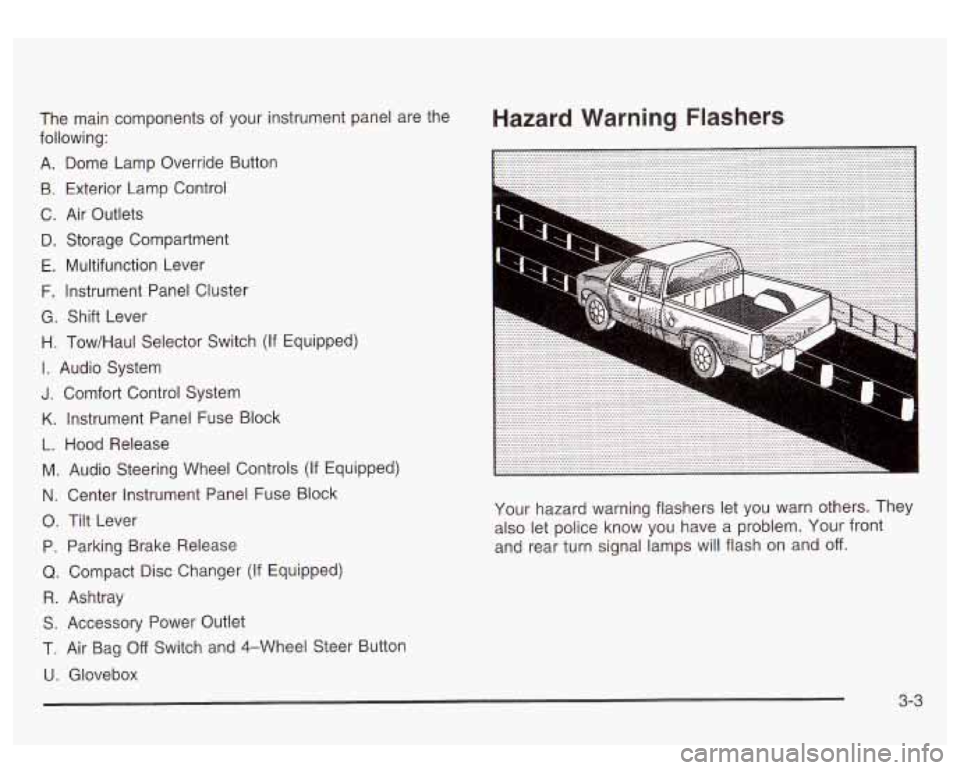
warning flashers let you warn others. They
also let police know you have a problem. Your front
and rear turn signal lamps will flash on and
off.
3-3
Page 130 of 428
Turn SignaVMultifunction Lever
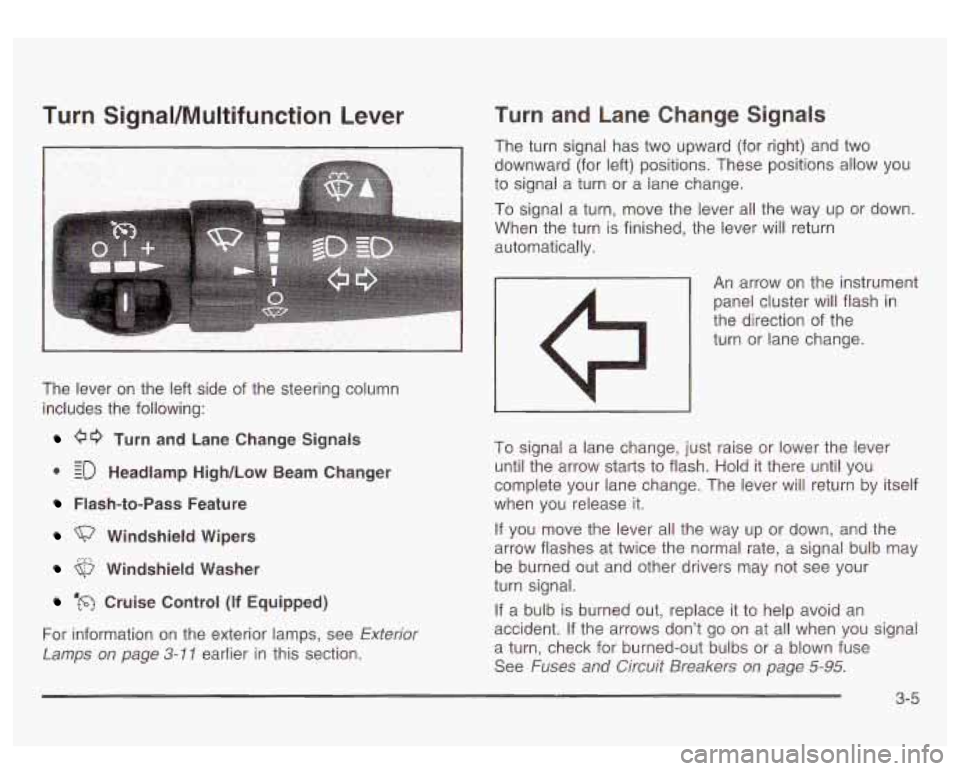
The lever on the left side of the steering column
includes the following:
00 Turn and Lane Change Signals
0 EO Headlamp High/Low Beam Changer
- -
Flash-to-Pass Feature
Windshield Wipers
Windshield Washer
‘m Cruise Control (if Equipped)
For information on the exterior lamps, see
Exterior
Lamps on page 3-11 earlier in this section.
Turn and Lane Change Signals
The turn signal has two upward (for right) and two
downward (for left) positions. These positions allow you
to signai a turn or a lane change.
To signal a turn, move the lever all the way up or down.
When the turn is finished, the lever will return
automatically.
An arrow on the instrument
panel cluster will flash
in
the direction of the
turn or lane change.
To signal a lane change, just raise or lower the lever
until the arrow starts to flash. Hold it there until you
complete your lane change. The lever will return by itself
when you release it.
If you move the lever all the way up or down, and the
arrow flashes at twice the normal rate, a signal bulb may
be burned out and other drivers may not see your
turn signal.
If a bulb
is burned out, replace it to help avoid an
accident. If the arrows don’t
go on at all when you signal
a turn, check for burned-out bulbs or a blown fuse
See
Fuses and Circuit Breakers on page 5-95.
3-5
Page 131 of 428
Turn Signal On Chime
If your turn signal is left on for more than 3/4 of a mile
(1.2 km), a chime will sound at each flash of the
turn signal. To turn
off the chime, move the turn signal
lever to the
off position.
Headlamp High/Low Beam Changer
To change the headlamps from low to high beam, push
the lever toward the instrument panel.
To return the
low-beam headlamps, pull the multifunction lever toward
you. Then release it.
When the high beams are
on, this light on the
instrument panel cluster
also will be on.
I I
Flash-To-Pass Feature
This feature allows you to use your high-beam
headlamps to signal a driver in front
of you that you
want to pass. It works even
if your headlamps are off
To use it, pull the turn signal lever toward you.
If your headlamps are
off or on low-beam, your
high-beam headlamps will turn on. They’ll stay on as long
as you hold the lever toward you and the high-beam
indicator on the instrument panel will come on. Release
the lever
to turn the high-beam headlamps off.
Windshield Wipers
0: OFF
$? : MIST
You control the windshield wipers by turning the band
with the wiper symbol on it.
For a single wiping cycle, turn the band to mist.
Hold it
there until the wipers start, then let go. The wipers
will stop after one wipe.
If you want more wipes, hold
the band on mist longer.
3-6
Page 203 of 428
PROG (Program): The front passengers must be
listening to something different for each of these
functions to work:
Press this button to go to the preset radio stations
When a cassette tape is playing, press this button
When a CD is playing in the radio, press this button
set
on the pushbuttons on the main radio.
to go to the other side
of the tape.
to go back to the beginning of the CD.
When a CD is playing in the CD changer, press this
button to select a disc.
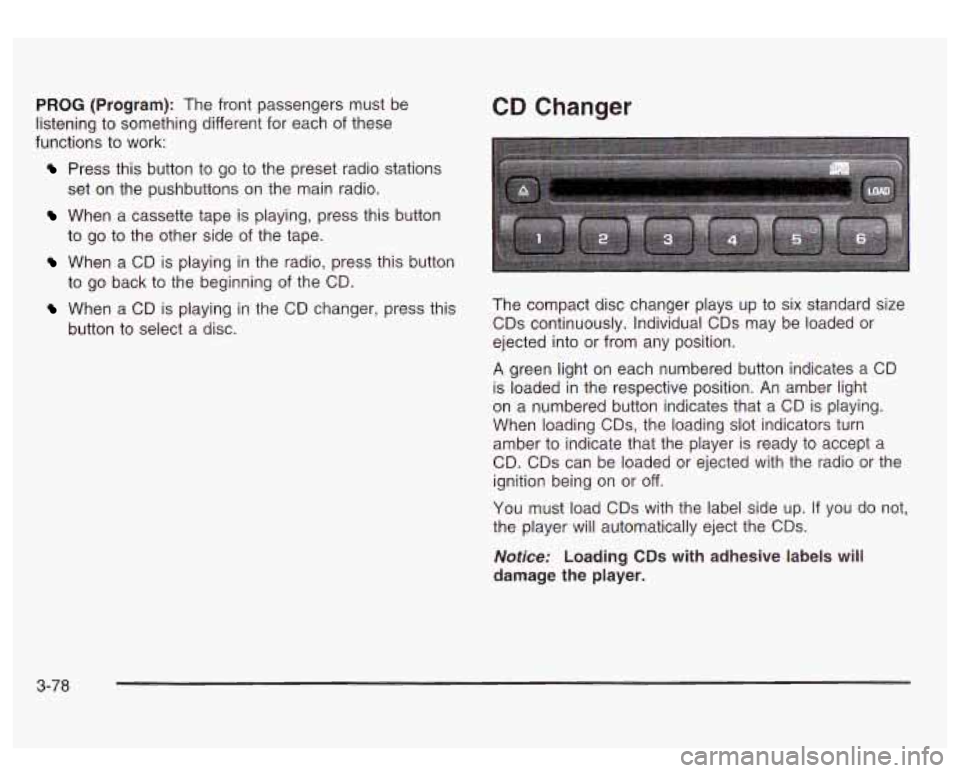
CD Changer
The compact disc changer plays up to six standard size
CDs continuously. Individual CDs may be loaded or
ejected into or from any position.
A green light on each numbered button indicates a CD
is loaded in the respective position. An amber light
on a numbered button indicates that a CD is playing.
When loading
CDs, the loading slot indicators turn
amber to indicate that the player is ready to accept a
CD. CDs can be loaded or ejected with the radio or the
ignition being on or
off.
You must load CDs with the label side up. If you do not,
the player will automatically eject the CDs.
Notice: Loading CDs with adhesive labels will
damage the player.
3-78
Page 204 of 428
To load a CD, perform the following steps:
1. Press the LOAD button. Available positions will
blink amber.
2. Select a position by pressing the desired numbered
button with the amber blinking light. If a button is
not pressed within five seconds, the changer will go
to the lowest available position.
amber. An internal door will open allowing a single
CD to be inserted into the changer. After
approximately
10 seconds the changer will be ready
to play.
3. Load the CD when the loading slot indicators turn
To load two or more CDs, perform the
following steps:
1. Press and hold the LOAD button. The first CD will
be loaded into the lowest numbered empty position.
2. Load a single CD when the loading slot indicators
turn amber. After about
10 seconds the changer will
cycle to the next available position.
the desired positions. If you do not wish to load all
of the positions, you can cancel the load all
function by pressing a button with a green flashing
indicator light or wait
20 seconds for the changer
to time out.
3. Repeat Step 2 until all CDs are loaded into all of
To eject a single CD, perform the following
steps:
1. Press the eject button (upward pointing arrow). The
buttons with loaded CDs will blink amber.
2. Press one of the amber blinking buttons to select
the location of the CD you want to eject. The
changer will move to that location and eject the CD.
If you do not remove the CD from the player
within
10 seconds, it will be reloaded. If the eject
button is pressed and a numbered location button is
not pressed within five seconds, the current or last played CD will be ejected.
To eject all CDs, press and hold the eject button.
There are two ways to play a CD. Perform
one of the following:
With the radio on, press the desired numbered
button with a green indicator light on the CD
changer.
changer will go to its last played position.
Press the TAPE DISC button on the radio. The CD
9-79
Page 205 of 428
CD Functions
1 PREV (Previous): Press this pushbutton to go to the
previous track
if the current track has been playing
for less than eight seconds. If pressed when the current
track has been playing for more than eight seconds,
it will go to the beginning of the current track. If you hold
or press this pushbutton more than once, the player
will continue moving back through the CD.
2 NEXT: Press this pushbutton to go to the next track.
If you hold this pushbutton or press it more than
once, the player will continue moving forward through
the CD.
3 REV (Reverse): Press and hold this pushbutton to
reverse quickly through a track. Release it to resume
playing.
4 FWD (Forward): Press and hold this pushbutton to
advance quickly through a track. Release it to resume
playing.
5 Q: Press this pushbutton to select a CD. The CD
number and track number will be displayed.
6 RDM (Random): Press this button to hear the tracks
in random, rather than sequential, order. RDM ALL
will appear on the radio display, which will randomly play
all of the loaded CDs. Press and hold this button until
you hear a beep and the radio will display RDM ONE, which
will randomly play the tracks on the current
CD. Press this button again
to turn off random play,
RDM
OFF will appear on the radio display.
4 SEEK b : Press the right or the left SEEK arrow to
go to the next or to the previous track on the CD.
BAND: Press BAND
to listen to the radio when a CD is
playing.
TAPE DISC: Press this button
if you have a CD loaded
in the changer and the radio is turned on,
to play a
CD. Press this button
to switch between playing a tape
and the CD changer
if all are loaded.
Compact Disc Changer Errors
CHK CD (Check): If this message appears on the
display, it could be for one of the following reasons:
You are driving on a very rough road. The CD
should play when the road gets smoother.
A CD is upside down.
It is dirty, scratched or wet.
0 It is very humid. If so, wait about an hour and try
The CD player is very hot.
again.
If any error
occurs repeatedly or if an error cannot be
corrected, contact your dealership.
3-80
Page 410 of 428
Accessory Power Outlets ................................. 3-16
Adding Washer Fluid
....................................... 5-38
Additional Program Information
........................... 7-8
Additives, Fuel ................................................. 5-6
Add-on Electrical Equipment
............................ 5-95
Add-on Equipment .......................................... 4-48
Off Light ..................................................... 3-28
Passenger Status Indicator
........................... 3-30
Readiness Light
.......................................... 3-27
Air Bag Systems
............................................. 1-57
Bag-Equipped Vehicle
............................... 1-72
Passenger Sensing System
........................... 1-68
Adjusting the Speakers
(Balance/Fade)
.............. 3-66
Air Bag
Adding Equipment to Your Air
Air Bag
Off Switch ....................................... 1-64
How Does an Air Bag Restrain?
.................... 1-62
Servicing Your Air Bag-Equipped Vehicle
......... 1-72
What Makes an
Air Bag inflate? .................... 1-61
What Will You See After an
Air Bag Inflates?
...................................... 1-62
When Should an Air Bag Inflate?
................... 1-61
Where Are the Air Bags?
.............................. 1-59
Air Cleaner/FiIter, Engine
................................. 5-1 9
All Overseas Locations ...................................... 7-4
All-Wheel Drive
............................................... 5-49
All-Wheel Drive (AWD) System
......................... 2-21
Aluminum or Chrome-Plated Wheels
.................. 5-90
AM ............................................................ 3-82
Antenna, Fixed Mast
....................................... 3-84
Anti-lock Brake System
..................................... 4-7
Appearance Care
............................................ 5-86
Care of Safety Belts
.................................... 5-88
Antenna,
XMTM Satellite
Radio System ............... 3-84
Anti-Lock Brake, System Warning
Light .............. 3-35
Chemical Paint Spotting
............................... 5-91
Cleaning the Inside of Your Vehicle
................ 5-86
Cleaning the Outside of Your Vehicle
.............. 5-88
Finish Damage
............................................ 5-91
GM Vehicle Care/Appearance Materials .......... 5-92
Sheet Metal Damage
................................... 5-91
Underbody Maintenance
............................... 5-91
Weatherstrips
.............................................. 5-88
Ashtrays
........................................................ 3-17
Audio System(s)
............................................. 3-61
Audio Systems
Audio Steering Wheel Controls
...................... 3-81
Care of Your Cassette Tape Player
................ 3-83
Care of Your CD Player
............................... 3-84
Care of Your CDs
........................................ 3-84
CD Changer
............................................... 3-78
DAB Radio Antenna System
.......................... 3-84
Fixed Mast Antenna
..................................... 3-84
Radio with Cassette and CD
......................... 3-62
Rear Seat Audio (RSA)
................................ 3-76
Setting the Time
.......................................... 3-61
Theft-Deterrent Feature
................................ 3-81
Understanding Radio Reception
..................... 3-82
1
Page 412 of 428
Care of Your (cont.)
CD Player
................................ ... 3-84
CDS
.......................................................... 3-84
Cargo Lamp
............................. ... 3-14
CARGO LAMP
ON ....................... ... 3-56
Cassette Tape Messages
................................. 3-73
Cassette Tape Player Service
........................... 6-10
CD Adapter Kits
............................................. 3-74
CD Changer
................................................... 3-78
CD Functions
................................................. 3-80
Center Console Storage Area
........................... 2-39
Center High-Mounted Stoplamp (CHMSL) and
Center Instrument Panel Fuse Block
.................. 5-98
Center Passenger Position, Safety Belts
............. 1-22
Chains, Tires .................................................. 5-68
Check Cargo Lamp
............................................... 5-56
CHANGE ENGINE OIL .................................... 3-54
Engine Light
.................................... ... 3-38
Check Engine Light
.......................... ... 3-38
CHECK OIL LEVEL
..................................... 3-58
CHECK WASHER FLUID
................................. 3-58
Checking Brake Fluid
...................................... 5-40
Checking Coolant ............................................ 5-26
Checking Engine Oil
........................................ 5-14
Checking Things Under the Hood
...................... 5-10
Checking Your Restraint Systems ...................... 1-73
Chemical Paint Spotting
................................... 5-91 Child Restraints
Child Restraint Systems
............................... 1-36
Infants and Young Children
........................... 1-32
Lower Anchorages and Top Tethers for
Children
(LATCH System) .......................... 1-43
Older Children ............................................. 1-30
Securing a Child Restraint Designed for the
Securing a Child Restraint in a Center
Securing a Child Restraint in a Rear
Securing a Child Restraint in the Right
LATCH System
........................................ 1-46
Rear Seat Position
................................... 1-48
Outside Seat Position
............................ 1-46
Front Seat Position
................................... 1-50
Top Strap ................................................... 1-40
Top Strap Anchor Location
............................ 1-41
Cigarette Lighter
............................................. 3-17
Where
to Put the Restraint
........................... 1-38
Cleaning Inside of Your Vehicle
.................................. 5-86
Outside
of Your Vehicle ................................ 5-88
Underbody Maintenance
............................... 5-91
Weatherstrips
.............................................. 5-88
Cleaning Exterior Lamps/Lenses
....................... 5-89
Cleaning the Mirror
......................................... 2-30
Climate Control Dual Automatic
..... . 3-18
Page 413 of 428
Compact Disc Changer Errors .......................... 3-80
Compact Disc Messages
.................................. 3-76
Compass Calibration
....................................... 2-30
Compass Variance
.......................................... 2-29
Content Theft-Deferrent
.................................... 2-1 3
Control of a Vehicle
.......................................... 4-5
Coolant
Engine Temperature Gage
............................ 3-36
Heater, Engine
............................................ 2-17
Surge Tank Pressure Cap
............................. 5-27
Cooling System
.............................................. 5-30
Cruise Control
.................................................. 3-8
Cruise Control Light
........................................ 3-41
Cupholder(s)
............................................... 2-39
Current and Past Model Order Forms
..... .... 7-11
Customer Assistance Information
Courtesy Transportation
.................................. 7-7
Customer Assistance for Text
Telephone (TTY) Users
............................... 7-4
Customer Assistance
Off ices ........................... 7-4
Customer Satisfaction Procedure
..................... 7-2
GM Mobility Program for Persons with
Disabilities
................................................ 7-5
Reporting Safety Defects to General Motors ...... 7-9
Reporting Safety Defects to the Canadian
Government
.............................................. 7-9
Reporting Safety Defects to the United States
Government
.............................................. 7-9
Roadside Assistance Program
......................... 7-5
Service Publications Ordering Information
........ 7-1 0
D
DAB Radio .................................................... 3-82
Defensive Driving
............................................. 4-2
Defogging and Defrosting
................................. 3-22
Doing Your Own Service Work
........................... 5-4
Dome Lamps
................................................. 3-16
Door
Daytime Running Lamps
.................................. 3-13
Locks
.......................................................... 2-6
Power Door Locks
......................................... 2-7
Rear Doors
.................................................. 2-8
Position, Safety Belt
..................................... 1-13
Driver Information Center (DIC)
......................... 3-43
Driver
DRIVER DOOR AJAR
..................................... 3-60
DIC Operation and Displays
.......................... 3-43
DIC Warnings and Messages
........................ 3-53
Driving At Night
..................................................... 4-29
City
........................................................... 4-33
Defensive
..................................................... 4-2
Drunken
....................................................... 4-2
Freeway
..................................................... 4-34
Hill and Mountain Roads
.............................. 4-36
In Rain and on Wet Roads
........................... 4-30
Winter
........................................................ 4-38
Driving On Grades
.......................................... 4-58
Driving on Snow or Ice
.................................... 4-39
Driving Through Deep Standing Water
............... 4-32
4