window GMC SIERRA DENALI 2003 Owners Manual
[x] Cancel search | Manufacturer: GMC, Model Year: 2003, Model line: SIERRA DENALI, Model: GMC SIERRA DENALI 2003Pages: 428, PDF Size: 20.35 MB
Page 2 of 428
The 2003 GMC Sierra Denali Owner Manual a
Seats and Restraint Systems ........................... 1-1
Front Seats ............................................... 1-2
Rear Seats
............................................... 1-7
Safety Belts
.............................................. 1-8
Child Restraints
....................................... 1-30
Air Bag Systems
...................................... 1-57
Restraint System Check
............................ 1-73
Features and Controls
..................................... 2-1
Keys
........................................................ 2-2
Doors and Locks
....................................... 2-6
Windows
................................................. 2-1 0
Theft-Deterrent Systems ............................ 2-1 3
Starting and Operating Your Vehicle ........... 2-15
Mirrors
.................................................... 2-28
Onstar@ System
...................................... 2-33
HomeLink@ Transmitter
............................. 2-35
Storage Areas
......................................... 2-39
Instrument Panel
............................................. 3-1
Vehicle
Personalization
............................. 2-42
Instrument Panel Overview
.......................... 3-2
Climate Controls
...................................... 3-1 8
Warning Lights, Gages and Indicators
......... 3-24
Driver Information Center (DIC)
.................. 3-43
Audio System(s)
....................................... 3-61 Driving Your Vehicle
....................................... 4-1
Your
Driving, the Road, and Your Vehicle ..... 4-2
Towing
................................................... 4-45
Service and Appearance Care
.......................... 5-1
Service
..................................................... 5-3
Fuel
......................................................... 5-5
Checking Things Under the Hood
............................................. 5-10
All-Wheel Drive
........................................ 5-49
Rear Axle
............................................... 5-50
Front Axle
............................................... 5-51
Bulb Replacement
.................................... 5-52
Windshield Wiper Blade Replacement
......... 5-60
Tires
...................................................... 5-61
Appearance Care
..................................... 5-86
Vehicle Identification
................................. 5-94
Electrical System
...................................... 5-95
Capacities and Specifications
................... 5-1 04
Normal Maintenance Replacement Parts
.... 5-1 05
Maintenance Schedule
..................................... 6-1
Maintenance Schedule
................................ 6-2
Customer Assistance Information
.................... 7-1
Customer Assistance Information
.................. 7-2
Reporting Safety Defects
............................ 7-9
Index
................................................................. 1
Page 31 of 428
Rear Seat Passengers
It’s very important for rear seat passengers to buckle
up! Accident statistics show that unbelted people in the
rear seat are hurt more often
in crashes than those
who are wearing safety belts.
Rear passengers who aren’t safety belted can be
thrown out of the vehicle in a crash. And they can strike
others in the vehicle who are wearing safety belts.
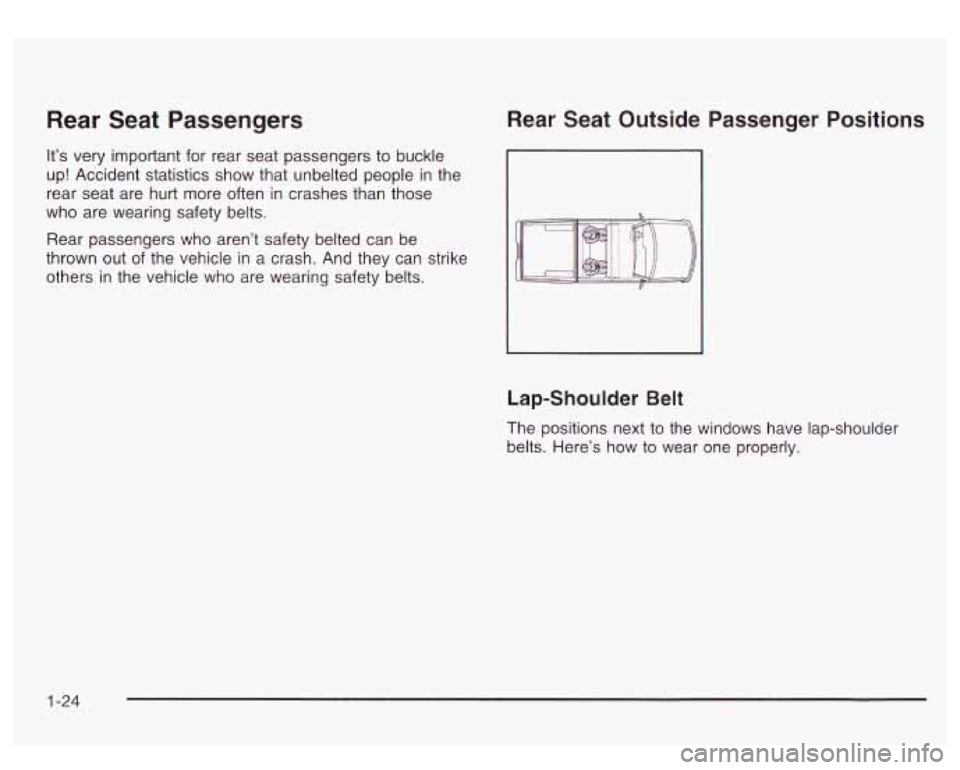
Rear Seat Outside Passenger Positions
Lap-Shoulder Belt
The positions next to the windows have lap-shoulder
belts. Here’s how to wear one properly.
1 -24
Page 44 of 428
I
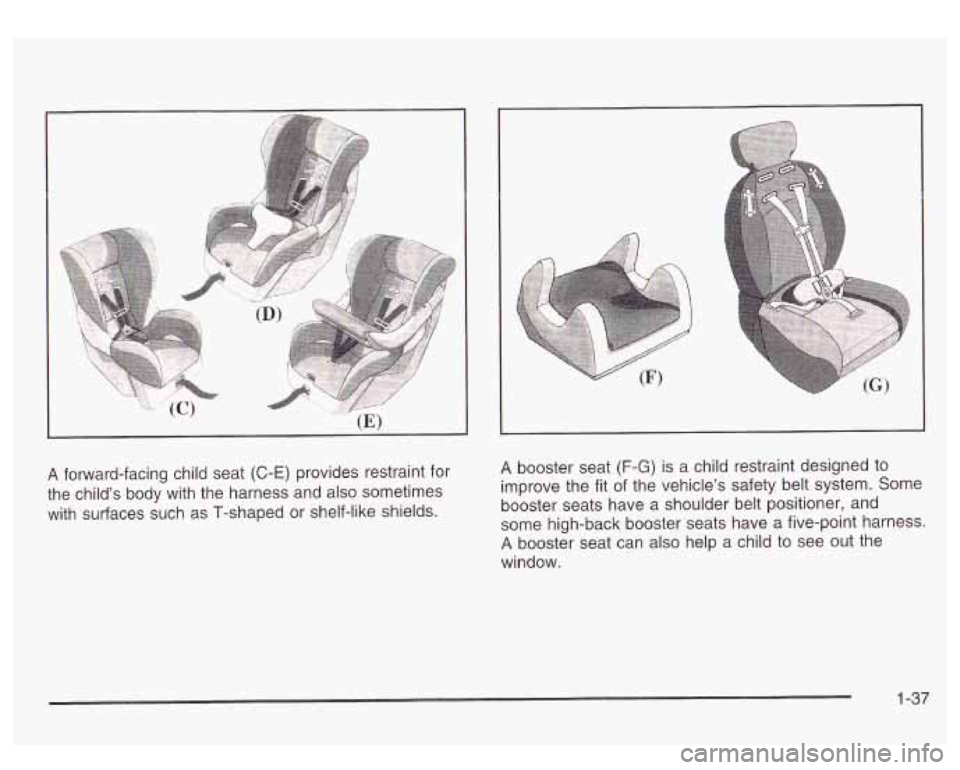
A forward-facing child seat (C-E) provides restraint for
the child’s body with the harness and also sometimes
with surfaces such as T-shaped or shelf-like shields.
I
I
A booster seat (F-G) is a child restraint desiqned to
improve the fit of the vehicle’s safety belt system. Some
booster seats have a shoulder belt positioner, and
some high-back booster seats have a five-point harness.
A booster seat can also help a child to see out the
window.
1-37
Page 70 of 428
When an air bag inflates, there is dust in the
air. This dust could cause breathing problems
for people with
a history of asthma or other
breathing trouble.
To avoid this, everyone in
the vehicle should get out as soon as it is safe
to do
so. If you have breathing problems but
can’t get out of the vehicle after an air bag
inflates, then get fresh air by opening a
window or
a door. If you experience breathing
problems following an air bag deployment, you
should seek medical attention.
In many crashes severe enough to inflate the air bag,
windshields are broken by vehicle deformation.
Additional windshield breakage may also occur from the
right front passenger air bag.
Air bags are designed to inflate only once. After
they inflate, you’ll need some new parts for your
air bag system.
If you don’t get them, the air
bag system won’t be there to help protect you in
another crash.
A new system will include air
bag modules and possibly other parts. The service
manual for your vehicle covers the need to
replace other parts.
Your vehicle is equipped with electronic frontal
sensors which help the sensing system distinguish
between a moderate and a more severe frontal
impact. Your vehicle is also equipped with a crash
sensing and diagnostic module, which records
information about the frontal air bag system. The
module records information about the readiness of
the system and when the system commands
are bag inflation. It records the status of the driver’s
safety belt usage in a crash in which the air bag
deploys or a crash in which the air bag nearly
deploys. The module also records speed, engine
RPM, brake and throttle data.
Let only qualified technicians work on your air bag
systems. Improper service can mean that an air
bag system won’t work properly. See your dealer for
service.
Notice: If you damage the covering for the driver’s
or the right front passenger’s air bag, the bag
may not work properly.
You may have to replace the
air bag module in the steering wheel or both the
air bag module and the instrument panel for
the right front passenger’s air bag.
Do not open or
break the air bag coverings.
1-63
Page 82 of 428
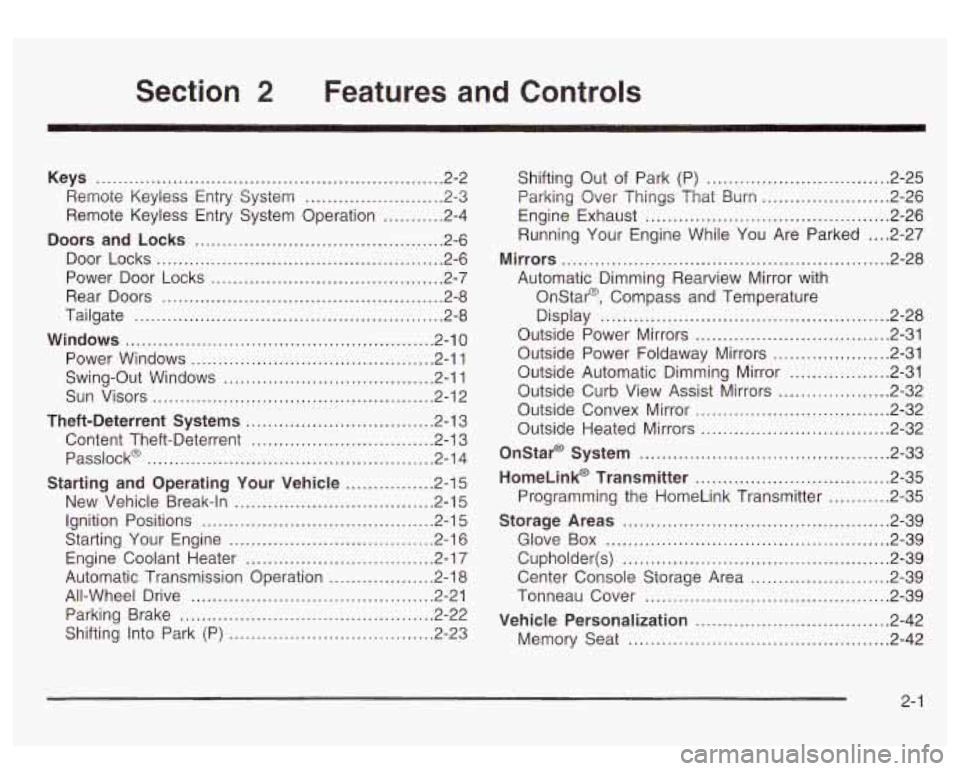
Section 2 Features and Controls
Keys ............................................................... 2-2
Remote Keyless Entry System
......................... 2-3
Remote Keyless Entry System Operation
........... 2-4
Doors and Locks
............................................. 2-6
Door Locks
.................................................... 2-6
Power Door Locks
.......................................... 2-7
Rear Doors
................................................... 2-8
Tailgate
........................................................ 2-8
Windows
........................................................ 2-10
Power Windows
............................................ 2-11
Swing-Out Windows
...................................... 2-11
Sun Visors
................................................... 2-12
Theft-Deterrent Systems
.................................. 2.13
Content Theft-Deterrent
................................. 2.13
Passlock@
.................................................... 2.14
Starting and Operating Your Vehicle
................ 2.15
New Vehicle Break-In
.................................... 2.15
Ignition Positions
.......................................... 2.15
Starting Your Engine
..................................... 2.16
Engine Coolant Heater
.................................. 2.17
Automatic Transmission Operation
................... 2.18
All-Wheel Drive
............................................ 2-21
Parking Brake
.............................................. 2-22
Shifting Into Park
(P) ..................................... 2-23 Shifting
Out
of Park (P) ................................. 2-25
Parking Over Things That Burn
....................... 2-26
Engine Exhaust
............................................ 2-26
Running Your Engine While You Are Parked
.... 2-27
Mirrors
........................................................... 2-28
Automatic Dimming Rearview Mirror with
OnStap, Compass and Temperature
Display
.................................................... 2-28
Outside Power Mirrors
................................... 2-31
Outside Power Foldaway Mirrors
..................... 2-31
Outside Automatic Dimming Mirror
.................. 2-31
Outside Curb View Assist Mirrors
.................... 2-32
Outside Convex Mirror
................................... 2-32
Outside Heated Mirrors
.................................. 2-32
Onstar@ System
............................................. 2-33
HomeLink@ Transmitter
................................... 2-35
Programming the HomeLink Transmitter
........... 2-35
Storage Areas
................................................ 2-39
Glove Box
................................................... 2-39
Cupholder(s)
................................................ 2-39
Center Console Storage Area
......................... 2-39
Tonneau Cover
............................................ 2-39
Vehicle Personalization
................................... 2-42
Memory Seat
............................................... 2-42
2- 1
Page 83 of 428
Keys
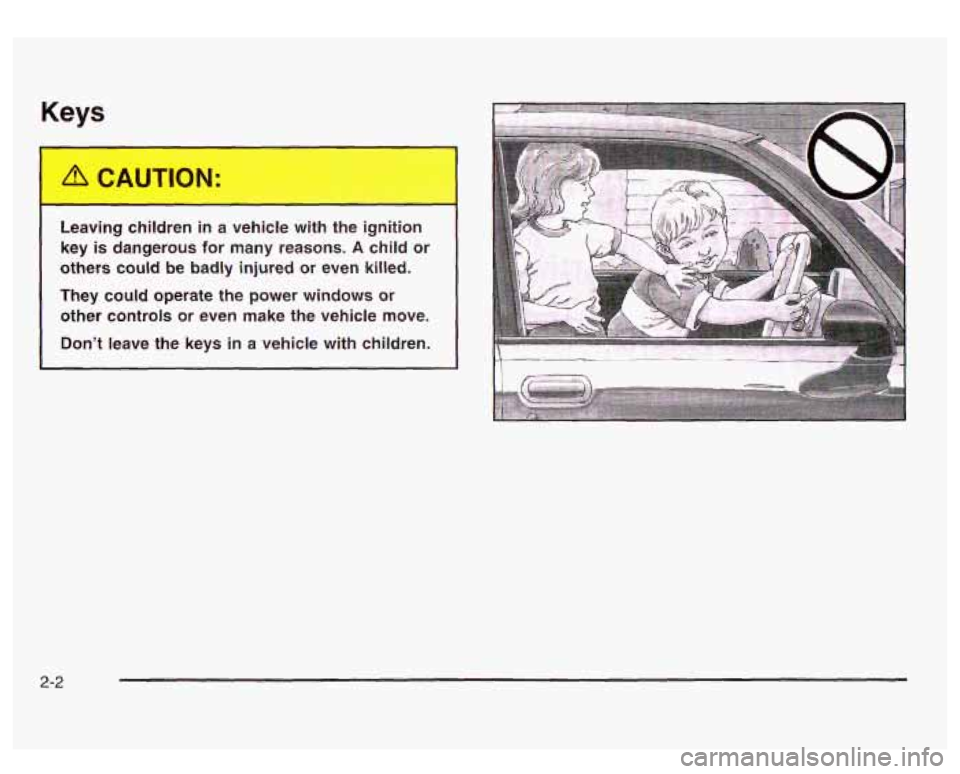
Leaving ,..ildren in a vehicle t...,h t..- ignition
key is dangerous for many reasons.
A child or
others could be badly injured or even killed.
They could operate the power windows or
other controls or even make the vehicle move.
Don't leave the keys in
a vehicle with children.
2-2
Page 91 of 428
Windows
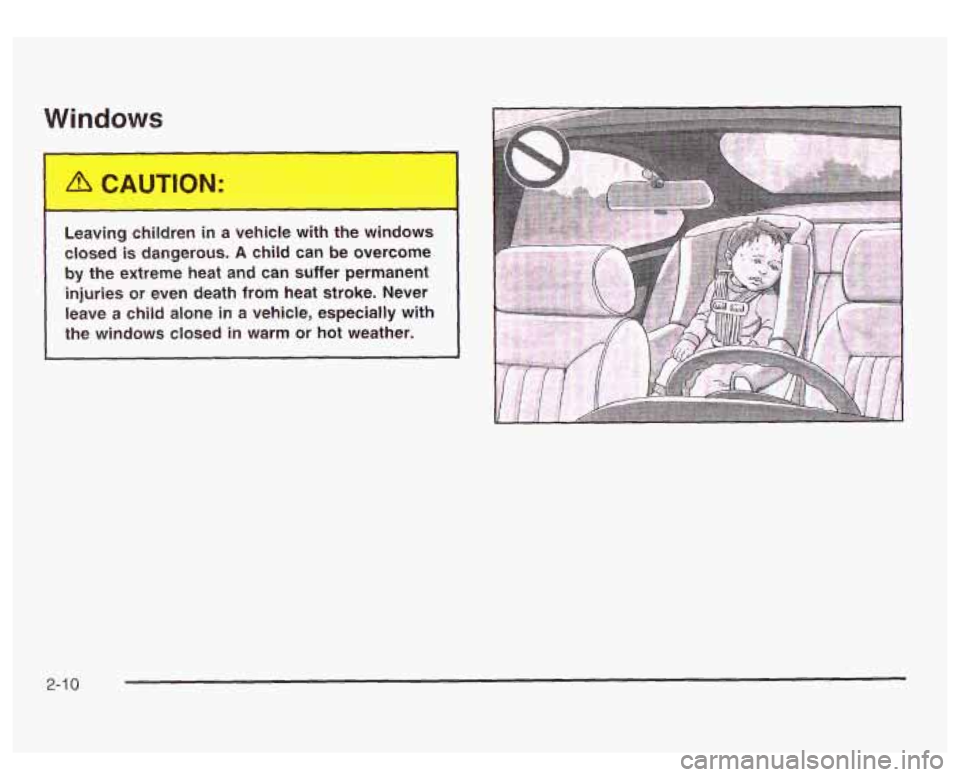
Le; ng child. --I in a vehicle with the windows
closed is dangerous.
A child can be overcome
by the extreme heat and can suffer permanent
injuries or even death
from heat stroke. Never
leave a child alone in a vehicle, especially with
the windows closed in warm or hot weather.
2-1 0
Page 92 of 428
Power Windows
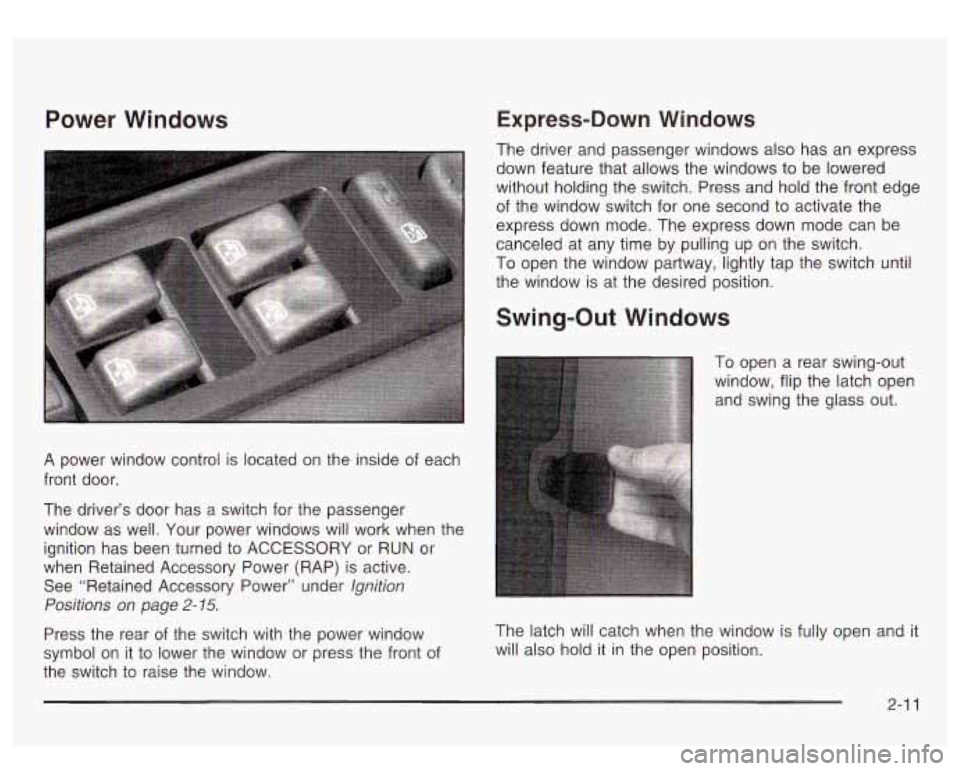
A power window control is located on the inside of each
front door.
The driver’s door has a switch for the passenger
window as well. Your power windows will work when the
ignition has been turned to ACCESSORY or RUN or
when Retained Accessory Power (RAP) is active.
See “Retained Accessory Power” under
Ignition
Positions
on page 2- 15.
Press the rear of the switch with the power window
symbol on it to lower the window or press the front of
the switch to raise the window.
Express-Down Windows
The driver and passenger windows also has an express
down feature that allows the windows to be lowered
without holding the switch. Press and hold the front edge
of the window switch for one second to activate the
express down mode. The express down mode can be
canceled at any time by pulling up on the switch.
To open the window partway, lightly tap the switch until
the window is at the desired position.
Swing-Out Windows
To open a rear swing-out
window, flip the latch open
and swing the glass out.
*, -,&y: * “cf .. - .- . ”” , . Y,.-, ”
The latch will catch when the window is fully open and it
will also hold it in the open position.
2-1 7
Page 95 of 428
Here’s how to avoid setting off the alarm by accident:
If you don’t want to activate the theft-deterrent
system, the vehicle should be locked with the door
key after the doors are closed.
Always unlock a door with a key, or use the remote
keyless entry transmitter. Unlocking a door any
other way will set
off the alarm if the system
has been armed.
If you set off the alarm by accident, unlock any door
with the key. You can also turn
off the alarm by pressing
UNLOCK on the remote keyless entry transmitter or
by placing the key in the ignition and turning it to
START.
Testing the Alarm
The alarm can be tested by following these steps:
1. From inside the vehicle, lower the driver’s window
and open the driver’s door.
2. Activate the system by locking the doors with the
power door lock switch while the door is open, or
with the remote keyless entry transmitter.
3. Get out of the vehicle, close the door and wait for
the security message
to go out.
4. Then reach in through the window, unlock the door
with the manual door lock and open the door. This
should set
off the alarm. If the
alarm does not sound and the headlamps do not
flash, you may have the feature turned
off. See DIC
Operation and Displays on page 3-43 for more
information.
Passlock@
Your vehicle is equipped with the
Passlock@ theft-deterrent system.
Passlock@ is a passive theft-deterrent system.
Passlock@ enables fuel
if the ignition lock cylinder is
turned with a valid key.
If a correct key is not used or the
ignition lock cylinder is tampered with, fuel is disabled.
If the engine stalls and the security light flashes,
wait until the light stops flashing before trying to restart
the engine. Remember
to release the key from
START as soon as the engine starts.
If the engine is running and the security light comes on,
you will be able
to restart the engine if you turn the
engine
off. However, your Passlock@ system is
not working properly and must be serviced by your
dealer. Your vehicle is not protected by Passlock@ at this
time. You may also want to check the fuse (see
Fuses and Circuit Breakers on page 5-95.) See your
dealer for service.
In an emergency, call the GM Roadside Assistance
Center. See
Roadside Assistance Program on page 7-5
under Customer Assistance Information.
2-1 4
Page 97 of 428
LOCK (A): This position locks your ignition and
transmission. It’s a theft-deterrent feature. You will only
be able to remove your key when the ignition is
turned to
LOCK.
ACCESSORY (B): This position lets you use things like
the radio, power windows and the windshield wipers
when the engine is
off.
RUN (C): This position is for driving.
START
(D): This position starts your engine.
Retained Accessory Power (RAP)
The Retained Accessory Power (RAP) feature will allow
certain features on your vehicle to continue to work
up to
10 minutes after the ignition key is turned to OFF.
Starting Your Engine
Move your shift lever to PARK (P) or NEUTRAL (N).
Your engine won’t start in any other position - that’s a
safety feature. To restart when you’re already moving,
use NEUTRAL (N) only.
Notice: Don’t try to shift to PARK (P) if your
vehicle is moving. If you do, you could damage the
transmission. Shift to PARK (P) only when your
vehicle
is stopped.
1. With your foot off the accelerator pedal, turn the
ignition key to START. When the engine starts,
let go of the key. The idle speed will go down as
your engine gets warm.
Notice: Holding your key in START for longer than
15 seconds at a time will cause your battery to
be drained much sooner. And the excessive heat
can damage your starter motor. Wait about
15
seconds between each try to help avoid draining
your battery or damaging your starter.
2. If it doesn’t start within 10 seconds, push the
accelerator pedal all the way
to the floor, while you
hold the ignition key in START. When the engine
starts, let
go of the key and let up on the accelerator
pedal. Wait about
15 seconds between each try.
2-1 6