GMC SIERRA DENALI 2004 Owners Manual
SIERRA DENALI 2004
GMC
GMC
https://www.carmanualsonline.info/img/44/57876/w960_57876-0.png
GMC SIERRA DENALI 2004 Owners Manual
Trending: wheel, fog light, oil reset, key battery, oil pressure, sensor, washer fluid
Page 371 of 452
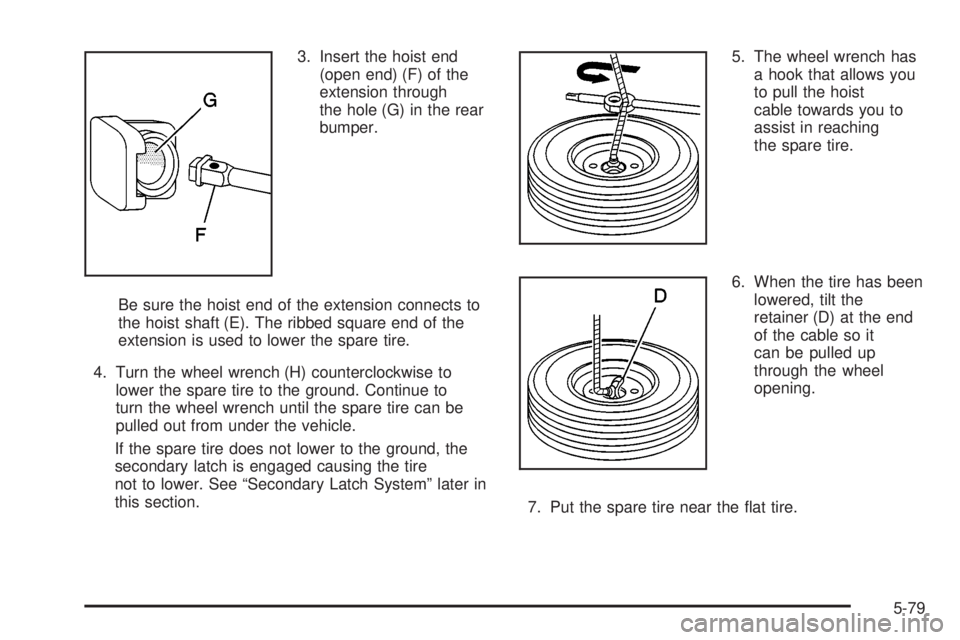
3. Insert the hoist end
(open end) (F) of the
extension through
the hole (G) in the rear
bumper.
Be sure the hoist end of the extension connects to
the hoist shaft (E). The ribbed square end of the
extension is used to lower the spare tire.
4. Turn the wheel wrench (H) counterclockwise to
lower the spare tire to the ground. Continue to
turn the wheel wrench until the spare tire can be
pulled out from under the vehicle.
If the spare tire does not lower to the ground, the
secondary latch is engaged causing the tire
not to lower. See ªSecondary Latch Systemº later in
this section.5. The wheel wrench has
a hook that allows you
to pull the hoist
cable towards you to
assist in reaching
the spare tire.
6. When the tire has been
lowered, tilt the
retainer (D) at the end
of the cable so it
can be pulled up
through the wheel
opening.
7. Put the spare tire near the ¯at tire.
5-79
Page 372 of 452
Removing the Flat Tire and Installing
the Spare Tire
Use the following pictures and instructions to remove
the ¯at tire and raise the vehicle.
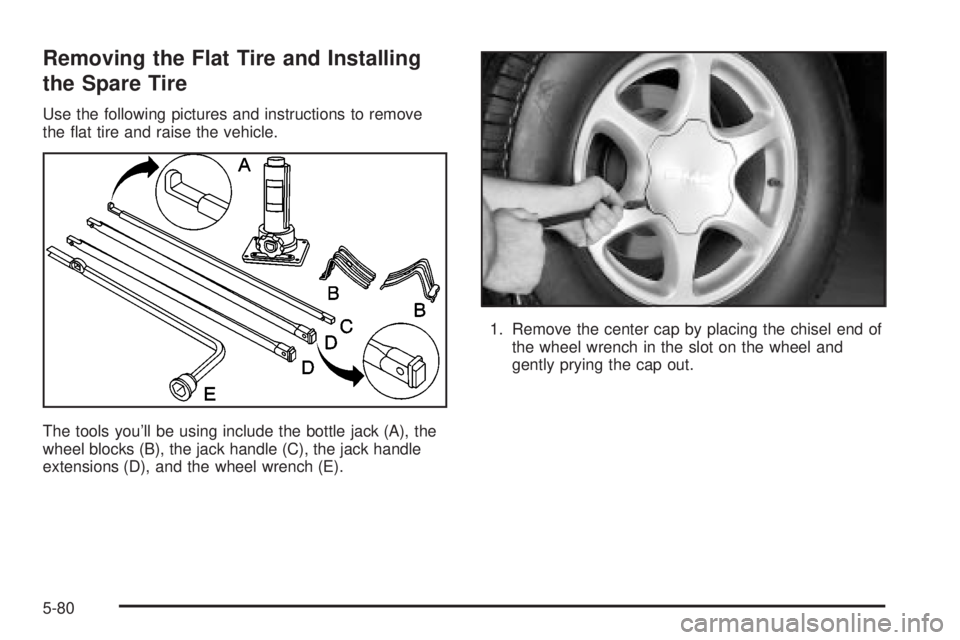
The tools you'll be using include the bottle jack (A), the
wheel blocks (B), the jack handle (C), the jack handle
extensions (D), and the wheel wrench (E).1. Remove the center cap by placing the chisel end of
the wheel wrench in the slot on the wheel and
gently prying the cap out.
5-80
Page 373 of 452
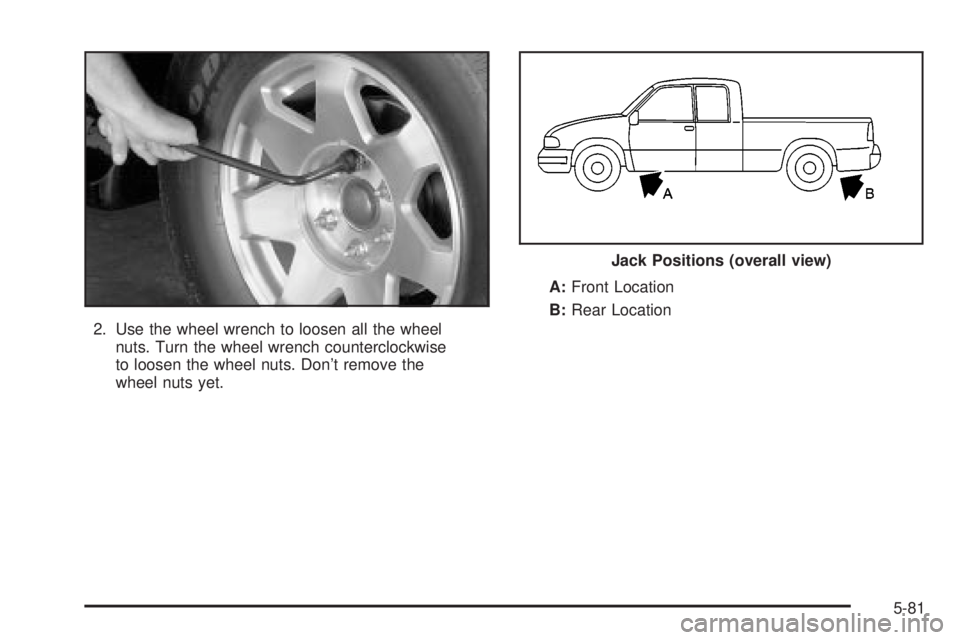
2. Use the wheel wrench to loosen all the wheel
nuts. Turn the wheel wrench counterclockwise
to loosen the wheel nuts. Don't remove the
wheel nuts yet.A:Front Location
B:Rear Location
Jack Positions (overall view)
5-81
Page 374 of 452
Notice:If your vehicle has QUADRASTEERŸ and
you use a jack to raise the vehicle without
positioning it correctly, you could damage the
QUADRASTEERŸ system. When raising your
vehicle on a jack, avoid contact with tie rods and tie
rod boots.
{CAUTION:
Getting under a vehicle when it is jacked up is
dangerous. If the vehicle slips off the jack you
could be badly injured or killed. Never get under
a vehicle when it is supported only by a jack.
{CAUTION:
Raising your vehicle with the jack improperly
positioned can damage the vehicle and even
make the vehicle fall. To help avoid personal
injury and vehicle damage, be sure to ®t the
jack lift head into the proper location before
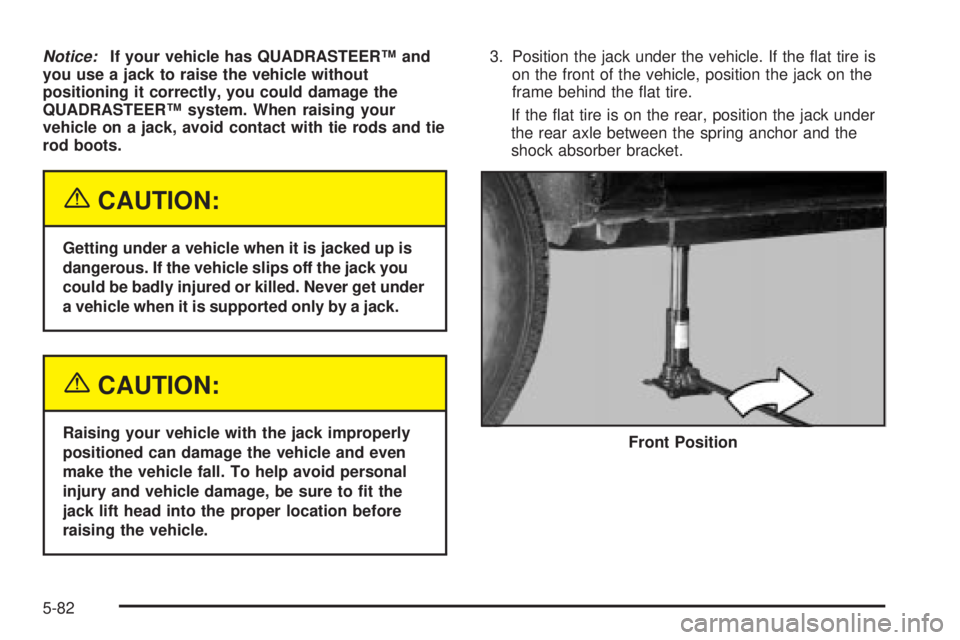
raising the vehicle.3. Position the jack under the vehicle. If the ¯at tire is
on the front of the vehicle, position the jack on the
frame behind the ¯at tire.
If the ¯at tire is on the rear, position the jack under
the rear axle between the spring anchor and the
shock absorber bracket.
Front Position
5-82
Page 375 of 452
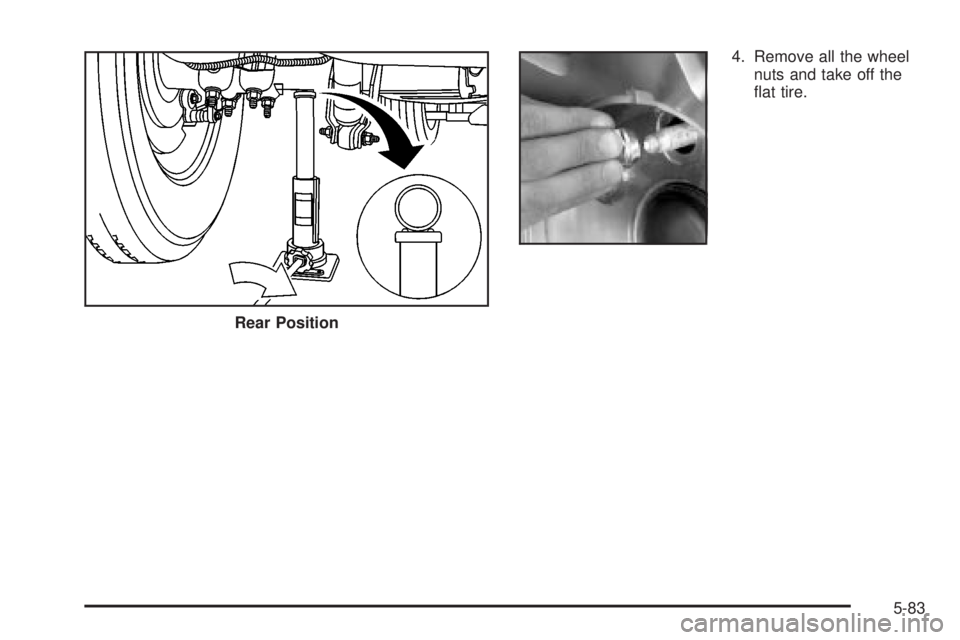
4. Remove all the wheel
nuts and take off the
¯at tire.
Rear Position
5-83
Page 376 of 452
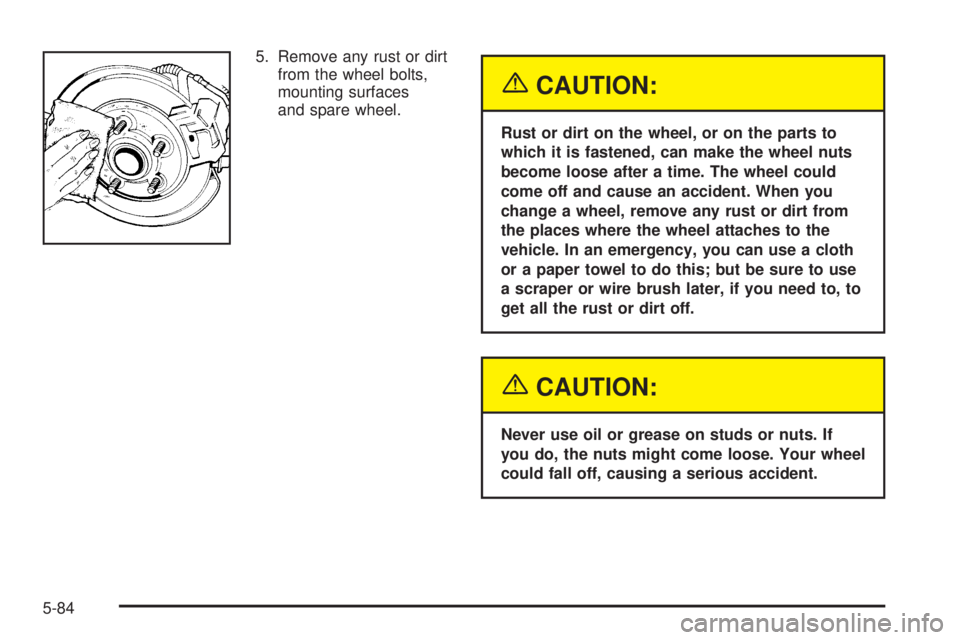
5. Remove any rust or dirt
from the wheel bolts,
mounting surfaces
and spare wheel.
{CAUTION:
Rust or dirt on the wheel, or on the parts to
which it is fastened, can make the wheel nuts
become loose after a time. The wheel could
come off and cause an accident. When you
change a wheel, remove any rust or dirt from
the places where the wheel attaches to the
vehicle. In an emergency, you can use a cloth
or a paper towel to do this; but be sure to use
a scraper or wire brush later, if you need to, to
get all the rust or dirt off.
{CAUTION:
Never use oil or grease on studs or nuts. If
you do, the nuts might come loose. Your wheel
could fall off, causing a serious accident.
5-84
Page 377 of 452
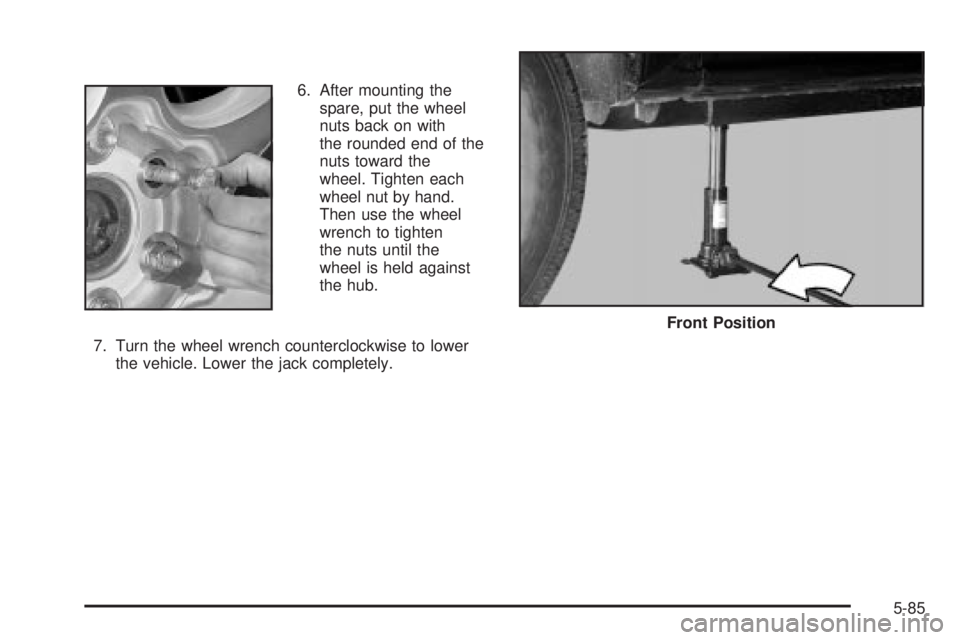
6. After mounting the
spare, put the wheel
nuts back on with
the rounded end of the
nuts toward the
wheel. Tighten each
wheel nut by hand.
Then use the wheel
wrench to tighten
the nuts until the
wheel is held against
the hub.
7. Turn the wheel wrench counterclockwise to lower
the vehicle. Lower the jack completely.
Front Position
5-85
Page 378 of 452
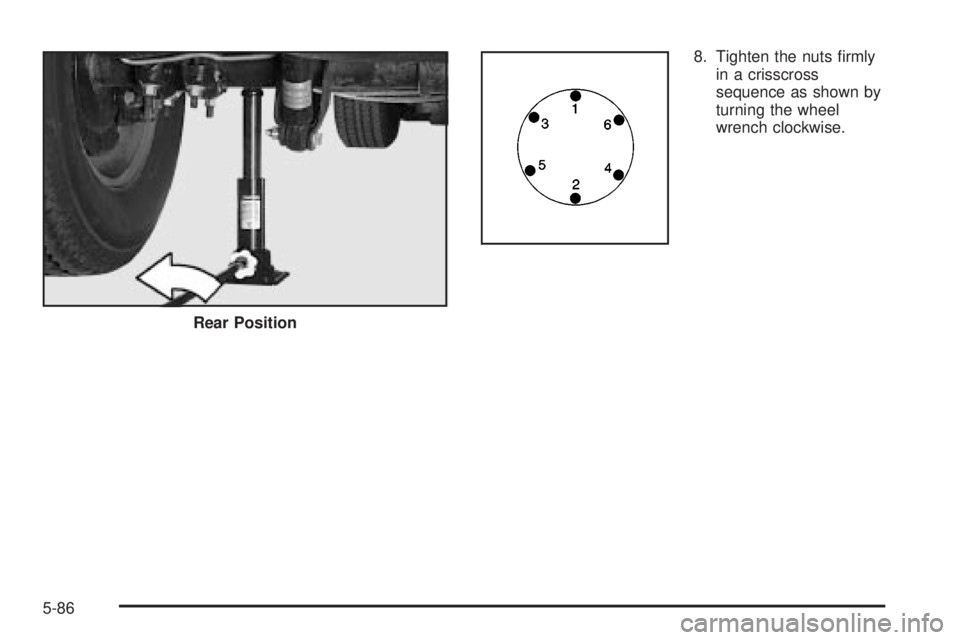
8. Tighten the nuts ®rmly
in a crisscross
sequence as shown by
turning the wheel
wrench clockwise.
Rear Position
5-86
Page 379 of 452
{CAUTION:
Incorrect wheel nuts or improperly tightened
wheel nuts can cause the wheel to come loose
and even come off. This could lead to an
accident. Be sure to use the correct wheel
nuts. If you have to replace them, be sure to
get new GM original equipment wheel nuts.
Stop somewhere as soon as you can and have
the nuts tightened with a torque wrench to the
proper torque speci®cation. See ªCapacities
and Speci®cationsº in the Index for wheel nut
torque speci®cation.
Notice:Improperly tightened wheel nuts can lead
to brake pulsation and rotor damage. To avoid
expensive brake repairs, evenly tighten the wheel
nuts in the proper sequence and to the proper
torque speci®cation. See ªCapacities and
Speci®cationsº in the index for the wheel nut torque
speci®cation.
When you reinstall the regular wheel and tire, you must
also reinstall the center cap. Place the cap on the
wheel and tap it into place until it seats ¯ush with the
wheel. The cap only goes on one way. Be sure to line up
the tab on the center cap with the indentation on the
wheel.
5-87
Page 380 of 452
Storing a Flat or Spare Tire, Jack
and Tools
{CAUTION:
Storing a jack, a tire, or other equipment in the
passenger compartment of the vehicle could
cause injury. In a sudden stop or collision,
loose equipment could strike someone. Store
all these in the proper place.
Notice:Storing an aluminum wheel with a ¯at tire
under your vehicle for an extended period of time or
with the valve stem pointing up may damage the
wheel. Always stow the wheel with the valve
stem pointing down and have the wheel/tire repaired
as soon as possible.
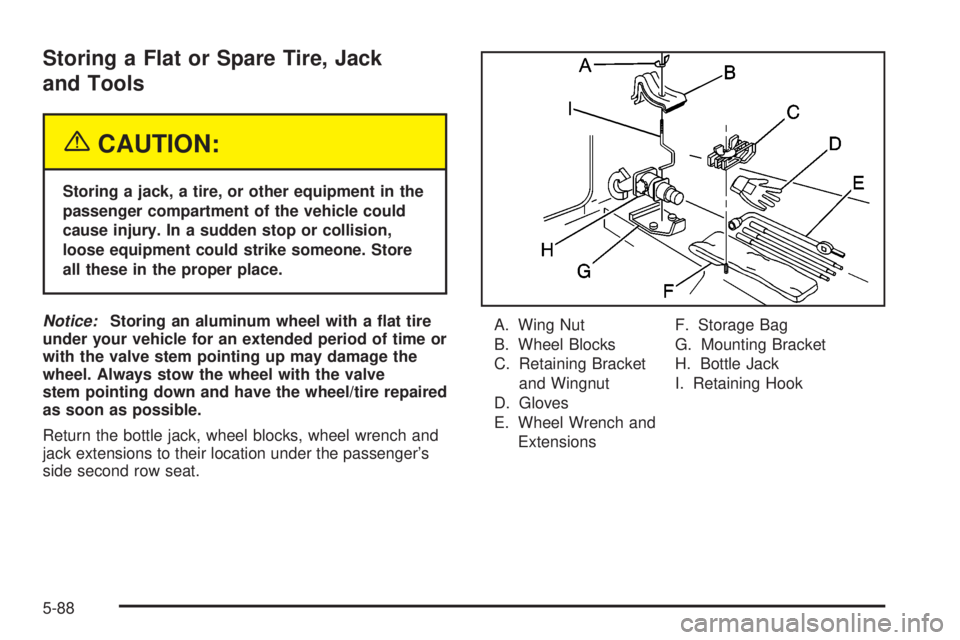
Return the bottle jack, wheel blocks, wheel wrench and
jack extensions to their location under the passenger's
side second row seat.A. Wing Nut
B. Wheel Blocks
C. Retaining Bracket
and Wingnut
D. Gloves
E. Wheel Wrench and
ExtensionsF. Storage Bag
G. Mounting Bracket
H. Bottle Jack
I. Retaining Hook
5-88
Trending: traction control, headlamp, check oil, gas mileage, fuel cap release, key fob, cooling
