maintenance schedule GMC SIERRA DENALI 2004 Owners Manual
[x] Cancel search | Manufacturer: GMC, Model Year: 2004, Model line: SIERRA DENALI, Model: GMC SIERRA DENALI 2004Pages: 452, PDF Size: 3.02 MB
Page 1 of 452
Seats and Restraint Systems........................... 1-1
Front Seats
............................................... 1-3
Rear Seats
............................................... 1-8
Safety Belts
.............................................. 1-8
Child Restraints
.......................................1-29
Air Bag Systems
......................................1-62
Restraint System Check
............................1-79
Features and Controls..................................... 2-1
Keys
........................................................ 2-2
Doors and Locks
....................................... 2-6
Windows
.................................................2-13
Theft-Deterrent Systems
............................2-15
Starting and Operating Your Vehicle
...........2-18
Mirrors
....................................................2-31
OnStar
žSystem
......................................2-36
HomeLinkžTransmitter
.............................2-38
Storage Areas
.........................................2-42
Vehicle Personalization
.............................2-45
Instrument Panel............................................. 3-1
Instrument Panel Overview
.......................... 3-2
Climate Controls
......................................3-19
Warning Lights, Gages and Indicators
.........3-27
Driver Information Center (DIC)
..................3-46
Audio System(s)
.......................................3-64Driving Your Vehicle....................................... 4-1
Your Driving, the Road, and Your Vehicle
..... 4-2
Towing
...................................................4-48
Service and Appearance Care.......................... 5-1
Service
..................................................... 5-3
Fuel
......................................................... 5-4
Checking Things Under the Hood
................. 5-8
All-Wheel Drive
........................................5-46
Rear Axle
...............................................5-47
Front Axle
...............................................5-48
Bulb Replacement
....................................5-49
Windshield Wiper Blade Replacement
.........5-58
Tires
......................................................5-59
Appearance Care
.....................................5-96
Vehicle Identi®cation
...............................5-104
Electrical System
....................................5-105
Capacities and Speci®cations
...................5-114
Maintenance Schedule..................................... 6-1
Maintenance Schedule
................................ 6-2
Customer Assistance and Information.............. 7-1
Customer Assistance and Information
........... 7-2
Reporting Safety Defects
...........................7-10
Index................................................................ 1
2004 GMC Sierra Denali Owner ManualM
Page 172 of 452
Notice:If you drive your vehicle with the
transmission temperature gage above normal
operating range, you can damage the transmission.
This could lead to costly repairs that would not
be covered by your warranty. Do not drive your
vehicle while the transmission temperature gage
reading is above normal. See your dealer for service.
The following situations can cause the transmission to
operate at higher temperatures:
·Towing a trailer
·Hot outside air temperatures
·Hauling a large or heavy load
·Low transmission ¯uid level
·High transmission ¯uid level
·Restricted air ¯ow to the radiator and the auxiliary
transmission oil cooler (if equipped).
A temporary solution to hotter transmission operating
temperatures may be to let the transmission cool down.
If the transmission is operated at higher temperatures
on a frequent basis, see
Scheduled Maintenance
on page 6-4for the proper transmission maintenance
intervals.
Malfunction Indicator Lamp
Check Engine Light
Your vehicle is equipped
with a computer which
monitors operation of the
fuel, ignition and emission
control systems.
This system is called OBD II (On-Board
Diagnostics-Second Generation) and is intended to
assure that emissions are at acceptable levels for the
life of the vehicle, helping to produce a cleaner
environment. The Check Engine light comes on to
indicate that there is a problem and service is required.
Malfunctions often will be indicated by the system
before any problem is apparent. This may prevent more
serious damage to your vehicle. This system is also
designed to assist your service technician in correctly
diagnosing any malfunction.
3-40
Page 175 of 452
This can happen if you have recently replaced your
battery or if your battery has run down. The diagnostic
system is designed to evaluate critical emission
control systems during normal driving. This may take
several days of routine driving. If you have done this and
your vehicle still does not pass the inspection for lack
of OBD system readiness, your GM dealer can prepare
the vehicle for inspection.
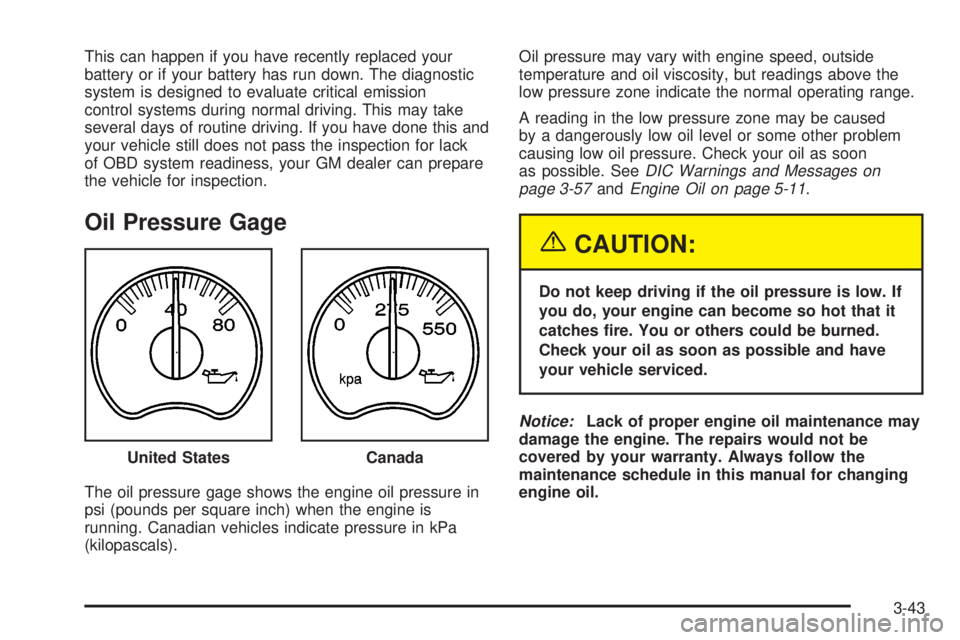
Oil Pressure Gage
The oil pressure gage shows the engine oil pressure in
psi (pounds per square inch) when the engine is
running. Canadian vehicles indicate pressure in kPa
(kilopascals).Oil pressure may vary with engine speed, outside
temperature and oil viscosity, but readings above the
low pressure zone indicate the normal operating range.
A reading in the low pressure zone may be caused
by a dangerously low oil level or some other problem
causing low oil pressure. Check your oil as soon
as possible. See
DIC Warnings and Messages on
page 3-57andEngine Oil on page 5-11.
{CAUTION:
Do not keep driving if the oil pressure is low. If
you do, your engine can become so hot that it
catches ®re. You or others could be burned.
Check your oil as soon as possible and have
your vehicle serviced.
Notice:Lack of proper engine oil maintenance may
damage the engine. The repairs would not be
covered by your warranty. Always follow the
maintenance schedule in this manual for changing
engine oil. United States
Canada
3-43
Page 182 of 452
Instant Fuel Economy
Press the fuel information button until INST ECON
appears in the display. Instant fuel economy is how
many miles per gallon your vehicle is getting at
the particular moment in time. The instant fuel economy
cannot be reset.
GM Oil Life System
Press the fuel information button until ENGINE OIL LIFE
appears in the display. The GM Oil Life System shows
an estimate of the oil's remaining useful life. It will show
100% when the system is reset after an oil change. It
will alert you to change your oil on a schedule consistent
with your driving conditions.
Always reset the engine oil life after an oil change. To
reset the Oil Life System use the fuel button to reach the
ENGINE OIL LIFE screen and then press and hold
the select button for ®ve seconds while ENGINE OIL
LIFE is displayed. OIL LIFE RESET will appear on
the display for 10 seconds to let you know the system is
reset.
The DIC does not replace the need to maintain your
vehicle as recommended in the Maintenance Schedule
in this manual. Also, the oil change reminder will not
detect dusty conditions or engine malfunctions that may
affect the oil. Also, the oil change reminder does notmeasure how much oil you have in your engine. So, be
sure to check your oil level often. See
Engine Oil on
page 5-11.
Personalization Button
You can program certain features to a preferred setting
for up to two people. Press the personalization button
to scroll through the following personalization features.
All of the personalization options may not be available
on your vehicle. Only the options available will be
displayed on your DIC.
If your vehicle is not equipped with the DIC steering
wheel buttons you will not have any of the following
personalization options except for DISPLAY
LANGUAGE. See DISPLAY LANGUAGE later in this
section for more information.
·AUTOMATIC LOCKING
·AUTOMATIC UNLOCKING
·DELAYED LOCKING
·REMOTE LOCK FEEDBACK
·ALARM WARNING TYPE
·REMOTE UNLOCK FEEDBACK
·HEADLAMPS ON AT EXIT
3-50
Page 195 of 452
TURN SIGNAL ON
If a turn signal is left on for 3/4 of a mile (1.2 km), this
message will appear on the display and you will
hear a chime. Move the turn signal/multifunction lever to
the off position. Pressing the select button will
acknowledge this message and clear it from the DIC
display.
TRACTION ACTIVE
When the traction control system had detected that any
of the vehicle's wheels are slipping, the traction
control system will activate and this message will appear
on the DIC. For more information see ªTraction Assistº
in the Index.
TRANSMISSION HOT
If the transmission ¯uid temperature becomes high, the
message center will display this message.
When the transmission enters the protection mode, you
may notice a change in the transmission shifting
patterns. When the transmission ¯uid temperature
returns to normal, the display will turn off and the
transmission shifting patterns will return to normal.
Notice:If you drive your vehicle while the
transmission ¯uid is overheating and the
transmission temperature warning is displayed on
the instrument panel cluster and/or DIC, you
can damage the transmission. This could lead to
costly repairs that would not be covered by
your warranty. Do not drive your vehicle with
overheated transmission ¯uid or while transmission
temperature warning is displayed.
The following situations can cause the transmission to
operate at higher temperatures:
·Towing a trailer
·Hot outside air temperatures
·Hauling a large or heavy load
·Low transmission ¯uid level
·High transmission ¯uid level
·Restricted air ¯ow to the radiator and the auxiliary
transmission oil cooler.
A temporary solution to hotter transmission operating
temperatures may be to let the transmission cool down.
If the transmission is operated at higher temperatures
on a frequent basis, see
Scheduled Maintenance
on page 6-4for the proper transmission maintenance
intervals.
3-63
Page 251 of 452
{CAUTION:
Driving through rushing water can be
dangerous. Deep water can sweep your vehicle
downstream and you and your passengers
could drown. If it is only shallow water, it can
still wash away the ground from under your
tires, and you could lose traction and roll
the vehicle over. Do not drive through
rushing water.
See
Driving in Rain and on Wet Roads on page 4-33for
more information on driving through water.
After Off-Road Driving
Remove any brush or debris that has collected on the
underbody, chassis or under the hood. These
accumulations can be a ®re hazard.
After operation in mud or sand, have the brake linings
cleaned and checked. These substances can cause
glazing and uneven braking. Check the body structure,
steering, suspension, wheels, tires and exhaust
system for damage. Also, check the fuel lines and
cooling system for any leakage.
Your vehicle will require more frequent service due to
off-road use. Refer to the Maintenance Schedule
for additional information.
4-31
Page 288 of 452
When You Are Ready to Leave After
Parking on a Hill
1. Apply your regular brakes and hold the pedal down
while you:
·start your engine,
·shift into a gear, and
·release the parking brake.
2. Let up on the brake pedal.
3. Drive slowly until the trailer is clear of the chocks.
4. Stop and have someone pick up and store the
chocks.
Maintenance When Trailer Towing
Your vehicle will need service more often when you're
pulling a trailer. See the Maintenance Schedule for more
on this. Things that are especially important in trailer
operation are automatic transmission ¯uid (don't over®ll),
engine oil, axle lubricant, belts, cooling system and
brake system. Each of these is covered in this manual,
and the Index will help you ®nd them quickly. If
you're trailering, it's a good idea to review these sections
before you start your trip.
Check periodically to see that all hitch nuts and bolts
are tight.
4-68
Page 310 of 452
Automatic Transmission Fluid
When to Check and Change
A good time to check your automatic transmission ¯uid
level is when the engine oil is changed.
Change both the ¯uid and ®lter every 50,000 miles
(83 000 km) if the vehicle is mainly driven under one or
more of these conditions:
·In heavy city traffic where the outside temperature
regularly reaches 90ÉF (32ÉC) or higher.
·In hilly or mountainous terrain.
·When doing frequent trailer towing.
·Uses such as found in taxi, police or delivery
service.
If you do not use your vehicle under any of these
conditions, change the ¯uid and ®lter every
100,000 miles (166 000 km).
See
Scheduled Maintenance on page 6-4.
How to Check
Because this operation can be a little difficult, you may
choose to have this done at the dealership service
department.
If you do it yourself, be sure to follow all the instructions
here, or you could get a false reading on the dipstick.
Notice:Too much or too little ¯uid can damage
your transmission. Too much can mean that some
of the ¯uid could come out and fall on hot engine
part or exhaust system parts, starting a ®re.
Too little ¯uid could cause the transmission to
overheat. Be sure to get an accurate reading if you
check your transmission ¯uid.
Wait at least 30 minutes before checking the
transmission ¯uid level if you have been driving:
·When outside temperatures are above 90ÉF (32ÉC).
·At high speed for quite a while.
·In heavy traffic ± especially in hot weather.
·While pulling a trailer.
To get the right reading, the ¯uid should be at
normal operating temperature, which is 180ÉF to 200ÉF
(82ÉC to 93ÉC).
5-18
Page 312 of 452
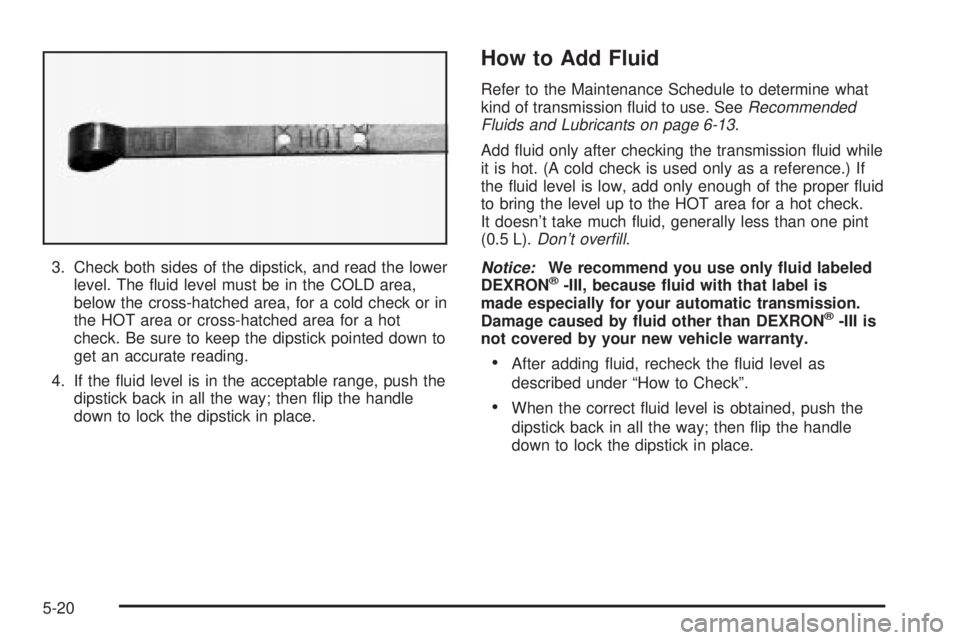
3. Check both sides of the dipstick, and read the lower
level. The ¯uid level must be in the COLD area,
below the cross-hatched area, for a cold check or in
the HOT area or cross-hatched area for a hot
check. Be sure to keep the dipstick pointed down to
get an accurate reading.
4. If the ¯uid level is in the acceptable range, push the
dipstick back in all the way; then ¯ip the handle
down to lock the dipstick in place.
How to Add Fluid
Refer to the Maintenance Schedule to determine what
kind of transmission ¯uid to use. SeeRecommended
Fluids and Lubricants on page 6-13.
Add ¯uid only after checking the transmission ¯uid while
it is hot. (A cold check is used only as a reference.) If
the ¯uid level is low, add only enough of the proper ¯uid
to bring the level up to the HOT area for a hot check.
It doesn't take much ¯uid, generally less than one pint
(0.5 L).
Don't over®ll.
Notice:
We recommend you use only ¯uid labeled
DEXRONž-III, because ¯uid with that label is
made especially for your automatic transmission.
Damage caused by ¯uid other than DEXRON
ž-III is
not covered by your new vehicle warranty.
·After adding ¯uid, recheck the ¯uid level as
described under ªHow to Checkº.
·When the correct ¯uid level is obtained, push the
dipstick back in all the way; then ¯ip the handle
down to lock the dipstick in place.
5-20
Page 329 of 452
So, it is not a good idea to ªtop offº your brake ¯uid.
Adding brake ¯uid will not correct a leak. If you add ¯uid
when your linings are worn, then you will have too
much ¯uid when you get new brake linings. You should
add (or remove) brake ¯uid, as necessary, only when
work is done on the brake hydraulic system.
{CAUTION:
If you have too much brake ¯uid, it can spill on
the engine. The ¯uid will burn if the engine is
hot enough. You or others could be burned,
and your vehicle could be damaged. Add brake
¯uid only when work is done on the brake
hydraulic system. See ªChecking Brake Fluidº
in this section.
Refer to the Maintenance Schedule to determine when
to check your brake ¯uid. See
Scheduled Maintenance
on page 6-4.
Checking Brake Fluid
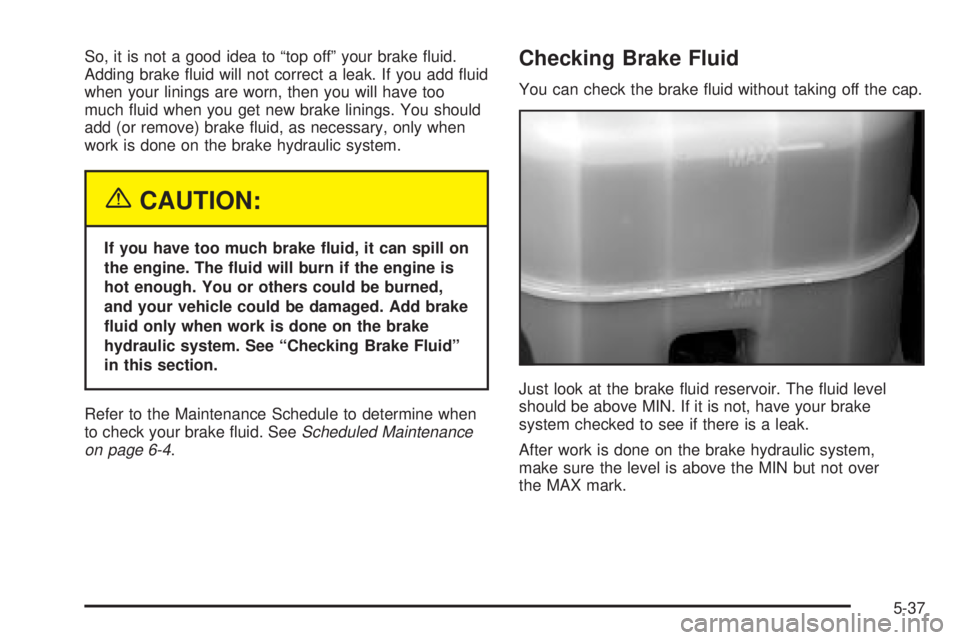
You can check the brake ¯uid without taking off the cap.
Just look at the brake ¯uid reservoir. The ¯uid level
should be above MIN. If it is not, have your brake
system checked to see if there is a leak.
After work is done on the brake hydraulic system,
make sure the level is above the MIN but not over
the MAX mark.
5-37