GMC TERRAIN 2010 Owners Manual
Manufacturer: GMC, Model Year: 2010, Model line: TERRAIN, Model: GMC TERRAIN 2010Pages: 410, PDF Size: 2.55 MB
Page 91 of 410

Storage 3-3
WARNING (Continued)
Never carry something longer or
wider than the roof rack on top of
the vehicle unless using a GM
Certified accessory carrier.
This vehicle may be equipped with a
roof rack. For roof racks that do not
have cross rails included, GM
Certified cross rails can be
purchased as an accessory. See
your dealer/retailer for additional
information.
Notice: Loading cargo on the
roof rack that weighs more than
100 kg (220 lbs) or hangs over the
rear or sides of the vehicle may
damage the vehicle. Load cargo
so that it rests evenly between
the crossrails, making sure to
fasten cargo securely. To prevent damage or loss of cargo
when driving, check to make sure
cross rails and cargo are securely
fastened. Loading cargo on the roof
rack will make the vehicle's center
of gravity higher. Avoid high speeds,
sudden starts, sharp turns, sudden
braking or abrupt maneuvers,
otherwise it may result in loss of
control. If driving for a long distance,
on rough roads, or at high speeds,
occasionally stop the vehicle to
make sure the cargo remains in its
place. Do not exceed the maximum
vehicle capacity when loading the
vehicle. For more information on
vehicle capacity and loading, see
Vehicle Load Limits on page 8‑22.
The roof rack crossrails can be
locked in four positions along the
roof rack side rails.
Page 92 of 410
3-4 Storage
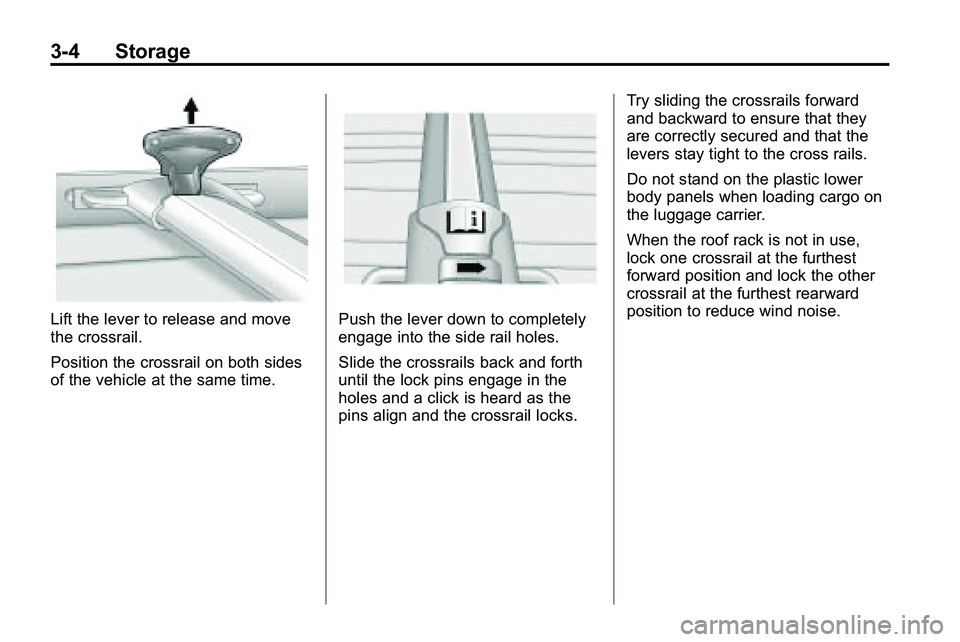
Lift the lever to release and move
the crossrail.
Position the crossrail on both sides
of the vehicle at the same time.Push the lever down to completely
engage into the side rail holes.
Slide the crossrails back and forth
until the lock pins engage in the
holes and a click is heard as the
pins align and the crossrail locks.Try sliding the crossrails forward
and backward to ensure that they
are correctly secured and that the
levers stay tight to the cross rails.
Do not stand on the plastic lower
body panels when loading cargo on
the luggage carrier.
When the roof rack is not in use,
lock one crossrail at the furthest
forward position and lock the other
crossrail at the furthest rearward
position to reduce wind noise.
Page 93 of 410
Instruments and Controls 4-1
Instruments and
Controls
Instrument Panel Overview
Instrument Panel Overview . . . . 4-4
Controls
Steering Wheel Adjustment . . . 4-6
Steering Wheel Controls . . . . . . 4-6
Horn . . . . . . . . . . . . . . . . . . . . . . . . . . 4-7
Windshield Wiper/Washer . . . . . 4-7
Rear Window Wiper/Washer . . . . . . . . . . . . . . . . . . . . . . 4-8
Compass . . . . . . . . . . . . . . . . . . . . . 4-9
Clock (With Date Display) . . . . . 4-9
Clock (Without Date Display) . . . . . . . . . . . . . . . . . . . . 4-10
Power Outlets . . . . . . . . . . . . . . . 4-10
Warning Lights, Gauges, and
Indicators
Warning Lights, Gauges, and Indicators . . . . . . . . . . . . . . . . . . . 4-11
Instrument Cluster . . . . . . . . . . . 4-12
Speedometer . . . . . . . . . . . . . . . . 4-13
Odometer . . . . . . . . . . . . . . . . . . . . 4-13
Tachometer . . . . . . . . . . . . . . . . . . 4-13
Fuel Gauge . . . . . . . . . . . . . . . . . . 4-13
Engine Coolant Temperature Gauge . . . . . . . . 4-14
Safety Belt Reminders . . . . . . . 4-14
Airbag Readiness Light . . . . . . 4-15
Passenger Airbag Status Indicator . . . . . . . . . . . . . . . . . . . . 4-15
Charging System Light . . . . . . 4-16
Malfunction Indicator Lamp . . . . . . . . . . . . . 4-17
Brake System Warning Light . . . . . . . . . . . . . . . . . . . . . . . 4-19 Antilock Brake System (ABS)
Warning Light . . . . . . . . . . . . . . 4-20
Traction Off Light . . . . . . . . . . . . 4-21
StabiliTrak®OFF Light . . . . . . . 4-21
Traction Control System
(TCS)/StabiliTrak
®Light . . . . 4-21
Tire Pressure Light . . . . . . . . . . 4-22
Engine Oil Pressure Light . . . . 4-23
Fuel Economy Light . . . . . . . . . 4-23
Low Fuel Warning Light . . . . . . 4-24
Security Light . . . . . . . . . . . . . . . . 4-24
High-Beam on Light . . . . . . . . . 4-24
Fog Lamp Light . . . . . . . . . . . . . . 4-25
Lamps on Reminder . . . . . . . . . 4-25
Cruise Control Light . . . . . . . . . 4-25
Information Displays
Driver Information Center (DIC) . . . . . . . . . . . . . . . 4-25
Page 94 of 410

4-2 Instruments and Controls
Vehicle Messages
Vehicle Messages . . . . . . . . . . . 4-29
Battery Voltage and ChargingMessages . . . . . . . . . . . . . . . . . . 4-29
Brake System Messages . . . . 4-30
Compass Messages . . . . . . . . . 4-30
Cruise Control Messages . . . . 4-30
Door Ajar Messages . . . . . . . . . 4-30
Engine Cooling System Messages . . . . . . . . . . . . . . . . . . 4-31
Engine Oil Messages . . . . . . . . 4-31
Engine Power Messages . . . . 4-32
Fuel System Messages . . . . . . 4-32
Key and Lock Messages . . . . . 4-33 Object Detection System
Messages . . . . . . . . . . . . . . . . . . 4-33
Ride Control System Messages . . . . . . . . . . . . . . . . . . 4-33
Airbag System Messages . . . . 4-34
Safety Belt Messages . . . . . . . 4-34
Anti-Theft Alarm System
Messages . . . . . . . . . . . . . . . . . . 4-34
Service Vehicle Messages . . . 4-34
Tire Messages . . . . . . . . . . . . . . . 4-35
Transmission Messages . . . . . 4-35
Vehicle Reminder Messages . . . . . . . . . . . . . . . . . . 4-36
Washer Fluid Messages . . . . . 4-36
Vehicle Personalization
Vehicle Personalization . . . . . . 4-36
OnStar®System
OnStar®System . . . . . . . . . . . . . 4-41
Page 95 of 410
Instruments and Controls 4-3
2NOTES
Page 96 of 410
4-4 Instruments and Controls
Instrument Panel Overview
Page 97 of 410

Instruments and Controls 4-5
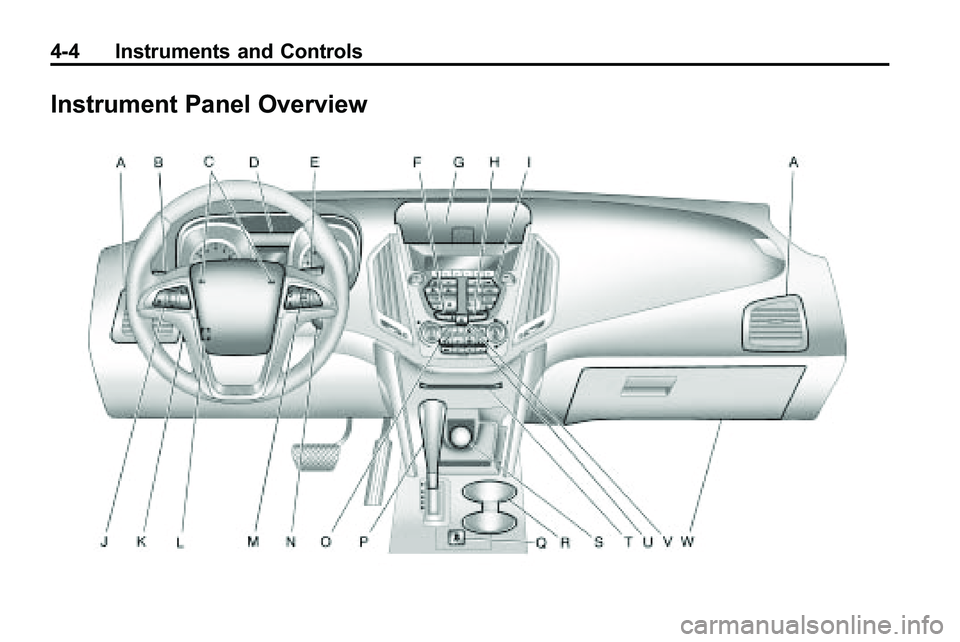
A.Air Vents on page 7‑6.
B. Turn and Lane-Change Signals
on page 5‑3.Exterior Lamp
Controlson page 5‑1. Fog
Lamps on page 5‑3.
C. Horn on page 4‑7.
D. Instrument Cluster
on
page 4‑12.
E. Windshield Wiper/Washer
on
page 4‑7. Rear Window
Wiper/Washer on page 4‑8.
F. Power Door Locks
on
page 1‑7.
G. Instrument Panel Storage
on
page 3‑1. H.
Safety Locks on page 1‑8.
I. AM-FM Radio on page 6‑11.
J. Cruise Control
on page 8‑44.
K. Instrument Panel Illumination
Control
on page 5‑4.
L. Steering Wheel Adjustment
on
page 4‑6.
M. Steering Wheel Controls
on
page 4‑6.
N. Ignition Positions on page 8‑28.
O. Climate Control Systems
on
page 7‑1or Automatic Climate
Control System on page 7‑3.
P. Shift Lever. See Automatic
Transmission on page 8‑35. Q.
StabiliTrak System
on
page 8‑42.
R. Cupholders on page 3‑1.
S. Power Outlets on page 4‑10.
T. CD/DVD Player Slot. See CD
Player
on page 6‑18or
CD/DVD Player on page 6‑21.
U. Driver Information Center (DIC) Buttons. See Driver Information
Center (DIC) on page 4‑25.
V. Hazard Warning Flashers
on
page 5‑3.
W. Glove Box on page 3‑1.
Page 98 of 410
4-6 Instruments and Controls
Controls
Steering Wheel
Adjustment
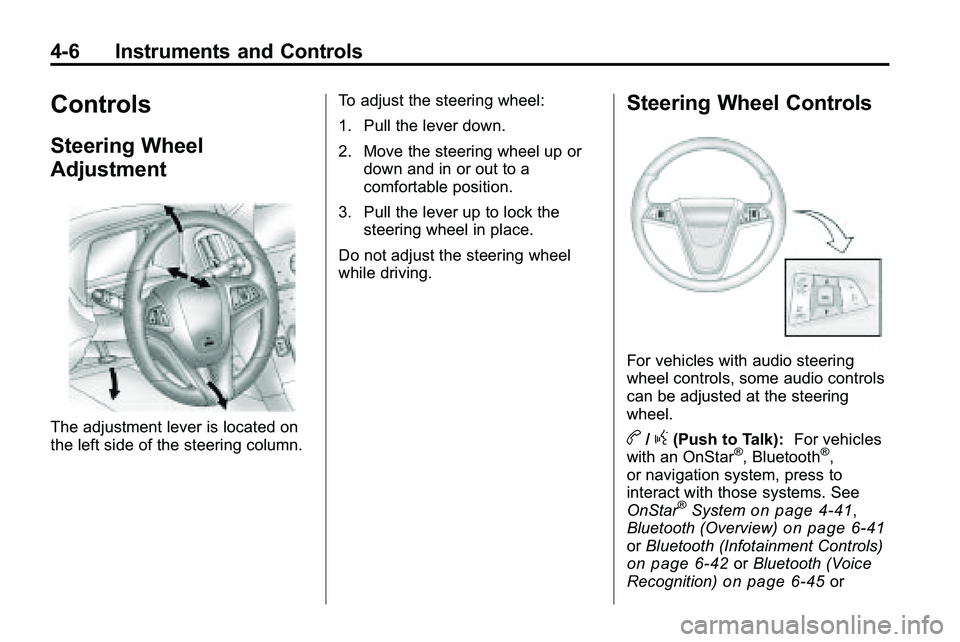
The adjustment lever is located on
the left side of the steering column.To adjust the steering wheel:
1. Pull the lever down.
2. Move the steering wheel up or
down and in or out to a
comfortable position.
3. Pull the lever up to lock the steering wheel in place.
Do not adjust the steering wheel
while driving.
Steering Wheel Controls
For vehicles with audio steering
wheel controls, some audio controls
can be adjusted at the steering
wheel.
b/g(Push to Talk): For vehicles
with an OnStar®, Bluetooth®,
or navigation system, press to
interact with those systems. See
OnStar
®Systemon page 4‑41,
Bluetooth (Overview)on page 6‑41or Bluetooth (Infotainment Controls)on page 6‑42orBluetooth (Voice
Recognition)on page 6‑45or
Page 99 of 410
Instruments and Controls 4-7
Bluetooth (Navigation)on
page 6‑56, or the separate
navigation manual for more
information.
$/c(Mute/End Call): Press to
silence the vehicle speakers only.
Press again to turn the sound on.
For vehicles with OnStar or
Bluetooth systems, press to
reject an incoming call, or end a
current call.
_SRC^(Toggle Switch): Press
to select an audio source.
Toggle up or down to select the next
or previous favorite radio station or
CD track, DVD, if equipped, track,
or MP3 track.
+
x− (Volume): Press + to
increase the volume, press −to
decrease the volume.
Horn
Press near the horn symbols or
press on the steering wheel pad to
sound the horn.
Windshield Wiper/Washer
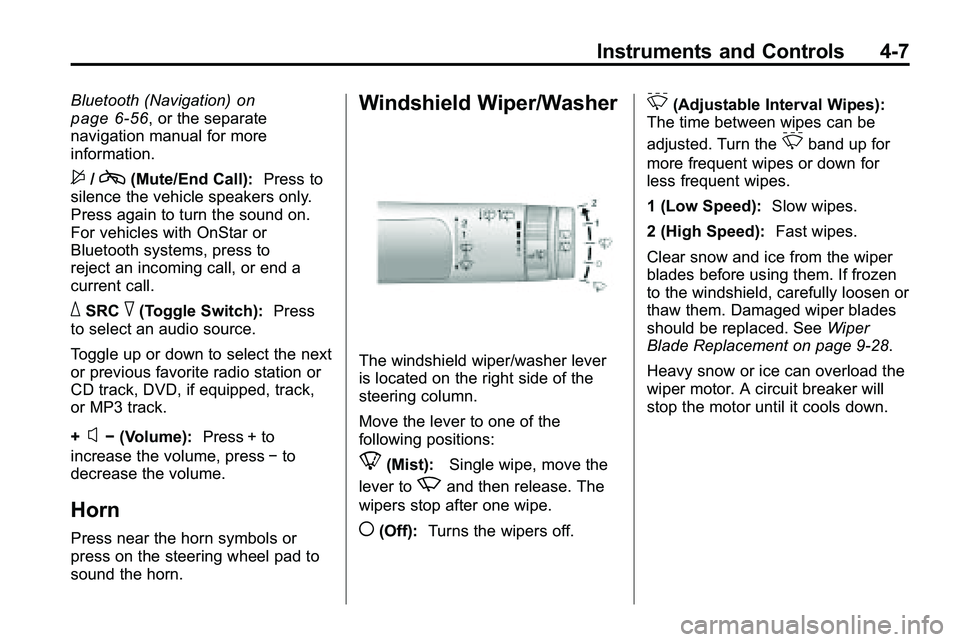
The windshield wiper/washer lever
is located on the right side of the
steering column.
Move the lever to one of the
following positions:
8(Mist): Single wipe, move the
lever to
zand then release. The
wipers stop after one wipe.
((Off): Turns the wipers off.
&(Adjustable Interval Wipes):
The time between wipes can be
adjusted. Turn the
&band up for
more frequent wipes or down for
less frequent wipes.
1 (Low Speed): Slow wipes.
2 (High Speed): Fast wipes.
Clear snow and ice from the wiper
blades before using them. If frozen
to the windshield, carefully loosen or
thaw them. Damaged wiper blades
should be replaced. See Wiper
Blade Replacement on page 9‑28.
Heavy snow or ice can overload the
wiper motor. A circuit breaker will
stop the motor until it cools down.
Page 100 of 410
4-8 Instruments and Controls
Windshield Washer
Pull the lever toward you to spray
washer fluid on the windshield. The
spray continues until the lever is
released. The wipers will run a few
times. SeeWasher Fluid
on
page 9‑22for information on filling
the windshield washer fluid
reservoir.
{WARNING
In freezing weather, do not use
your washer until the windshield
is warmed. Otherwise the washer
fluid can form ice on the
windshield, blocking your vision.
Rear Window
Wiper/Washer
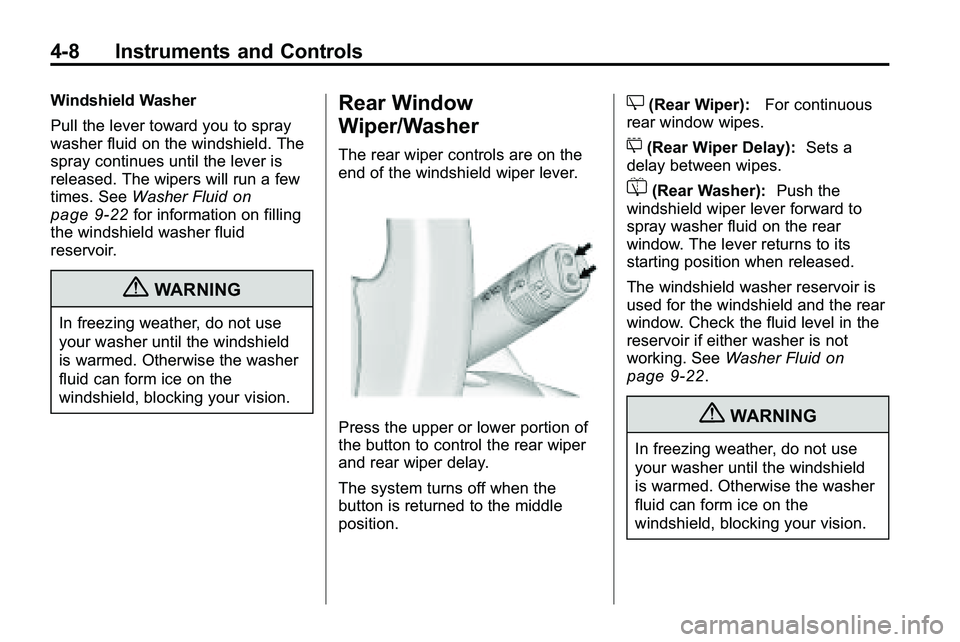
The rear wiper controls are on the
end of the windshield wiper lever.
Press the upper or lower portion of
the button to control the rear wiper
and rear wiper delay.
The system turns off when the
button is returned to the middle
position.
Z(Rear Wiper): For continuous
rear window wipes.
5(Rear Wiper Delay): Sets a
delay between wipes.
=(Rear Washer): Push the
windshield wiper lever forward to
spray washer fluid on the rear
window. The lever returns to its
starting position when released.
The windshield washer reservoir is
used for the windshield and the rear
window. Check the fluid level in the
reservoir if either washer is not
working. See Washer Fluid
on
page 9‑22.
{WARNING
In freezing weather, do not use
your washer until the windshield
is warmed. Otherwise the washer
fluid can form ice on the
windshield, blocking your vision.