service GMC TERRAIN 2010 Service Manual
[x] Cancel search | Manufacturer: GMC, Model Year: 2010, Model line: TERRAIN, Model: GMC TERRAIN 2010Pages: 410, PDF Size: 2.55 MB
Page 216 of 410

8-8 Driving and Operating
Many of the vehicle design features
that help make the vehicle more
responsive on paved roads during
poor weather conditions also help
make it better suited for off‐road use
than conventional passenger
vehicles. The vehicle does not have
features usually thought to be
necessary for extended or severe
off‐road use such as special
underbody shielding and transfer
case low gear range.
The airbag system is designed to
work properly under a wide range of
conditions, including off‐road usage.
Always wear your safety belt and
observe safe driving speeds,
especially on rough terrain.
Drinking and driving can be very
dangerous on any road and this is
certainly true for off-road driving.
At the very time you need special
alertness and driving skills, your
reflexes, perceptions, and judgmentcan be affected by even a small
amount of alcohol. You could have a
serious
—or even fatal —accident
if you drink and drive or ride with a
driver who has been drinking.
Off-roading can be great fun but has
some definite hazards. The greatest
of these is the terrain itself. When
off-road driving, traffic lanes are not
marked, curves are not banked, and
there are no road signs. Surfaces
can be slippery, rough, uphill,
or downhill.
Avoid sharp turns and abrupt
maneuvers. Failure to operate the
vehicle correctly off‐road could
result in loss of vehicle control or
vehicle rollover.
Off-roading involves some new
skills. That is why it is very
important that you read these
driving tips and suggestions to help
make off-road driving safer and
more enjoyable.Before You Go Off-Roading
.Have all necessary maintenance
and service work done.
.Make sure there is enough fuel,
that fluid levels are where they
should be, and that the spare
tire is fully inflated.
.Be sure to read all the
information about all-wheel-drive
vehicles in this manual.
.Make sure all underbody
shields, if the vehicle has them,
are properly attached.
.Know the local laws that apply to
off-roading where you will be
driving or check with law
enforcement people in the area.
.Be sure to get the necessary
permission if you will be on
private land.
Page 225 of 410

Driving and Operating 8-17
Driving in Water
{WARNING
Driving through rushing water can
be dangerous. Deep water can
sweep your vehicle downstream
and you and your passengers
could drown. If it is only shallow
water, it can still wash away the
ground from under your tires, and
you could lose traction and roll
the vehicle over. Do not drive
through rushing water.
Heavy rain can mean flash flooding,
and flood waters demand extreme
caution. Find out how deep the water is
before driving through it. Do not try
it if it is deep enough to cover the
wheel hubs, axles, or exhaust
pipe
—you probably will not get
through. Deep water can damage
the axle and other vehicle parts.
If the water is not too deep, drive
slowly through it. At faster speeds,
water splashes on the ignition
system and the vehicle can stall.
Stalling can also occur if you get the
tailpipe under water. If the tailpipe is
under water, you will never be able
to start the engine. When going
through water, remember that when
the brakes get wet, it might take
longer to stop. See Driving on Wet
Roads on page 8‑18.
After Off-Road Driving
Remove any brush or debris that
has collected on the underbody,
chassis, or under the hood. These
accumulations can be a fire hazard.
After operation in mud or sand,
have the brake linings cleaned and
checked. These substances can
cause glazing and uneven braking.
Check the body structure, steering,
suspension, wheels, tires, axles,
and exhaust system for damage and
check the fuel lines and cooling
system for any leakage.
The vehicle requires more frequent
service due to off-road use. Refer to
the Maintenance Schedule for
additional information.
Page 227 of 410

Driving and Operating 8-19
.Keep your eyes moving—scan
the road ahead and to the sides.
.Check the rearview mirror and
vehicle instruments often.
Hill and Mountain Roads
Driving on steep hills or through
mountains is different than driving
on flat or rolling terrain. Tips for
driving in these conditions include:
.Keep the vehicle serviced and in
good shape.
.Check all fluid levels and brakes,
tires, cooling system, and
transmission.
.Going down steep or long hills,
shift to a lower gear.
{WARNING
If you do not shift down, the
brakes could get so hot that they
would not work well. You would
then have poor braking or even
none going down a hill. You could
crash. Shift down to let the engine
assist the brakes on a steep
downhill slope.
{WARNING
Coasting downhill in N (Neutral)
or with the ignition off is
dangerous. The brakes will have
to do all the work of slowing down
and they could get so hot that
(Continued)
WARNING (Continued)
they would not work well. You
would then have poor braking or
even none going down a hill. You
could crash. Always have the
engine running and the vehicle in
gear when going downhill.
.Stay in your own lane. Do not
swing wide or cut across the
center of the road. Drive at
speeds that let you stay in your
own lane.
.Top of hills: Be alert—
something could be in your lane
(stalled car, accident).
.Pay attention to special road
signs (falling rocks area, winding
roads, long grades, passing or
no-passing zones) and take
appropriate action.
Page 236 of 410
8-28 Driving and Operating
Ignition Positions
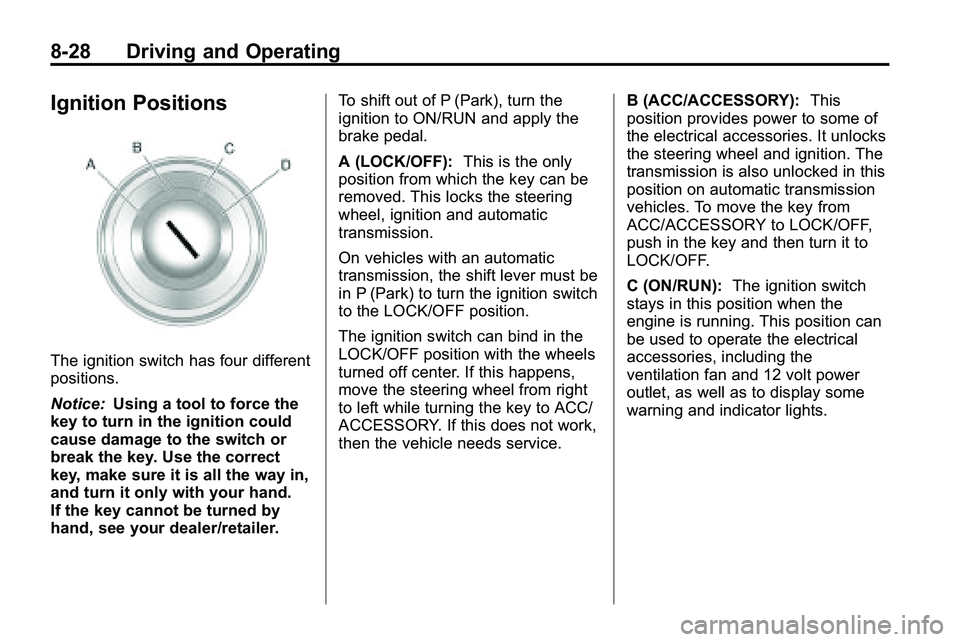
The ignition switch has four different
positions.
Notice:Using a tool to force the
key to turn in the ignition could
cause damage to the switch or
break the key. Use the correct
key, make sure it is all the way in,
and turn it only with your hand.
If the key cannot be turned by
hand, see your dealer/retailer. To shift out of P (Park), turn the
ignition to ON/RUN and apply the
brake pedal.
A (LOCK/OFF):
This is the only
position from which the key can be
removed. This locks the steering
wheel, ignition and automatic
transmission.
On vehicles with an automatic
transmission, the shift lever must be
in P (Park) to turn the ignition switch
to the LOCK/OFF position.
The ignition switch can bind in the
LOCK/OFF position with the wheels
turned off center. If this happens,
move the steering wheel from right
to left while turning the key to ACC/
ACCESSORY. If this does not work,
then the vehicle needs service. B (ACC/ACCESSORY):
This
position provides power to some of
the electrical accessories. It unlocks
the steering wheel and ignition. The
transmission is also unlocked in this
position on automatic transmission
vehicles. To move the key from
ACC/ACCESSORY to LOCK/OFF,
push in the key and then turn it to
LOCK/OFF.
C (ON/RUN): The ignition switch
stays in this position when the
engine is running. This position can
be used to operate the electrical
accessories, including the
ventilation fan and 12 volt power
outlet, as well as to display some
warning and indicator lights.
Page 241 of 410
Driving and Operating 8-33
Torque Lock
Torque lock is when the weight
of the vehicle puts too much force
on the parking pawl in the
transmission. This happens when
parking on a hill and shifting the
transmission into P (Park) is not
done properly and then it is difficult
to shift out of P (Park). To prevent
torque lock, set the parking brake
and then shift into P (Park). To find
out how, see“Shifting Into Park”
listed previously.
If torque lock does occur, the
vehicle may need to be pushed
uphill by another vehicle to relieve
the parking pawl pressure, so you
can shift out of P (Park).
Shifting Out of Park
To shift out of P (Park):
1. Apply the brake pedal.
2. Press the shift lever button.
3. Move the shift lever.
If you still are unable to shift out of
P (Park):
1. Fully release the shift lever button.
2. Hold the brake pedal down and press the shift lever button
again.
3. Move the shift lever.
If you still cannot move the shift
lever from P (Park), see your dealer/
retailer for service.
Parking Over Things
That Burn
{WARNING
Things that can burn could touch
hot exhaust parts under the
vehicle and ignite. Do not park
over papers, leaves, dry grass,
or other things that can burn.
Page 245 of 410
Driving and Operating 8-37
Notice:If the vehicle seems to
accelerate slowly or not shift
gears when you go faster, and
you continue to drive the vehicle
that way, you could damage the
transmission. Have the vehicle
serviced right away. You can
drive in L (Low) when you are
driving less than 56 km/h (35 mph)
and D (Drive) for higher speeds
until then.
M (Manual Mode): Allows the
driver to select the range of gear
positions. If the vehicle has this
feature, see Manual Mode
on
page 8‑37.
Manual Mode
Electronic Range Select
(ERS) Mode
ERS or manual mode allows for the
selection of the range of gear
positions. Use this mode when
driving down hill or towing a trailer
to limit the top gear and vehicle
speed. The shift position indicator
within the Driver Information Center
(DIC) will display a number next to
the M indicating the highest
available gear under manual mode
and the driving conditions when
manual mode was selected.
To use this feature:
1. Move the shift lever to M (Manual Mode).
2. Press the plus/minus button on the shift lever, to increase or
decrease the gear range
available. When shifting to M (Manual Mode),
the transmission will shift to a preset
lower gear range. For this preset
range, the highest gear available is
displayed next to the M in the DIC.
See
Driver Information Center (DIC)
on page 4‑25for more information.
All gears below that number are
available to use. For example, when
4 (Fourth) is shown next to the M,
1 (First) through 4 (Fourth) gears are
shifted automatically. To shift to
5 (Fifth) gear, press the + (Plus)
button or shift into D (Drive).
M (Manual Mode) will prevent
shifting to a lower gear range if the
engine speed is too high. If vehicle
speed is not reduced within the time
allowed, the lower gear range shift
will not be completed. Slow the
vehicle, then press the −(Minus)
button to the desired lower gear
range.
While using the ERS, cruise control
can be used.
Page 251 of 410
Driving and Operating 8-43
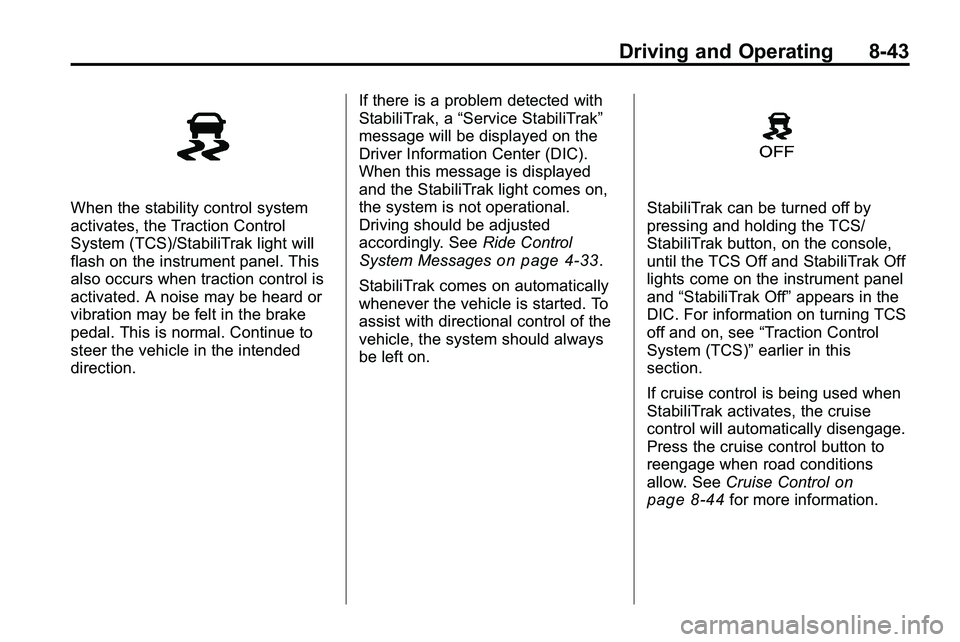
When the stability control system
activates, the Traction Control
System (TCS)/StabiliTrak light will
flash on the instrument panel. This
also occurs when traction control is
activated. A noise may be heard or
vibration may be felt in the brake
pedal. This is normal. Continue to
steer the vehicle in the intended
direction.If there is a problem detected with
StabiliTrak, a
“Service StabiliTrak”
message will be displayed on the
Driver Information Center (DIC).
When this message is displayed
and the StabiliTrak light comes on,
the system is not operational.
Driving should be adjusted
accordingly. See Ride Control
System Messages
on page 4‑33.
StabiliTrak comes on automatically
whenever the vehicle is started. To
assist with directional control of the
vehicle, the system should always
be left on.
StabiliTrak can be turned off by
pressing and holding the TCS/
StabiliTrak button, on the console,
until the TCS Off and StabiliTrak Off
lights come on the instrument panel
and “StabiliTrak Off” appears in the
DIC. For information on turning TCS
off and on, see “Traction Control
System (TCS)” earlier in this
section.
If cruise control is being used when
StabiliTrak activates, the cruise
control will automatically disengage.
Press the cruise control button to
reengage when road conditions
allow. See Cruise Control
on
page 8‑44for more information.
Page 260 of 410

8-52 Driving and Operating
Guidelines
The RVC system has a guideline
overlay that can help the driver align
the vehicle when backing into a
parking spot.
To turn the guidelines on or off:
1. Shift into P (Park).
2. Press the CONFIG button.
3. Select Display.
4. Select Guidelines. When acheck mark appears next to the
Guidelines option, guidelines will
appear.
Rear Vision Camera Error
Messages
SERVICE REAR VISION CAMERA
SYSTEM: This message can
display on the navigation screen
when the system is not receiving
information it requires from other
vehicle systems.
If any other problem occurs or if a
problem persists, see your dealer/
retailer.Rear Vision Camera Location
The camera is located above the
license plate.
The area displayed by the camera is
limited.
It does not display objects that are
close to either corner or under the
bumper and can vary depending on
vehicle orientation or road
conditions. The distance of the
image that appears on the screen is
different from the actual distance. The following illustration shows the
field of view that the camera
provides.
Page 262 of 410
8-54 Driving and Operating
Fuel
Use of the recommended fuel
is an important part of the proper
maintenance of this vehicle. To help
keep the engine clean and maintain
optimum vehicle performance, we
recommend the use of gasoline
advertised as TOP TIER Detergent
Gasoline.
Look for the TOP TIER label on the
fuel pump to ensure gasoline meets
enhanced detergency standards
developed by auto companies. A list
of marketers providing TOP TIER
Detergent Gasoline can be found at
www.toptiergas.com.
Recommended Fuel
Use regular unleaded gasoline with
a posted octane rating of 87 or
higher. If the octane rating is less
than 87, an audible knocking noise,
commonly referred to as spark
knock, might be heard when driving.
If this occurs, use a gasoline rated
at 87 octane or higher as soon as
possible. If heavy knocking is heard
when using gasoline rated at
87 octane or higher, the engine
needs service.
Gasoline Specifications
At a minimum, gasoline should
meet ASTM specification D 4814in the United States or CAN/
CGSB‐3.5 or 3.511 in Canada.
Some gasolines contain an
octane-enhancing additive called
methylcyclopentadienyl manganese
tricarbonyl (MMT). We recommend
against the use of gasolines
containing MMT. See Fuel
Additives
on page 8‑55for
additional information.
Page 264 of 410
8-56 Driving and Operating
Gasolines containing oxygenates,
such as ethers and ethanol, and
reformulated gasolines might be
available in your area. We
recommend that you use these
gasolines, if they comply with the
specifications described earlier.
However, E85 (85% ethanol) and
other fuels containing more than
10% ethanol must not be used in
vehicles that were not designed for
those fuels.
Notice:This vehicle was not
designed for fuel that contains
methanol. Do not use fuel
containing methanol. It can
corrode metal parts in the fuel
system and also damage plastic
and rubber parts. That damage
would not be covered under the
vehicle warranty.
Some gasolines that are
not reformulated for low
emissions can contain an
octane-enhancing additive called
methylcyclopentadienyl manganese tricarbonyl (MMT); ask the attendant
where you buy gasoline whether the
fuel contains MMT. We recommend
against the use of such gasolines.
Fuels containing MMT can reduce
the life of spark plugs and the
performance of the emission control
system could be affected. The
malfunction indicator lamp might
turn on. If this occurs, return to your
dealer/retailer for service.
Filling the Tank
{WARNING
Fuel vapor burns violently and a
fuel fire can cause bad injuries.
To help avoid injuries to you and
others, read and follow all the
instructions on the fuel pump
island. Turn off the engine when
refueling. Do not smoke near fuel
or when refueling the vehicle. Do
not use cellular phones. Keep
(Continued)
WARNING (Continued)
sparks, flames, and smoking
materials away from fuel. Do not
leave the fuel pump unattended
when refueling the vehicle. This is
against the law in some places.
Do not re-enter the vehicle while
pumping fuel. Keep children away
from the fuel pump; never let
children pump fuel.
The fuel cap is behind the fuel door
on the vehicle's passenger side.
Turn the fuel cap counterclockwise
to remove. Do not release the cap
too soon or it will spring back.
Reinstall the cap by turning it
clockwise until it clicks.
If the cap is not properly installed,
the Malfunction Indicator Lamp
come on. See Malfunction Indicator
Lamp
on page 4‑17for more
information.