Menu GMC TERRAIN 2015 Owner's Manual
[x] Cancel search | Manufacturer: GMC, Model Year: 2015, Model line: TERRAIN, Model: GMC TERRAIN 2015Pages: 357, PDF Size: 4.04 MB
Page 24 of 357

Black plate (17,1)GMC Terrain/Terrain Denali Owner Manual (GMNA-Localizing-U.S./Canada/
Mexico-7707484) - 2015 - crc - 10/1/14
In Brief 1-17
Cruise Control
o:Press to turn the cruise control
system on and off.
n: Press to disengage cruise
control without erasing the set
speed from memory.
RES/+: If there is a set speed in
memory, move the thumbwheel up
briefly to resume to that speed or
hold upward to accelerate. If cruise
control is already active, use to
increase vehicle speed. SET/−:
Move the thumbwheel down
briefly to set the speed and activate
cruise control. If cruise control is
already active, use to decrease
speed.
See Cruise Control on page 9-34.
Driver Information
Center (DIC)
The DIC display is in the center of
the instrument cluster. It shows the
status of many vehicle systems.
The DIC buttons are below the
climate control system. MENU:
Press this button to get to
the Trip/Fuel Menu and the Vehicle
Information Menu.
QorR: Use these buttons to
scroll through the items in each
menu. A small marker will move
along the page as you scroll through
the items. This shows where each
page is in the menu.
SET/CLR: Use this button to set or
clear the menu item when it is
displayed.
See Driver Information Center (DIC)
on page 5-20.
Forward Collision Alert
(FCA) System
If equipped, FCA may help avoid or
reduce the harm caused by
front-end crashes. FCA provides a
green indicator,
V, when a vehicle
is detected ahead. When
approaching a vehicle ahead too
quickly, FCA provides a red flashing
Page 27 of 357
Black plate (20,1)GMC Terrain/Terrain Denali Owner Manual (GMNA-Localizing-U.S./Canada/
Mexico-7707484) - 2015 - crc - 10/1/14
1-20 In Brief
.To turn off both Traction Control
and StabiliTrak, press and
hold
guntilgandiilluminate
and the appropriate DIC
message displays. See Ride
Control System Messages on
page 5-28.
.Pressgagain to turn on both
systems.
See Traction Control/Electronic
Stability Control on page 9-32.
Tire Pressure Monitor
This vehicle may have a Tire
Pressure Monitor System (TPMS).
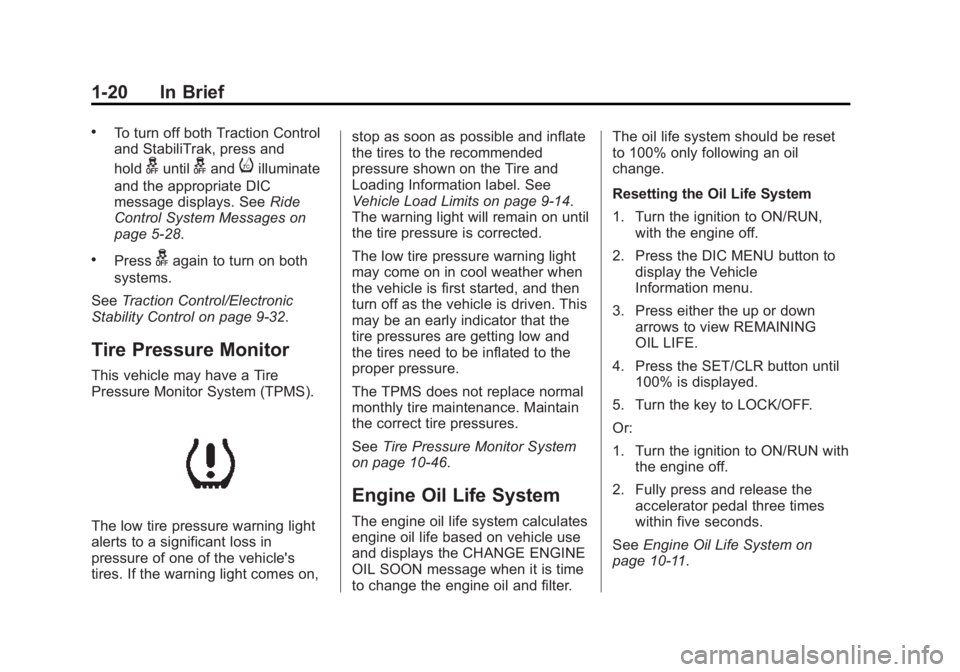
The low tire pressure warning light
alerts to a significant loss in
pressure of one of the vehicle's
tires. If the warning light comes on, stop as soon as possible and inflate
the tires to the recommended
pressure shown on the Tire and
Loading Information label. See
Vehicle Load Limits on page 9-14.
The warning light will remain on until
the tire pressure is corrected.
The low tire pressure warning light
may come on in cool weather when
the vehicle is first started, and then
turn off as the vehicle is driven. This
may be an early indicator that the
tire pressures are getting low and
the tires need to be inflated to the
proper pressure.
The TPMS does not replace normal
monthly tire maintenance. Maintain
the correct tire pressures.
See
Tire Pressure Monitor System
on page 10-46.
Engine Oil Life System
The engine oil life system calculates
engine oil life based on vehicle use
and displays the CHANGE ENGINE
OIL SOON message when it is time
to change the engine oil and filter. The oil life system should be reset
to 100% only following an oil
change.
Resetting the Oil Life System
1. Turn the ignition to ON/RUN,
with the engine off.
2. Press the DIC MENU button to display the Vehicle
Information menu.
3. Press either the up or down arrows to view REMAINING
OIL LIFE.
4. Press the SET/CLR button until 100% is displayed.
5. Turn the key to LOCK/OFF.
Or:
1. Turn the ignition to ON/RUN with the engine off.
2. Fully press and release the accelerator pedal three times
within five seconds.
See Engine Oil Life System on
page 10-11.
Page 56 of 357
Black plate (7,1)GMC Terrain/Terrain Denali Owner Manual (GMNA-Localizing-U.S./Canada/
Mexico-7707484) - 2015 - crc - 10/1/14
Seats and Restraints 3-7
turned off. These automatically
stored positions are referred to as
RKE Memory positions. See
Remote Keyless Entry (RKE)
System Operation on page 2-3.
Storing Button Memory Positions
To save positions into Button
Memory:
1. Adjust the driver seat, seatbackrecliner, and both outside mirrors
to the desired driving positions.
2. Press and hold MEM (Memory) and “1”at the same time until a
beep sounds.
3. Repeat Steps 1 and 2 for a second driver using “2.”
Recalling Button Memory
Positions
To recall the Button Memory
positions, press and hold “1”or“2.”
The driver seat and outside mirrors
move to the positions stored to
those buttons when pressed. Releasing
“1”or“2” before the
stored positions are reached stops
the recall.
If something has blocked the driver
seat while recalling a memory
position, the recall may stop.
Remove the obstruction; then press
and hold the appropriate manual
control for the memory item that is
not recalling for two seconds. Try
recalling the memory position again
by pressing the appropriate memory
button. If the memory position is still
not recalling, see your dealer for
service.
Recalling RKE Memory Positions
(Memory Remote Recall)
The Memory Remote Recall feature
can recall the driver seat and
outside mirrors to previously stored
RKE Memory positions when
entering the vehicle.
Every time the ignition is turned off,
the positions of the driver seat and
outside mirrors are automatically
stored to the RKE transmitter that
was used to start the vehicle. These positions are called RKE Memory
positions and may be different than
the previously mentioned Button
Memory positions saved to the
“1”
or“2” buttons. To recall RKE
Memory positions, unlock the driver
door with the RKE transmitter and
open the driver door. If the driver
door is already open, pressing the
RKE transmitter
Kbutton will also
activate the RKE Memory recall.
The driver seat and outside mirrors
will move to the previously saved
RKE Memory positions.
This feature is turned on or off using
the vehicle personalization menu.
See Vehicle Personalization on
page 5-31.
To stop recall movement, press any
of the memory, power mirror,
or power seat controls.
If something has blocked the driver
seat while recalling a memory
position, the recall may stop.
Remove the obstruction; then press
and hold the appropriate manual
control for the memory item that is
Page 57 of 357

Black plate (8,1)GMC Terrain/Terrain Denali Owner Manual (GMNA-Localizing-U.S./Canada/
Mexico-7707484) - 2015 - crc - 10/1/14
3-8 Seats and Restraints
not recalling for two seconds. Try
recalling the memory position again
by opening the driver door and
pressing the
Kon the RKE
transmitter.
RKE transmitters are not labeled
with a number. If your memory seat
position is stored to "1" or "2" but
this position is not automatically
recalling, then change the stored
position or switch RKE transmitters
with the other driver.
If the memory position is still not
recalling, see your dealer for
service.
Easy Exit Driver Seat
This feature moves the seat
rearward allowing the driver more
room to exit the vehicle.
To activate, turn the ignition off and
open the driver door. If the driver
door is already open, turning the
ignition off will activate the recall. This feature can be turned on or off
using the vehicle personalization
menu. See
Vehicle Personalization
on page 5-31.
To stop recall movement, press one
of the memory or power seat
controls.
If something has blocked the driver
seat while recalling the exit position,
the recall may stop. Remove the
obstruction; then press and hold the
power seat control rearward for
two seconds. Try recalling the exit
position again. If the exit position is
still not recalling, see your dealer for
service.
Heated Front Seats
{Warning
If you cannot feel temperature
change or pain to the skin, the
seat heater may cause burns. To
reduce the risk of burns, people
with such a condition should use
care when using the seat heater,
especially for long periods of
time. Do not place anything on
the seat that insulates against
heat, such as a blanket, cushion,
cover, or similar item. This may
cause the seat heater to
overheat. An overheated seat
heater may cause a burn or may
damage the seat.
Page 109 of 357
Black plate (4,1)GMC Terrain/Terrain Denali Owner Manual (GMNA-Localizing-U.S./Canada/
Mexico-7707484) - 2015 - crc - 10/1/14
5-4 Instruments and Controls
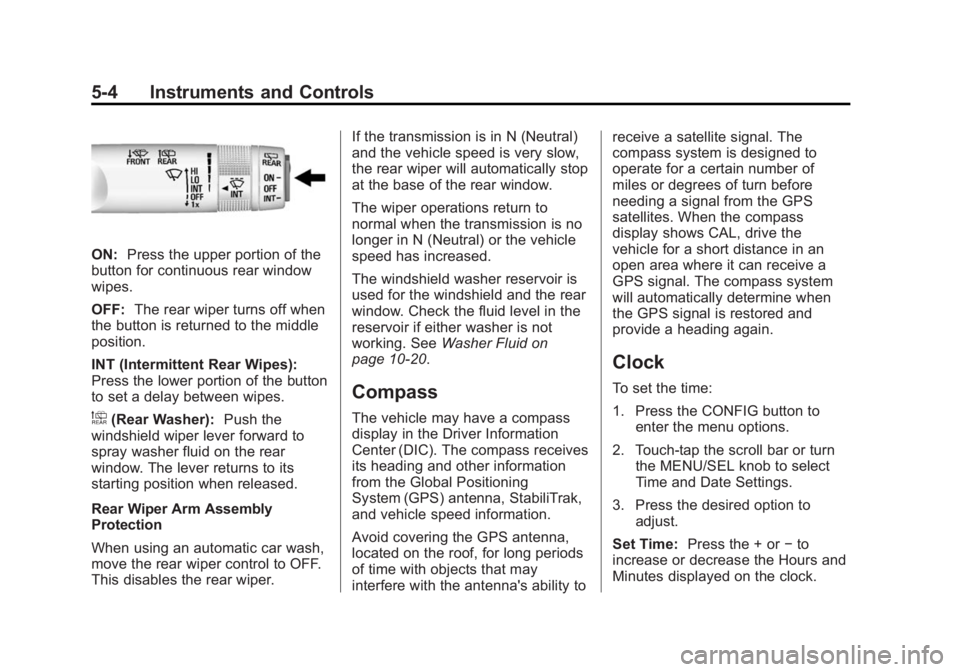
ON:Press the upper portion of the
button for continuous rear window
wipes.
OFF: The rear wiper turns off when
the button is returned to the middle
position.
INT (Intermittent Rear Wipes):
Press the lower portion of the button
to set a delay between wipes.
a(Rear Washer): Push the
windshield wiper lever forward to
spray washer fluid on the rear
window. The lever returns to its
starting position when released.
Rear Wiper Arm Assembly
Protection
When using an automatic car wash,
move the rear wiper control to OFF.
This disables the rear wiper. If the transmission is in N (Neutral)
and the vehicle speed is very slow,
the rear wiper will automatically stop
at the base of the rear window.
The wiper operations return to
normal when the transmission is no
longer in N (Neutral) or the vehicle
speed has increased.
The windshield washer reservoir is
used for the windshield and the rear
window. Check the fluid level in the
reservoir if either washer is not
working. See
Washer Fluid on
page 10-20.
Compass
The vehicle may have a compass
display in the Driver Information
Center (DIC). The compass receives
its heading and other information
from the Global Positioning
System (GPS) antenna, StabiliTrak,
and vehicle speed information.
Avoid covering the GPS antenna,
located on the roof, for long periods
of time with objects that may
interfere with the antenna's ability to receive a satellite signal. The
compass system is designed to
operate for a certain number of
miles or degrees of turn before
needing a signal from the GPS
satellites. When the compass
display shows CAL, drive the
vehicle for a short distance in an
open area where it can receive a
GPS signal. The compass system
will automatically determine when
the GPS signal is restored and
provide a heading again.
Clock
To set the time:
1. Press the CONFIG button to
enter the menu options.
2. Touch-tap the scroll bar or turn the MENU/SEL knob to select
Time and Date Settings.
3. Press the desired option to adjust.
Set Time: Press the + or −to
increase or decrease the Hours and
Minutes displayed on the clock.
Page 126 of 357

Black plate (21,1)GMC Terrain/Terrain Denali Owner Manual (GMNA-Localizing-U.S./Canada/
Mexico-7707484) - 2015 - crc - 10/1/14
Instruments and Controls 5-21
DIC Buttons
MENU:Press this button to get to
the Trip/Fuel Menu and the Vehicle
Information Menu.
QorR: Use these buttons to
scroll through the items in each
menu. A small marker will move
along the page as you scroll through
the items. This shows where each
page is in the menu.
SET/CLR (Set/Clear): Use this
button to set or clear the menu item
when it is displayed.
Trip/Fuel Menu Items
Press the MENU button until Trip/
Fuel Information Menu is displayed.
Then press
Rto scroll through the
following menu items:
.Digital Speedometer
.Trip 1
.Trip 2
.Fuel Range
.Average Fuel Economy
.Best Average Fuel Economy
.Average Vehicle Speed
.Timer
.Navigation
.Blank Display
Digital Speedometer
The speedometer shows how fast
the vehicle is moving in either
kilometers per hour (km/h) or miles
per hour (mph). The speedometer
cannot be reset. Trip 1 and Trip 2
This display shows the current
distance traveled, in either
kilometers (km) or miles (mi), since
the last reset for the trip odometer.
The trip odometer can be reset to
zero by pressing SET/CLR while the
trip odometer display is showing.
Fuel Range
This display shows the approximate
distance the vehicle can be driven
without refueling. The fuel range
estimate is based on an average of
the vehicle's fuel economy over
recent driving history and the
amount of fuel remaining in the fuel
tank. Fuel range cannot be reset.
Average Fuel Economy
This display shows the approximate
average liters per 100 kilometers
(L/100 km) or miles per
gallon (mpg). This number is
calculated based on the number of
L/100 km (mpg) recorded since the
last time this menu item was reset.
This number reflects only the
Page 127 of 357

Black plate (22,1)GMC Terrain/Terrain Denali Owner Manual (GMNA-Localizing-U.S./Canada/
Mexico-7707484) - 2015 - crc - 10/1/14
5-22 Instruments and Controls
approximate average fuel economy
that the vehicle has right now, and
will change as driving conditions
change. The fuel economy can be
reset by pressing SET/CLR while
the Average Fuel Economy display
is showing. The display may not
reset to zero.
Best Average Fuel Economy
The right hand side displays the
best average fuel economy (AFE)
that is achieved for a selected
distance. The left hand side displays
a running average of fuel economy
for the most recently traveled
selected distance. The center of the
Best AFE menu includes a digital
readout and bar graph to show the
instantaneous fuel economy.
Quickly press the SET/CLR button
to display a page for selecting one
of the distance options. Move the
up/down arrow to choose the
selection, and SET/CLR to change
the setting.When viewing best AFE, a several
second press and hold of SET/CLR
will reset the best value. The best
value will show
“- - -”until the
selected distance has been
traveled.
The display provides feedback on
how current driving behavior in the
bar graph affects the running
average in the left display and how
well recent driving compares to the
best that has been achieved.
Average Vehicle Speed
This display shows the average
speed of the vehicle in kilometers
per hour (km/h) or miles per
hour (mph). This average is
calculated based on the various
vehicle speeds recorded since the
last reset of this value. The average
speed can be reset by pressing
SET/CLR while the Average Vehicle
Speed display is showing. Timer
This display can be used as a timer.
To start the timer, press SET/CLR
while Timer is displayed. The
display will show the amount of time
that has passed since the timer was
last reset, not including time the
ignition is off. Time will continue to
be counted as long as the ignition is
on, even if another display is being
shown on the DIC. The timer will
record up to 99 hours, 59 minutes
and 59 seconds (99:59:59) after
which the display will return to zero.
To stop the timer, press SET/CLR
briefly while Timer is displayed. To
reset the timer to zero, press and
hold SET/CLR.
Navigation
This display is used for the OnStar
or Navigation System Turn-by-Turn
guidance, if equipped. See
OnStar
Overview on page 14-1 or the
infotainment manual, if equipped.
Blank Display
This display shows no information.
Page 128 of 357
Black plate (23,1)GMC Terrain/Terrain Denali Owner Manual (GMNA-Localizing-U.S./Canada/
Mexico-7707484) - 2015 - crc - 10/1/14
Instruments and Controls 5-23
Vehicle Information Menu
Items
Press the MENU button until Vehicle
Information Menu is displayed. Then
press
Rto scroll through the
following menu items:
.Unit
.Tire Pressure
.Remaining Oil Life
.Blank Display
Unit
Press SET/CLR to enter the unit
menu. Then press
QorRto switch
between METRIC or US when the
Unit display is active. Press SET/
CLR to confirm the setting. This will
change the displays on the cluster
and DIC to either metric or English
(US) measurements. Tire Pressure
The display will show a vehicle with
the approximate pressures of all
four tires. Tire pressure is displayed
in either kilopascal (kPa) or in
pounds per square inch (psi).
See
Tire Pressure Monitor System
on page 10-46 andTire Pressure
Monitor Operation on page 10-47.
Remaining Oil Life
This display shows an estimate of
the oil's remaining useful life.
If REMAINING OIL LIFE 99% is
displayed, that means 99% of the
current oil life remains.
When the remaining oil life is low,
the CHANGE ENGINE OIL SOON
message will appear on the display.
See Engine Oil Messages on
page 5-26. The oil should be
changed as soon as possible. See
Engine Oil on page 10-8. In addition
to the engine oil life system
monitoring the oil life, additional
maintenance is recommended in the Maintenance Schedule in this
manual. See
Maintenance Schedule
on page 11-2.
Remember, the Oil Life display must
be reset after each oil change. It will
not reset itself. Also, be careful not
to reset the Oil Life display
accidentally at any time other than
when the oil has just been changed.
It cannot be reset accurately until
the next oil change. To reset the
engine oil life system, press SET/
CLR while the Oil Life display is
active. The display will ask for
confirmation of a reset. Press
Qor
Rto select Yes or No. Then press
SET/CLR to confirm the selection.
See Engine Oil Life System on
page 10-11.
Blank Display
This display shows no information.
Compass
The vehicle may have a compass in
the Driver Information Center (DIC).
See Compass on page 5-4.
Page 136 of 357
Black plate (31,1)GMC Terrain/Terrain Denali Owner Manual (GMNA-Localizing-U.S./Canada/
Mexico-7707484) - 2015 - crc - 10/1/14
Instruments and Controls 5-31
Vehicle
Personalization
Use the audio system controls to
access the personalization menus
for customizing vehicle features.
The following are all possible
personalization features. Depending
on the vehicle, some may not be
available.
Infotainment System Audio
System Controls
Using the Faceplate
MENU/SEL Knob
.Press to enter, select, or activate
a highlighted menu option.
.Turn to highlight a menu option.
.Press to enable or disable a
system setting.
}BACK
.Press to exit a menu.
.Press to return to a previous
screen.Using the Touch Screen
Press a screen feature to:
.View more feature options.
.Enable or disable the feature.
w:
Press to scroll up.
x:Press to scroll down.
Back: Press to return to the
previous menu.
To access the
personalization menu:
1. Press Config on the Home page
on the infotainment system
display or CONFIG on the
faceplate.
2. Select the desired feature to display a list of available
options.
3. Select the desired feature setting.
Personalization Menus
The following list of menu items may
be available:
.Languages
.Time and Date
.Radio Settings
.Phone Settings
.Navigation Settings
.Display Settings
.Vehicle Settings
Each menu is detailed in the
following information.
Languages
Select Languages, then select from
the available language(s).
Time and Date
Manually set the time and date. See
Clock on page 5-4.
Radio Settings
Select and the following may
display:
.Auto Volume
.Gracenote Options
.XM Channel Art
.Max Startup Volume
Page 137 of 357
Black plate (32,1)GMC Terrain/Terrain Denali Owner Manual (GMNA-Localizing-U.S./Canada/
Mexico-7707484) - 2015 - crc - 10/1/14
5-32 Instruments and Controls
.Number of Favorites Pages
.XM Categories
.Software Versions Menu
Auto Volume
This feature adjusts the volume to
minimize the effects of unwanted
background noise that can result
from changing road surfaces, driving
speeds, or open windows. This
feature works best at lower volume
settings where background noise is
typically louder than the sound
system volume.
Select Off, Low, Medium, or High.
Gracenote Options
Select and the following may
display:
.Normalization
Normalization
This feature improves voice
recognition and media groupings.
See “CD Player,” “USB,” “Auxiliary
Devices,” and“Bluetooth Audio” in
the infotainment manual. Select to enable or disable.
XM Channel Art
This feature turns the XM Audio
page background on the XM
Channel display on and off.
Select to enable or disable.
Max Startup Volume
This feature sets the maximum
startup volume. If the vehicle is
started and the volume is greater
than this level, the volume is
adjusted to this level.
Press + or
−to increase or
decrease the volume.
Number of Favorites Pages
Press to set the number of favorites
to display.
Select the desired number.
XM Categories
This allows which available XM
Categories are used and displayed.
Press to enable or disable available
categories. Software Versions Menu
Press to display information about
the system and update software if
available.
Phone Settings
Select and the following may
display:
.Bluetooth
Bluetooth
Select and the following may
display:
.Device List
.Pair Device
Device List
Select to connect to a different
phone source, disconnect a phone,
or delete a phone.
Pair Device
Select to pair a new device. See
“Pairing a Phone/Device” in
“Bluetooth” in the infotainment
manual.