remote control GMC TERRAIN 2021 User Guide
[x] Cancel search | Manufacturer: GMC, Model Year: 2021, Model line: TERRAIN, Model: GMC TERRAIN 2021Pages: 377, PDF Size: 9.13 MB
Page 113 of 377
GMC Terrain/Terrain Denali Owner Manual(GMNA-Localizing-U.S./Canada/
Mexico-14420055) - 2021 - CRC - 11/13/20
112 Instruments and Controls
Remote Start Auto Cool Seats
If equipped and turned on, this feature will
turn on the ventilated seats when using
remote start on warm days. SeeHeated and
Ventilated Front Seats 035 and
Remote Vehicle Start 013.
Touch Off or On.
Remote Start Auto Heat Seats
If equipped and turned on, this feature will
turn on the heated seats when using remote
start on cold days. See Heated and
Ventilated Front Seats 035 and
Remote Vehicle Start 013.
Touch Off or On.
Remote Window Operation
This allows the windows to be opened when
pressing and holding
Kon the RKE
transmitter. See Remote Keyless Entry (RKE)
System Operation 07.
Touch Off or On.
Passive Door Unlock
This setting specifies which doors unlock
when using the button on the driver door
handle to unlock the vehicle.
Touch All Doors or Driver Door Only. Passive Door Lock
This setting specifies if the vehicle will
automatically lock, or lock and provide an
alert after all the doors are closed, and you
walk away from the vehicle with the remote
key. See
Remote Keyless Entry (RKE) System
Operation 07.
Touch Off, On with Horn Chirp, or On.
Remote Left in Vehicle Alert
This feature sounds an alert when the RKE
transmitter is left in the vehicle. This menu
also enables the Remote No Longer In
Vehicle Alert.
Touch Off or On.
Seating Position
Touch and the following may display:
.Seat Entry Memory
.Seat Exit Memory
Seat Entry Memory
This feature automatically recalls the
previously stored 1 or 2 button positions
when the ignition is changed from off to on
or ACC/ACCESSORY. See Memory Seats033.
Touch Off or On. Seat Exit Memory
This feature automatically recalls the
previously stored exit button positions when
the ignition is changed from on or ACC/
ACCESSORY to off if the driver door is open
or opened. See
Memory Seats033.
Touch Off or On.
Teen Driver
See Teen Driver 0167.
Valet Mode
This will lock the infotainment system and
steering wheel controls. It may also limit
access to vehicle storage locations,
if equipped.
To enable valet mode:
1. Enter a four-digit code on the keypad.
2. Select Enter to go to the confirmation screen.
3. Re-enter the four-digit code.
Touch Lock or Unlock to lock or unlock the
system. Touch Back to go back to the
previous menu.
Universal Remote System
See Radio Frequency Statement 0354.
Page 114 of 377
GMC Terrain/Terrain Denali Owner Manual(GMNA-Localizing-U.S./Canada/
Mexico-14420055) - 2021 - CRC - 11/13/20
Instruments and Controls 113
Universal Remote System
Programming
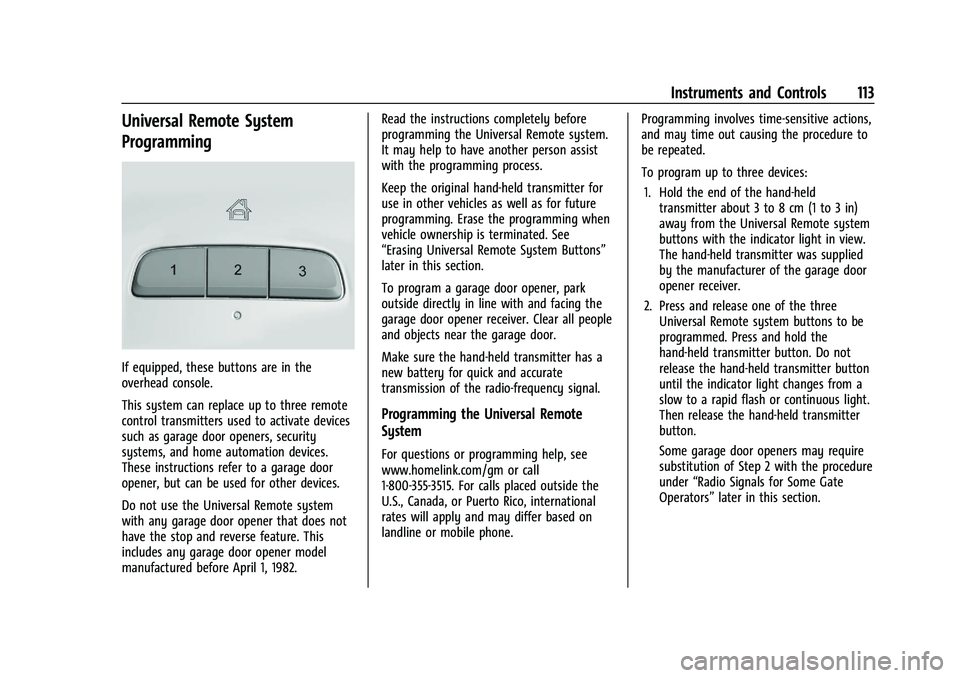
If equipped, these buttons are in the
overhead console.
This system can replace up to three remote
control transmitters used to activate devices
such as garage door openers, security
systems, and home automation devices.
These instructions refer to a garage door
opener, but can be used for other devices.
Do not use the Universal Remote system
with any garage door opener that does not
have the stop and reverse feature. This
includes any garage door opener model
manufactured before April 1, 1982.Read the instructions completely before
programming the Universal Remote system.
It may help to have another person assist
with the programming process.
Keep the original hand-held transmitter for
use in other vehicles as well as for future
programming. Erase the programming when
vehicle ownership is terminated. See
“Erasing Universal Remote System Buttons”
later in this section.
To program a garage door opener, park
outside directly in line with and facing the
garage door opener receiver. Clear all people
and objects near the garage door.
Make sure the hand-held transmitter has a
new battery for quick and accurate
transmission of the radio-frequency signal.
Programming the Universal Remote
System
For questions or programming help, see
www.homelink.com/gm or call
1-800-355-3515. For calls placed outside the
U.S., Canada, or Puerto Rico, international
rates will apply and may differ based on
landline or mobile phone.
Programming involves time-sensitive actions,
and may time out causing the procedure to
be repeated.
To program up to three devices:
1. Hold the end of the hand-held transmitter about 3 to 8 cm (1 to 3 in)
away from the Universal Remote system
buttons with the indicator light in view.
The hand-held transmitter was supplied
by the manufacturer of the garage door
opener receiver.
2. Press and release one of the three Universal Remote system buttons to be
programmed. Press and hold the
hand-held transmitter button. Do not
release the hand-held transmitter button
until the indicator light changes from a
slow to a rapid flash or continuous light.
Then release the hand-held transmitter
button.
Some garage door openers may require
substitution of Step 2 with the procedure
under “Radio Signals for Some Gate
Operators” later in this section.
Page 115 of 377
GMC Terrain/Terrain Denali Owner Manual(GMNA-Localizing-U.S./Canada/
Mexico-14420055) - 2021 - CRC - 11/13/20
114 Instruments and Controls
3. Press and hold the newly programmedUniversal Remote system button for
five seconds while watching the indicator
light and garage door activation.
.If the indicator light stays on
continuously or the garage door
moves when the button is pressed,
then programming is complete. There
is no need to complete Steps 4–6.
.If the indicator light does not come
on or the garage door does not
move, a second button press may be
required. For a second time, press
and hold the newly programmed
button for five seconds. If the
indicator light is continuously lit,
or the garage door moves,
programming is complete.
.If the indicator light flashes rapidly
and the garage door does not move,
continue with programming
Steps 4–6.
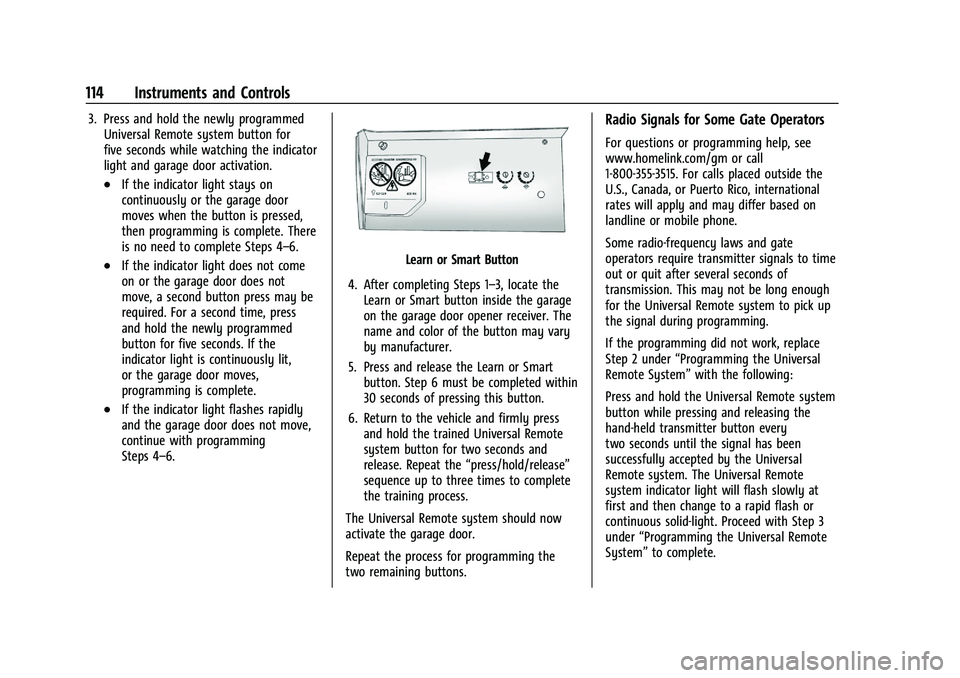
Learn or Smart Button
4. After completing Steps 1–3, locate the Learn or Smart button inside the garage
on the garage door opener receiver. The
name and color of the button may vary
by manufacturer.
5. Press and release the Learn or Smart button. Step 6 must be completed within
30 seconds of pressing this button.
6. Return to the vehicle and firmly press and hold the trained Universal Remote
system button for two seconds and
release. Repeat the “press/hold/release”
sequence up to three times to complete
the training process.
The Universal Remote system should now
activate the garage door.
Repeat the process for programming the
two remaining buttons.
Radio Signals for Some Gate Operators
For questions or programming help, see
www.homelink.com/gm or call
1-800-355-3515. For calls placed outside the
U.S., Canada, or Puerto Rico, international
rates will apply and may differ based on
landline or mobile phone.
Some radio-frequency laws and gate
operators require transmitter signals to time
out or quit after several seconds of
transmission. This may not be long enough
for the Universal Remote system to pick up
the signal during programming.
If the programming did not work, replace
Step 2 under “Programming the Universal
Remote System” with the following:
Press and hold the Universal Remote system
button while pressing and releasing the
hand-held transmitter button every
two seconds until the signal has been
successfully accepted by the Universal
Remote system. The Universal Remote
system indicator light will flash slowly at
first and then change to a rapid flash or
continuous solid-light. Proceed with Step 3
under “Programming the Universal Remote
System” to complete.
Page 116 of 377

GMC Terrain/Terrain Denali Owner Manual(GMNA-Localizing-U.S./Canada/
Mexico-14420055) - 2021 - CRC - 11/13/20
Instruments and Controls 115
Universal Remote System
Operation
Using the Universal Remote System
Press and hold the appropriate Universal
Remote system button for at least one-half
second. The indicator light will come on
while the signal is being transmitted.
Erasing Universal Remote System
Buttons
Erase all programmed buttons when vehicle
ownership is terminated.
To erase:1. Press and hold the two outside buttons until the indicator light begins to flash.
This should take about 10 seconds.
2. Release both buttons.
Reprogramming a Single Universal
Remote System Button
To reprogram any of the system buttons: 1. Press and hold any one of the buttons. Do not release the button. 2. The indicator light will begin to flash
after 20 seconds. Without releasing the
button, proceed with Step 1 under
“Programming the Universal Remote
System.”
Page 122 of 377
GMC Terrain/Terrain Denali Owner Manual(GMNA-Localizing-U.S./Canada/
Mexico-14420055) - 2021 - CRC - 11/13/20
Lighting 121
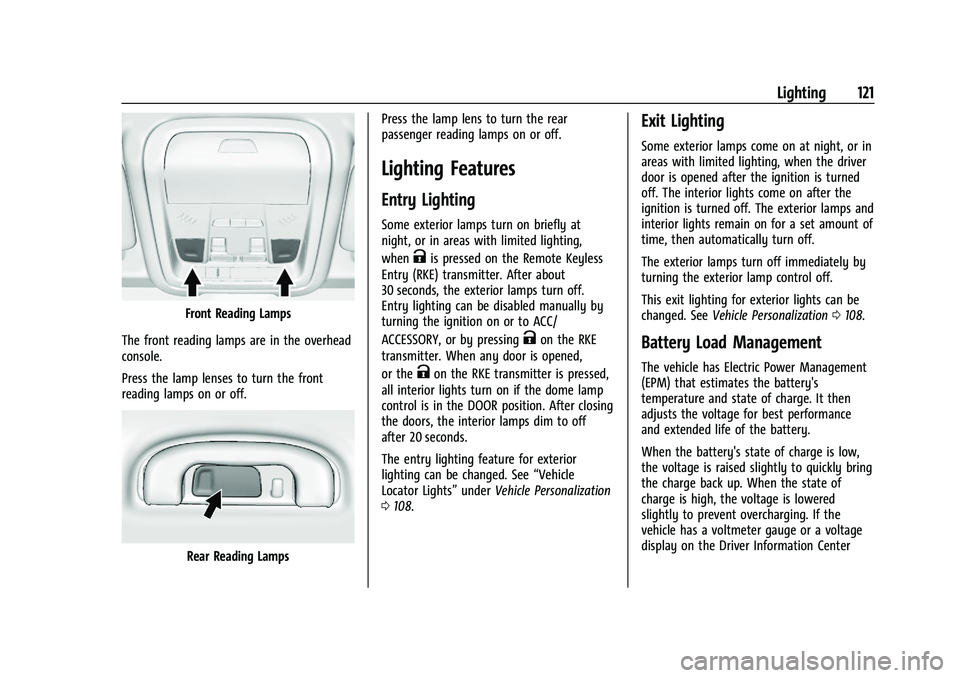
Front Reading Lamps
The front reading lamps are in the overhead
console.
Press the lamp lenses to turn the front
reading lamps on or off.
Rear Reading Lamps Press the lamp lens to turn the rear
passenger reading lamps on or off.
Lighting Features
Entry Lighting
Some exterior lamps turn on briefly at
night, or in areas with limited lighting,
when
Kis pressed on the Remote Keyless
Entry (RKE) transmitter. After about
30 seconds, the exterior lamps turn off.
Entry lighting can be disabled manually by
turning the ignition on or to ACC/
ACCESSORY, or by pressing
Kon the RKE
transmitter. When any door is opened,
or the
Kon the RKE transmitter is pressed,
all interior lights turn on if the dome lamp
control is in the DOOR position. After closing
the doors, the interior lamps dim to off
after 20 seconds.
The entry lighting feature for exterior
lighting can be changed. See “Vehicle
Locator Lights” underVehicle Personalization
0 108.
Exit Lighting
Some exterior lamps come on at night, or in
areas with limited lighting, when the driver
door is opened after the ignition is turned
off. The interior lights come on after the
ignition is turned off. The exterior lamps and
interior lights remain on for a set amount of
time, then automatically turn off.
The exterior lamps turn off immediately by
turning the exterior lamp control off.
This exit lighting for exterior lights can be
changed. See Vehicle Personalization 0108.
Battery Load Management
The vehicle has Electric Power Management
(EPM) that estimates the battery's
temperature and state of charge. It then
adjusts the voltage for best performance
and extended life of the battery.
When the battery's state of charge is low,
the voltage is raised slightly to quickly bring
the charge back up. When the state of
charge is high, the voltage is lowered
slightly to prevent overcharging. If the
vehicle has a voltmeter gauge or a voltage
display on the Driver Information Center
Page 167 of 377
GMC Terrain/Terrain Denali Owner Manual(GMNA-Localizing-U.S./Canada/
Mexico-14420055) - 2021 - CRC - 11/13/20
166 Infotainment System
.Set Up My Places
.Map Preferences
.Route Preferences
.Navigation Voice Control
.Traffic Preferences
.Alert Preferences
.Manage History
.Predictive Navigation
.About
See Using the Navigation System 0138.
Phone
Touch and the following may display:
.My Number: Displays the cell phone
number of the Bluetooth connected
device.
.Active Call View: Shows active call display
when answering a call.
Touch the controls on the infotainment
display to disable or enable.
.Privacy: Only show call alerts in the
instrument cluster.
Touch Off or On.
.Sort Contacts: Touch to sort by first or
last name.
.Re-sync Device Contacts: This allows the device contacts to re-sync
if you are having difficulty accessing all of
the contacts on your cell phone.
.Delete All Vehicle Contacts: Touch to
delete all vehicle stored contacts.
.OnStar Phone TTY Mode: This enables
OnStar cell phone TTY mode.
Touch Disable or Enable.
Vehicle
This menu allows adjustment of different
vehicle features. See
Vehicle Personalization
0 108.
Personal
If equipped, this menu allows adjustment of
different user profile settings. See “Users”in
Using the System 0127 for information on
setting up user profiles.
The menu may contain the following:
Name
Touch to edit your user name that will be
displayed in the vehicle.
Vehicle Account Information
Touch to view the vehicle account
information and to change the account
password. An
“unverified user account” pop-up will
display until the account information
verification process has been completed on
the Internet. Check your registered e-mail
account for an activation e-mail to complete
the verification process.
Profile Picture
Touch to choose or change your profile
picture.
Profile Identifiers
Touch to have the vehicle recognize the
identifier you choose.
Touch Vehicle Key 1 and/or Vehicle Key 2.
If the Remote Key is lost or stolen, see your
dealer.
Security
Touch to have your profile secured with a
Personal Identification Number (PIN).
Touch No or Yes.
Vehicle Name
Touch to edit your vehicle name.
Vehicle Account
Touch to view the vehicle account
information and to change the account
password.
Page 360 of 377
GMC Terrain/Terrain Denali Owner Manual(GMNA-Localizing-U.S./Canada/
Mexico-14420055) - 2021 - CRC - 11/13/20
OnStar 359
Reactivation for Subsequent Owners
PressQand follow the prompts to speak to
an Advisor as soon as possible. The Advisor
will update vehicle records and explain
OnStar or connected service options.
How OnStar Service Works
Automatic Crash Response, Emergency
Services, Crisis Assist, Stolen Vehicle
Assistance, Remote Services, and Roadside
Assistance are available on most vehicles.
Not all OnStar services are available
everywhere or on all vehicles. For more
information, a full description of OnStar
services, system limitations, and OnStar User
Terms, Privacy Statement, and Software
Terms:
.Call 1-888-4ONSTAR (1-888-466-7827).
.See www.onstar.com (U.S.).
.See www.onstar.ca (Canada).
.Call TTY 1-877-248-2080.
.PressQto speak with an Advisor.
OnStar or connected services cannot work
unless the vehicle is in a place where OnStar
has an agreement with a wireless service
provider for service in that area. The
wireless service provider must also have
coverage, network capacity, reception, and technology compatible with OnStar or
connected services. Service involving location
information about the vehicle cannot work
unless GPS signals are available,
unobstructed, and compatible with the
OnStar hardware. OnStar or connected
services may not work if the OnStar
equipment is not properly installed or it has
not been properly maintained. If equipment
or software is added, connected,
or modified, OnStar or connected services
may not work. Other problems beyond the
control of OnStar
—such as hills, tall
buildings, tunnels, weather, electrical system
design and architecture of the vehicle,
damage to the vehicle in a crash, or wireless
phone network congestion or jamming —
may prevent service.
See Radio Frequency Statement 0354.
Services for People with Disabilities
Advisors provide services to help with
physical disabilities and medical conditions.
Press
Qto help:
.Locate a gas station with an attendant to
pump gas.
.Find a hotel, restaurant, etc., that meets
accessibility needs.
.Provide directions to the closest hospital
or pharmacy in urgent situations.
TTY Users
OnStar has the ability to communicate to
deaf, hard-of-hearing, or speech-impaired
customers while in the vehicle. The available
dealer-installed TTY system can provide
in-vehicle access to all OnStar services,
except Virtual Advisor and OnStar
Turn-by-Turn Navigation.
If equipped, TTY mode can be turned on or
off by touching Settings, then Apps, and
then Phone. When TTY mode is on, phone
calls can be made or received with OnStar
using the infotainment display.
OnStar Personal Identification
Number (PIN)
A PIN is needed to access some OnStar
services. The PIN will need to be changed
the first time when speaking with an
Advisor. To change the OnStar PIN, contact
an OnStar Advisor by pressing
Qor calling
1-888-4ONSTAR.
Warranty
OnStar equipment may be warranted as part
of the vehicle warranty.
Page 364 of 377
GMC Terrain/Terrain Denali Owner Manual(GMNA-Localizing-U.S./Canada/
Mexico-14420055) - 2021 - CRC - 11/13/20
Connected Services 363
PressQ, then ask the Advisor to download
directions to the vehicle’s navigation system,
if equipped. After the call ends, the
navigation screen will provide prompts to
begin driving directions. Routes that are sent
to the navigation screen can only be
canceled through the navigation system.
See www.onstar.com (U.S.) or www.onstar.ca
(Canada).
Connections
The following services help with staying
connected.
For coverage maps, see www.onstar.com
(U.S.) or www.onstar.ca (Canada).
Ensuring Security
.Change the default passwords for the
Wi-Fi hotspot and myGMC mobile
application. Make these passwords
different from each other and use a
combination of letters and numbers to
increase the security.
.Change the default name of the SSID
(Service Set Identifier). This is your
network’s name that is visible to other
wireless devices. Choose a unique name
and avoid family names or vehicle
descriptions. Wi-Fi Hotspot (If Equipped)
The vehicle may have a built-in Wi-Fi
hotspot that provides access to the Internet
and web content at 4G LTE speed. Up to
seven mobile devices can be connected.
A data plan is required. Use the in-vehicle
controls only when it is safe to do so.
1. To retrieve Wi-Fi hotspot information, press
=to open the OnStar app on the
infotainment display, then select Wi-Fi
Hotspot. On some vehicles, touch Wi-Fi
or Wi-Fi Settings on the screen.
2. The Wi-Fi settings will display the Wi-Fi hotspot name (SSID), password, and on
some vehicles, the connection type (no
Internet connection, 3G, 4G, 4G LTE), and
signal quality (poor, good, excellent). The
LTE icon shows connection to Wi-Fi. It is
possible that the icon may not illuminate
even though the vehicle has an active
connection.
3. To change the SSID or password, press
Qor call 1-888-4ONSTAR to connect
with an Advisor. On some vehicles, the
SSID and password can be changed in
the Wi-Fi Hotspot menu. After initial set-up, your vehicle’s Wi-Fi
hotspot will connect automatically to your
mobile devices. Manage data usage by
turning Wi-Fi on or off on your mobile
device, using the myGMC mobile app, or
by contacting an OnStar Advisor. On some
vehicles, Wi-Fi can also be managed from
the Wi-Fi Hotspot menu.
MyGMC Mobile App (If Available)
Download the myGMC mobile app to
compatible Apple and Android smartphones.
GMC users can access the following services
from a smartphone:
.Remotely start/stop the vehicle,
if factory-equipped.
.Lock/unlock doors, if equipped with
automatic locks.
.Activate the horn and lamps.
.Check the vehicle’s fuel level, oil life,
or tire pressure, if factory-equipped with
the Tire Pressure Monitor System.
.Send destinations to the vehicle.
.Locate the vehicle on a map (U.S.
market only).
.Turn the vehicle's Wi-Fi hotspot on/off,
manage settings, and monitor data
consumption, if equipped.
.Locate a dealer and schedule service.
Page 371 of 377
GMC Terrain/Terrain Denali Owner Manual(GMNA-Localizing-U.S./Canada/-
Mexico-14420055) - 2021 - CRC - 11/13/20
370 Index
Infotainment System . . . . . . . . . . . . . . . . . . . . 356
Instrument Cluster . . . . . . . . . . . . . . . . . . . . 85, 88
Instrument Panel Overview . . . . . . . . . . . . . . . . 4
Interior Rearview Mirrors . . . . . . . . . . . . . . . . . .25
Introduction . . . . . . . . . . . . . . . . . . . . . . . . . . . 1, 123
J
Jump Starting - North America . . . . . . . . . . . 316
K
Keyless EntryRemote (RKE) System . . . . . . . . . . . . . . . . . . . . 7
Keys . . . . . . . . . . . . . . . . . . . . . . . . . . . . . . . . . . . . . . . 6
L
Labeling, Tire Sidewall . . . . . . . . . . . . . . . . . . . 288
Lamps Courtesy . . . . . . . . . . . . . . . . . . . . . . . . . . . . . . . 120
Daytime Running (DRL) . . . . . . . . . . . . . . . . . 118
Dome . . . . . . . . . . . . . . . . . . . . . . . . . . . . . . . . . . 120
Exterior Controls . . . . . . . . . . . . . . . . . . . . . . . . 116
Exterior Lighting Battery Saver . . . . . . . . 122
Front Turn Signal . . . . . . . . . . . . . . . . . . . . . . 278
License Plate . . . . . . . . . . . . . . . . . . . . . . . . . . . 279
Malfunction Indicator (Check
Engine) . . . . . . . . . . . . . . . . . . . . . . . . . . . . . . . 93
On Reminder . . . . . . . . . . . . . . . . . . . . . . . . . . 100
Reading . . . . . . . . . . . . . . . . . . . . . . . . . . . . . . . . 120 Lamps (cont'd)
Taillamps . . . . . . . . . . . . . . . . . . . . . . . . . . . . . . 278
Lane Change Alert (LCA) . . . . . . . . . . . . . . . . . 242
Lane Keep Assist (LKA) . . . . . . . . . . . . . . . . . . . 244
Lane Keep Assist Light . . . . . . . . . . . . . . . . . . . . 96
Lap-Shoulder Belt . . . . . . . . . . . . . . . . . . . . . . . . . 42
LATCH System Replacing Parts after a Crash . . . . . . . . . . . 68
LATCH, Lower Anchors and Tethers for Children . . . . . . . . . . . . . . . . . . . . . . . . . . . . . . . . . 63
LED Lighting . . . . . . . . . . . . . . . . . . . . . . . . . . . . . 278
Liftgate . . . . . . . . . . . . . . . . . . . . . . . . . . . . . . . . . . . . 17
Lighting Entry . . . . . . . . . . . . . . . . . . . . . . . . . . . . . . . . . . . 121
Exit . . . . . . . . . . . . . . . . . . . . . . . . . . . . . . . . . . . . . 121
Illumination Control . . . . . . . . . . . . . . . . . . . 120
LED . . . . . . . . . . . . . . . . . . . . . . . . . . . . . . . . . . . . 278
Lights Airbag Readiness . . . . . . . . . . . . . . . . . . . . . . . 92
Antilock Brake System (ABS)Warning . . . . . . . . . . . . . . . . . . . . . . . . . . . . . . 96
Brake System Warning . . . . . . . . . . . . . . . . . 95
Charging System . . . . . . . . . . . . . . . . . . . . . . . 93
Check Engine (Malfunction Indicator) . . . . . . . . . . . . . . . . . . . . . . . . . . . . . 93
Cruise Control . . . . . . . . . . . . . . . . . . . . . . . . . 100
Door Ajar . . . . . . . . . . . . . . . . . . . . . . . . . . . . . . 100
Electric Parking Brake . . . . . . . . . . . . . . . . . . . 95 Lights (cont'd)
Engine Oil Pressure . . . . . . . . . . . . . . . . . . . . . 98
Flash-to-Pass . . . . . . . . . . . . . . . . . . . . . . . . . . . . 118
Front Fog Lamp . . . . . . . . . . . . . . . . . . . . . . . . 100
High-Beam On . . . . . . . . . . . . . . . . . . . . . . . . . . 99
High/Low Beam Changer . . . . . . . . . . . . . . . 117
Hill Descent Control . . . . . . . . . . . . . . . . . . . . 96
Lane Keep Assist . . . . . . . . . . . . . . . . . . . . . . . . 96
Low Fuel Warning . . . . . . . . . . . . . . . . . . . . . . 99
Seat Belt Reminders . . . . . . . . . . . . . . . . . . . . 91
Security . . . . . . . . . . . . . . . . . . . . . . . . . . . . . . . . . 99
Service Electric Parking Brake . . . . . . . . . . . 95
StabiliTrak OFF . . . . . . . . . . . . . . . . . . . . . . . . . . 97
Tire Pressure . . . . . . . . . . . . . . . . . . . . . . . . . . . . 98
Tow/Haul Mode . . . . . . . . . . . . . . . . . . . . . . . . 96
Traction Control System
(TCS)/StabiliTrak . . . . . . . . . . . . . . . . . . . . . . 98
Traction Off . . . . . . . . . . . . . . . . . . . . . . . . . . . . . 97
Locks Automatic Door . . . . . . . . . . . . . . . . . . . . . . . . . 16
Delayed Locking . . . . . . . . . . . . . . . . . . . . . . . . 16
Door . . . . . . . . . . . . . . . . . . . . . . . . . . . . . . . . . . . . 14
Lockout Protection . . . . . . . . . . . . . . . . . . . . . . 16
Power Door . . . . . . . . . . . . . . . . . . . . . . . . . . . . . 16
Safety . . . . . . . . . . . . . . . . . . . . . . . . . . . . . . . . . . . 17
Loss of Control . . . . . . . . . . . . . . . . . . . . . . . . . . 190
Low Fuel Warning Light . . . . . . . . . . . . . . . . . . 99
Page 374 of 377
GMC Terrain/Terrain Denali Owner Manual(GMNA-Localizing-U.S./Canada/-
Mexico-14420055) - 2021 - CRC - 11/13/20
Index 373
RoadsDriving, Wet . . . . . . . . . . . . . . . . . . . . . . . . . . . 193
Roadside Assistance Program . . . . . . . . . . . . 349
Roof Sunroof . . . . . . . . . . . . . . . . . . . . . . . . . . . . . . . . . 27
Roof Rack System . . . . . . . . . . . . . . . . . . . . . . . . . 76
Rotation, Tires . . . . . . . . . . . . . . . . . . . . . . . . . . . 298
Routing, Engine Drive Belt . . . . . . . . . . . . . . . 345
Running the Vehicle While Parked . . . . . . . 208
S
Safety Defects Reporting Canadian Government . . . . . . . . . . . . . . . . . 354
General Motors . . . . . . . . . . . . . . . . . . . . . . . . 355
U.S. Government . . . . . . . . . . . . . . . . . . . . . . . 354
Safety Locks . . . . . . . . . . . . . . . . . . . . . . . . . . . . . . . 17
Safety System Check . . . . . . . . . . . . . . . . . . . . . 46
Satellite Radio . . . . . . . . . . . . . . . . . . . . . . . . . . . . 133
Scheduling Appointments . . . . . . . . . . . . . . . . 350
Sealant Kit, Tire . . . . . . . . . . . . . . . . . . . . . . . . . . 305
Seat Belts . . . . . . . . . . . . . . . . . . . . . . . . . . . . . . . . . 40 Care . . . . . . . . . . . . . . . . . . . . . . . . . . . . . . . . . . . . 46
Extender . . . . . . . . . . . . . . . . . . . . . . . . . . . . . . . . 46
How to Wear Seat Belts Properly . . . . . . . 41
Lap-Shoulder Belt . . . . . . . . . . . . . . . . . . . . . . . 42
Reminders . . . . . . . . . . . . . . . . . . . . . . . . . . . . . . 91
Replacing after a Crash . . . . . . . . . . . . . . . . . 47
Use During Pregnancy . . . . . . . . . . . . . . . . . . 46 Seats
Adjustment, Front . . . . . . . . . . . . . . . . . . . . . . 30
Folding Seatback . . . . . . . . . . . . . . . . . . . . . . . . 36
Head Restraints . . . . . . . . . . . . . . . . . . . . . . . . . 29
Heated and Ventilated Front . . . . . . . . . . . . 35
Heated, Rear . . . . . . . . . . . . . . . . . . . . . . . . . . . . 39
Lumbar Adjustment, Front . . . . . . . . . . . . . . 32
Memory . . . . . . . . . . . . . . . . . . . . . . . . . . . . . . . . 33
Power Adjustment, Front . . . . . . . . . . . . . . . . 31
Rear . . . . . . . . . . . . . . . . . . . . . . . . . . . . . . . . . . . . 37
Reclining Seatbacks . . . . . . . . . . . . . . . . . . . . . 32
Securing Child Restraints . . . . . . . . . . . . . . 69, 70
Security Light . . . . . . . . . . . . . . . . . . . . . . . . . . . . . . . . . . . . 99
OnStar . . . . . . . . . . . . . . . . . . . . . . . . . . . . . . . . . 358
Vehicle . . . . . . . . . . . . . . . . . . . . . . . . . . . . . . . . . 22
Vehicle Alarm . . . . . . . . . . . . . . . . . . . . . . . . . . . 22
Service . . . . . . . . . . . . . . . . . . . . . . . . . . . . . . . . . . . .183 Accessories and Modifications . . . . . . . . . 258
Climate Control System . . . . . . . . . . . . . . . . 178
Doing Your Own Work . . . . . . . . . . . . . . . . . 259
Maintenance Records . . . . . . . . . . . . . . . . . . 341
Maintenance, General Information . . . . . 330
Parts Identification . . . . . . . . . . . . . . . . . . . . . 342
Scheduling Appointments . . . . . . . . . . . . . . 350
Service Electric Parking Brake Light . . . . . . . 95
Services Special Application . . . . . . . . . . . . . . . . . . . . . 336 Servicing System . . . . . . . . . . . . . . . . . . . . . . . . 149
Servicing the Airbag . . . . . . . . . . . . . . . . . . . . . . .55
Settings . . . . . . . . . . . . . . . . . . . . . . . . . . . . . . . . . . 160
Shifting
Into Park . . . . . . . . . . . . . . . . . . . . . . . . . . . . . . 204
Out of Park . . . . . . . . . . . . . . . . . . . . . . . . . . . . 205
Side Blind Zone Alert (SBZA) . . . . . . . . . . . . . 242
Signals, Turn and Lane-Change . . . . . . . . . . . . 119
Software Updates . . . . . . . . . . . . . . . . . . . . . . . . 130
Spare Tire Compact . . . . . . . . . . . . . . . . . . . . . . . . . . . . . . . 315
Special Application Services . . . . . . . . . . . . . . 336
Specifications and Capacities . . . . . . . . . . . . . 343
Speedometer . . . . . . . . . . . . . . . . . . . . . . . . . . . . . 89
StabiliTrak OFF Light . . . . . . . . . . . . . . . . . . . . . . . . . . . . . . . 97
Start Assist, Hill . . . . . . . . . . . . . . . . . . . . . . . . . . .214
Start Vehicle, Remote . . . . . . . . . . . . . . . . . . . . . . 13
Starter Switch Check . . . . . . . . . . . . . . . . . . . . . 274
Starting the Engine . . . . . . . . . . . . . . . . . . . . . . 201
Steering . . . . . . . . . . . . . . . . . . . . . . . . . . . . . . . . . 188 Heated Wheel . . . . . . . . . . . . . . . . . . . . . . . . . . 79
Wheel Adjustment . . . . . . . . . . . . . . . . . . . . . . 79
Wheel Controls . . . . . . . . . . . . . . . . . . . . . . . . . 79
Steering Wheel Controls . . . . . . . . . . . . . . . . . 126
Stop/Start System . . . . . . . . . . . . . . . . . . . . . . . 201
Storage Areas
Cargo Cover . . . . . . . . . . . . . . . . . . . . . . . . . . . . 75