ECO mode GMC TERRAIN 2021 Owner's Manual
[x] Cancel search | Manufacturer: GMC, Model Year: 2021, Model line: TERRAIN, Model: GMC TERRAIN 2021Pages: 377, PDF Size: 9.13 MB
Page 2 of 377
GMC Terrain/Terrain Denali Owner Manual(GMNA-Localizing-U.S./Canada/
Mexico-14420055) - 2021 - CRC - 11/13/20
Contents
Introduction . . . . . . . . . . . . . . . . . . . . . . . . . . . . . . 1
Keys, Doors, and Windows . . . . . . . . . . . . . . . 6
Seats and Restraints . . . . . . . . . . . . . . . . . . . . . 29
Storage . . . . . . . . . . . . . . . . . . . . . . . . . . . . . . . . . . 74
Instruments and Controls . . . . . . . . . . . . . . . . 78
Lighting . . . . . . . . . . . . . . . . . . . . . . . . . . . . . . . . . 116
Infotainment System . . . . . . . . . . . . . . . . . . . 123
Climate Controls . . . . . . . . . . . . . . . . . . . . . . . . 178
Driving and Operating . . . . . . . . . . . . . . . . . . 185
Vehicle Care . . . . . . . . . . . . . . . . . . . . . . . . . . . . 257
Service and Maintenance . . . . . . . . . . . . . . . 330
Technical Data . . . . . . . . . . . . . . . . . . . . . . . . . 342
Customer Information . . . . . . . . . . . . . . . . . . 346
Reporting Safety Defects . . . . . . . . . . . . . . . 354
OnStar . . . . . . . . . . . . . . . . . . . . . . . . . . . . . . . . . 357
Connected Services . . . . . . . . . . . . . . . . . . . . . 362
Index . . . . . . . . . . . . . . . . . . . . . . . . . . 365
Introduction
The names, logos, emblems, slogans, vehicle
model names, and vehicle body designs
appearing in this manual including, but not
limited to, GM, the GM logo, GMC, the GMC
Truck Emblem, TERRAIN, and DENALI are
trademarks and/or service marks of General
Motors LLC, its subsidiaries, affiliates,
or licensors.
For vehicles first sold in Canada, substitute
the name“General Motors of Canada
Company” for GMC Motor Division wherever
it appears in this manual.
This manual describes features that may or
may not be on the vehicle because of
optional equipment that was not purchased
on the vehicle, model variants, country
specifications, features/applications that may not be available in your region, or changes
subsequent to the printing of this owner’s
manual.
Refer to the purchase documentation
relating to your specific vehicle to confirm
the features.
Keep this manual in the vehicle for quick
reference.Canadian Vehicle Owners
A French language manual can be obtained
from your dealer, at www.helminc.com,
or from:
Propriétaires Canadiens
On peut obtenir un exemplaire de ce guide
en français auprès du concessionnaire ou à
l'adresse suivante:
Helm, Incorporated
Attention: Customer Service
47911 Halyard Drive
Plymouth, MI 48170
USA
Litho in U.S.A.
Part No. 84443536 B Second Printing©2020 General Motors LLC. All Rights Reserved.
Page 11 of 377
GMC Terrain/Terrain Denali Owner Manual(GMNA-Localizing-U.S./Canada/
Mexico-14420055) - 2021 - CRC - 11/13/20
10 Keys, Doors, and Windows
Key Access
To access a vehicle with a dead transmitter
battery, seeDoor Locks014.
Programming Transmitters to the Vehicle
Only RKE transmitters programmed to the
vehicle will work. If a transmitter is lost or
stolen, a replacement can be purchased and
programmed through your dealer. The
vehicle can be reprogrammed so that lost or
stolen transmitters no longer work. Each
vehicle can have up to eight transmitters
matched to it.
Programming with Recognized Transmitters
A new transmitter can be programmed to
the vehicle when there are two recognized
transmitters.
To program, the vehicle must be off and all
of the transmitters, both currently
recognized and new, must be with you.
1. Remove the key from the RKE transmitter.
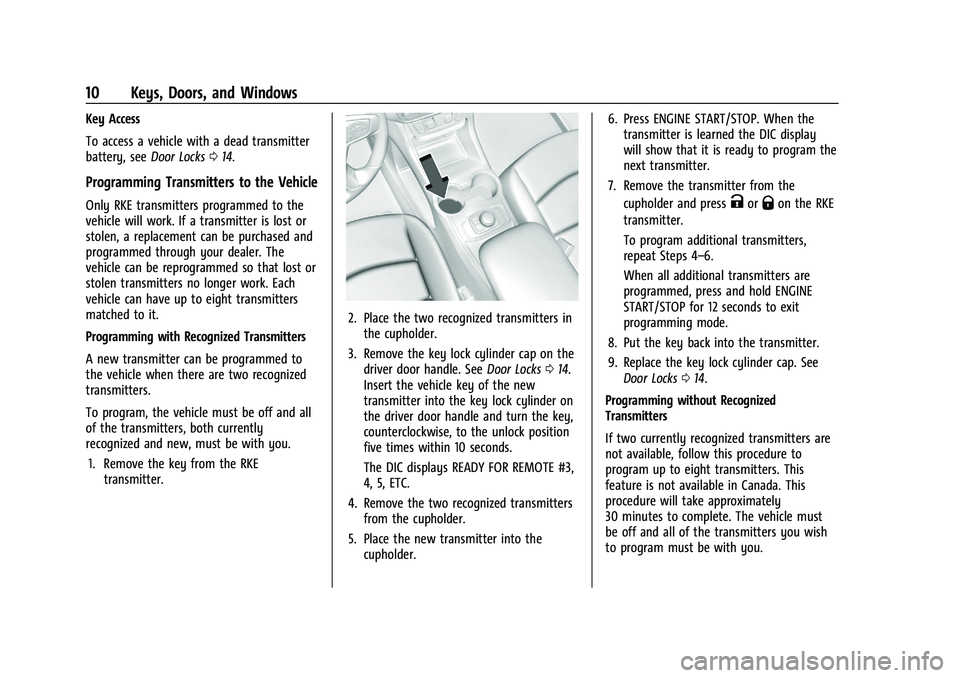
2. Place the two recognized transmitters inthe cupholder.
3. Remove the key lock cylinder cap on the driver door handle. See Door Locks014.
Insert the vehicle key of the new
transmitter into the key lock cylinder on
the driver door handle and turn the key,
counterclockwise, to the unlock position
five times within 10 seconds.
The DIC displays READY FOR REMOTE #3,
4, 5, ETC.
4. Remove the two recognized transmitters from the cupholder.
5. Place the new transmitter into the cupholder. 6. Press ENGINE START/STOP. When the
transmitter is learned the DIC display
will show that it is ready to program the
next transmitter.
7. Remove the transmitter from the cupholder and press
KorQon the RKE
transmitter.
To program additional transmitters,
repeat Steps 4–6.
When all additional transmitters are
programmed, press and hold ENGINE
START/STOP for 12 seconds to exit
programming mode.
8. Put the key back into the transmitter.
9. Replace the key lock cylinder cap. See Door Locks 014.
Programming without Recognized
Transmitters
If two currently recognized transmitters are
not available, follow this procedure to
program up to eight transmitters. This
feature is not available in Canada. This
procedure will take approximately
30 minutes to complete. The vehicle must
be off and all of the transmitters you wish
to program must be with you.
Page 12 of 377
GMC Terrain/Terrain Denali Owner Manual(GMNA-Localizing-U.S./Canada/
Mexico-14420055) - 2021 - CRC - 11/13/20
Keys, Doors, and Windows 11
1. Remove the key from the RKEtransmitter.
2. Remove the key lock cylinder cap on the driver door handle. See Door Locks014.
Insert the vehicle key of the transmitter
into the key lock cylinder on the driver
door handle and turn the key,
counterclockwise, to the unlock position
five times within 10 seconds.
The DIC displays REMOTE LEARN
PENDING, PLEASE WAIT.
3. Wait for 10 minutes until the DIC displays PRESS ENGINE START BUTTON TO
LEARN and then press ENGINE
START/STOP.
The DIC display will again show REMOTE
LEARN PENDING, PLEASE WAIT.
4. Repeat Step 2 two additional times. After the third time all previously known
transmitters will no longer work with the
vehicle. Remaining transmitters can be
relearned during the next steps.
The DIC display should now show READY
FOR REMOTE # 1.
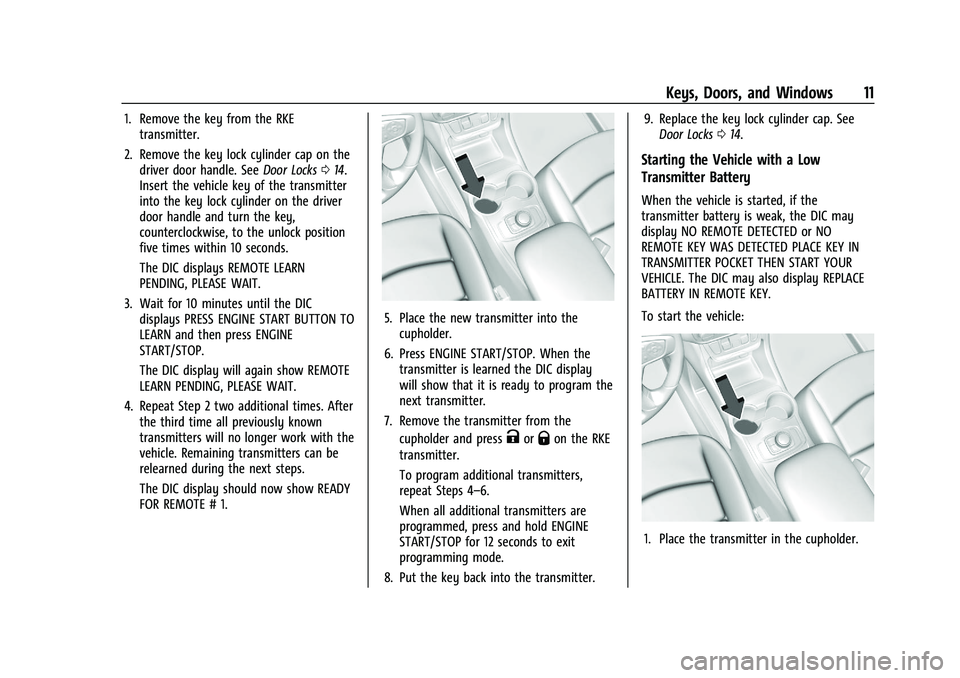
5. Place the new transmitter into thecupholder.
6. Press ENGINE START/STOP. When the transmitter is learned the DIC display
will show that it is ready to program the
next transmitter.
7. Remove the transmitter from the cupholder and press
KorQon the RKE
transmitter.
To program additional transmitters,
repeat Steps 4–6.
When all additional transmitters are
programmed, press and hold ENGINE
START/STOP for 12 seconds to exit
programming mode.
8. Put the key back into the transmitter. 9. Replace the key lock cylinder cap. See
Door Locks 014.
Starting the Vehicle with a Low
Transmitter Battery
When the vehicle is started, if the
transmitter battery is weak, the DIC may
display NO REMOTE DETECTED or NO
REMOTE KEY WAS DETECTED PLACE KEY IN
TRANSMITTER POCKET THEN START YOUR
VEHICLE. The DIC may also display REPLACE
BATTERY IN REMOTE KEY.
To start the vehicle:
1. Place the transmitter in the cupholder.
Page 21 of 377
GMC Terrain/Terrain Denali Owner Manual(GMNA-Localizing-U.S./Canada/
Mexico-14420055) - 2021 - CRC - 11/13/20
20 Keys, Doors, and Windows
liftgate continues to automatically close
after opening, see your dealer for service
before using the power liftgate.
Interfering with the power liftgate motion
or manually closing the liftgate too quickly
after power opening may resemble a
support strut failure. This could also activate
the falling liftgate detection feature. Allow
the liftgate to complete its operation and
wait a few seconds before manually closing
the liftgate.
Obstacle Detection Features
If the liftgate encounters an obstacle during
a power open or close cycle, the liftgate will
automatically reverse direction and move a
short distance away from the obstacle. After
removing the obstruction, the power liftgate
operation can be used again. If the liftgate
encounters multiple obstacles on the same
power cycle, the power function will
deactivate. After removing the obstructions,
manually close the liftgate which will allow
normal power operation functions to
resume.If the vehicle is locked while the liftgate is
closing, and an obstacle is encountered that
prevents the liftgate from completely
closing, the horn will sound as an alert that
the liftgate did not close.
Setting the 3/4 Mode
To change the position the liftgate stops at
when opening:
1. Select MAX or 3/4 mode and power open the liftgate.
2. Stop the liftgate movement at the desired height by pressing any liftgate
switch. Manually adjust the liftgate
position if needed.
3. Press and hold
lnext to the pull cup
on the bottom of the liftgate until the
turn signals flash and a beep sounds.
This indicates the setting has been
recorded.
The liftgate cannot be set below a minimum
programmable height. If there is no light
flash or sound, then the height adjustment
may be too low.
Manual Operation
Select OFF to manually operate the liftgate.
Caution
Attempting to move the liftgate too
quickly and with excessive force may
result in damage to the vehicle.
Operate the liftgate manually with a
smooth motion and moderate speed. The
system includes a feature which limits the
manual closing speed to protect the
components.
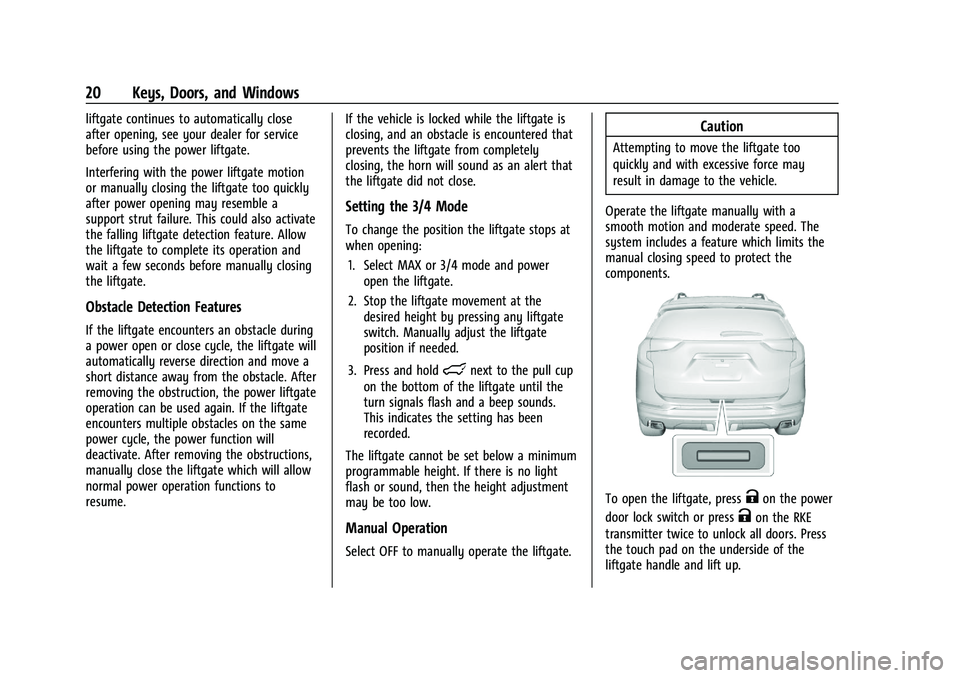
To open the liftgate, pressKon the power
door lock switch or press
Kon the RKE
transmitter twice to unlock all doors. Press
the touch pad on the underside of the
liftgate handle and lift up.
Page 22 of 377
GMC Terrain/Terrain Denali Owner Manual(GMNA-Localizing-U.S./Canada/
Mexico-14420055) - 2021 - CRC - 11/13/20
Keys, Doors, and Windows 21
Use the pull cup to lower and close the
liftgate. Do not press the touch pad while
closing the liftgate. This will cause the
liftgate to be unlatched.
The liftgate can be opened when locked if
the RKE transmitter is within 1 m (3 ft) of
the liftgate. SeeRemote Keyless Entry (RKE)
System Operation 07.
The liftgate has an electric latch. If the
battery is disconnected or has low voltage,
the liftgate will not open. The liftgate will
resume operation when the battery is
reconnected and charged.
Hands-Free Operation
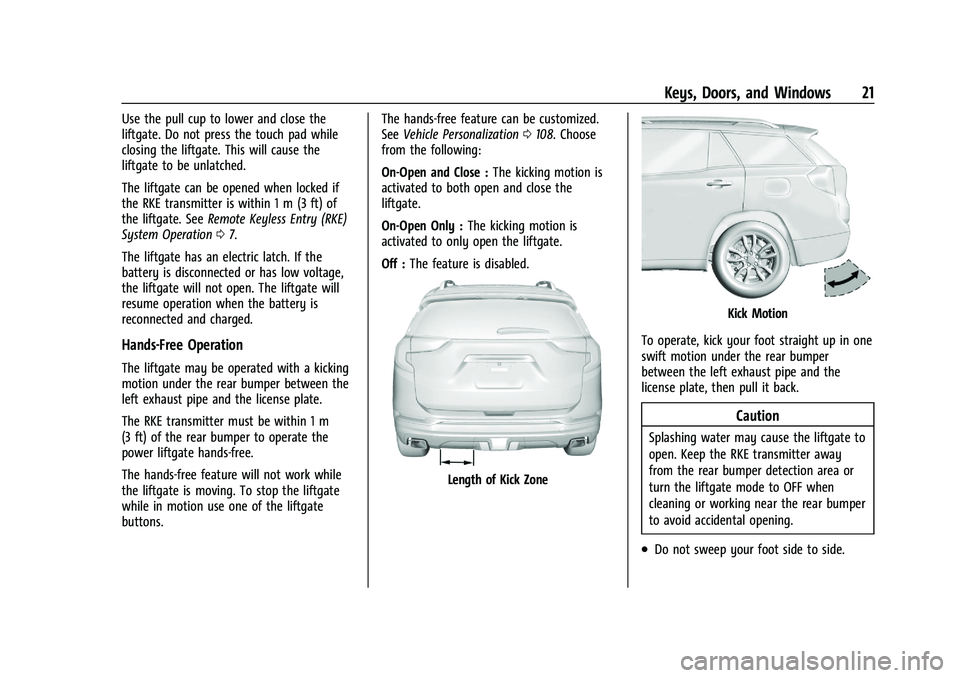
The liftgate may be operated with a kicking
motion under the rear bumper between the
left exhaust pipe and the license plate.
The RKE transmitter must be within 1 m
(3 ft) of the rear bumper to operate the
power liftgate hands-free.
The hands-free feature will not work while
the liftgate is moving. To stop the liftgate
while in motion use one of the liftgate
buttons. The hands-free feature can be customized.
See
Vehicle Personalization 0108. Choose
from the following:
On-Open and Close : The kicking motion is
activated to both open and close the
liftgate.
On-Open Only : The kicking motion is
activated to only open the liftgate.
Off : The feature is disabled.
Length of Kick Zone
Kick Motion
To operate, kick your foot straight up in one
swift motion under the rear bumper
between the left exhaust pipe and the
license plate, then pull it back.
Caution
Splashing water may cause the liftgate to
open. Keep the RKE transmitter away
from the rear bumper detection area or
turn the liftgate mode to OFF when
cleaning or working near the rear bumper
to avoid accidental opening.
.Do not sweep your foot side to side.
Page 29 of 377
GMC Terrain/Terrain Denali Owner Manual(GMNA-Localizing-U.S./Canada/
Mexico-14420055) - 2021 - CRC - 11/13/20
28 Keys, Doors, and Windows
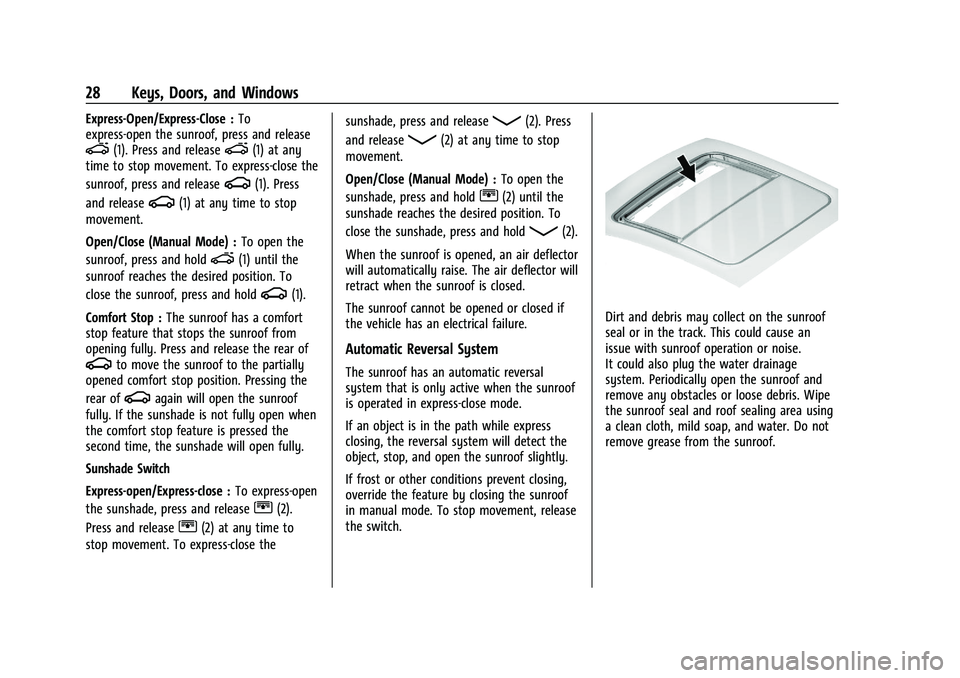
Express-Open/Express-Close :To
express-open the sunroof, press and release
e(1). Press and releasee(1) at any
time to stop movement. To express-close the
sunroof, press and release
g(1). Press
and release
g(1) at any time to stop
movement.
Open/Close (Manual Mode) : To open the
sunroof, press and hold
e(1) until the
sunroof reaches the desired position. To
close the sunroof, press and hold
g(1).
Comfort Stop : The sunroof has a comfort
stop feature that stops the sunroof from
opening fully. Press and release the rear of
gto move the sunroof to the partially
opened comfort stop position. Pressing the
rear of
gagain will open the sunroof
fully. If the sunshade is not fully open when
the comfort stop feature is pressed the
second time, the sunshade will open fully.
Sunshade Switch
Express-open/Express-close : To express-open
the sunshade, press and release
r(2).
Press and release
r(2) at any time to
stop movement. To express-close the sunshade, press and release
Q(2). Press
and release
Q(2) at any time to stop
movement.
Open/Close (Manual Mode) : To open the
sunshade, press and hold
r(2) until the
sunshade reaches the desired position. To
close the sunshade, press and hold
Q(2).
When the sunroof is opened, an air deflector
will automatically raise. The air deflector will
retract when the sunroof is closed.
The sunroof cannot be opened or closed if
the vehicle has an electrical failure.
Automatic Reversal System
The sunroof has an automatic reversal
system that is only active when the sunroof
is operated in express-close mode.
If an object is in the path while express
closing, the reversal system will detect the
object, stop, and open the sunroof slightly.
If frost or other conditions prevent closing,
override the feature by closing the sunroof
in manual mode. To stop movement, release
the switch.
Dirt and debris may collect on the sunroof
seal or in the track. This could cause an
issue with sunroof operation or noise.
It could also plug the water drainage
system. Periodically open the sunroof and
remove any obstacles or loose debris. Wipe
the sunroof seal and roof sealing area using
a clean cloth, mild soap, and water. Do not
remove grease from the sunroof.
Page 52 of 377
GMC Terrain/Terrain Denali Owner Manual(GMNA-Localizing-U.S./Canada/
Mexico-14420055) - 2021 - CRC - 11/13/20
Seats and Restraints 51
How Does an Airbag Restrain?
In moderate to severe frontal or near frontal
collisions, even belted occupants can contact
the steering wheel or the instrument panel.
In moderate to severe side collisions, even
belted occupants can contact the inside of
the vehicle.
Airbags supplement the protection provided
by seat belts by distributing the force of the
impact more evenly over the
occupant's body.
Rollover capable roof-rail airbags are
designed to help contain the head and chest
of occupants in the outboard seating
positions in the first and second rows. The
rollover capable roof-rail airbags are
designed to help reduce the risk of full or
partial ejection in rollover events, although
no system can prevent all such ejections.
But airbags would not help in many types
of collisions, primarily because the
occupant's motion is not toward those
airbags. SeeWhen Should an Airbag Inflate?
0 50.
Airbags should never be regarded as
anything more than a supplement to seat
belts.
What Will You See after an
Airbag Inflates?
After frontal and seat-mounted side impact
airbags inflate, they quickly deflate, so
quickly that some people may not even
realize the airbags inflated. Roof-rail airbags
may still be at least partially inflated for
some time after they inflate. Some
components of the airbag module may be
hot for several minutes. For location of the
airbags, see Where Are the Airbags? 048.
The parts of the airbag that come into
contact with you may be warm, but not too
hot to touch. There may be some smoke
and dust coming from the vents in the
deflated airbags. Airbag inflation does not
prevent the driver from seeing out of the
windshield or being able to steer the
vehicle, nor does it prevent people from
leaving the vehicle.
{Warning
When an airbag inflates, there may be
dust in the air. This dust could cause
breathing problems for people with a
history of asthma or other breathing
trouble. To avoid this, everyone in the (Continued)
Warning (Continued)
vehicle should get out as soon as it is
safe to do so. If you have breathing
problems but cannot get out of the
vehicle after an airbag inflates, then get
fresh air by opening a window or a door.
If you experience breathing problems
following an airbag deployment, you
should seek medical attention.
The vehicle has a feature that may
automatically unlock the doors, turn on the
interior lamps and hazard warning flashers,
and shut off the fuel system after the
airbags inflate. The feature may also
activate, without airbag inflation, after an
event that exceeds a predetermined
threshold. After turning the ignition off and
then on again, the fuel system will return to
normal operation; the doors can be locked,
the interior lamps can be turned off, and
the hazard warning flashers can be turned
off using the controls for those features.
If any of these systems are damaged in the
crash they may not operate as normal.
Page 53 of 377
GMC Terrain/Terrain Denali Owner Manual(GMNA-Localizing-U.S./Canada/
Mexico-14420055) - 2021 - CRC - 11/13/20
52 Seats and Restraints
{Warning
A crash severe enough to inflate the
airbags may have also damaged
important functions in the vehicle, such
as the fuel system, brake and steering
systems, etc. Even if the vehicle appears
to be drivable after a moderate crash,
there may be concealed damage that
could make it difficult to safely operate
the vehicle.
Use caution if you should attempt to
restart the engine after a crash has
occurred.
In many crashes severe enough to inflate
the airbag, windshields are broken by
vehicle deformation. Additional windshield
breakage may also occur from the front
outboard passenger airbag.
.Airbags are designed to inflate only once.
After an airbag inflates, you will need
some new parts for the airbag system.
If you do not get them, the airbag
system will not be there to help protect
you in another crash. A new system will
include airbag modules and possibly other
parts. The service manual for the vehicle
covers the need to replace other parts.
.The vehicle has a crash sensing and
diagnostic module which records
information after a crash. See Vehicle
Data Recording and Privacy 0355 and
Event Data Recorders 0356.
.Let only qualified technicians work on the
airbag systems. Improper service can
mean that an airbag system will not work
properly. See your dealer for service.
Passenger Sensing System
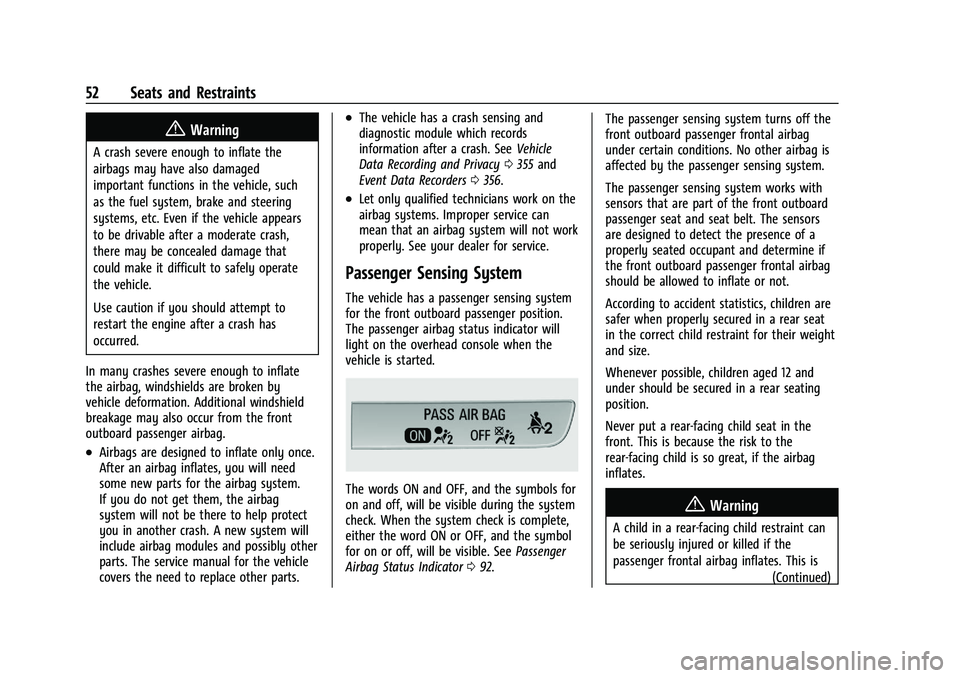
The vehicle has a passenger sensing system
for the front outboard passenger position.
The passenger airbag status indicator will
light on the overhead console when the
vehicle is started.
The words ON and OFF, and the symbols for
on and off, will be visible during the system
check. When the system check is complete,
either the word ON or OFF, and the symbol
for on or off, will be visible. See Passenger
Airbag Status Indicator 092. The passenger sensing system turns off the
front outboard passenger frontal airbag
under certain conditions. No other airbag is
affected by the passenger sensing system.
The passenger sensing system works with
sensors that are part of the front outboard
passenger seat and seat belt. The sensors
are designed to detect the presence of a
properly seated occupant and determine if
the front outboard passenger frontal airbag
should be allowed to inflate or not.
According to accident statistics, children are
safer when properly secured in a rear seat
in the correct child restraint for their weight
and size.
Whenever possible, children aged 12 and
under should be secured in a rear seating
position.
Never put a rear-facing child seat in the
front. This is because the risk to the
rear-facing child is so great, if the airbag
inflates.
{Warning
A child in a rear-facing child restraint can
be seriously injured or killed if the
passenger frontal airbag inflates. This is
(Continued)
Page 94 of 377
GMC Terrain/Terrain Denali Owner Manual(GMNA-Localizing-U.S./Canada/
Mexico-14420055) - 2021 - CRC - 11/13/20
Instruments and Controls 93
If the word ON, and the on symbol, are lit
on the passenger airbag status indicator, it
means that the front outboard passenger
frontal airbag is allowed to inflate.
If the word OFF, and the off symbol, are lit
on the passenger airbag status indicator, it
means that the passenger sensing system
has turned off the front outboard passenger
frontal airbag.
If, after several seconds, both status
indicator lights remain on, or if there are no
lights at all, there may be a problem with
the lights or the passenger sensing system.
See your dealer for service.
{Warning
If the airbag readiness light ever comes
on and stays on, it means that
something may be wrong with the airbag
system. To help avoid injury to yourself
or others, have the vehicle serviced right
away. SeeAirbag Readiness Light 092
for more information, including important
safety information.
Charging System Light
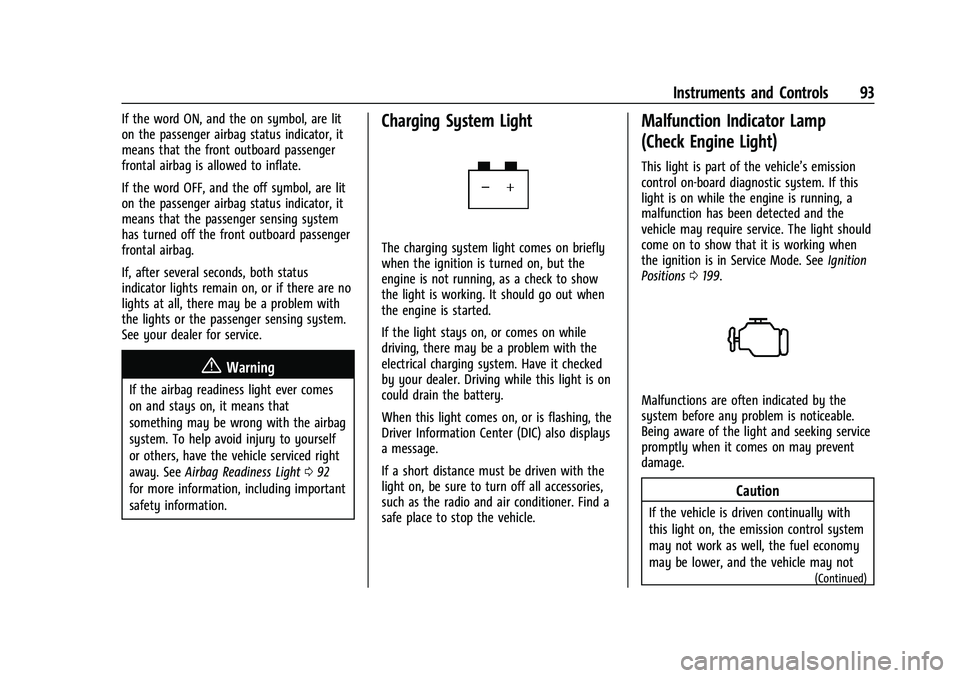
The charging system light comes on briefly
when the ignition is turned on, but the
engine is not running, as a check to show
the light is working. It should go out when
the engine is started.
If the light stays on, or comes on while
driving, there may be a problem with the
electrical charging system. Have it checked
by your dealer. Driving while this light is on
could drain the battery.
When this light comes on, or is flashing, the
Driver Information Center (DIC) also displays
a message.
If a short distance must be driven with the
light on, be sure to turn off all accessories,
such as the radio and air conditioner. Find a
safe place to stop the vehicle.
Malfunction Indicator Lamp
(Check Engine Light)
This light is part of the vehicle’s emission
control on-board diagnostic system. If this
light is on while the engine is running, a
malfunction has been detected and the
vehicle may require service. The light should
come on to show that it is working when
the ignition is in Service Mode. See Ignition
Positions 0199.
Malfunctions are often indicated by the
system before any problem is noticeable.
Being aware of the light and seeking service
promptly when it comes on may prevent
damage.
Caution
If the vehicle is driven continually with
this light on, the emission control system
may not work as well, the fuel economy
may be lower, and the vehicle may not
(Continued)
Page 108 of 377
GMC Terrain/Terrain Denali Owner Manual(GMNA-Localizing-U.S./Canada/
Mexico-14420055) - 2021 - CRC - 11/13/20
Instruments and Controls 107
selected distance. Displayed below the bar
graph is the best average fuel economy that
has been achieved for the selected distance.
The selected distance is displayed at the top
of the page as“last xxx mi/km.”
Press
Vto select the distance or reset best
value. Use
wandxto choose the
distance and press
V. Presswandxto
select “Reset Best Score.” Press
Vto reset
the best average fuel economy. After reset,
the best value displays “-,-”until the
selected distance has been traveled.
The display provides information on how
current driving behavior affects the running
average and how well recent driving
compares to the best that has been
achieved for the selected distance.
Average Speed : Displays the average
vehicle speed of the vehicle in kilometers
per hour (km/h) or miles per hour (mph).
This average is based on the various vehicle
speeds recorded since the last reset. Reset
the average speed by pressing
Vwhile this
display is active to show a confirmation
window to select yes or no and press
V. Timer :
This display can be used as a timer.
To start the timer, press
Vto open the
menu while this display is active. Use
w
andxto select Start Timer or Reset. Press
V. To stop the timer, pressVwhile this
display is active. The display will show the
amount of time that has passed since the
timer was last reset.
Follow Distance/Gap Setting : If equipped,
the current follow time to the vehicle ahead
is displayed as a time value on this page.
When Adaptive Cruise Control (ACC) has
been engaged, the display switches to the
gap setting page. This page shows the
current gap setting along with the vehicle
ahead indicator.
Driver Assistance : If equipped, shows
information for Lane Keep Assist (LKA), Lane
Departure Warning (LDW), and Forward
Collision Alert (FCA).
Battery Voltage : Displays the current
battery voltage, if equipped. Battery voltage
changes are normal while driving. See
Charging System Light 093. If there is a
problem with the battery charging system, a
DIC will display a message. Coolant Temperature :
Displays the coolant
temperature in degrees Celsius (°C) or
degrees Fahrenheit (°F).
Economy Trend : Shows history of the
Average Fuel Economy from the last 50 km
(30 mi). Each bar represents about 5 km
(3 mi) of driving. During driving the bars will
shift to always reflect the most recent
distance on the right side. Press
Vto open
the menu while this display is active to clear
the graph. Select yes or no and press
V.
Oil Pressure : Oil pressure is displayed in
either kilopascal (kPa) or in pounds per
square inch (psi). Oil pressure can vary with
engine speed, outside temperature, and oil
viscosity. On some models, the oil pump will
vary engine oil pressure according to engine
needs. Oil pressure may change quickly as
the engine speed or load varies. This is
normal. If the oil pressure warning light or
DIC message indicates oil pressure outside
the normal operating range, check the
vehicle's oil as soon as possible.