Screen GMC TERRAIN 2022 Owners Manual
[x] Cancel search | Manufacturer: GMC, Model Year: 2022, Model line: TERRAIN, Model: GMC TERRAIN 2022Pages: 371, PDF Size: 17.71 MB
Page 10 of 371
GMC Terrain/Terrain Denali Owner Manual (GMNA-Localizing-U.S./Canada/
Mexico-16540740) - 2023 - CRC - 6/16/22
Keys, Doors, and Windows 9
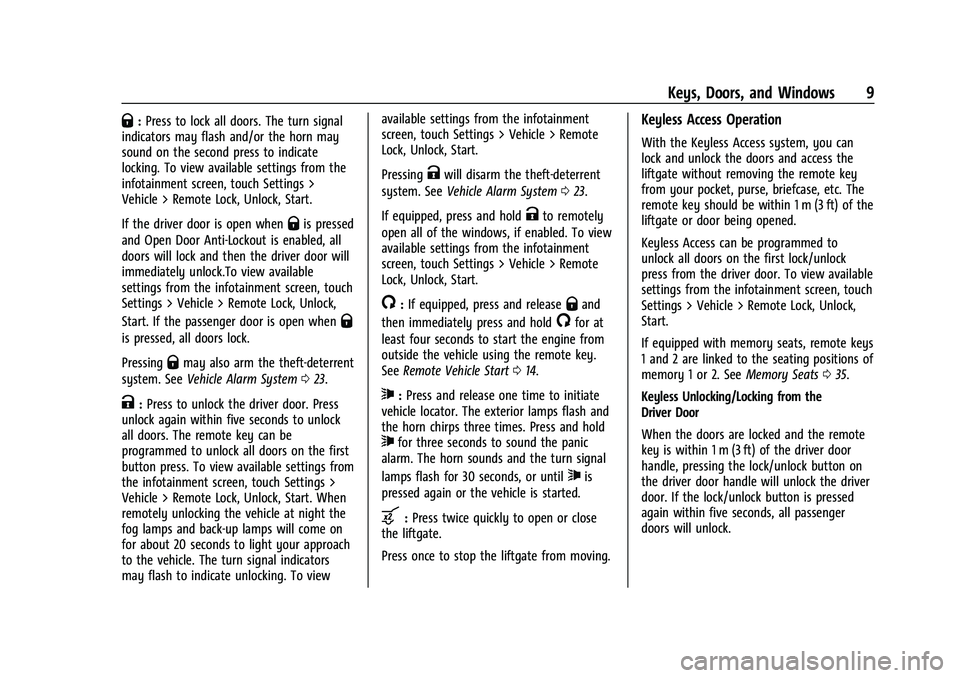
Q:Press to lock all doors. The turn signal
indicators may flash and/or the horn may
sound on the second press to indicate
locking. To view available settings from the
infotainment screen, touch Settings >
Vehicle > Remote Lock, Unlock, Start.
If the driver door is open when
Qis pressed
and Open Door Anti-Lockout is enabled, all
doors will lock and then the driver door will
immediately unlock.To view available
settings from the infotainment screen, touch
Settings > Vehicle > Remote Lock, Unlock,
Start. If the passenger door is open when
Q
is pressed, all doors lock.
Pressing
Qmay also arm the theft-deterrent
system. See Vehicle Alarm System 023.
K:Press to unlock the driver door. Press
unlock again within five seconds to unlock
all doors. The remote key can be
programmed to unlock all doors on the first
button press. To view available settings from
the infotainment screen, touch Settings >
Vehicle > Remote Lock, Unlock, Start. When
remotely unlocking the vehicle at night the
fog lamps and back-up lamps will come on
for about 20 seconds to light your approach
to the vehicle. The turn signal indicators
may flash to indicate unlocking. To view available settings from the infotainment
screen, touch Settings > Vehicle > Remote
Lock, Unlock, Start.
Pressing
Kwill disarm the theft-deterrent
system. See Vehicle Alarm System 023.
If equipped, press and hold
Kto remotely
open all of the windows, if enabled. To view
available settings from the infotainment
screen, touch Settings > Vehicle > Remote
Lock, Unlock, Start.
/: If equipped, press and releaseQand
then immediately press and hold
/for at
least four seconds to start the engine from
outside the vehicle using the remote key.
See Remote Vehicle Start 014.
7:Press and release one time to initiate
vehicle locator. The exterior lamps flash and
the horn chirps three times. Press and hold
7for three seconds to sound the panic
alarm. The horn sounds and the turn signal
lamps flash for 30 seconds, or until
7is
pressed again or the vehicle is started.
b: Press twice quickly to open or close
the liftgate.
Press once to stop the liftgate from moving.
Keyless Access Operation
With the Keyless Access system, you can
lock and unlock the doors and access the
liftgate without removing the remote key
from your pocket, purse, briefcase, etc. The
remote key should be within 1 m (3 ft) of the
liftgate or door being opened.
Keyless Access can be programmed to
unlock all doors on the first lock/unlock
press from the driver door. To view available
settings from the infotainment screen, touch
Settings > Vehicle > Remote Lock, Unlock,
Start.
If equipped with memory seats, remote keys
1 and 2 are linked to the seating positions of
memory 1 or 2. See Memory Seats035.
Keyless Unlocking/Locking from the
Driver Door
When the doors are locked and the remote
key is within 1 m (3 ft) of the driver door
handle, pressing the lock/unlock button on
the driver door handle will unlock the driver
door. If the lock/unlock button is pressed
again within five seconds, all passenger
doors will unlock.
Page 11 of 371
GMC Terrain/Terrain Denali Owner Manual (GMNA-Localizing-U.S./Canada/
Mexico-16540740) - 2023 - CRC - 6/16/22
10 Keys, Doors, and Windows
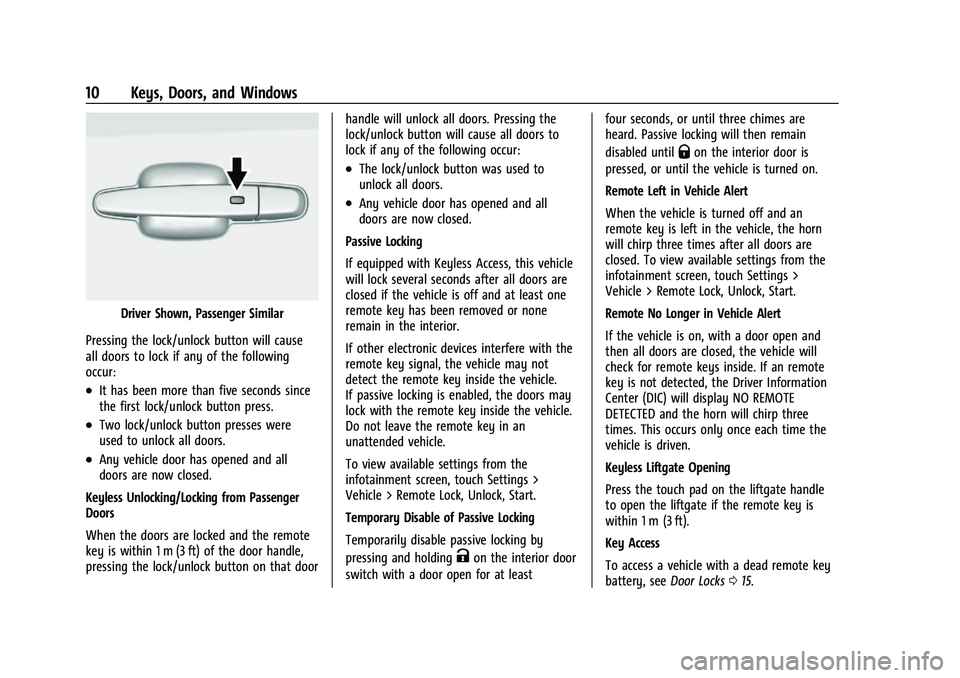
Driver Shown, Passenger Similar
Pressing the lock/unlock button will cause
all doors to lock if any of the following
occur:
.It has been more than five seconds since
the first lock/unlock button press.
.Two lock/unlock button presses were
used to unlock all doors.
.Any vehicle door has opened and all
doors are now closed.
Keyless Unlocking/Locking from Passenger
Doors
When the doors are locked and the remote
key is within 1 m (3 ft) of the door handle,
pressing the lock/unlock button on that door handle will unlock all doors. Pressing the
lock/unlock button will cause all doors to
lock if any of the following occur:
.The lock/unlock button was used to
unlock all doors.
.Any vehicle door has opened and all
doors are now closed.
Passive Locking
If equipped with Keyless Access, this vehicle
will lock several seconds after all doors are
closed if the vehicle is off and at least one
remote key has been removed or none
remain in the interior.
If other electronic devices interfere with the
remote key signal, the vehicle may not
detect the remote key inside the vehicle.
If passive locking is enabled, the doors may
lock with the remote key inside the vehicle.
Do not leave the remote key in an
unattended vehicle.
To view available settings from the
infotainment screen, touch Settings >
Vehicle > Remote Lock, Unlock, Start.
Temporary Disable of Passive Locking
Temporarily disable passive locking by
pressing and holding
Kon the interior door
switch with a door open for at least four seconds, or until three chimes are
heard. Passive locking will then remain
disabled until
Qon the interior door is
pressed, or until the vehicle is turned on.
Remote Left in Vehicle Alert
When the vehicle is turned off and an
remote key is left in the vehicle, the horn
will chirp three times after all doors are
closed. To view available settings from the
infotainment screen, touch Settings >
Vehicle > Remote Lock, Unlock, Start.
Remote No Longer in Vehicle Alert
If the vehicle is on, with a door open and
then all doors are closed, the vehicle will
check for remote keys inside. If an remote
key is not detected, the Driver Information
Center (DIC) will display NO REMOTE
DETECTED and the horn will chirp three
times. This occurs only once each time the
vehicle is driven.
Keyless Liftgate Opening
Press the touch pad on the liftgate handle
to open the liftgate if the remote key is
within 1 m (3 ft).
Key Access
To access a vehicle with a dead remote key
battery, see Door Locks015.
Page 18 of 371
GMC Terrain/Terrain Denali Owner Manual (GMNA-Localizing-U.S./Canada/
Mexico-16540740) - 2023 - CRC - 6/16/22
Keys, Doors, and Windows 17
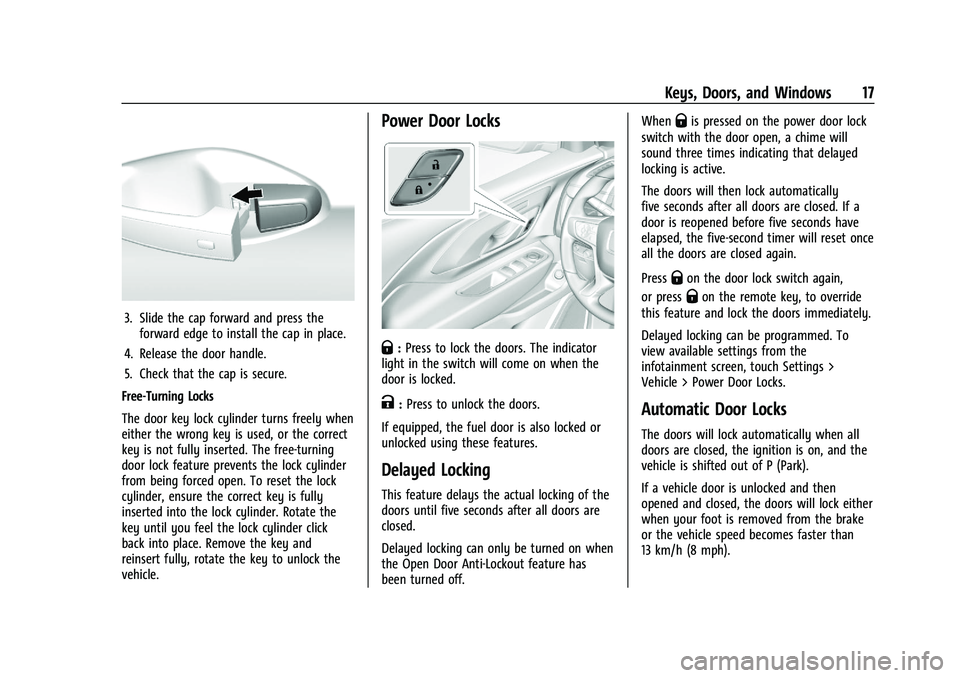
3. Slide the cap forward and press theforward edge to install the cap in place.
4. Release the door handle.
5. Check that the cap is secure.
Free-Turning Locks
The door key lock cylinder turns freely when
either the wrong key is used, or the correct
key is not fully inserted. The free-turning
door lock feature prevents the lock cylinder
from being forced open. To reset the lock
cylinder, ensure the correct key is fully
inserted into the lock cylinder. Rotate the
key until you feel the lock cylinder click
back into place. Remove the key and
reinsert fully, rotate the key to unlock the
vehicle.
Power Door Locks
Q: Press to lock the doors. The indicator
light in the switch will come on when the
door is locked.
K: Press to unlock the doors.
If equipped, the fuel door is also locked or
unlocked using these features.
Delayed Locking
This feature delays the actual locking of the
doors until five seconds after all doors are
closed.
Delayed locking can only be turned on when
the Open Door Anti-Lockout feature has
been turned off. When
Qis pressed on the power door lock
switch with the door open, a chime will
sound three times indicating that delayed
locking is active.
The doors will then lock automatically
five seconds after all doors are closed. If a
door is reopened before five seconds have
elapsed, the five-second timer will reset once
all the doors are closed again.
Press
Qon the door lock switch again,
or press
Qon the remote key, to override
this feature and lock the doors immediately.
Delayed locking can be programmed. To
view available settings from the
infotainment screen, touch Settings >
Vehicle > Power Door Locks.
Automatic Door Locks
The doors will lock automatically when all
doors are closed, the ignition is on, and the
vehicle is shifted out of P (Park).
If a vehicle door is unlocked and then
opened and closed, the doors will lock either
when your foot is removed from the brake
or the vehicle speed becomes faster than
13 km/h (8 mph).
Page 19 of 371

GMC Terrain/Terrain Denali Owner Manual (GMNA-Localizing-U.S./Canada/
Mexico-16540740) - 2023 - CRC - 6/16/22
18 Keys, Doors, and Windows
To unlock the doors:
.PressKon the power door lock switch.
.Shift into P (Park).
Automatic door locking cannot be disabled.
Automatic door unlocking can be
programmed. To view available settings
from the infotainment screen, touch Settings
> Vehicle > Power Door Locks.
Lockout Protection
If the ignition is on or in accessory mode
and the power door lock switch is pressed
with the driver door open, all the doors will
lock and only the driver door will unlock.
If the vehicle is off and locking is requested
while a door is open, when all doors are
closed the vehicle will check for remote keys
inside. If an remote key is detected and the
number of remote keys inside has not
reduced, the driver door will unlock and the
horn will chirp three times.
Lockout Protection can be manually
overridden by pressing and holding
Qon
the power door lock switch. Open Door Anti-Lockout
If Open Door Anti-Lockout is turned on and
the vehicle is off, the driver door is open,
and locking is requested, all the doors will
lock and only the driver door will unlock.
The Open Door Anti-Lockout feature can be
turned on or off. To view available settings
from the infotainment screen, touch Settings
> Vehicle > Power Door Locks.
Safety Locks
The rear door safety locks prevent
passengers from opening the rear doors
from inside the vehicle.
Manual Safety Locks
If equipped, the safety lock is on the inside
edge of the rear doors. To use the
safety lock:
1. Move the lever down to the lock position.
2. Close the door.
3. Do the same for the other rear door.
To open a rear door when the safety lock
is on: 1. Unlock the door by activating the inside handle, by pressing the power door lock
switch, or by using the Remote Keyless
Entry (RKE) transmitter.
2. Open the door from the outside.
When the safety lock is enabled, adults and
older children will not be able to open the
rear door from the inside. Cancel the safety
locks to enable the doors to open from the
inside.
To cancel the safety lock: 1. Unlock the door and open it from the outside.
2. Move the lever up to unlock. Do the same for the other door.
Page 23 of 371
GMC Terrain/Terrain Denali Owner Manual (GMNA-Localizing-U.S./Canada/
Mexico-16540740) - 2023 - CRC - 6/16/22
22 Keys, Doors, and Windows
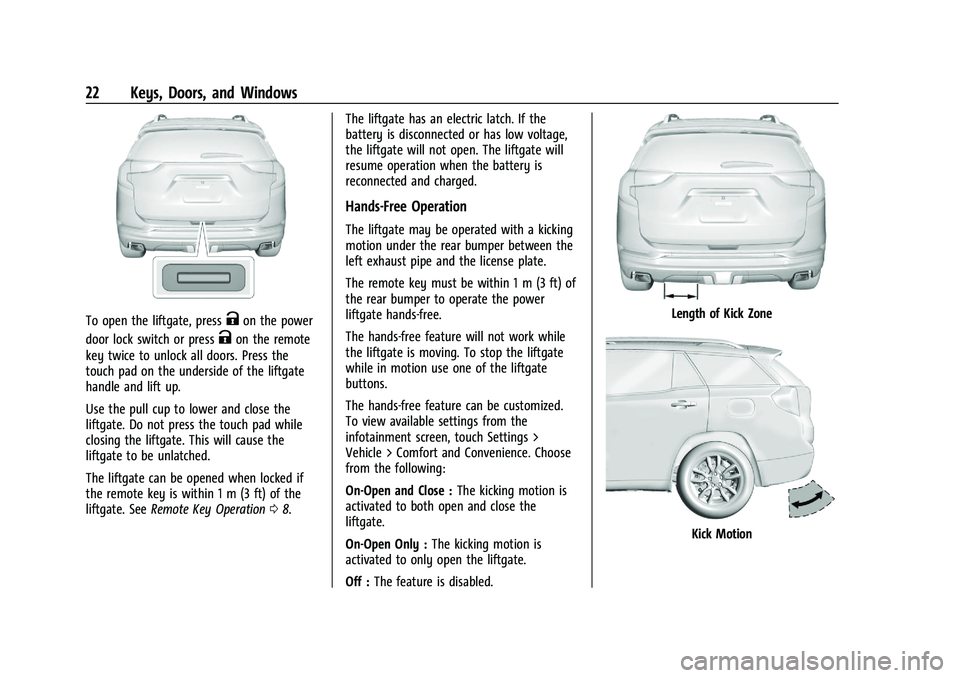
To open the liftgate, pressKon the power
door lock switch or press
Kon the remote
key twice to unlock all doors. Press the
touch pad on the underside of the liftgate
handle and lift up.
Use the pull cup to lower and close the
liftgate. Do not press the touch pad while
closing the liftgate. This will cause the
liftgate to be unlatched.
The liftgate can be opened when locked if
the remote key is within 1 m (3 ft) of the
liftgate. See Remote Key Operation 08. The liftgate has an electric latch. If the
battery is disconnected or has low voltage,
the liftgate will not open. The liftgate will
resume operation when the battery is
reconnected and charged.
Hands-Free Operation
The liftgate may be operated with a kicking
motion under the rear bumper between the
left exhaust pipe and the license plate.
The remote key must be within 1 m (3 ft) of
the rear bumper to operate the power
liftgate hands-free.
The hands-free feature will not work while
the liftgate is moving. To stop the liftgate
while in motion use one of the liftgate
buttons.
The hands-free feature can be customized.
To view available settings from the
infotainment screen, touch Settings >
Vehicle > Comfort and Convenience. Choose
from the following:
On-Open and Close :
The kicking motion is
activated to both open and close the
liftgate.
On-Open Only : The kicking motion is
activated to only open the liftgate.
Off : The feature is disabled.
Length of Kick Zone
Kick Motion
Page 27 of 371
GMC Terrain/Terrain Denali Owner Manual (GMNA-Localizing-U.S./Canada/
Mexico-16540740) - 2023 - CRC - 6/16/22
26 Keys, Doors, and Windows
Heated Mirrors
If equipped, the heated outside mirrors turn
on when the rear window defogger is on
and help to clear fog or frost from the
surface of the mirrors.
K:This button is on the climate control
panel.
See “Rear Window Defogger” underDual
Automatic Climate Control System 0180.
Automatic Dimming Mirror
If the vehicle has the automatic dimming
mirror, the driver outside mirror
automatically adjusts for the glare of
headlamps behind you.
Reverse Tilt Mirrors
If equipped with reverse tilt mirrors and
memory seats, the passenger and/or driver
mirror tilts to a preselected position when
the vehicle is in R (Reverse). This allows the
curb to be seen when parallel parking.
The mirror(s) may move from their tilted
position when:
.The vehicle is shifted out of R (Reverse),
or remains in R (Reverse) for about
30 seconds.
.The vehicle is turned off.
.The vehicle is driven in R (Reverse) above
a set speed.
To view available settings from the
infotainment screen, touch Settings >
Vehicle > Comfort and Convenience.
Interior Mirrors
Interior Rearview Mirrors
Adjust the rearview mirror for a clear view
of the area behind your vehicle.
Do not spray glass cleaner directly on the
mirror. Use a soft towel dampened with
water.
Manual Rearview Mirror
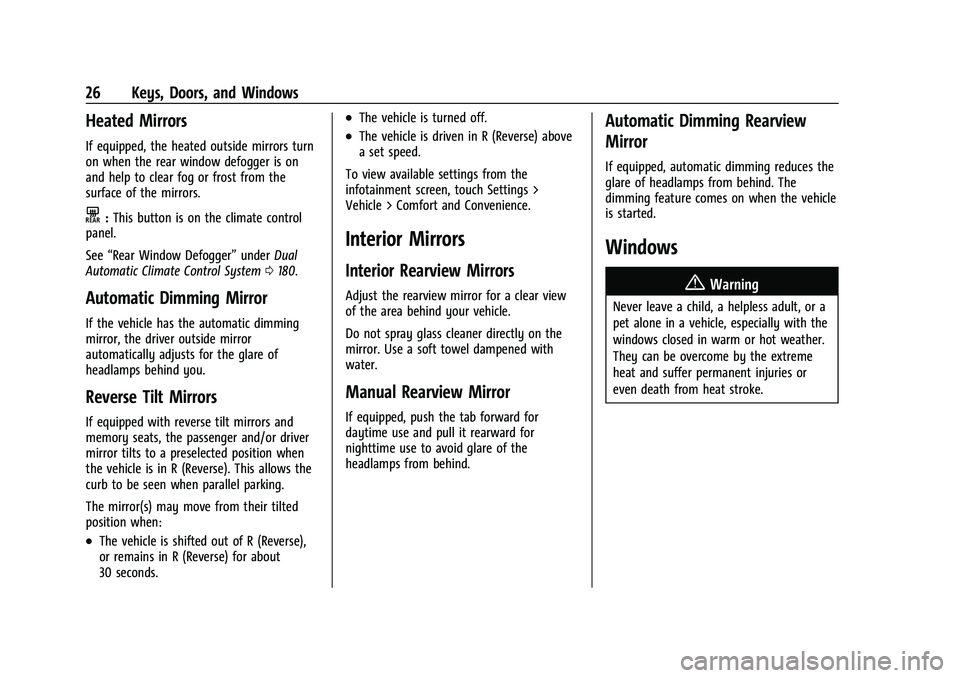
If equipped, push the tab forward for
daytime use and pull it rearward for
nighttime use to avoid glare of the
headlamps from behind.
Automatic Dimming Rearview
Mirror
If equipped, automatic dimming reduces the
glare of headlamps from behind. The
dimming feature comes on when the vehicle
is started.
Windows
{
Warning
Never leave a child, a helpless adult, or a
pet alone in a vehicle, especially with the
windows closed in warm or hot weather.
They can be overcome by the extreme
heat and suffer permanent injuries or
even death from heat stroke.
Page 29 of 371
GMC Terrain/Terrain Denali Owner Manual (GMNA-Localizing-U.S./Canada/
Mexico-16540740) - 2023 - CRC - 6/16/22
28 Keys, Doors, and Windows
If equipped, pull the window switch up fully
and quickly release to express close the
window.
Briefly press or pull the window switch in
the same direction to stop that window’s
express movement.
Window Automatic Reversal System
The express-close feature will reverse
window movement if it comes in contact
with an object. Extreme cold or ice could
cause the window to auto-reverse. The
window will operate normally after the
object or condition is removed.
Automatic Reversal System Override
{Warning
If automatic reversal system override is
active, the window will not reverse
automatically. You or others could be
injured and the window could be
damaged. Before using automatic reversal
system override, make sure that all
people and obstructions are clear of the
window path.When the engine is on, override the
automatic reversal system by pulling and
holding the window switch if conditions
prevent it from closing.
Programming the Power Windows
Programming may be necessary if the
vehicle’s battery has been disconnected or
discharged. If the window will not express
close, program each express-close window:
1. Close all doors.
2. Turn the ignition on or to accessory mode.
3. Partially open the window to be programmed. Then close it and continue
to pull the switch briefly after the
window has fully closed.
4. Open the window and continue to press the switch briefly after the window has
fully opened.
Remote Window Operation
If equipped, this feature allows all the
windows to be opened remotely. If enabled in vehicle personalization, press
and hold
Kon the remote key. To view
available settings from the infotainment
screen, touch Settings > Vehicle > Remote
Lock, Unlock, Start.
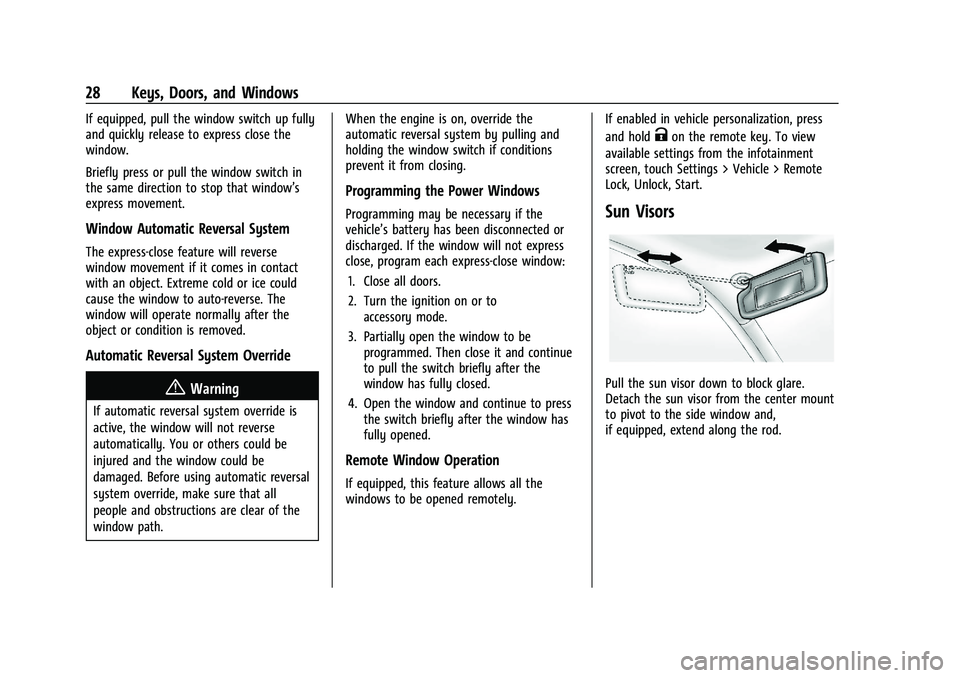
Sun Visors
Pull the sun visor down to block glare.
Detach the sun visor from the center mount
to pivot to the side window and,
if equipped, extend along the rod.
Page 86 of 371
GMC Terrain/Terrain Denali Owner Manual (GMNA-Localizing-U.S./Canada/
Mexico-16540740) - 2023 - CRC - 6/16/22
Instruments and Controls 85
(RAP) off and then back on. SeeRetained
Accessory Power (RAP) 0205. The power
restarts when equipment using 150 watts or
less is plugged into the outlet and a system
fault is not detected.
The power outlet is not designed for the
following and may not work properly if they
are plugged in:
.Equipment with high initial peak wattage,
such as compressor-driven refrigerators
and electric power tools
.Other equipment requiring an extremely
stable power supply, such as
microcomputer-controlled electric blankets
and touch sensor lamps
.Medical equipment
Wireless Charging
If equipped and enabled, the vehicle has
wireless charging pocket outside the armrest
of the center console. The system operates
at 145 kHz and wirelessly charges one Qi
compatible smartphone. The power output
of the system is capable of charging at a
rate up to 3 amp (15 W), as requested by
the compatible smartphone. See Radio
Frequency Statement 0347.
{Warning
Wireless charging may affect the
operation of an implanted pacemaker or
other medical devices. If you have one, it
is recommended to consult with your
doctor before using the wireless charging
system.
The vehicle must be on, in accessory mode,
or Retained Accessory Power (RAP) must be
active. The wireless charging feature may
not correctly indicate charging when the
vehicle is in RAP, during a Bluetooth phone
call, or when phone projection (e.g. Apple
CarPlay / Android Auto) is active. See
Retained Accessory Power (RAP) 0205. The operating temperature is
−40 °C (−40 °F)
to 85 °C (185 °F) for the charging system and
0 °C (32 °F) to 35 °C (95 °F) for the phone.
A charging stopped alert may be displayed
on the infotainment screen, if the wireless
charger or smartphone are outside of
normal operating temperature. Charging will
automatically resume when a normal
operating temperature is reached.
{Warning
Remove all objects from the charger
before charging your compatible
smartphone. Objects, such as coins, keys,
rings, paper clips, or cards, between the
smartphone and charger may become
very hot.
On the rare occasion that the charging
system does not detect an object, and
the object gets wedged between the
smartphone and charger, remove the
smartphone and allow the object to cool
before removing it from the charger, to
prevent burns.
Page 87 of 371

GMC Terrain/Terrain Denali Owner Manual (GMNA-Localizing-U.S./Canada/
Mexico-16540740) - 2023 - CRC - 6/16/22
86 Instruments and Controls
To charge a compatible smartphone:1. Confirm the smartphone is capable of wireless charging.
2. Remove all objects from the charging pocket. The system may not charge if
there are any objects between the
smartphone and charger.
3. Insert phone into vertical pocket with the screen pointing towards the rear of the
vehicle.
To maximize the charge rate, ensure the
smartphone is fully seated and centered
in the holder with nothing under it. A thick smartphone case may prevent
the charger from working, or reduce the
charging performance. See your dealer
for additional information.
4. A green
]will appear on the
infotainment display, next to the phone
icon. This indicates that the smartphone
is detected.
5. If a smartphone is placed on the charger and
]turns off or turns yellow, remove
the smartphone and any objects from
the pocket. Turn the smartphone
180 degrees and wait a few seconds
before placing/aligning it on the pocket
again.
6. If a smartphone is placed on the charger and
]turns red, the charger and/or the
smartphone is overheated. Remove the
smartphone and any objects from the
charger in order to cool the system.
The smartphone may become warm during
charging. This is normal. In warmer
temperatures, the speed of charging may be
reduced.
For vehicles with wireless phone projection,
the smartphone may overheat during
wireless charging. The smartphone may slow
down, stop charging, or shut down to protect the battery. The phone may need to
be removed from its case to prevent
overheating. The
]may flash while the
phone is cooling down enough for wireless
charging to automatically resume. This is
normal. Individual phone performance
may vary.
Software Acknowledgements
Certain Wireless Charging Module product
from LG Electronics, Inc. ("LGE") contains the
open source software detailed below. Refer
to the indicated open source licenses (as are
included following this notice) for the terms
and conditions of their use.
OSS Notice Information
To obtain the source code that is contained
in this product, please visit https://
opensource.lge.com. In addition to the
source code, all referred license terms,
warranty disclaimers and copyright notices
are available for download. LG Electronics
will also provide open source code to you
on CD-ROM for a charge covering the cost of
performing such distribution (such as the
cost of media, shipping, and handling) upon
email request to [email protected]. This
offer is valid for three (3) years from the
date on which you purchased the product.
Page 109 of 371

GMC Terrain/Terrain Denali Owner Manual (GMNA-Localizing-U.S./Canada/
Mexico-16540740) - 2023 - CRC - 6/16/22
108 Instruments and Controls
Cruise Control Light
The cruise control light is white when the
cruise control is on and ready, and turns
green when the cruise control is set and
active. SeeCruise Control 0220.
Adaptive Cruise Control Light
This light is white when the Adaptive Cruise
Control (ACC, if equipped) is on and ready,
and turns green when the ACC is set and
active. See Adaptive Cruise Control (Camera)
0 222.
Door Ajar Light
This light comes on when a door is open or
not securely latched. Before driving, check
that all doors are properly closed.
Information Displays
Driver Information Center (DIC)
(Base and Midlevel)
The DIC displays are shown in the center of
the instrument cluster in the Info app. See
Instrument Cluster (Base and Midlevel) 088
or Instrument Cluster (Uplevel) 091 or
Instrument Cluster (Denali Only) 093. The
displays show the status of many vehicle
systems. The controls for the DIC are on the
right steering wheel control.
worx: Press to move up or down in
a list.
oorp: Press to move between the
interactive display zones in the cluster.
V: Press to open a menu or select a menu
item. Press and hold to reset values on
certain screens.
Base Level DIC
Useoorpto choose the Trip, Vehicle,
or Eco menus. Use
worxto scroll
through items in each menu.