change time GMC YUKON 2009 Get To Know Guide
[x] Cancel search | Manufacturer: GMC, Model Year: 2009, Model line: YUKON, Model: GMC YUKON 2009Pages: 24, PDF Size: 1.31 MB
Page 12 of 24

Getting to Know Your Yukon/Yukon Denali12
Setting the Speed Compensated
Volume (if equipped)
With Speed Compensated Volume, the
radio automatically adjusts the volume
to compensate for road noise as vehicle
speed changes.
To set Speed Compensated Volume:
1. Set the radio volume to the desired
level.
2. Press the MENU button to display the
radio setup menu.
3. Press the pushbutton below the auto
volume label on the radio display.
4. Press the pushbutton under the
desired setting (Off, Low, Medium
or High) to select the level of
compensation.
The compensation will be set once the
display times out after 10 seconds.
Setting the Time
To set the time:
1. Press the (Clock) button. Or,
if equipped, press the MENU button
until the clock option is displayed;
and then press the pushbutton
located under the clock option label.
The HR, MIN, MM, DD, YYYY labels
will appear on the display.
2. Press the pushbutton under any of
the labels to be changed.
3. Press the pushbutton again, the right
SEEK arrow or the FWD button to
increase the numbers. Press the left
SEEK arrow or the REV button to
decrease the numbers. Rotating the
(Tune) knob also will increase or
decrease the selected label.
4. Press the Clock or MENU button to
set the displayed time and date.MP3 Capability
Your audio system has MP3 playing
capability. A CD-R containing MP3 audio
files will play automatically when insert-
ed into the CD player. An MP3 label will
be displayed.
Radio Data System (if equipped)
When you tune to a Radio Data System
(RDS) station, the station name and call
letters will appear on the display instead
of the frequency. RDS stations may also
provide the time of day, a program type
for current programming and the name
of the program being broadcast.
RDS features are available for use only
on FM stations that broadcast RDS
information. RDS relies on receiving
specific information from these stations
and will work only when the information
is available.
See Section 3 of your Owner Manual.
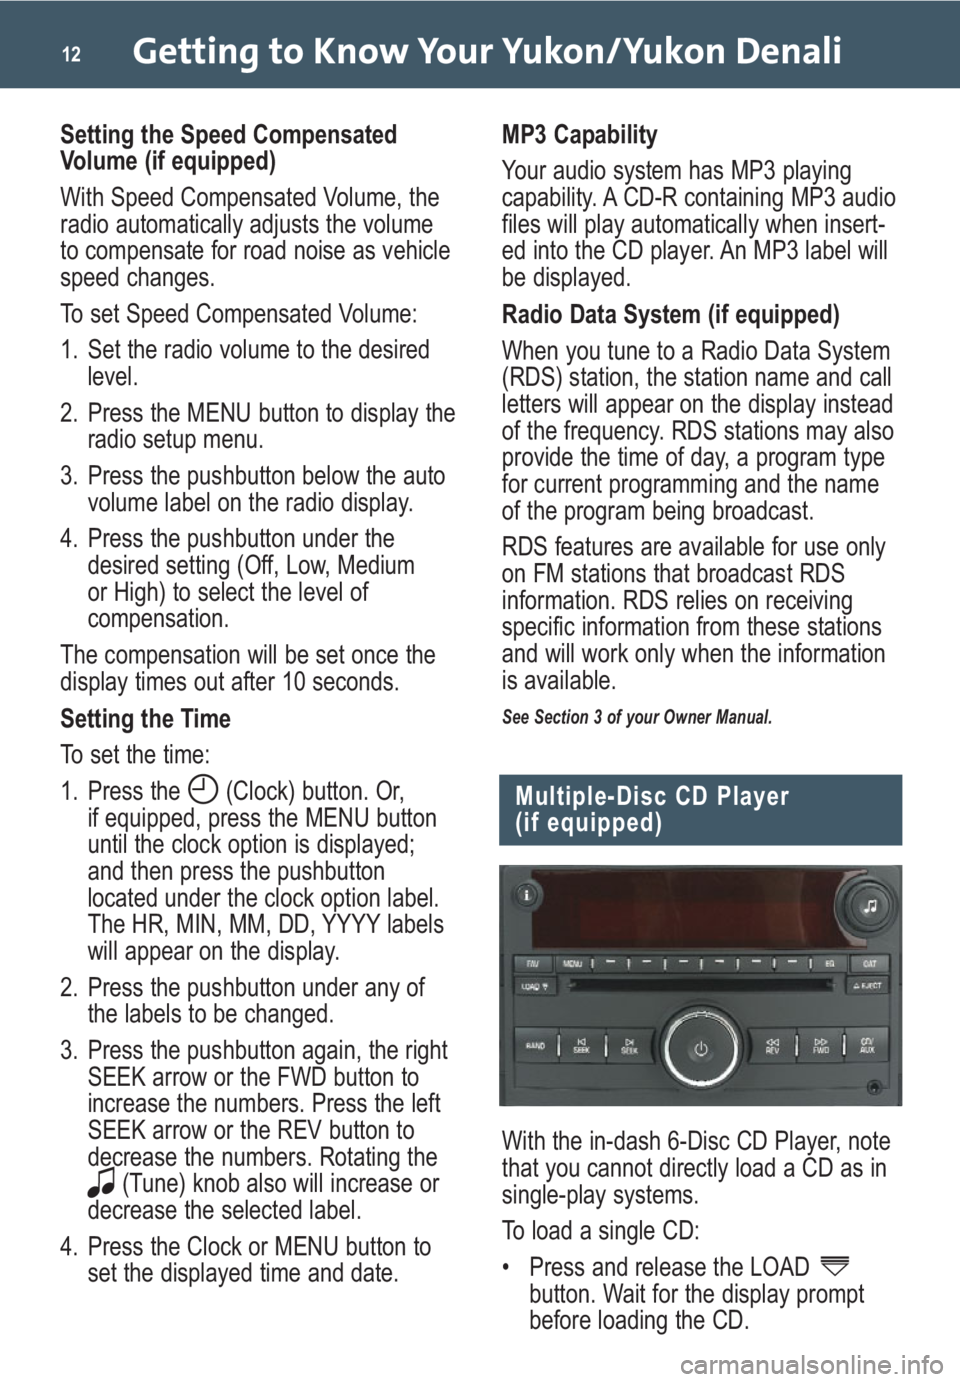
Multiple-Disc CD Player
(if equipped)
With the in-dash 6-Disc CD Player, note
that you cannot directly load a CD as in
single-play systems.
To load a single CD:
• Press and release the LOAD
button. Wait for the display prompt
before loading the CD.
Page 18 of 24

Getting to Know Your Yukon/Yukon Denali18
Automatic Headlamp System
and Interior Lamps
Side Blind Zone Alert
(if equipped)
When a vehicle is detected in your blind
zone on either side of the vehicle, a
warning light will be displayed in the
corresponding outside mirror. If the turn
signal is activated while a vehicle is
detected, the warning light will flash. The
system is turned on each time the vehi-
cle is started. It can be turned off using
the DIC.
See Sections 2 and 3 of your Owner Manual.
Your vehicle is equipped with an
Automatic Headlamp System, which
turns on the Daytime Running Lamps
(DRLs) during the day and the head-
lamps and other exterior lamps at night
or when necessary.
The system uses a light sensor, located
on top of the instrument panel, to deter-
mine light conditions. For proper system
operation, avoid placing any objects on
or near the sensor.
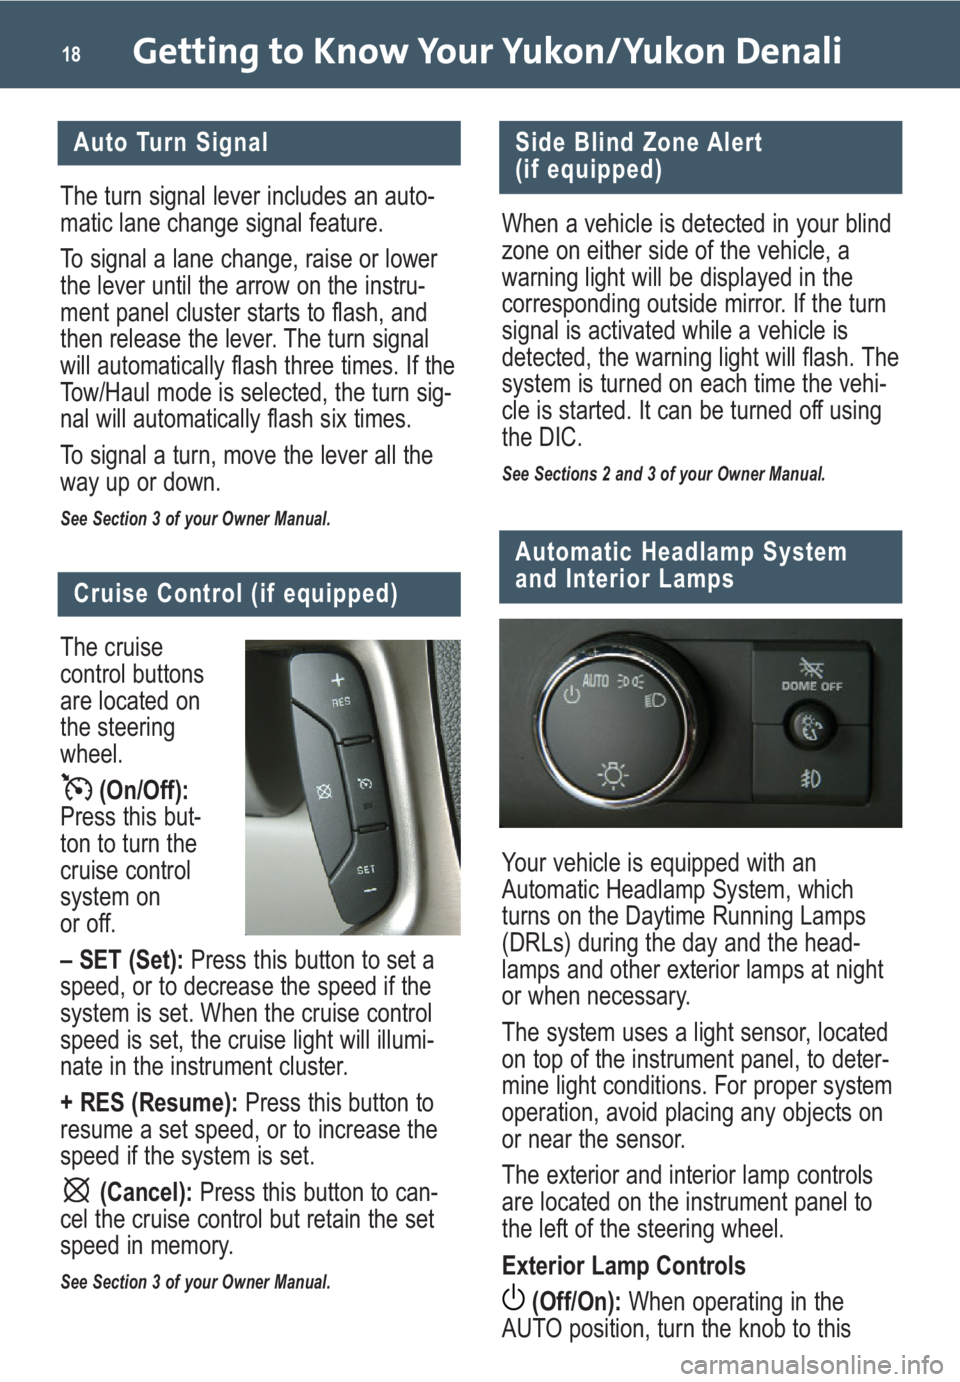
The exterior and interior lamp controls
are located on the instrument panel to
the left of the steering wheel.
Exterior Lamp Controls
(Off/On):When operating in the
AUTO position, turn the knob to this
The cruise
control buttons
are located on
the steering
wheel.
(On/Off):
Press this but-
ton to turn the
cruise control
system on
or off.
– SET (Set):Press this button to set a
speed, or to decrease the speed if the
system is set. When the cruise control
speed is set, the cruise light will illumi-
nate in the instrument cluster.
+ RES (Resume):Press this button to
resume a set speed, or to increase the
speed if the system is set.
(Cancel): Press this button to can-
cel the cruise control but retain the set
speed in memory.
See Section 3 of your Owner Manual.
Auto Turn Signal
Cruise Control (if equipped)
The turn signal lever includes an auto-
matic lane change signal feature.
To signal a lane change, raise or lower
the lever until the arrow on the instru-
ment panel cluster starts to flash, and
then release the lever. The turn signal
will automatically flash three times. If the
Tow/Haul mode is selected, the turn sig-
nal will automatically flash six times.
To signal a turn, move the lever all the
way up or down.
See Section 3 of your Owner Manual.
Page 23 of 24

23
The Oil Life System calculates engine oil
life based on vehicle use and displays
CHANGE ENGINE OIL in the Driver
Information Center (DIC) when it’s nec-
essary to change your engine oil and
filter. The Oil Life System should be reset
to 100% only following an oil change.
Reset the Oil Life System using the DIC:
1. Turn on the ignition.
2. Press the (Vehicle Information)
button until the DIC displays OIL LIFE
REMAINING.
3. Press and hold the (Set/Reset)
button until 100% is displayed.
4. Turn off the ignition.
Reset the Oil Life System without the DIC:
1. Turn on the ignition, with the engine off.
2. Fully press and release the accelera-
tor pedal slowly three times within
five seconds.
3. If the CHANGE ENGINE OIL mes-
sage flashes, the system is reset;
otherwise, repeat the procedure.
4. Turn off the ignition.
See Section 5 of your Owner Manual.
Reset the Engine Oil Life
System
Refueling the Vehicle
To open the fuel door, press the center-
rear edge of the door and it will pop
open slightly. Pull the door to open it
fully.
When closing the fuel door, press the
rear edge of the door until it latches and
is flush with the side of the vehicle.
See Section 5 of your Owner Manual.
Maximizing Fuel Economy
Your driving behavior is a big contributor
to your vehicle’s fuel economy.
Modifying your driving habits will
improve your fuel mileage. Here are
several fuel-saving tips:
• Combine short trips to minimize cold
engine starts, which reduce fuel
economy.
• Avoid quick starts and stops.
Accelerate moderately and drive at a
steady speed.
• Anticipate traffic flow and brake mod-
erately or coast.
• Use the air conditioning and defrost
modes only when necessary.
• Minimize electrical accessory opera-
tion by turning off items such as the
rear defogger and heated seats when
they are not needed.
• Use the remote start feature sparing-
ly. This feature turns the engine on,
consuming fuel at idle.
• Do not warm up the engine by idling.
Even on the coldest days, driving will
help the engine warm up faster.
• Selecting the AUTO feature on 4WD
models will be less economical than
2WD.
• Unload unnecessary cargo to reduce
the amount of weight in the vehicle.
• Regularly check and maintain proper
tire pressure.
• Maintain your vehicle. Regular main-
tenance will keep your vehicle run-
ning cleaner and more efficiently.
Page 24 of 24

Getting to Know Your Yukon/Yukon Denali24
15911401 A
Roadside Assistance
My GMLink
The GMC Owner Center at My GMLink
is a complimentary service for GMC
owners, a one-stop resource to enhance
your GMC ownership experience.
Exclusive member benefits include
online service reminders, vehicle main-
tenance tips, online owner manual,
special privileges and more. Sign up
today at www.mygmlink.com.
Certain restrictions, precautions and safety procedures apply to your vehicle. Please read your Owner
Manual for complete instructions. All information contained herein is based on information available at the
time of printing and is subject to change without notice. Copyright 2008 by GM Corp. All rights reserved.
!15911401=A!
1-800-GMC-8782
(1-800-462-8782)
TTY Users: 1-888-889-2438
As the proud owner of a new GMC
vehicle, you are automatically enrolled in
the GMC Roadside Assistance program.
This value-added service is intended to
provide you with peace of mind as you
drive in the city or travel the open road.
GMC’s Roadside Assistance toll-free
number is staffed by a team of technically
trained advisors, who are available
24 hours a day, 365 days a year. The
advisors can provide minor repair infor-
mation or make arrangements to tow
your vehicle to the nearest GMC dealer.
GMC will provide the following services
for 5 years/100,000 miles at no expense
to you:
• Fuel delivery
• Lockout service (identification
required)
• Tow to nearest dealership for warranty
service
• Flat tire assistance
• Jump starts
In many instances, mechanical failures
are covered under GMC’s comprehensive
warranty. However, when other services
are utilized, our advisors will explain any
payment obligations you might incur.
OWNER INFORMATIONFor prompt and efficient assistance when
calling, please provide the following infor-
mation to the advisor:
• Location of the vehicle
• Telephone number and your location
• Vehicle model, year and color
• Vehicle mileage
• Vehicle Identification Number (VIN)
• Vehicle license plate number
GMC reserves the right to limit services
or reimbursement to an owner or driver
when, in GMC’s judgment, the claims
become excessive in frequency or type
of occurrence.
Roadside Assistance and OnStar
®
(if equipped)
If you have a current OnStar subscrip-
tion, press the OnStar button and the
vehicle will send your current GPS
location to an OnStar Advisor who will
speak to you, assess your problem,
contact Roadside Assistance and relay
your exact location
so you will get the
help you need.