key GMC YUKON 2021 Owner's Guide
[x] Cancel search | Manufacturer: GMC, Model Year: 2021, Model line: YUKON, Model: GMC YUKON 2021Pages: 433, PDF Size: 6.54 MB
Page 39 of 433
GMC Yukon/Yukon XL/Denali Owner Manual (GMNA-Localizing-U.S./
Canada/Mexico-13690468) - 2021 - crc - 8/14/20
36 Keys, Doors, and Windows
.Press or pullC(2) again to stop at the
desired location.
Sunroof Vent Operation:
.Press and releaseE(3) to vent the
sunroof.
.Pull and releaseE(3) to close the
sunroof vent.
Automatic Reversal System
The sunroof and power sunshade,
if equipped, have an automatic reversal
system that is only active when the sunroof
and power sunshade are operated in
express-close mode.
If an object is in the path while
express-closing, the reversal system will
detect an object, stop, and open the sunroof
or power sunshade slightly.
If this condition occurs, attempt to remove
the object, then pull and release the switch
to express close. If the reversal occurs
multiple times, the DIC message OPEN THEN
CLOSE SUNROOF will display, and express is
disabled. To operate sunroof while express is
disabled, the switch must be either pressed
or pulled and held.
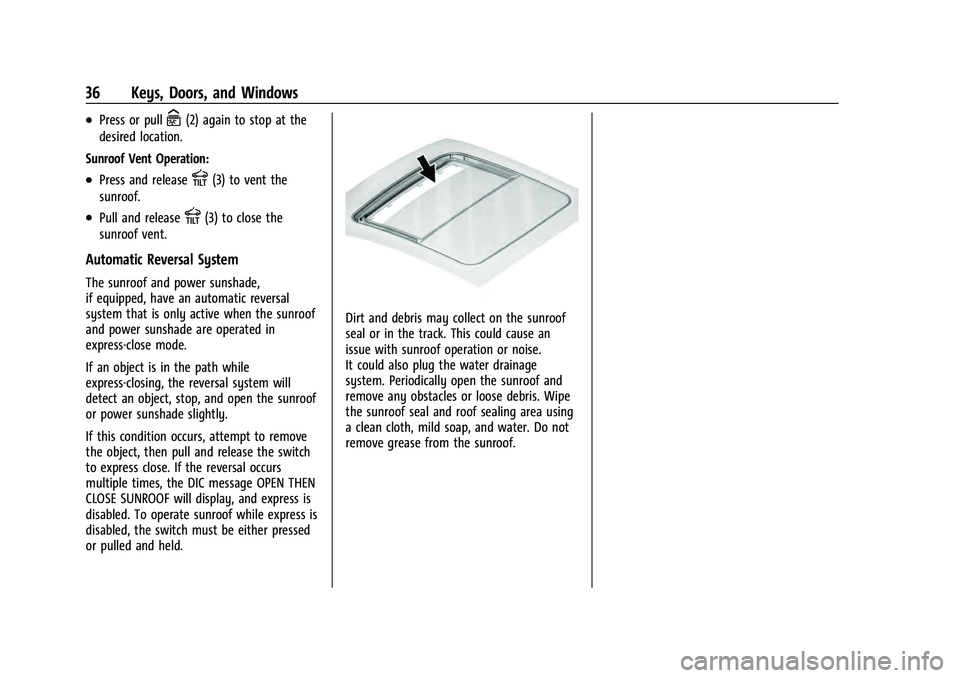
Dirt and debris may collect on the sunroof
seal or in the track. This could cause an
issue with sunroof operation or noise.
It could also plug the water drainage
system. Periodically open the sunroof and
remove any obstacles or loose debris. Wipe
the sunroof seal and roof sealing area using
a clean cloth, mild soap, and water. Do not
remove grease from the sunroof.
Page 44 of 433
GMC Yukon/Yukon XL/Denali Owner Manual (GMNA-Localizing-U.S./
Canada/Mexico-13690468) - 2021 - crc - 8/14/20
Seats and Restraints 41
Reclining Seatbacks
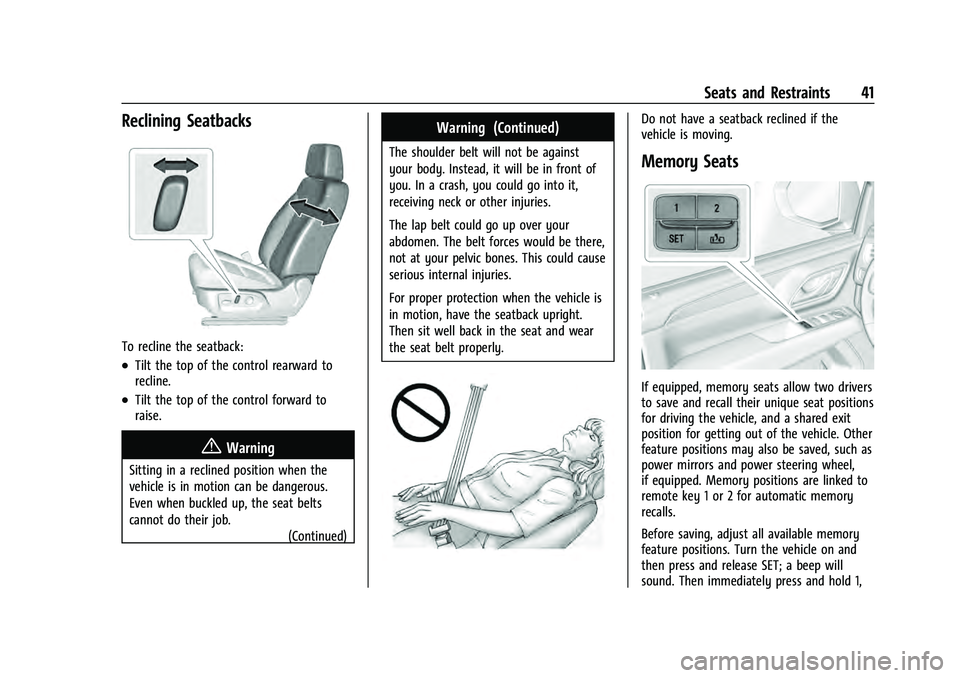
To recline the seatback:
.Tilt the top of the control rearward to
recline.
.Tilt the top of the control forward to
raise.
{Warning
Sitting in a reclined position when the
vehicle is in motion can be dangerous.
Even when buckled up, the seat belts
cannot do their job.(Continued)
Warning (Continued)
The shoulder belt will not be against
your body. Instead, it will be in front of
you. In a crash, you could go into it,
receiving neck or other injuries.
The lap belt could go up over your
abdomen. The belt forces would be there,
not at your pelvic bones. This could cause
serious internal injuries.
For proper protection when the vehicle is
in motion, have the seatback upright.
Then sit well back in the seat and wear
the seat belt properly.
Do not have a seatback reclined if the
vehicle is moving.
Memory Seats
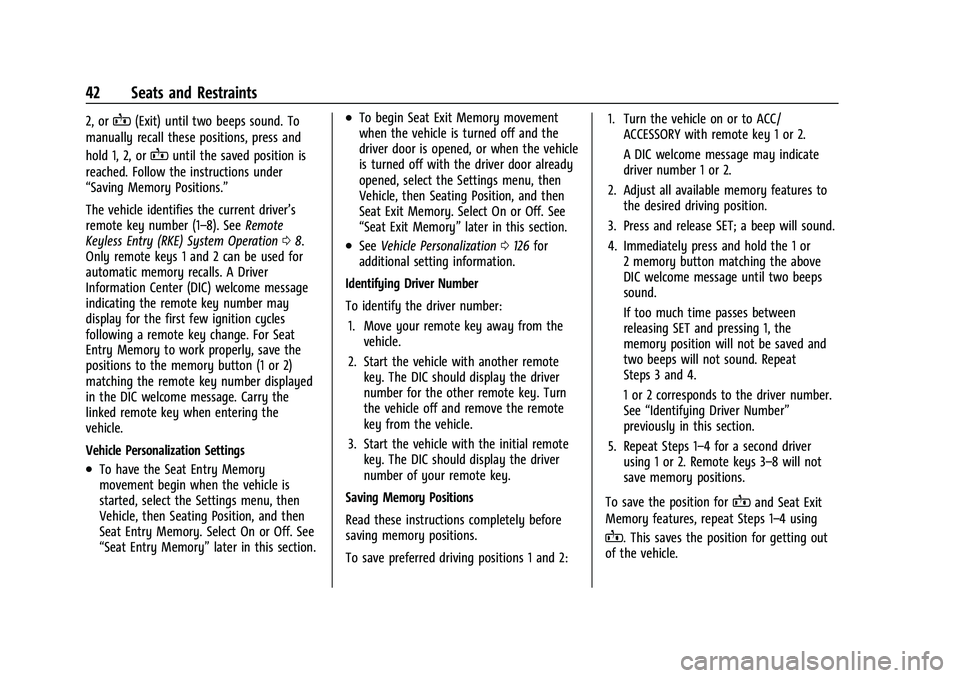
If equipped, memory seats allow two drivers
to save and recall their unique seat positions
for driving the vehicle, and a shared exit
position for getting out of the vehicle. Other
feature positions may also be saved, such as
power mirrors and power steering wheel,
if equipped. Memory positions are linked to
remote key 1 or 2 for automatic memory
recalls.
Before saving, adjust all available memory
feature positions. Turn the vehicle on and
then press and release SET; a beep will
sound. Then immediately press and hold 1,
Page 45 of 433
GMC Yukon/Yukon XL/Denali Owner Manual (GMNA-Localizing-U.S./
Canada/Mexico-13690468) - 2021 - crc - 8/14/20
42 Seats and Restraints
2, orB(Exit) until two beeps sound. To
manually recall these positions, press and
hold 1, 2, or
Buntil the saved position is
reached. Follow the instructions under
“Saving Memory Positions.”
The vehicle identifies the current driver’s
remote key number (1–8). See Remote
Keyless Entry (RKE) System Operation 08.
Only remote keys 1 and 2 can be used for
automatic memory recalls. A Driver
Information Center (DIC) welcome message
indicating the remote key number may
display for the first few ignition cycles
following a remote key change. For Seat
Entry Memory to work properly, save the
positions to the memory button (1 or 2)
matching the remote key number displayed
in the DIC welcome message. Carry the
linked remote key when entering the
vehicle.
Vehicle Personalization Settings
.To have the Seat Entry Memory
movement begin when the vehicle is
started, select the Settings menu, then
Vehicle, then Seating Position, and then
Seat Entry Memory. Select On or Off. See
“Seat Entry Memory” later in this section.
.To begin Seat Exit Memory movement
when the vehicle is turned off and the
driver door is opened, or when the vehicle
is turned off with the driver door already
opened, select the Settings menu, then
Vehicle, then Seating Position, and then
Seat Exit Memory. Select On or Off. See
“Seat Exit Memory”later in this section.
.SeeVehicle Personalization 0126 for
additional setting information.
Identifying Driver Number
To identify the driver number: 1. Move your remote key away from the vehicle.
2. Start the vehicle with another remote key. The DIC should display the driver
number for the other remote key. Turn
the vehicle off and remove the remote
key from the vehicle.
3. Start the vehicle with the initial remote key. The DIC should display the driver
number of your remote key.
Saving Memory Positions
Read these instructions completely before
saving memory positions.
To save preferred driving positions 1 and 2: 1. Turn the vehicle on or to ACC/
ACCESSORY with remote key 1 or 2.
A DIC welcome message may indicate
driver number 1 or 2.
2. Adjust all available memory features to the desired driving position.
3. Press and release SET; a beep will sound.
4. Immediately press and hold the 1 or 2 memory button matching the above
DIC welcome message until two beeps
sound.
If too much time passes between
releasing SET and pressing 1, the
memory position will not be saved and
two beeps will not sound. Repeat
Steps 3 and 4.
1 or 2 corresponds to the driver number.
See “Identifying Driver Number”
previously in this section.
5. Repeat Steps 1–4 for a second driver using 1 or 2. Remote keys 3–8 will not
save memory positions.
To save the position for
Band Seat Exit
Memory features, repeat Steps 1–4 using
B. This saves the position for getting out
of the vehicle.
Page 46 of 433
GMC Yukon/Yukon XL/Denali Owner Manual (GMNA-Localizing-U.S./
Canada/Mexico-13690468) - 2021 - crc - 8/14/20
Seats and Restraints 43
Save preferred memory feature positions to
both 1 and 2 if you are the only driver.
Manually Recalling Memory Positions
Press and hold 1, 2, or
Bto recall the
previously saved memory positions if you
are driver 1 or 2 identified in the DIC
welcome message.
To stop Manual Memory recall movement,
release 1, 2, or
Bor press any of the
following controls:
.Power seat
.Memory SET
.Power mirror, with the driver or
passenger side mirror selected
.Power steering wheel, if equipped
Manual Memory recall movement for 1, 2,
or
Bbuttons may be initiated and may
complete to the saved memory position if
the vehicle is in or out of P (Park).
Seat Entry Memory
The vehicle identifies the number of the
current driver’s remote key (1–8). See
Remote Keyless Entry (RKE) System
Operation 08. If the remote key is 1 or 2,
and Seat Entry Memory is enabled in vehicle
personalization, the positions saved to the same memory button number 1 or 2 are
automatically recalled when the vehicle is
turned on, or turned from off to ACC/
ACCESSORY. Remote keys 3–8 will not
provide automatic memory recalls.
To turn Seat Entry Memory on or off, see
“Vehicle Personalization Settings”
previously
in this section and Vehicle Personalization
0 126.
The vehicle must be in P (Park) to start Seat
Entry Memory. Seat Entry Memory recall
will complete if the vehicle is shifted out of
P (Park) prior to reaching the saved memory
position.
To stop Seat Entry Memory recall
movement, turn the vehicle off or press any
of the following controls:.Power seat
.Memory SET, 1, 2, orB
.Power mirror, with the driver or
passenger side mirror selected
.Power steering wheel, if equipped
If the saved memory seat position does not
automatically recall or recalls to the wrong
positions, the driver’s remote key number (1
or 2) may not match the memory button number that positions were saved to. Try
storing the position to the other memory
button or try the other remote key.
Seat Exit Memory
Seat Exit Memory is not linked to an remote
key. The position saved to
Bis used for all
drivers. To turn Seat Exit Memory on or off,
see "Vehicle Personalization Settings"
previously in this section and Vehicle
Personalization 0126.
If turned on, the position saved to
Bis
automatically recalled when one of the
following occurs:
.The vehicle is turned off and the driver
door is opened within a short time.
.The vehicle is turned off with the driver
door open.
To stop Seat Exit Memory movement, press
any of the following memory controls:
.Power seat
.Memory SET, 1, 2, orB
.Power mirror, with the driver or
passenger side mirror selected
.Power steering wheel, if equipped
Page 53 of 433
GMC Yukon/Yukon XL/Denali Owner Manual (GMNA-Localizing-U.S./
Canada/Mexico-13690468) - 2021 - crc - 8/14/20
50 Seats and Restraints
3. Press the switch again to release the rearof the seat from the floor. The seat will
tumble forward.
The switches (2) can be used to fold the
third row seatbacks from the cargo area. See
Third Row Seats 050.
Returning the Seat to the Sitting Position
{Warning
If either seatback is not locked, it could
move forward in a sudden stop or crash.
That could cause injury to the person
sitting there. Always push and pull on
the seatbacks to be sure they are locked.
To return the seat to the sitting position
from the tumbled position: 1. Pull the seat down until it latches to the floor. The seatback cannot be raised if
the seat is not latched to the floor.
2. Lift the seatback and push it rearward. Push and pull on the seatback to make
sure it is locked.
3. For the 60/40 split-bench seat, make sure the seat belt in the center seating
position is not caught between the two
seats and is not twisted.
Third Row Seats
Caution
Folding a rear seat with the seat belts
still fastened may cause damage to the
seat or the seat belts. Always unbuckle
the seat belts and return them to their
normal stowed position before folding a
rear seat.
The third row seatbacks can be folded to
increase cargo space. 1. Open the liftgate to access the controls for the third row seat.
2. Make sure that there is nothing under, in front of, or on the seat.
3. If the second row seat is in the full rear position, adjust it forward to allow the
third row seat to fold fully flat.
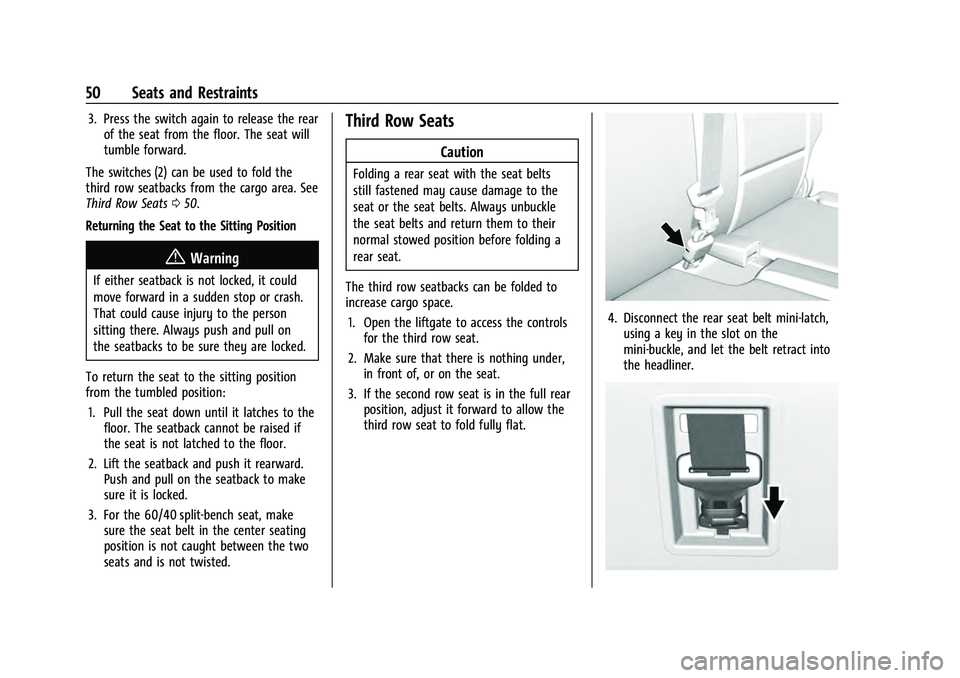
4. Disconnect the rear seat belt mini-latch,using a key in the slot on the
mini-buckle, and let the belt retract into
the headliner.
Page 62 of 433
GMC Yukon/Yukon XL/Denali Owner Manual (GMNA-Localizing-U.S./
Canada/Mexico-13690468) - 2021 - crc - 8/14/20
Seats and Restraints 59
Seat Belt Use During Pregnancy
Seat belts work for everyone, including
pregnant women. Like all occupants, they
are more likely to be seriously injured if
they do not wear seat belts.
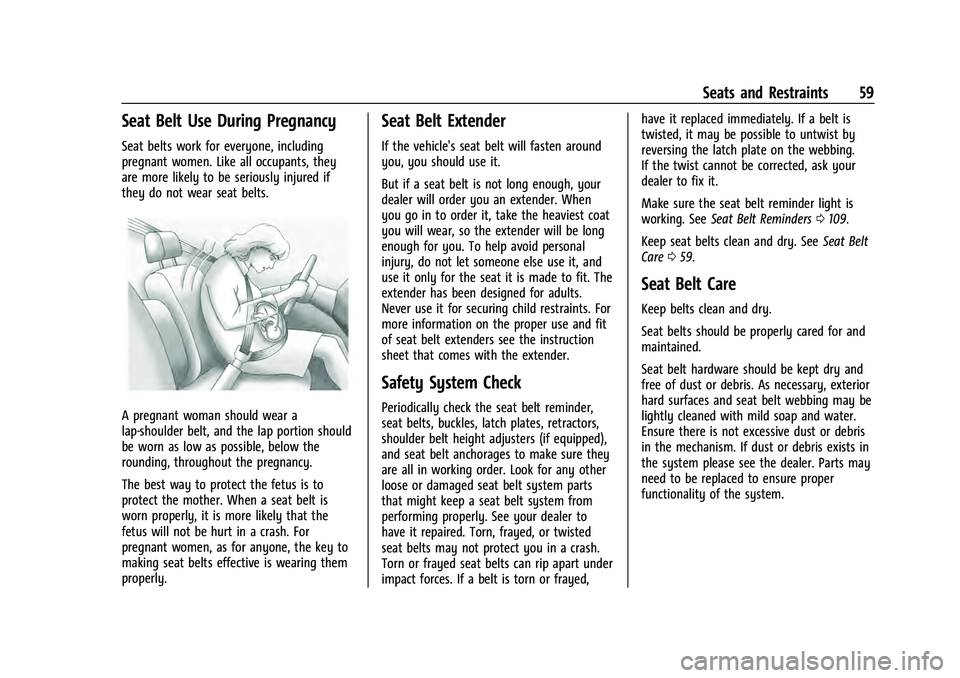
A pregnant woman should wear a
lap-shoulder belt, and the lap portion should
be worn as low as possible, below the
rounding, throughout the pregnancy.
The best way to protect the fetus is to
protect the mother. When a seat belt is
worn properly, it is more likely that the
fetus will not be hurt in a crash. For
pregnant women, as for anyone, the key to
making seat belts effective is wearing them
properly.
Seat Belt Extender
If the vehicle's seat belt will fasten around
you, you should use it.
But if a seat belt is not long enough, your
dealer will order you an extender. When
you go in to order it, take the heaviest coat
you will wear, so the extender will be long
enough for you. To help avoid personal
injury, do not let someone else use it, and
use it only for the seat it is made to fit. The
extender has been designed for adults.
Never use it for securing child restraints. For
more information on the proper use and fit
of seat belt extenders see the instruction
sheet that comes with the extender.
Safety System Check
Periodically check the seat belt reminder,
seat belts, buckles, latch plates, retractors,
shoulder belt height adjusters (if equipped),
and seat belt anchorages to make sure they
are all in working order. Look for any other
loose or damaged seat belt system parts
that might keep a seat belt system from
performing properly. See your dealer to
have it repaired. Torn, frayed, or twisted
seat belts may not protect you in a crash.
Torn or frayed seat belts can rip apart under
impact forces. If a belt is torn or frayed,have it replaced immediately. If a belt is
twisted, it may be possible to untwist by
reversing the latch plate on the webbing.
If the twist cannot be corrected, ask your
dealer to fix it.
Make sure the seat belt reminder light is
working. See
Seat Belt Reminders 0109.
Keep seat belts clean and dry. See Seat Belt
Care 059.
Seat Belt Care
Keep belts clean and dry.
Seat belts should be properly cared for and
maintained.
Seat belt hardware should be kept dry and
free of dust or debris. As necessary, exterior
hard surfaces and seat belt webbing may be
lightly cleaned with mild soap and water.
Ensure there is not excessive dust or debris
in the mechanism. If dust or debris exists in
the system please see the dealer. Parts may
need to be replaced to ensure proper
functionality of the system.
Page 92 of 433
GMC Yukon/Yukon XL/Denali Owner Manual (GMNA-Localizing-U.S./
Canada/Mexico-13690468) - 2021 - crc - 8/14/20
Storage 89
Storage
Storage Compartments
Storage Compartments . . . . . . . . . . . . . . . . . 89
Instrument Panel Storage . . . . . . . . . . . . . . 89
Glove Box . . . . . . . . . . . . . . . . . . . . . . . . . . . . . . 89
Cupholders . . . . . . . . . . . . . . . . . . . . . . . . . . . . . 89
Armrest Storage . . . . . . . . . . . . . . . . . . . . . . . 90
Rear Storage . . . . . . . . . . . . . . . . . . . . . . . . . . . 90
Center Console Storage . . . . . . . . . . . . . . . . . 91
Floor Console Storage . . . . . . . . . . . . . . . . . . 92
Additional Storage Features
Cargo Tie-Downs . . . . . . . . . . . . . . . . . . . . . . . 93
Convenience Net . . . . . . . . . . . . . . . . . . . . . . . 93
Roof Rack System
Roof Rack System . . . . . . . . . . . . . . . . . . . . . . 93
Storage Compartments{
Warning
Do not store heavy or sharp objects in
storage compartments. In a crash, these
objects may cause the cover to open and
could result in injury.
Instrument Panel Storage
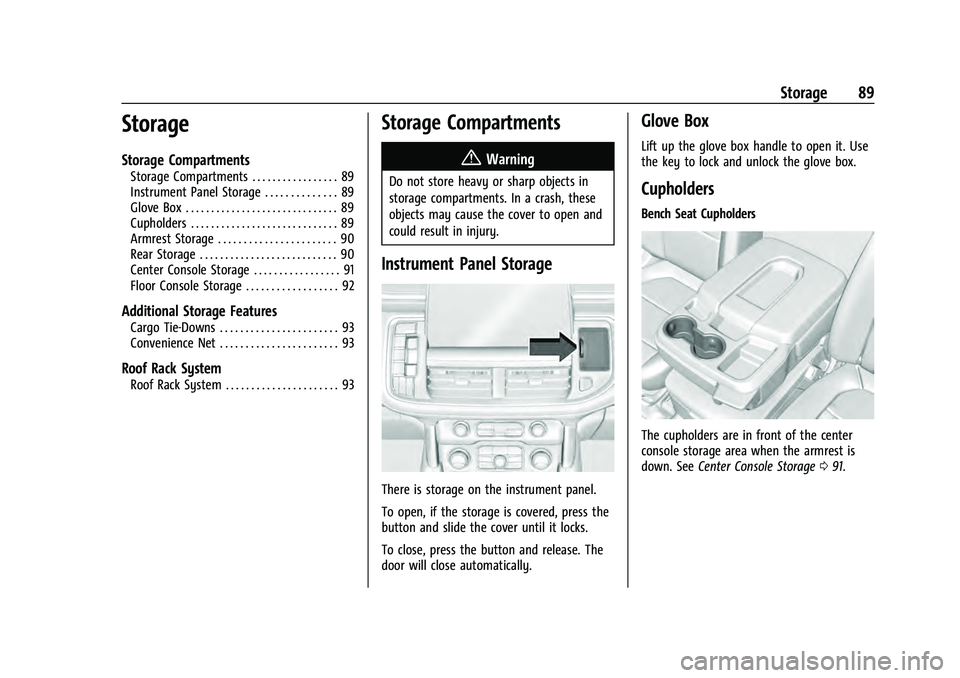
There is storage on the instrument panel.
To open, if the storage is covered, press the
button and slide the cover until it locks.
To close, press the button and release. The
door will close automatically.
Glove Box
Lift up the glove box handle to open it. Use
the key to lock and unlock the glove box.
Cupholders
Bench Seat Cupholders
The cupholders are in front of the center
console storage area when the armrest is
down. See Center Console Storage 091.
Page 95 of 433

GMC Yukon/Yukon XL/Denali Owner Manual (GMNA-Localizing-U.S./
Canada/Mexico-13690468) - 2021 - crc - 8/14/20
92 Storage
Press and holdRto move the center
console rearward.
Press and hold
Qto move the center
console forward.
When the center console is all of the way
back, there is a storage bin under the
armrest. Pull on the handle to open.
To move the armrest forward, push forward
on the center of the armrest with the palm
of your hand.
When Valet Mode is enabled, the center
console slide is locked. See Vehicle
Personalization 0126.
Floor Console Storage
If equipped with front center seat storage,
unlock with the mechanical key inside the
remote key. See Keys07.
Press the latch, and lift to open.
Page 105 of 433
GMC Yukon/Yukon XL/Denali Owner Manual (GMNA-Localizing-U.S./
Canada/Mexico-13690468) - 2021 - crc - 8/14/20
102 Instruments and Controls
vehicle is in RAP or during Bluetooth phone
calls. SeeRetained Accessory Power (RAP)
0 229.
The operating temperature is −20 °C (−4 °F)
to 60 °C (140 °F) for the charging system
and 0 °C (32 °F) to 35 °C (95 °F) for the
phone.
{Warning
Remove all objects from the charging pad
before charging your compatible
smartphone. Objects, such as coins, keys,
rings, paper clips, or cards, between the
smartphone and charging pad will
become very hot. On the rare occasion
that the charging system does not detect
an object, and the object gets wedged
between the smartphone and charger,
remove the smartphone and allow the
object to cool before removing it from
the charging pad, to prevent burns.
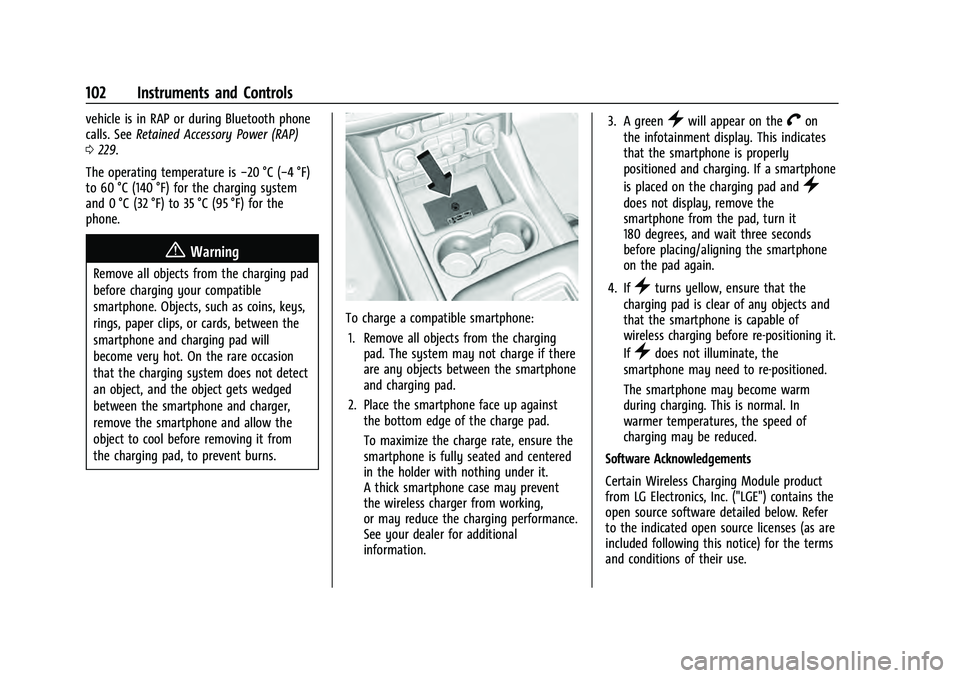
To charge a compatible smartphone:
1. Remove all objects from the charging pad. The system may not charge if there
are any objects between the smartphone
and charging pad.
2. Place the smartphone face up against the bottom edge of the charge pad.
To maximize the charge rate, ensure the
smartphone is fully seated and centered
in the holder with nothing under it.
A thick smartphone case may prevent
the wireless charger from working,
or may reduce the charging performance.
See your dealer for additional
information. 3. A green
}will appear on theVon
the infotainment display. This indicates
that the smartphone is properly
positioned and charging. If a smartphone
is placed on the charging pad and
}
does not display, remove the
smartphone from the pad, turn it
180 degrees, and wait three seconds
before placing/aligning the smartphone
on the pad again.
4. If
}turns yellow, ensure that the
charging pad is clear of any objects and
that the smartphone is capable of
wireless charging before re-positioning it.
If
}does not illuminate, the
smartphone may need to re-positioned.
The smartphone may become warm
during charging. This is normal. In
warmer temperatures, the speed of
charging may be reduced.
Software Acknowledgements
Certain Wireless Charging Module product
from LG Electronics, Inc. ("LGE") contains the
open source software detailed below. Refer
to the indicated open source licenses (as are
included following this notice) for the terms
and conditions of their use.
Page 131 of 433
GMC Yukon/Yukon XL/Denali Owner Manual (GMNA-Localizing-U.S./
Canada/Mexico-13690468) - 2021 - crc - 8/14/20
128 Instruments and Controls
.Auto Wipe in Reverse Gear
Automatic Entry/Egress Assist
This feature specifies if the vehicle will
automatically lower to make it easier to
enter or exit the vehicle.
Touch Off or On.
Chime Volume
This determines the chime volume level.
Touch the controls on the infotainment
display to adjust the volume.
Hands Free Liftgate/Trunk Control
The liftgate may be operated with a kicking
motion under the left corner of the rear
bumper. See Liftgate018.
Touch Off, On-Open and Close,
or On-Open Only.
Reverse Tilt Mirror
When on, the driver, passenger, or both
driver and passenger outside mirrors will tilt
downward when the vehicle is shifted into
R (Reverse) to improve visibility of the
ground near the rear wheels. They may
move from their tilted position when the
vehicle is shifted out of R (Reverse) or
turned off. See Reverse Tilt Mirrors 030. Touch Off, On - Driver and Passenger, On -
Driver, or On - Passenger.
Remote Mirror Folding
When on, the outside mirrors will remotely
fold or unfold when the Remote Key
Qor
Kbutton is pressed and held. See
Folding
Mirrors 029.
Touch Off or On.
Rain Sense Wipers
This setting automatically turns on the
wipers when moisture is detected and the
wiper switch is in intermittent mode.
Touch Disabled or Enabled.
Auto Wipe in Reverse Gear
When on and the front wiper is on, the rear
wiper will automatically activate when the
vehicle is shifted into R (Reverse).
Touch Off or On.
Lighting
Touch and the following may display:
.Vehicle Locator Lights
.Exit Lighting
.Automatic High Beam Assist Vehicle Locator Lights
This setting flashes the vehicle’s headlamps
when
Kis pressed on the Remote Key.
Touch Off or On.
Exit Lighting
This setting specifies how long the
headlamps stay on after the vehicle is
turned off and exited.
Touch Off, 30 Seconds, 60 Seconds,
or 120 Seconds.
Automatic High Beam Assist
This setting specifies how the high beams
adjust based on the vehicle environment.
See Exterior Lamp Controls 0134.
Touch IntelliBeam or Adaptive Headlight
System.
Power Door Locks
Touch and the following may display:
.Auto Door Lock
.Auto Door Unlock
.Delayed Door Lock